Objective: This blog post provides insights about the Smart controls and how to implement in SAP Business Application Studio environment.
SAPUI5 smart controls are a special category of controls that help to boost application development and are part of the SAP Fiori Elements offering. Specific feature of the smart controls is that they can interpret the OData protocol and be adaptive depending on the protocol’s annotations.
In this blog post, I’ll demo about few of the smart controls like Smart Table, Smart Form, Smart Filter Bar, Smart Field with an example.
Smart Table: It is used to create different types of tables based on OData metadata. The control allows the user to define personalized table settings. The control analyses the $metadta document of an OData service and renders a table for a specific entity set.
The control allows the consuming application to build list patterns based on OData services in an efficient and consistent way and thus makes it easy for the user to create tables without much effort. For example, the control enables the automatic creation of columns.
https://sapui5.hana.ondemand.com/#/api/sap.ui.comp.smarttable.SmartTableSmart Form:
This control makes it possible to render a form. Depending on user authorizations, the form enables users, for example, to switch from display to edit mode, add and group fields, rename field labels, and implement a user input check.
https://sapui5.hana.ondemand.com/#/api/sap.ui.comp.smartform.SmartFormSmart Link: It is a control provides a popover with navigation links to related applications.
Smart Filter Bar: It is control analyses the $metadata document of an OData service and renders a Filter Bar control that can be used to filter, for example, a table or a chart.
https://sapui5.hana.ondemand.com/#/api/sap.ui.comp.smartfilterbar.SmartFilterBarSmart Field: The Smart Field control interprets metadata that represents entity relationship models, data types, service capabilities, and annotations in OData services to automatically generate the underlying inner controls and reduce the amount of code needed for developing applications. In some cases, the OData entity is derived from the control’s binding context. The OData entity’s property that is changed or displayed with the control is derived from the control’s value property.
https://sapui5.hana.ondemand.com/#/api/sap.ui.comp.smartfield.SmartFieldSteps Followed:
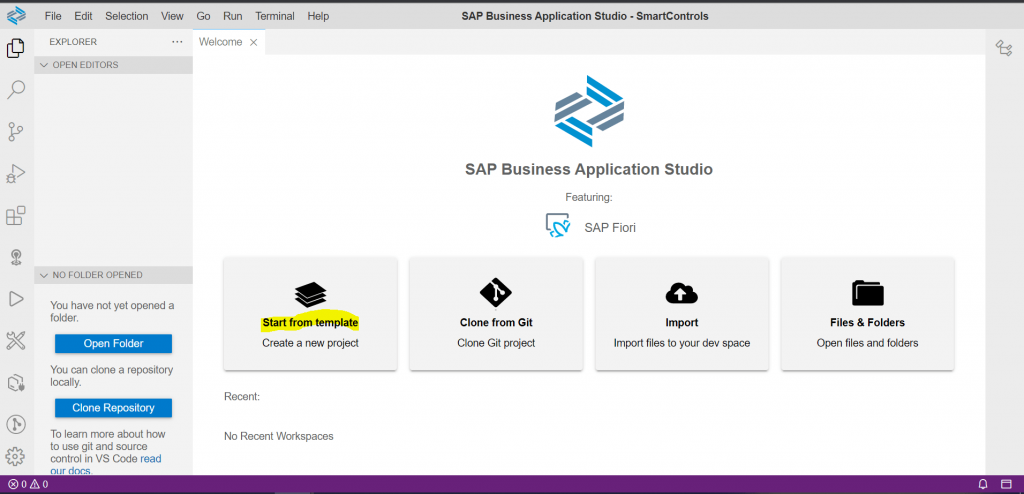
Login to BAS to create new project for demo.
Start from template – To create a new project from scratch.
Clone from Git – We can clone the existing app from GIT repository and start working.
Import – Projects from the storage in the machine can be imported.
Files & Folders – To open the files and folders in dev space.
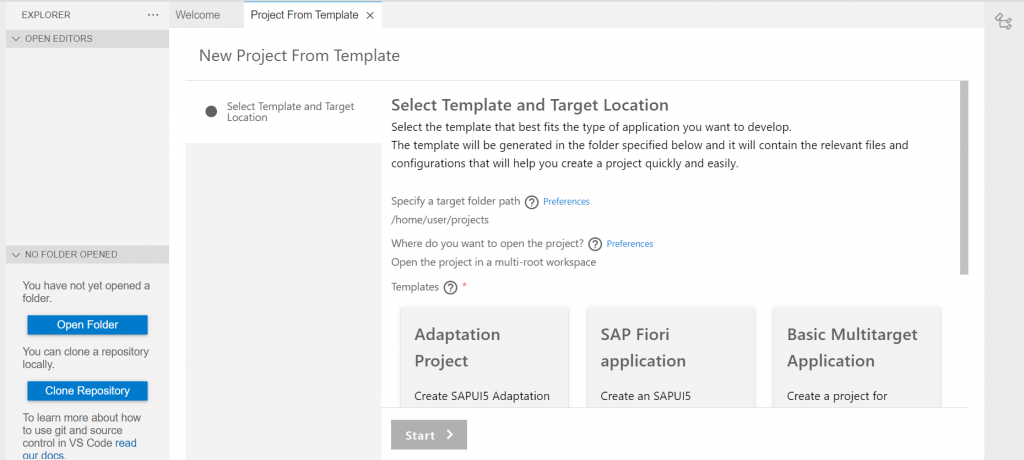
In our scenario for demo, i have created with Start from template.
Adaptation Project – SAPUI5 Adaptation Project allows developers to extend SAP Fiori application in SAP Business Application Studio.
SAPUI5 Adaptation Project lets you create an app variant for an existing SAP Fiori elements-based application or freestyle application, on S/4 HANA on-premise ABAP system or the Cloud Foundry environment, and provides extension capabilities for UI5 controls. You can create an app variant that includes the changes that you make to the source application and to the variant itself.
Sap Fiori application – Create an SAPUI5 application using SAP Fiori elements or a freestyle approach.
Basic Multitarget Application – An MTA is logically a single application, consisting of multiple related and interdependent parts (herein called modules) that are developed using different technologies or programming paradigms and designed to run on different target runtime environments, with a single, consistent lifecycle.
In our scenario, i have used Sap Fiori Application.
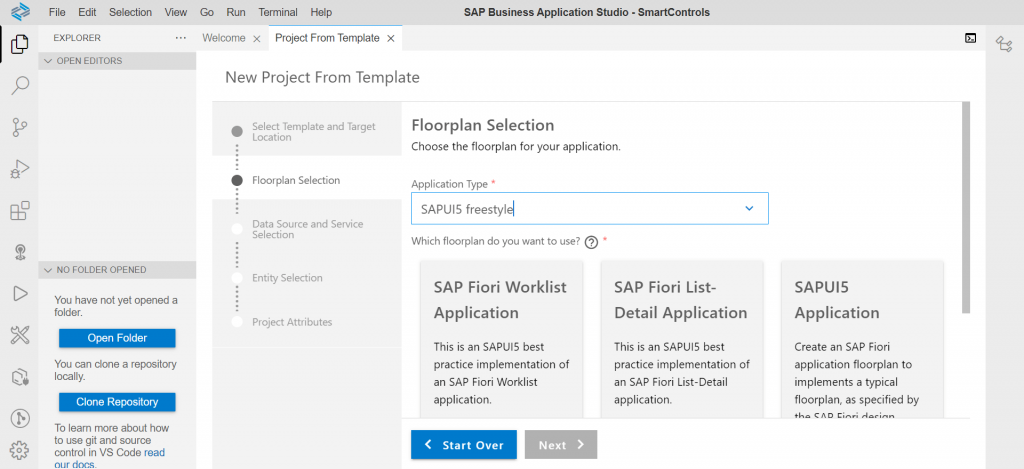
Floorplan – A floorplan is a template. It is a combination of user interface (UI) ‘patterns’ arranged in a specific order in an application that allows a user to accomplish a certain activity, for example, searching for, identifying, and maintaining data for an object.
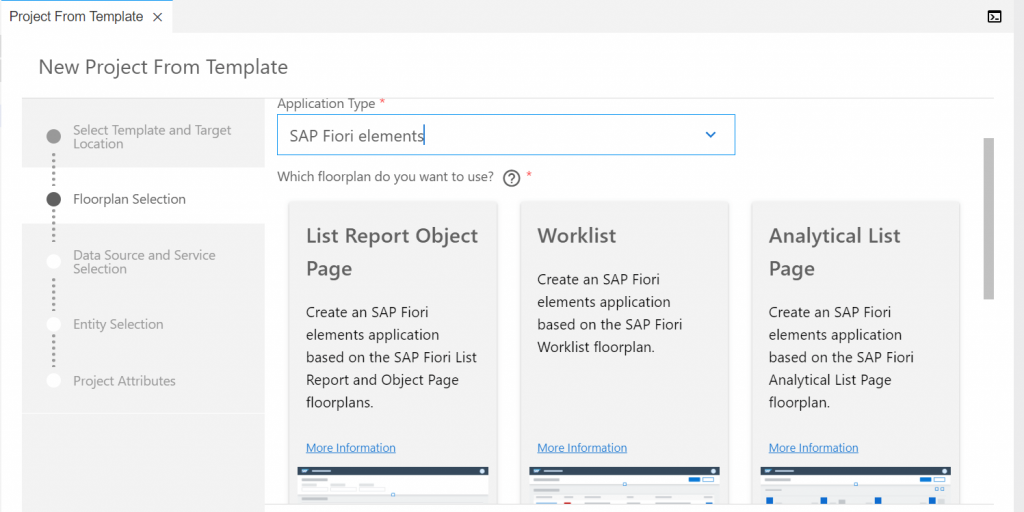
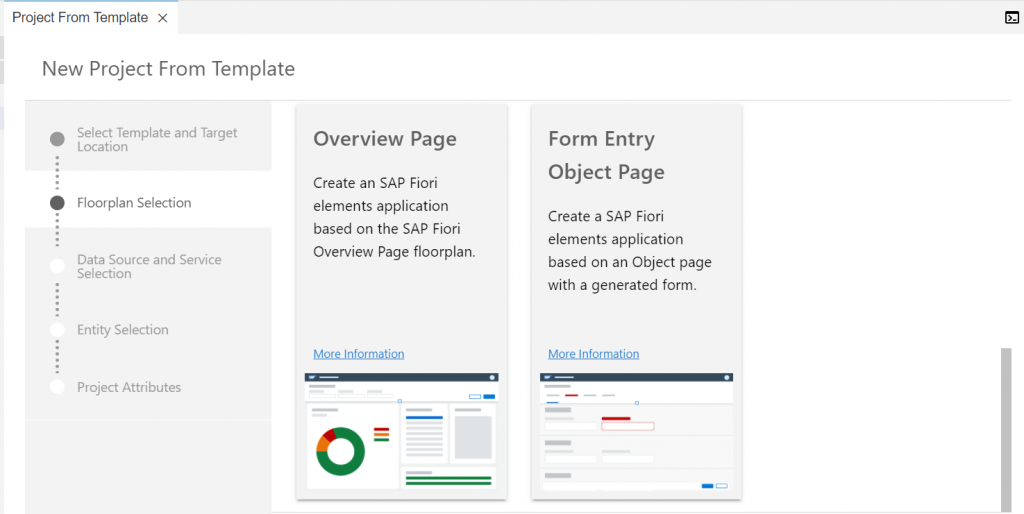
Select Floorplan: Fiori Elements, SAP UI5 Freestyle.
Fiori Elements:

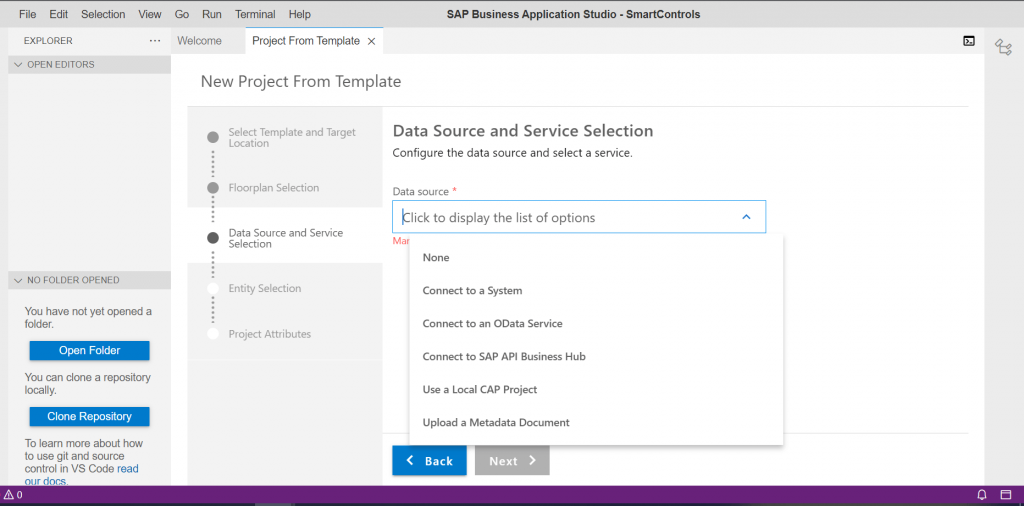
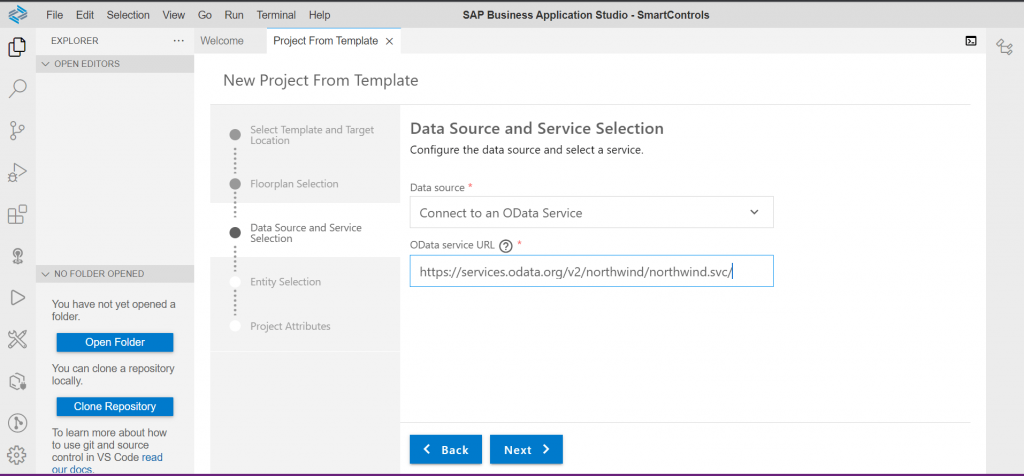
Data Source and service selection – Here we have to select the source from where the data is coming. We have few options here.
Connect to a system – Connect to any ECC or Hana system to get the service details.
Connect to an OData service – Directly provide the uri of the service.
Connect to SAP API Business Hub – The SAP API Business Hub is a web application hosted by SAP to discover, explore, and test SAP and partner APIs (application programming interfaces) that are required to build extensions or process integrations. It also hosts Integration content, Events, CDS views, and more.
Use a Local CAP object – The SAP Cloud Application Programming Model (CAP) is a framework of languages, libraries, and tools for building enterprise-grade services and applications.
Upload a Metadata Document- We can upload the details of the service directly by uploading from local computer.
In my scenario, I have used OData service provided by Northwind.
https://services.odata.org/v2/northwind/northwind.svc/
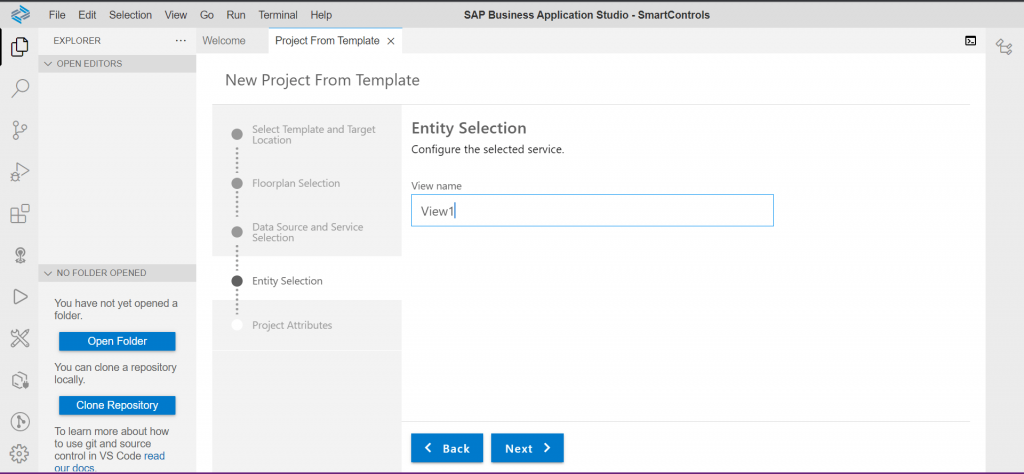
Name the view as View1:
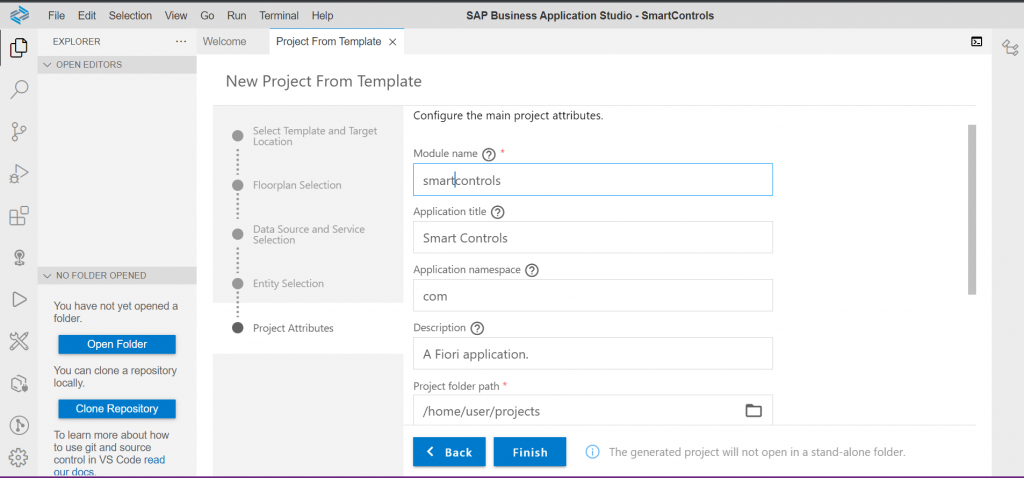
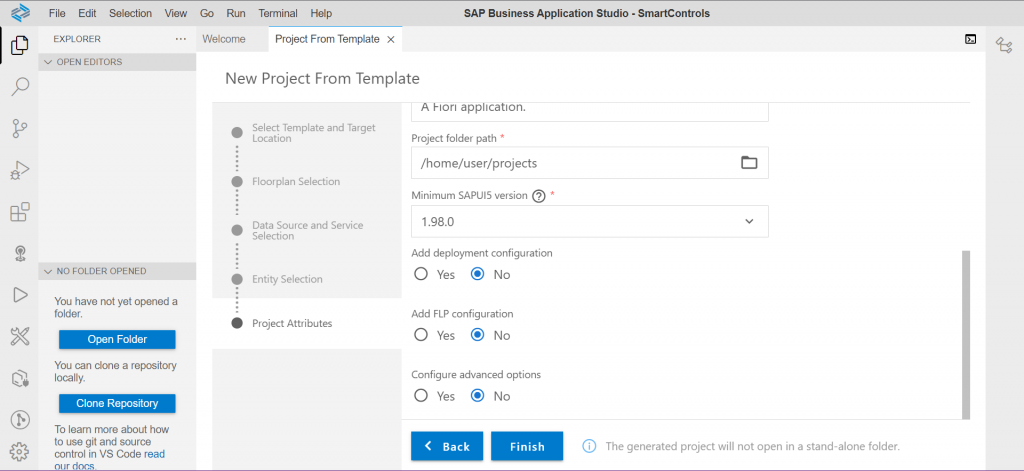
Project is created as below.
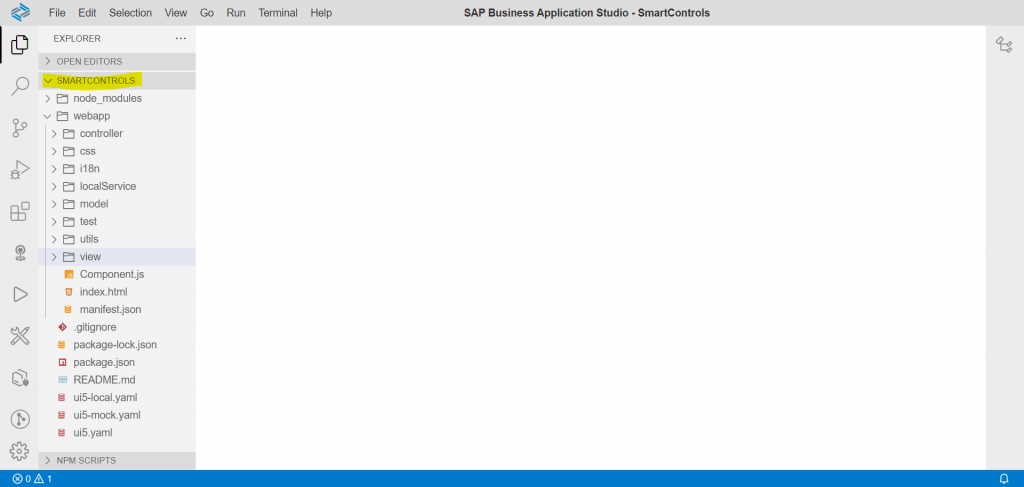
For demo, my requirement is showing a Smart table which has Smart Filter bar, Smart Link and navigation to Smart Form. For this I have taken two views.
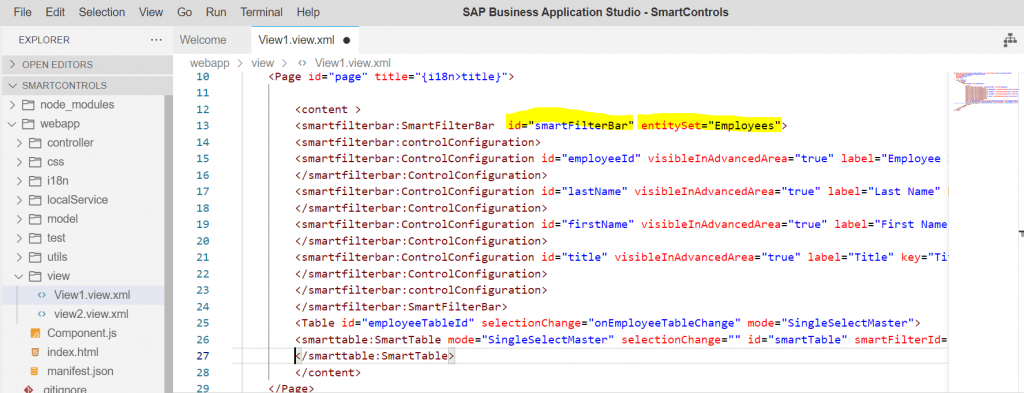
My Initial view is View1 and it has Smart table, smart filter bar.
<mvc:View xmlns:smarttable="sap.ui.comp.smarttable" xmlns:smartfilterbar="sap.ui.comp.smartfilterbar"
controllerName="com.smartcontrols.controller.View1"
xmlns:mvc="sap.ui.core.mvc"
displayBlock="true"
xmlns="sap.m"
>
<Shell id="shell">
<App id="app">
<pages>
<Page id="page" title="{i18n>title}">
<content >
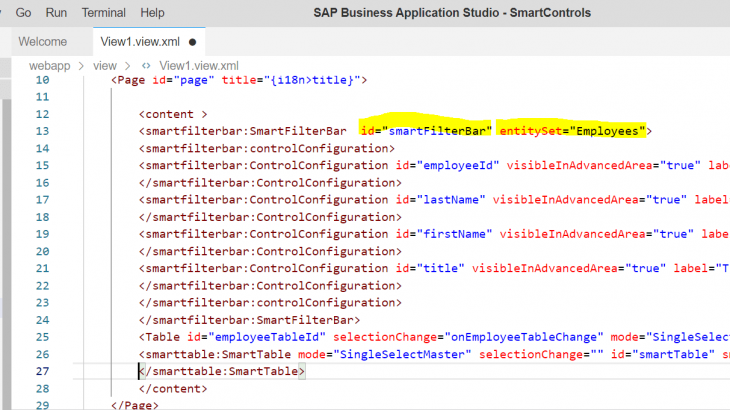
<smartfilterbar:SmartFilterBar id="smartFilterBar" entitySet="Employees">
<smartfilterbar:controlConfiguration>
<smartfilterbar:ControlConfiguration id="employeeId" visibleInAdvancedArea="true" label="Employee ID" key="EmployeeID">
</smartfilterbar:ControlConfiguration>
<smartfilterbar:ControlConfiguration id="lastName" visibleInAdvancedArea="true" label="Last Name" key="LastName">
</smartfilterbar:ControlConfiguration>
<smartfilterbar:ControlConfiguration id="firstName" visibleInAdvancedArea="true" label="First Name" key="FirstName">
</smartfilterbar:ControlConfiguration>
<smartfilterbar:ControlConfiguration id="title" visibleInAdvancedArea="true" label="Title" key="Title">
</smartfilterbar:ControlConfiguration>
</smartfilterbar:controlConfiguration>
</smartfilterbar:SmartFilterBar>
<smarttable:SmartTable id="smartTable" smartFilterId="smartFilterBar" entitySet="Employees" enableAutoBinding="true" initiallyVisibleFields="EmployeeID,LastName,FirstName,Title" tableType="ResponsiveTable" >
<Table id="employeeTableId" selectionChange="onEmployeeTableChange" mode="SingleSelectMaster">
</Table>
</smarttable:SmartTable>
</content>
</Page>
</pages>
</App>
</Shell>
</mvc:View>Smart Filter Bar – The Smart Filter Bar control uses the OData metadata of an entity in order to create a Filter Bar. Whether a field is visible on the Filter Bar, supports type-ahead and value help, for example, is automatically determined. When you use control configurations and group configurations it is possible to configure the Filter Bar and adapt it according to your needs. Note: Most of the attributes/properties are not dynamic and cannot be changed once the control has been initialized.
Smart filter bar has to be set Id and entity set
Entity set – The OData entity set whose metadata is used to create the Smart Filter Bar.
Id – Unique ID of this instance. If not given, a so called autoID will be generated by the framework.
Smart controlConfiguration: Using control configurations you can add additional configuration to filter fields, for example set custom labels, change the order of fields, or change the filter field control type.
Smart ControlConfiguration: ControlConfiguration can be used to add additional configuration for filter fields in the Smart Filter Bar control, in order to overwrite the default settings from the OData metadata. For instance, it is possible to change the label, index or control type of a filter field.
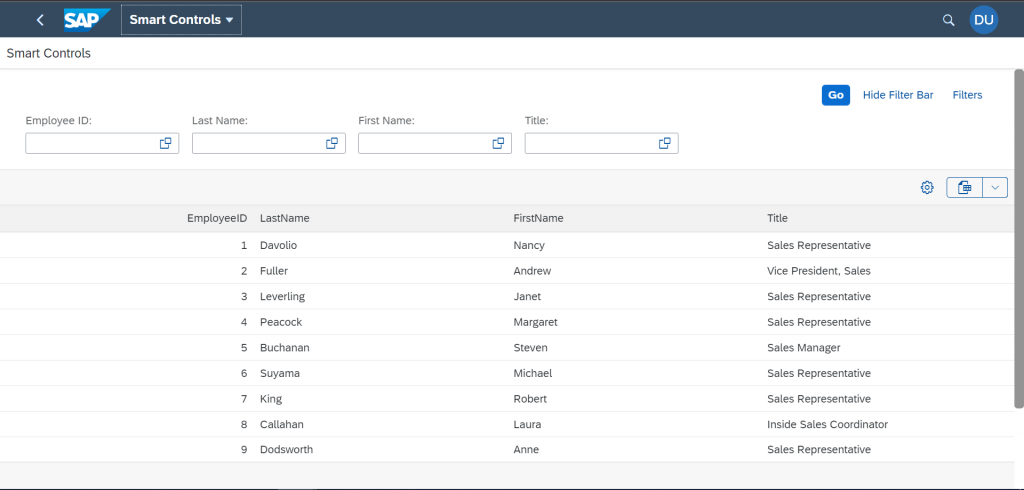
Hide Fiter Bar – Will hide the Filter bar and vice-versa.
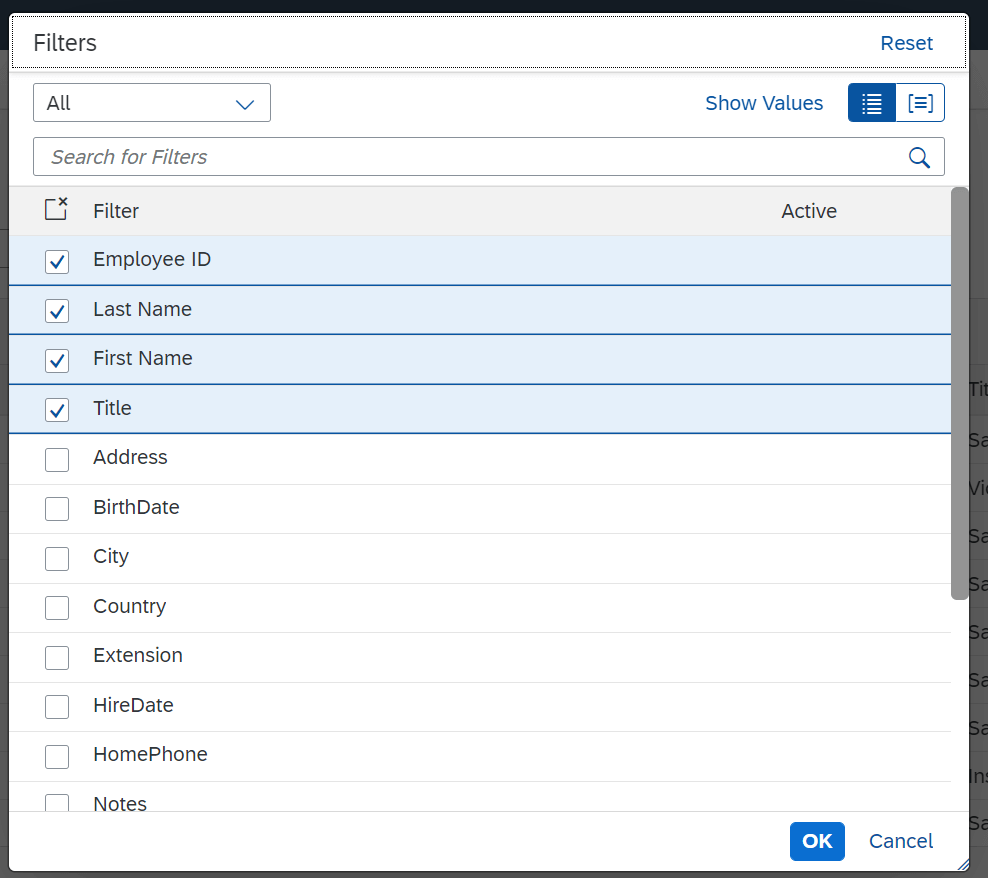
Filters – This option provides us more filter options that we can choose coming from metadata.
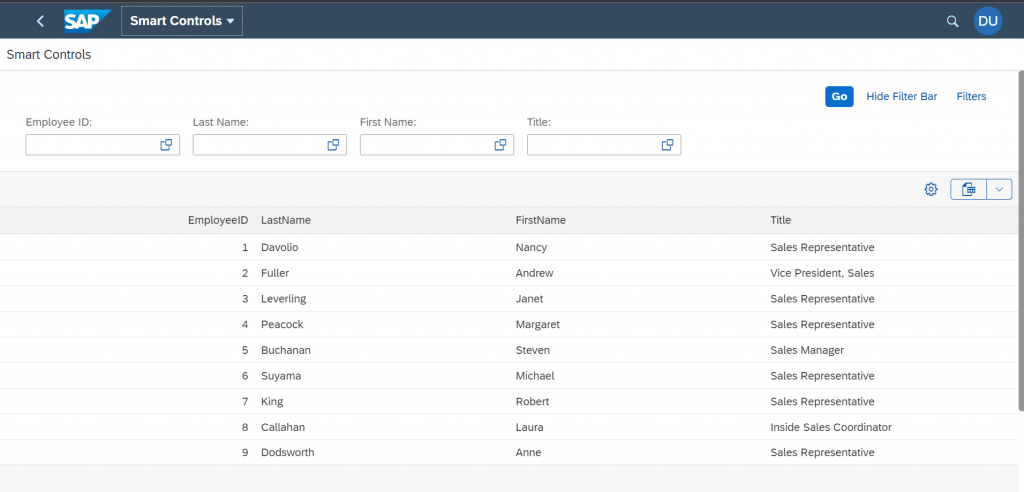
VisibleInAdvancedArea – If it is set to true, in the initial load of the view, it is as follows
VisibleInAdvancedArea, if it is set to false, then the filters will not be shown.

Label – Using this property it is possible to overwrite the label of a filter field in the Smart Filter Bar.
Key – The key property corresponds to the field name from the OData service $metadata document.
Smart table – The Smart Table control creates a table based on OData metadata and the configuration specified. The entity Set attribute must be specified to use the control. This attribute is used to fetch fields from OData metadata, from which columns will be generated; it can also be used to fetch the actual table data. Based on the table Type property, this control will render a standard, analytical, tree, or responsive table. Note: Most of the attributes/properties are not dynamic and cannot be changed once the control has been initialized.
Smart Filter Id – ID of the corresponding Smart Filter control; When specified, the Smart Table searches for the Smart Filter (also in the closest parent View) and attaches to the relevant events of the Smart Filter; to fetch data, show overlay etc.
Entity Set – The entity set name from which to fetch data and generate the columns.
EnableAutoBinding – When set to true, this enables automatic binding of the table using the tableBindingPath (if it exists) or entity Set property. This happens just after the initialise event has been fired.
Table Type – Specifies the type of table to be created in the Smart Table control.
There are so many other properties for smart table.
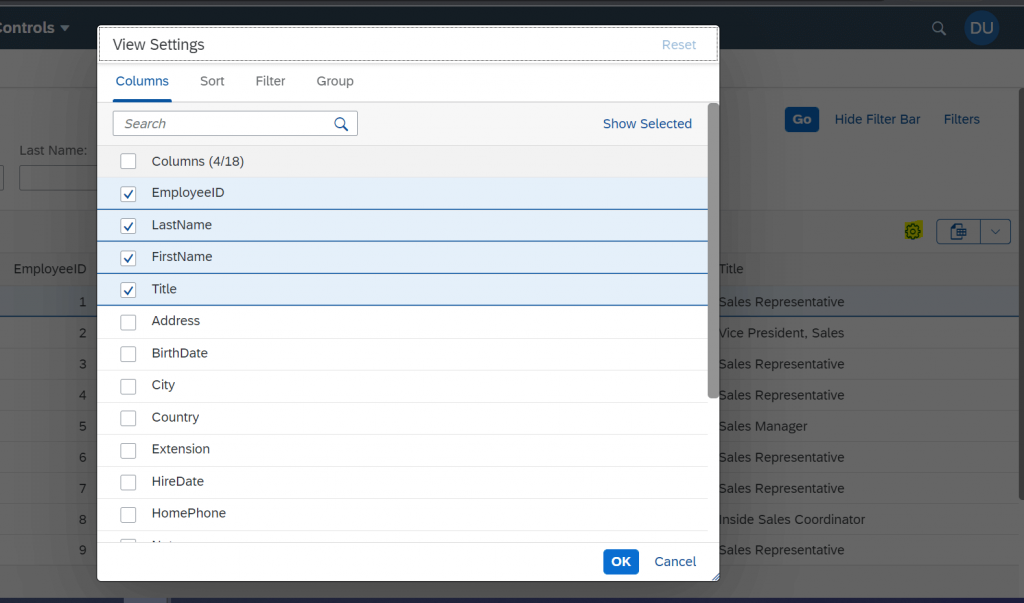
We get best features like Personalization, export functionality available with Smart table.
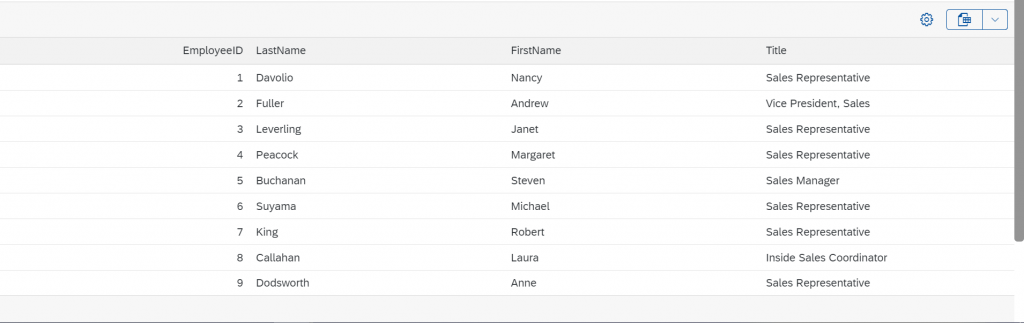
With Personalization, we can have the required columns to be visible coming from metadata and show in the table.
Sorting, Filtering and grouping can also be achieved as part of smart controls.
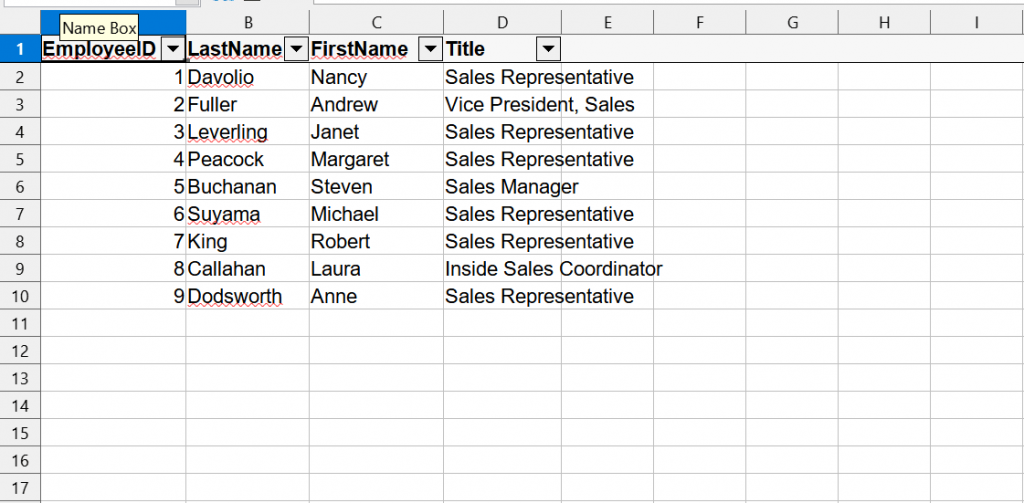
With Export functionality, we can export the file in xlxs format with filter and without filters to local computer.
Example:
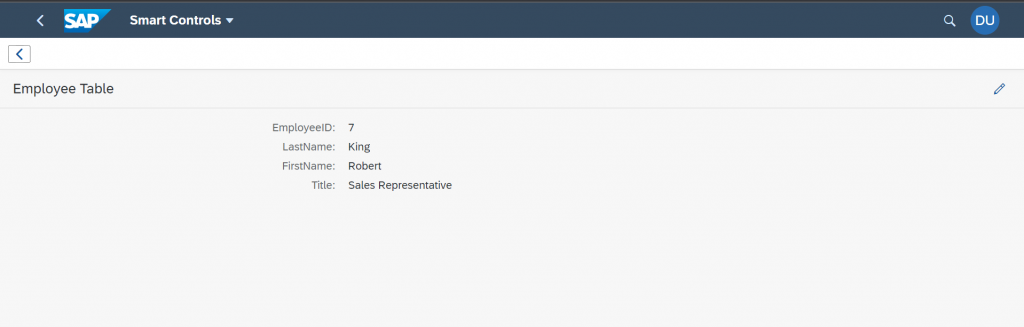
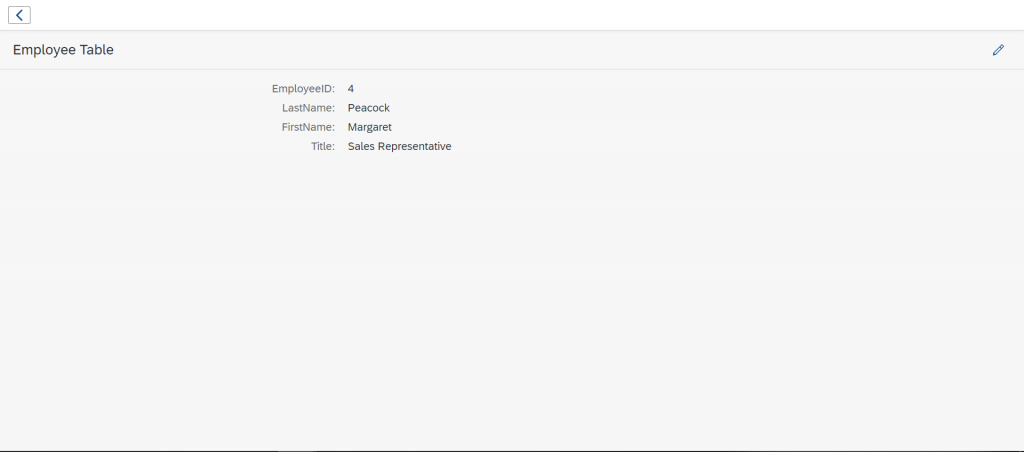
As per the demo requirement, when i click on the row, it will navigate to other view with Smart Form control.
Smart Form – The Smart Form control renders a form (sap.ui.layout.form.Form). When used with the Smart Field control the label is taken from the metadata annotation sap: label if not specified directly.
Group element – A Group Element is a combination of one label and different controls associated to this label.
Smart Field – The Smart Field control interprets metadata that represents entity relationship models, data types, service capabilities, and annotations in OData services to automatically generate the underlying inner controls and reduce the amount of code needed for developing applications. In some cases, the OData entity is derived from the control’s binding context. The OData entity’s property that is changed or displayed with the control is derived from the control’s value property.
Code is as follows:
<mvc:View xmlns:smartfield="sap.ui.comp.smartfield" xmlns:smartform="sap.ui.comp.smartform"
     controllerName="com.smartcontrols.controller.view2"
    xmlns:mvc="sap.ui.core.mvc"
    displayBlock="true"
    xmlns="sap.m"
 >
 <Page id="page2"  showNavButton="true" navButtonPress="onBack">
         <content>
         <smartform:SmartForm editTogglable="true" id="smartForm"  title="Employee Table">
           <smartform:Group id="Group1">
             <smartform:GroupElement id="GroupElement1">
              <smartfield:SmartField id="smartfeild1" textLabel="EmployeeID" value="{EmployeeID}"></smartfield:SmartField>
             </smartform:GroupElement>
              <smartform:GroupElement id="GroupElement2" >
              <smartfield:SmartField id="smartfeild2" textLabel="LastName" value="{LastName}"></smartfield:SmartField>
              </smartform:GroupElement>
              <smartform:GroupElement id="GroupElement3" >
              <smartfield:SmartField id="smartfeild3" textLabel="FirstName" value="{FirstName}"></smartfield:SmartField>
             </smartform:GroupElement>
              <smartform:GroupElement id="GroupElement4">
              <smartfield:SmartField id="smartfeild4" textLabel="Title" value="{Title}"></smartfield:SmartField>
             </smartform:GroupElement>
           </smartform:Group>
         </smartform:SmartForm>
         </content>
        </Page>
        </mvc:View>
Smart form is generated with editable/display mode.
Final Output:
Without applying any filters.
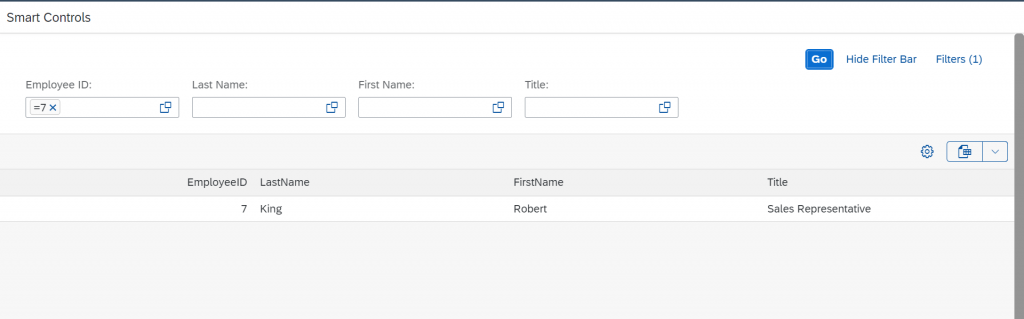
After applying filters:
Smart Form: