IBM Watson Assistant is an AI-powered virtual agent that provides customers with fast, consistent and accurate answers across any messaging platform, application, device or channel. Using artificial intelligence and natural language processing, Watson Assistant learns from customer conversations, improving its ability to resolve issues the first time.
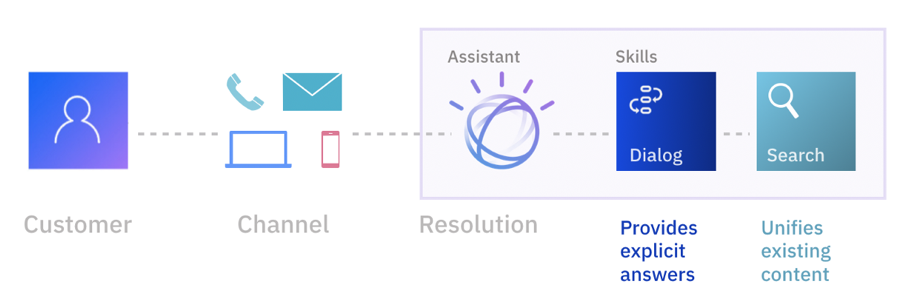
The following diagram describes the user experience where the channel is our app:
I am using IBM Cloud account which is offering many services, The account is free and provides access to everything you need to develop, track, plan, and deploy apps.
You can create one from here : https://cloud.ibm.com/login
This blog will introduce you to add IBM Watson Assistant chatbot for your SAP UI5 Application where this app will look like a basic home page.
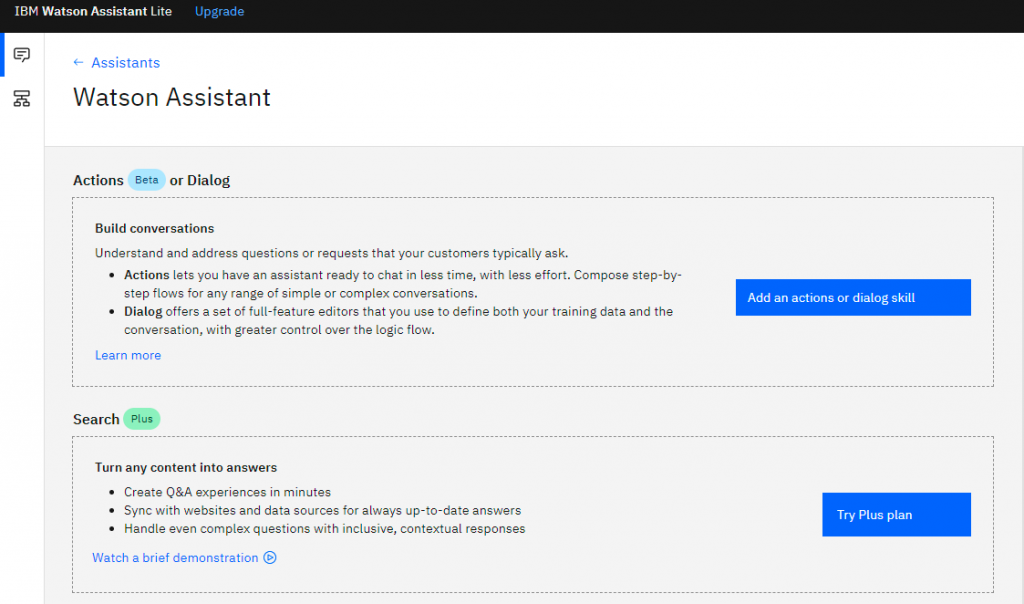
1: Create the Assistant service
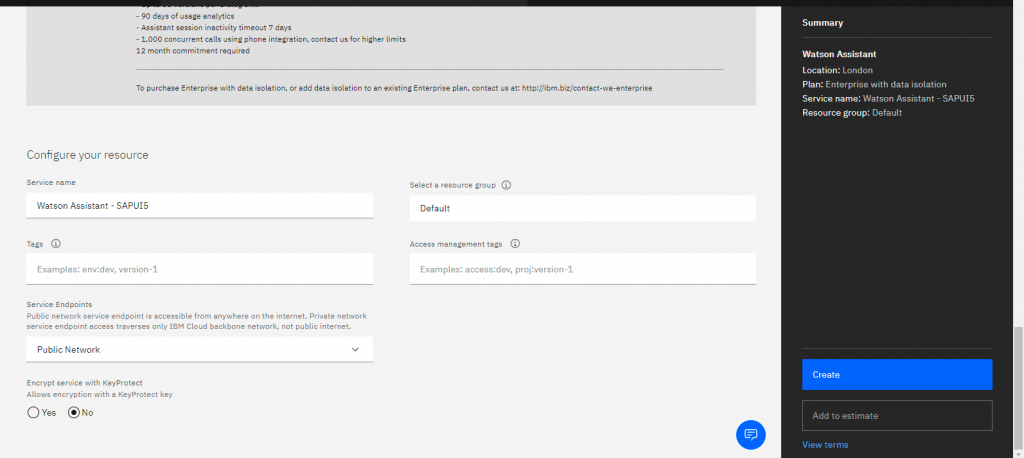
Login to the IBM Cloud. On the dashboard, click button Create Resource, Click on Services from the left bar ( There is a lot of services that everyone has it’s own functionality ), Choose AI / Machine Learning and Click Watson Assistant. We will use the Lite free plan.

Scroll to change Service name to “Watson Assistant – SAPUI5” ( Optional ) then Click on Create
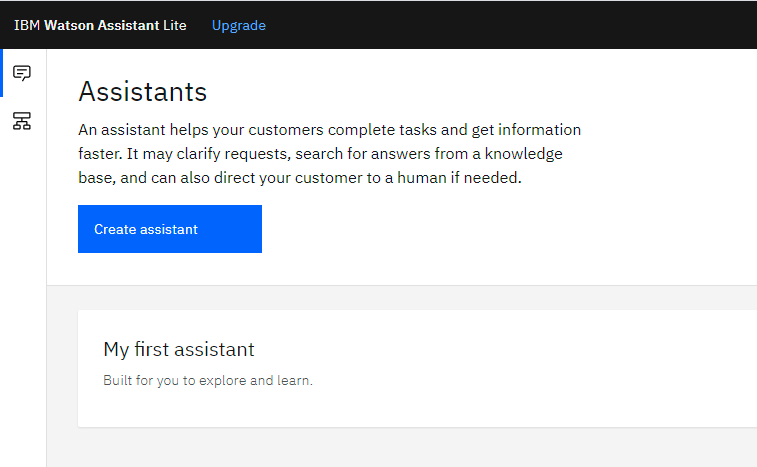
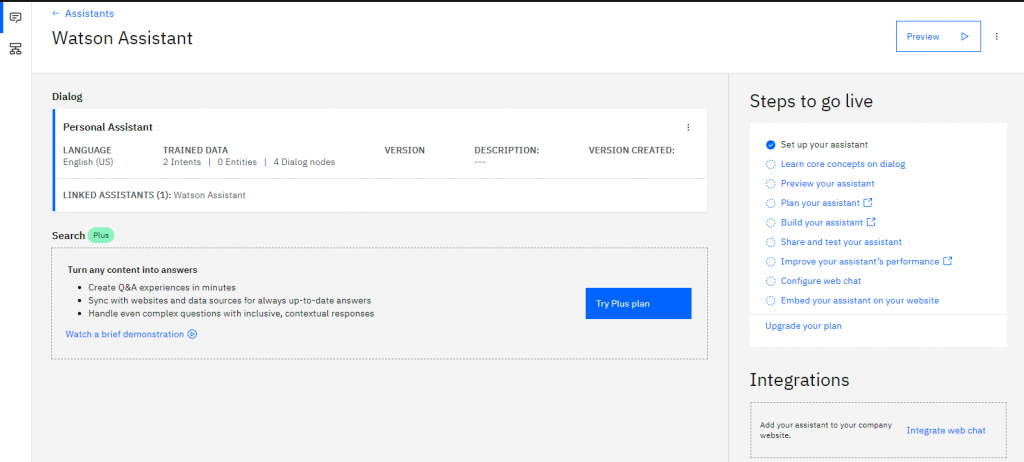
After the service is created, Launch Watson Assistant, then Create Assistant & enter Assistant Name “Watson Assistant” and click Create.
In this simple scenario we won’t dig into all the service details, We will just make the bot responds to user with his Company HR & IT contact details. We will start by creating bot skills ( bot training phase ).
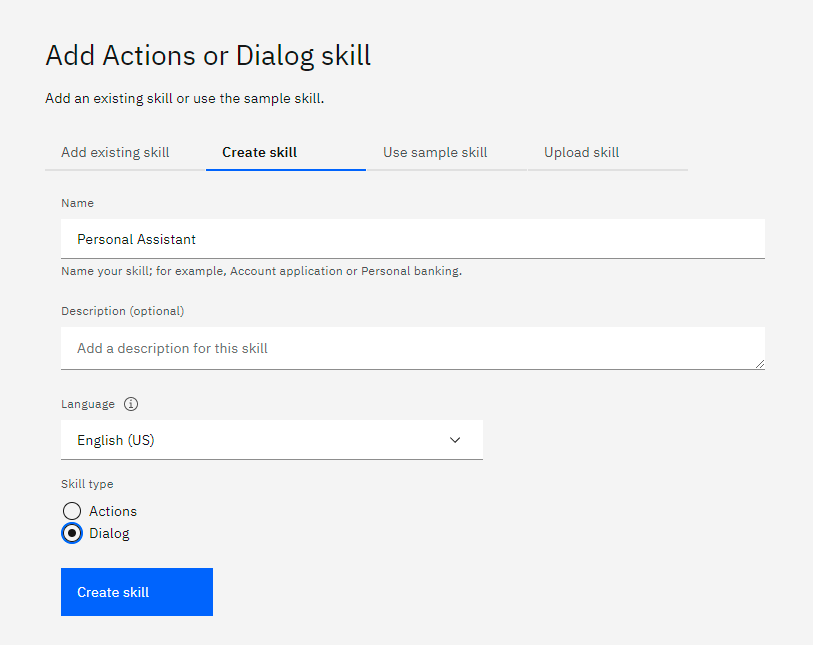
2: Create a Dialog Skill
A dialog skill is a container for the artifacts that define the flow of a conversation that your assistant can have with your customers where Actions skill ( Compose step-by-step flows for any range of simple or complex conversations ) is still in its beta versions.
Click Add an actions or dialog skill.
Choose it’s Name, language and type we stated then Click Create Skill.
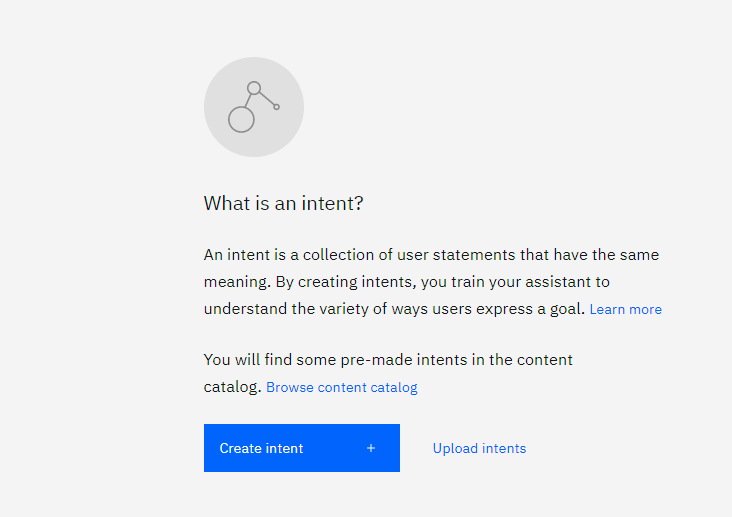
3: Create Intent & Dialogs
The Intents page is where you start to train your assistant. You can add training data that was built by IBM to your skill. Prebuilt intents are available from the content catalog, But in this tutorial we will create our own intents.
Click Create Intent
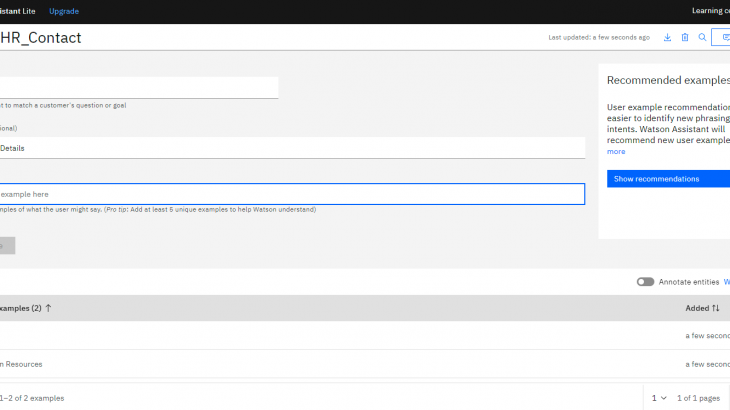
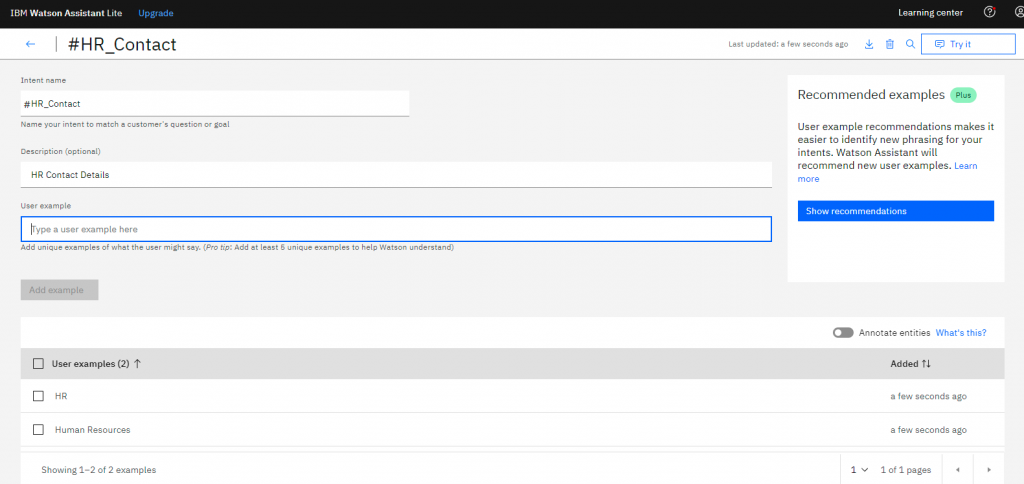
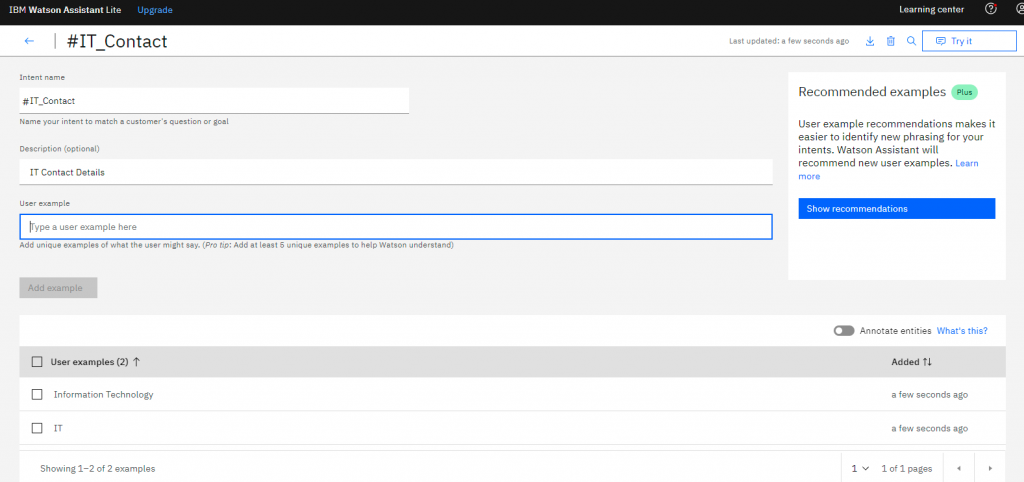
Now we will Enter Intent Name that match user question, In this step We will add User examples referring to HR contact details like the following.
Repeat the same steps for IT contact details intent like the following.
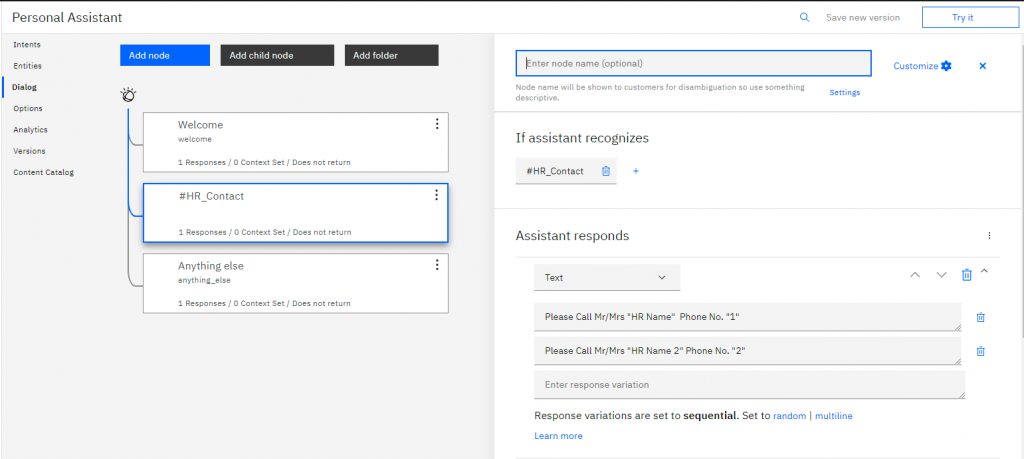
A dialog defines the flow of your conversation in the form of a logic tree. It matches intents (what users say) to responses (what your virtual assistant says back). Each node of the tree has a condition that triggers it, based on user input.
From the Skills menu, choose Dialog and Click Add node to state the intents we created before responses.
Under “If assistant recognizes”, Put HR Intent & Enter Assistant responds text with its details.
I have put two contacts for example.
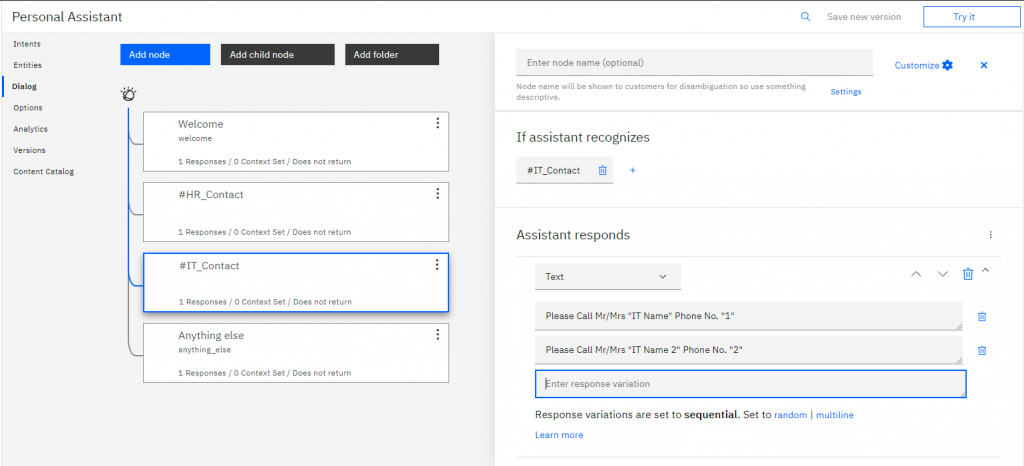
Repeat the same steps for IT contact details dialog.
We can test it to see the results by clicking Try it:
Enter “HR” in the chat & See the results.
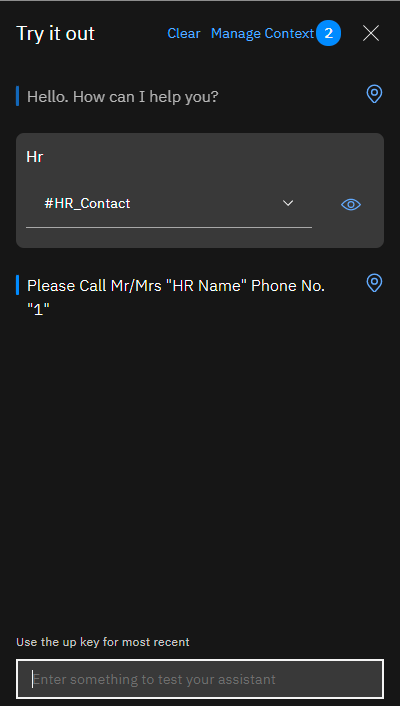
It’s working as expected, It answered with the HR contact.
4: Integrating web chat
Now We need to add this widget into our UI5 app, So we will need the widget credentials
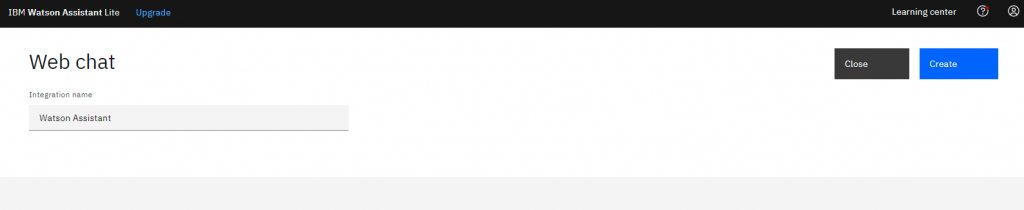
On the left bar, Click on Assistants and choose Watson Assistant that we created before then Scroll and In the right Click Integrate web chat.
Choose Integration name “Watson Assistant” and Click Create
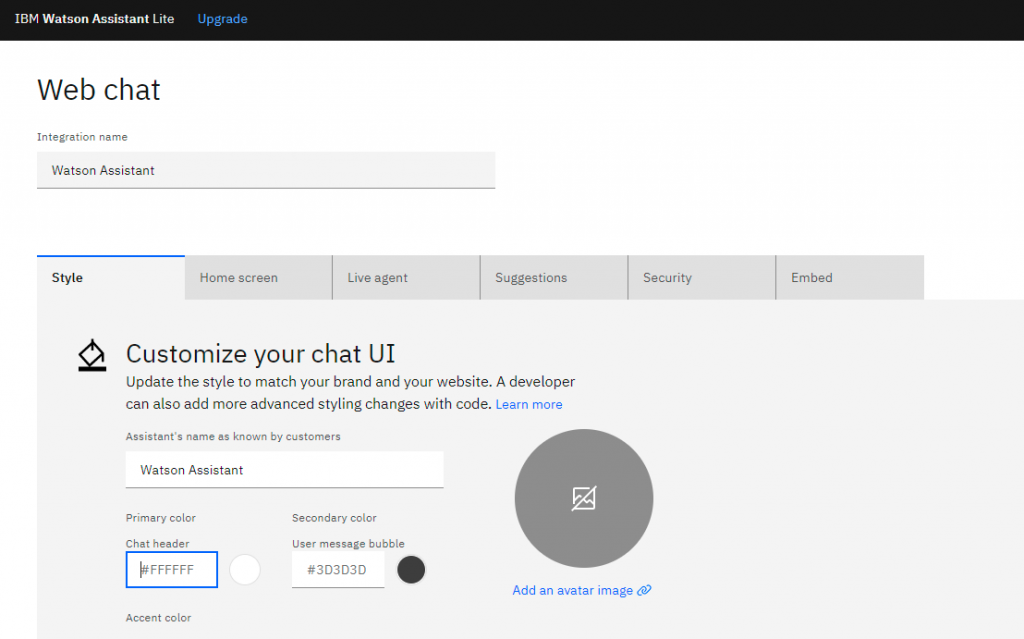
After it’s created, You can customize it’s style from Style tab.
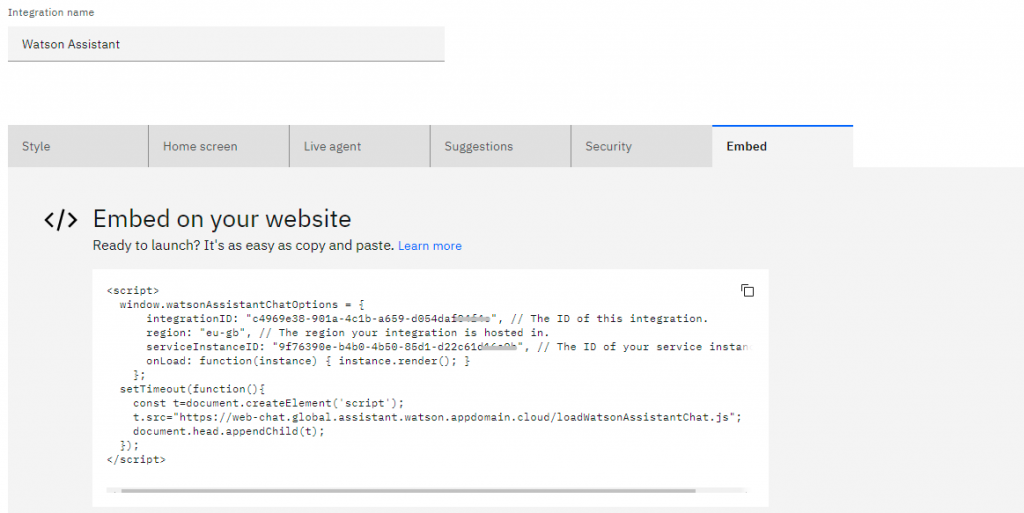
Now Click Embed and copy the following script that we will use later in our app.
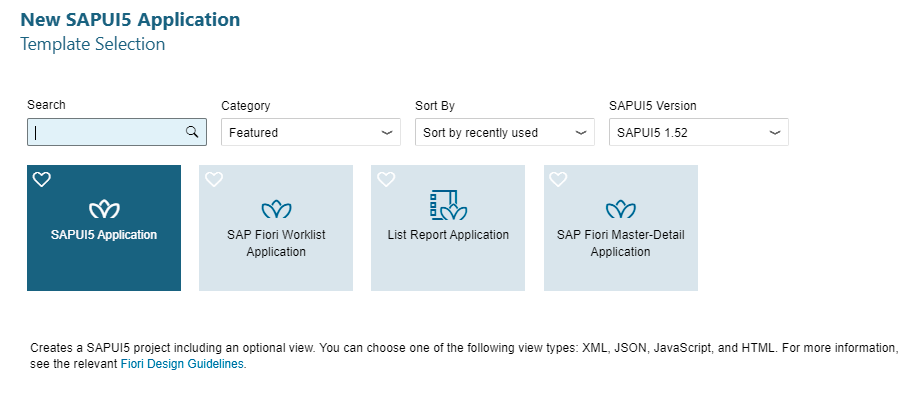
5: Create SAPUI5 App
I am using in this blog SAP Web IDE however it’s recommended to use SAP Business Application Studio.
Create New SAPUI5 Application
After the project is created. Navigate to Project name > webapp > index.html and Paste the script we copied at the last step to look like the following :
<!DOCTYPE HTML>
<html>
<head>
<meta http-equiv="X-UA-Compatible" content="IE=edge" />
<meta charset="UTF-8">
<title>Homepage</title>
<script id="sap-ui-bootstrap"
src="https://sapui5.hana.ondemand.com/resources/sap-ui-core.js"
data-sap-ui-libs="sap.m"
data-sap-ui-theme="sap_belize"
data-sap-ui-compatVersion="edge"
data-sap-ui-resourceroots='{"HomepageHomepage": ""}'
data-sap-ui-oninit="module:sap/ui/core/ComponentSupport"
data-sap-ui-async="true"
data-sap-ui-frameOptions="trusted">
</script>
<script>
window.watsonAssistantChatOptions = {
integrationID: "c4969e38-901a-4c1b-a659-d054daf_____", // The ID of this integration.
region: "eu-gb", // The region your integration is hosted in.
serviceInstanceID: "9f76390e-b4b0-4b50-85d1-d22c61d_____", // The ID of your service instance.
onLoad: function(instance) {
instance.render(); // Renders the web chat widget on your page.
}
};
setTimeout(function(){
const t=document.createElement('script');
t.src="https://web-chat.global.assistant.watson.appdomain.cloud/loadWatsonAssistantChat.js";
document.head.appendChild(t);
});
</script>
<link rel="stylesheet" type="text/css" href="css/style.css">
<script>
sap.ui.getCore().attachInit(function() {
new sap.m.Shell({
app: new sap.ui.core.ComponentContainer({
height : "100%",
name : "HomepageHomepage"
})
}).placeAt("content");
});
</script>
</head>
<body class="sapUiBody" id="content">
</body>
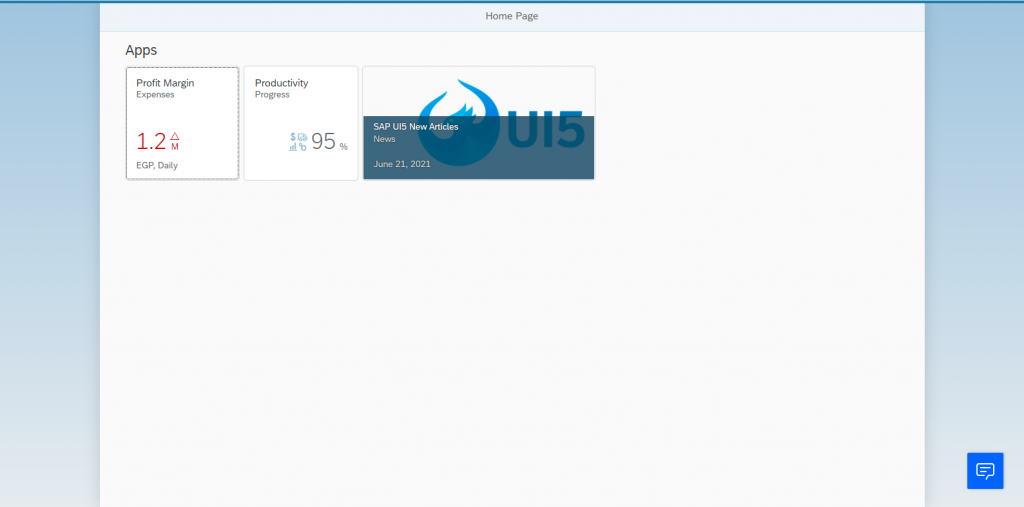
</html>Navigate to your view and We will add a few tiles ( Static & Dynamic ) to make the basic view for user home page.
<mvc:View controllerName="HomepageHomepage.controller.View1" xmlns:html="http://www.w3.org/1999/xhtml" xmlns:mvc="sap.ui.core.mvc"
	displayBlock="true" xmlns="sap.m" xmlns:layout="sap.ui.layout" xmlns:microchart="sap.suite.ui.microchart">
	<App>
		<pages>
			<Page title="{i18n>title}">
				<layout:VerticalLayout class="sapUiResponsiveMargin">
					<Title titleStyle="H2" text="{i18n>Apps}" class="sapUiTinyMarginBegin"/>
					<layout:HorizontalLayout allowWrapping="true">
						<GenericTile class="sapUiTinyMarginBegin sapUiTinyMarginTop tileLayout" header="Profit Margin" subheader="Expenses" press="onPress">
							<TileContent unit="EGP" footer="Daily">
								<NumericContent scale="M" value="1.2" valueColor="Error" indicator="Up" withMargin="false"/>
							</TileContent>
						</GenericTile>
						<GenericTile class="sapUiTinyMarginBegin sapUiTinyMarginTop" header="Productivity" subheader="Progress">
							<tileContent>
								<TileContent>
									<content>
										<NumericContent scale="%" value="95" icon="sap-icon://s4hana"/>
									</content>
								</TileContent>
							</tileContent>
						</GenericTile>

						<SlideTile class="sapUiTinyMarginBegin sapUiTinyMarginTop" transitionTime="250" displayTime="2500">
							<GenericTile backgroundImage="https://raw.githubusercontent.com/SAP/ui5-tooling/master/docs/images/UI5_logo_wide.png" frameType="TwoByOne" press="onPress">
								<TileContent footer="June 21, 2021">
									<NewsContent contentText="SAP UI5 New Articles" subheader="News"/>
								</TileContent>
							</GenericTile>
							<GenericTile backgroundImage="https://experience.sap.com/fiori-design-web/wp-content/uploads/sites/5/2016/06/composition_launchpad-homepage-V1.30-1.36-1100x554.png" frameType="TwoByOne" >
								<TileContent footer="June 21, 2021">
									<NewsContent contentText="SAP Fiori New Features" subheader="Today, SAP News"/>
								</TileContent>
							</GenericTile>
						</SlideTile>
					</layout:HorizontalLayout>
				</layout:VerticalLayout>
			</Page>
		</pages>
	</App>
</mvc:View>
We can run the application, It will look like the following where chatbot is displayed at the bottom & The tiles we created at the top :
We can test the widget across the app by typing “I need to contact HR” & “IT” and let’s see the result.


