Introduction
This blog post will guide you through the steps to create SAP IoT Services in Cloud Foundry environment and to establish connection between SAP IoT Service and SAP UI5 Application to consume data.
We will start with introduction and will go through enablement, configuration and consumption of IoT Service. Along this, we will showcase a UI5 application consuming this IoT Service.
What is SAP IoT Service?
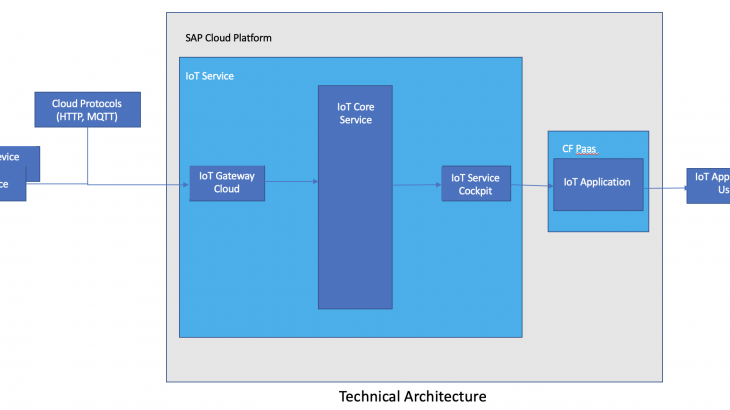
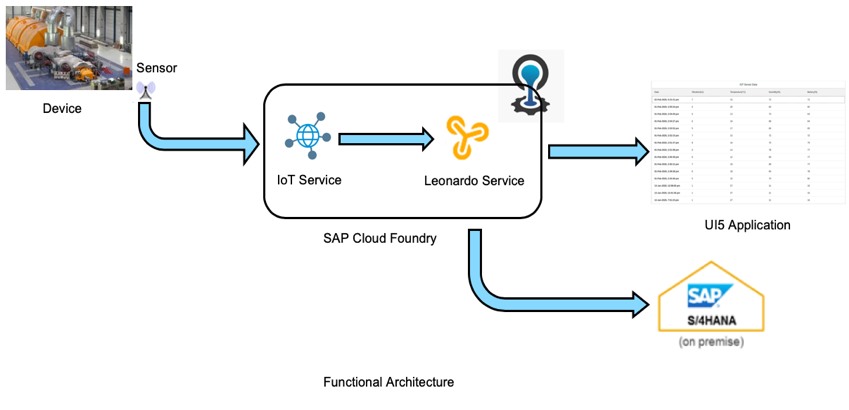
The SAP Cloud Platform (SCP) Internet of Things (IoT) service allows users to develop, modify and consume real time IoT based business applications. The IoT service for Cloud Foundry environment provides connection between real time devices and SAP Cloud Platform for IoT data flow and device management. IoT data flows between devices and SCP using various IoT protocols through a secured connection.
Also Read: SAP Cloud Platform Integration Certification Preparation Guide

Steps
- Enablement of SAP IoT Service in Cloud Foundry environment on SAP Cloud Platform
- Configuration of IoT things(Capability, Sensor Type, Sensor, Device etc) in IoT Service Cockpit
- Setup Connection between IoT Service and UI5 Application (Destination Creation)
- UI5 Application development consuming IoT data
Enablement of SAP IoT Service in Cloud Foundry environment on SAP Cloud Platform: –
Open SAP Cloud Platform Cockpit and register yourself, if you have already registered then logon with your user credential.
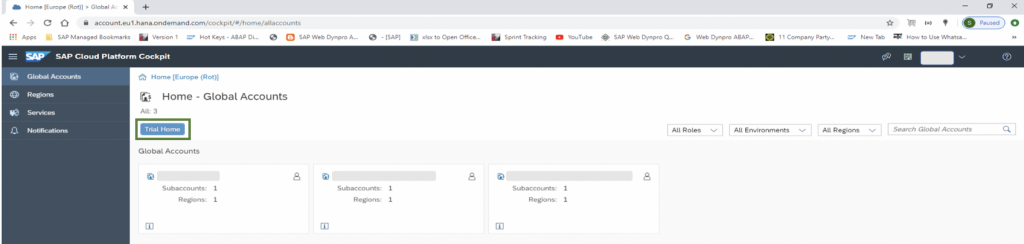
User has to provide quota to services, purchased in the sub-account, to make them available. If you don’t have any productive account, click on ‘Trial Home’. It will navigate you to default global account ‘I/S/C Number + trial’, add quotas to the services you purchased in your sub-account.

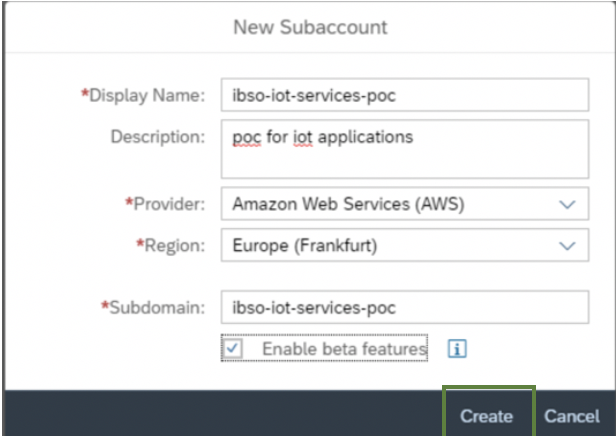
Click on button ‘New Sub-account’. A popup will appear. Fill the details for new sub-account as shown in below screen shot and click button ‘Create’.
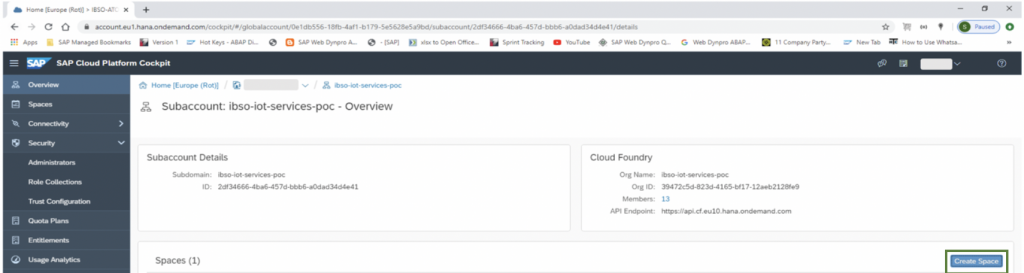
A New subaccount is created. Click on button ‘Enable Cloud Foundry’. There would be a popup for ‘Organization Name’ which will have default name as ‘<Global account name>_<Subaccount name>’ .

On press button ‘Create’, It will create a new Cloud Foundry Organization with filled name. Now click on button ‘Create Space’. A dialog would be opened. Enter a suitable space name and mark ‘Space Manager and Space Developer’ as selected.
On press button ‘Create’, It will create a new Space with filled name and you can see newly added Space in ‘Space’ section.
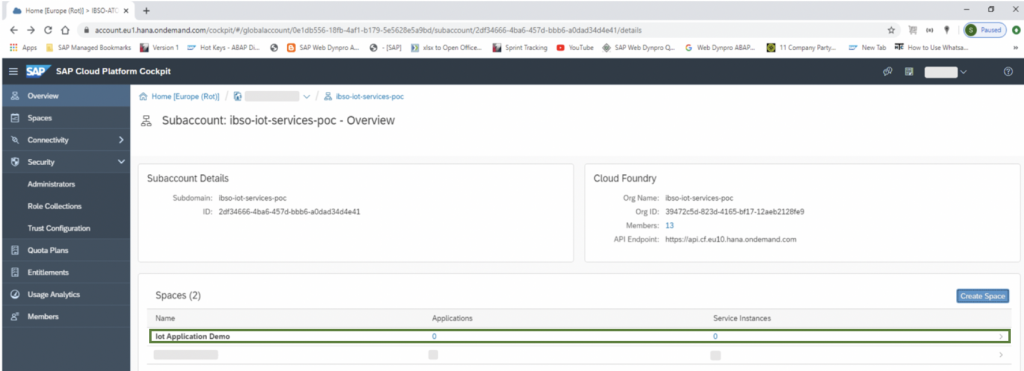
Click on created Space. It will navigate to that space. You can see section ‘Service’ tab in left side of page. This tab is having 3 sections – Service Marketplace (SAP provided services for which user has taken subscription), Service Instances (Instances created by user), User Provided Services.
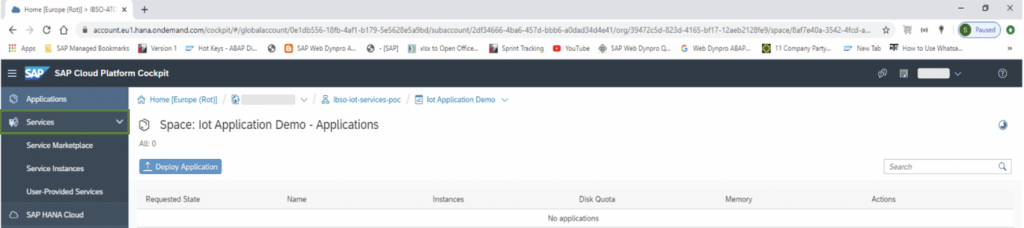
Click on first tab Service Marketplace. You can see tile for ‘Internet of Things’ service, if you have subscription for this service.

Click on this tile, user can see documentation and Standard plans for this service. Click on ‘Instances’ in left most section. Now press button ‘New Instance’ to create a new instance of IoT Service. A popup will appear.

In first screen (Choose Service Plan), select ‘standard’ service plan and press button ‘Next’. Next two screens (Specify Parameters and Assign Application) are optional, so just press button ‘Next’. In last screen (Confirm), Enter a suitable instance name and press button ‘Finish’. It may take some time to create a new IoT instance.
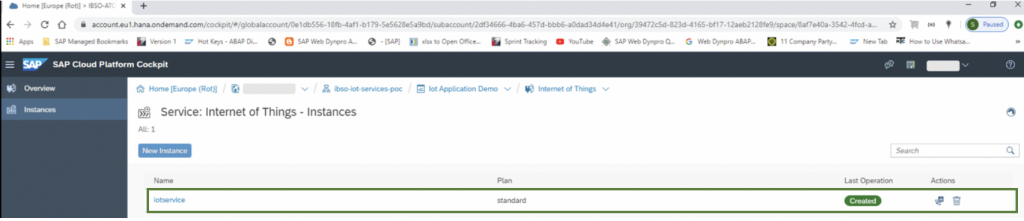
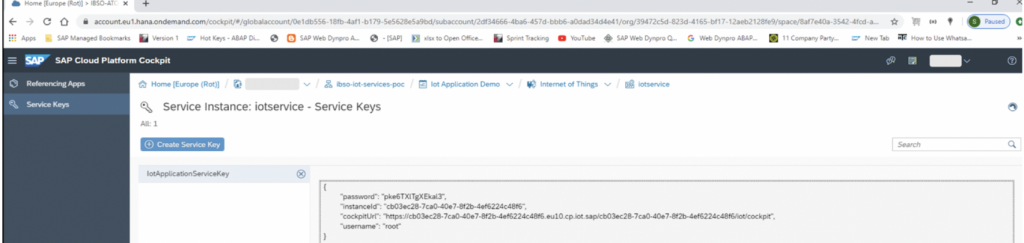
On click of newly created instance, user will be navigated to detailed page. Now create a service key for instance, for that select ‘Service Keys’ in left section and click on button ‘Create Service Key’.

A popup will appear, enter an appropriate name for Service Key and press button ‘Save’. It will create a service key, basically a JSON object, which contains instanceId (IoT instance Id), cockpitUrl (IoT Cockpit URL), username (Cockpit Username), password (Cockpit Password). Copy username and password, which will be required for IoT Cockpit Login in further steps.
Go to space ‘IoT Application Demo’ and select tab ‘Service Instances’ under section ‘Services’ in leftmost part of page. Click on icon ‘Open Dashboard’ in ‘Action’ column of rightmost part of page as shown in below screenshot.
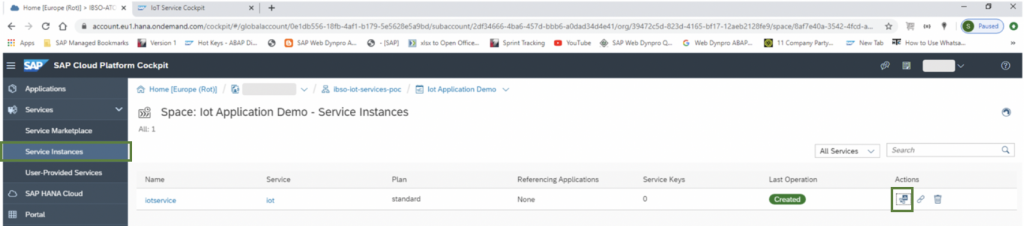
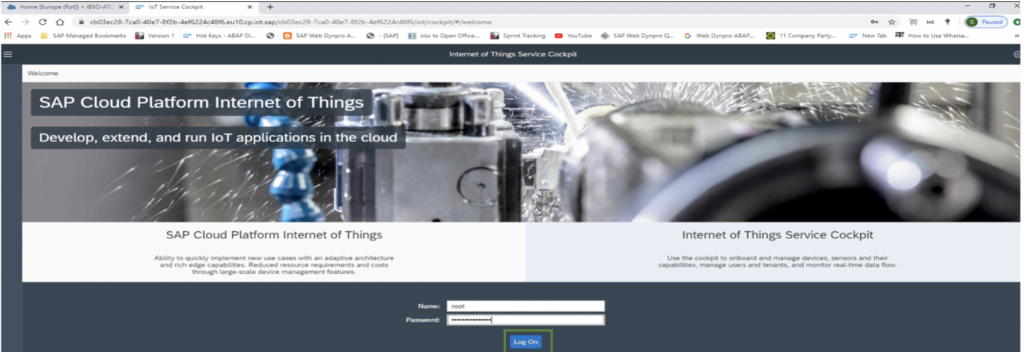
On click of icon ‘Open Dashboard’, Internet of Things Service Cockpit is opened in new tab. Enter username and password in login screen as mentioned above and press button ‘Log On’.
Configuration of IoT things(Capability, Sensor Type, Sensor, Device) in IoT Service Cockpit:-
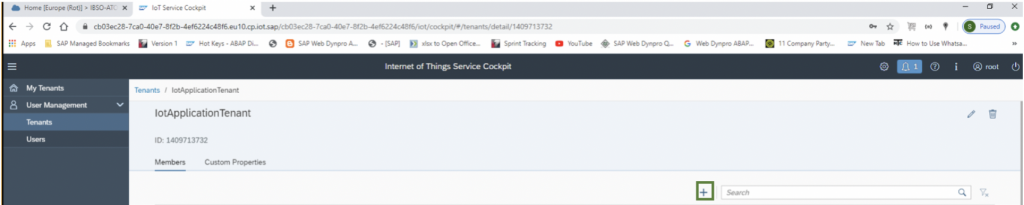
You can see Dashboard of ‘IoT Service Cockpit’. IoT Service provide multi-tenancy feature which means multiple tenants can be created for a single instance. Tenant will have one owner who will assign users. In left side toolbar, select ‘Tenants’ tab and click on icon ‘+’ in right side of page to add a new tenant.

A new screen will be opened, enter a suitable tenant name and press footer bar button ‘Create’. A new tenant is added with auto generated unique ‘ID’. Click on icon ‘+’ to assign user to tenant. Popup will open. Enter user name as ‘root’ and role as ‘User’. Press button ‘Add’.
Click on tab ‘Tenants’ under ‘User Management’ Section. User can see newly added tenant and on click of tenant, user can see added users under ‘Members’ section of tenant.
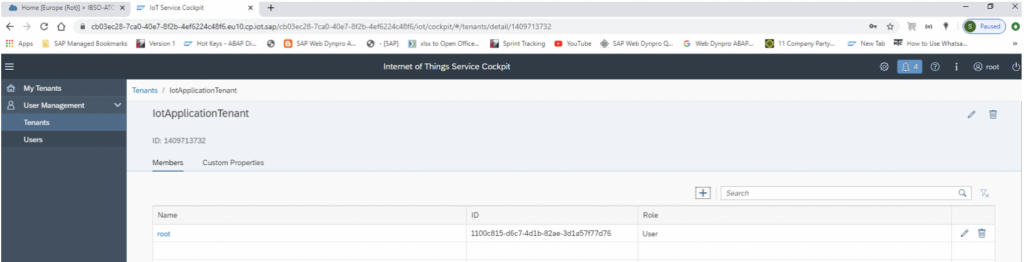
Select tab ‘My Tenants’ under ‘User Management’ Section, all the tenants would be listed here.

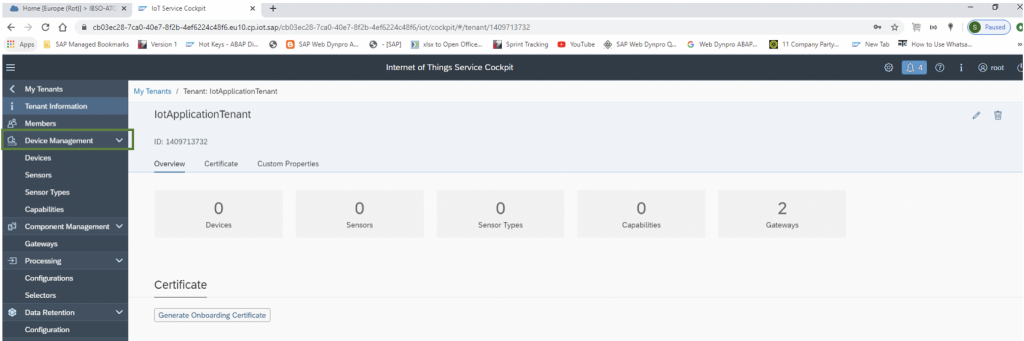
Click on tenant ‘IotApplicationTenant’. It will navigate you to that tenant. Select ‘Device Management’ tab from left side toolbar where you can see Devices, Sensors, Sensor Types, Capabilities, Gateways etc.
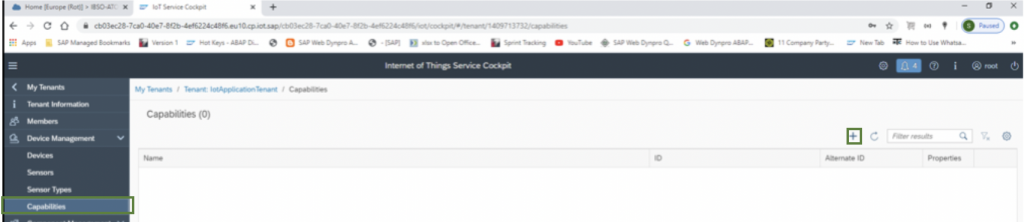
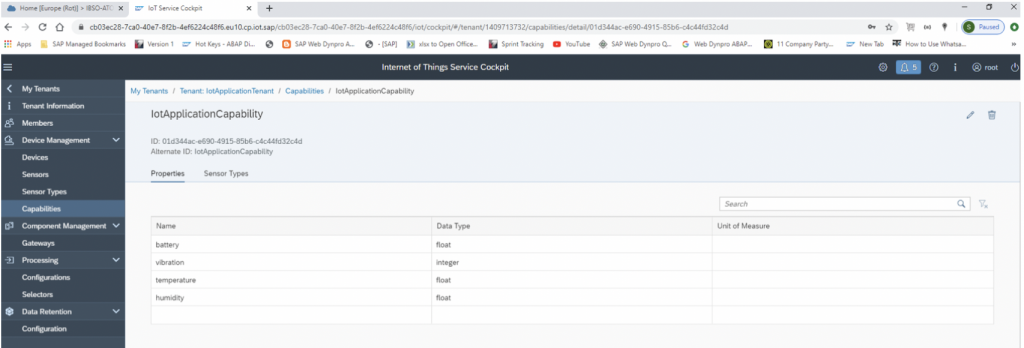
Select ‘Capabilities’ under ‘Device Management’, click on icon ‘+’ to add a new capability. A new screen will be opened.
Enter a suitable capability Name, Alternate Id in General Information section and click on icon ‘+’ in Properties section to add properties as per your requirement. Add property Name and Data Type as shown in below screen. Press footer bar button ‘Create’. A confirmation popup will appear, click on button ‘Confirm’.
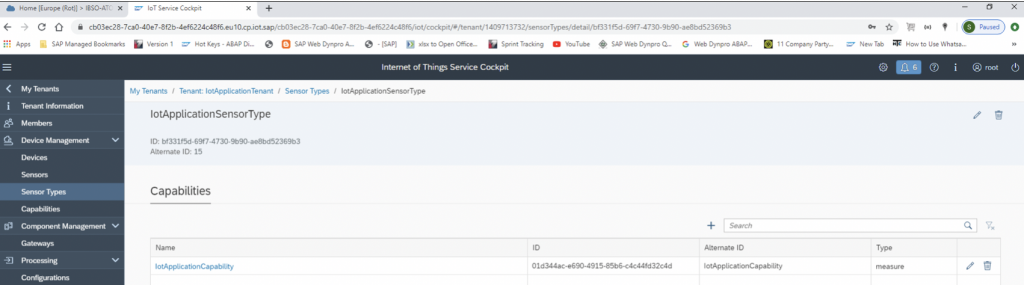
Select ‘Sensor Types’ under ‘Device Management’, click on icon ‘+’ to add a new sensor type. A new screen will be opened. Enter a suitable sensor Name, Alternate Id in General Information section and click on icon ‘+’ in Capabilities section. Add capability from drop down as shown in below screen. Press footer bar button ‘Create’.
Select ‘Devices’ under ‘Device Management’, click on icon ‘+’ to add a new device. A new screen will be opened. Enter suitable device Name, Gateway (REST), Alternate Id in General Information section. Press footer bar button ‘Create’. Confirmation popup will appear, click on button ‘Confirm’.
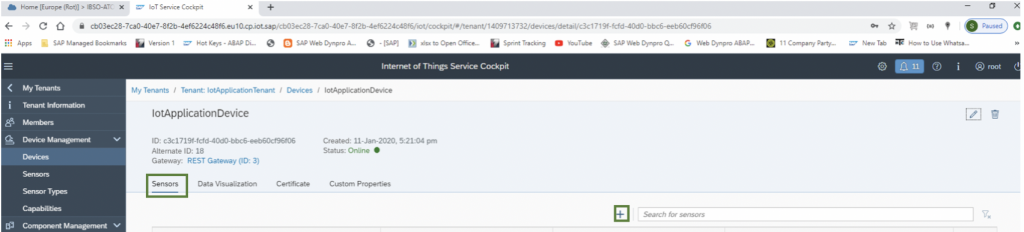
Select tab ‘Sensors’ under ‘IotApplicationDevice’, click on icon ‘+’ to add a new device. A new screen will be opened. Enter a valid sensor Name, Sensor Type, Alternate ID in General Information section. Press button ‘Confirm’ in confirmation popup.

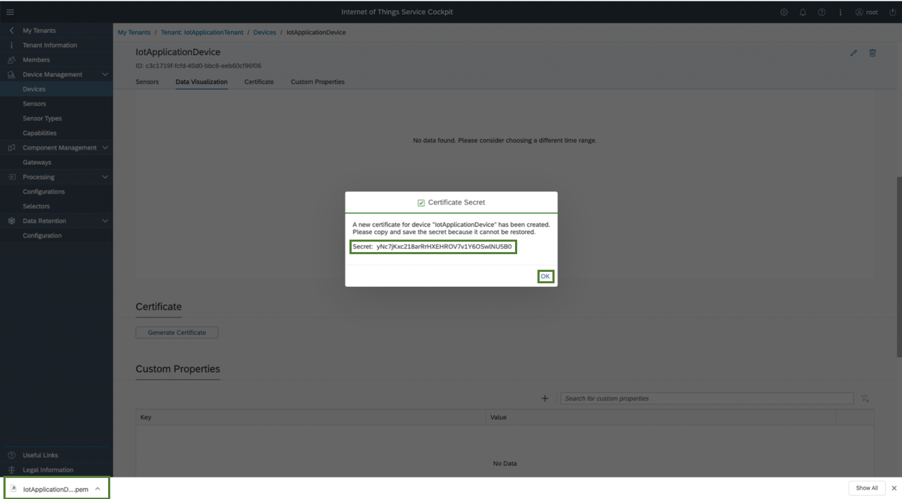
Select tab ‘Certificate’ under ‘IotApplicationDevice’, press button ‘Generate Certificate’ and select ‘pem’ in Certificate Type. Press button ‘Generate’. A file with name ‘-device_certificate.pem’ will be downloaded to browser default download location and a popup will appear with Certificate Secret. Copy secret key which will be required for data ingestion.
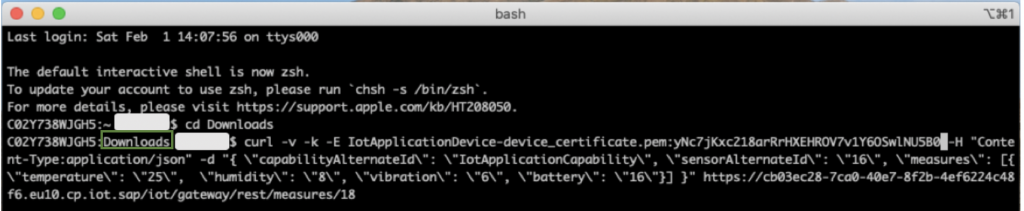
Curl Command for data ingestion: – In MacOS, curl command is already available.
Open command prompt and go to the folder where pem certificate is downloaded. Write command as shown and press Enter.

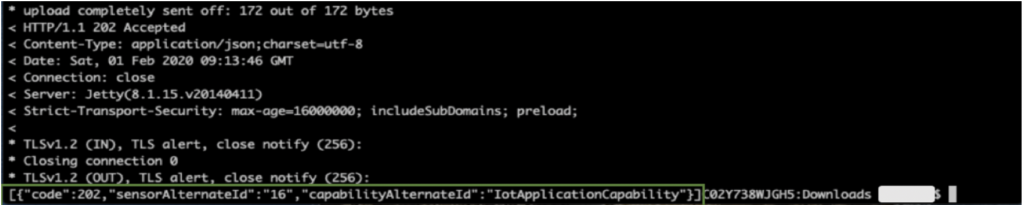
You can see status 202 which indicates that data has been successfully ingested in IoT Cockpit.
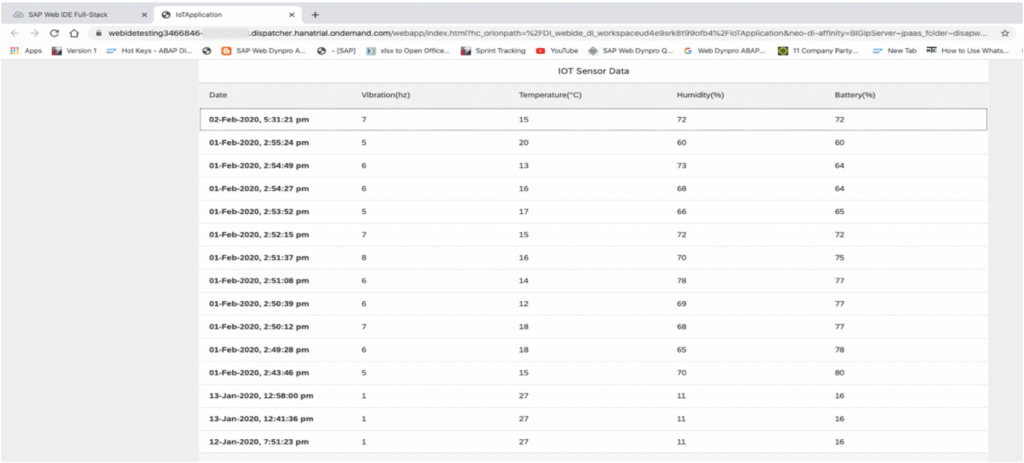
Select tab ‘Data Visualization’ under ‘IotApplicationDevice’, select sensor name which is assigned to device. Click on segmented icon ‘Tabular data or Graphical data’ on right most side of table toolbar.
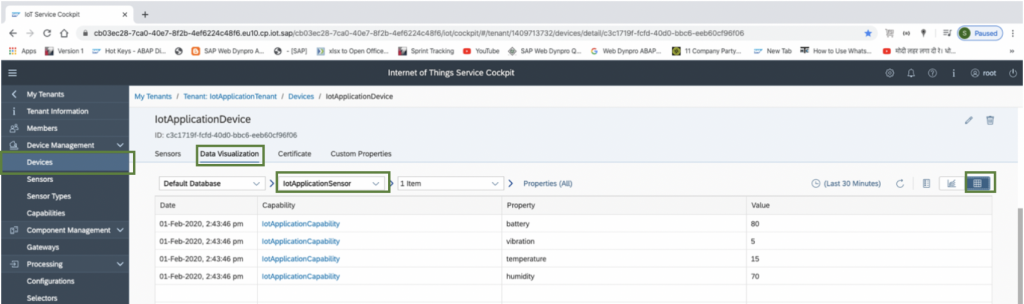
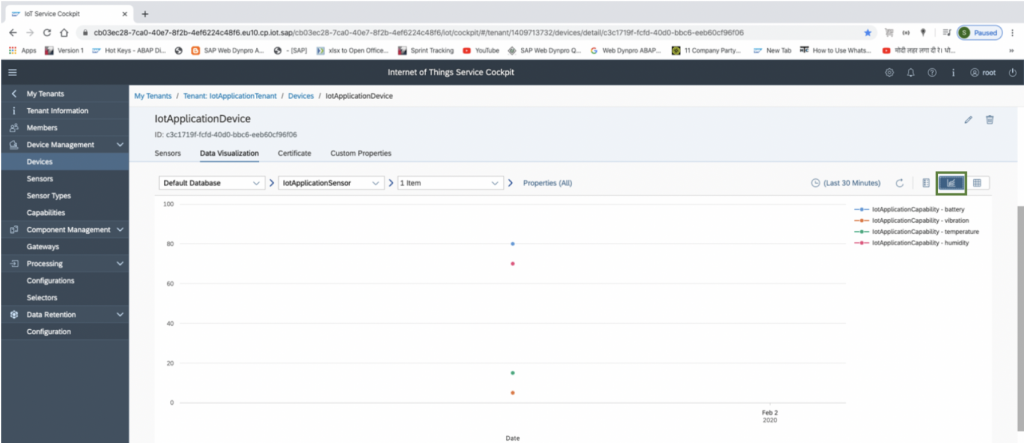
Similarly, you can push more data records and see it in tabular/graphical form as mentioned above.
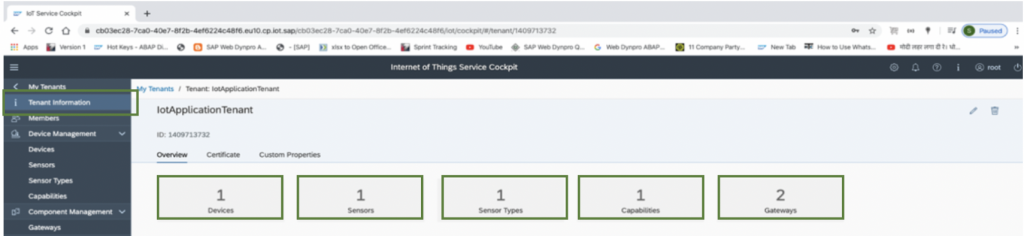
Now click on ‘Tenant Information’ tab, user can see all the created Devices, Sensors, Sensor Types, Capabilities and Gateways.
Setup connection between IoT Service and UI5 Application (Destination Creation):-
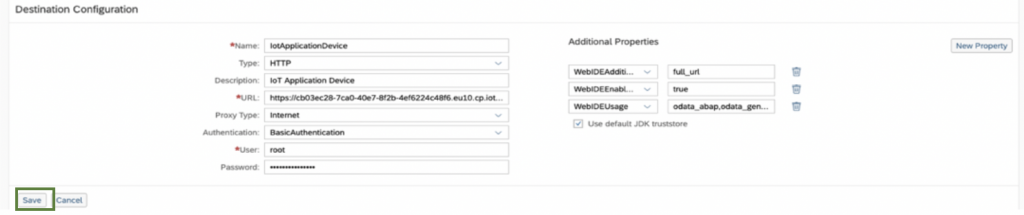
Now we will create a destination to consume IoT data in SAP UI5 application. Go to sub-account (Neo Environment) and click on ‘Destination’ under ‘Connectivity’ section in leftmost toolbar of page. Click on ‘New Destination’.

Create a new destination as shown in below screen shot. Then press ‘Save’ and click on ‘Check Connection’. It will show message: Connection to <Device> established. Response returned: “302: Found”

SAP UI5 Application development consuming IoT data: –
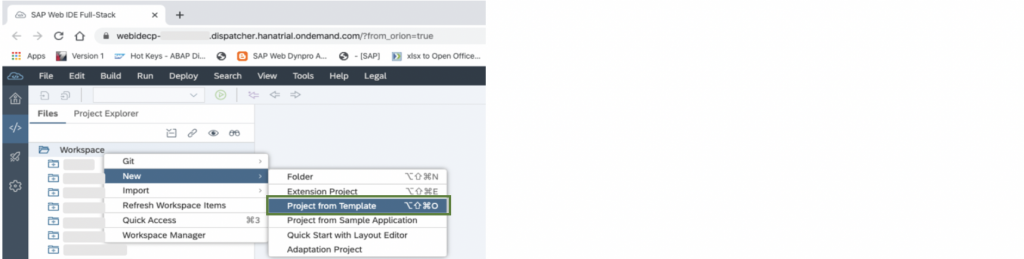
Click on Services in leftmost menu of page as we did for service ‘Internet of Things’. Select tile ‘SAP Web IDE Full-Stack’ and enable service, if not already done and click on link ‘Go to Service’. It will take you through SAP Web IDE portal, where we will develop SAP UI5 application. Now right click on ‘Workspace’ to create new UI5 application using standard template.
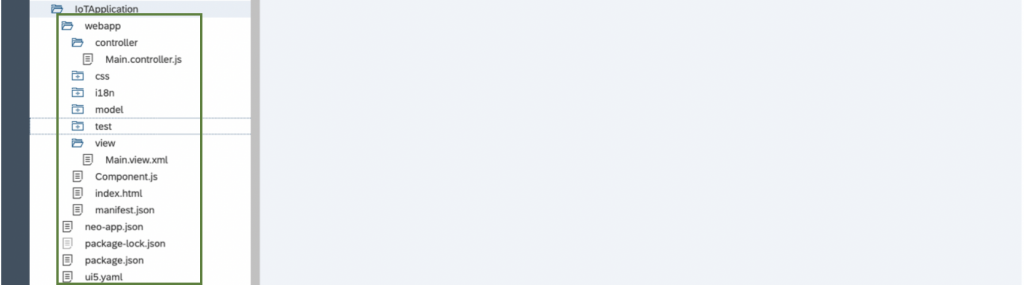
In first tab ‘Template Selection’, choose tile ‘SAPUI5 Application’. In second tab ‘Basic Information’, Give a suitable Project Name and Namespace. In third tab ‘Template Customization’, Enter view name. In fourth tab ‘Confirmation’, Press button ‘Finish’.
Example: – Project Name – ‘IoTApplication’, Namespace – ‘iot.app’, View Type – ‘XML’, View Name – ‘Main’
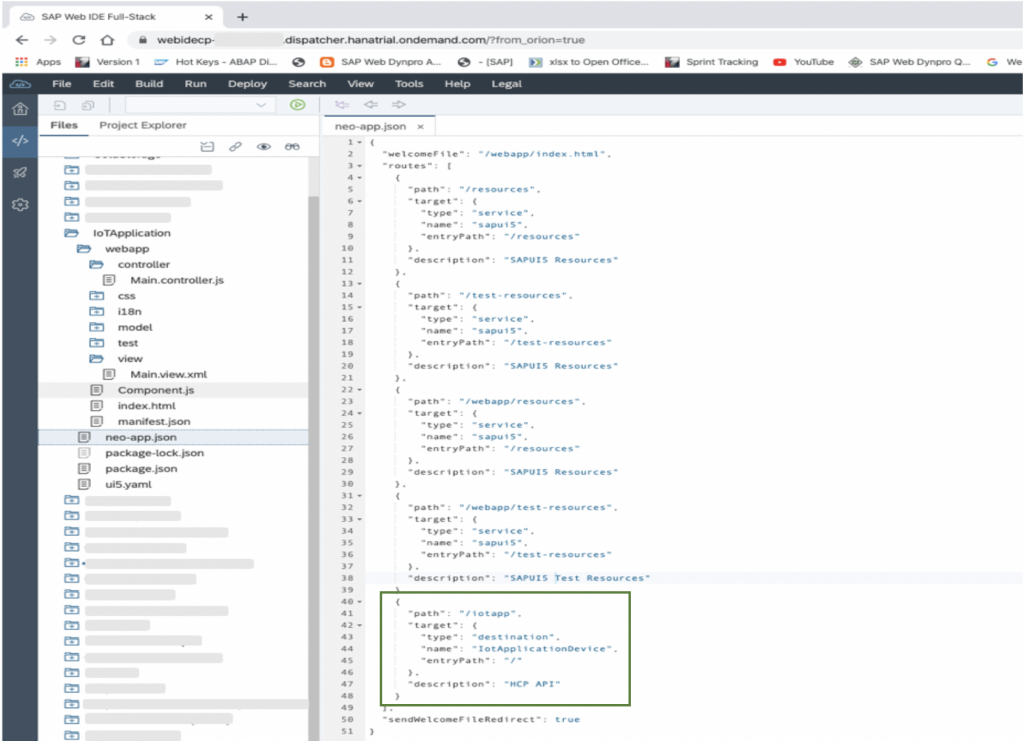
Open neo-app.json file and add highlighted code so that UI5 application can connect to IoT data through created destination.
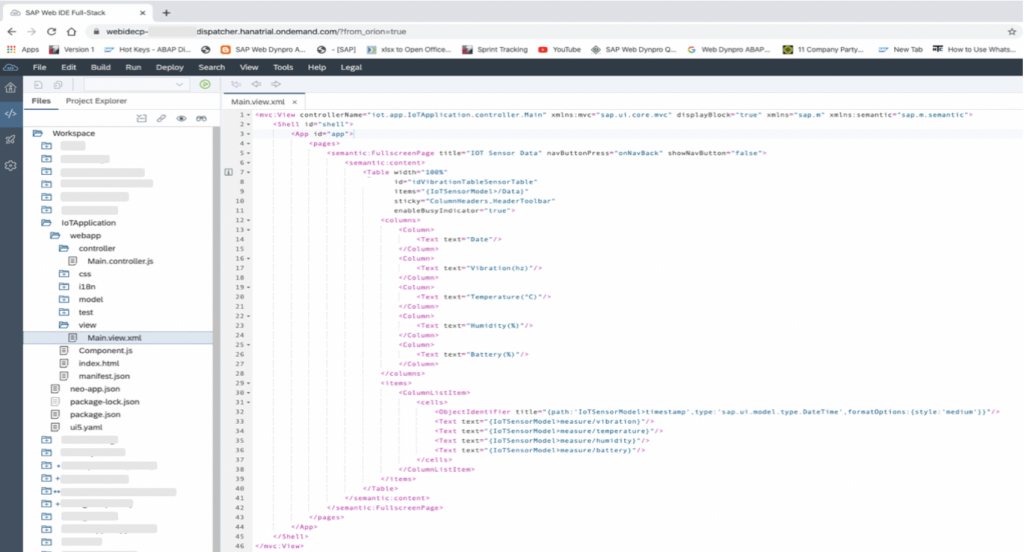
Open Main.view.xml file and add code as shown in below screenshot to show table in UI5 app.
Open Main.controller.js file and add code as shown in below screenshot to get IoT data.

Right click on project and press Run -> Run as Web Application. A Popup will appear, select ‘index.html’ and press ‘OK’. A UI5 application will be loaded in new tab with IoT data as shown in below screen.