In this post will install and configure a Cloud Connector. So we will install a small server on our computer that will serve as a security tunnel to share the resources of a connection to SAP through our platform. We will also make the necessary configuration to take advantage of those resources from the SAP WebIDE service.
There are two different uses of the SAP Cloud Connector.
On one hand, it is the official SAP tool to expose our SAP On Premise system to the outside world (outside our DMZ). Although it is a very simple installation, it is a task carried out by experts in operations and Basis. In this scenario, developers consume services directly from their SCP accounts without ever having to enter the Cloud Connector.
On the other hand, through the SAP Cloud Connector we can expose the SAP resources to which we have access from our computer, therefore we can expose any server that we have access to with our SAP Logon as usual. This is an option widely used by developers and will be the use case that we will see in detail below.
STEP 1: INSTALL THE CLOUD CONNECTOR
Before installing the connector is recommendable to take a look at its prerequisites.
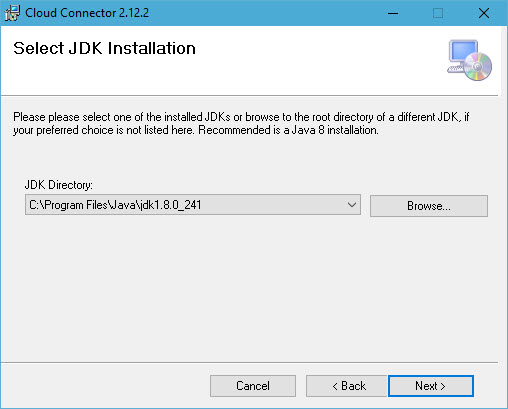
There we can see that it is necessary to have Java JDK version 7 / 8 for its installation. Access the download link here if you need it. The installation should not give any problem but sometimes it happens, especially if you had installed a very old version of Java or things like that.
As a precaution, once the JDK is installed it is necessary to restart the computer before continuing.
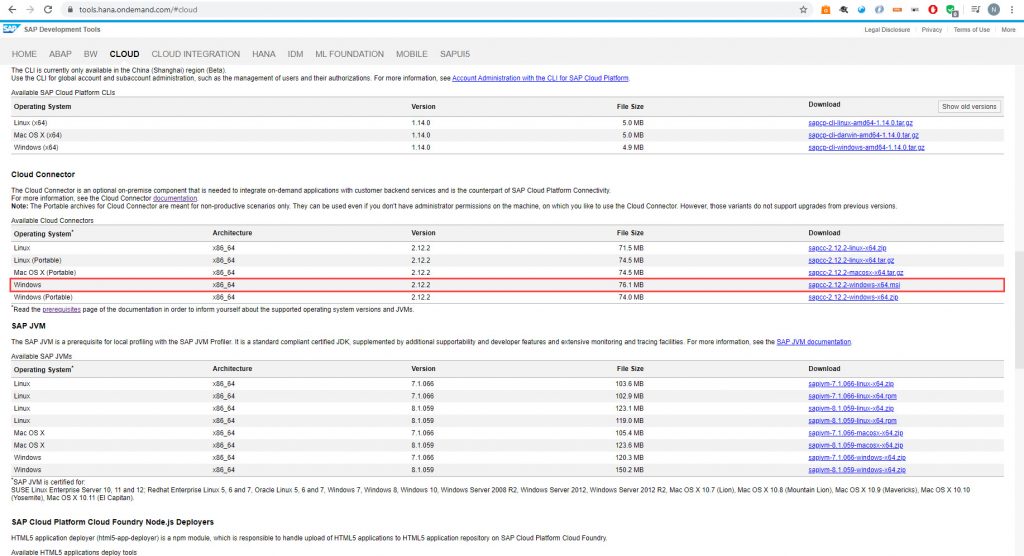
To download the SAP Cloud Connector we access the SAP Development Tool site and select the correct version for our system.
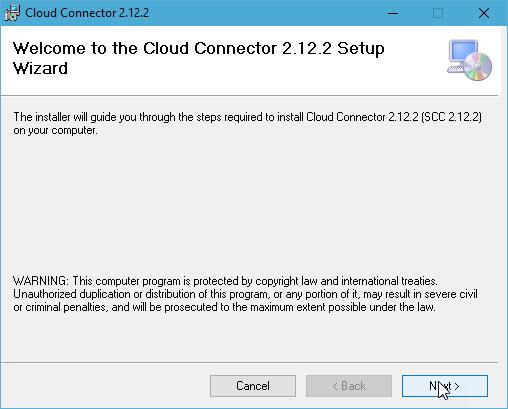
Once downloaded, run the installer and follow the default installation of the Cloud Connector.
If the installation has ended with no problem you can go directly to step 2, however it is possible that you have encountered any problem along the way because your system is not detecting the SDK directory correctly, and the path shown is not correct. This is how it should look like:
What could this be due to if we have correctly installed our JDK?
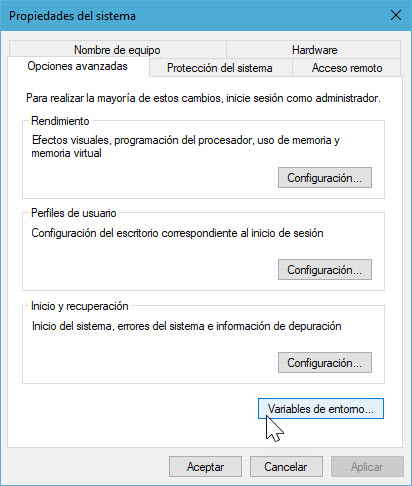
- One of the possibilities is that we have another version of the JDK and the system has allowed us to install the new one anyway (either because they are different bits versions, or any other reason) they may be bumping into each other even if we indicate the route ourselves. We must delete it and leave only one version.If despite this, it still does not working, it may also be the case that we have a system variable pointing to the previous version, and deleting it would be enough. To check it out, look in the computer configuration → system properties → environment variables.
- It may happen that despite this the route remains unseen, luckily we can force our system to see it. Take a look at this post to see how to do it.
- If all of the above has not worked for you, or it was not your case, the system is probably asking us to simply run the connector installation file as an administrator by subject of permissions. You will need to do it through the computer console, since this execution option is not available directly in this case. Use the ‘msiexec -i’ command followed by the file path (it will be easier if you place the installer directly on disk C:/).
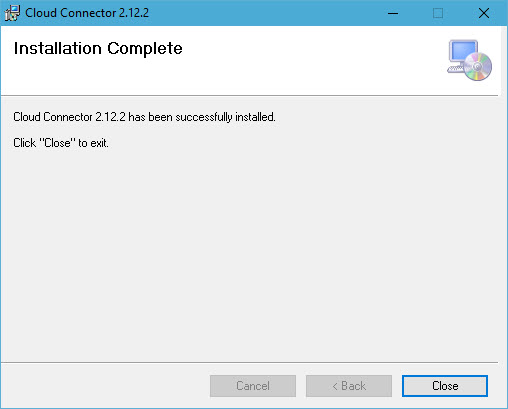
Finally, after one of these options, a sum of them or hopefully none of them, our installation must have been completed successfully.
STEP 2: ACCESS TO THE CLOUD CONNECTOR
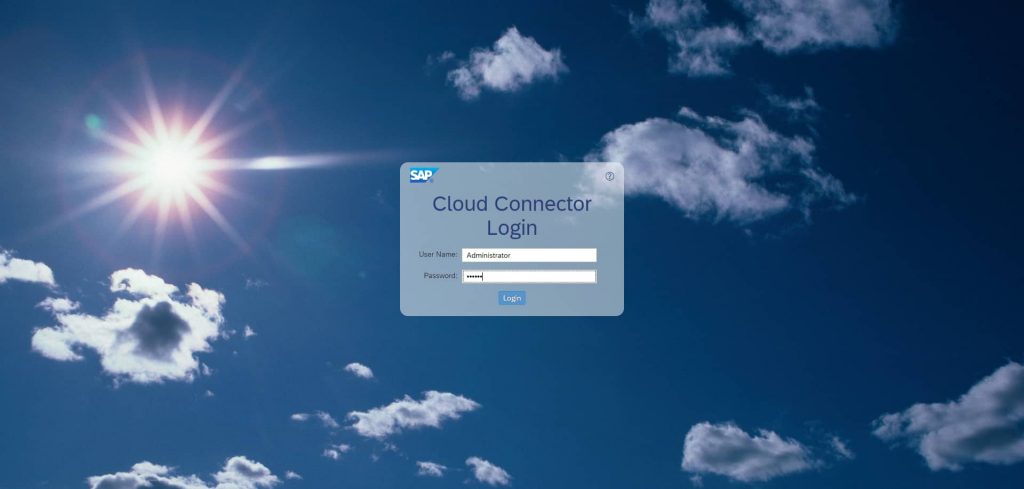
To access the Cloud Connector UI administrator, open the browser and enter https://localhost:8443/ (unless you have indicated a different port during installation).
The browser will report an error, to continue click on ‘advanced settings’ → ‘Access localhost’ or as your browser indicates, I’m with Chrome.

Once on the page, enter with the following data:
- User: Administrator
- Password: manage
Upon entering you will have to change the password, and to choose between ‘master instance’ or ‘shadow instance’ as an instance for the connector.
The first option is quite intuitive, it is the main instance. But what is a shadow instance? It is a redundant instance, that is, in the event of a failure in the main instance the redundant would take its role. We need the master instance.
STEP 3: CONNECT AN ABAP SYSTEM WITH SAP CLOUD PLATFORM THROUGH THE CLOUD CONNECTOR
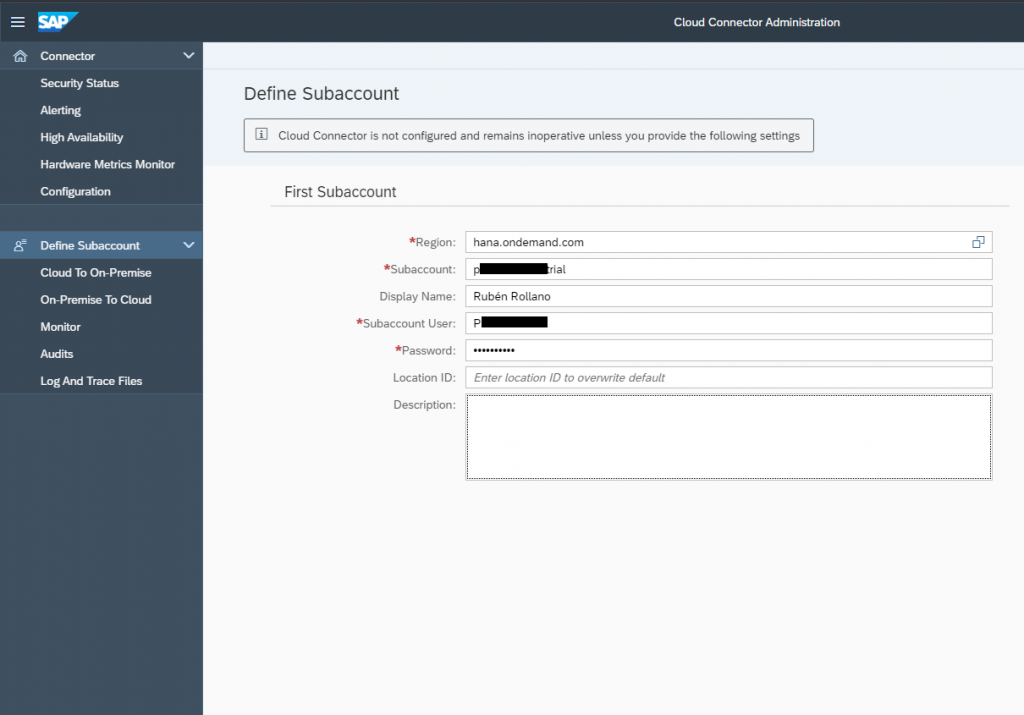
Upon entering, you will be asked to define a SAP Cloud Platform sub-account to which our Cloud Connector points.
If we are working with the free SCP account, the ‘region’ field will be hanatrial.ondemand.com. On the other hand, it is also important to be careful with the case sensitive; In a subaccount, it is normal for the ‘p’ to be lowercase. And our password must be the same as in SAP Cloud Platform.
Once all the data is completed, save and if everything is correct, the screen will appear with the data in green indicating that the connection has been established.
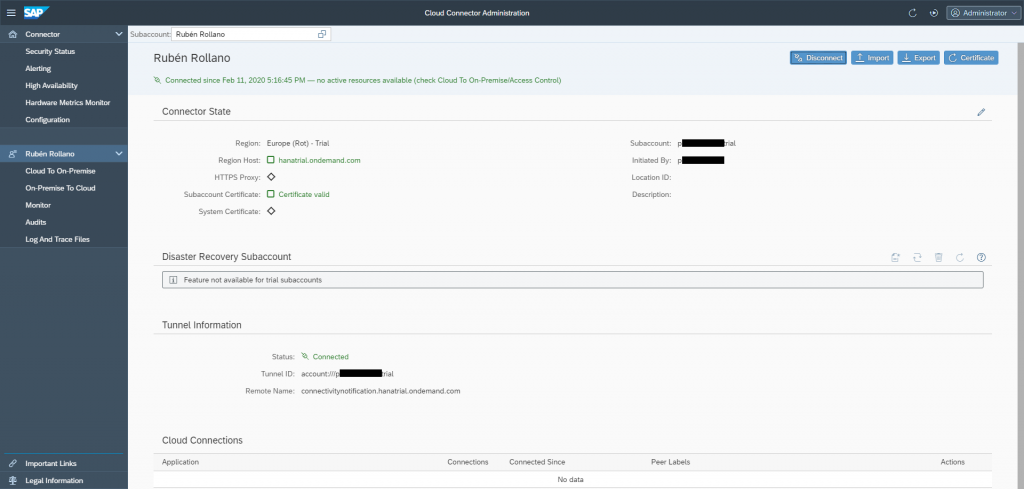
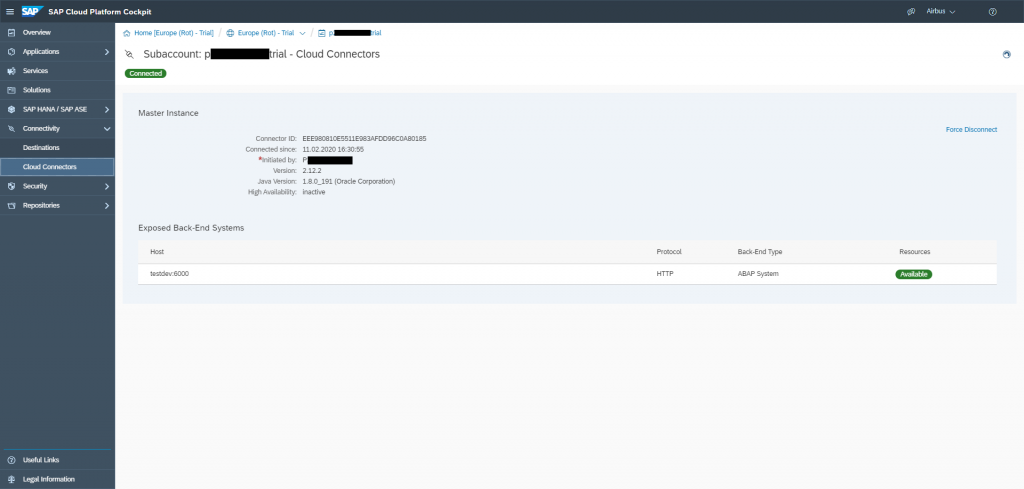
We can verify the connection by entering our associated SAP Cloud Platform account → ‘Connectivity’ → ‘Cloud Connector’. Here we will see that the master instance has been created, but that no back-end system has been configured for it yet.
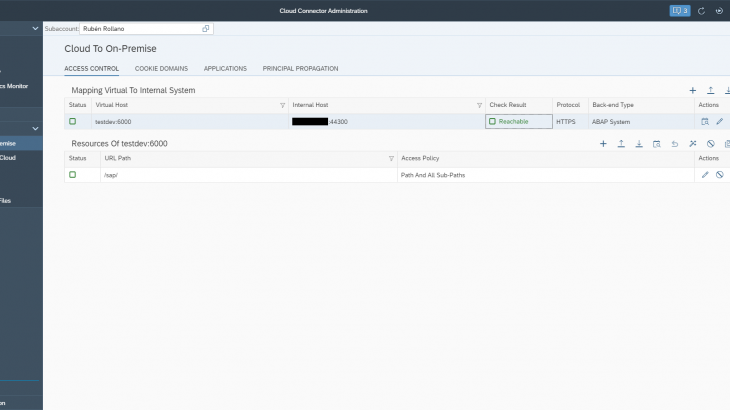
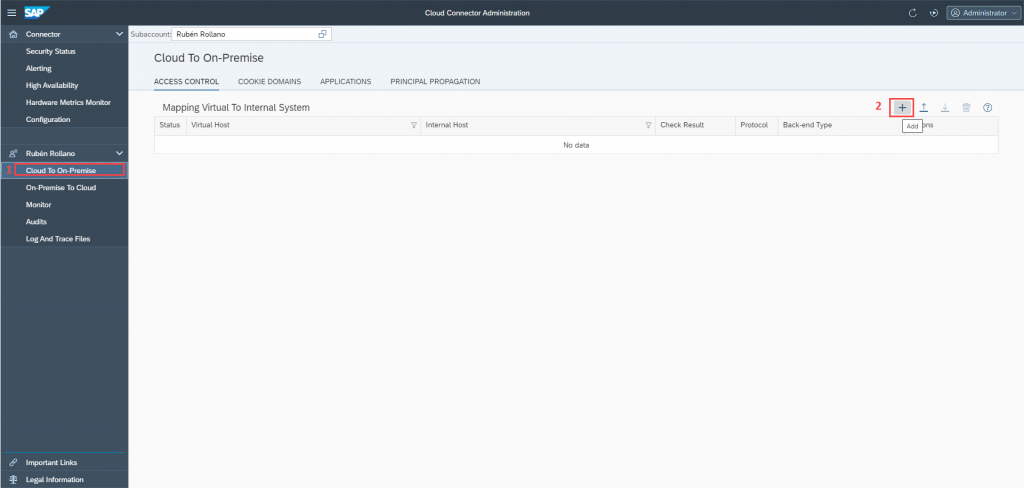
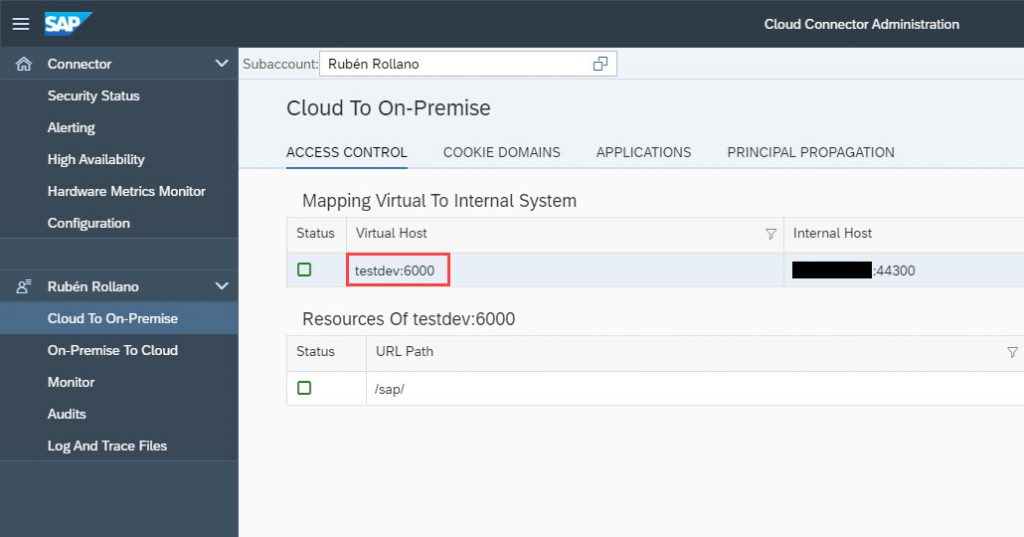
We return to the Cloud Connector administrator and choose the option ‘Cloud To On-Premise’ to add the new configuration.
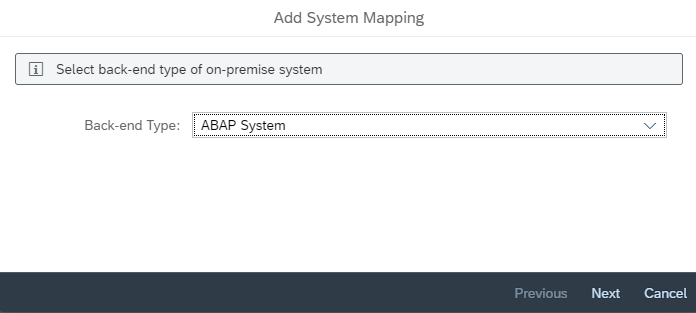
The first option is left as it comes by default.
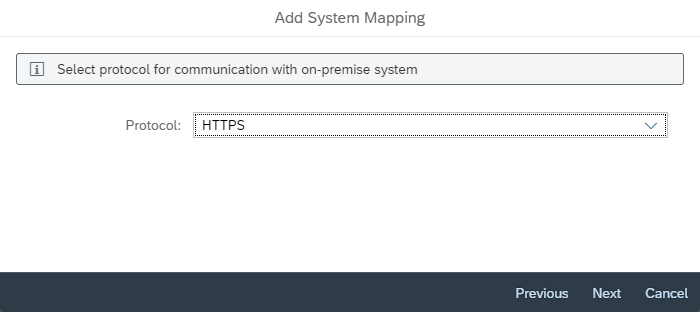
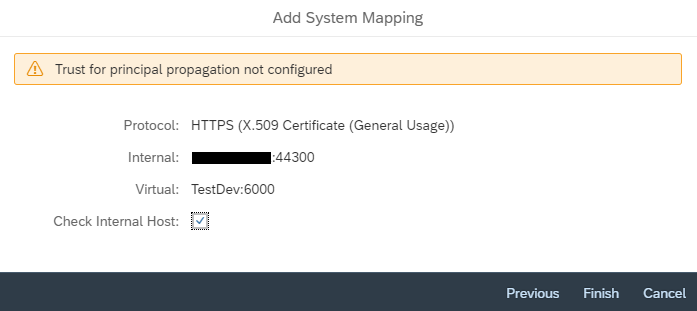
We establish ‘HTTPS’ as the protocol.
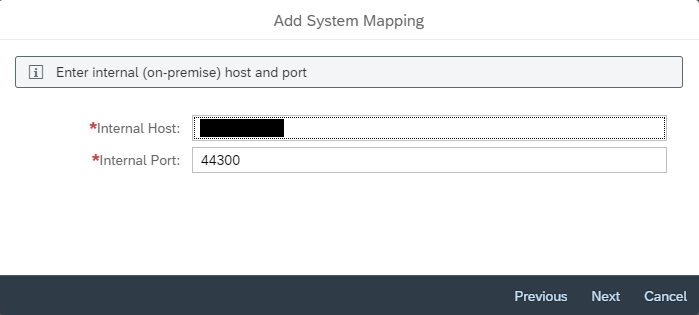
The ‘Internal Host’ will be the route of the host to which the connector will point, while the internal Port will normally be 44300, since it is the port indicated by default.
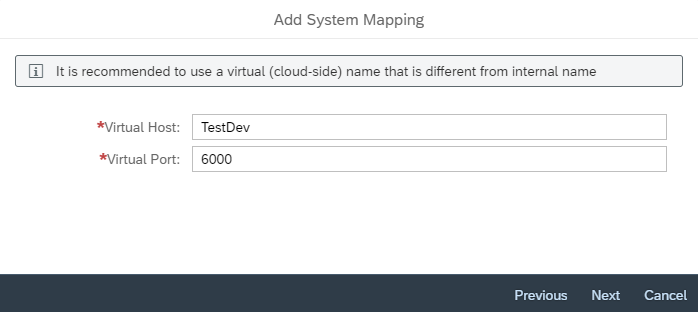
It is good to use a Virtual Host and a Virtual Port to not expose the real ones. Here you can choose the values you want.
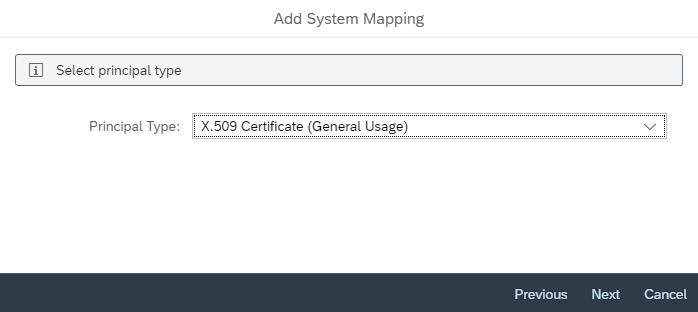
Choose the general purpose certificate.
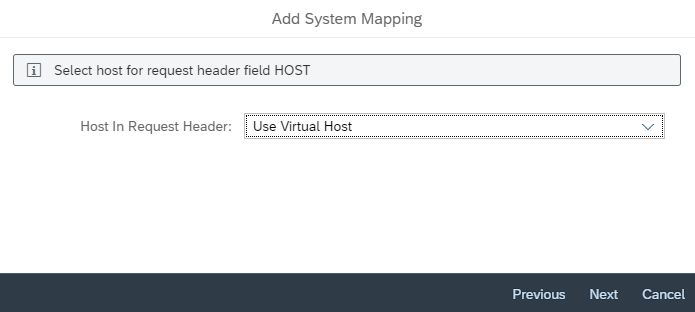
Select the ‘Use virtual Host’ option instead of real one so as not to expose them.
Confirm that the data is correct and finish.
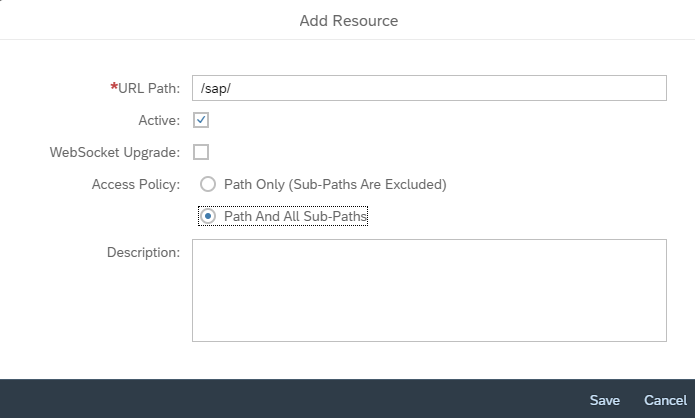
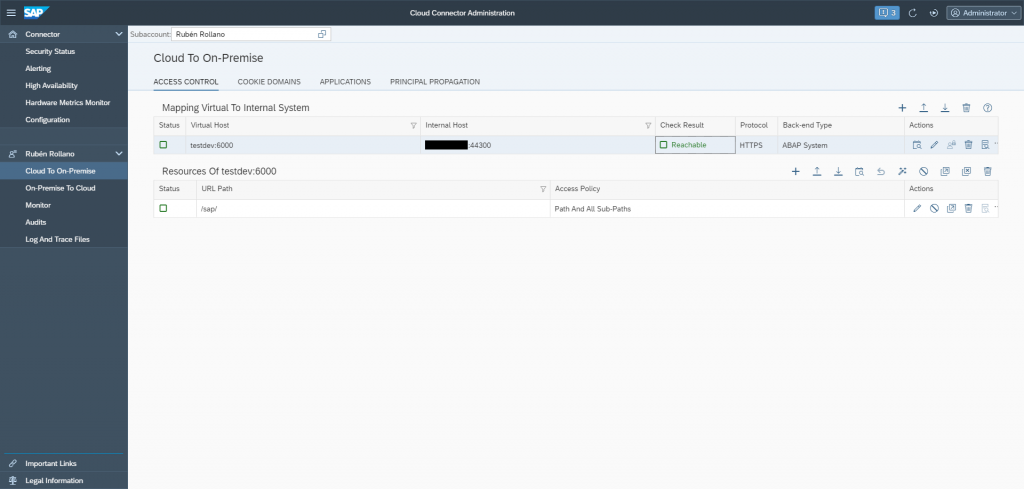
We also have to specify the accessible resources of our connection by clicking on the ‘+’ sign.
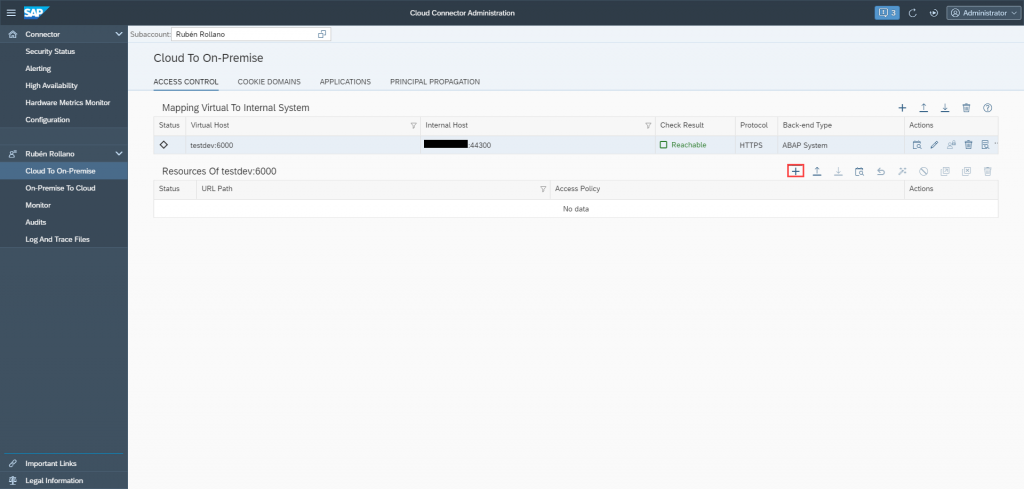
With the following configuration we indicate the resources that we are going to expose, in our case all SAP. Another more correct option would be to expose only the SAP OData ‘/sap/opu/odata’ although we may want to expose other resources, such as if we want to use an image repository.
Now if we return to our account in SAP Cloud Platform we can see that we have already configured our back-end system.
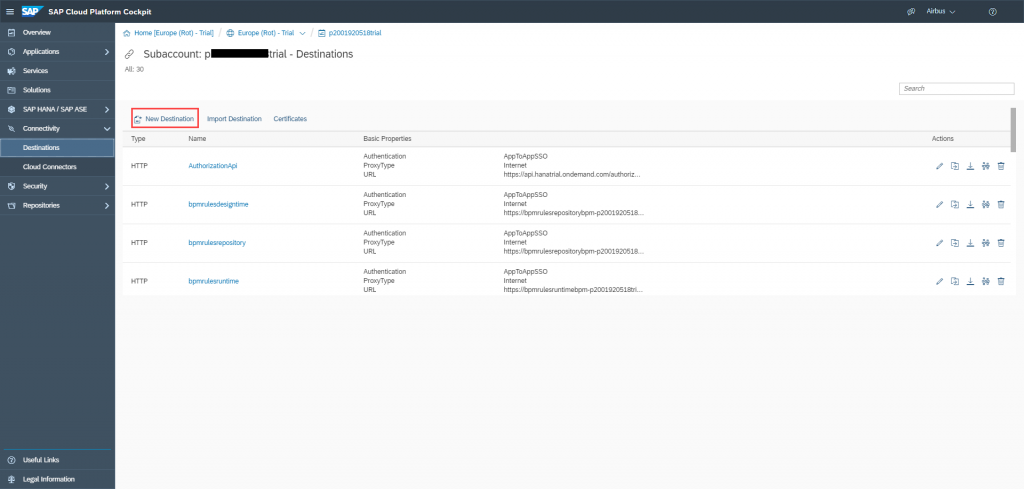
What we call a security tunnel is already established, but we still have one step left so that our Web IDE can refer to the back-end system, create a destination in SCP.
Access the platform → ‘Connectivity’ → ‘Destinations’ → ‘new destination’.
Fill in the destination data taking into account that the URL must refer to the data that we have indicated in the Cloud Connector. In our case it will be the set of the virtual host and the virtual port, since we have preferred to expose the virtual ones.
As we want to share the resources of our computer to consume them from the WebIDE, we will choose a basic authentication, using the same username and password as in the SAP Logon.
In case of you want to expose your On Premise system, the propagation of entity would be more appropiated.
Finally we have to add the properties of our destination.
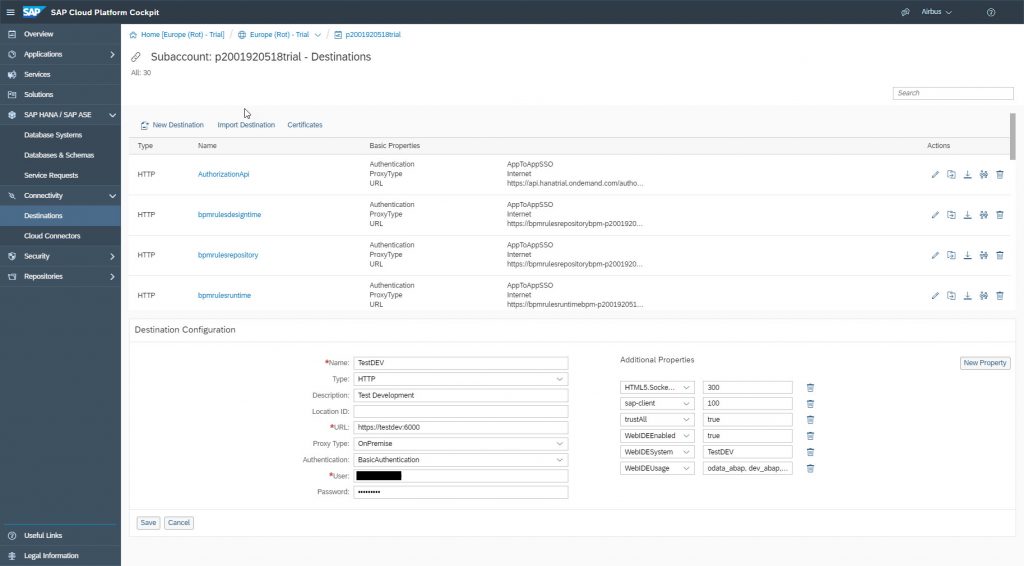
| ADDITIONAL PROPERTIES | VALUE |
| HTML5.SocketReadTimeoutInSeconds | 300 |
| sap-client | 100 |
| trustAll | true |
| WebIDEEnabled | true |
| WebIDESystem | Here you must indicate the same name that has been given to the destination. |
| WebIDEUsage | odata_abap, dev_abap, ui5_execute_abap, bsp_execute_abap, odata_gen |
Do not forget to save, and press the ‘check connection’ button to verify that everything went well.
Now we have our end-to-end connection between an ABAP system and SAP Cloud Platform in a secure way through SAP Cloud Connector. Although if you still need a litmus test that shows you that it works, you can try to create a project from a template in your Web IDE and check that in the section of ‘data connection’ the name of your destination appears.


