Steampunk and RAP (ABAP RESTful Application Programming Model), and yes, we are still talking about SAP! SAP finally came up with a cool name for an even cooler product. Steampunk aka RAP aka SAP BTP (Business Technology Platform) ABAP Environment is an all-inclusive ABAP platform that is cloud ready.
Some clients have huge ABAP Repositories, and it is understandable if they would want to continue using it in S/4HANA environment as well. SAP BTP ABAP environment is what they would then use for the cloud ready developments. RESTful OData Services based on CDS (Core Data Services) views too can be created.
If someone told me that we could expose a custom SAP view through a browser 5 years ago, I would not have believed him/her and yet here I am, about to do exactly that; expose a CDS View without even explicitly creating an OData service. The below is the outcome you will reap if you follow this blog post till the end. Isn’t it cool? So, what are we waiting for!! Let’s dive in…
Here is a comprehensive step-by-step guide with screenshots to create a CDS view and expose it:
1. Open Eclipse IDE (ABAP Development Tools) and login to your system (called project in ADT terms)
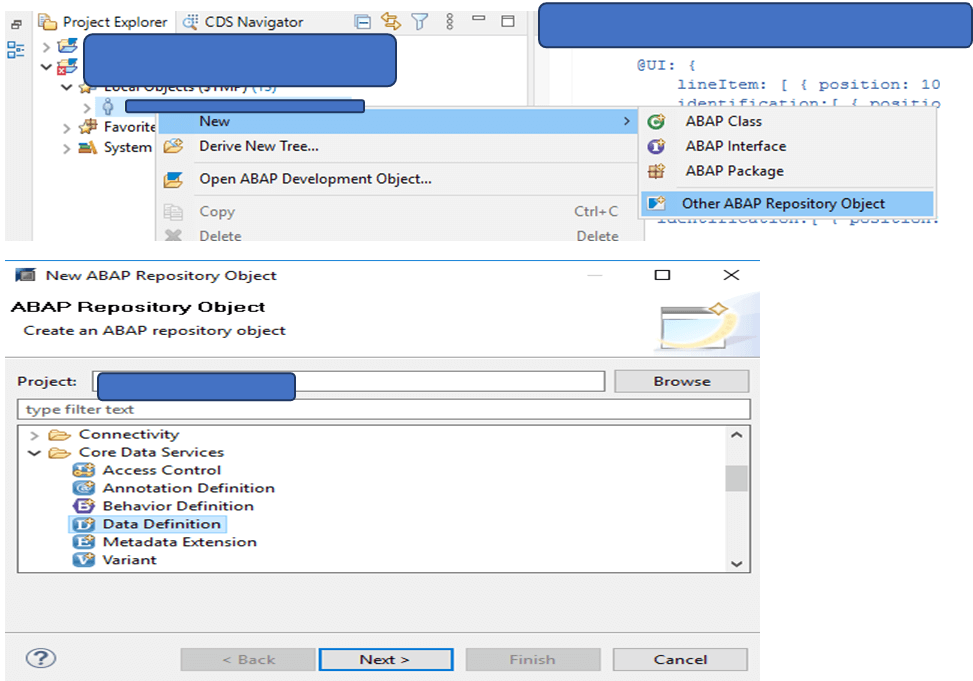
2. Create a new Data Definition
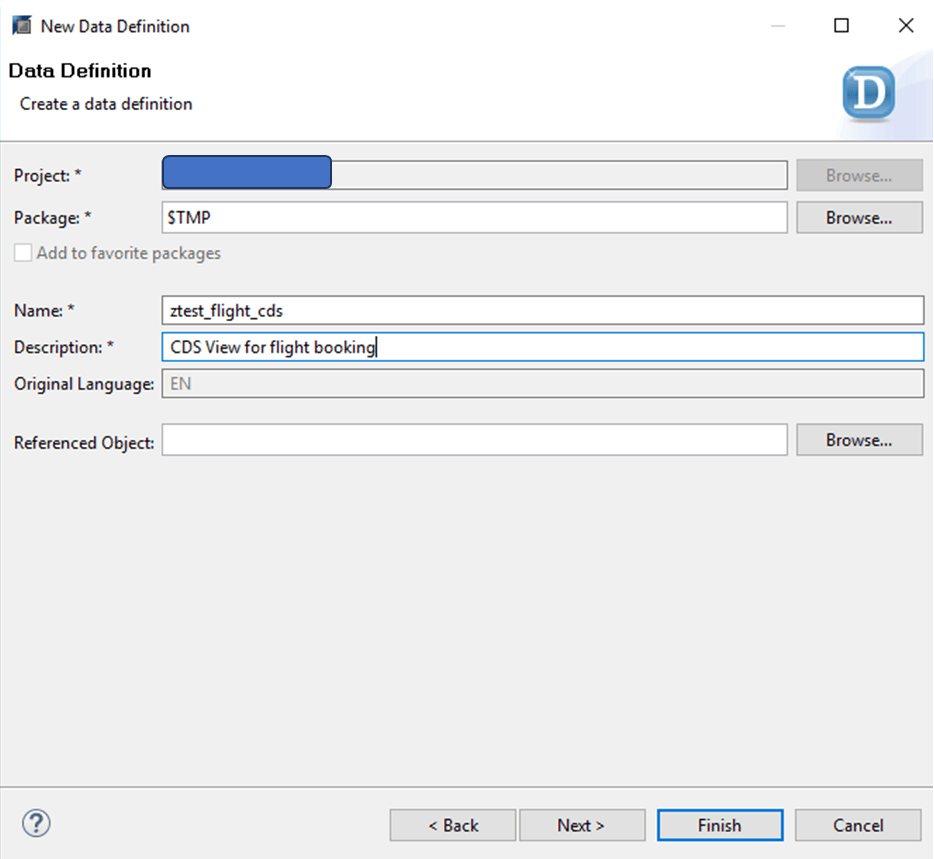
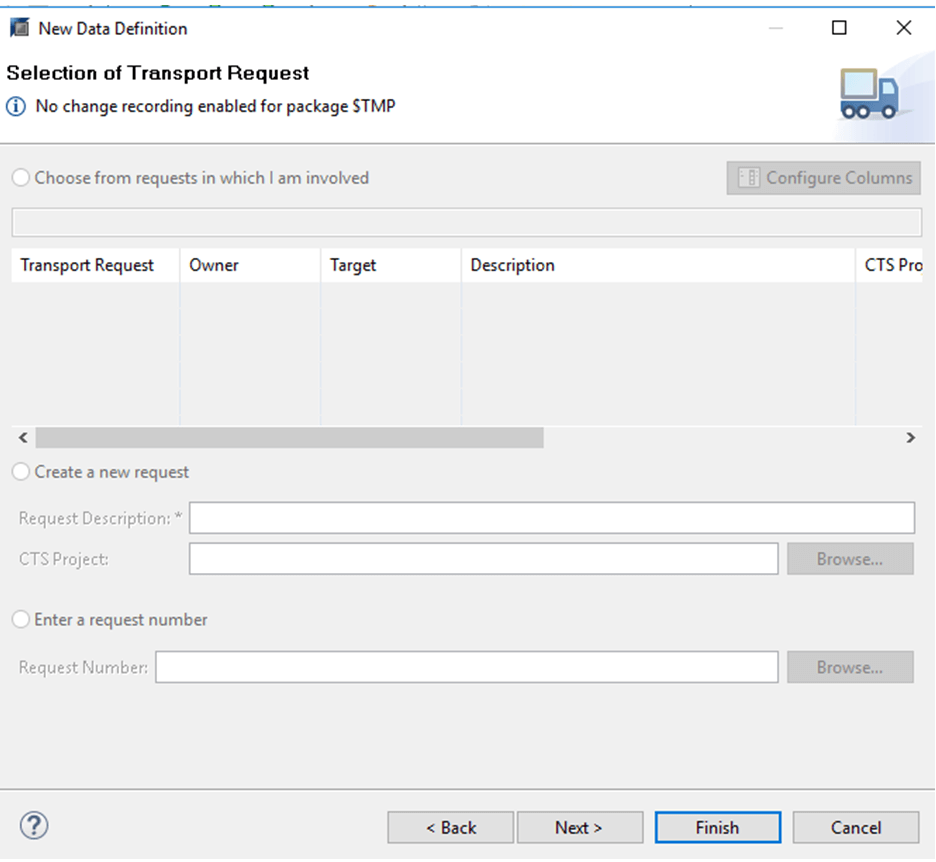
3. No transport request (TR) is selected as this is a local object. But if yours is an object that is not local, here is where you select a transport request.
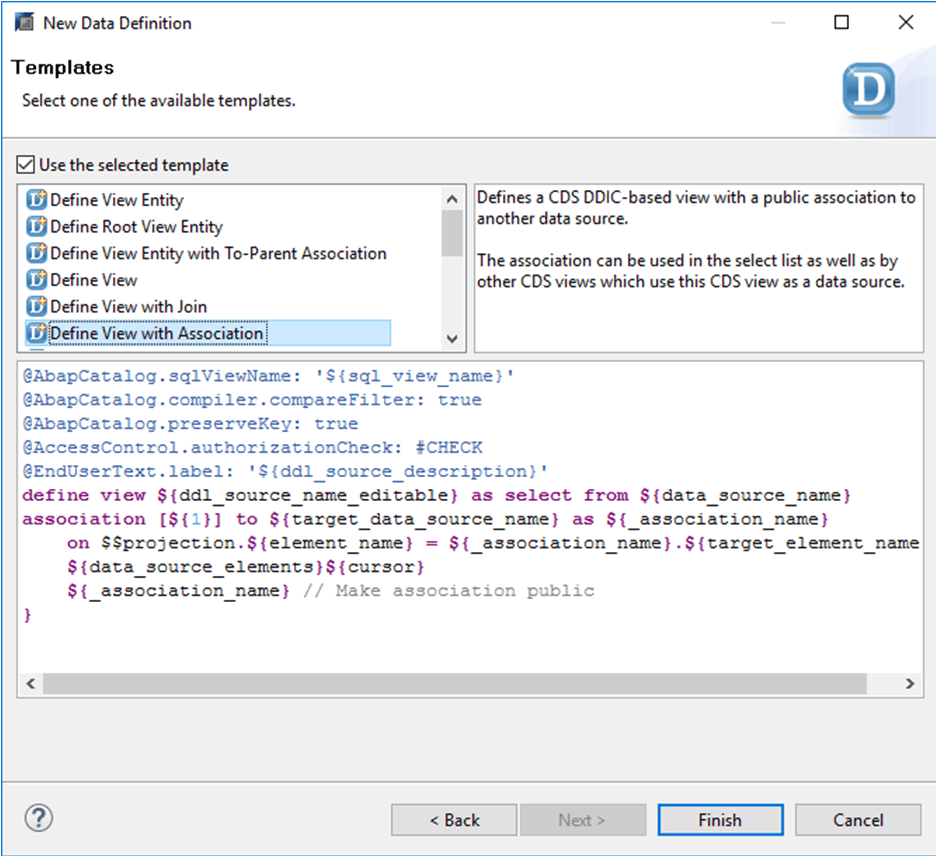
4. We will be creating a view with association, so you need to select that option and click on finish. Association is an on-demand join which is executed only when the data is accessed (also called the lazy approach; prerequisite is that the association needs to be made public).
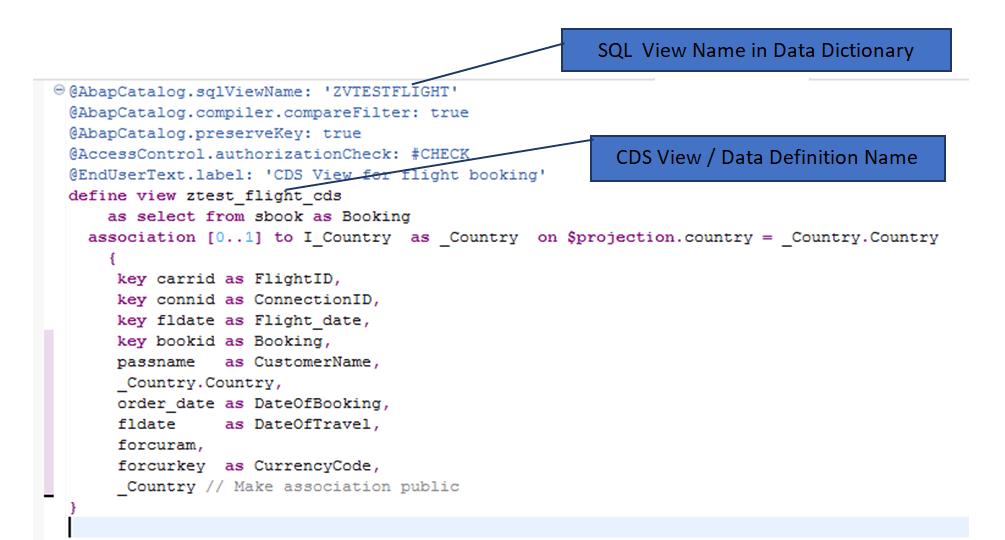
5. Below is the code.
@AbapCatalog.sqlViewName:'ZVTESTFLIGHT'
@AbapCatalog.compiler.compareFilter:true
@AbapCatalog.preserveKey:true
@AccessControl.authorizationCheck:#CHECK
@EndUserText.label:'CDS View for flight booking'
defineview ztest_flight_cds
asselectfrom sbook as Booking
association[0..1]to I_Country  as _Country  on$projection.country = _Country.Country
{
key carrid as FlightID,
key connid as ConnectionID,
key fldate as Flight_date,
key bookid as Booking,
     passname   as CustomerName,
     _Country.Country,
     order_date as DateOfBooking,
     fldate     as DateOfTravel,
     forcuram,
     forcurkey  as CurrencyCode,
     _Country // Make association public
}
6. Now add the UI annotations at the header level and for each field and the final code will be as follows. Copy paste below code in the editor.
@AbapCatalog.sqlViewName: 'ZVTESTFLIGHT'
@AbapCatalog.compiler.compareFilter: true
@AbapCatalog.preserveKey: true
@AccessControl.authorizationCheck: #CHECK
@EndUserText.label: 'CDS View for flight booking'
@Search.searchable : true
@UI:
{
headerInfo:
{
typeName: 'Booking',
typeNamePlural: 'Bookings',
title: { type: #STANDARD, value: 'Booking' }
}
}
define view ztest_flight_cds
as select from sbook as Booking
association [0..1] to I_Country as _Country on $projection.country = _Country.Country
{
@UI.facet: [
{
id: 'Booking',
purpose: #STANDARD,
type: #IDENTIFICATION_REFERENCE,
label: 'Booking',
position: 10 }
]
@UI: {
lineItem: [ { position: 10, importance: #HIGH, label: 'Flight ID' } ],
identification:[ { position: 10, label: 'Flight ID' } ]
}
key carrid as FlightID,
@UI: {
lineItem: [ { position: 20, importance: #HIGH, label: 'Connection ID' } ],
identification:[ { position: 20, label: 'Connection ID' } ]
}
key connid as ConnectionID,
@UI: {
lineItem: [ { position: 30, importance: #HIGH, label: 'Fl.Date' } ],
identification:[ { position: 30, label: 'Fl.Date' } ]
}
key fldate as Flight_date,
@UI: {
lineItem: [ { position: 40, importance: #HIGH, label: 'Booking ID' } ],
identification:[ { position: 40, label: 'Booking ID' } ]
}
key bookid as Booking,
@UI: {
lineItem: [ { position: 50, label: 'Customer', importance: #HIGH } ],
identification:[ { position: 50, label: 'Customer' } ]
}
@Search.defaultSearchElement: true
passname as CustomerName,
@UI: {
identification:[ { position: 60, label: 'Country' } ]
}
_Country.Country,
@UI: {
identification:[ { position: 60, label: 'Booked On' } ]
}
order_date as DateOfBooking,
@UI: { identification:[ { position: 70, label: 'Traveling on' } ] }
fldate as DateOfTravel,
@UI: {
lineItem: [ { position: 80, label: 'Cost', importance: #HIGH } ],
identification:[ { position: 80, label: 'Cost' } ]
}
@Semantics.amount.currencyCode: 'CurrencyCode'
forcuram,
@UI: { identification:[ { position: 90, label: 'Currency' } ] }
@Semantics.currencyCode: true
forcurkey as CurrencyCode,
_Country // Make association public
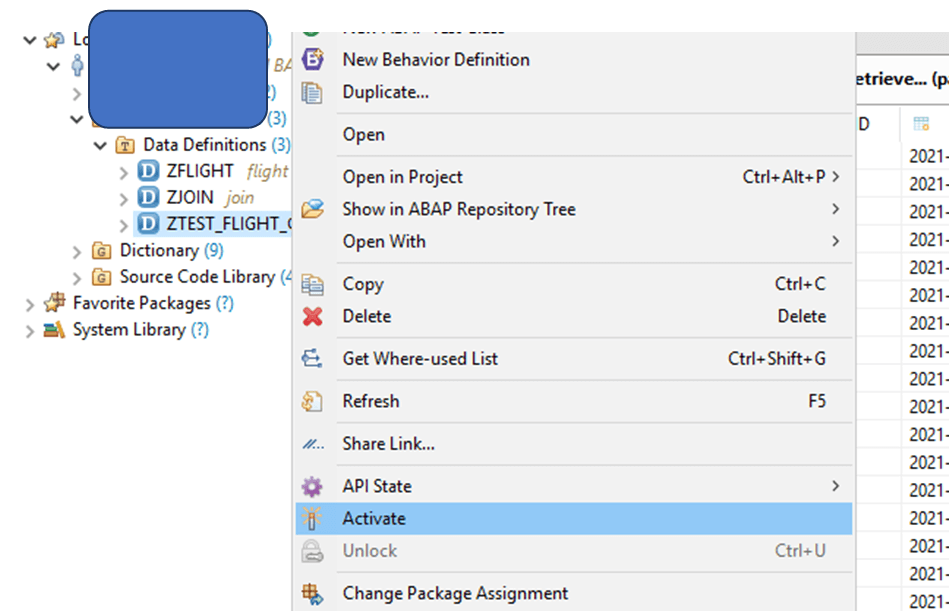
}7. Activate the CDS View
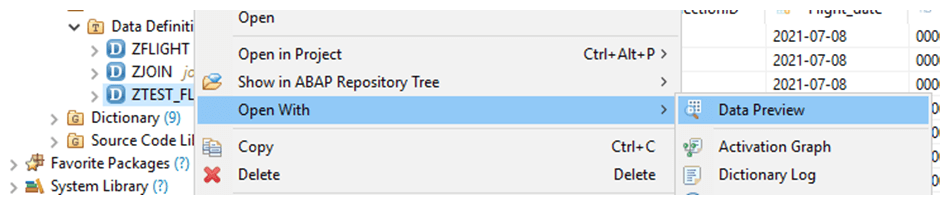
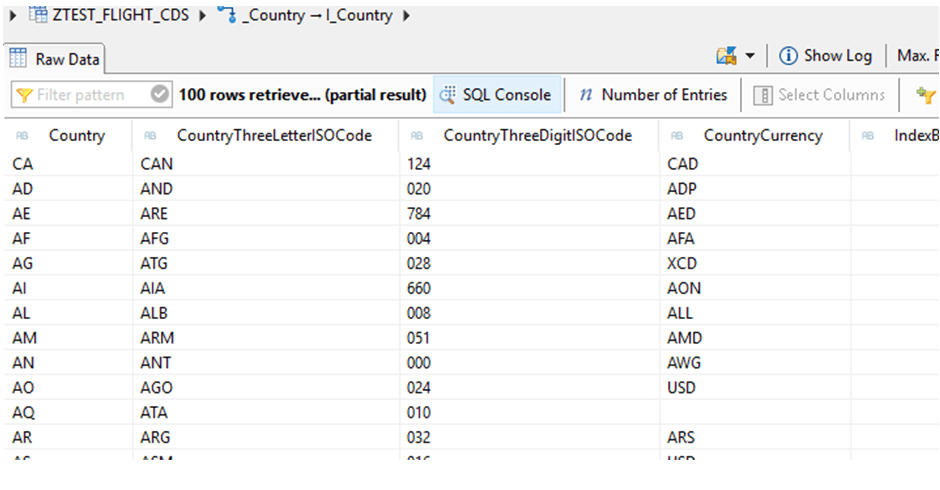
8. We can test our CDS View with Data Preview. Right-click on the Data Definition and select Open with->Data Preview
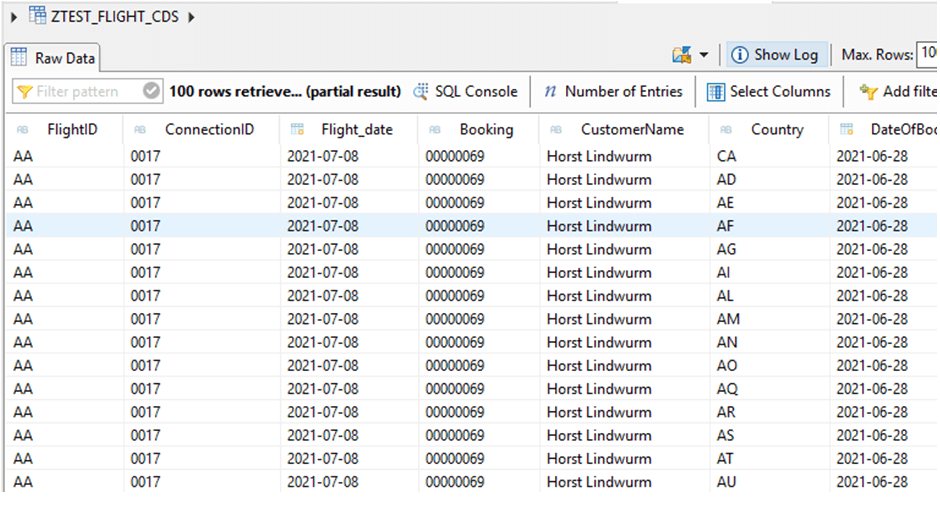
Data is displayed as below:
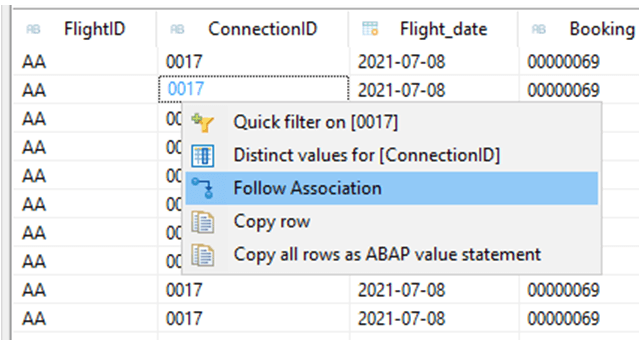
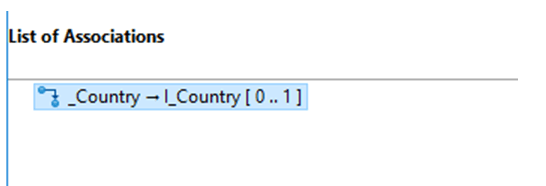
Right click on any of the value, follow association, and we can see country data too
9. Now we will create service definition.
a. Right-click the Data Definition name and select ‘New Service Definition’.

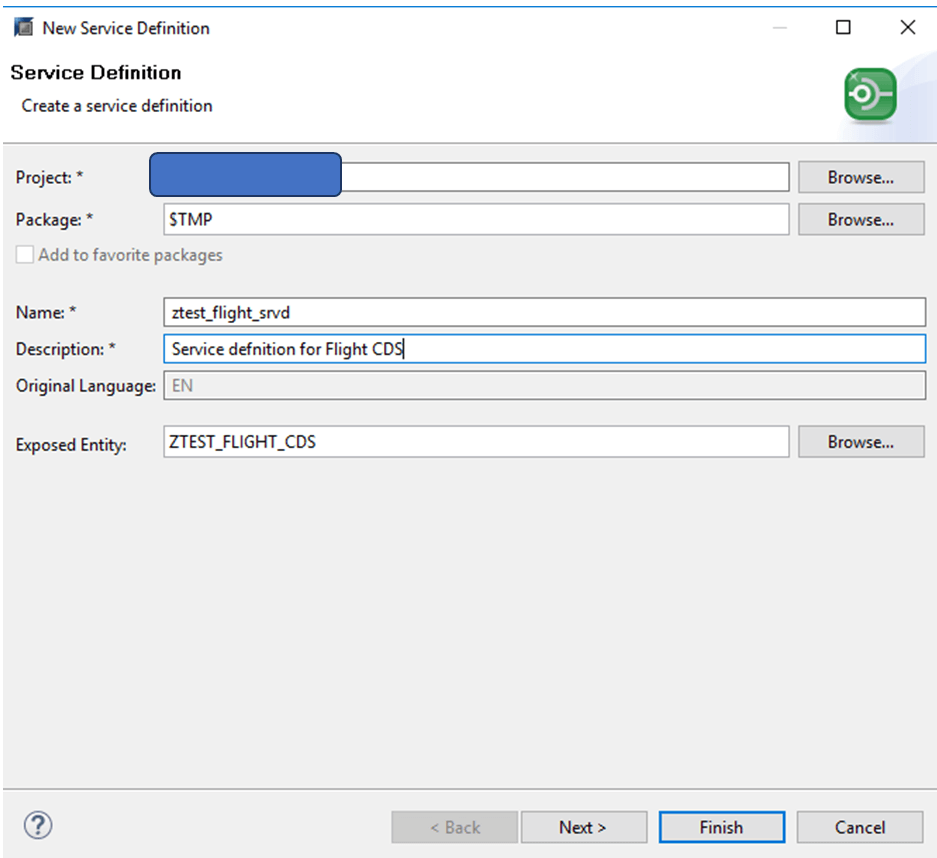

b. No TR is required since this is a local object as well.
c. Click Finish.

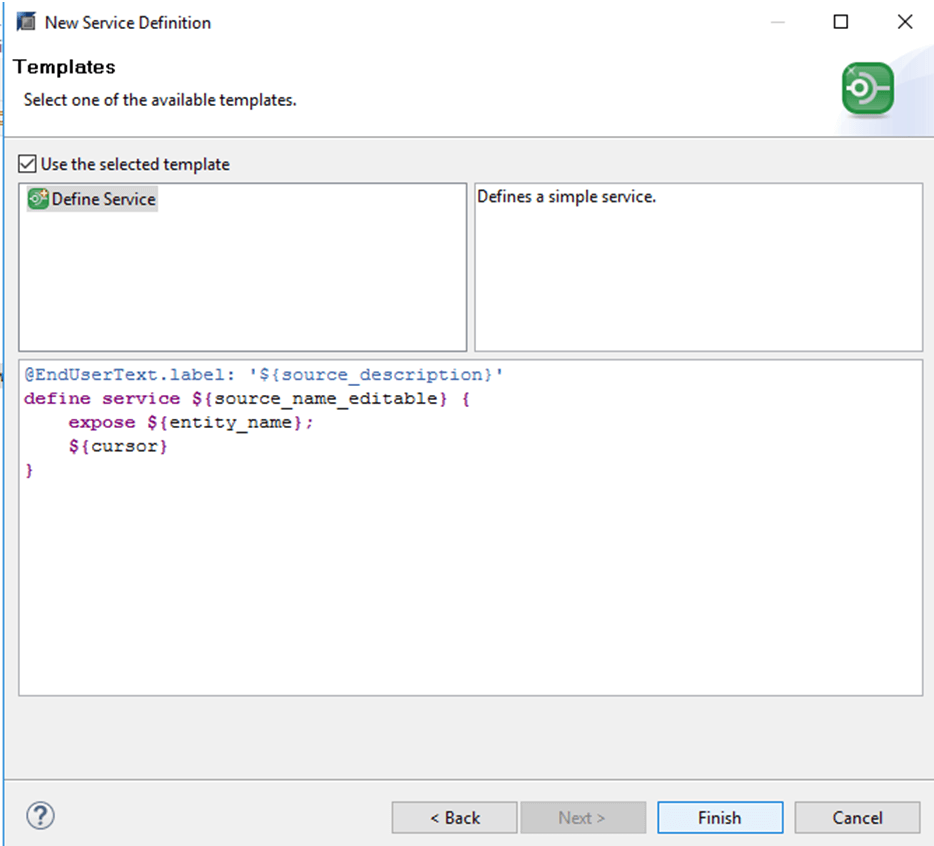
d. Copy and paste the below code:
@EndUserText.label:'Service defnition for Flight CDS'
defineservice Ztest_flight_srvd {
expose ztest_flight_cds;
expose I_Country;
}
e. Activate the Service Definition
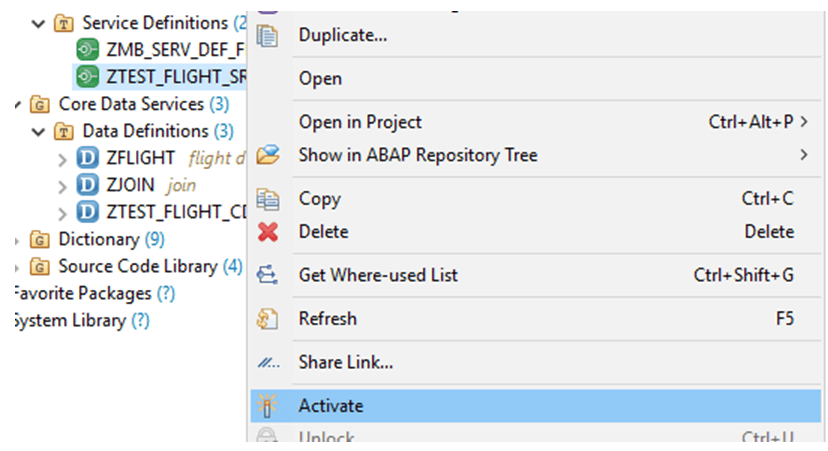
- Now we will create the service binding
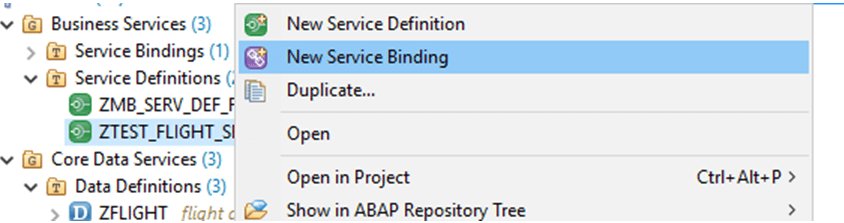
a. Right-click the service definition name and select ‘New Service Binding’
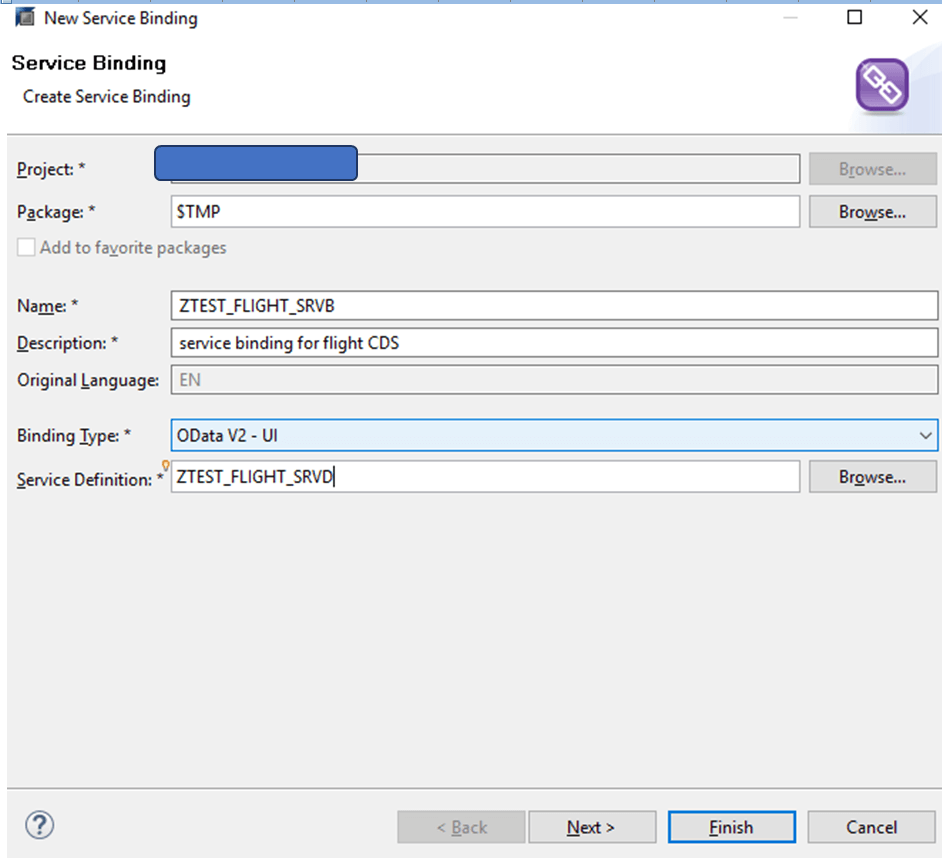
b. Click Finish
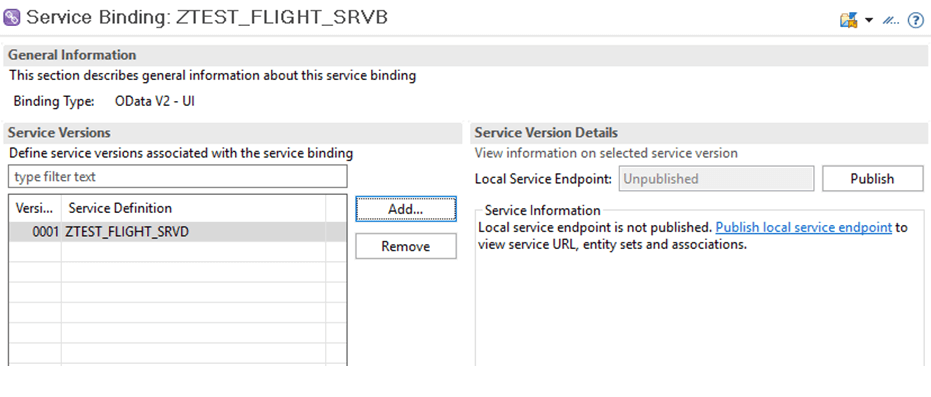
c. Click on Publish
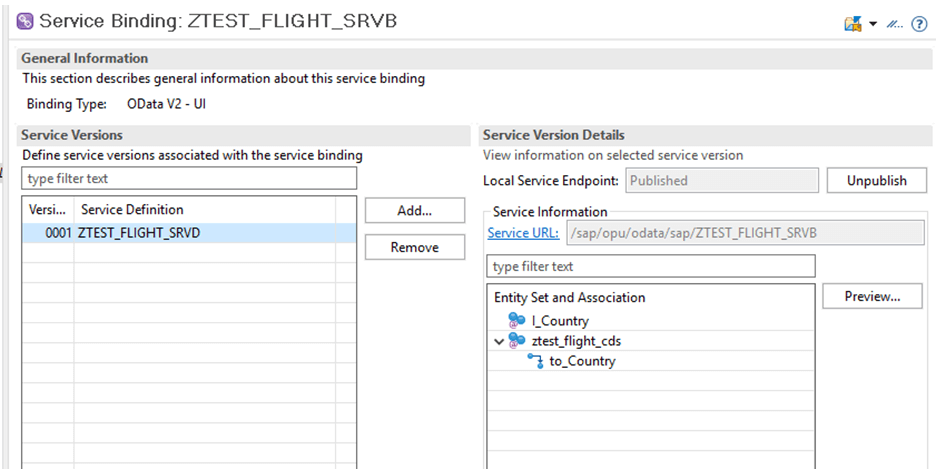
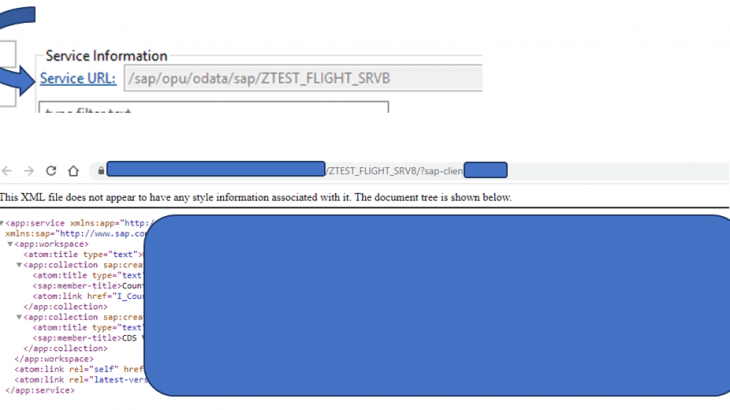
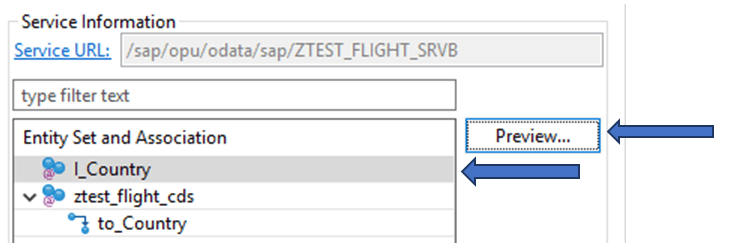
The OData Service URL is automatically generated without us using SEGW transaction
d. Click on the service URL link
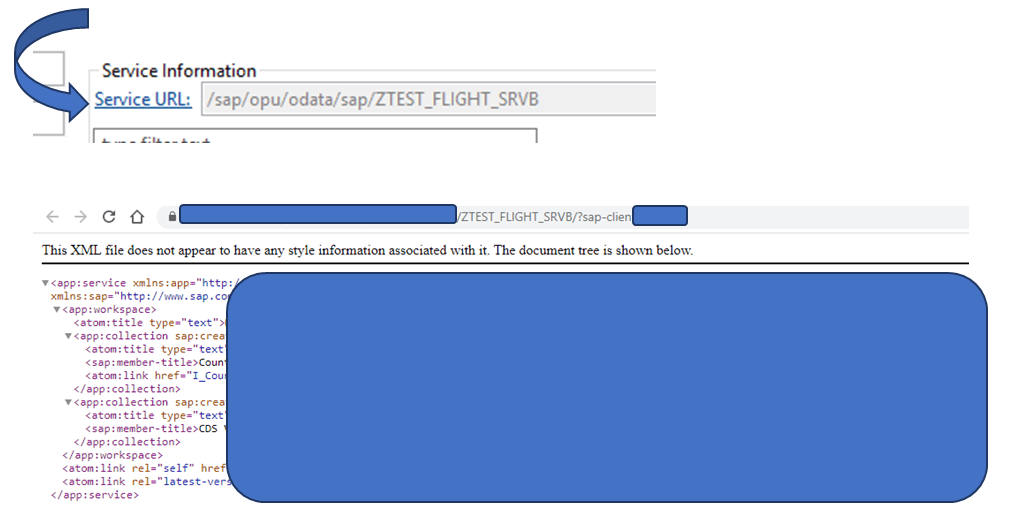
The above metadata is displayed
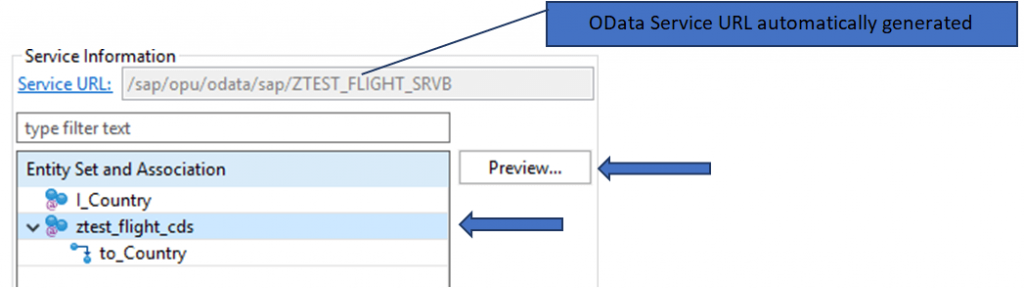
e. Select an entity and click on the Preview option
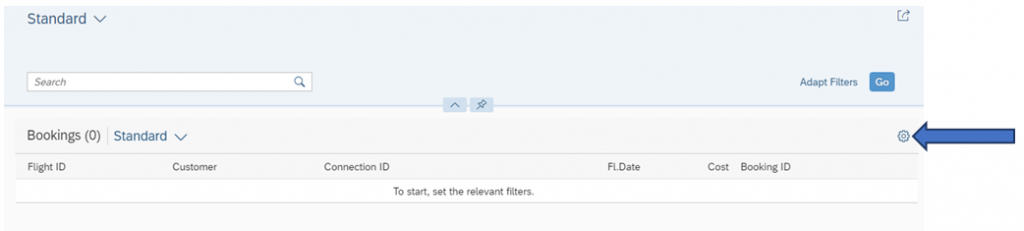
f. Click on settings and select all columns
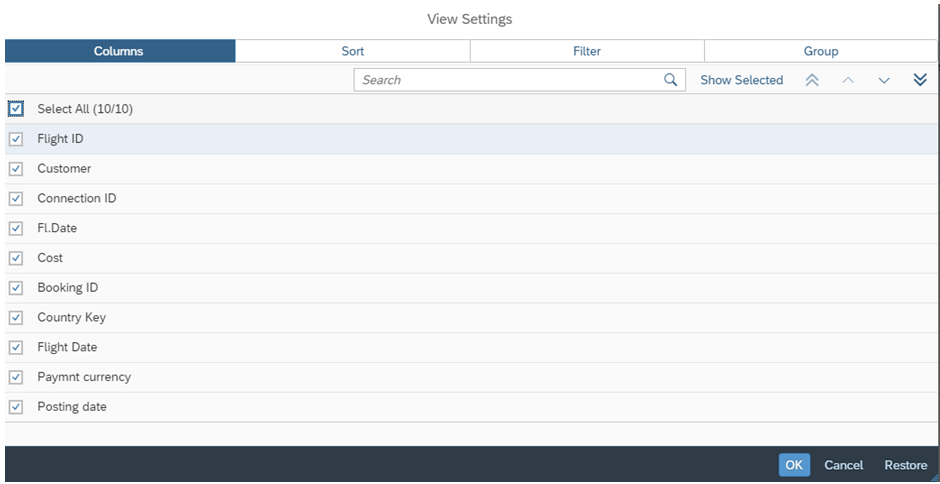
g. Click OK
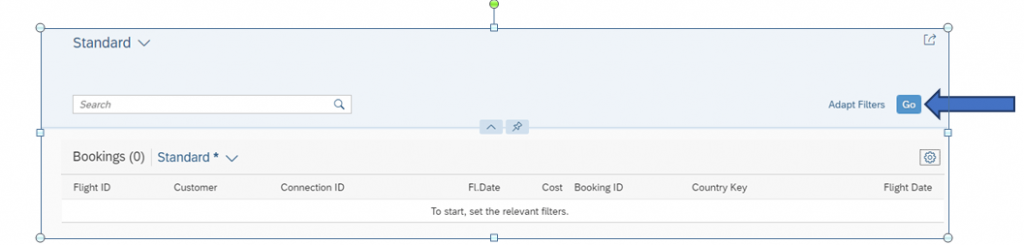
You still don’t see anything and no need to panic
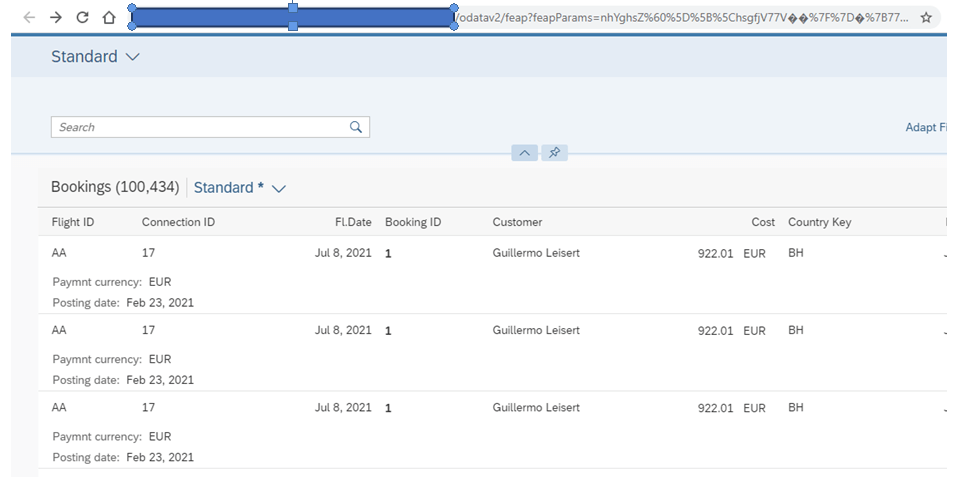
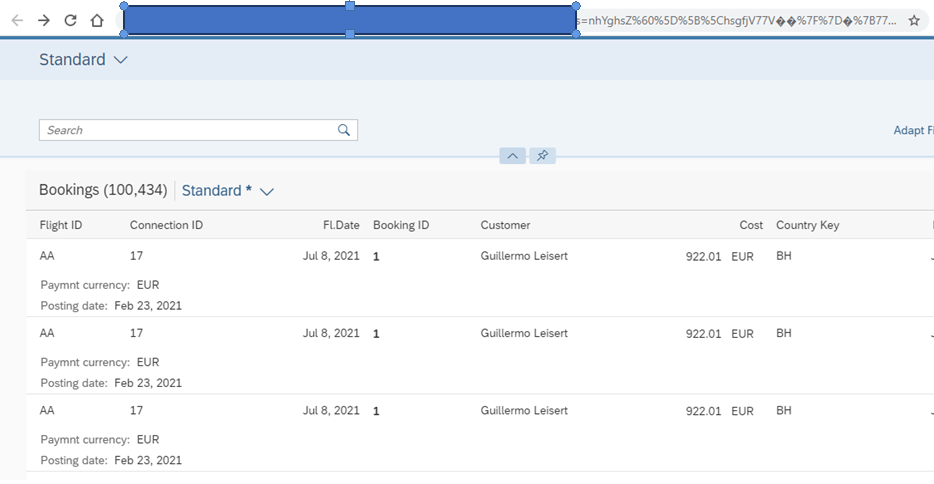
h. Just click on GO
Voila!! All the entries magically appear
i. Go back to the Eclipse and select the other entity this time and click on Preview
j. Repeat steps f. through h.
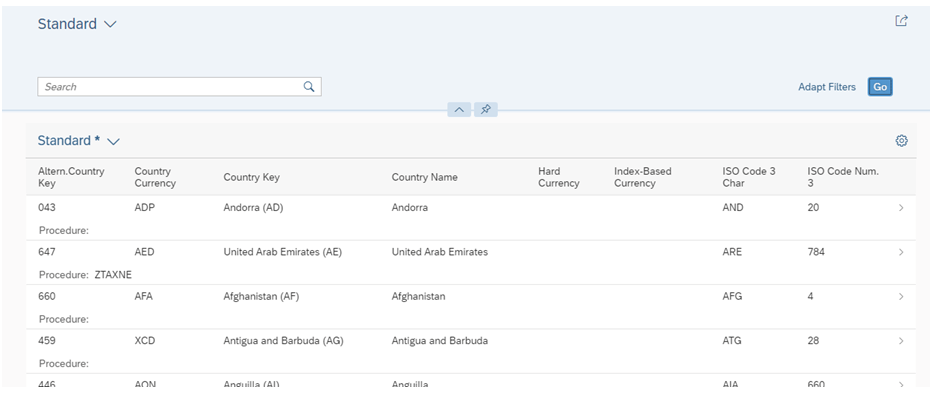
You see the above country entries from the Country view.


