The blog will take you through all the steps required to deploy a client and server side application on SAP BTP.
Pre-requisites:
- Basic knowledge of UI5
- Basic node-express knowledge
Login/Register on the SAP BTP platform
SAP Business Technology Platform (formerly Cloud Foundry) is a PaaS offered by SAP to host your on-premise applications on cloud. To get started, login or register to the same using the below url:
https://account.hana.ondemand.com/#/home/welcome
Once you login for the first time, you should be able to see the below prompt appear.
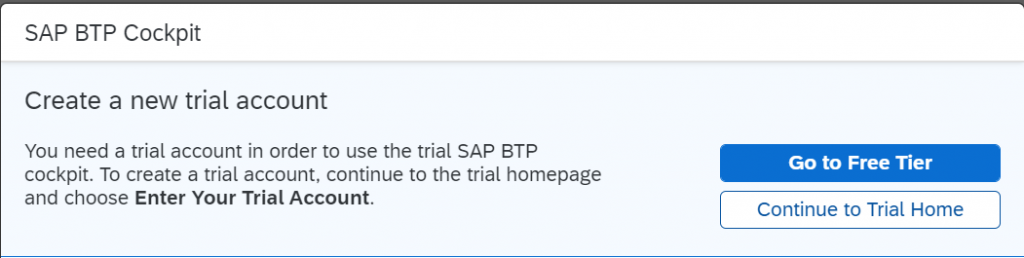
Select “Continue to Trial Home”.
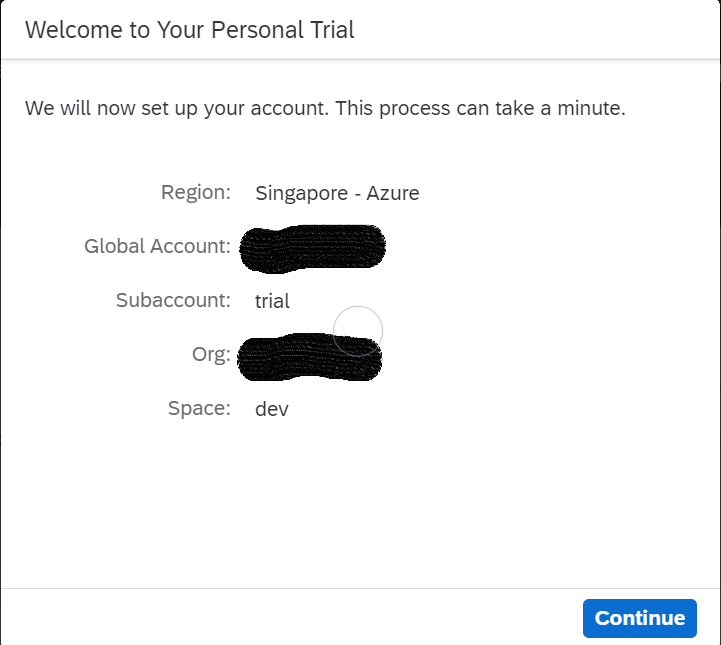
Next, you should see the following pop-up appear.
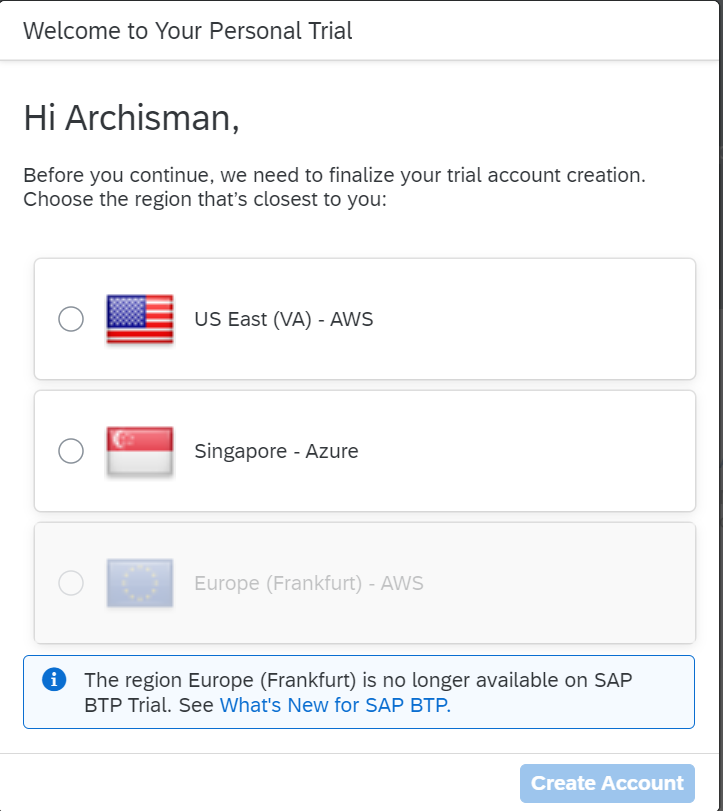
I will select Singapore as that’s the server closest to my current location and click on “Create Account”. The account creation takes a while, you should be able to see the below screen eventually.
Once you click “Continue”, you should be able to see the BTP Home Screen.
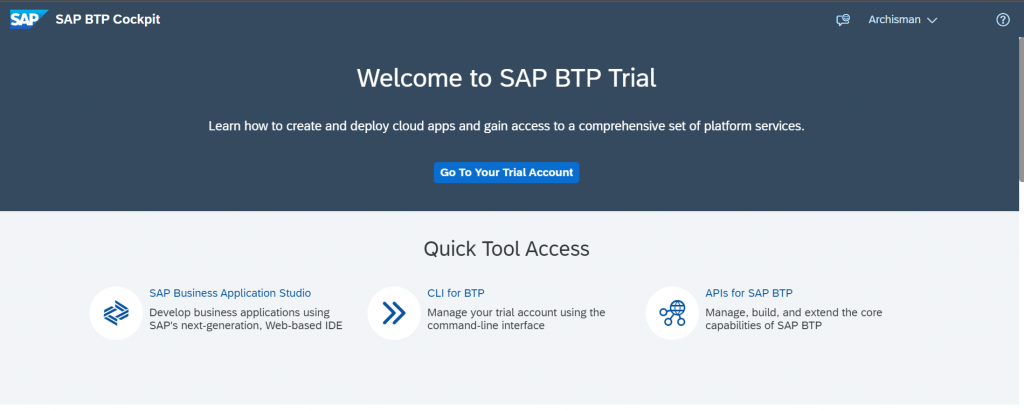
Click on “Go To Your Trial Account”. You will be redirected to a new url. Bookmark this for future use.
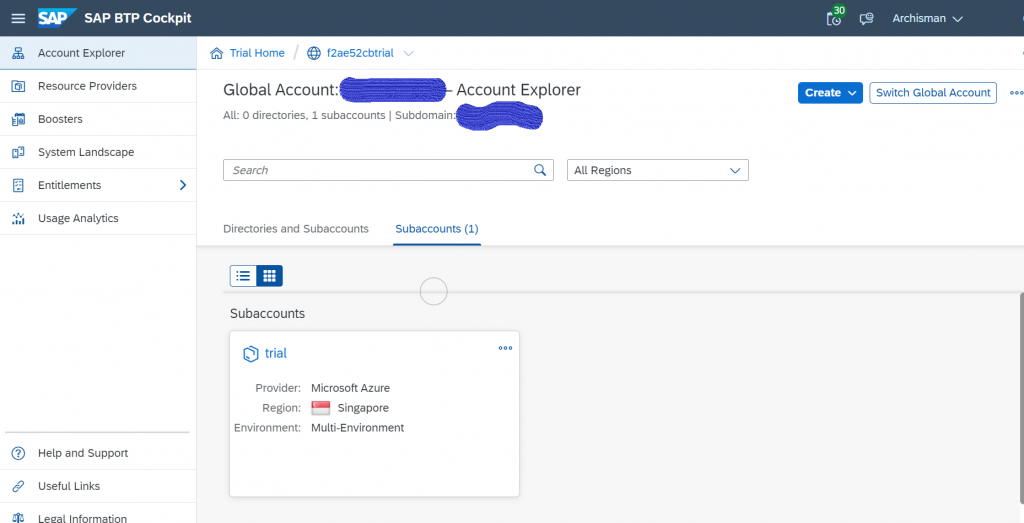
A “trial” sub-account was already created while creating our account. We will create our own.
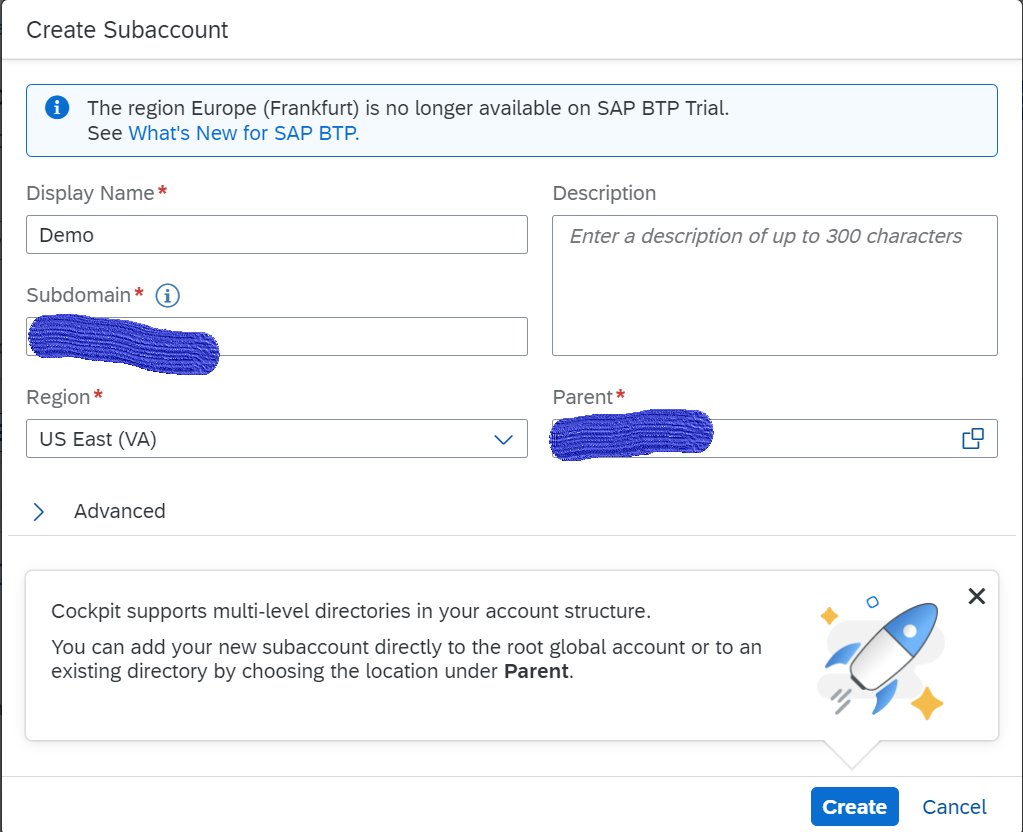
Click on “Create”–>Subaccount. In the pop up that appears, give your sub-account some meaningful name and select the “US East AWS region”. Hit “Create”.
Create Cloud Foundry Environment
SAP BTP offers 2 environments to host/manage application viz. Cloud Foundry and Kyma. We will be using Cloud Foundry here. Go inside the newly created sub-account and click on “Enable Cloud Foundry”. Nothing needs to be changed in the pop up that follows. Hit “Create”.
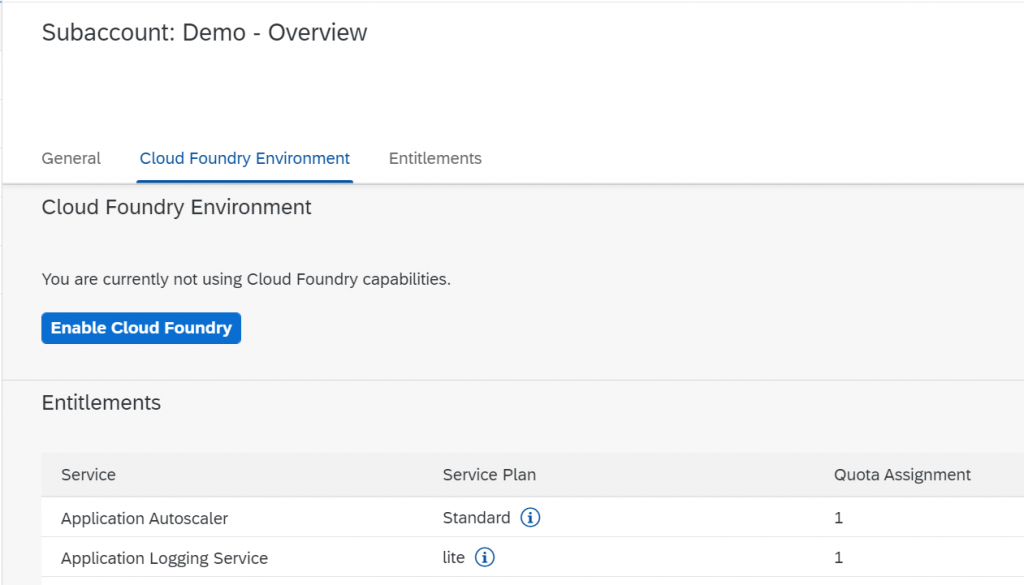
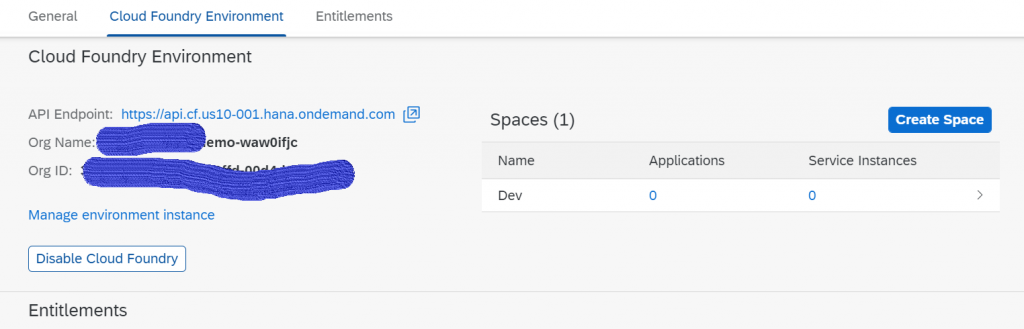
Once enabled, we will need to create a “space” to deploy our application.
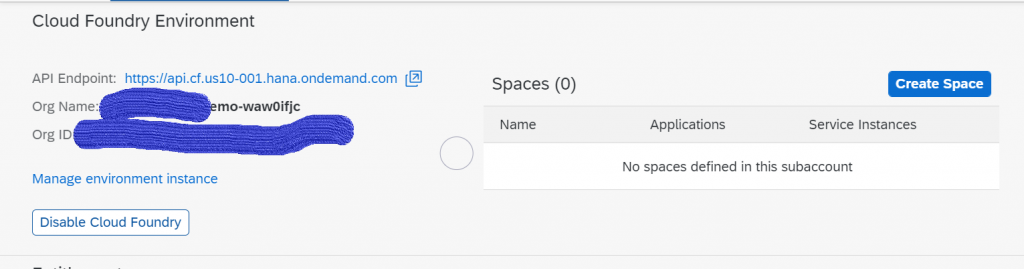
Click on “Create Space” and give it some meaningful name. Now your BTP platform is ready to have applications deployed onto it.
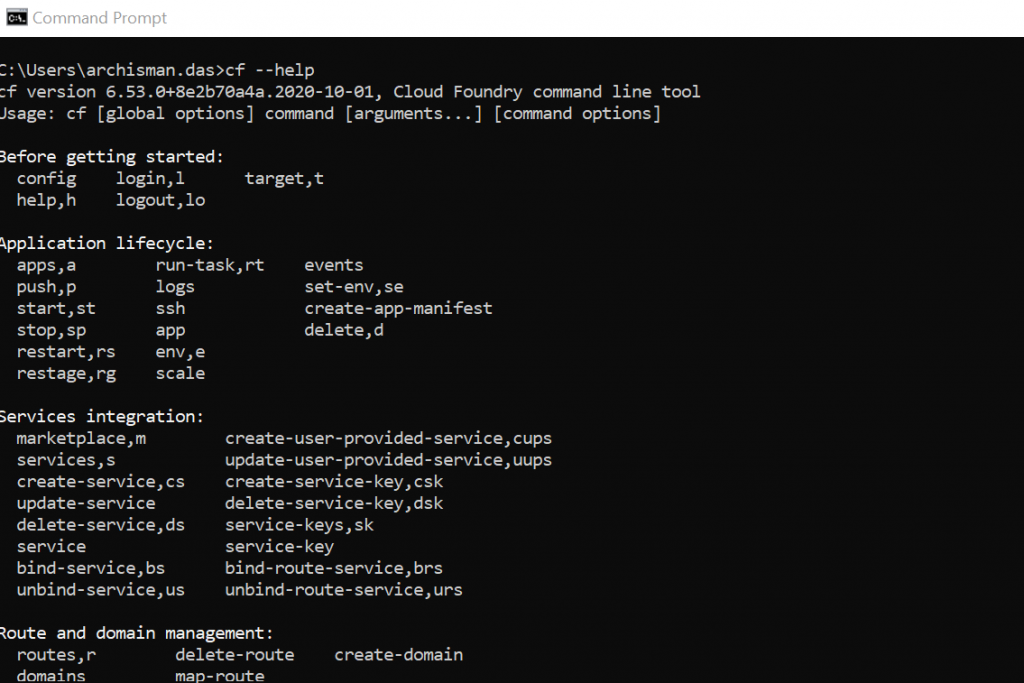
Install Cloud Foundry CLI
Download the package for your respective OS from below URL and install the same on your local machine. We will be using cloud foundry cli to push our applications to btp.
https://github.com/cloudfoundry/cli/wiki/V6-CLI-Installation-Guide
Once installed, open cmd and run cf –help. If installed properly, you should be able to see a list of available commands.
The Application
Our application will consist of 3 layers:
- Database: PostgreSql
- Business Logic: Node Js
- UI: UI5
Provisioning the database
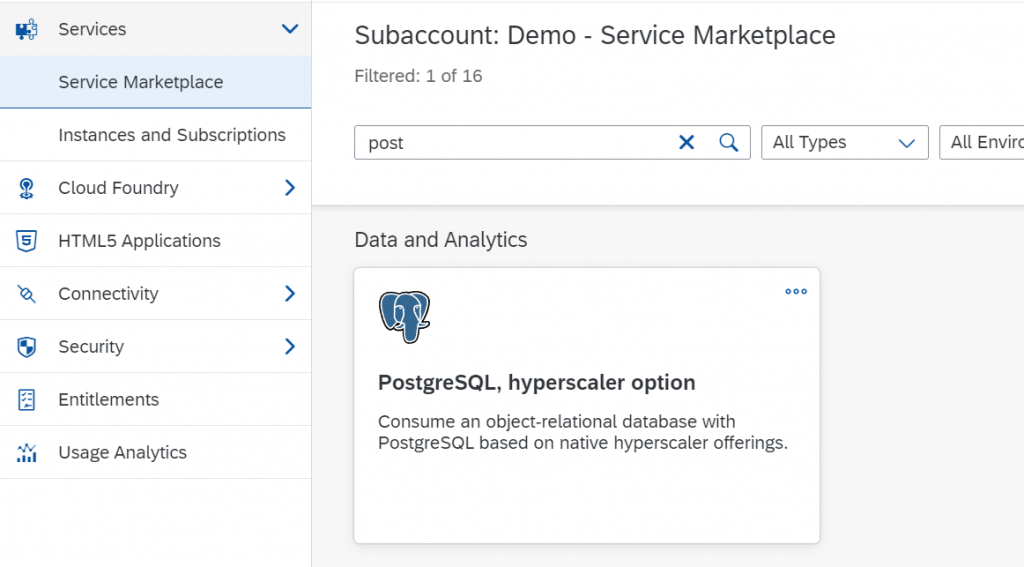
Inside your subaccount, click on Service Marketplace and search for “PostgreSql”.
Come back to cmd and login to your cloud foundry account using “cf login -a https://api.cf.us10-001.hana.ondemand.com/”. Provide your username and password which was used to create the btp account.
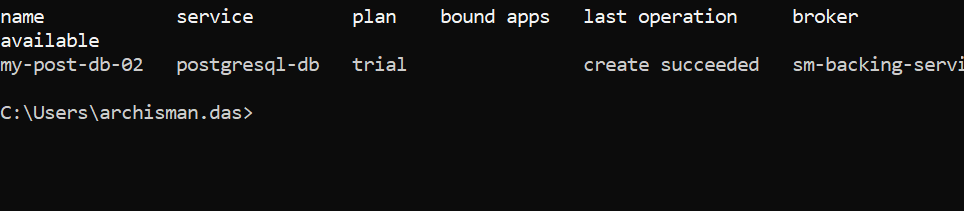
Create an instance of postgresql using the following command: “cf create-service postgresql-db trial my-post-db-02”. Here “postgresql-db” is the name of the service, “trial” is the service plan and “my-post-db-02” is the instance name. The instance creation takes about 10 mins. Once completed, run the command “cf services” and you should be able to see the service listed for your account.
Creating the Node backend application
Now that our database instance is provisioned, we need to create our backend node application and bind the same to our database service.
Before initializing our node project, we will need to update our postgre service with a tag name which will be used by our node application to identify and bind to the service.
Open cmd and run the following command: cf update-service my-post-db-02 -t “my-post-db-02”
Create a new Node application using the “npm init -y” command. The main challenge here is to establish binding with the postgre service. We will be using the @sap/xsenv node module to achieve this.
Below is the dbConn.js file.
const promise = require('bluebird')
const xsenv = require('@sap/xsenv')
//const env = require('../default-env.json')

const optionsDbPromise = {
    promiseLib: promise
}
const pgp = require('pg-promise')(optionsDbPromise)

var conn_service = {}

try {
    //let envCredentials = env.VCAP_SERVICES['my-postgre-db'][0].credentials

    xsenv.loadEnv()
    const envCredentials = xsenv.getServices({
        "my-post-db-02": { "tag": "my-post-db-02" }
    })["my-post-db-02"]

    conn_service.host = envCredentials.hostname
    conn_service.port = envCredentials.port
    conn_service.database = envCredentials.dbname
    conn_service.user = envCredentials.username
    conn_service.password = envCredentials.password
    conn_service.ssl = {
        rejectUnauthorized: false,
        ca: envCredentials.sslrootcert
    }

} catch (error) {
    console.log('error')
}

console.log(conn_service)

const db = pgp(conn_service)

db.func('version')
    .timeout(2000)
    .then((data) => {
        console.log('DB connection success ', data)
    }).catch((error) => {
        console.log(error)
    })

module.exports = {
    db,
    pgp
}
Above we are fetching our “my-post-db-02” service details using the tag filter which we updated earlier. Once these details are fetched, a db connection is created using the hostname, port, ssl root certificate, db name, username and password details for the service. The db instance is exported to be used in other files.
Next we need to write the apis which will directly interact with the db. Here we will only showcase creating a table, inserting data, fetching data and updating a record.
Below is our apis.js file.
const { db } = require("./dbConn")

const setupDB = (req, res, db, pgp) => {
    const QueryFile = pgp.QueryFile

    db.any(new QueryFile('./lib/sqlSetup.sql'), [])
        .then(data => {
            res.status(200).send({ "message": "DB setup successful" })
        }).catch(error => {
            res.status(500).send({ "message": error })
        })
}

const getAllData = (req, res, db) => {
    return db.any("select * from ORGANIZATION_MGT.USER_LIST")
        .then(data => {
            res.status(200).send({ "message": data })
        }).catch(error => {
            res.status(500).send({ "message": error })
        })
}

const updateUserData = (req, res, db) => {
    const id = req.params.id.toString()
    const location = req.query.location
    console.log('-------------------------------------------Request----------------------------------------')
    console.log(req)
    return db.any(`update ORGANIZATION_MGT.USER_LIST set baselocation='${location}' where id='${id}'`)
        .then(data => {
            res.status(200).send({ "message": `User ${id} base location updated successfully!` })
        }).catch(error => {
            res.status(500).send({ "message": error })
        })
}

module.exports = {
    setupDB,
    getAllData,
    updateUserData
}
In the above file we have used a sqlSetup.sql file which is used to setup the table schema and insert data first time. Below is the script for the same.
CREATE SCHEMA IF NOT EXISTS ORGANIZATION_MGT;

DROP TABLE IF EXISTS ORGANIZATION_MGT.USER_LIST;
CREATE TABLE ORGANIZATION_MGT.USER_LIST( id VARCHAR(10) NOT NULL PRIMARY KEY, username VARCHAR(40), designation VARCHAR(20), baselocation VARCHAR(20) );
INSERT INTO ORGANIZATION_MGT.USER_LIST VALUES ( '835825', 'Archisman', 'SCON', 'Pune' ), ( '835826', 'Anuj', 'LCON', 'Nagpur' ), ( '835827', 'Vaishali', 'LCON', 'Pune' ), ( '835828', 'Ritwika', 'LCON', 'Pune' );
Now we will setup the routes in our index.js file which is the entry point of our application. Below is the code for the same.
const express = require('express')
const cors = require('cors')
const { setupDB, getAllData, updateUserData } = require('./lib/apis')
const { db, pgp } = require('./lib/dbConn')

const app = express()
app.use(cors(), (req, res, next) => {
    next()
})
app.use(express.json())
const port = process.env.PORT || 3000

app.post('/setup', (req, res) => {
    setupDB(req, res, db, pgp)
})

app.get('/users', (req, res) => {
    getAllData(req, res, db)
})

app.post('/users/:id', (req, res) => {
    updateUserData(req, res, db)
})

app.listen(process.env.PORT || 3000, () => {
    console.log(`App is running on port ${port}`)
})
Next, we will need to create the manifest.yaml file which consists of some essential information required by cloud foundry while creating the application in btp. Below is the code for the same.
applications:
- name: demo-node-app-01
memory: 512M
path: ./
buildpack: nodejs_buildpack
health-check-type: port
services:
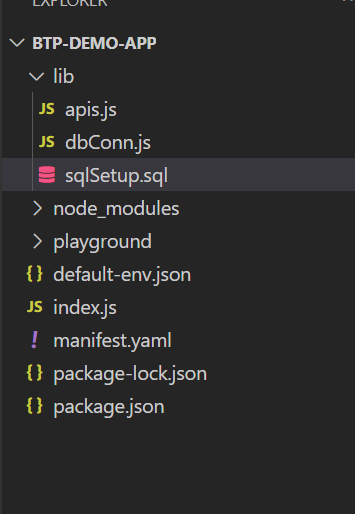
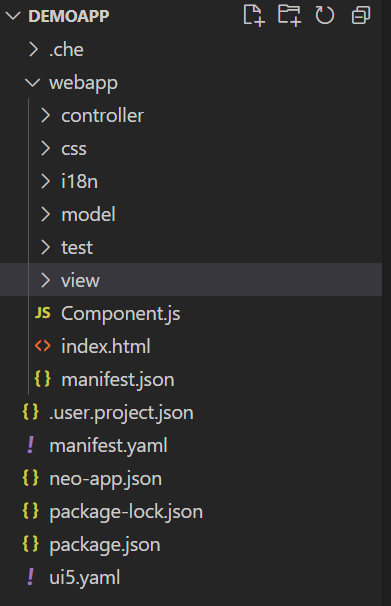
- my-post-db-02Upon creation of all the above files, this is how my project structure looks.
Deploying the Node application to BTP
Now that we have created our node application locally, it is time to push it to the cloud. Open cmd and navigate to the location where the manifest.yaml file (for the same node app) is location.
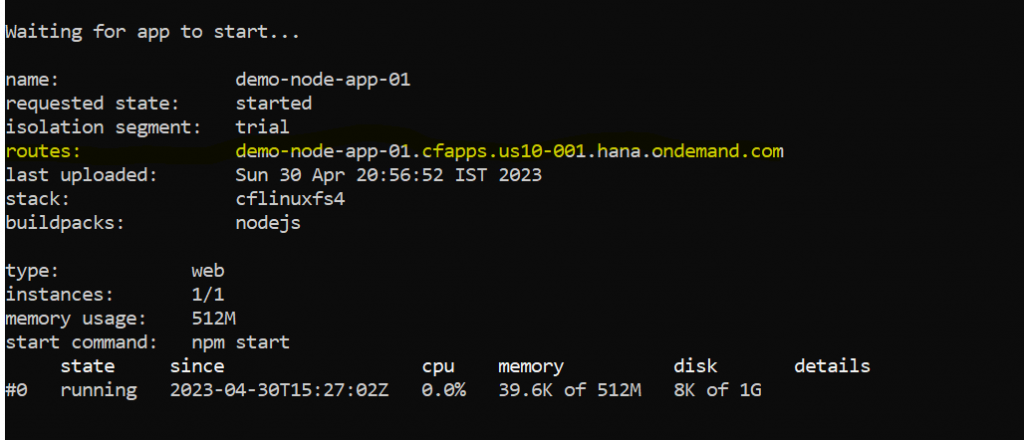
Run “cf push”. This will push the application to BTP and you should be able to see a route generated as shown below.
As a further check run the command “cf logs <app-name>–recent”. You should be able to see that the connection to the postgre service was successfully established.

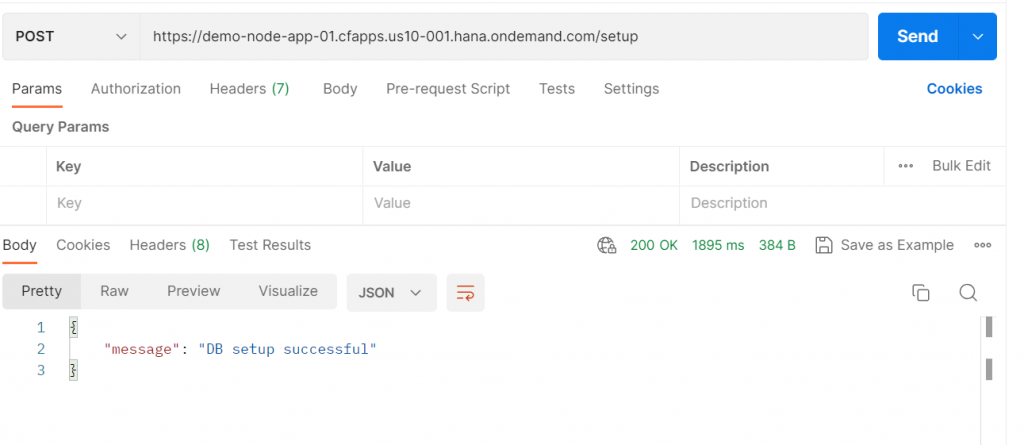
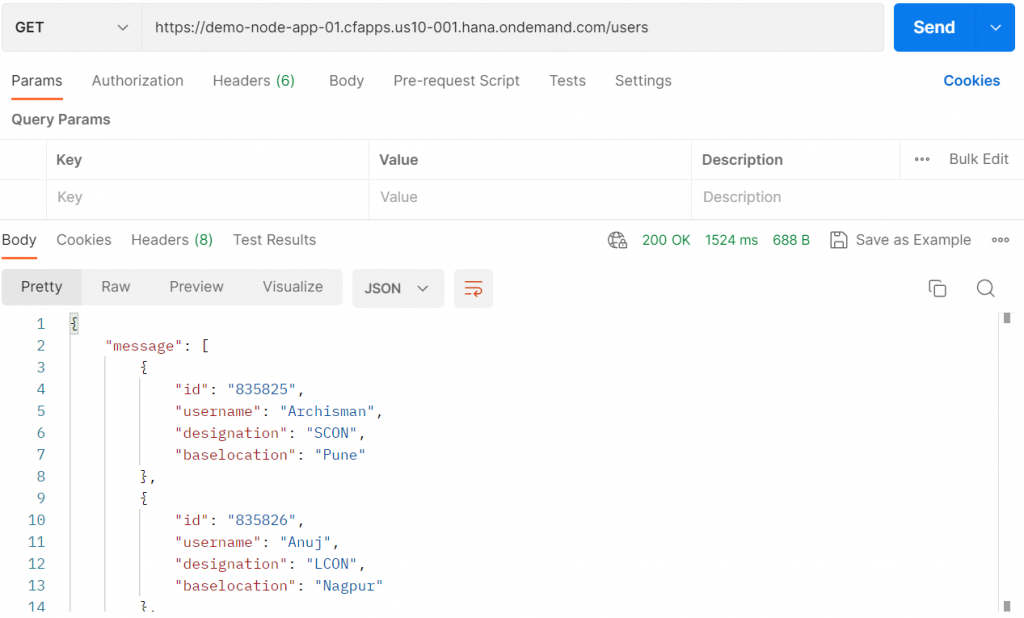
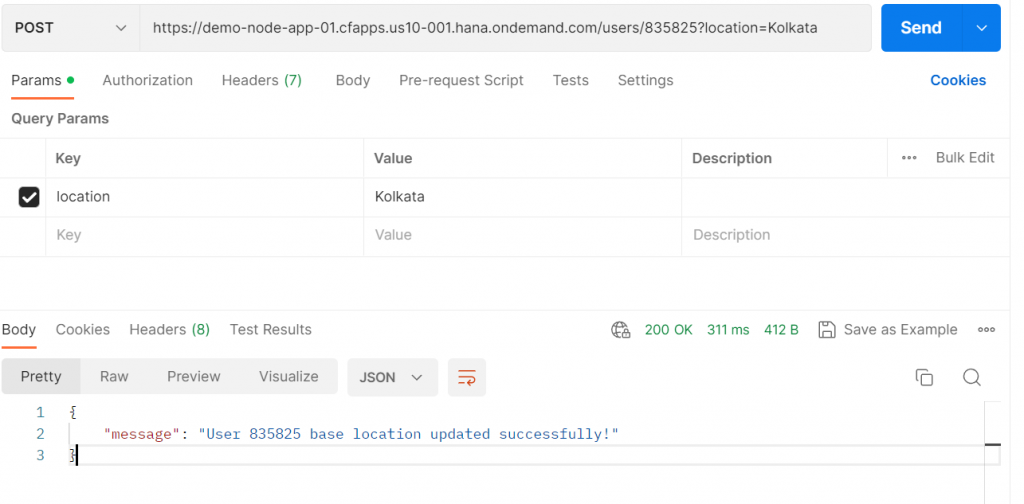
Testing our apis using POSTMAN
Now that our backend is established, we should test our apis using postman before integrating with the client side application.
We have 3 rest end points to test.
- POST /setup
- GET /users
- POST /users/:id?location
Below are snapshots for the same in postman.
Integrate api with client side application
Once we are satisfied that the apis are working properly, we can go ahead and integrate them to our client side application. I have provided the controller and view code snippet below showcasing the same.
sap.ui.define([
'sap/ui/core/mvc/Controller',
'sap/ui/model/json/JSONModel',
'sap/m/MessageBox'
], function (Controller, JSONModel, MessageBox) {
"use strict";
var oController
return Controller.extend("Sample.Quickstart.controller.View1", {
onInit: async function () {
oController = this
const oUserModel = new JSONModel()
oController.getView().setModel(oUserModel, 'oUserModel')
const sUrl = `https://demo-node-app-01.cfapps.us10-001.hana.ondemand.com/users`
await oUserModel.loadData(sUrl, {}, true, 'GET')
},
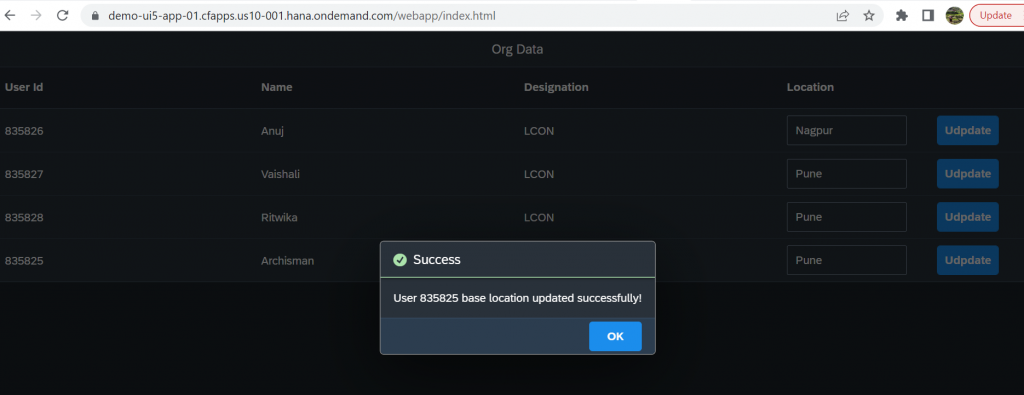
_onUpdateLocation: async (oEvent) => {
const sPath = oEvent.getSource().getBindingContext('oUserModel').sPath
const oUserModel = oController.getView().getModel('oUserModel')
const id = oUserModel.getProperty(`${sPath}/id`)
const location = oUserModel.getProperty(`${sPath}/baselocation`)
try {
const oUserUpdateModel = new JSONModel()
const sUrl = `https://demo-node-app-01.cfapps.us10-001.hana.ondemand.com/users/${id}?location=${location}`
const oParams = {
location
}
await oUserUpdateModel.loadData(sUrl, oParams, true, 'POST')
MessageBox.success(oUserUpdateModel.getData()['message'])
} catch (error) {
MessageBox.error(error.message)
}
}
});
});<mvc:View controllerName="Sample.Quickstart.controller.View1"
xmlns:mvc="sap.ui.core.mvc" displayBlock="true"
xmlns="sap.m">
<App id="app">
<pages>
<Page id="page" title="Org Data" titleAlignment="Center">
<content>
<Table items="{oUserModel>/message}">
<columns>
<Column>
<Label text="User Id" design="Bold"/>
</Column>
<Column>
<Label text="Name" design="Bold"/>
</Column>
<Column>
<Label text="Designation" design="Bold"/>
</Column>
<Column>
<Label text="Location" design="Bold"/>
</Column>
</columns>
<ColumnListItem>
<cells>
<Text text="{oUserModel>id}"/>
<Text text="{oUserModel>username}"/>
<Text text="{oUserModel>designation}"/>
<HBox>
<Input width="80%" value="{oUserModel>baselocation}"/>
<Button type="Emphasized" text="Udpdate" press="_onUpdateLocation"/>
</HBox>
</cells>
</ColumnListItem>
</Table>
</content>
</Page>
</pages>
</App>
</mvc:View>Before pushing this application to the cloud, we once again need to create a manifest.yaml file to help cloud foundry with the deployment. Below is the code for the same.
applications:
- name: demo-ui5-app-01
  memory: 512M
  path: ./
  buildpack: staticfile_buildpack
The project structure now looks as below.
Pushing the client side application to cloud
In the same manner that we deployed our node application, open cmd and navigate to the location where the manifest.yaml file is situated.
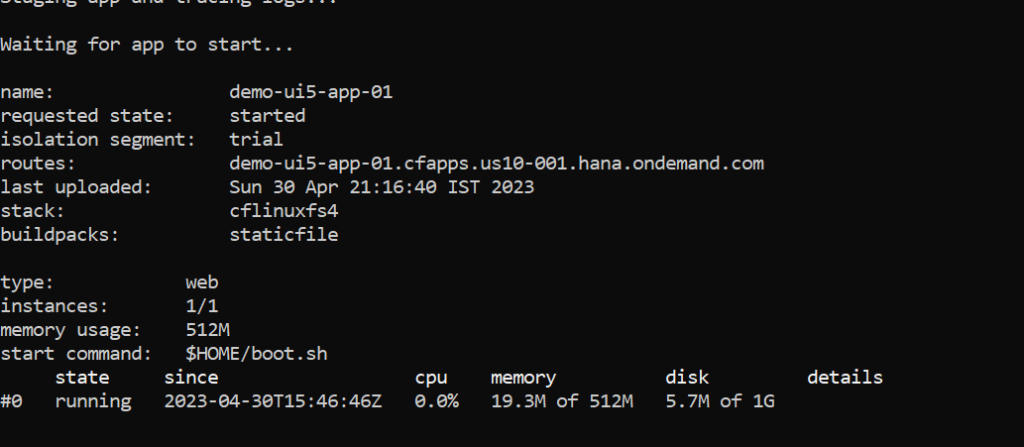
Run “cf push”. Again a route will be generated for the application as shown below.
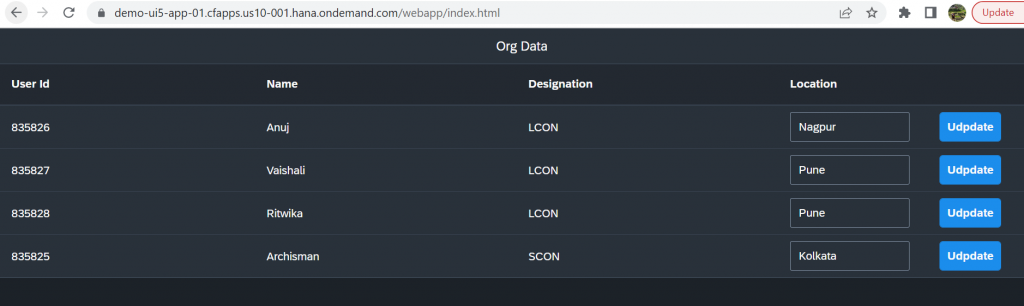
Now run the route in your browser and you should be able to see your application up and running. (Please note the /webapp/index.html that has been appended to the above route in the screenshot below)