Follow the link for odata creation
In this blog post, I am going to tell you step by step process to Post Odata services for SAP /SAP HANA system and how to test it.
We will take a simple demo for posting the sales document data into a custom table, Here we will try to navigate through Header-Item structure which also helps in understanding the real time scenarios for your project purpose.
I tried to explain the whole process in 5 steps.
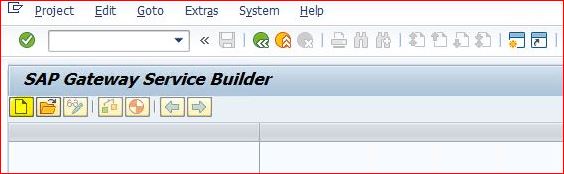
Step 1. Go to transaction code – SEGW.
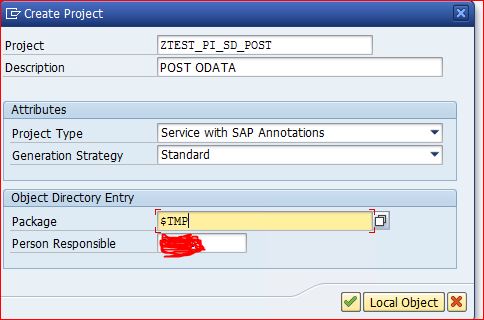
Click on Icon Create. A pop window will appear, Fill the details as per below mention in screen shot and click on check icon or enter.
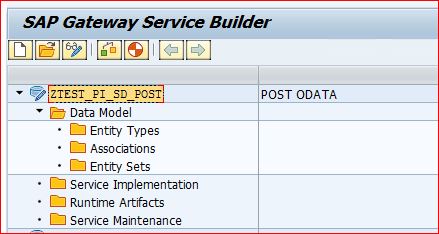
Below screen will appear where you can see below folder in project. In Folder data model, we can see three sub folders. Entity Type – it acts as work area, Entity Sets -It act as internal table and associations.
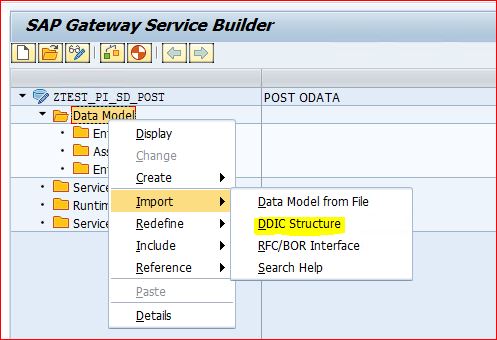
Now we are going to define structure of work area and internal table, Right click on Data model select import and select DDIC structure.
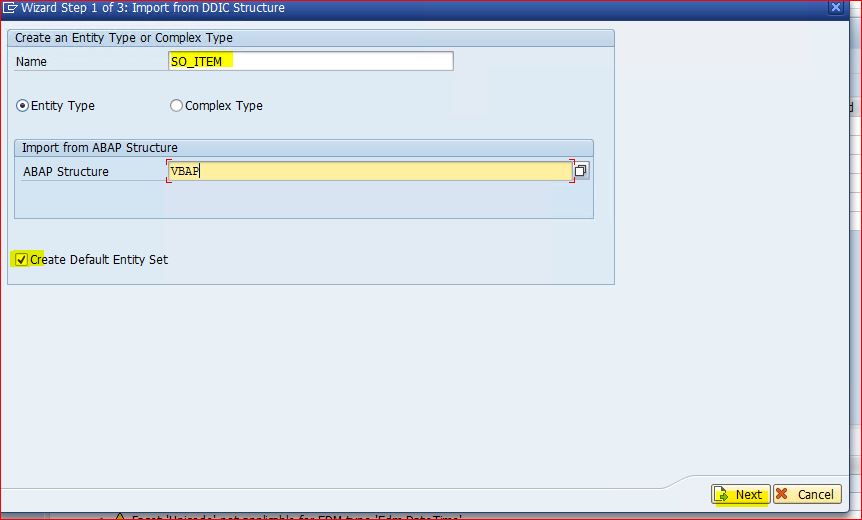
Here give the details of structure and structure name as per below screen below.
Select radio button Entity type and and click on check box entity set. fill ABAP structure as VBAK and click on next

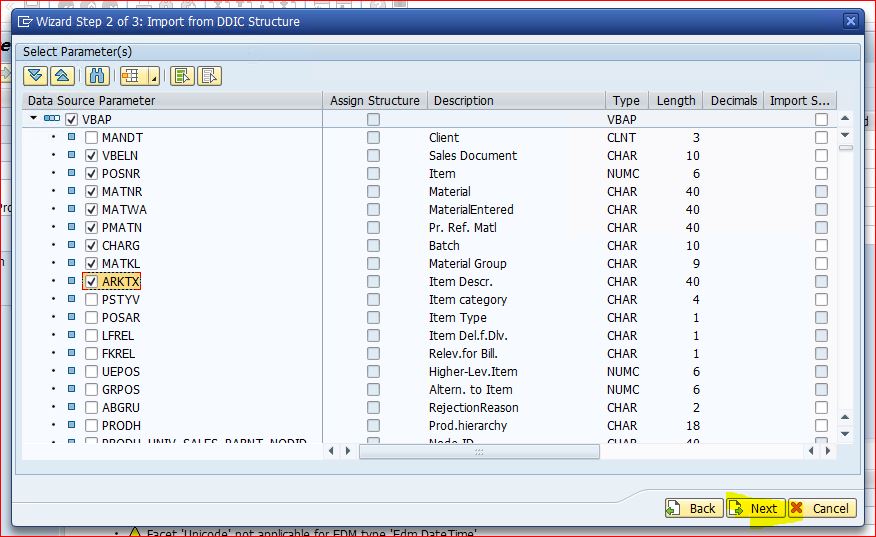
Now you will get the pop up screen with VBAK table fields name. Select fields for your structure and click on next.

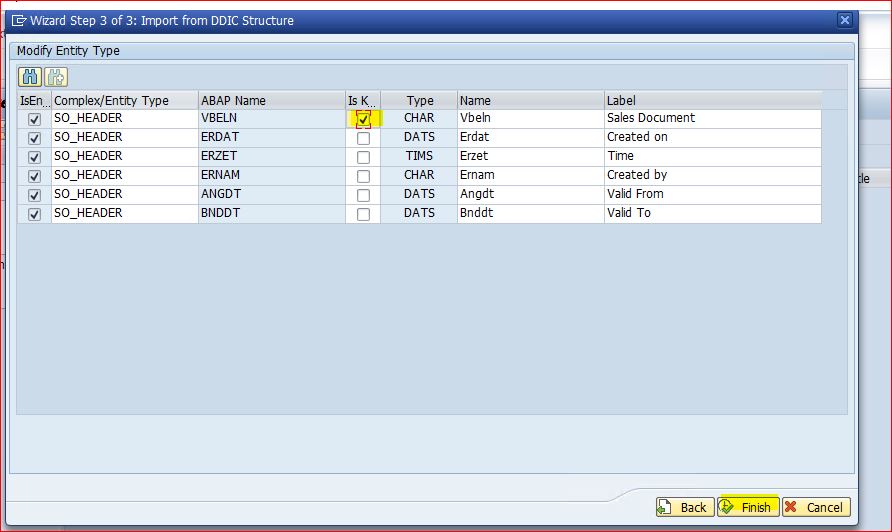
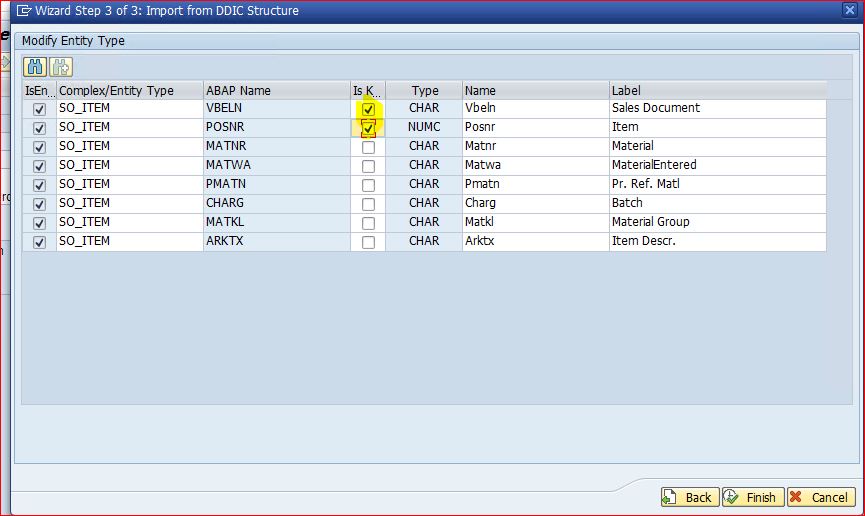
Other window will appear where we have to select the key field. tick on Vbeln as key field and click on finish. You may get warning message, it can be totally ignored.
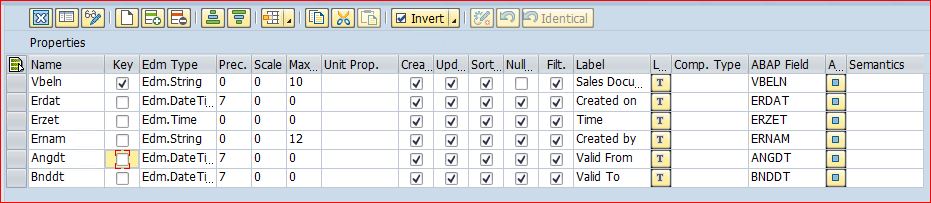
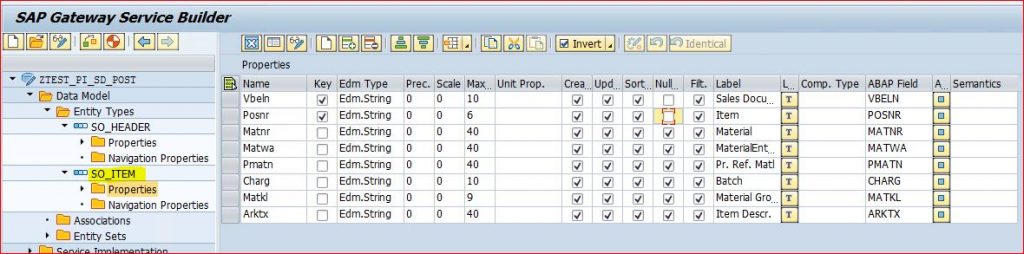
Now expand folder entity type and fill the below parameters in properties, Please don’t tick Null check box for VBELN as it is key field.
Similarly Create Structure for SD Item following same steps
Here, We are selecting VBELN and POSNR are Keys
click on Save button at the top of menu bar
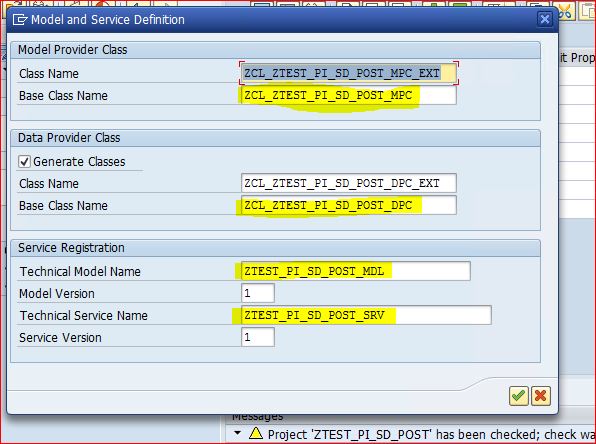
Now click on generate Icon, A pop up window will appear with class details, click on tick icon and proceed further. It will ask for package, give details and proceed further. These are also known as runtime artifacts.
Step 2. Now we will navigate the connection between header and Item entity, This is similar to maintain a key relation between header and Item data.
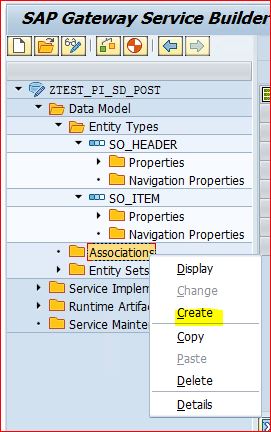
go to Association folder, right click on it and select Create
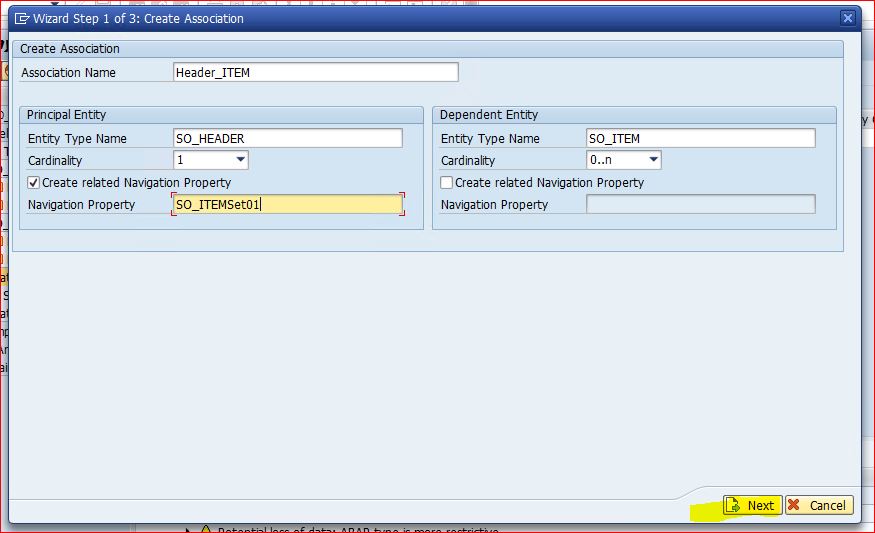
A pop up window will appear, Here you need to mention the association name. We are trying to link Header and item entity, hence select the principle entity as header one and dependent entity as item. Please fill the details as mentioned in below screen shot, press enter and click on next.
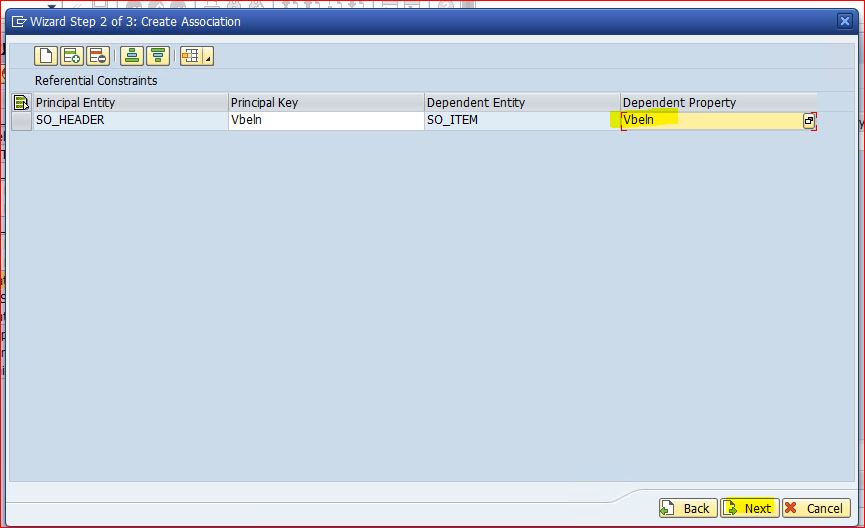
Next screen will come, Where you need to mention the relation between Header and Item entity, Like relation between header and item table of data base tables. Please select the parameters from F4 help and fill the details as below and click on next.
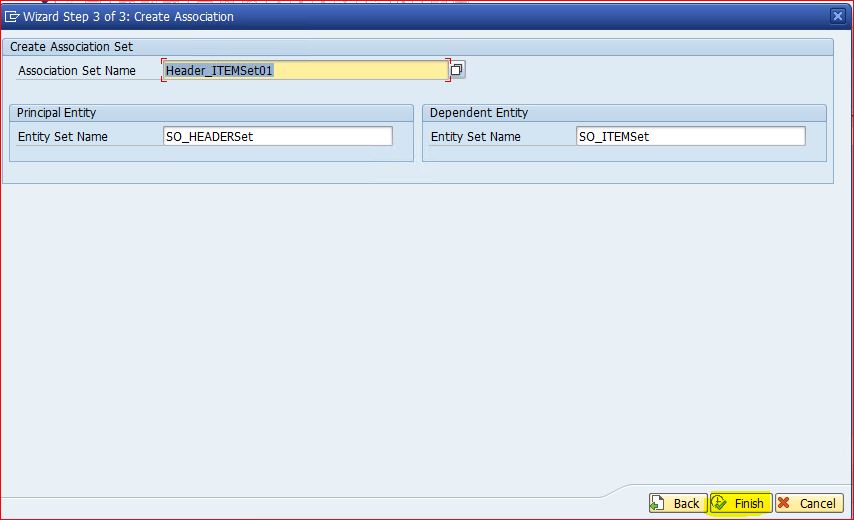
In next screen, It will show the link for association Set for header and item entity. Click on finish to complete the association linkage.
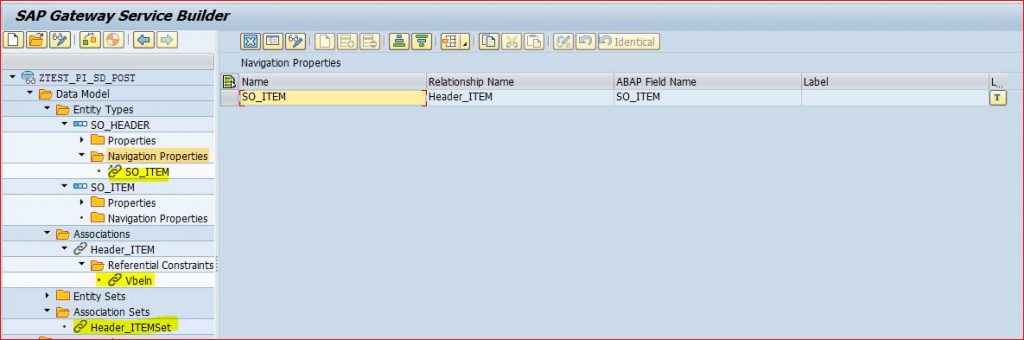
You can see Association and Association Set details as below with the navigation properties under your project as shown below
Save and click on generate ICON.
Step 3. Go to transaction code /IWFND/MAINT_SERVICE.
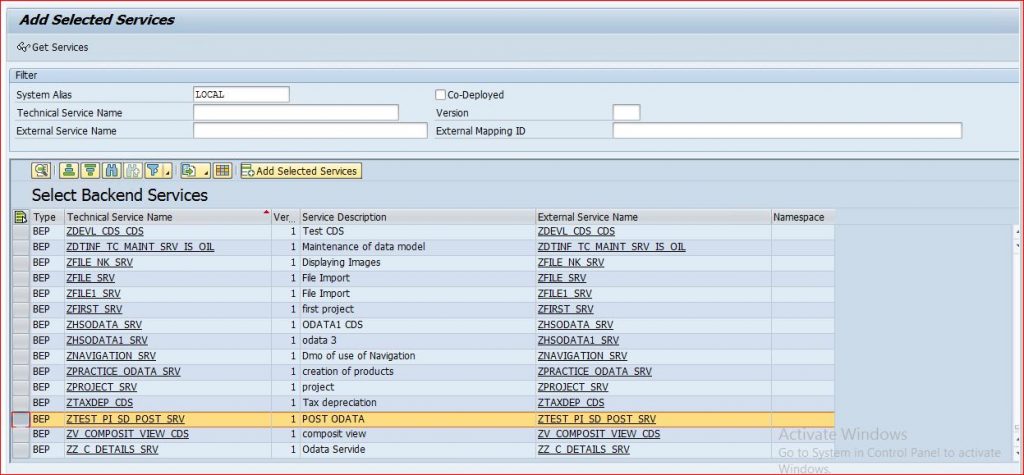
Click on push button Add services.
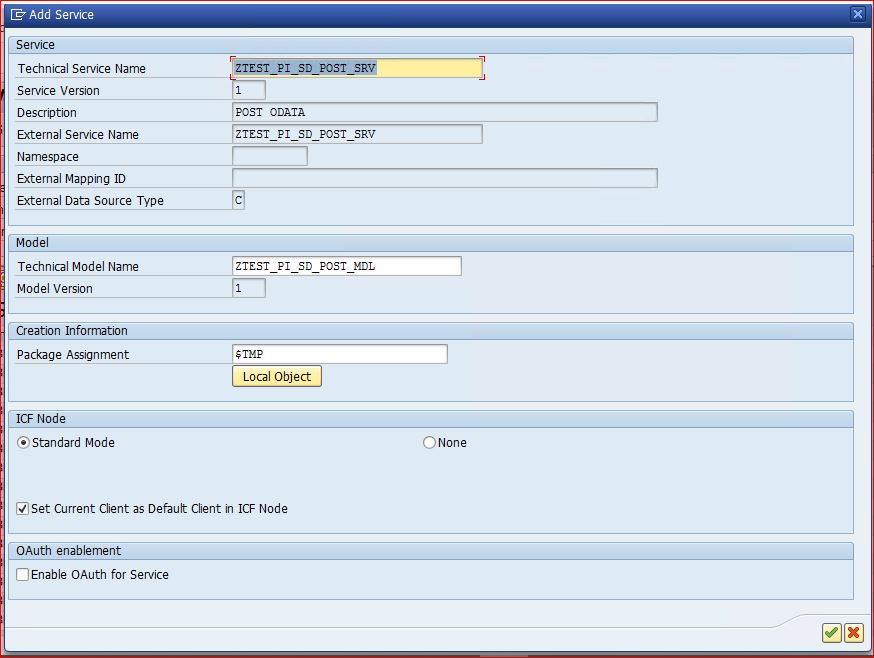
Now double click on your project name service. A pop up window will appear, enter the package details and click on tick icon. An Information message will be shown where it will confirm about the service is created and metadata loaded successfully
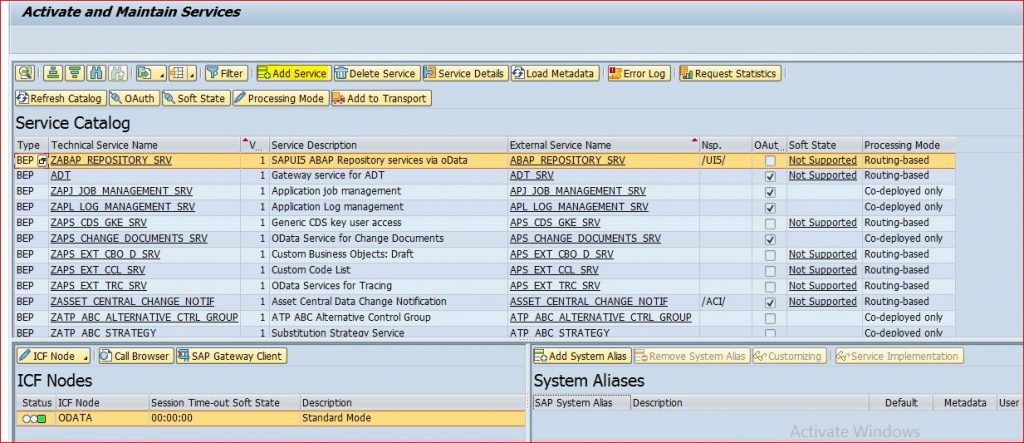
Now click back and go to main screen of transaction /IWFND/MAINT_SERVICE and find your service.
Click on SAP Gateway Client

A new screen will come, Execute the transaction and check the response.
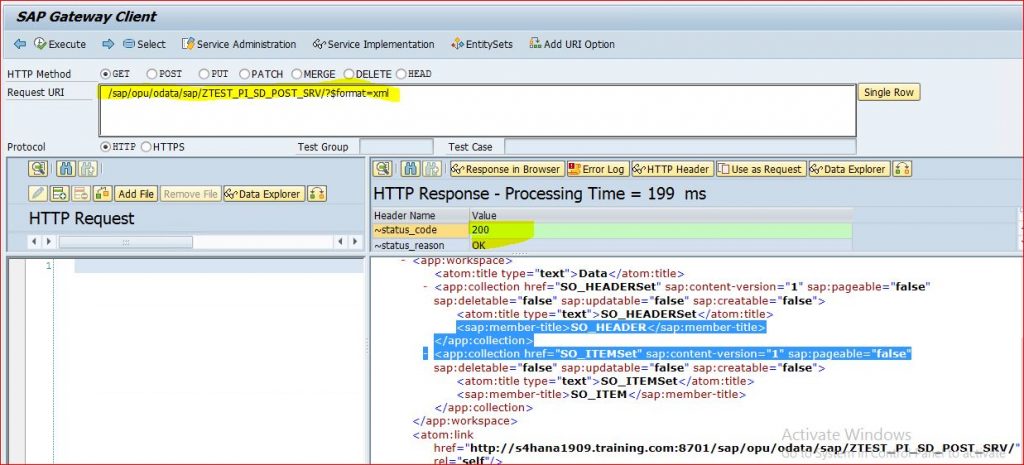
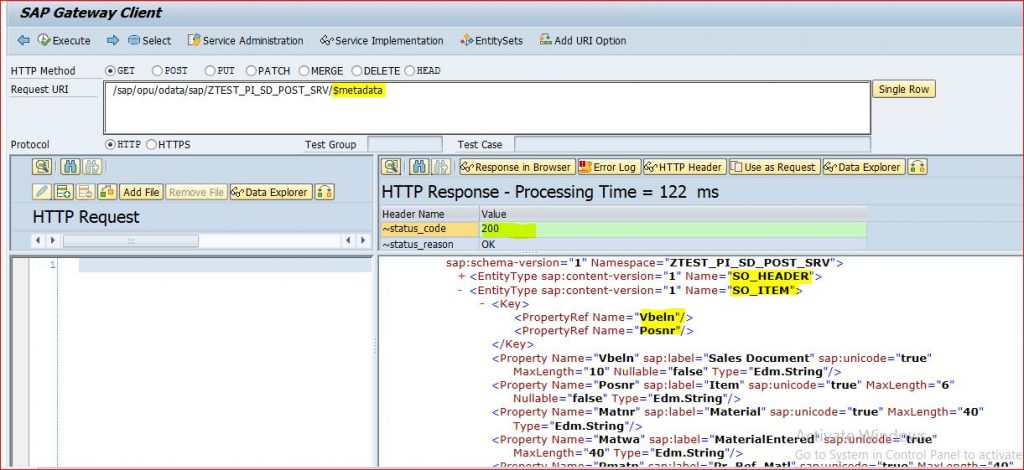
Now select the URL for metadata from add URL option to check the Header and Item navigation structure and execute. You will see the header and item entity fields in response.
Now we will write code to get and post data from odata services.
Step 4. to get the data from HTTP request and Post the data.
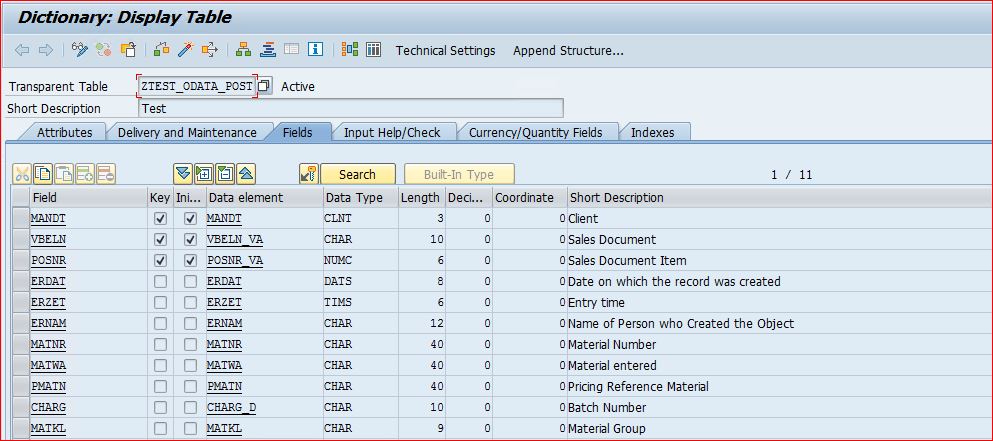
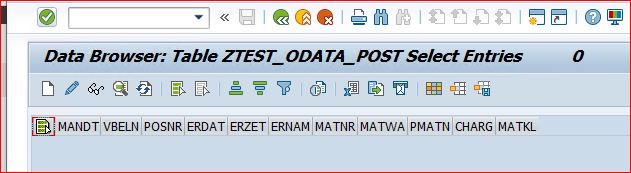
Let’s Create a custom table where we need to post data. I had created custom table with below fields. Here we will post data based on odata request,
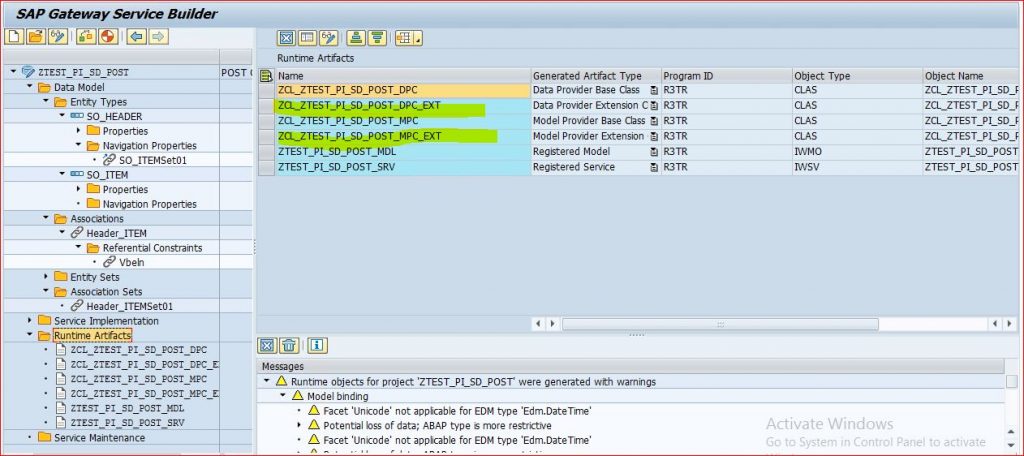
here we will explore more on Runtime Artifacts, The main two class are MDP( Model Provider class) and DPC ( Data provider Class).
MPC – This is used to define model. you can use the method Define to create entity, properties etc using code based implementation.
DPC – used to code your CRUDQ methods as well as function import methods. you write all your logic in redefined methods of DPC extension class.
now go to transaction SEGW and expand folder Runtime Artifacts.
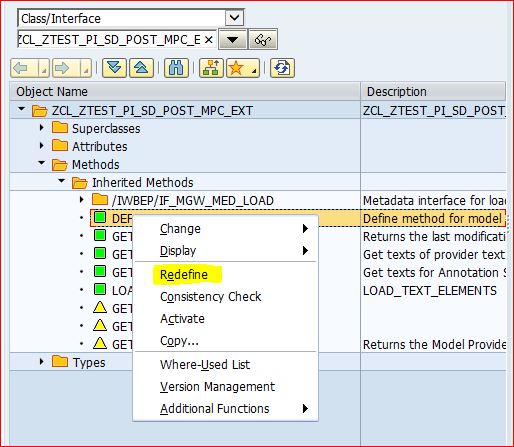
Here we can see, extension for data provider and module provider class. We need to redefine the Module provider extension class to bind and read the entity
Double click on Module provider extension class, It will redirect to class object, select method Define and right click on it to redefine the class.
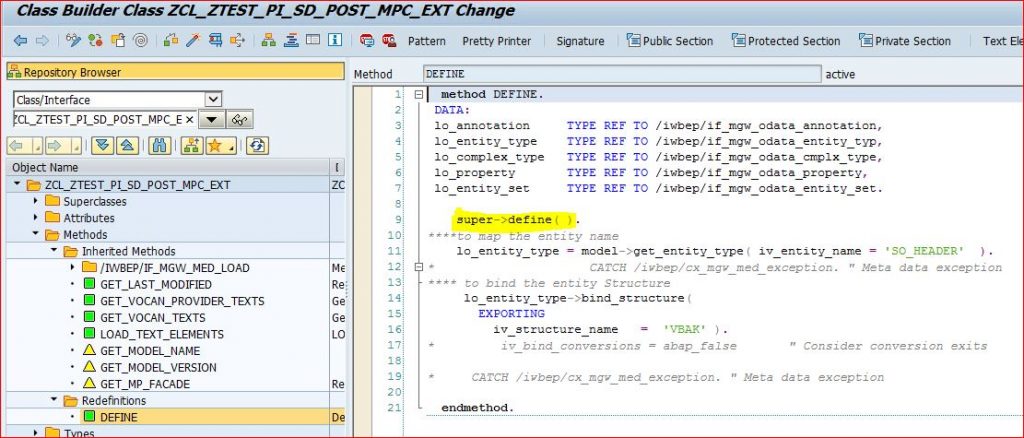
Now we will add the code to mapping the entity name and Entity Structure, first Define super class and then write the code as below. Here we have mapped the entity for header and bind with structure VBAK. Based on your requirement, you can take your custom structure or even define your structure in class for binding.
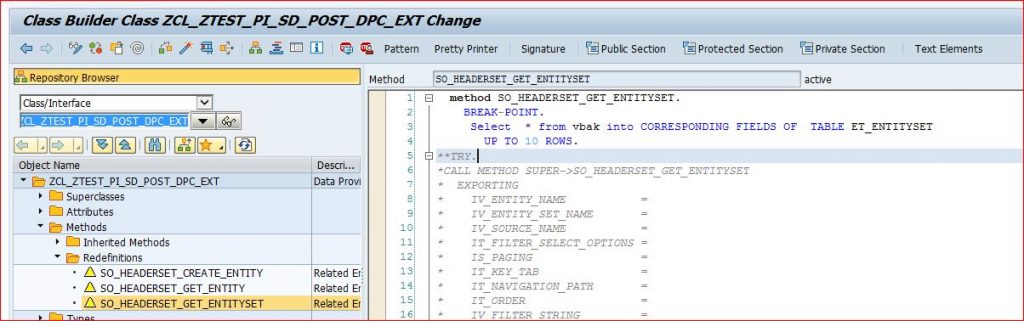
Now We will Redefine the method of class ZCL_ZTEST_PI_SD_POST_DPC_EXT.
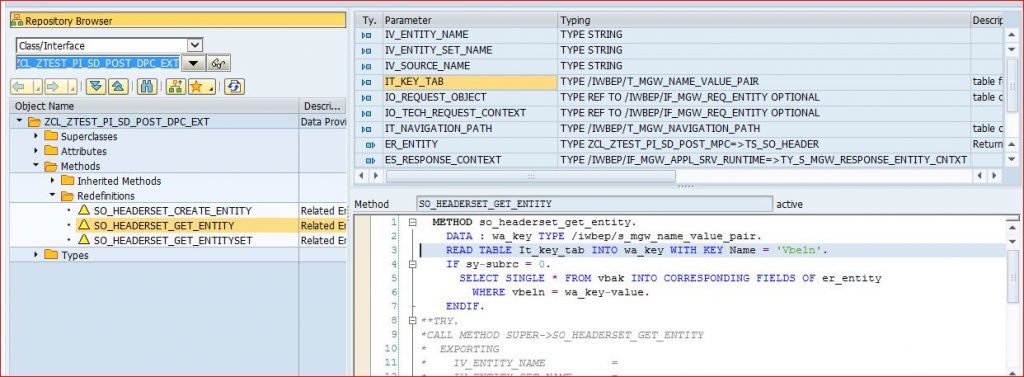
Method – SO_HEADERSET_GET_ENTITY.
Follow the same steps mentioned above and redefine the method. Here we will write logic to read the data from HTTP request to get the HTTP response. Make sure to use the same field name and they are case sensitive.
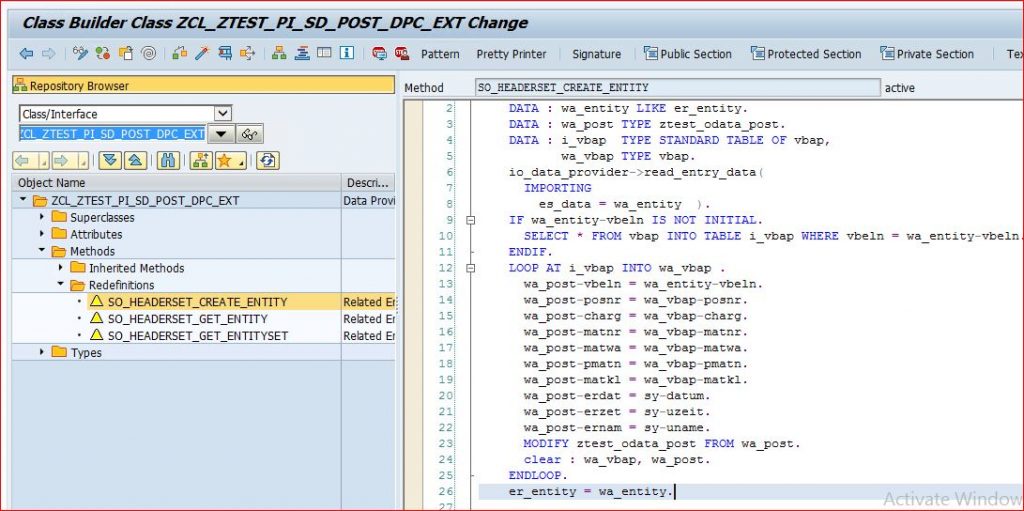
Method – SO_HEADERSET_CREATE_ENTITY
Redefine method to post the values read from HTTPS request to post data in Custom table.
Here, I had just written basic logic to read the value from HTTPS Request and update that in custom table. Please write the below code in method as shown below, Here we are first reading the data form HTTP request and based on that data we read are reading data from VBAP.
You can also redefine the method for entity set based on your requirement. Here I had just added simple SQL statement to get data into header entity set.
Now, lets try to post the data. Before posting data, we will check values in VBAK, VBAP and custom table. we are going to fetch values from tables and going to post them in custom table.


Now lets execute odata service in batch mode to get data and post data in one request.
Step – 5 Test odata services
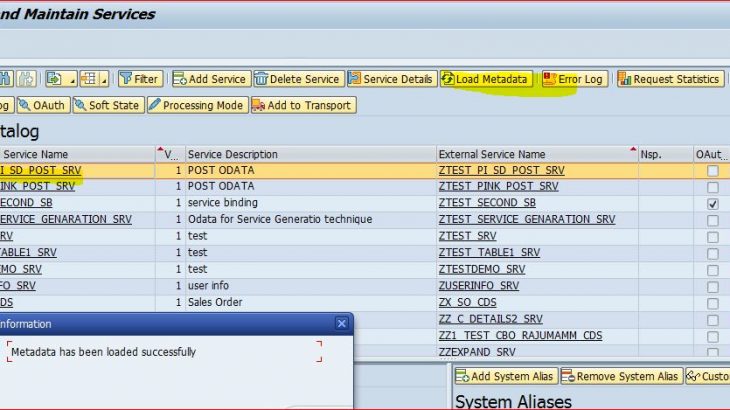
Go to transaction /IWFND/MAINT_SERVICE and find out your service, select your service and click on load metadata.
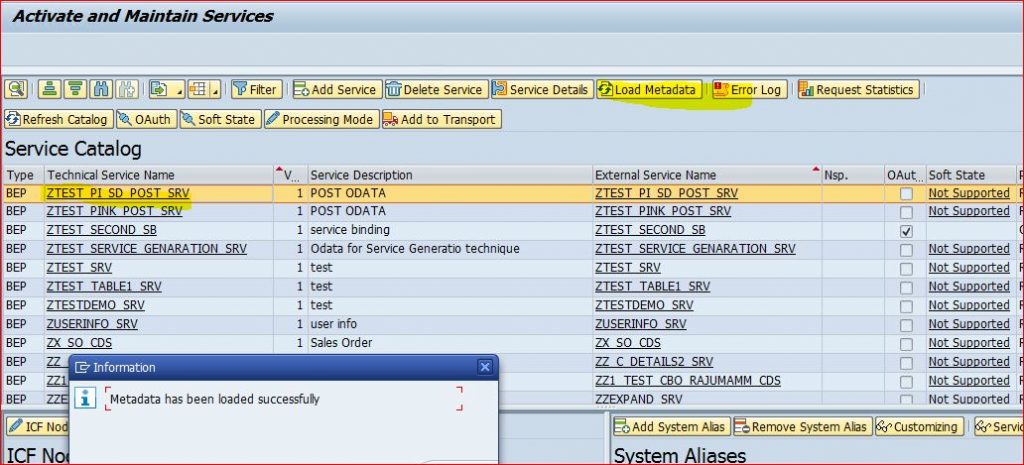
Information message will pop up – Metadata has been loaded successfully.
Now Select your service and click on SAP Gateway Client. You will redirect to other screen. click on add URI options and Select batch in that.

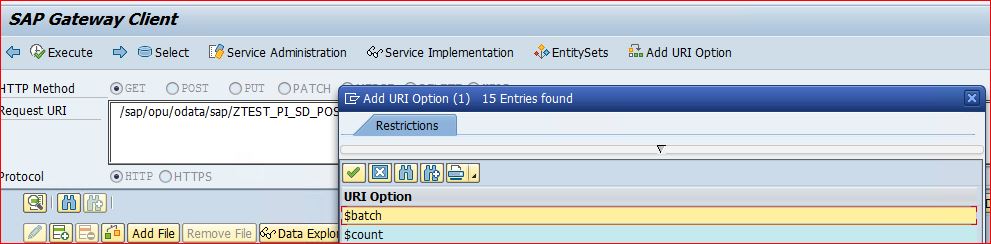
Now you can see the radio button on post and format for HTTP request.

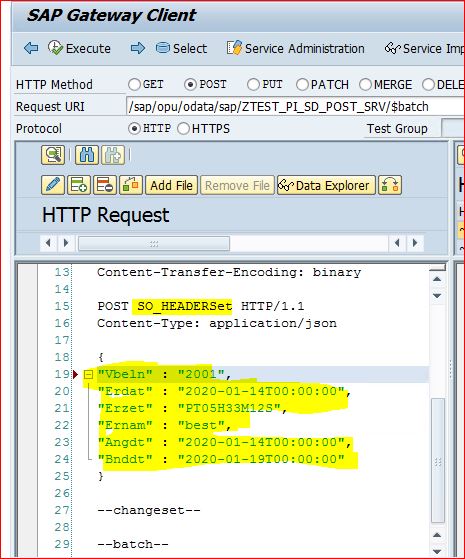
Here you need to mention your entity set and Key to get the values. Similarly for post also you need to mention entity set and input data in json format. Here in below screen, we are going to do changes for HTTP request for header entity set. These Fields are Case sensitive, make sure it should be as mentioned in entity set of Odata.

and scroll below in HTTP Request window and give details as mention below for post record.
Now, execute and see response in HTTP Response.
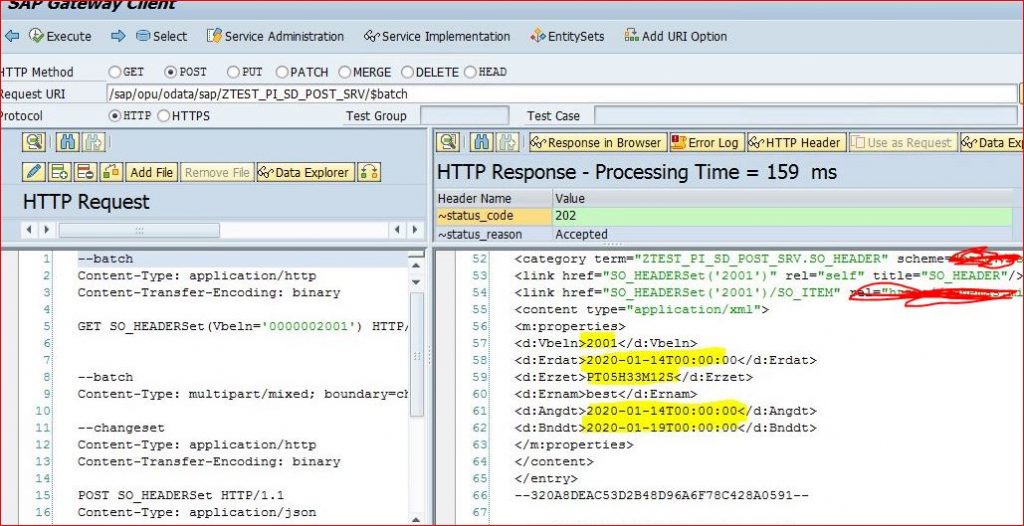
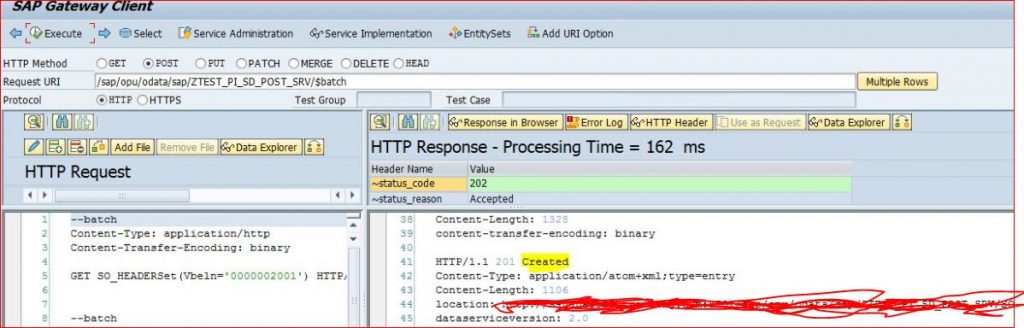
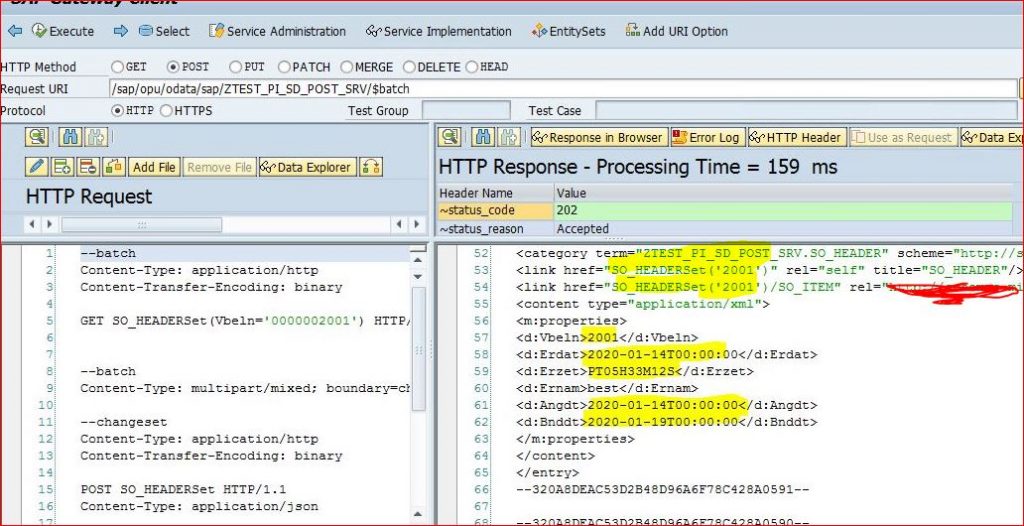
Here you can see HTTPS response based on KEY id for GET and for POST. we get values in response and they are created in custom table
for GET response :
for Post response:
You can see in response as created and below that are values which you can verify
Now Lets check the custom table data.
Here the table is updated with the values for POST, Based on logic written on VBAP and VBAK in Create entity method of DPC Extension class.

Here, We had completed our Odata service creation with a Service Builder Project with two entities and two entity-sets. We had created association and association sets, generated the runtime artifacts. We had registered and activated our OData service and loaded metadata. We had redefined method of MDP Extension class to bind the structure. We had also redefined DPC extension class to Get entity data, entity Set data and post data and updated custom table.


