This blog will help people to understand the basics of new functionality added by SAP from S4H 2020 in the form of FIORI app for “Defect processing”. This functionality will help to record & process defects without creating QM Notification.
Defect processing was available in SAP QM since the functionality of Quality Notification, but from S4H 2020, it can be created and processed independently without creating quality notifications.
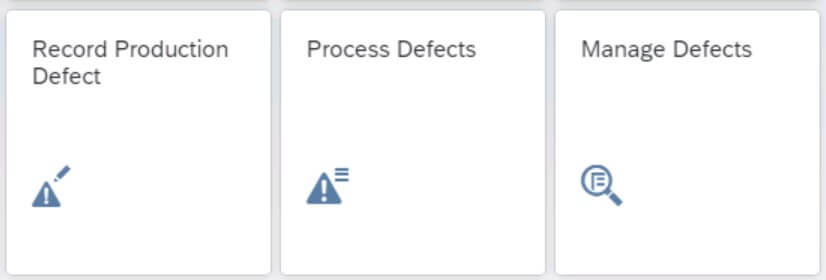
SAP has given Fiori applications to record, process & analyze the defect. Following are the three applications available:
- Record Production Defect
- Process Defect
- Manage Defect
Configuration Requirement
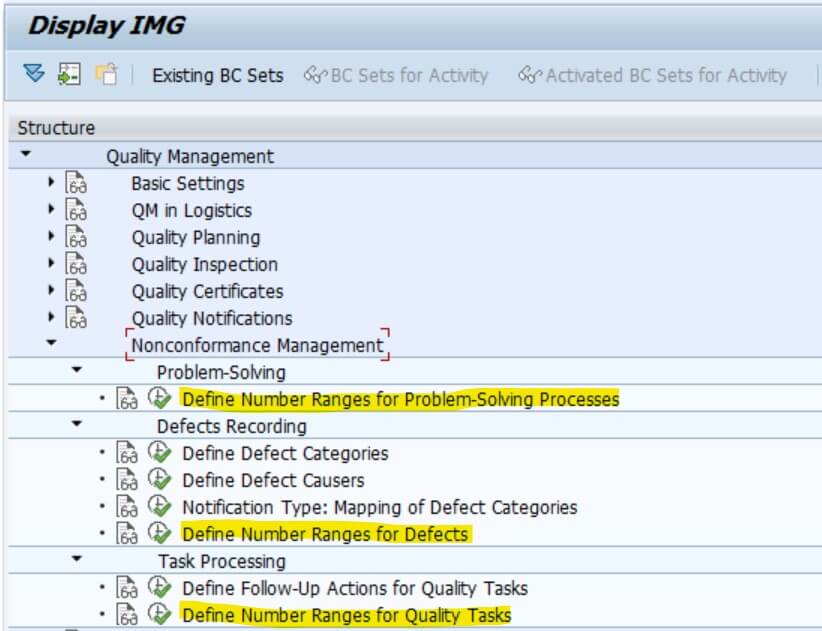
From S4H 2020 onward new node of “Nonconformance Management” can be seen. One of the important task to be performed under this node is to maintain number range for following:
- Problem Solving Process
- Defect Recording
- Task Processing
Config Path: Quality Management ->Nonconformance Management
Processing
To raise the defect, one need to login SAP Fiori Launchpad.
Once logged into the systems, as per available roles relevant application tiles can be seen.
- Record Production Defect App
To record the defect, click on “Record Production Defect” tile & system will give provision to enter details of the defects.
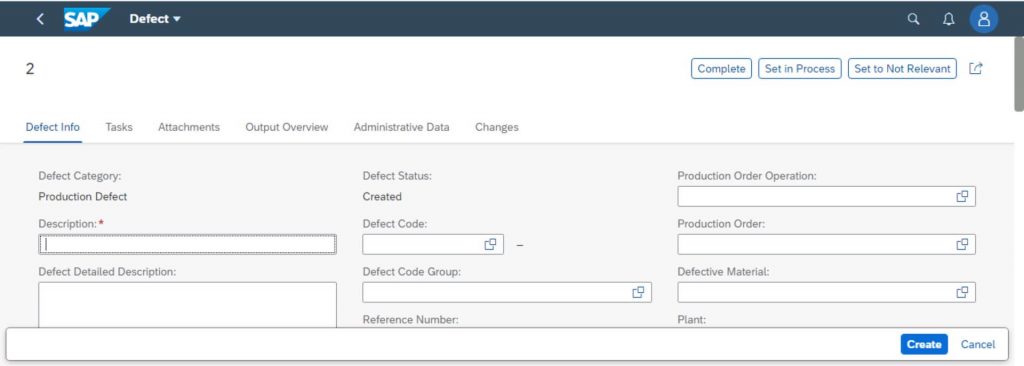
Provide necessary details in the tabs available, so that appropriate information can be captured in the defect for better resolution. Following are the tabs available:
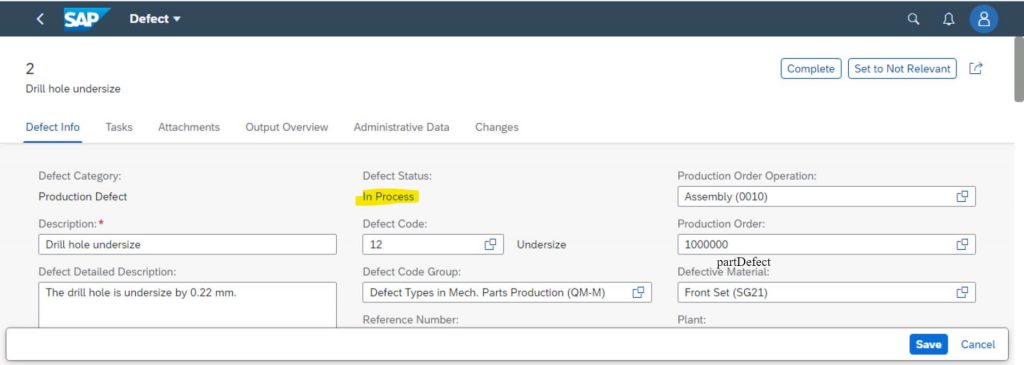
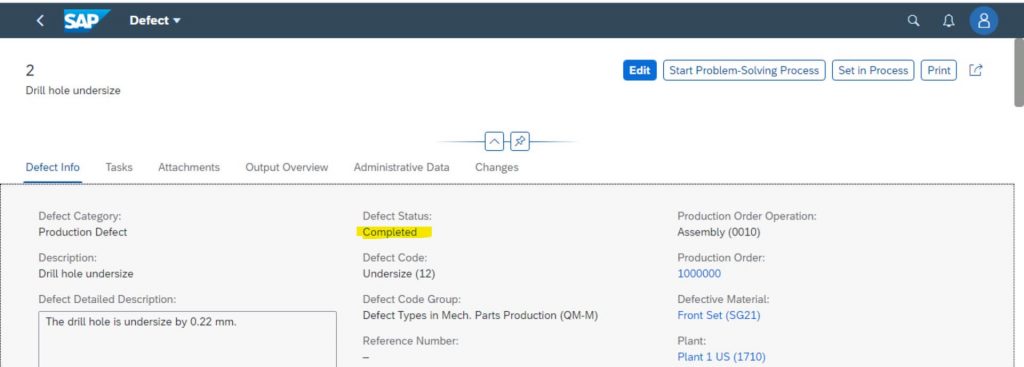
Defect Info:
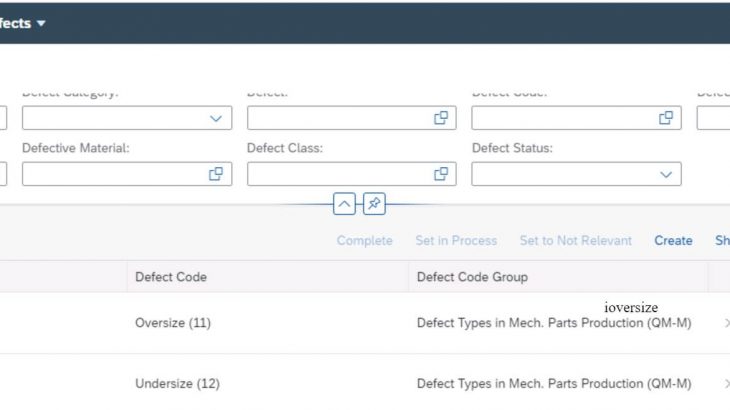
This tab gives provision to enter exact details of the defect. Here defect description, defect code, production order details, defective material, defect quantity, etc. can be entered.
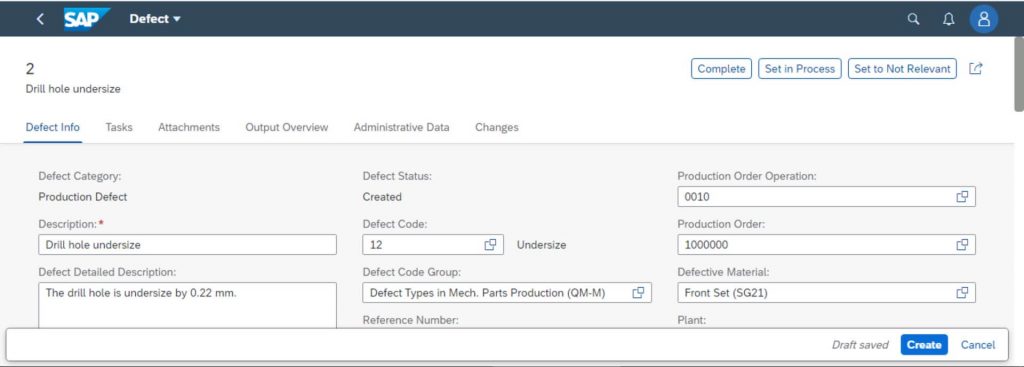
Once these basic details are entered, Click on “Create” button to create defect in the system.
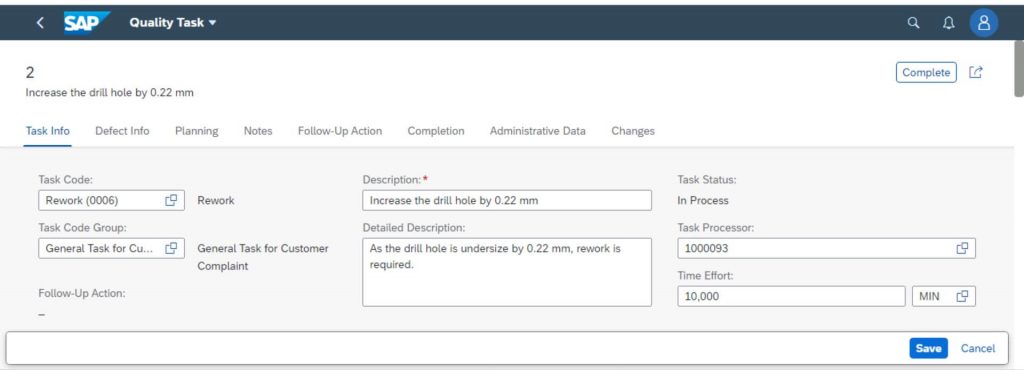
Task:
The tab “Task” is used to create tasks to be performed to overcome that defect.
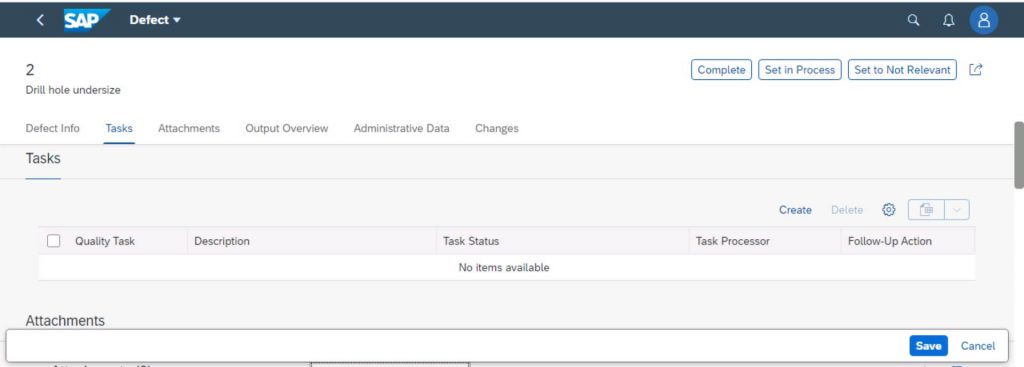
Click on “Create” button to create new task and system will give provision to enter the details of the task with multiple tabs.
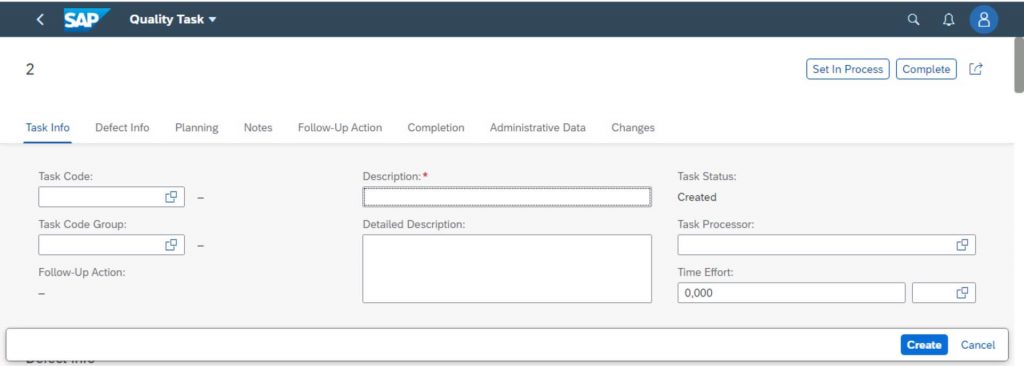
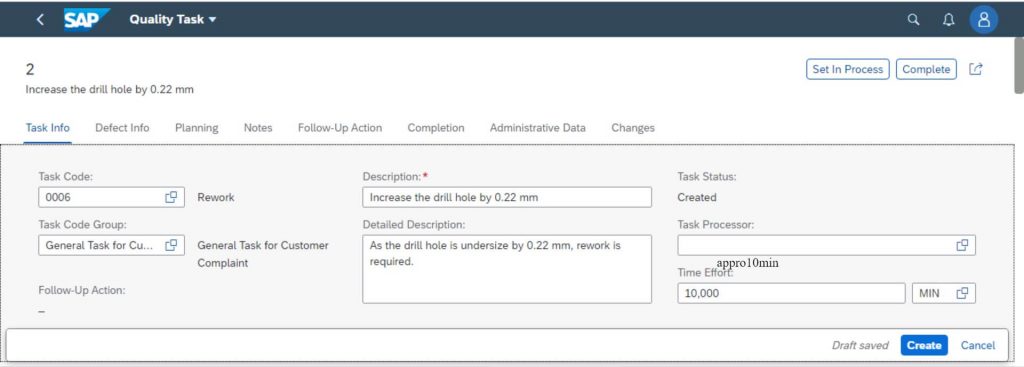
Now click on “Create” button to create the Task.
Attachment:
This tab gives provision to attach some evidence of the defect. Select appropriate document type from “Select Doc. Type to Upload” & select the document to be attached by clicking on “Upload” button.

Also, there is provision to attach the existing DMS documents to the defect for reference. To do so, click on “Assign Doc” button & select the required document number from the available list.
Once all these details are entered, click on “Set in Process” button, to process the defect. This will change the defect status from “Created” to “In process”.
- Process Defect App
Once clicked on tile “Process Defects”, system will show multiple filter option like Status, Category, Defect Code, Created On, etc. to filter the defects.
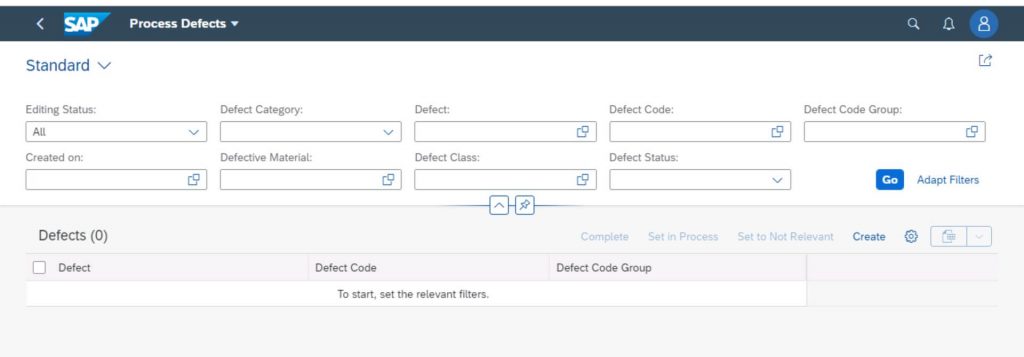
Provide necessary values in the filter if required & click on “Go” button or simply click on “Go” button. Once clicked, system will display the list of defects satisfying the criteria.
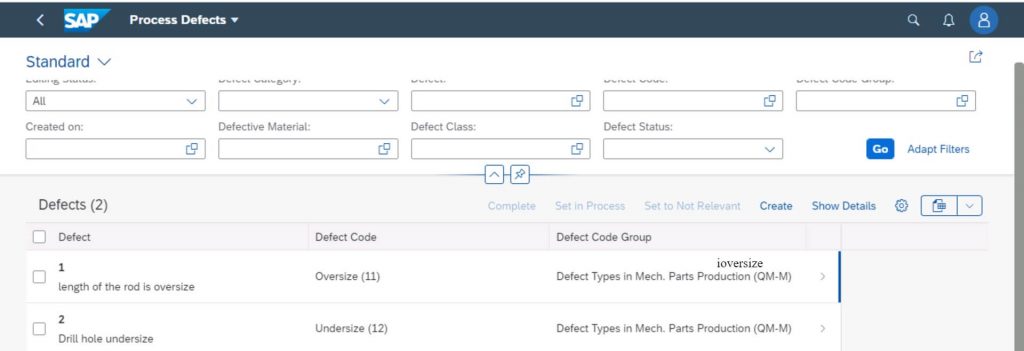
Click on the required defect to process it.
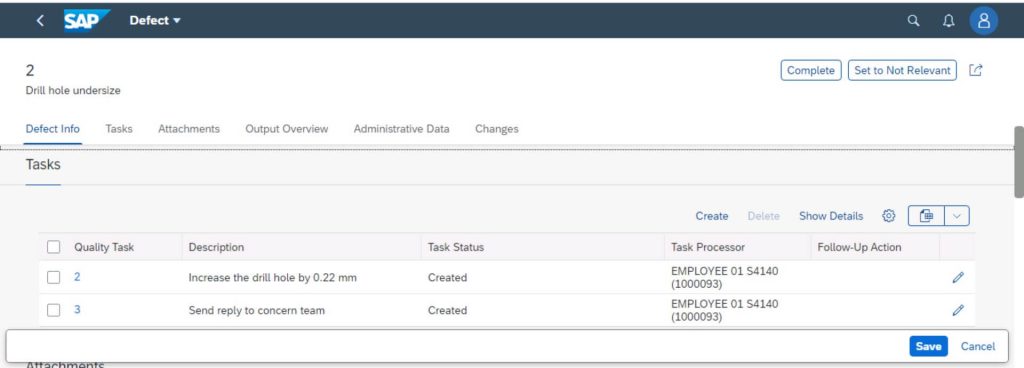
The tasks of defect can be processed from defect itself or app “Process Quality Task” can be used for the same.
Note:
It is always recommended to process the tasks from the app “Process Quality Task”, so that only authorized persons can process them. Also, usually task creator and processor are different, so the task processor will able to independently work on task without risk of modifying defect.
To process defect from Defect app, click on the Pencil icon in front of the task.
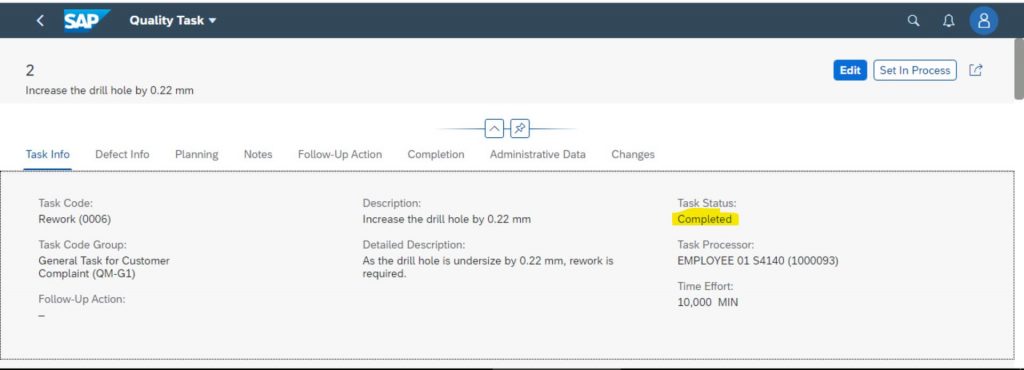
If required, provide the necessary notes under tab “Notes” & click on “Complete” button. Finally click on “Save” button. This will update the task status as “Completed”.
Do the same for all the task, as it’s mandatory to complete all the Task before closing the Defect.
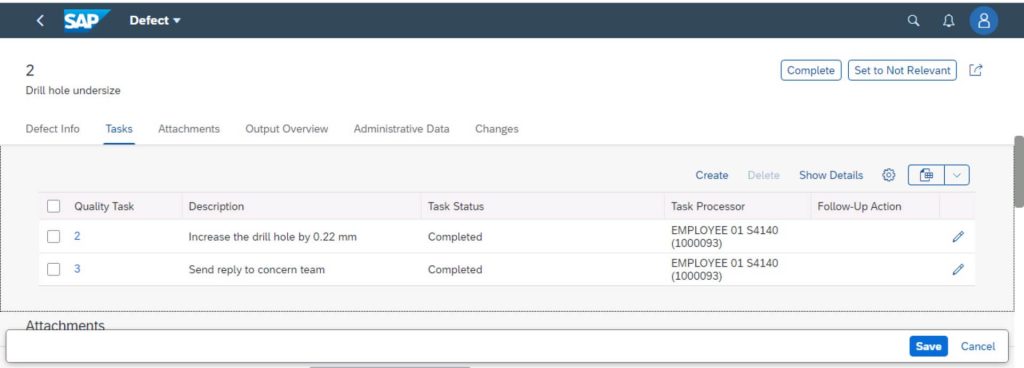
Once all the tasks are closed, click on “Complete” button to complete the task & click on “Save”.
- Manage Defect App
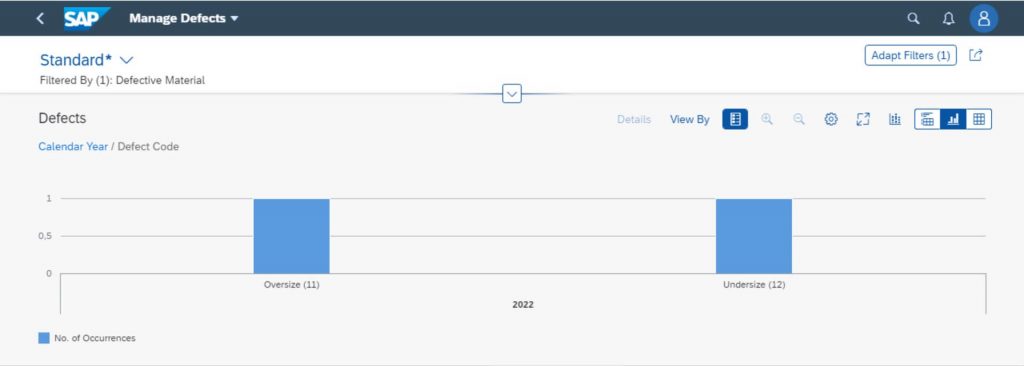
The purpose of this app is to get defect reports in different format. There are multiple options available to view the report.
The report can be seen Defect code wise, Supplier wise, Plant wise, etc. in different format like Pie Chart, Line Chart, Donut Chart, etc.
Please find below some of the combinations:
- Defect code wise Stacked Column Chart
- Defect code wise Pie Chart
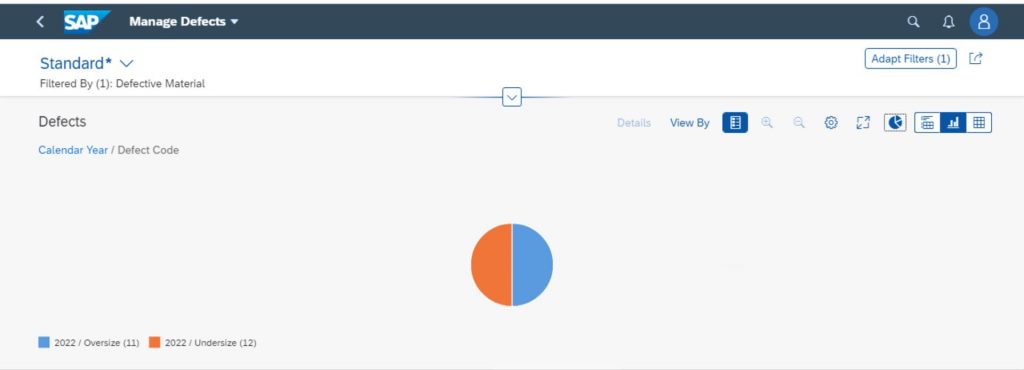
One can explore all the options by trying different combinations of “View by” & “Chart Type”.
Basic SAP Table Details for Defect
Although, the SAP has given new Fiori apps for Defect processing, the database tables used are existing only with modification in the field values.
Let’s have a look at some of the basic database tables used in the process.
- Defect Header
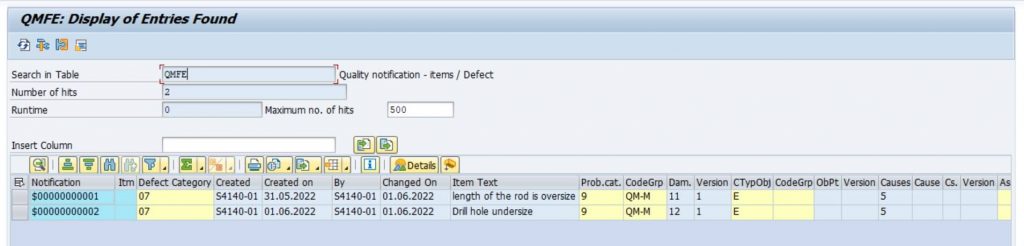
The data element used for Defect is “QMNUM” which is same for SAP Notification Number but with little difference. Here for defect, it is prefixed with “$” symbol e.g. if defect number is “1” in Fiori app, it will be saved in table as “$00000000001”. Defect category used here is “07” i.e. Production Defect.
QMFE is the table used to store Defect header details.
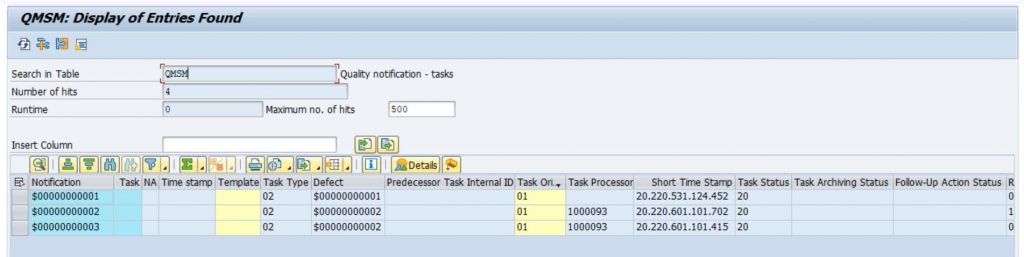
- Defect Task
The table used to store defect task is QMSM. For each task, system will create new sequential task number i.e. one task number cannot be seen in the two defects. Here also logic of “$” symbol is used to update the QMNUM field of table.
Link to Task & Defect is established with the help of field “DEFECTINTERNALID – Internal Defect ID”
In technical terms: QMFE-QMNUM = QMSM-DEFECTINTERNALID