With the not-so-recent advancement in technology, machine learning and AI are knocking on our doors, waiting to become a part of the applications we are building.
Today we will see how to integrate SAP’s Conversational AI (CAI) with SAP UI5. Following will be the highlights of this blog:
- Building intents and entities to train the chatbot
- Building a skill for the chatbot
- A bit of scripting on the chatbot
- Finally, connecting the chatbot to a UI5 page
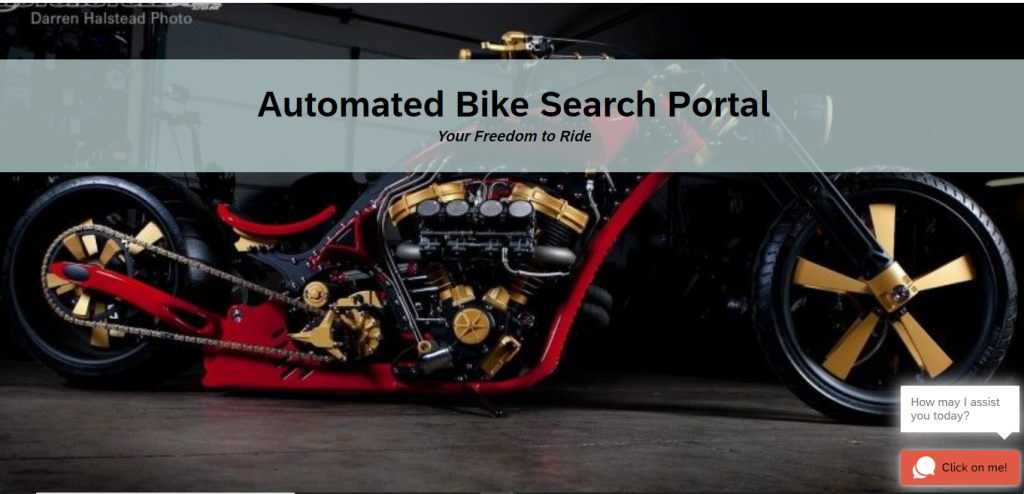
Before we get started, let us get a glimpse of the end product to make sure we are all on the same page.
What are we building?
The purpose of this application is to direct the user to the relevant URL/page based on their responses.
User directed to the relevant page based on his/her responses.
So now that we understand what we are building, let’s get started without further ado.
Create a new chatbot:
- Login to https://cai.tools.sap/
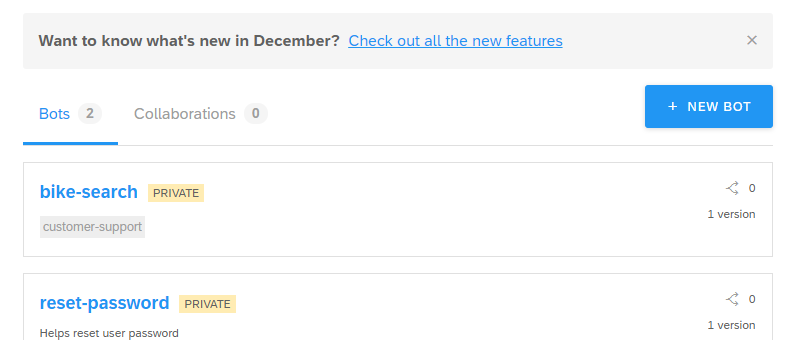
- Once you are logged in, you should be able to see the below page. I have a couple of bots already, but since we are creating a new bot click on the “+ New Bot” button to get started.
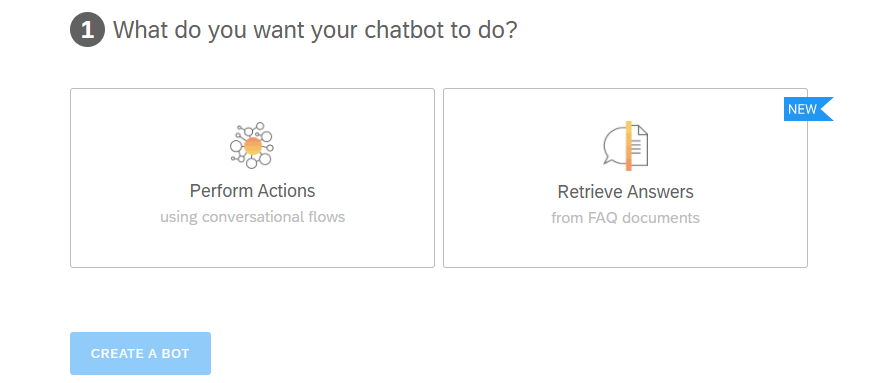
- Here we want our bot to perform certain actions based on user conversation, so select the first option and continue.
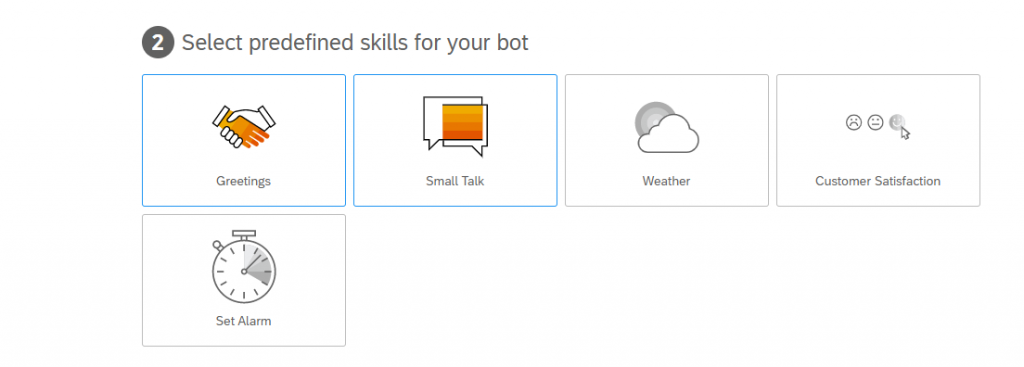
- Select the skills that you want your bot to possess by default. Here I have selected “Greetings” and “Small Talk”
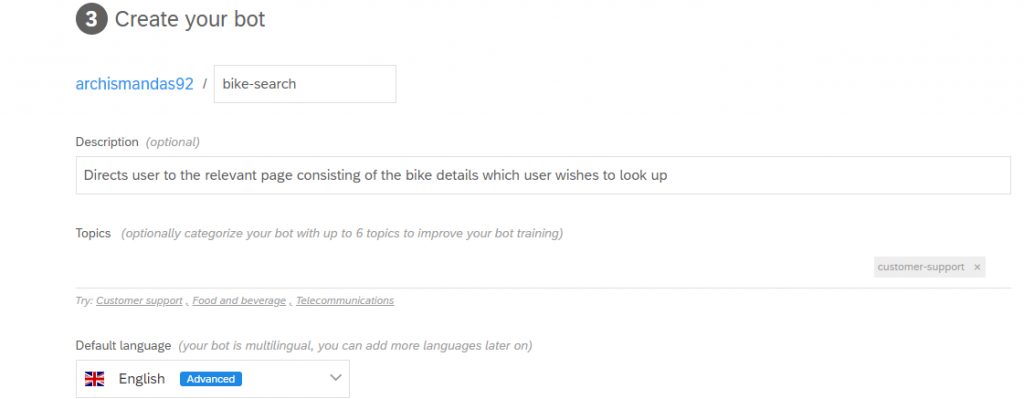
- Give your bot a meaningful name and description. Add topics/tags to your bot for better training performance. Here I have added “Customer Support”.
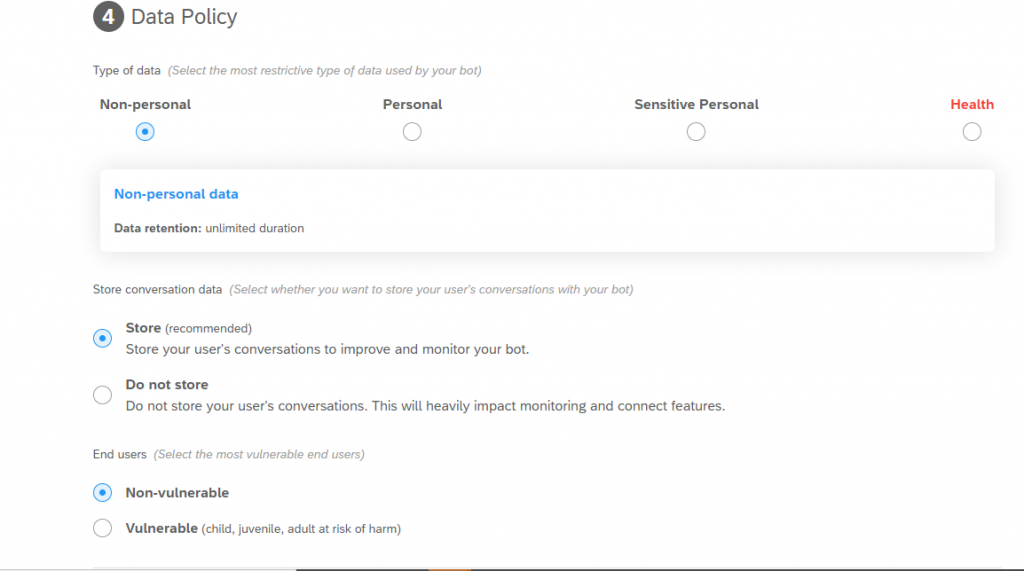
- Select the data policy settings as you see fit for your bot. Below are the settings for my bot.
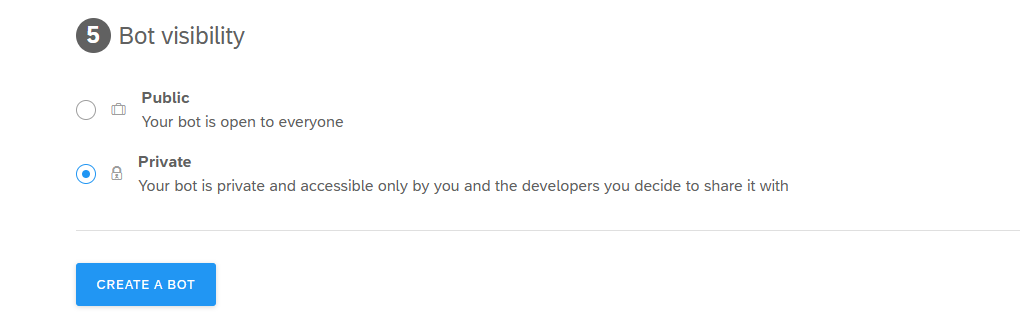
- Set the visibility for the bot and we are good to roll.
Training the Chatbot:
- Once the chatbot is created, do a few basic tests to check if our bot is functional with our predefined skills “Greetings” and “Small Talk”. You can do so by clicking on the “Chat Preview” option at the bottom right hand corner of the screen.
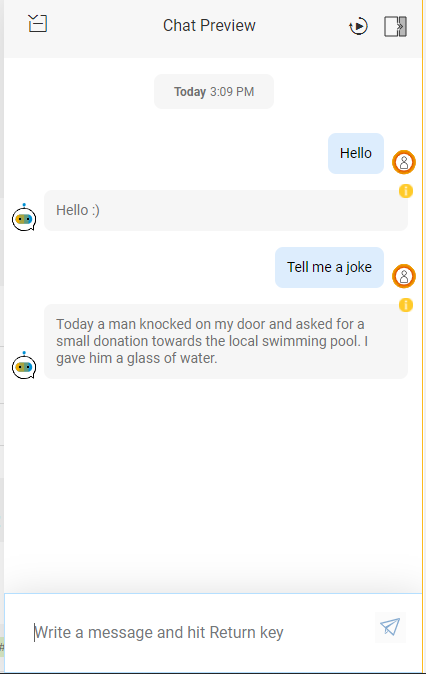
Great, now that our bot is functional let us go ahead and train it for our specific purpose.
- Under the Train tab you should already be able to see a few “intents” which are being used by our pre-defined skills. We will now create our own intent. Let us name it “start-search” as shown below.
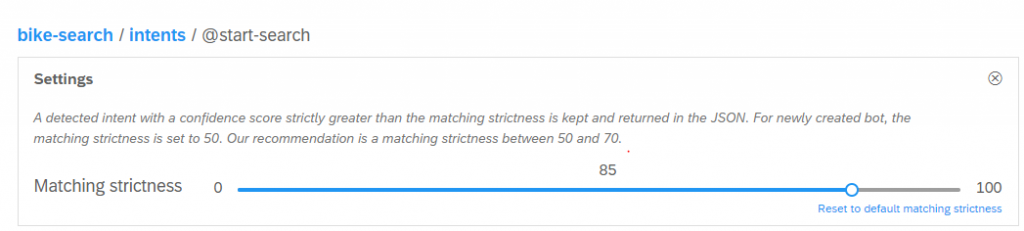
I have kept the matching strictness to 85. So only if my model has a confidence of 85% or more that what the user said matches this intent, only then this intent is selected. Else it will try to find out another intent with a better matching score. I will come back to this concept later again. Below are the expressions within my intent.
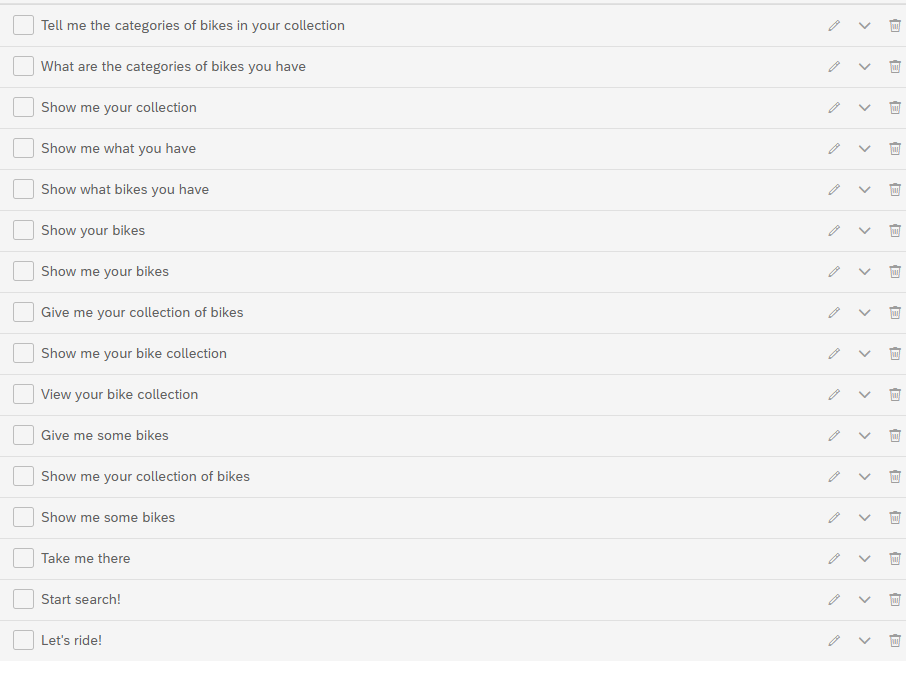
Natural Language Processing is a fairly difficult algorithm to train due to the large volume of dataset required to accurately train the model. So a word of caution, please do not expect your model to work if you are not providing enough expressions to help the model “learn”. To further elucidate this point, suppose you are giving just one expression “Show me your bikes” and in the chatbot you use the exact same words, you will see that the chatbot has a very low confidence score (maybe 15%) that you are trying to invoke this intent. It may then trigger the “small-talk” intent as it has higher confidence in that.
An intent on its own is pretty much useless. We need to use this intent to trigger a skill. So let us go ahead and do that.
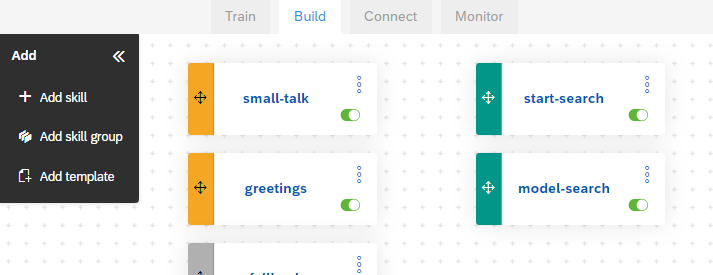
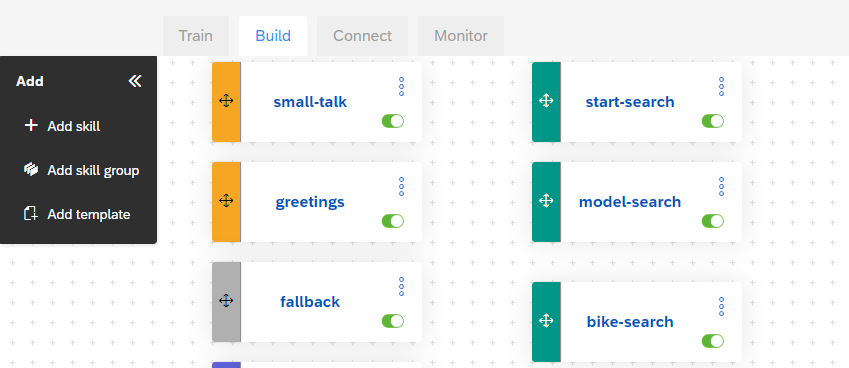
Creating a skill:
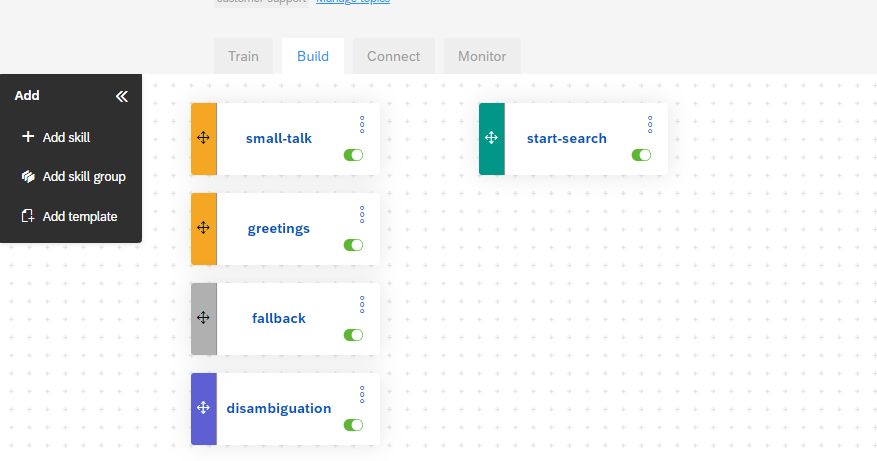
- Go to the Build tab and click on Add Skill. I have named my skill “start-search” as shown below.
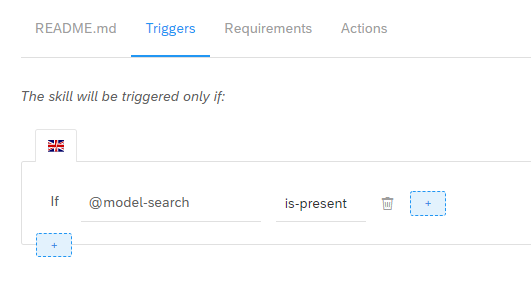
- Click on the skill to configure it. Under the Triggers tab, set the condition that will trigger the skill.
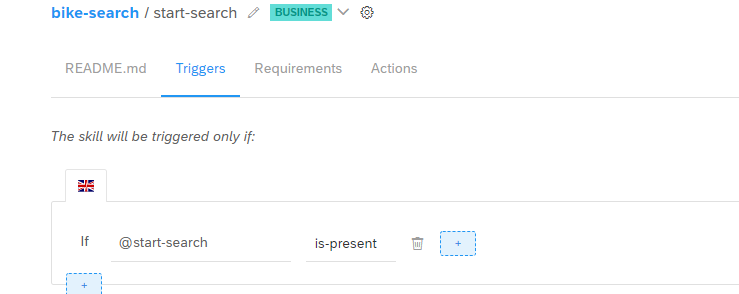
“@start-search” is the intent we had configured above. To put the above condition in a more verbose manner – if my model has a confidence of >=85%(based on our matching strictness before) that we are talking about matches this intent, only then my start-search skill will get triggered.
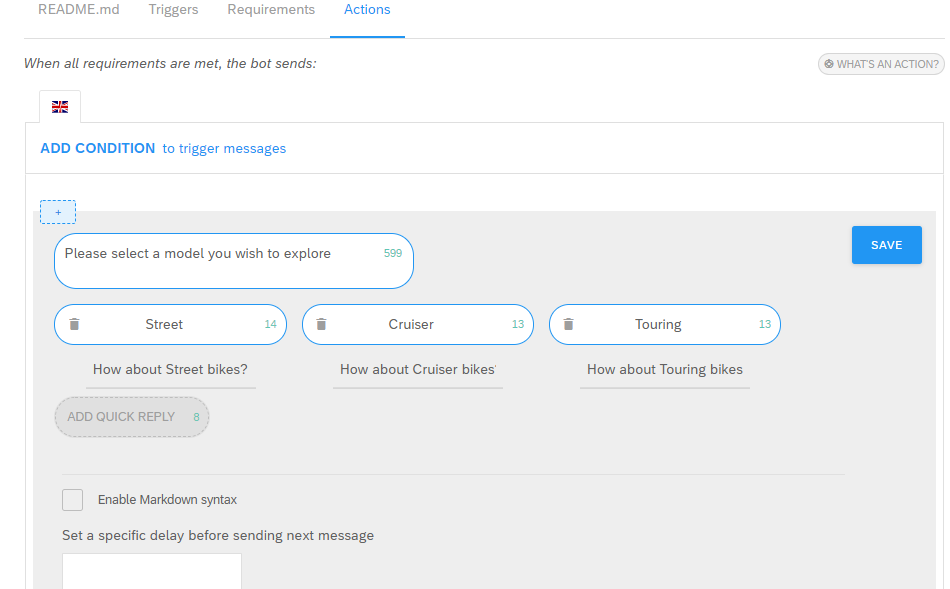
- Now let us configure the Actions once our skill is triggered. Below I have used the “Quick Reply” option. You may use the other options available such as Simple Text, Cards, Button, etc.
Now let us test if whatever we have done till now is working fine using the Chat Preview option.
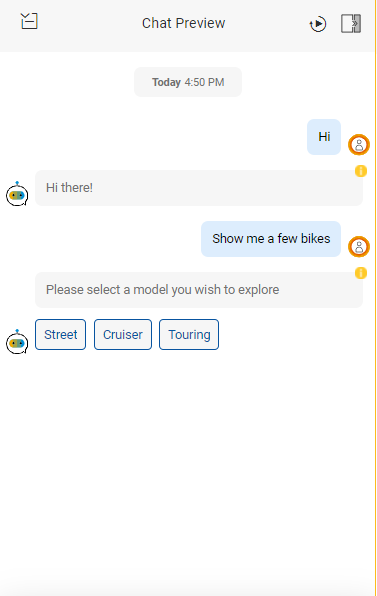
Voila, it works! Now if you see closely at my screenshots containing my expressions, it does not contain the exact ” Show me a few bikes”. This is exactly the power of machine learning.
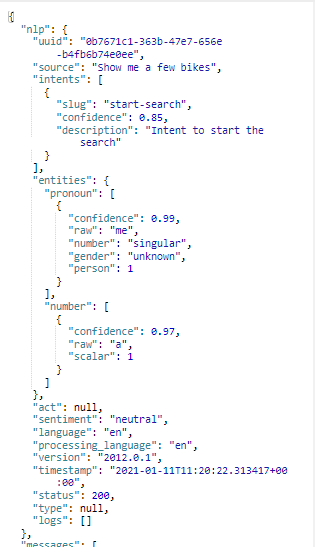
If you click on the yellow exclamation mark beside “Please select a model you wish to explore” you will be able to see the entire JSON data containing useful information such as which intent was triggered, with how much confidence, etc. This is the confidence we had spoken of earlier.
Creating new Entity:
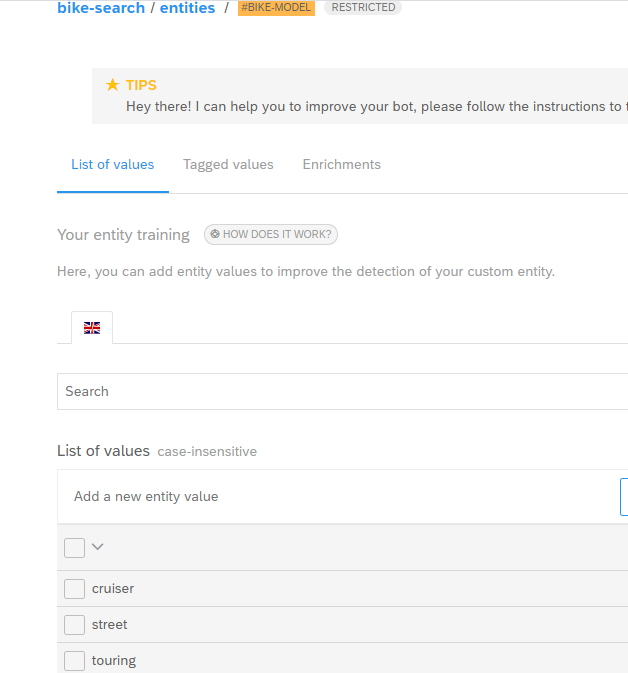
- Before we move on to creating our new skill, let us create an entity. An entity is basically a tag which will be used detect values or sub-expressions within our intent. These can later be used for scripting purposes. Below I have created an entity #bike-model consisting of 3 values (Cruiser, Touring, Street) corresponding to the 3 bike model names.
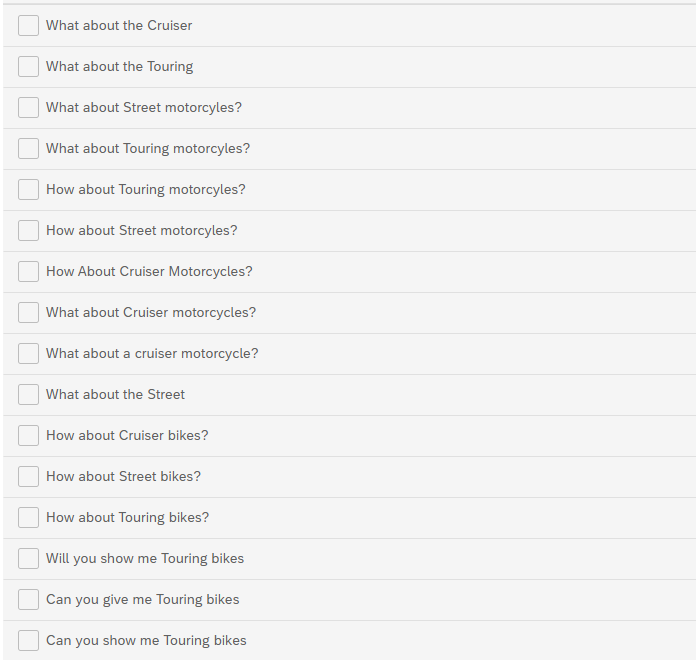
Now go ahead and create a new intent @model-search. Below are the expressions in my intent.
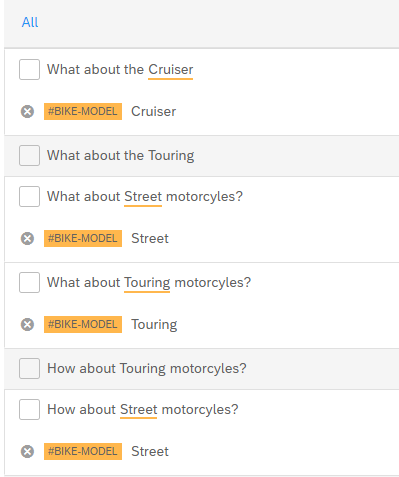
If you expand any of the above expressions, you will notice that the #bike-model entity that we created earlier has been tagged appropriately.
Now let us go ahead and build the skill model-search.
Similar to start-search skill, add a trigger expression.
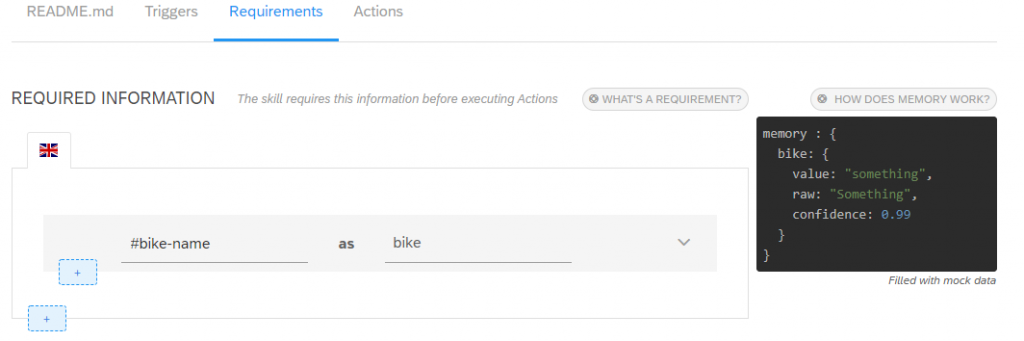
Unlike our previous skill start-search, we will be adding a requirement here as shown below. The requirement ensures that the skill will only be triggered if the requirement is satisfied.
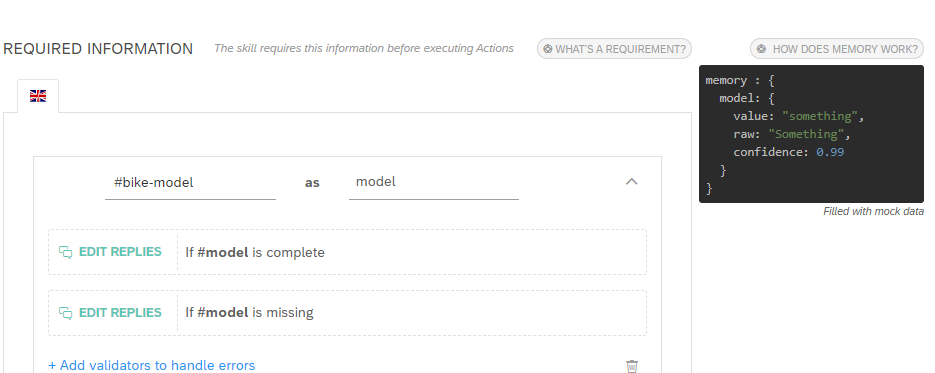
So when we have to refer the model name in the intent for scripting, we can access it by {{memory.model.value}}. Refer to the JSON structure in the above snapshot.
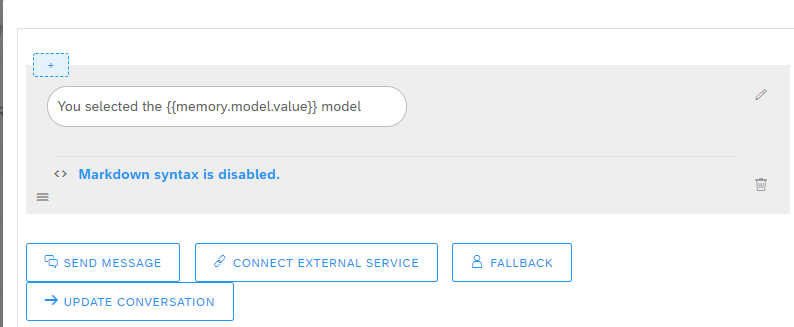
If the requirement is satisfied, we will display a message “You selected the <model name> model” and further actions under the Action tab will be triggered.
If requirement is not satisfied, we will simply display a message that the model name is missing and no further action is triggered.
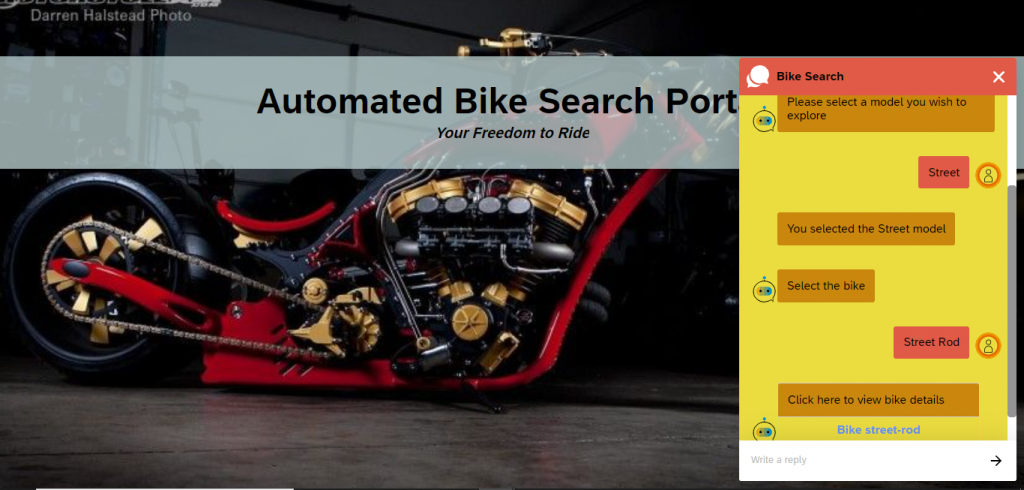
Based on the bike model entity detected, we will display quick replies with the respective bike names which fall under that particular model.

Let us test now if it works till this point.

Works like a charm! Our trained model was successfully able to detect the entity “street” and provide the corresponding bikes as options to be selected by the user.
Now the final part of our chatbot is to create a skill that would provide a URL to the user corresponding to the bike that he selects. Let us get going.
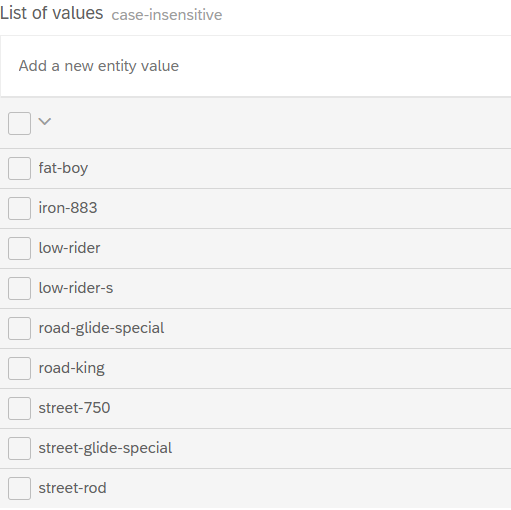
Create a new entity #bike-name that will consist of the bike names which will be tagged in our expressions.
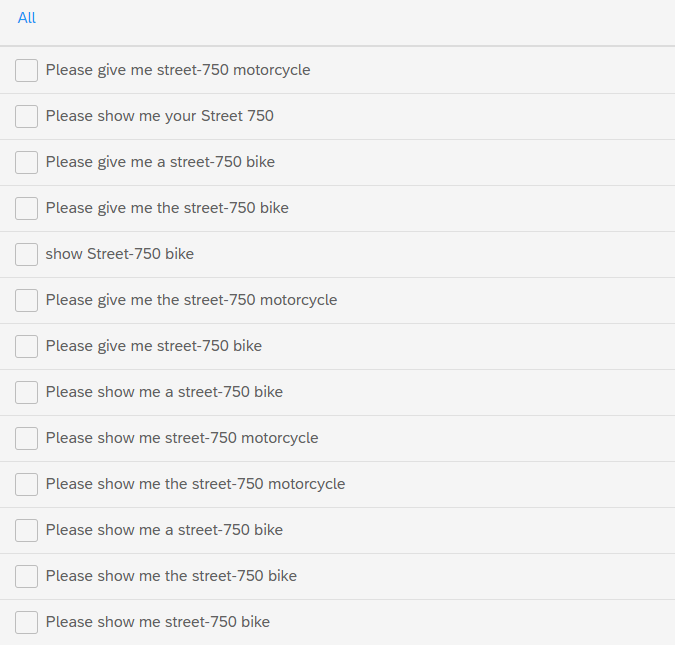
Create our final intent for this chatbot @bike-search. Here I have just provided Street-750 in all my expressions in my intent. I wanted to test if the model is able to learn and understand the rest of the bike names as well and tag them automatically during live conversation.
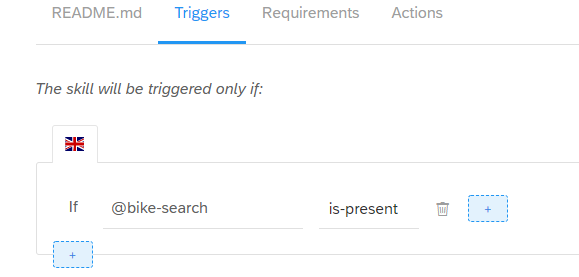
Now let us build the skill which will use this intent.
Add the trigger condition to the above skill as we have done for the other 2.
Similar to previous skill, here we will put the bike name as a requirement as shown below.
If above requirement is satisfied, execute the below action:
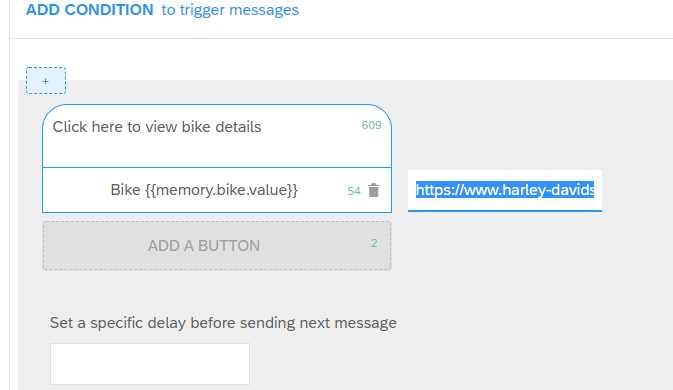
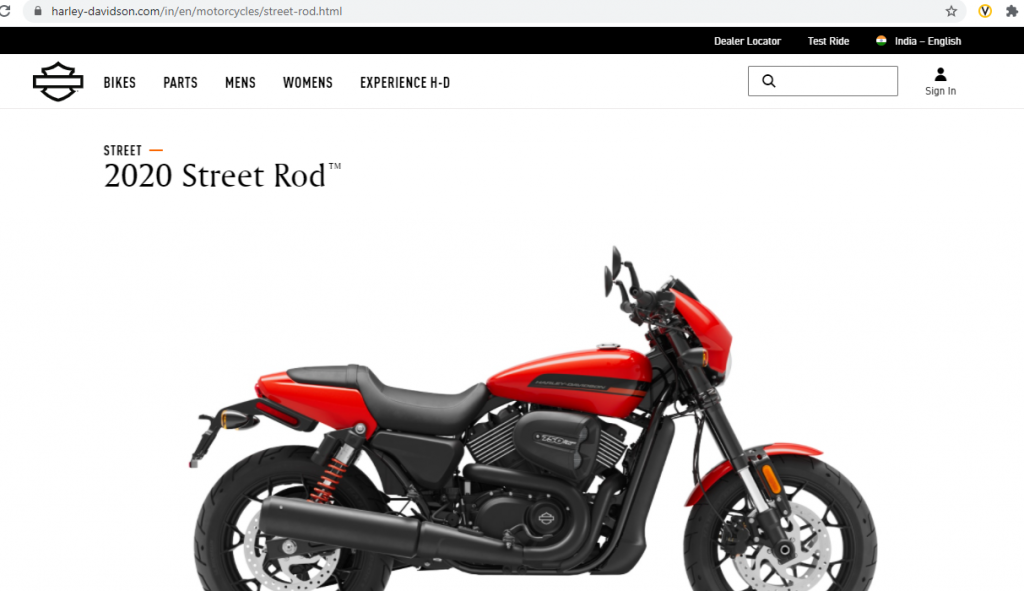
The highlighted URL linked to the button is –> https://www.harley-davidson.com/in/en/motorcycles/{{memory.bike.value}}.html
And once we provide the URL to user, we will need to reset the memory object as shown below, so that in the next iteration our model will not hold on to the previous values.

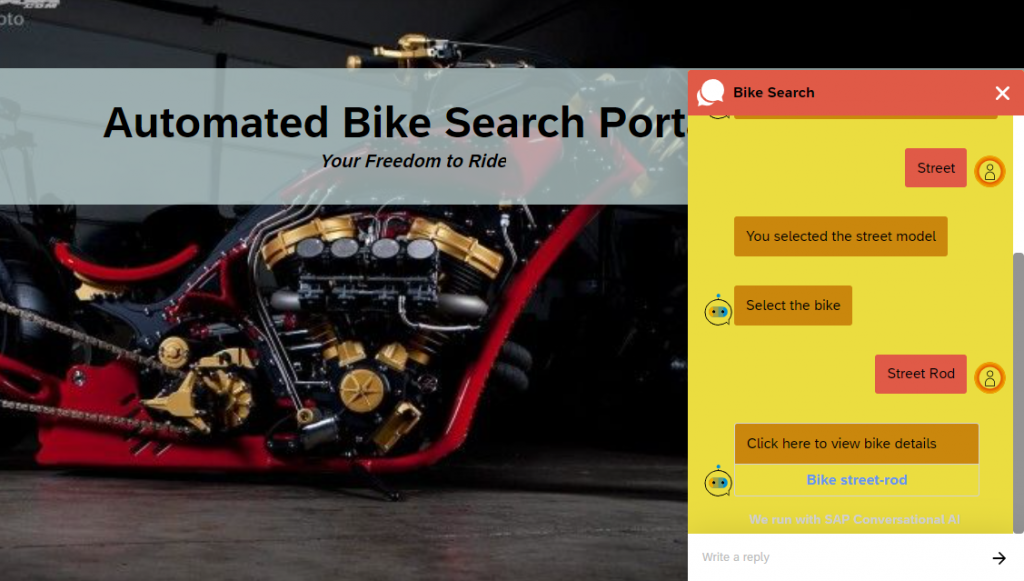
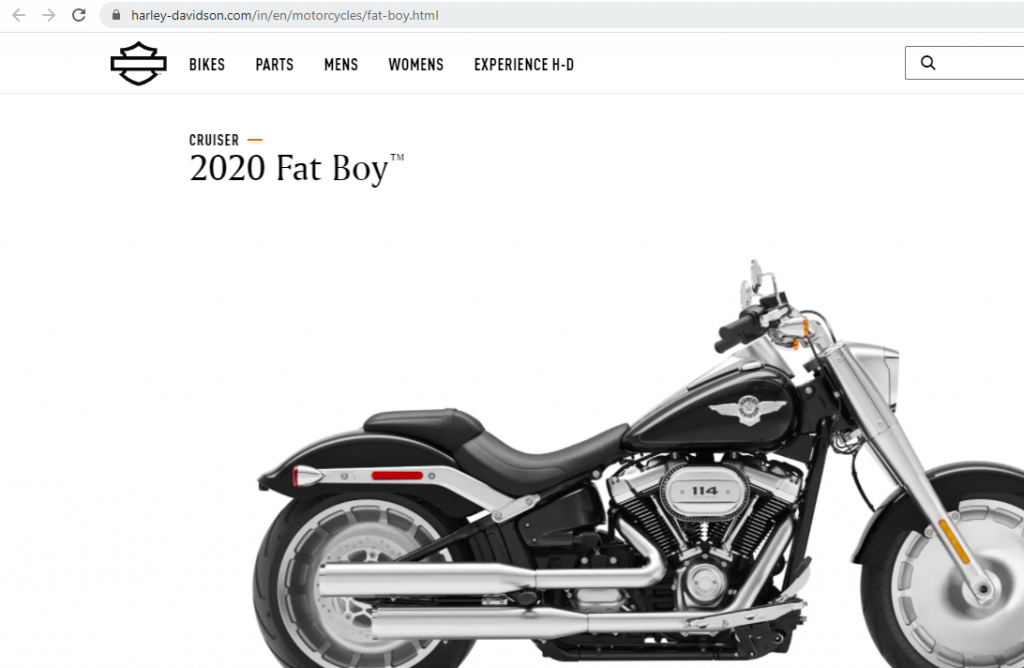
Let us now test this and see if it works with our limited number of expressions in our intent.

Works perfectly! So our model was able to “learn” and tag the other bike names (here Fat Boy) based off our entity #bike-name even though our expressions consisted of only Street-750. Once you click on the above link, you will be redirected to the corresponding page.
Phew, just one last bit of the puzzle remaining. How do we integrate this with UI5 or any HTML page for that matter ?
Integrating with UI5/HTML5:
Under the Connect Tab, click on the Webchat option.
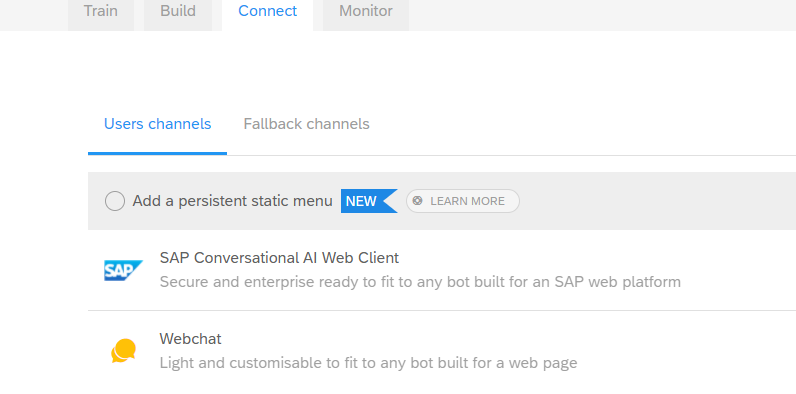
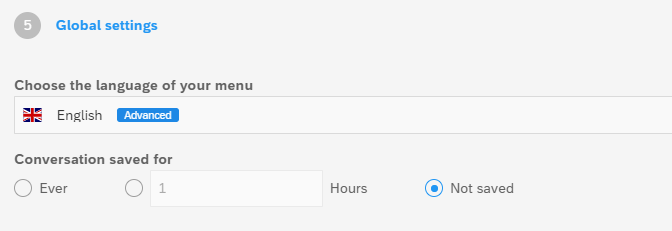
Adjust the various settings like color scheme, message settings, global settings and make a note of the script tag.

One minor bug that I found with this application was that even though I was selecting Conversation “Not Saved” in the global settings, my chat window was holding on to the previous chat even after refreshing the browser tab. To overcome this, first select “Ever” and save and then change to to “Not Saved” and save the settings again.
If you are looking to embed this in your HTML page, then just copy paste the above script in the body of your html and it will work fine.
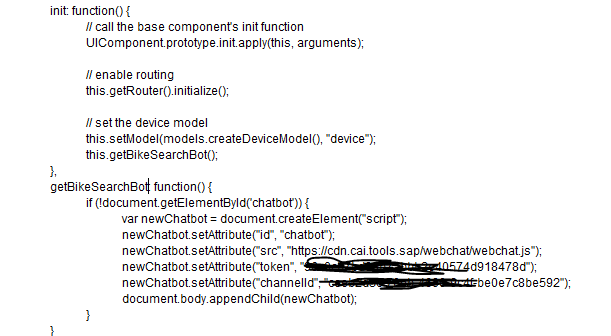
However, we know that in UI5, the Views get loaded after Index.html. So if we put the script tag in our Index.html file, we will see the chat bot loaded much earlier than our application actually gets loaded on screen. For this reason we will dynamically add the script tag in our Component.js file as shown below:
Now load your application. You should be able to see your chatbot appearing as below:
Go ahead and test the chatbot. You should be getting the same results.