Introduction
Recording Tool is used to store the Technical Address Entries for UI fields. It is used to activate recording for one or more users for specific timeframes. During this time, the system will record the technical addresses of the UI fields that the user accesses. It is used to track the users who have accessed certain fields that are configured. It is also used to delete the recorded entries.
This report can be used to activate and deactivate the user for storing the technical address for UI fields and to view the information that has been recorded in this way. This report can also be used to map logical attributes to UI fields.
Prerequisite
Product “UI data protection masking for SAP S/4HANA” is used in this scenario to protect sensitive data at field level and must be installed in the S/4HANA system.
The product is a cross-application product which can be used to mask/protect any field in SAP GUI, SAPUI5/SAP Fiori, CRM Web Client UI, Web Dynpro ABAP, and Embedded Analytics.
Requirement
To mask the fields in Analytical Queries, Technical Information (InfoProvider-Query-InfoObject) is required but due to some technical limitation “F1” is not working for Analytical Queries.
In this scenario “Recording Tool for UI Fields” feature will help user to find technical address for UI Masking. This report logs/records User Trace, InfoProvider-Query-InfoObject, Field Value and other metadata information that helps users to find Technical Address for masking.
Even after running the Recording Tool, if you do not see the InfoProvider-Query-InfoObject information of the field that you want to mask in the query result then it is not possible to mask that field technically because of technical limitation.
How to use Recording Tool for Technical Address?
User should be activated for recording then he needs to execute the query for which masking is required. Then, after successful execution of query user can view InfoProvider-Query-InfoObject and other metadata information.
Let’s begin
Execute the Recording Tool Transaction
- Execute T-Code “/N/UISM/TTRACE”. “Recording Tool for UI Fields” screen will be displayed.

- Enable Recording – Click on “Global Enable” button to activate recording at Global Level.

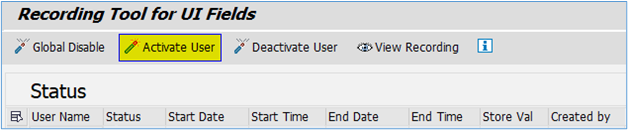
Activate User
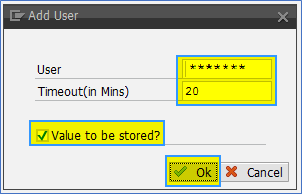
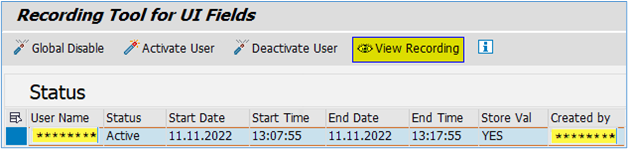
- Click on “Activate User” button to activate recording for the user. Provide the “Username”, “Timeout Period in minutes” and check “Value to be stored?” check-box and click on “OK” button.
- User: User for which store the technical address for UI fields entries.
- Timeout (in Mins): User activation timeout period in minutes.
- Value to be stored: Need to store the value or not.
- User: User for which store the technical address for UI fields entries.
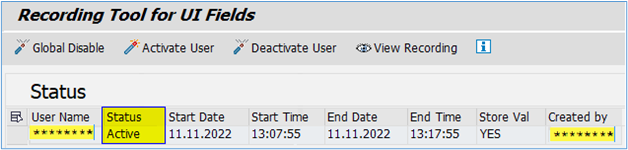
- Recording will get activated for the user and “Status” will change to “Active”
Launch the application
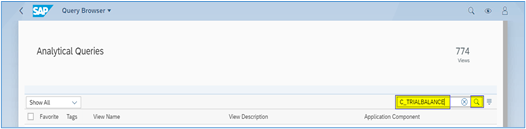
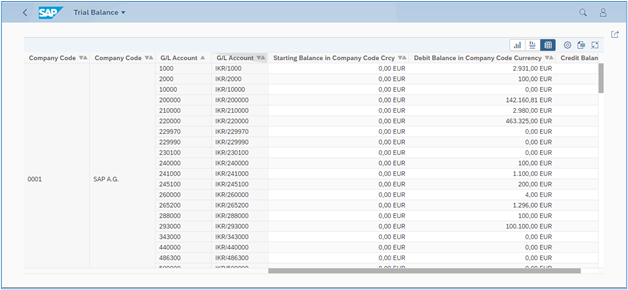
Once Recording for the user is activated, execute the Analytical Query using Query Browser application for which Technical Address need to be captured. In this blog post, we are taking example of “C_TRIALBALANCE” Analytical Query.
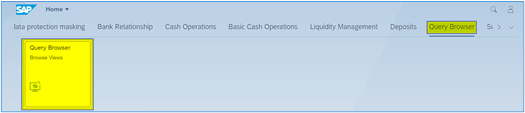
- Click on the “Query Browser” app tile to launch the application
- Enter “C_TRIALBALANCE” in Search field and click on “Search” button
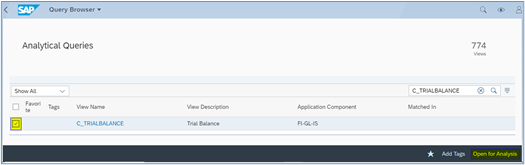
- Select the checkbox and click on “Open for Analysis” button
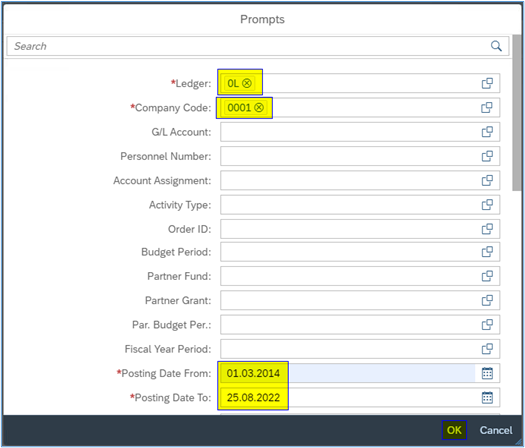
- Enter highlighted search criteria in the corresponding fields and click on “OK” button
- Query Result will be displayed
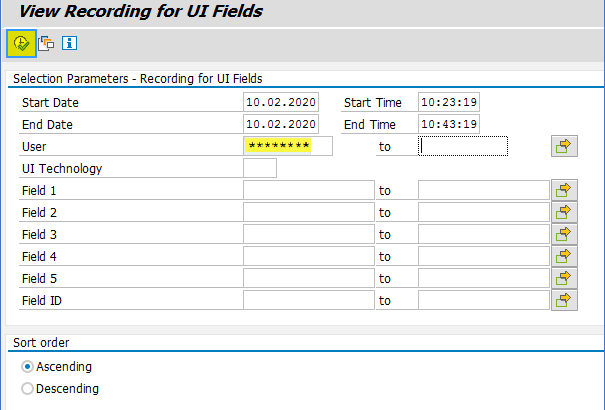
View Recording Data
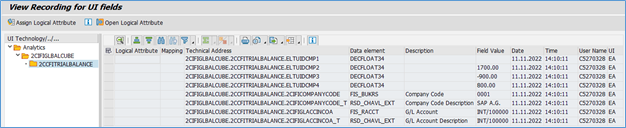
- Select the User for which you want to view the Recording Data and click on “View Recording” button
- Provide the Selection Criteria to view the Recording Data and click on “Execute” button

- View Recording Data based on the Channel (GUI, GUI Dynpro, Web Dynpro, Web Client UI, UI5, Analytics). Based on the selection criteria, the system displays a list of entries
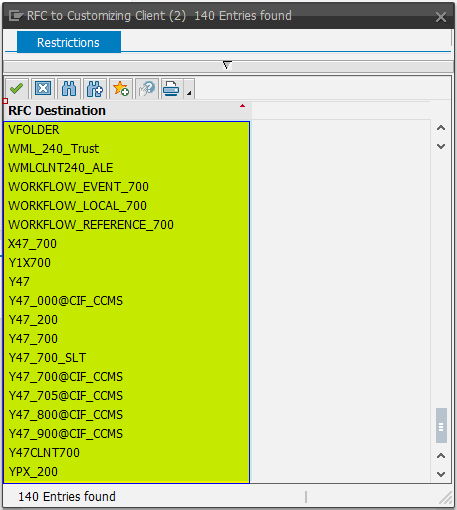
- Click on menu “RFC Destination” and then click on “Maintain RFC to Customizing Client” option
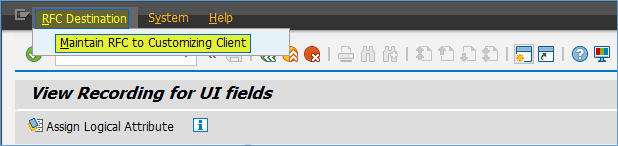
- Select the “RFC to Cust Client” value from the list which will be available by pressing “F4” on the field
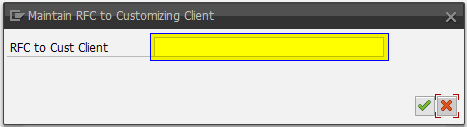
“RFC to Cust Client” field value must be specified. This field expects the “RFC Destination of the Customizing Client”. This RFC will be used by UI Data protection masking Recording Tool Application to maintain Masking Configuration in Customizing system. The Logical Attributes maintained in this client will be visible in simulation view report.
Assign Logical Attribute
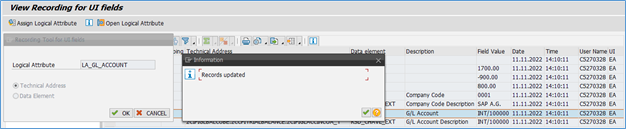
- Select the entry for which you want to configure the Logical Attribute and click on “Assign Logical Attribute” button.

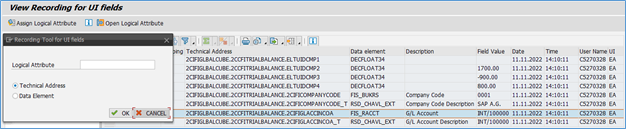
- Enter Logical Attribute name and select one of the options (i.e., Technical Address or Data Element) based on which you want to configure the Logical Attribute and click on “OK” button
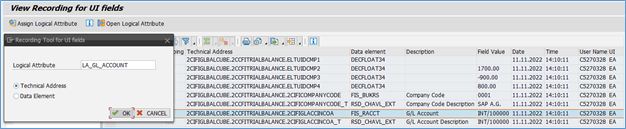
- Success message will be shown if Logical Attribute is successfully assigned and assigned Logical Attribute will be displayed next to the Field ID on which it has been assigned
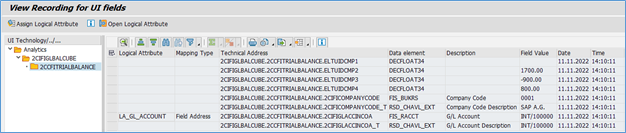
- Also, mapping of Logical Attribute with Technical Address can also be seen in “Analytics Technical Address” section under “Maintain Analytics Technical Address”.


