Introduction:
In this blog post you will learn about the two-step picking process in SAP EWM. There are some warehouses set up where the goods will be stored in an intermediate floor (i.e., Mezzanine Floor) or high racks. In such cases, picking a product from an intermediate floor to the respective staging bay for every outbound delivery leading to unnecessary and redundant movement.
To overcome the redundancies, 2 step picking can be implemented in these types of warehouses. This enables better optimization of the picking process by collectively picking products from an intermediate floor to ground floor for multiple deliveries in the first step known as “Withdrawal Step”. This is followed by picking up of products to the respective outbound deliveries known as “Allocation/ Subdivision step. Hence, two warehouse tasks will be created to perform this 2 Step picking.
Solution Approach:
The below mentioned configuration steps can be employed to achieve this functionality:
- In case of 2-step picking, we need two warehouse tasks to be created (i.e., one is for withdrawal step and the other is for allocation step). It is required to define a warehouse process type for every of the warehouse task creation.
Create warehouse process type for both the withdrawal and allocation step using the below mentioned node:
IMG Path – SPRO -> IMG -> SCM Extended Warehouse Management -> Extended Warehouse Management -> Cross-Process Settings -> Warehouse Task -> Define Warehouse Process Type.
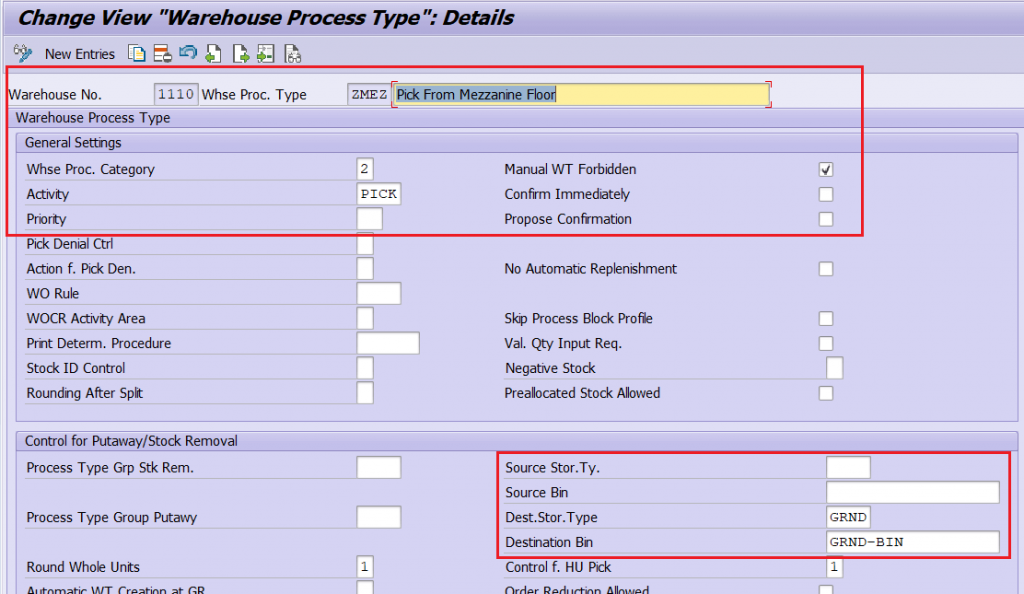
Withdrawal step: warehouse Process Type-ZMEZ (To move Goods from Mezzanine to Ground Floor)
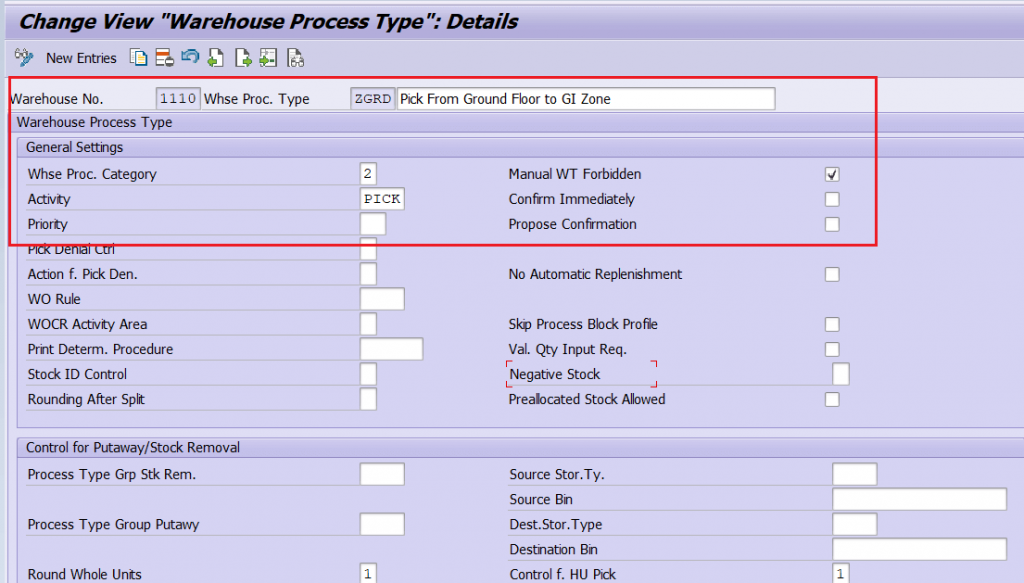
Allocation step: warehouse Process Type-ZGRD (To move Goods from Ground Floor to Goods issue Zone)
- In the outbound delivery, the allocation step of the warehouse process type (i.e., the one which is moving the stock from Ground floor to GI zone) should be assigned to the delivery item level. To determine this warehouse process type, a control indicator should be defined and assigned to the respective warehouse process type.
Finally, this control indicators will be mapped to the warehouse product master, so that respective warehouse process type will be determined during the delivery creation.
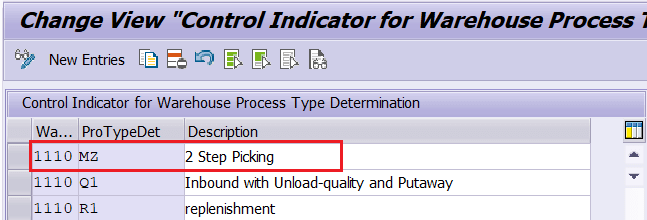
Create control indicators using the below mentioned node:
IMG Path – SPRO -> IMG -> SCM Extended Warehouse Management -> Extended Warehouse Management -> Cross-Process Settings -> Warehouse Task -> Define Control Indicators for Determining Warehouse Process Types.
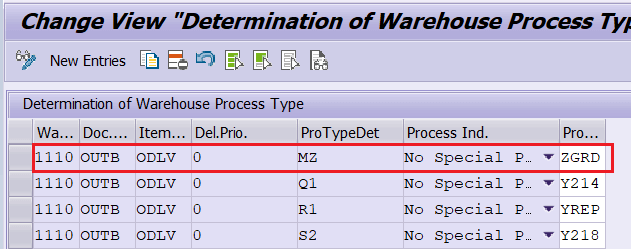
Assign this control indicator to the respective Document type, item type and warehouse process type using the below mentioned node:
IMG Path – SPRO -> IMG -> SCM Extended Warehouse Management -> Extended Warehouse Management -> Cross-Process Settings -> Warehouse Task -> Determine Warehouse Process Type.
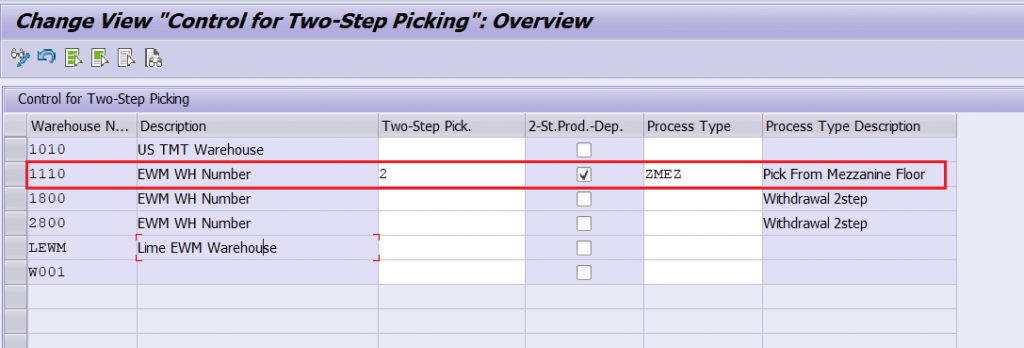
- Enable the 2-Step picking for the respective warehouse. Additionally, maintain the two-step picking product dependent and assign the warehouse process type of withdrawal step (ZMEZ).
The above-mentioned activations can be performed using the below mentioned node:
IMG Path – SPRO -> IMG -> SCM Extended Warehouse Management -> Extended Warehouse Management -> Goods Issue Process -> Wave Management -> General Settings -> Set Up Two-Step Picking.
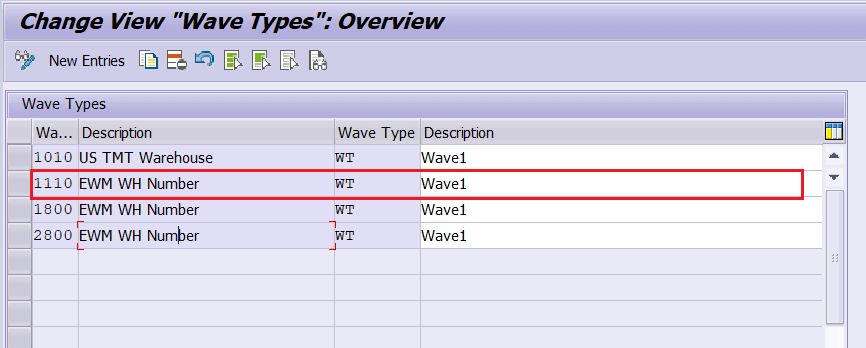
- Create the Wave Type using the below mentioned node:
IMG Path – SPRO -> IMG -> SCM Extended Warehouse Management -> Extended Warehouse Management -> Goods Issue Process -> Wave Management -> General Settings -> Maintain Wave Types
- Create the Wave Categories using the below mentioned node:
IMG Path – SPRO -> IMG -> SCM Extended Warehouse Management -> Extended Warehouse Management -> Goods Issue Process -> Wave Management -> General Settings -> Maintain Wave Categories.

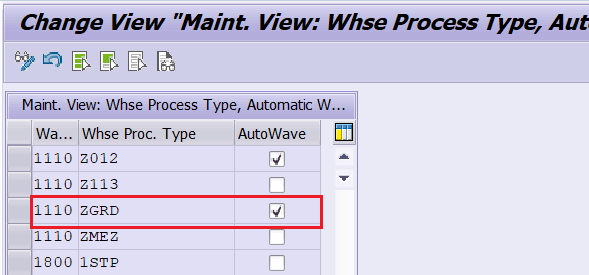
- Wave assignment can be done either manually or automatically, but in case we will be doing automatic wave assignment. To perform the automatic wave assignment, enable the automatic wave creation checkbox for the allocation step warehouse process type: ZGRD using the below mentioned node:
IMG Path – SPRO -> IMG -> SCM Extended Warehouse Management -> Extended Warehouse Management -> Goods Issue Process -> Wave Management -> General Settings -> Set Automatic Wave Generation for Warehouse Process Type.
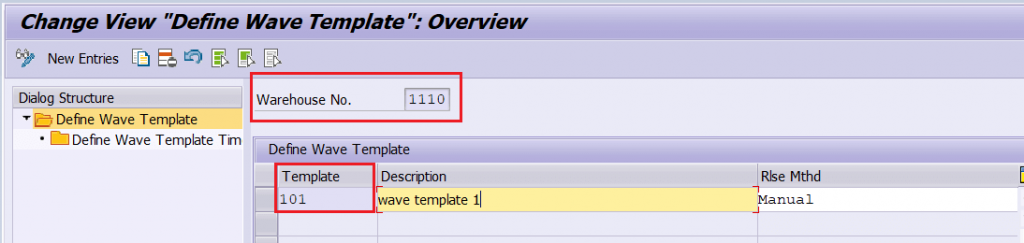
- Create a wave template using the t-code: /SCWM/WAVETMP.
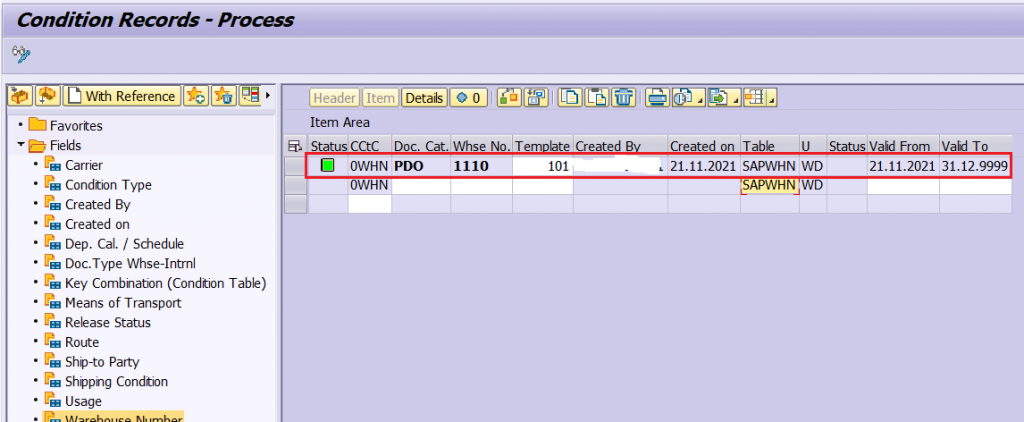
- To assign the wave automatically, we need to maintain the condition record using the t-code: /SCWM/WDGCM.
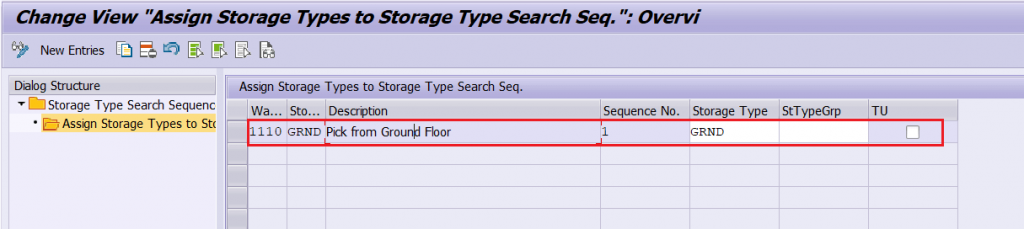
- Create a storage type search type search sequence for both the withdrawal and allocation step using the below mentioned node:
IMG Path – SPRO -> IMG -> SCM Extended Warehouse Management -> Extended Warehouse Management -> Goods Issue Process -> Strategies -> Specify Storage Type Search Sequence
For withdrawal step: To pick goods from Mezzanine floor.
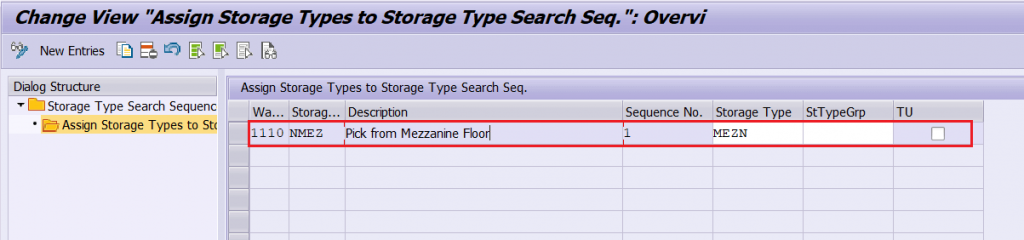
For allocation Step: To pick goods from Ground floor.
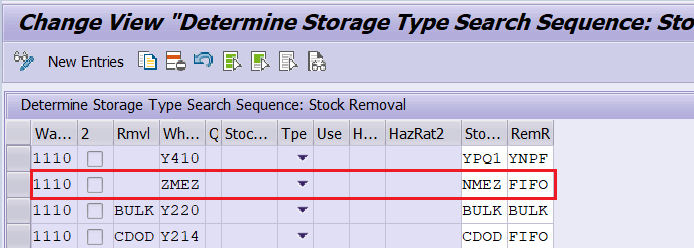
- Maintain the determination of storage type search sequence for both the steps using the below mentioned node:
IMG Path – SPRO -> IMG -> SCM Extended Warehouse Management -> Extended Warehouse Management -> Goods Issue Process -> Strategies -> Determine Storage Type Search Sequence for Stock Removal.
For withdrawal Step:
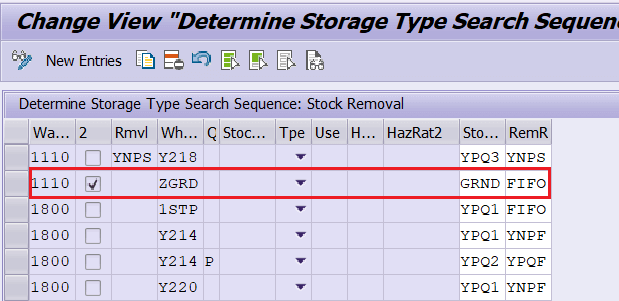
For allocation step:
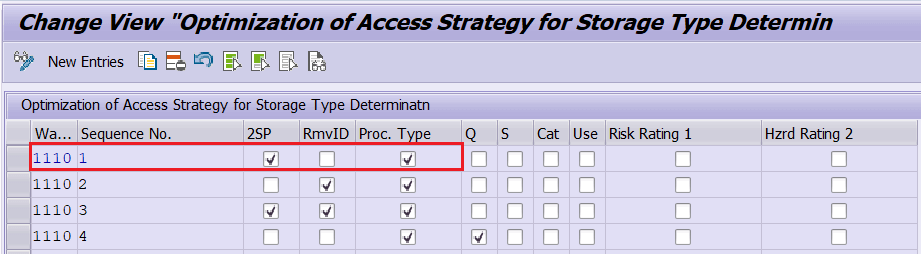
- Maintain the access strategy for Storage type determination in stock removal using the below mentioned node:
IMG Path – SPRO -> IMG -> SCM Extended Warehouse Management -> Extended Warehouse Management -> Goods Issue Process -> Strategies -> Optimization of Access Strategies for stor.type determination in Stck Rmvl.
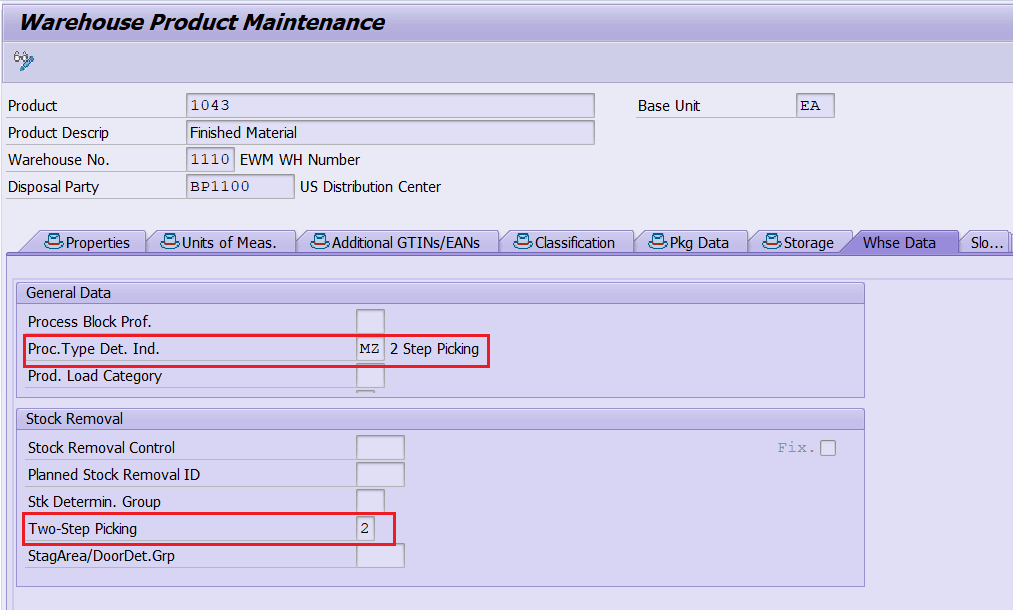
- Finally, the warehouse product master will be maintained with process type determination indicator and 2-step picking relevance indicator using the t-code:/SCWM/MAT1.
Testing:
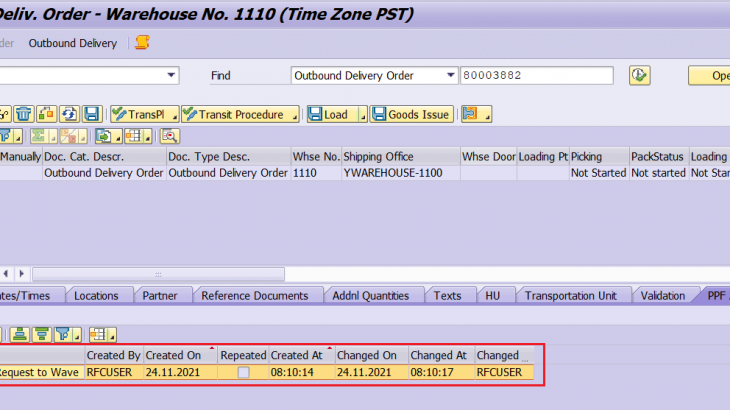
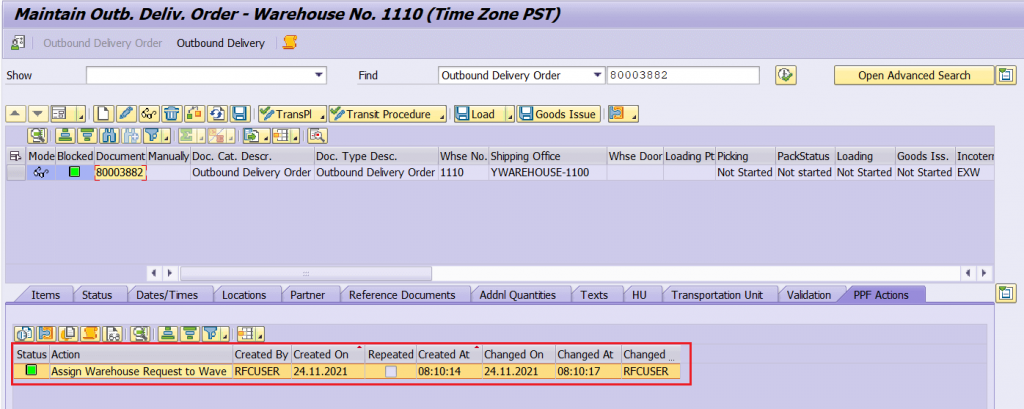
- Delivery is created & wave is assigned automatically by PPF trigger.
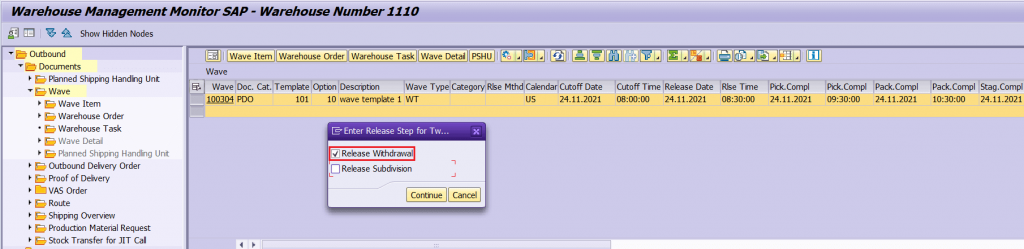
- In the monitor screen, by clicking on this Release Wave button, a pop up will be displayed with 2 options. Continue further by clicking on “Release Withdrawal” checkbox.
Monitor screen can be reached using the t-code:/SCWM/MON.

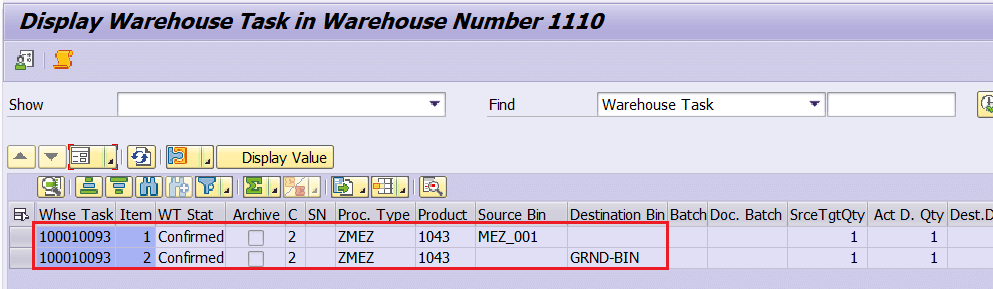
- By clicking the “Release withdrawal”, a warehouse order will be created to move the stock from Mezzanine floor to Ground Floor”.

- Confirm the Warehouse order using RF so that the stock is moved to the ground floor.
- In the monitor screen, by clicking on this Release Wave button, a pop up will be displayed with 2 options. Continue further by clicking on “Release Subdivision” checkbox.

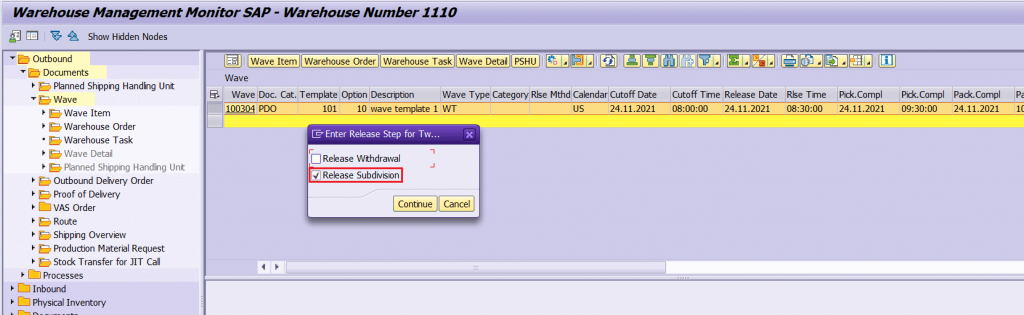
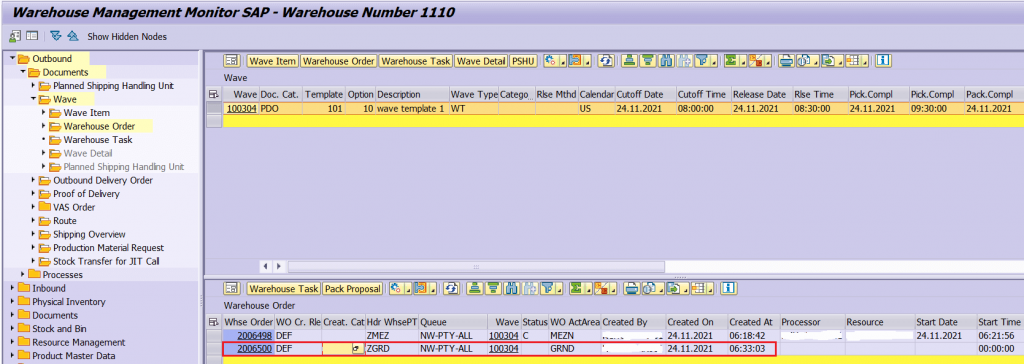
- By clicking the “Release Subdivision”, a warehouse order will be created to move the stock from Ground floor to Goods issue zone”.
- Confirm the Warehouse order using RF so that the stock is moved to the Good issue zone.
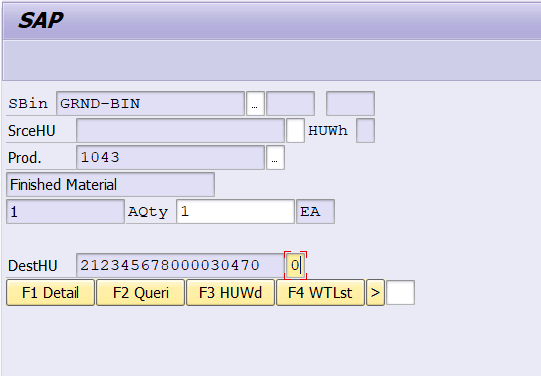
Login to the RF and follow the path-> Outbound Processes-> Picking-> Picking by WO and scan the WO.
Scanning the source & Destination information.
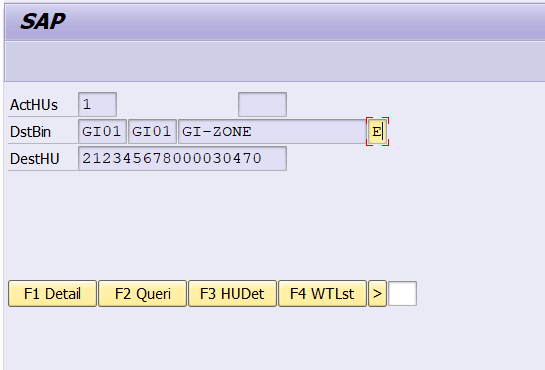
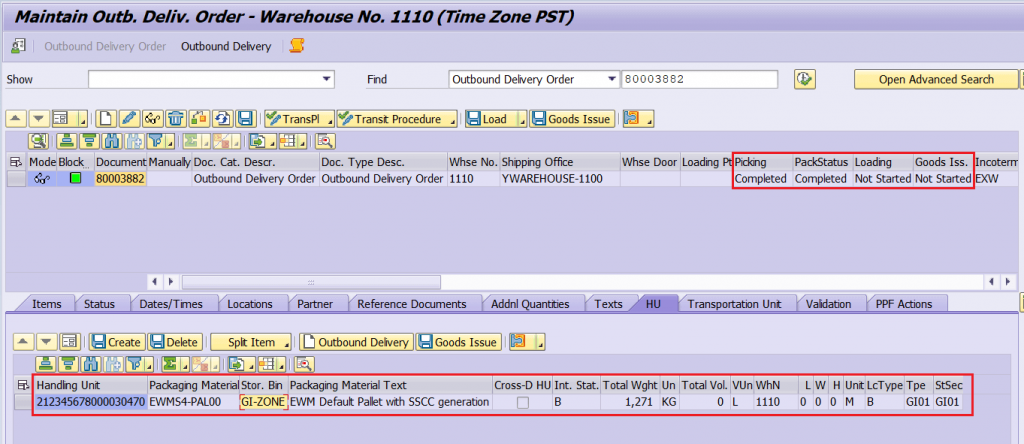
- Now the 2 Step picking is completed, and the goods are moved to the corresponding staging bay i.e., goods issue zone.