In this blog post I will concentrate on connecting the Solution Export Wizard in the SAP BTP Neo environment with Cloud ALM and Cloud TMS.
Scenario
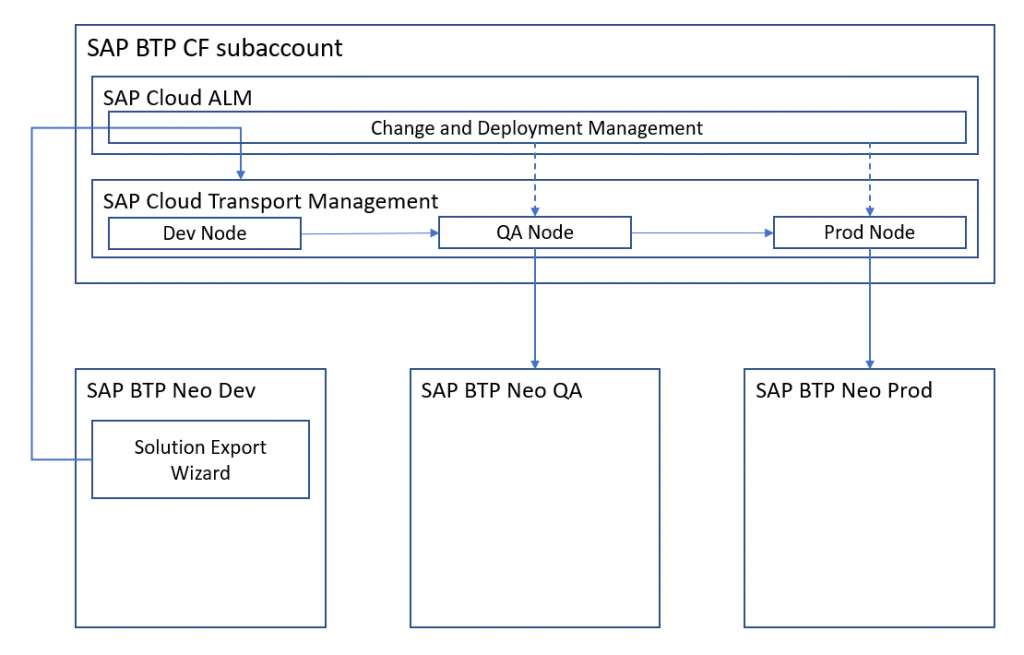
In this scenario we are connecting three Neo subaccounts to the Cloud ALM / cTMS subaccount running on Cloud Foundry. The transport requests are created using the Solution Export Wizard from the Neo Development subaccount.
The imports into the QA and Productive subaccounts on Neo are triggered from within Cloud ALM as part of the Change and Deployment Management process.
Prerequisites
Obviously you need a subscription to Cloud ALM.
The next necessary steps have been described in the blog post Enabling Change & Deployment Management in SAP Cloud ALM for SAP Integration Suite – Cloud Integration. Please follow the steps described there:
- Subscribe to SAP Cloud Transport Management Service
Please note that for newly provisioned SAP Cloud ALM tenants the SAP Cloud Transport Management Service is already subscribed in your SAP BTP subaccount. In this case you can skip the steps for manual subscription. What you will have to do in any case when using cTMS with Cloud ALM for the first time is assigning the cTMS specific role collections as described in the blog post to the members of your subaccount who should be able to maintain the cTMS transport landscape(s). - Set Up Cloud Integration
This section is not relevant for this scenario and can be skipped. - Set Up SAP Cloud ALM API Instance
This part has to be done only once when using the integration of Cloud ALM and cTMS for the first time. The service key of the Cloud ALM API instance which is created in this section will be needed later when creating a destination in the Neo environment.
If you just add this Neo scenario to an already existing Cloud ALM / cTMS subaccount you can skip this section. - The remaining sections in the blog post are specific to the scenario described there and can be skipped.
Setup Process
Define destinations to your target Neo subaccounts
Enter the Cloud Foundry subaccount hosting your Cloud ALM and your cTMS subscription. Go to the ‘Destinations‘ tab and choose ‘New Destination’.
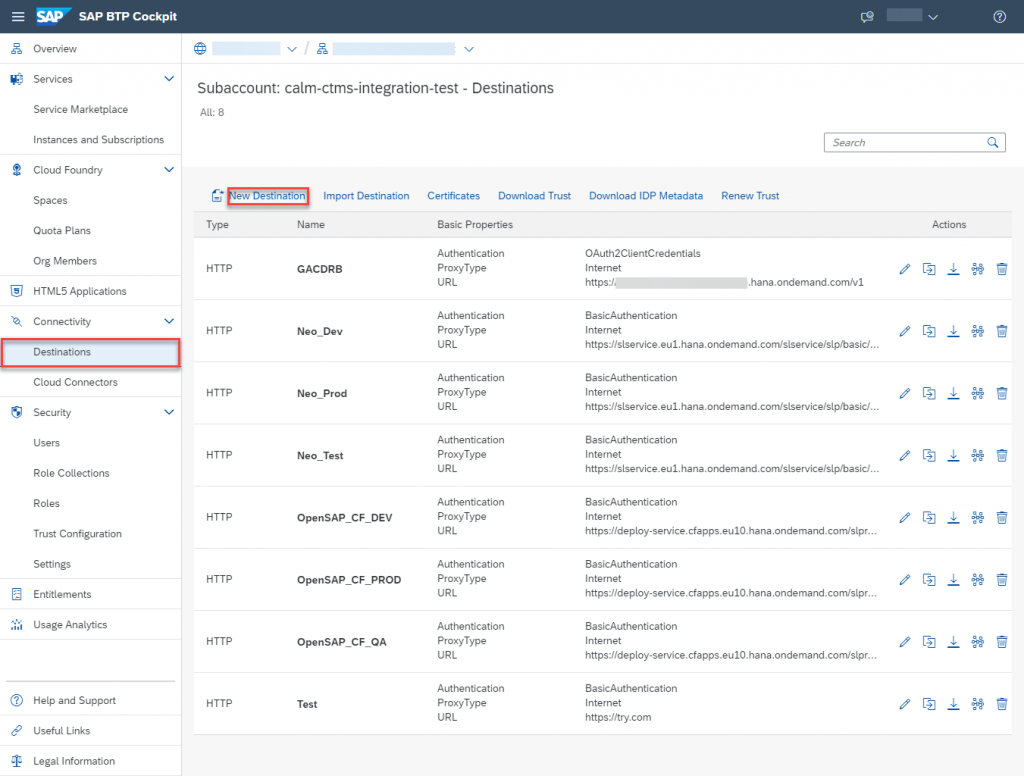
Create a destination at least for all subaccounts into which you would like to import content (in our scenario this would be QA and Prod). Follow the instructions for creating destination for ‘MTA Deployment on Neo‘ on this SAP Help page. There is no difference to stand-alone cTMS.
Your destination should look like this:
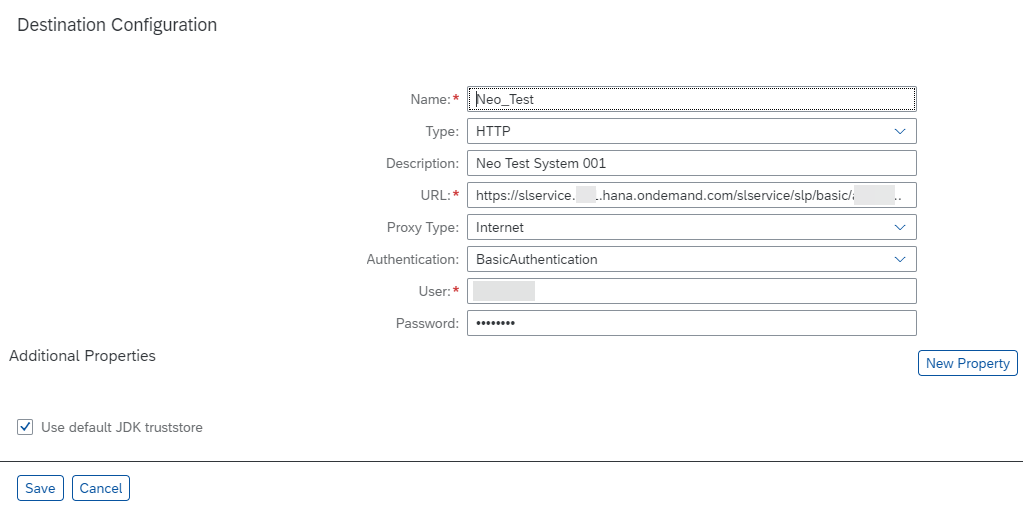
Repeat this step for the destination to the productive subaccount.
Create cTMS transport landscape
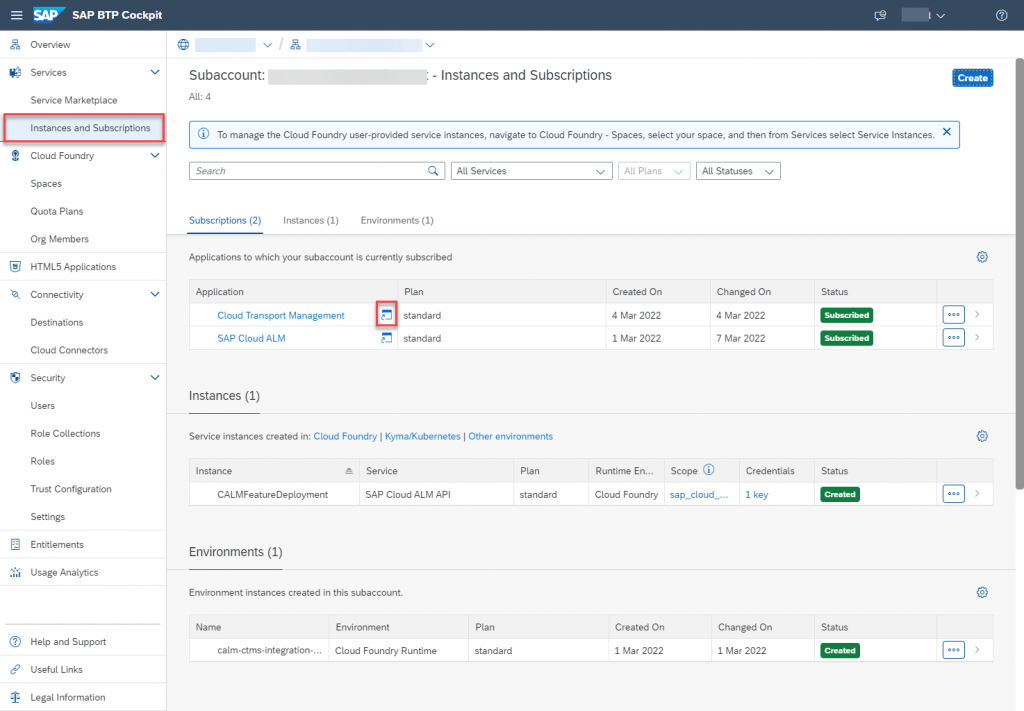
Enter the cTMS user interface by opening the ‘Instances and Subscriptions‘ tab in the SAP BTP Cockpit of you Cloud ALM / cTMS subaccount. In the subscriptions area click on the icon beside the ‘Cloud Transport Management’ subscription.
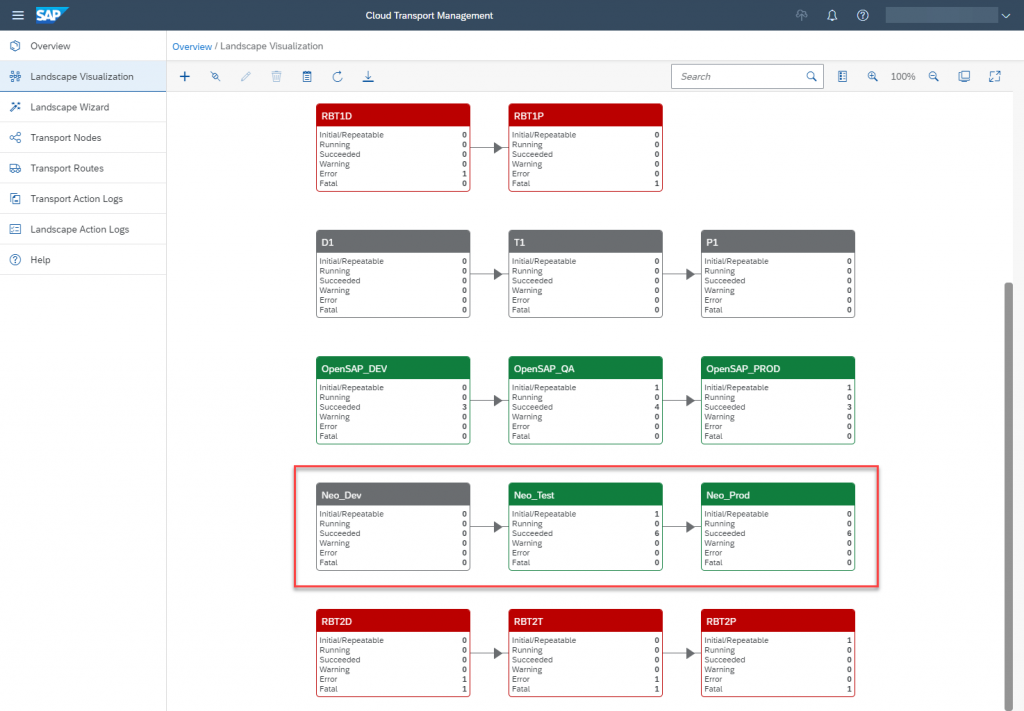
In the cTMS UI open the ‘Landscape Visualization‘ tab.
Create the cTMS transport landscape for the Neo use case as described in the cTMS documentation here and here. In our scenario you will have to create three transport nodes (for example ‘Neo_Dev’, ‘Neo_Test’ and ‘Neo_Prod’). Make sure to use Forward Mode ‘Auto’, Content Type ‘Multi-Target Application’, and the destinations defined in the previous section (at least for QA/Test and Prod). This would for example look like this:

Then connect the nodes by two transport routes (Dev – Test and Test – Prod) so that you get a linear three node landscape Dev – Test – Prod. Again this step works as in a stand-alone cTMS scenario.
Configure Solution Export Wizard in the Neo Development subaccount
The Solution Export Wizard’s integration with cTMS relies on a destination being configured inside the Solution Lifecycle Management service in the Development subaccount on Neo.
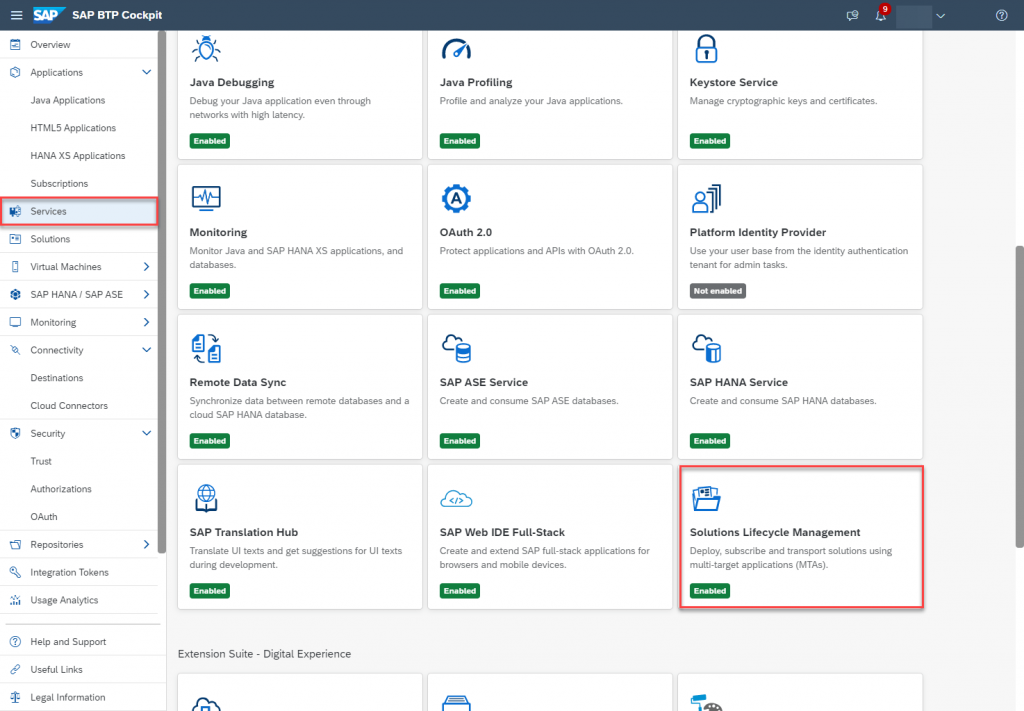
To perform this configuration enter the SAP BTP Cockpit of the Neo Development subaccount, choose the ‘Services‘ tab, and click on the ‘Solution Lifecycle Management‘ tile.
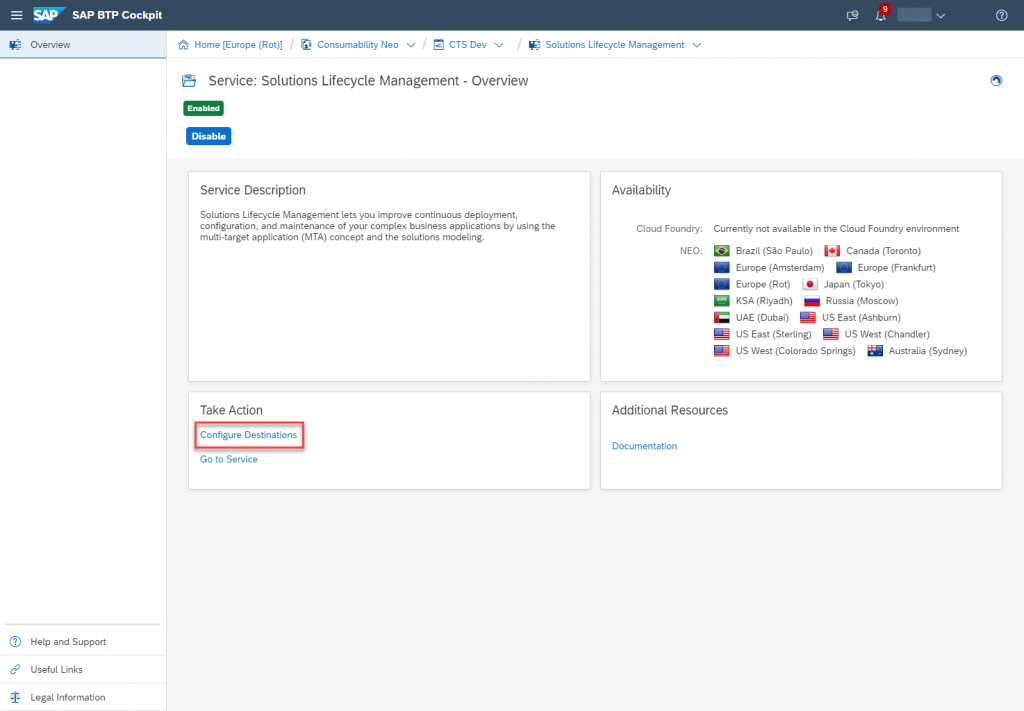
In the next screen click on ‘Configure Destinations‘.
Create a new destination with the fixed name ‘TransportManagementService‘ with properties as described in the below table. You will now need the Cloud ALM API service key created in the Prerequisites section.
| Field | Description |
| Name | TransportManagementService (this value is case-sensitive) |
| Type | HTTP |
Description (optional) | You can provide a description for your reference. |
| URL | Enter the URL (“Api”) of the service key of your SAP Cloud ALM API instance and append /imp-cdm-transport-management-api/v1. That follows a pattern like this: https://eu10.alm.cloud.sap/api/imp-cdm-transport-management-api/v1 |
| Proxy Type | Internet |
| Authentication | OAuth2ClientCredentials |
| Client ID | clientid from the service key of your SAP Cloud ALM API instance. |
| Client Secret | clientsecret from the service key of your SAP Cloud ALM API instance. |
| Token Service URL | Enter the value of url (uaa section) from the service key of your SAP Cloud ALM API instance. Append /oauth/token at the end of URL fetched from the service key. |
| Additional Properties | Choose New Property. Enter sourceSystemId (this value is case-sensitive) as the key and reuse the name of the development node (case sensitive) in your cTMS transport landscape for Neo. In our scenario this would be ‘Neo_Dev’. |
The resulting destination should look like this:
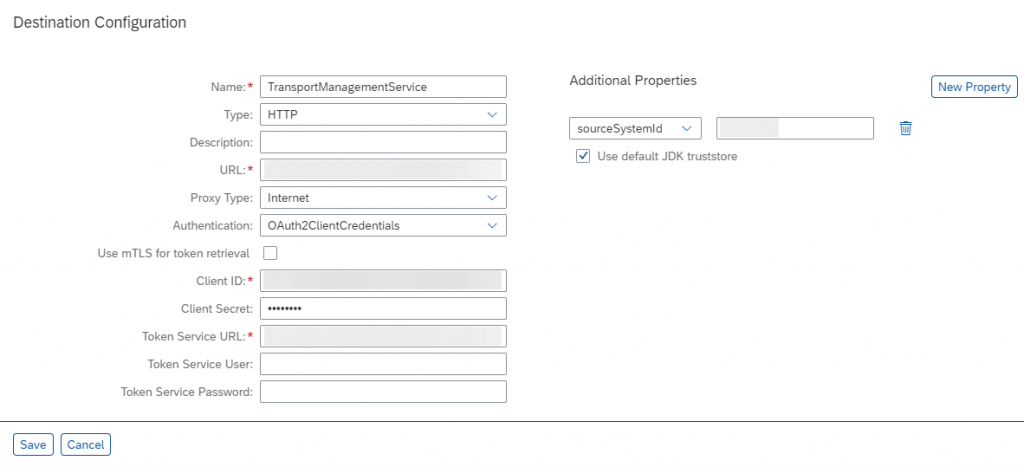
Here we find the main difference between a stand-alone cTMS and an integrated Cloud ALM / cTMS scenario. The calls to create new transport request are routed through Cloud ALM. The URL parameter points to the Cloud ALM API service instance and from there to cTMS. This enables Cloud ALM to ‘know’ of the transports which are newly created and later offer them for attachment to features.
Using the scenario
To test this scenario go to the Neo development subaccount and choose the ‘Solutions‘ tab. Here click on ‘Export‘.
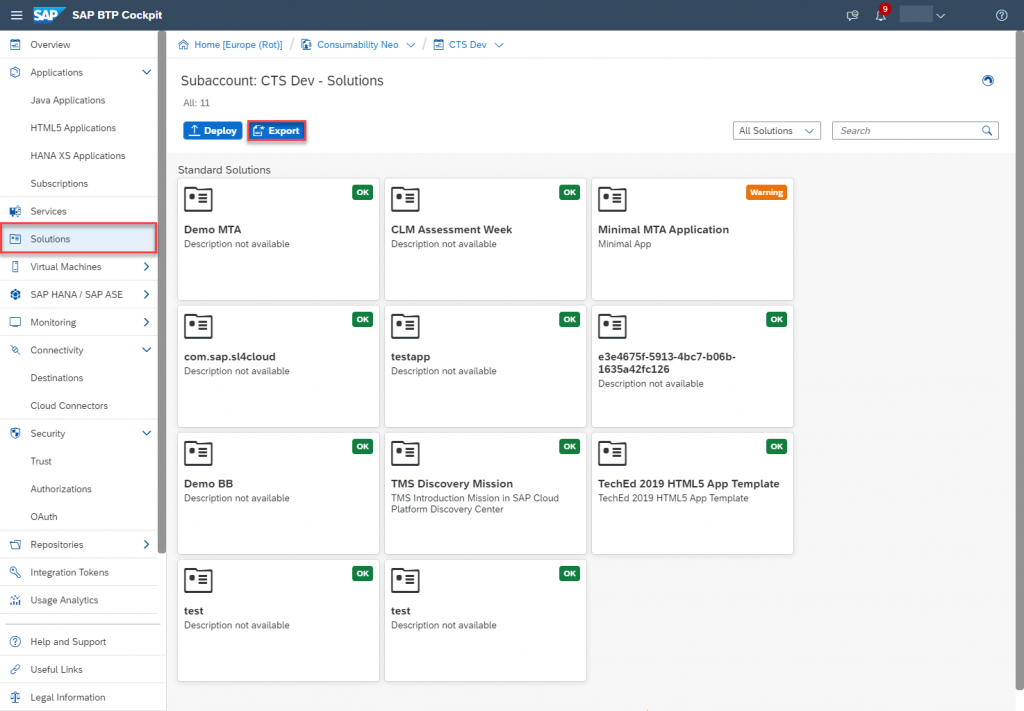
The Solution Export Wizard now starts to analyse the applications running in this subaccount and offers them for selection.
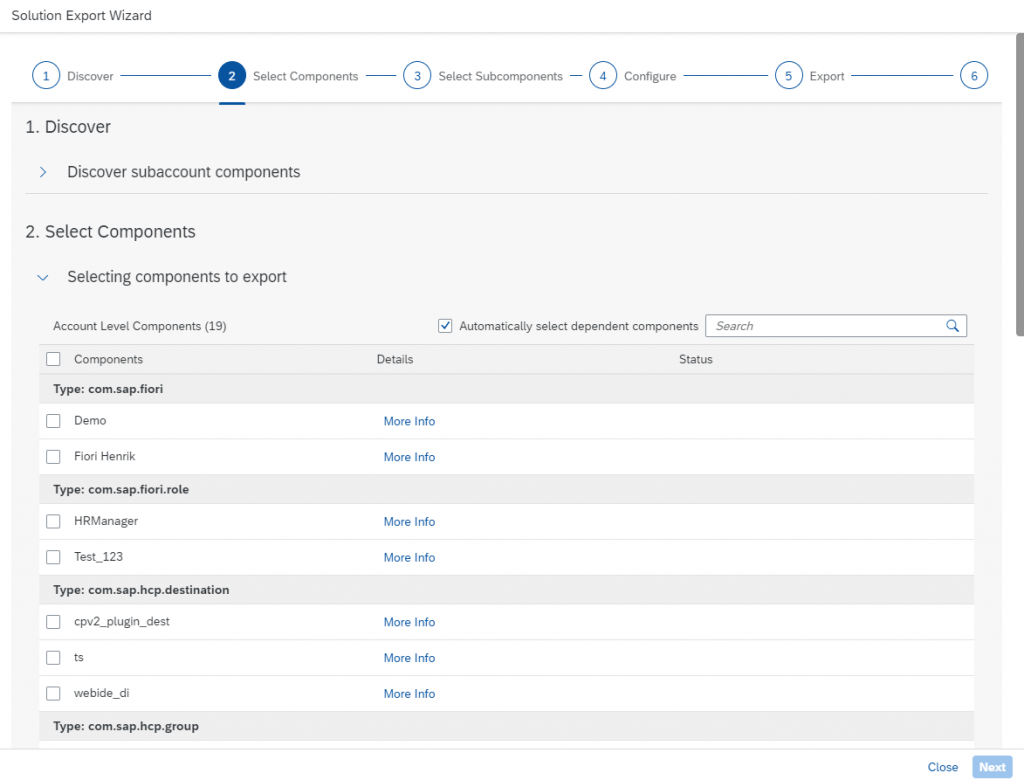
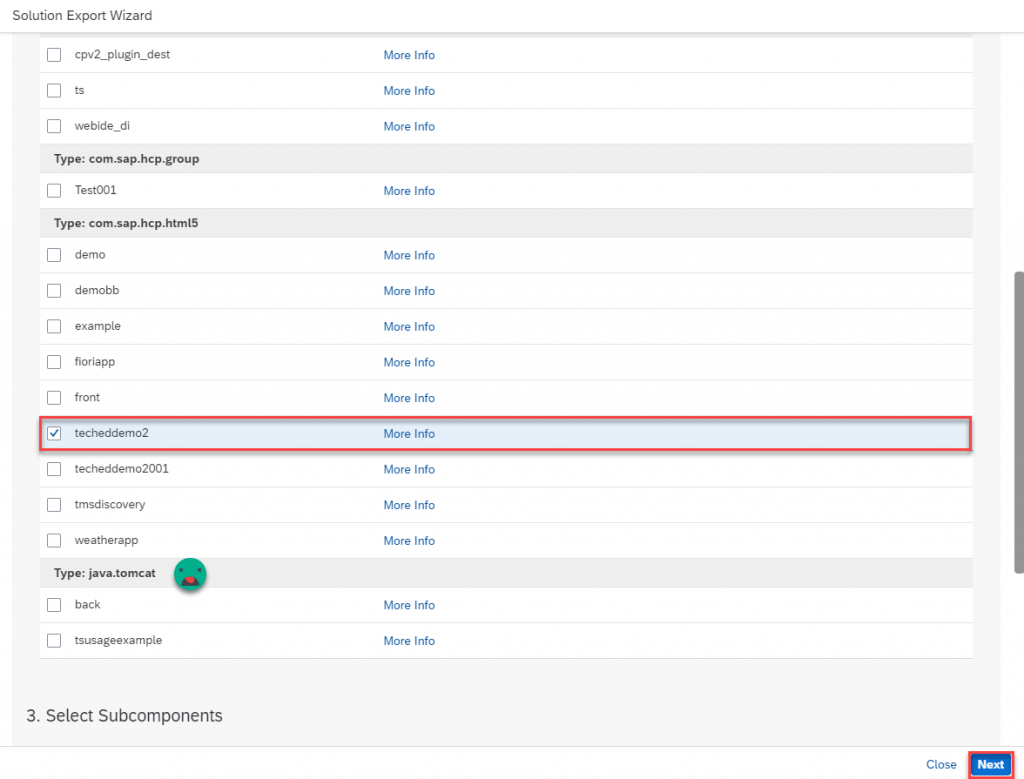
Select one or several artefacts you would like to transport and click on ‘Next‘. Please note that Java applications cannot be exported with the Solution Export Wizard.
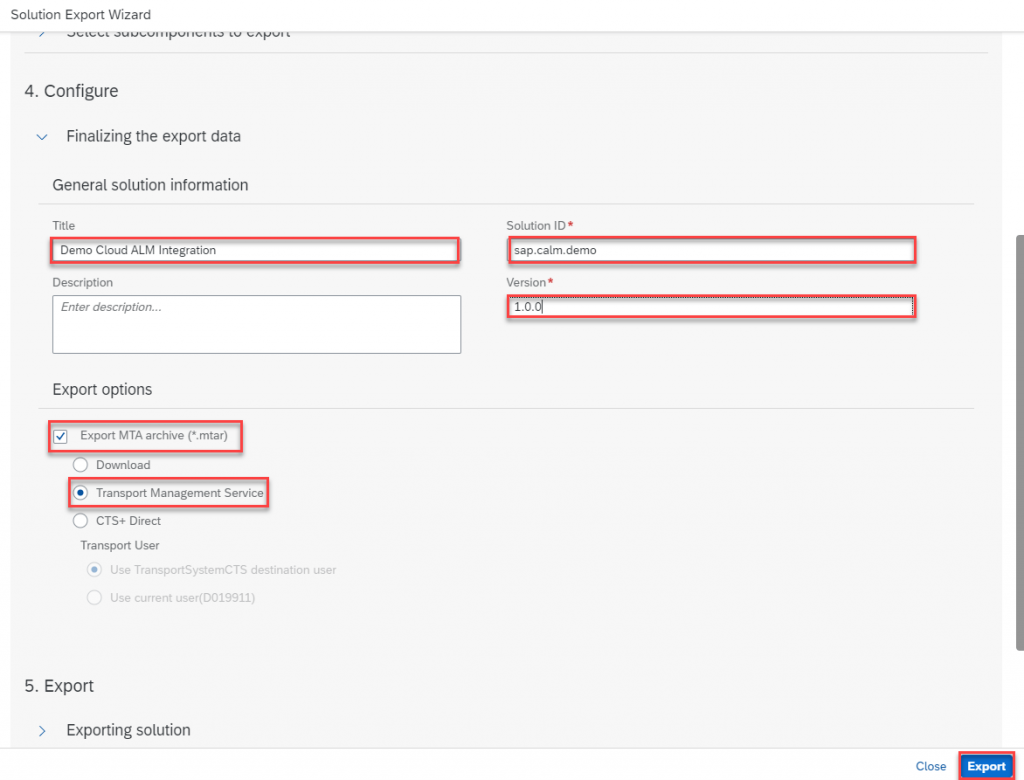
Provide a Title, a Solution ID and a Version.
Select the checkbox Export MTA archive (*.mtar) and Transport Management Service.
Finally click on Export.
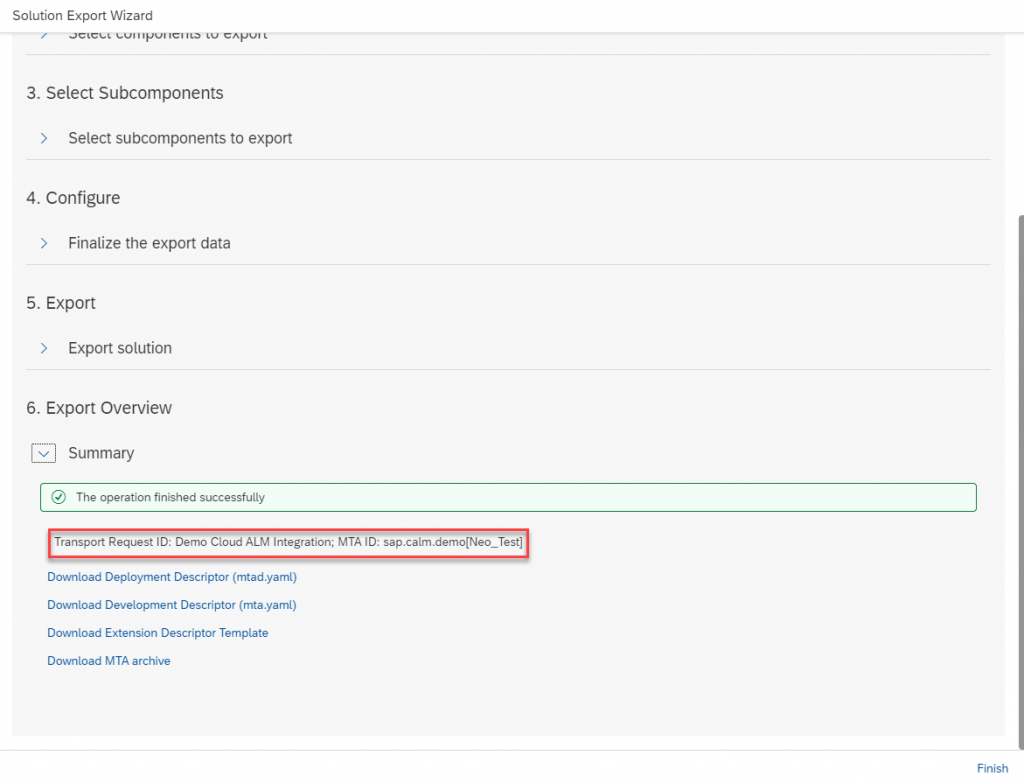
The Solution Export Wizard now packages the selected artefacts into a multi-target application archive and attaches it to a newly created cTMS transport request. The transport request is released and put into the import queue of the transport node following the source node, in our scenario ‘Neo_Test‘.
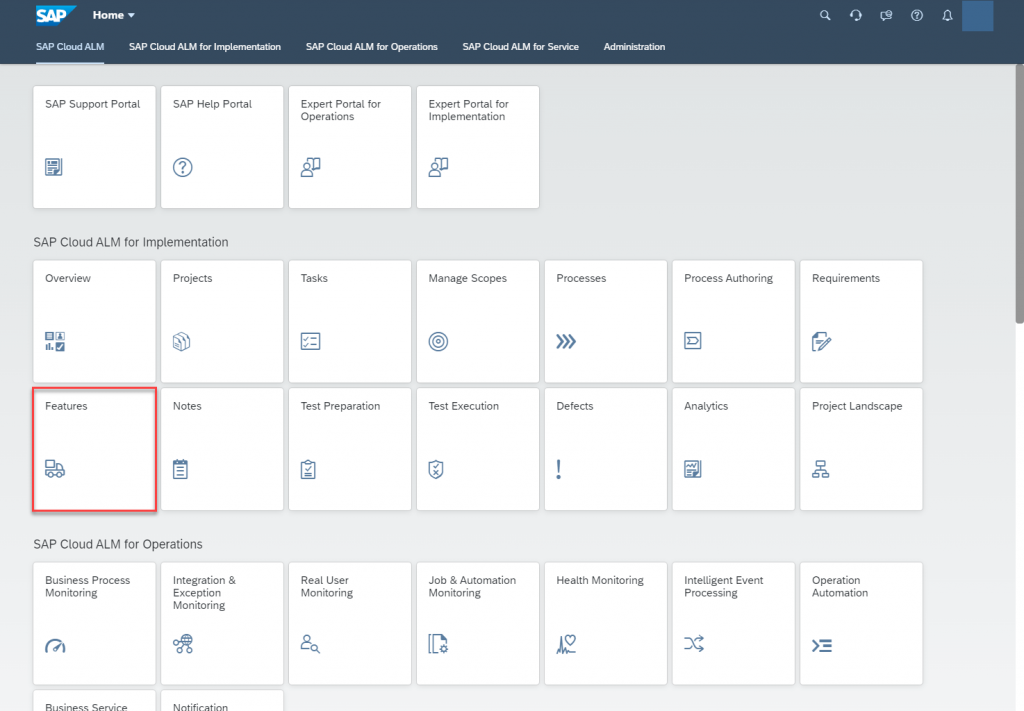
Now switch to your Cloud ALM home page and click on the ‘Features‘ tile. Please note: in the ‘real’ Change Management process you would create a Requirement first and then assign Features to it.
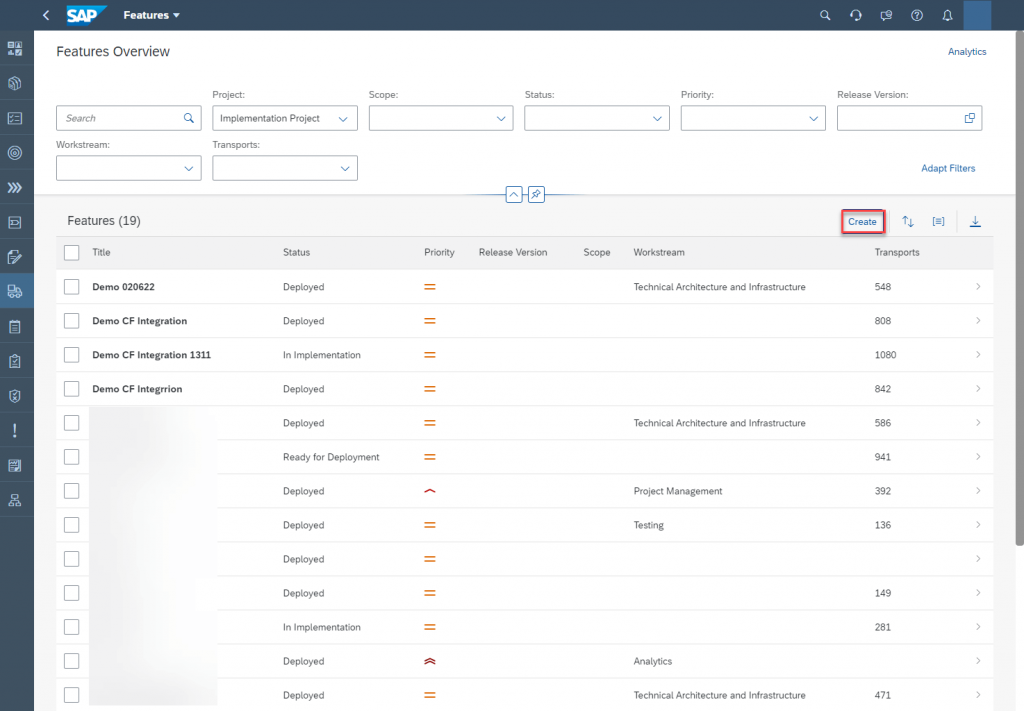
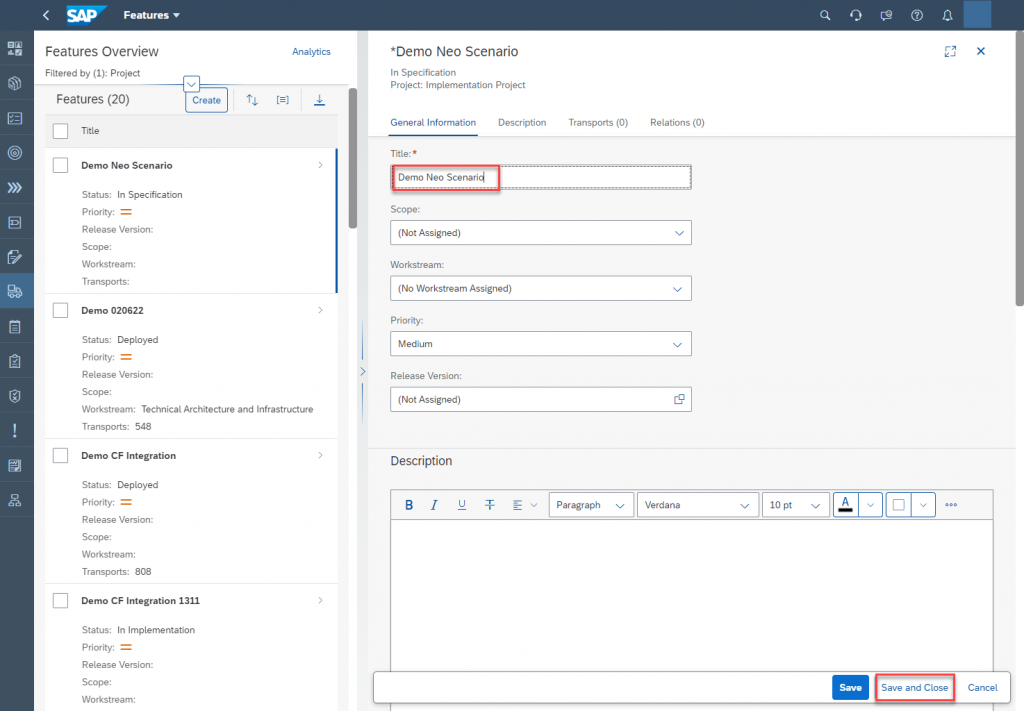
On the Features view click on ‘Create‘.
Provide a Title and click on ‘Save and Close‘.
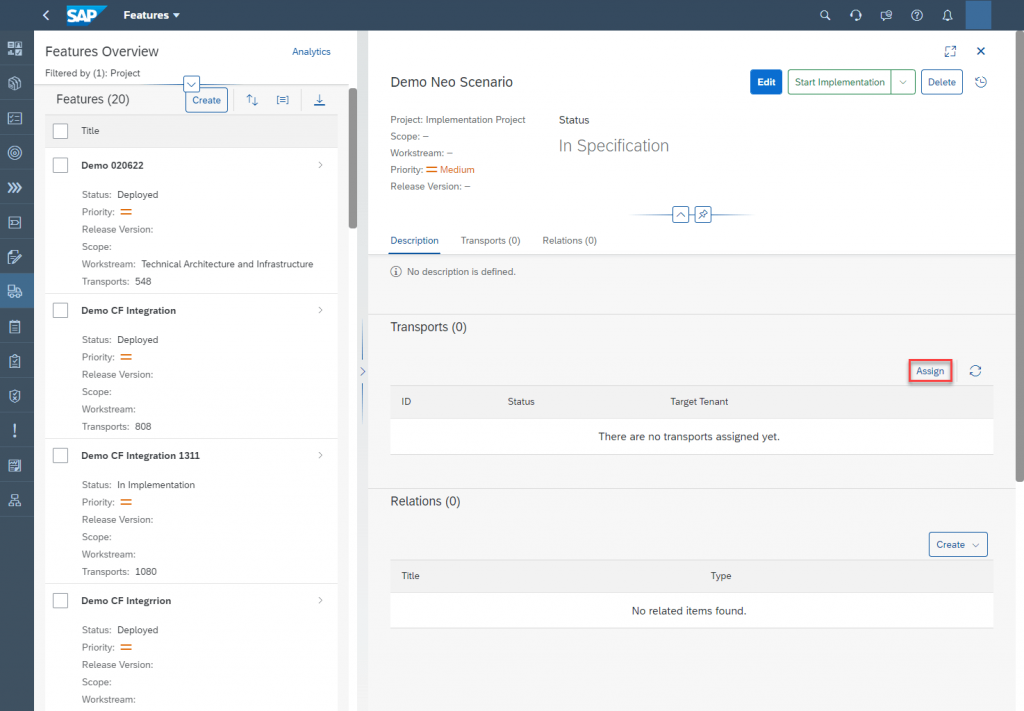
Click on ‘Assign‘ in the Transports area.
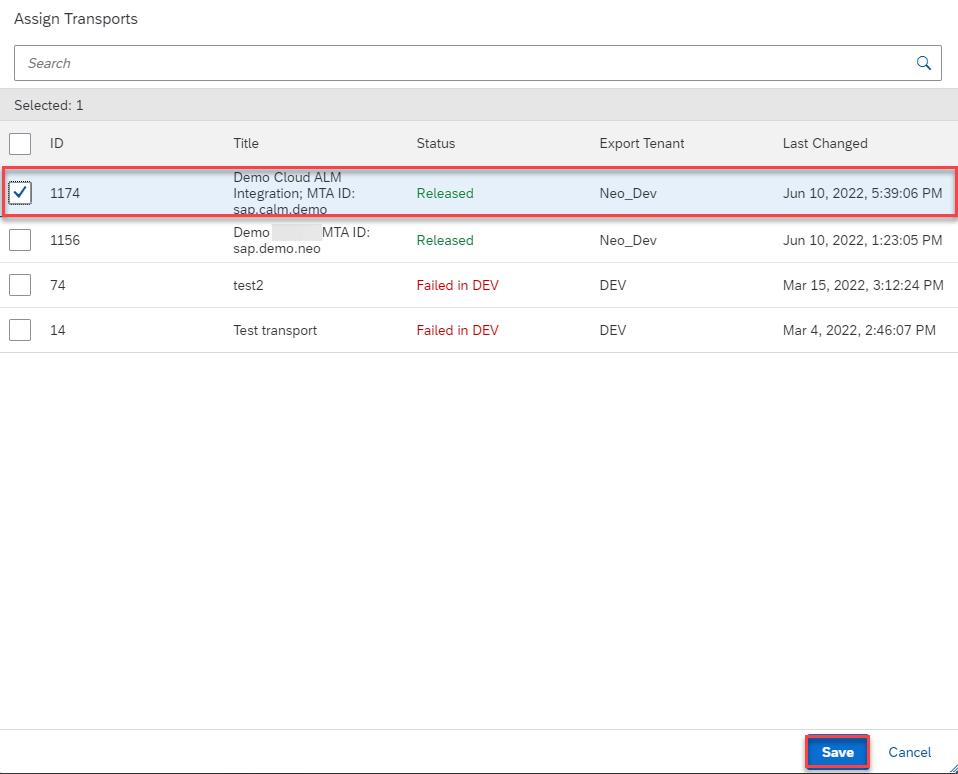
Select the transport request you have just created and click on ‘Save‘.
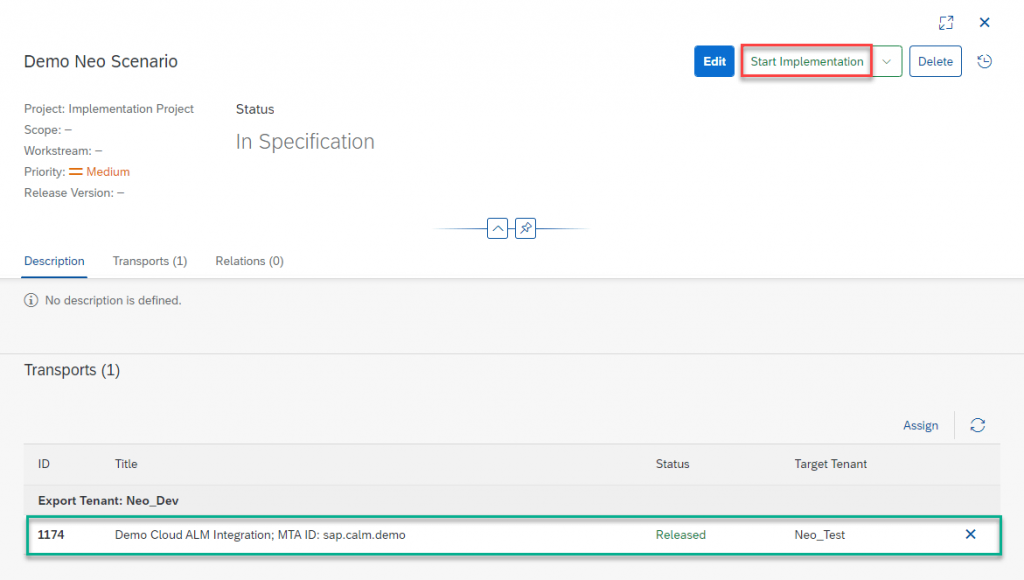
The transport request is attached to the feature. Now click on ‘Start Implementation‘. Confirm the popup.
The status of the feature changes to ‘In Implementation’. Click on ‘Deploy‘. If the ‘Deploy’ button is not active, click on the refresh icon. Confirm the popup.
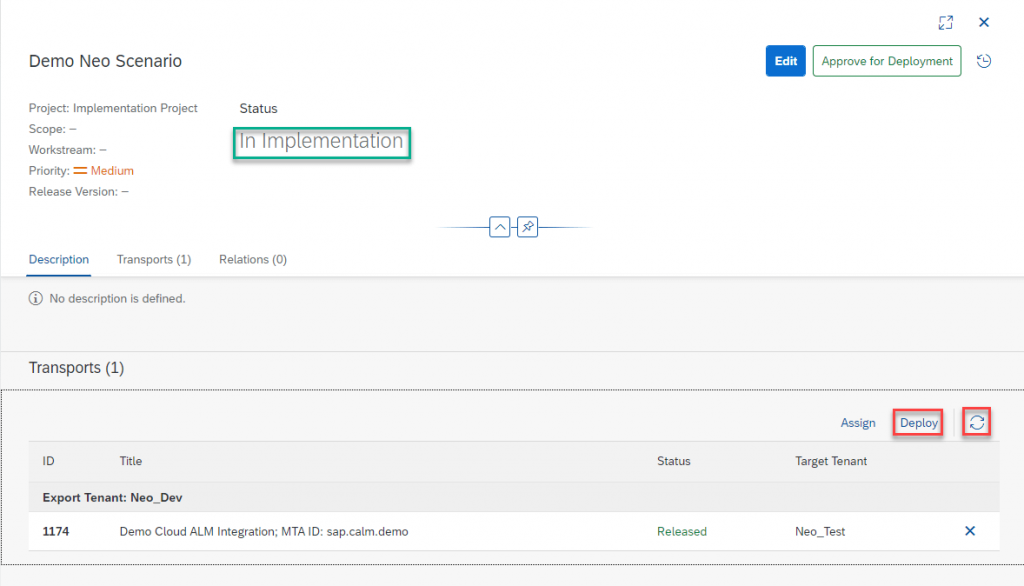
The import into ‘Neo_Test’ is now triggered.
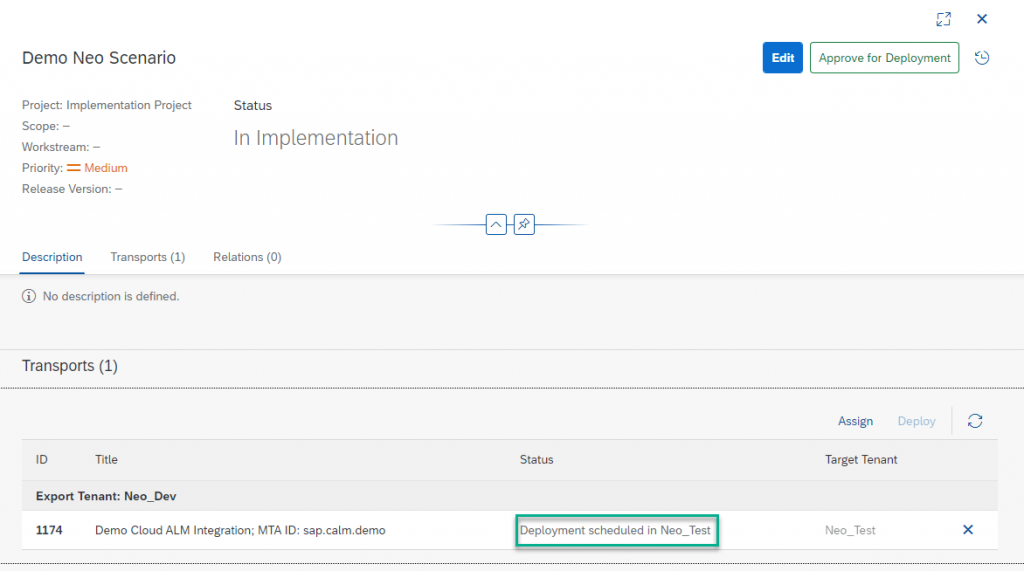
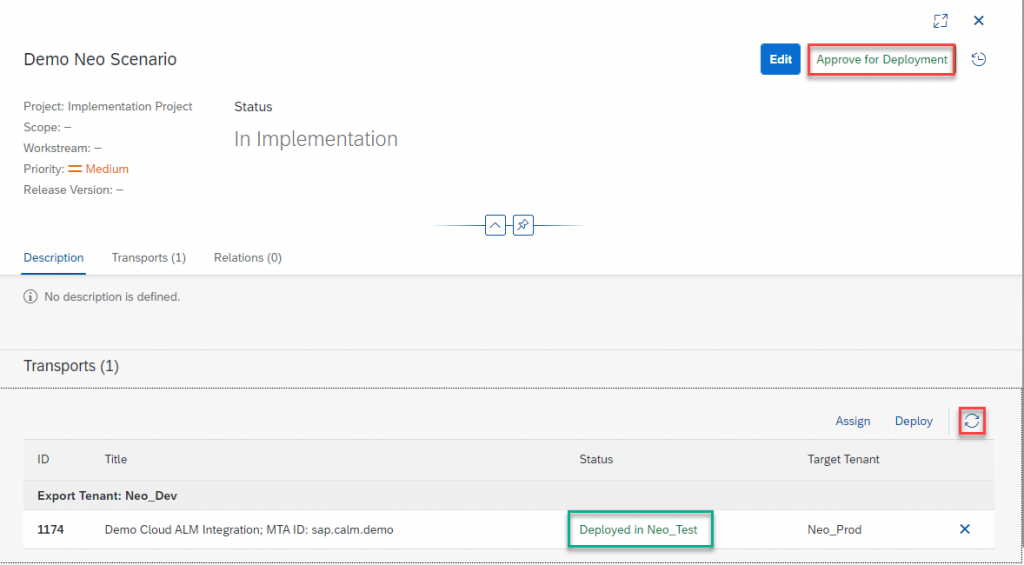
Click on the refresh icon to update the status. Eventually the import completes and the artefacts are now available in the test subaccount. After successful testing click on ‘Approve for Deployment’. Confirm to popup.
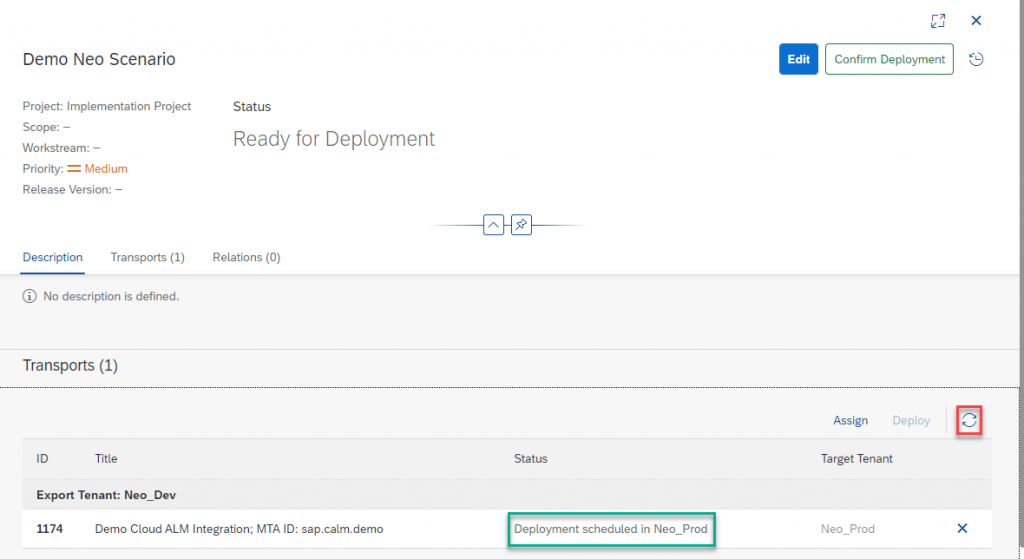
The status of the feature changes to ‘Ready for Deployment’. Click on ‘Deploy‘. Confirm the popup.
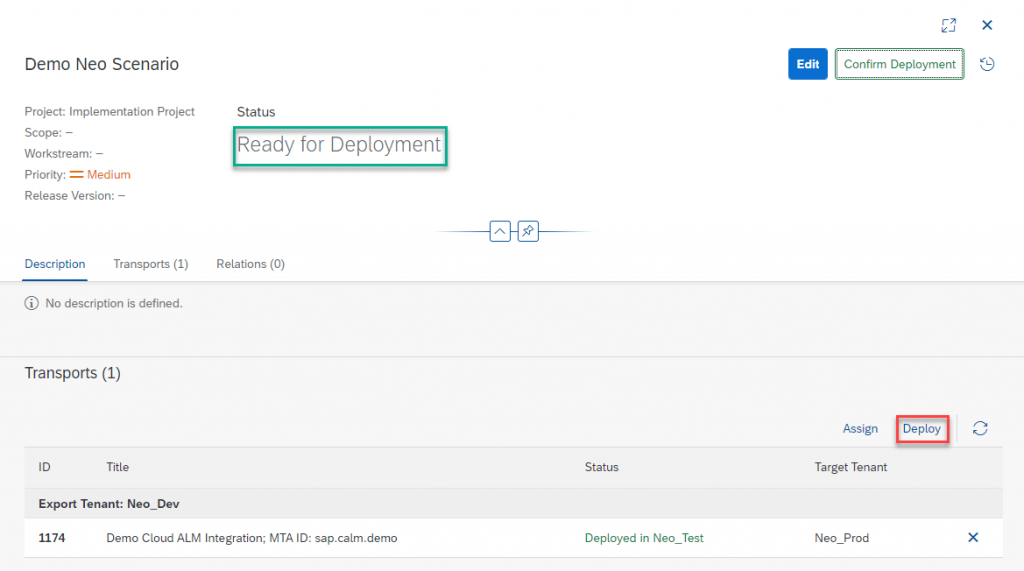
The import into ‘Neo_Prod’ is now triggered.
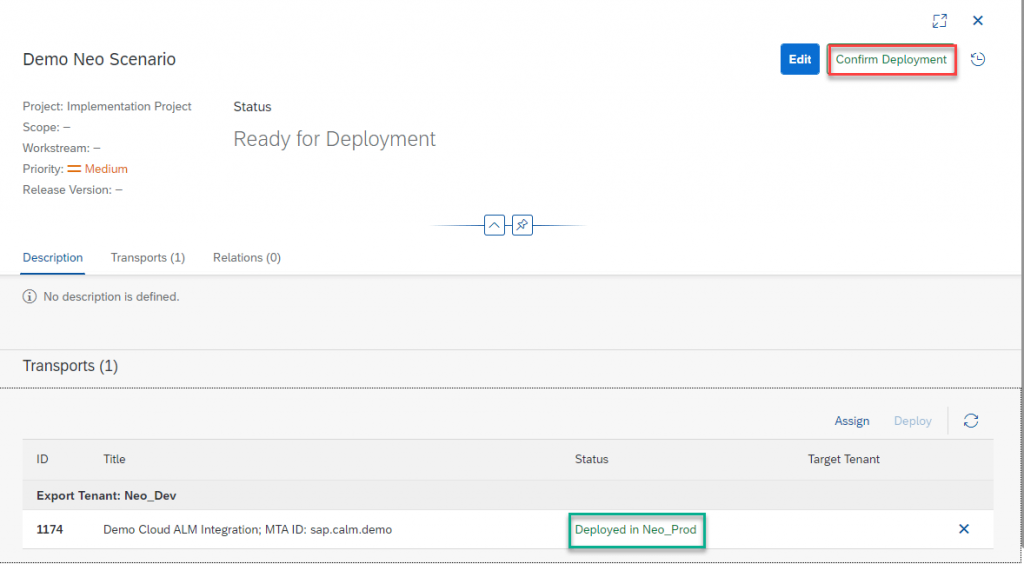
Click on the refresh icon to update the status. Eventually the import completes and the artefacts are now available in the productive subaccount.

You can now finalize the implementation of this feature by clicking on ‘Confirm Deployment’. Confirm the popup.
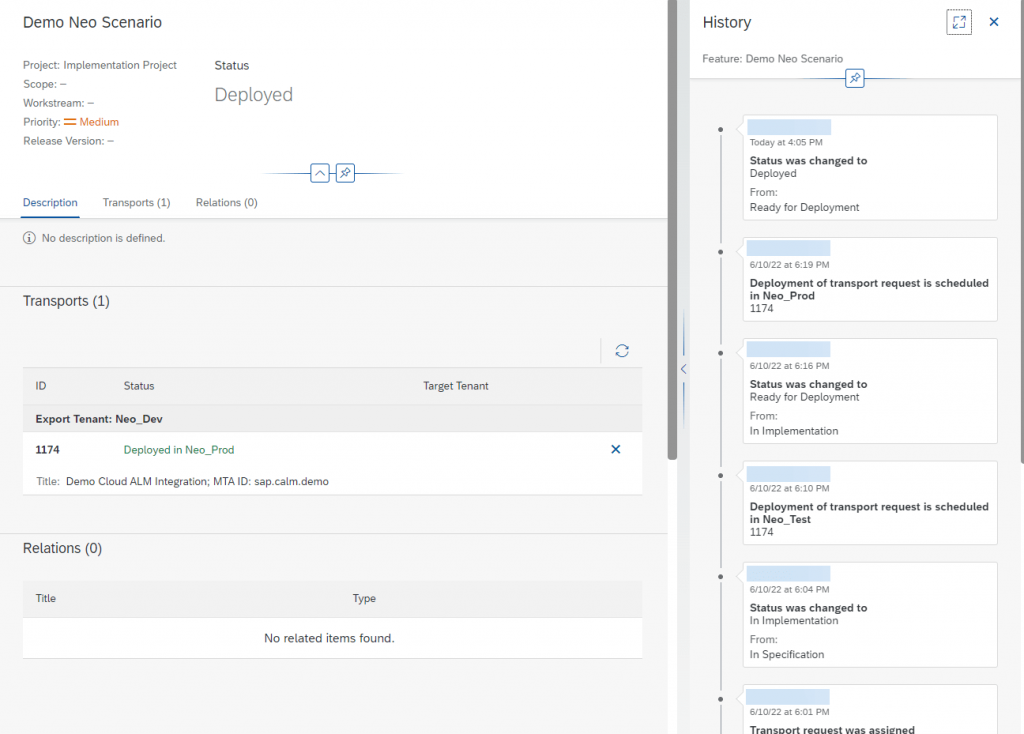
The status of the feature changes to ‘Deployed’. You can display a summary of the implementation steps by clicking on the clock icon in the upper right corner.
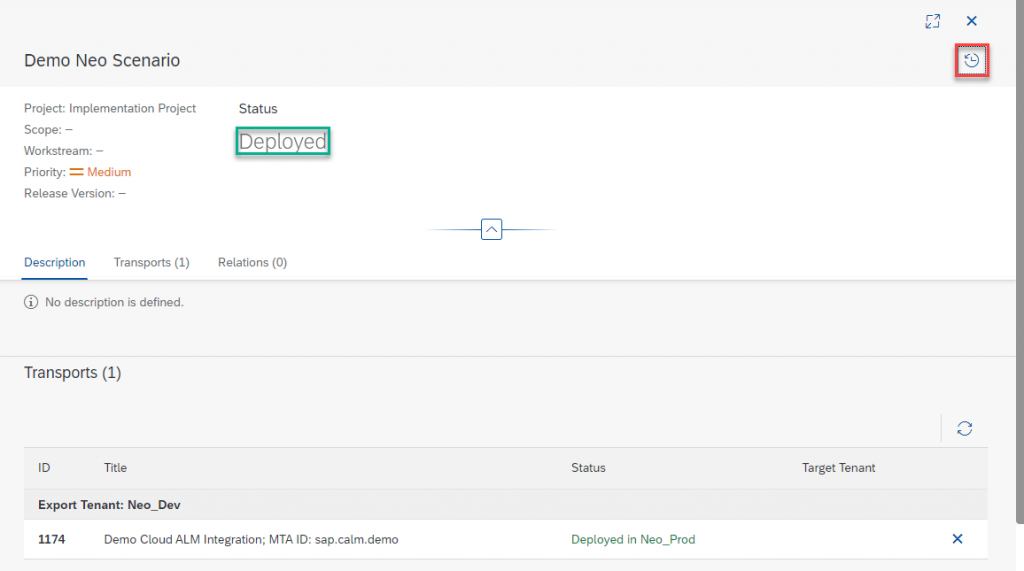
The history looks like this: