Introduction
Compensation Statements are a critical aspect of the entire compensation process. Often, my clients first request is to make sure that they stay as a one-page document, despite the vast amount of information they want to provide. Or, they want to maximize the look and feel of the statements for the employees. Over the years, I have compiled a number of techniques that I find myself using over and over to not maximize the use of the Standard SuccessFactors Statement, but make them more friendly for employees to comprehend overall. It is important to mention that all of these tips and tricks are to avoid creating a fully custom statement. There is always an opportunity to engage SAP or a partner, such as Veritas Prime, to create a statement completely through XSL code. However, sometimes budget or time restrictions pose a roadblock in every organization going this route, not to mention the maintenance difficulty this provides for the basic admin user.
Also Read: SAP SF Comp Certification Preparation Guide
I have divided the various options I have developed into two categories; changes made in the template editor interface and changes made through the XSL code. Depending on your comfort level in the system, particularly in the coding aspect of the system, some of these options may be more of interest for your organization’s needs. The code changes certainly have more impact but there are a number of considerations to make when deciding to change the code of a compensation statement. I have included a list of considerations to help you weigh out the option to go this route better in the beginning of the XSL Code Changes section. The tips and tricks we will be covering in detail in the blog are:
Template Editor Interface Changes:
- Include Performance Rating in the Text Section
- Adding Images to the Text Section
- Excluding Standard Signature Section
- Shortening Performance Rating Labels
XSL Code Changes:
- Updating Font Size of Table Header
- Editing Table Width
- Removing Text Section for Full Table Look
- Adding 2 or More Logos
- Moving Logo Left, Right, or Center
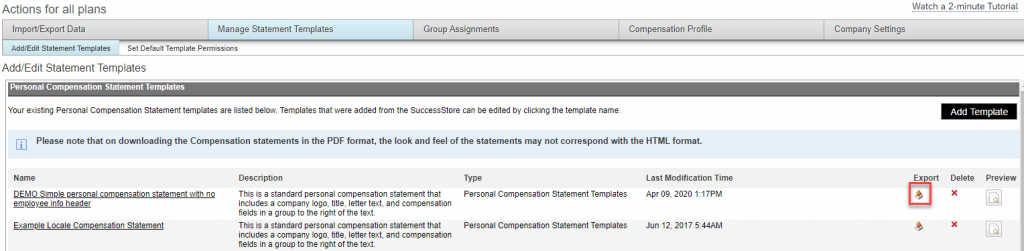
You will need to navigate to the statement template editor in SuccessFactors to begin making changes. The editor can be found in the Compensation Module under the Actions for all Plans tool. The second tab across the top is where all of the statement templates are housed for editing. All changes discussed will be done through this screen. To enter a statement you want to edit, simply select the hyperlinked name and you will be brought to the template editor interface.

Before we get started, keep in mind that several of these changes can be combined to create an even better statement in the end. Find and try ones that you think will best accomplish the look and feel you are aiming for.
Template Editor Interface Changes
The changes discussed in this section are easy updates for any level of SuccessFactors Administrator. They are done right in the system and do not require any basic code knowledge. These changes are fairly minimal in change impact but still offer a better end user experience with the statements as whole.
Include Performance Rating in the Text Section
The standard approach to include an employee’s performance rating to the compensation statement is to add it into the table. Sometimes, the label of the rating can be long or it is just simply another field that makes the table longer. The inclusion of conditional statements allows us to add the performance rating and label to the text section of the form.
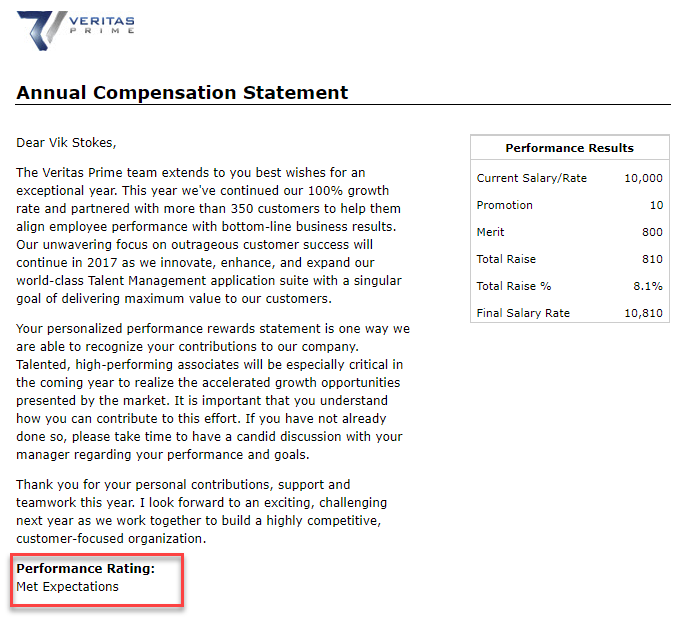
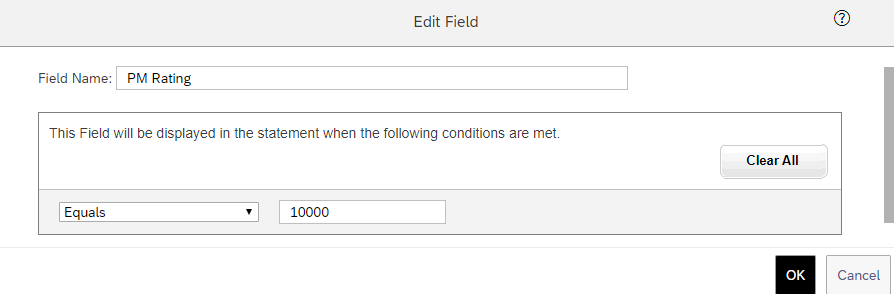
To accomplish this change, begin in the Template Editor. You will want to keep the PM Rating as a field in the table. However, change the condition for this field to be something that is impossible for your organization to achieve. For example, a rating of 10,000 which is going to make the field disappear but will make it an option when we add conditional text.
Add a Text Section and select the pencil icon to add a Condition. Create the condition using the Performance Rating values for each corresponding text section.
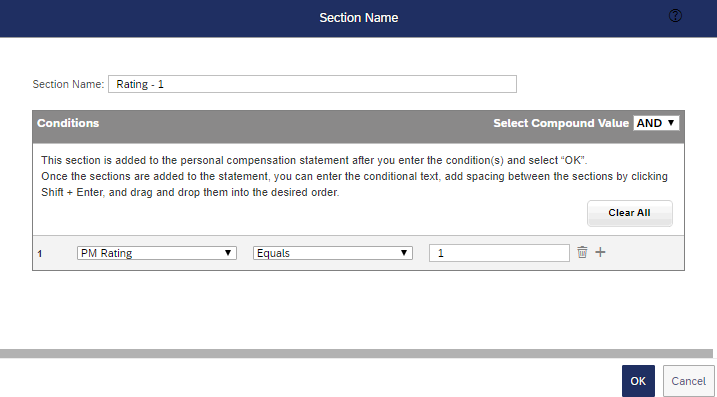
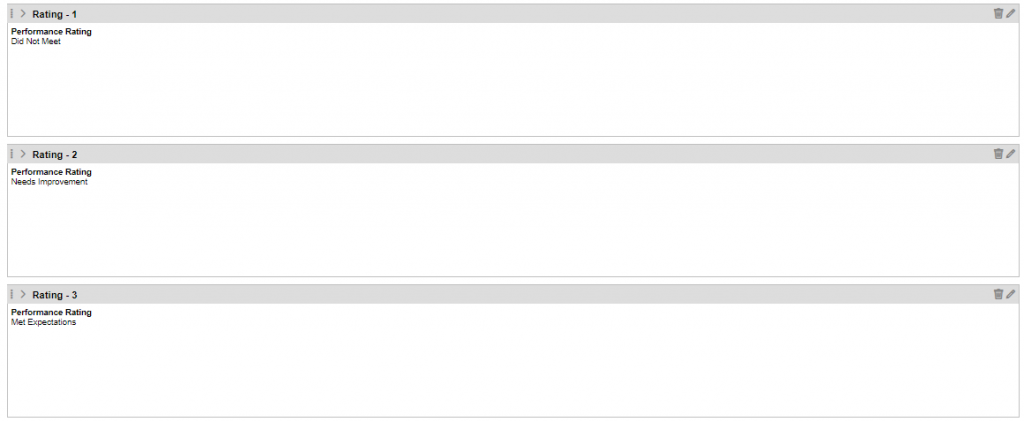
Create a conditional text section for each performance score in your organizations scale.
Want something different? Try adding the text to the paragraph section of your form. This will require you to put the full text in each of the conditional boxes you created.
Adding Images to Text Section
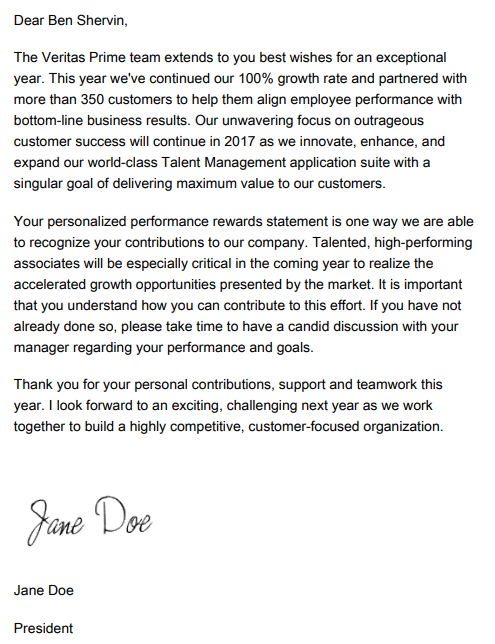
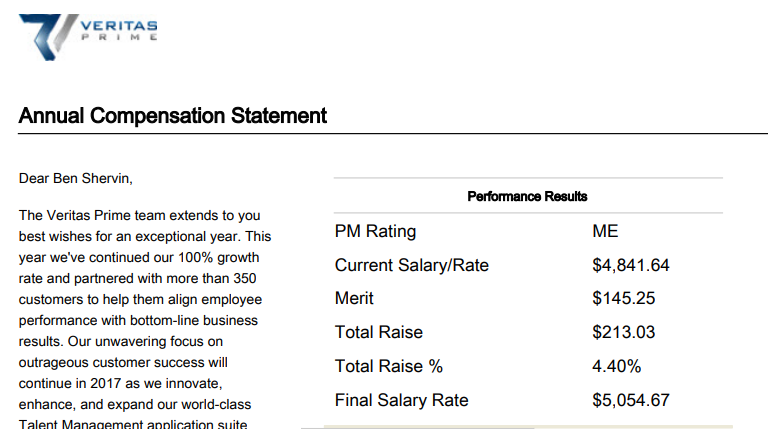
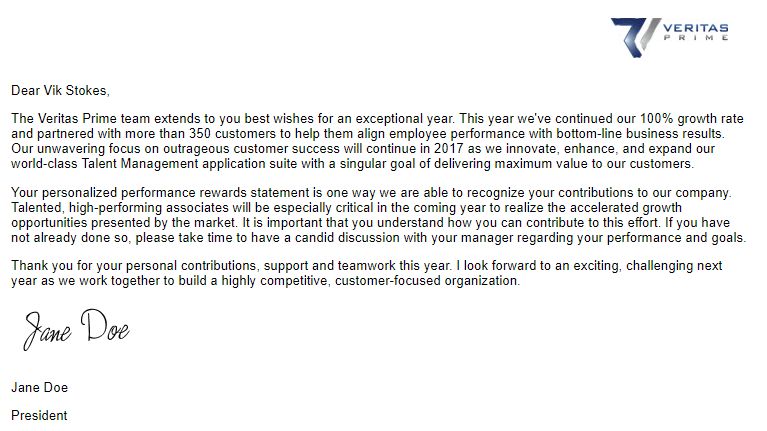
Images can add a sense of personalization to a compensation statement or call out important details for your employee base of the compensation process. One of the most frequent requests I see is to add a personalized signature to the letter from the CEO of an organization. The only way to bring an image into the text of a statement is by hosting the image on another site. You may be able to accomplish this on your own internal hosting site for your organization or there are a lot of free hosting sites such as imgur that allow you to post easily and host for free.
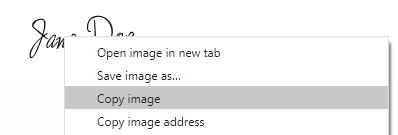
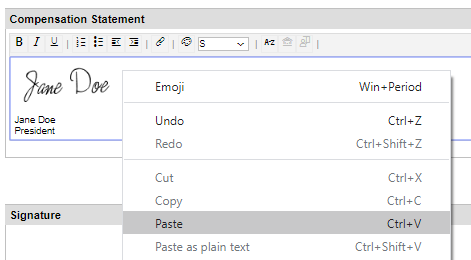
To accomplish this change, you must first host the image you want to add. Once this is done, you can simply copy the image and paste it into any text section of the compensation form.
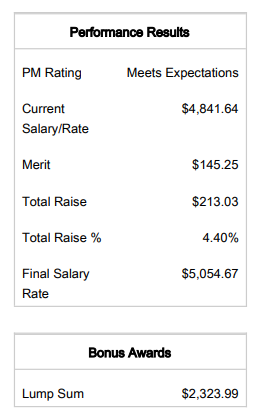
Some additional elements that can be added through an image are tables that share payout or performance information, additional logos, or get creative!
Excluding the Standard Signature Section
A really simple change that has a big impact is not using the standard signature section that is not removable from the interface. The problem with the standard text section is set up to fall below the text and table. This often can cause the statement to spill over to the next page. There is no reason you can’t add the “Signature” piece of text to the regular text section. The way to essentially “exclude” this section from the statement completely is by adding a few spaces to the text area. You have the put something and this is a way to not have this section affect the statement length.

Shortening Performance Rating Labels
If you are using the entire text label for the Performance Rating on the statement, you might realize that it causes the entire table to shift and text to wrap. The standard set up for the table is that everything stretches to accommodate the longest output on the right side. This can cause the entire table to look unpleasant when a rating is long.
This change requires some pre-planning as you must make the change before you launch the Compensation Planning sheets. In order to shorten the labels, you need to create a custom field in the column designer that outputs the desired values. This field can be hidden but must be set to reportable in order to pull into the compensation statement. The formula can utilize if statements to pull in the ratings and translate them to the shortened label version of your preference.
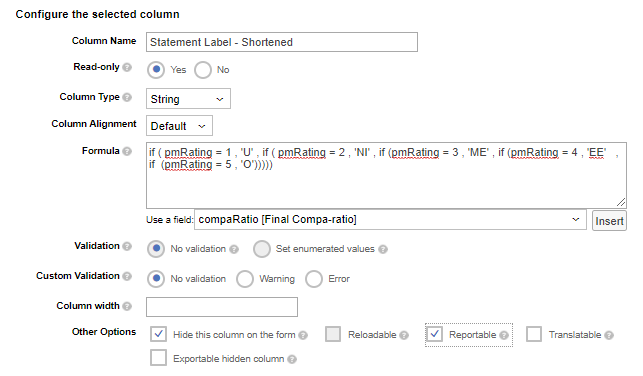
When creating the statement, simply add this new field and relabel as needed instead of the standard performance rating field. To avoid confusion on what the new labels mean, you can always create a small table and paste it as an image in the text portion of the statement using the directions in the Adding Images portion of this blog.
XSL Code Changes
To make more impactful changes to the compensation statement, we must venture into the world of XSL code. There are several key things you will want to keep in mind before going the route of changing the code for a compensation statement.
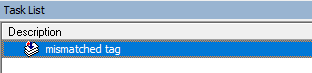
- You will likely want to have a basic understanding of code language. While this is a plain English code and I will be giving you language to copy and paste, it is easy to start having mismatch tags that will prevent SuccessFactors from reading the code and producing the end result statement. A tag is used in code to open up a new element, for example, if I am creating a table the tag would be . When I am done creating the context of that table, I will need to close the element off by including a to the code to close that piece off. Notice these when you open and begin to take a look at the code as this is a basic piece that we will need to ensure is correct when making any changes.
- Once changes are made to the code and imported back into the system, the in-system editor will no longer be available for that statement. My suggestion is to create the statement to your liking prior to exporting all in the tool and then make the small edits you want through code thereafter. You will find for simple changes it is much easier to complete them in the system than trying to figure out what the code change you require is. Keeping all this in mind, SAP will not support customized statements. What this means is if something isn’t working in the code of the statement you edited, you can not open any support tickets for that. However, you can always reach out to your support partner who may be able to give you more assistance.
- Editing code can be done in a couple different tools. The one I recommend the most (which is free!) is XML Pad. You can search for this tool in any engine and download it to your desktop. When you download the statement, you will want to select the View in Folder option. Then, using a right click on the XSL file, select Open With… and choose the XML Pad editor. If you do not wish to get a specific tool, Notepad will suffice. One of the main reasons I recommend a specific tool though is they quite often will include spot checks in your code. XML Pad, for example, will identify and warn you of mismatched tags, as described above, it will prevent you from doing some extra trouble shooting in the long run trying to decipher where the code went wrong.
- You will need to be aware of the process to export and import the Statement into your system. When you are in the Add/Edit Statement Templates page of the Manage Statement Templates tab, you will notice an export icon next to all of the different statements. Select this icon for the statement you wish to edit.
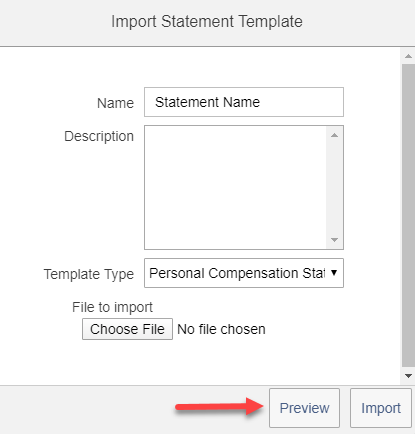
To import the edited file back into the system, you will need to select the Add Template button and choose the option From an Import File.

An import tool will display where you can select the edited XSL File, enter the template name, and see a preview of the changes, and import the template. I highly encourage that before you import, you select the preview button. This will help save you a lot of time if something isn’t exactly the way you want it. You can back out of the import process, make more updates, and check the changes quickly here. Keep in mind the preview may be slightly different than the PDF version of the statement that employees will ultimately get but it will provide a good enough sense of the change.
- There is a vast amount of customization you can begin to play around with in the code. These changes are meant to be simplistic in nature to help with the layout of the statement. The more comfortable you get with the code and understanding it, the more you may feel you can complete. The more custom you begin to make your statement, the more that you will need to update and maintain year to year (or month to month depending on your compensation cycle) so, be realistic in the time and energy you are willing to put forth to maintain the statement you are creating.
Updating Font Size of Table Headers
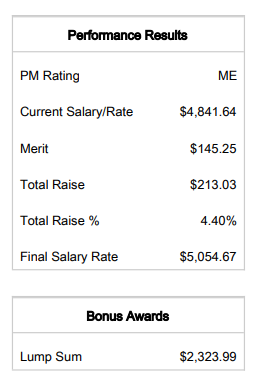
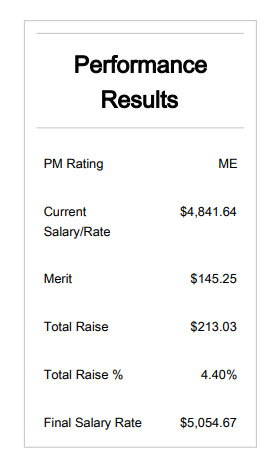
The table that is standard in SuccessFactors can be underwhelming when it comes to calling out the important information on the statement. A very simple update that can be made is changing the size of the table header text. This can help call out table more and draw the eye to it.

Sample of Code Added:
<th colspan='2' style='border-top: 1px solid #ccc;border-bottom: 1px solid #ccc;padding: .5em;text-align: center;font-weight: bold;font-size: 20px;'><![CDATA[Performance Results]]></th>Where to Add/Edit Code:

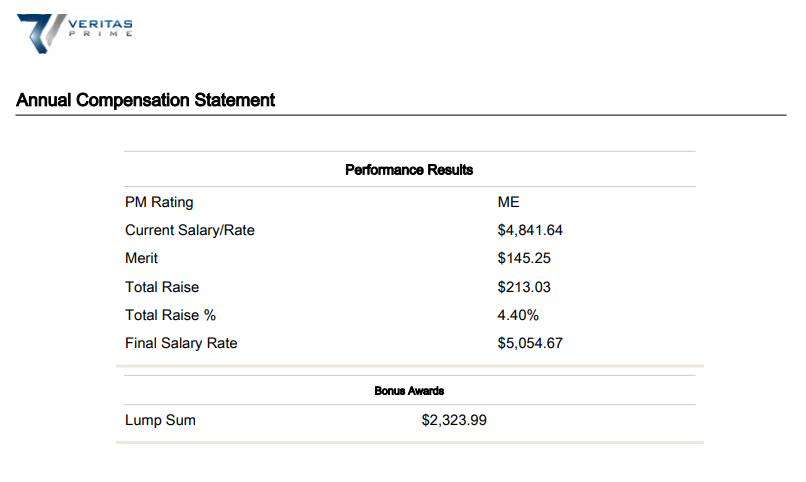
This change can be made a little more subtly by going with a slightly smaller px size. You will notice this code will already be in the statement and you can simply edit the highlighted section 20px to any size you want, by standard (shown in the before picture) is set to 11px. One additional thing to keep in mind, if you have multiple tables (such as the Bonus Awards table above) the code and text size is separated. You will need to change the code for both tables in order for the table headers to match. I don’t recommend you try to use this technique to go smaller than the standard 11px. With the bolded look of the text, it can make the text bunched up and impossible for the end user to read. Although it might ultimately save some space, it won’t be visually appealing in the long run.
Want to remove the header all together? Try removing the entire line of code above for a result only table look.
Editing Table Width
If you have longer label’s or just want to emphasize the table in the statement more than the text area, a good option would be to extend the width of the table. This is a fairly easy change in the code and can certainly make the statement more appealing overall.
Sample of Code Added:
<div style="margin-left:20px;margin-right:40px;margin-bottom:0px;margin-top:0px;font-size:10pt">
<table style='table-layout:fixed;border-bottom: 2px solid;padding: .5em' width="600px" font-size="11pt">
Where to Add/Edit Code:

You will need to replace the opening code for the table as shown above with the code provided. You will notice the width section which is the part you can edit to choose a larger or smaller size table. The entire code needs to be replaced in order to make this change. If you have multiple tables, such as an incentive table separate from the merit increase table, you will need to replace the text for each table.
Removing Text Section for a Full Table Look
You may have no need for the text section at all and want to have the table take up the entire statement. This will allow you to add more output fields and give a completely different look to the statement.
Sample of Code Added:
<div style="margin-left:20px;margin-right:40px;margin-bottom:0px;margin-top:0px;font-size:10pt">
<table style='table-layout:fixed;border-bottom: 2px solid;padding: .5em' width="600px" font-size="11pt">
Where to Add/Edit Code:
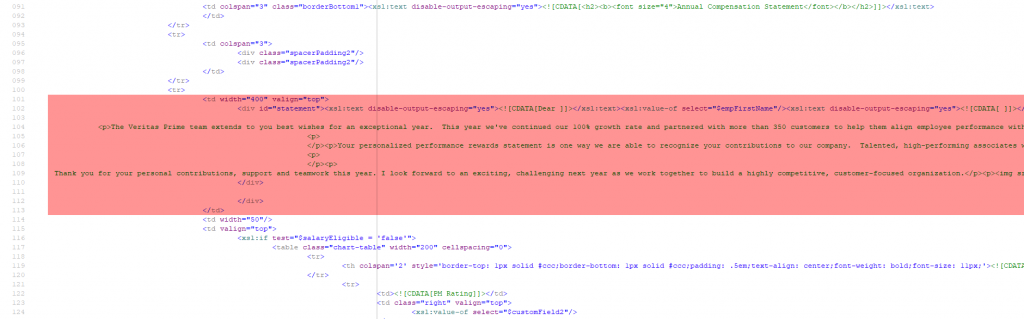

You will notice that the code that is added is the same as the width change code. The biggest difference here is that you will need to remove the entire code regarding the statement section. You will noticed it is highlighted in red in the images above. This begins with the code <td width=”400” valign=”top”> and ends with the closing tag </td>. By simply removing this code you will no longer have the text section and can edit the table to have a wider look across the statement body. Keep in mind, you will need to replace the text for each table if there are multiple tables in your statement. There are additional table editing capabilities if you want to add multiple columns in one row or move the text around. Such abilities are more complex code changes that are not covered in this blog.
Adding 2 or more logos
For organizations that have multiple logos they frequently use, the options to upload one can be a problem. The logos can be stacked on top of each other. It is important that both images are hosted on an external site such as imgur for this approach to work, the system logo type will not work.

Sample of Code Added:
<body STYLE="font-family:Arial, helvetica, sans-serif; font-size:11pt">
<div style="margin-left:20px;margin-right:40px;margin-bottom:0px;margin-top:0px;font-size:10pt">
<table id="content" width="740px">
<tr>
<td style="text-align:left;"><img src="{$companyLogoURL}" alt="Success Factors"/></td>
<td style="text-align:right;"><img src="{$companyLogoURL2}" alt="Success Factors"/></td>
</tr>
</table>
Where to Add/Edit Code:
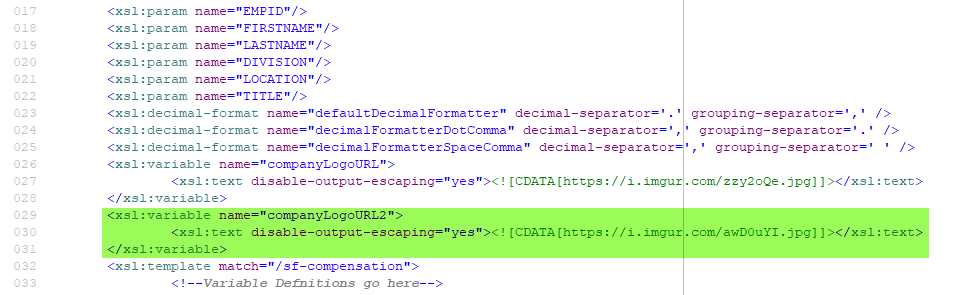

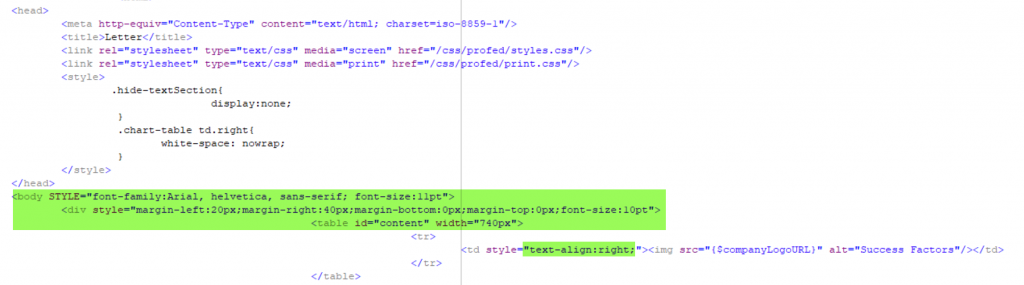
There are two places that you will need to add code in order for the logo to be included. This includes adding a second variable with the URL linked as shown in the first image and adding the code to show a second logo in the body. You will notice in the entire red box that there are some additional changes that need to be made in order to identify the display change to the entire form.
One note about changes to the logo, this does change the look of the form to be top down without the text area and table being side to side. I recommend that you use the table width editing and try to make it work with all of the elements of the statement.
Moving Logo Left, Right, or Center
The default logo is flushed to the left side of the page. If you prefer to move this logo (or logos) you can simply change the align verbiage in the code to move it where you prefer. The accepted types are left, right, or center.
Sample of Code Added:
<body STYLE="font-family:Arial, helvetica, sans-serif; font-size:11pt">
<div style="margin-left:20px;margin-right:40px;margin-bottom:0px;margin-top:0px;font-size:10pt">
<table id="content" width="740px">
<tr>
<td style="text-align:right;"><img src="{$companyLogoURL}" alt="Success Factors"/></td>
</tr>
</table>
Where to Add/Edit Code:
Similar to the two logos approach, this change will affect the entire statement to make it top down instead of side to side. With this, I recommend that you use the table width changer to make it fit the page better and give the entire statement a better flow.


