SAP Cloud Identity Services (CIS), part of SAP BTP, can be used to integrate Identity Access Management (IAM). In our last blog, we discussed the integration of SAP Cloud Identity Services (CIS) with IBM Security Verify, and now we’re taking the next step in this integration. User provisioning is the process of setting up new user accounts in a system or application. In this blog, we will explore a common use case – – transitioning user provisioning from IBM Verify to SAP Cloud Identity Services, and how this transition can streamline operations and enhance security.
The Challenge of User Provisioning
User provisioning is the process of granting and controlling access to resources within an organisation’s information technology infrastructure. Historically, on-boarding or off-boarding users has been a laborious and time-consuming procedure that frequently required numerous processes across multiple systems. As businesses embrace cloud solutions, the complexity of user provisioning has grown, necessitating automated and integrated approaches.
Transitioning from IBM Verify to SAP Cloud Identity Services
IBM Verify is a comprehensive identity and access management system that includes multi-factor authentication (MFA) and adaptive access control, while SAP Cloud Identity Services offers identity lifecycle management, single sign-on (SSO), and access governance features. Integrating these two systems can help organisations automate and streamline user provisioning operations, while also improving security and user experience.
How does it work?

The diagram shows that IBM Security Verify acts as a central user management system. It creates user accounts and manages their attributes, and also provisions them (or creates them) in SAP Cloud Identity Services, potentially syncing relevant user attributes. Selected attributes from Verify are mapped to specific target attributes in SAP Cloud Identity Services, ensuring consistent user information across both systems. SCIM, a standardised protocol, enables communication between Verify and SAP Cloud Identity Services. On the left side of the diagram, IBM Security Verify acts as a SCIM server, receiving requests for user management and then modifying the target directory as needed. This streamlines user creation and ensures consistent user information across both systems.
Prerequisites
- SAP Cloud Identity Services
- IBM Security Verify
- A smartphone with IBM Security Verify App
Configurations and Settings in IBM Security Verify and SAP Cloud Identity Services
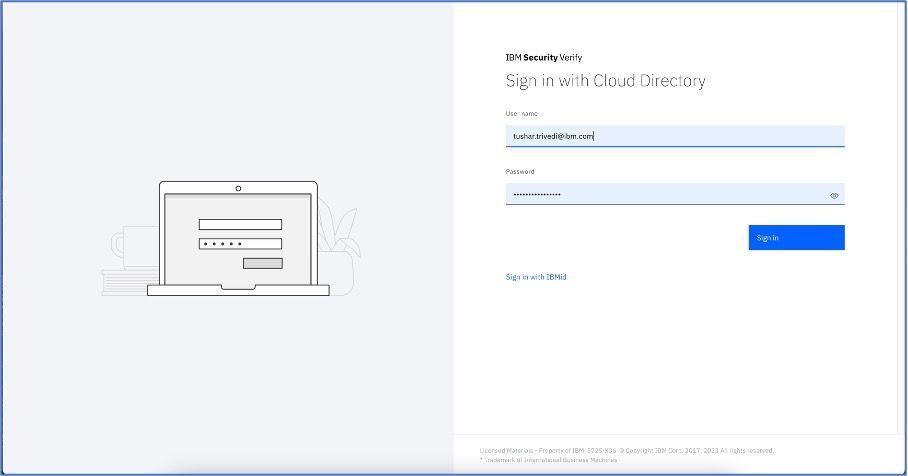
Log into IBM Security Verify as an administrator
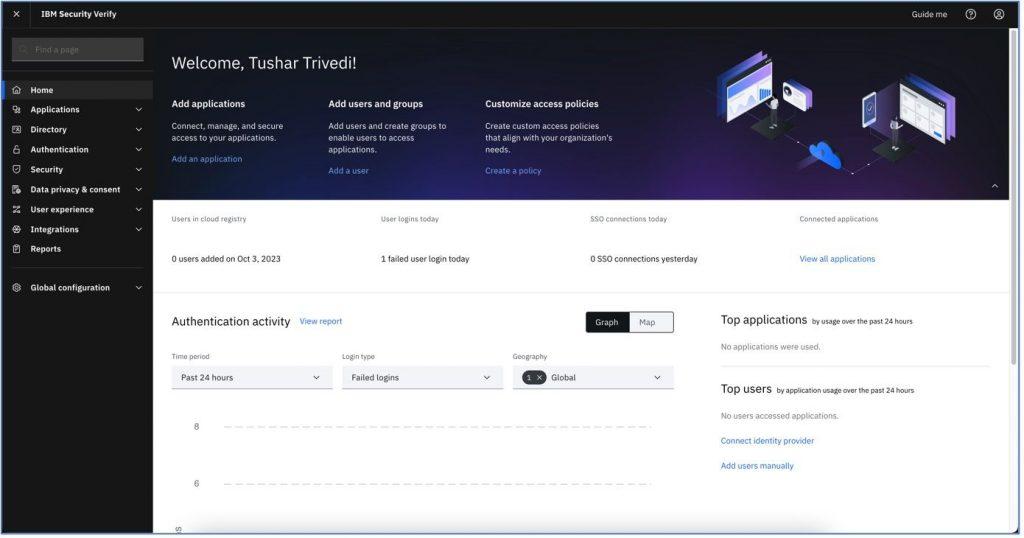
When a user logs in, the home screen as shown below will be displayed.
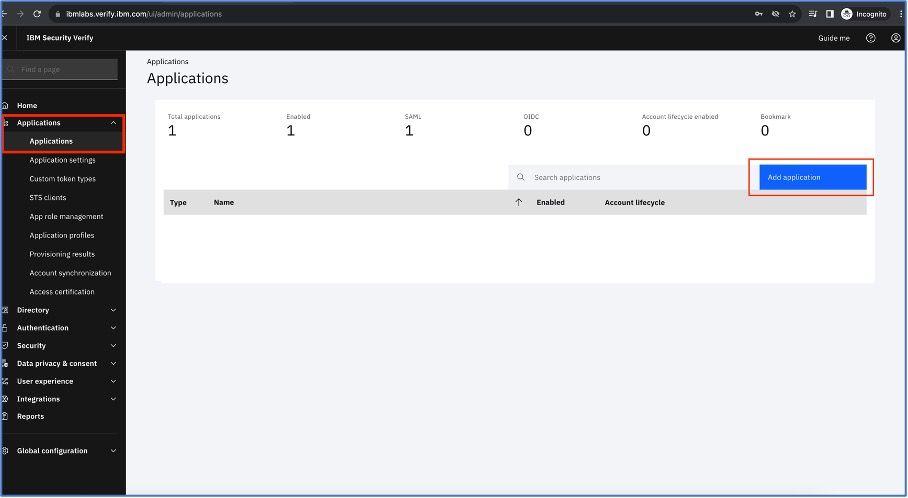
On the left panel, click on “Applications” under “Applications”. On the right side of the screen, there is an “Add application” button. Click on it.
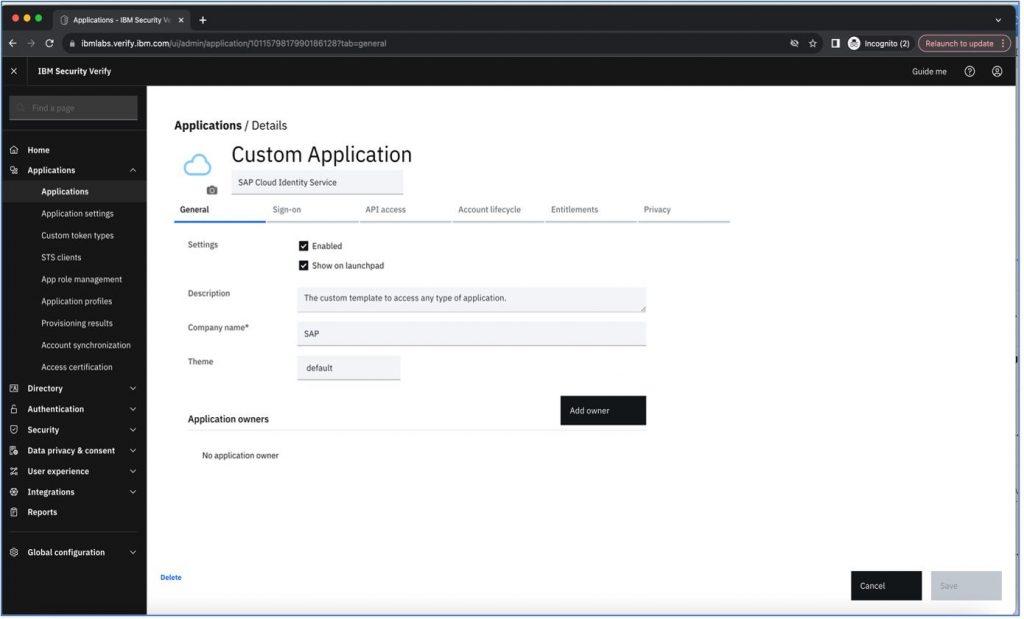
Fill in the necessary details under “General” section as below and save the details.
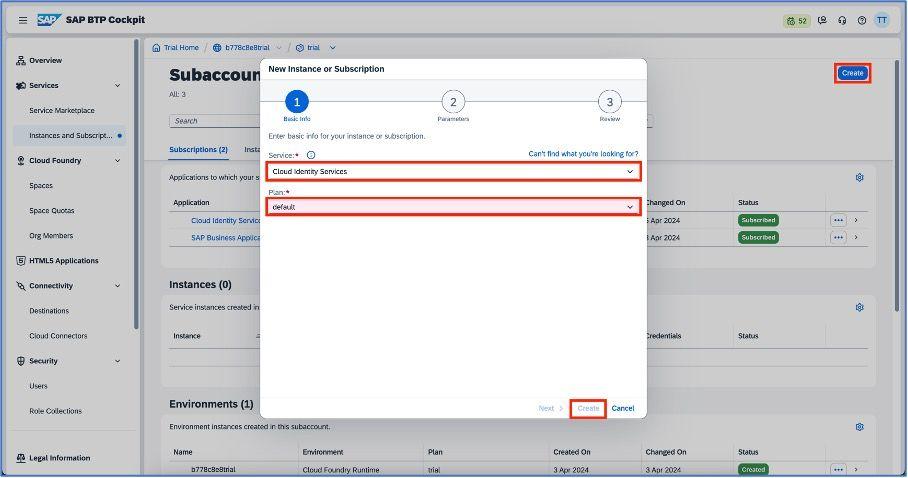
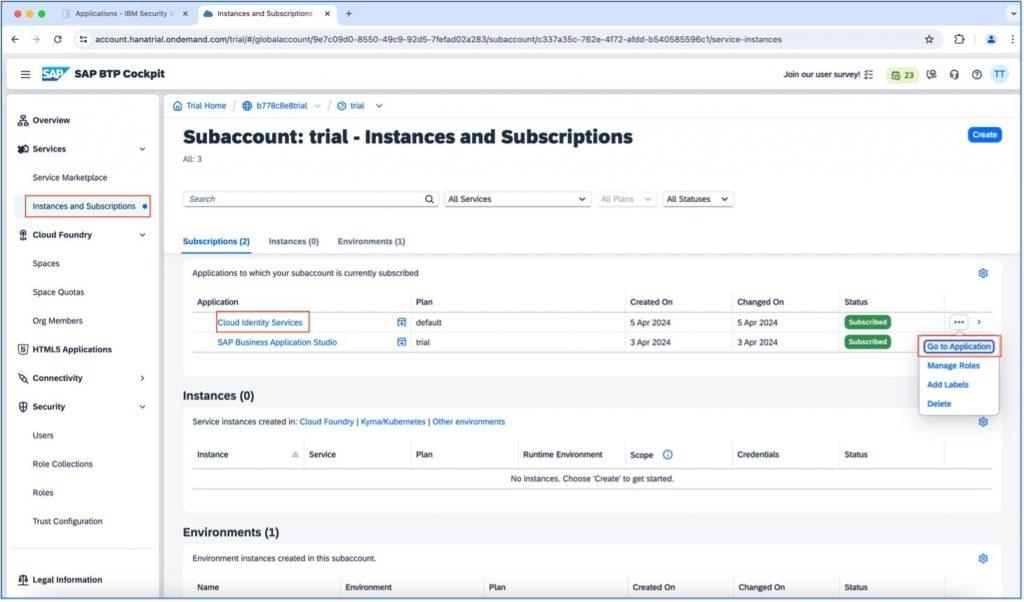
Before we go further, let’s log into SAP BTP account and you will be navigated on SAP BTP Cockpit. As suggested below, navigate to the “Instances and Subscriptions” tab which is under “Services.”
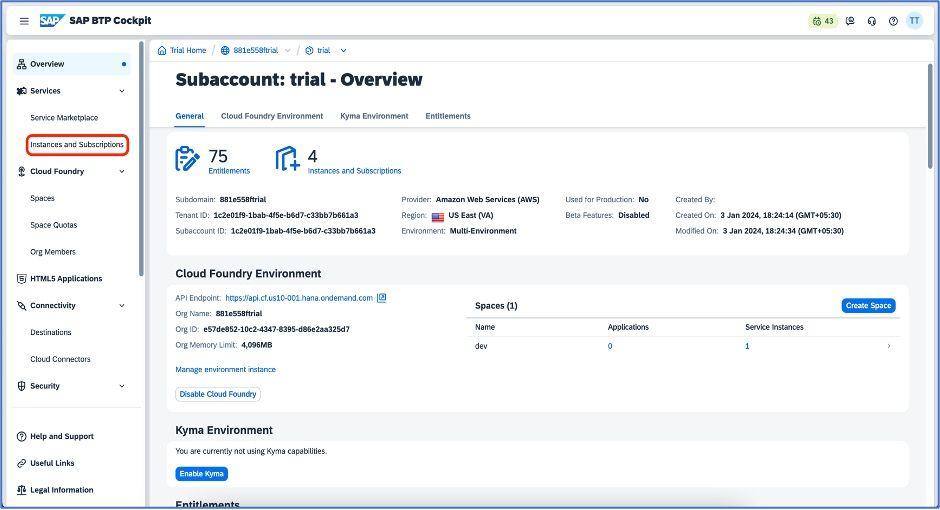
You have to enable the cloud identity services application.
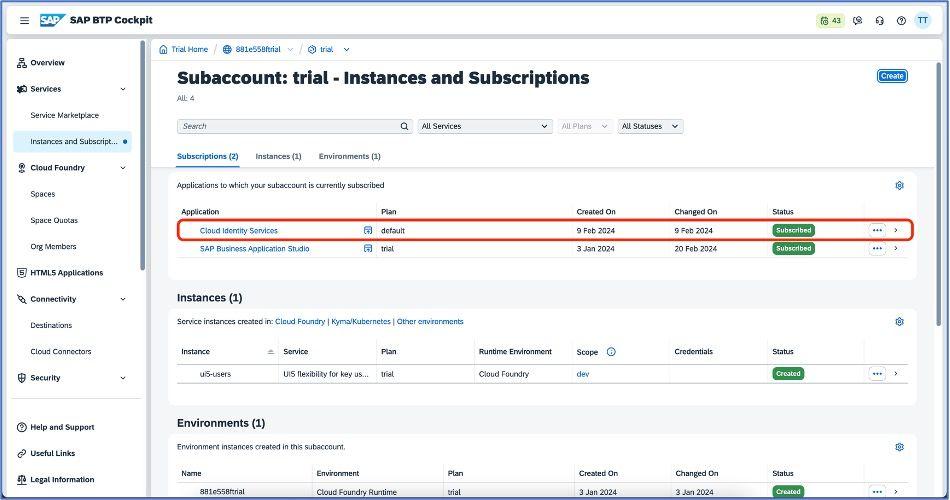
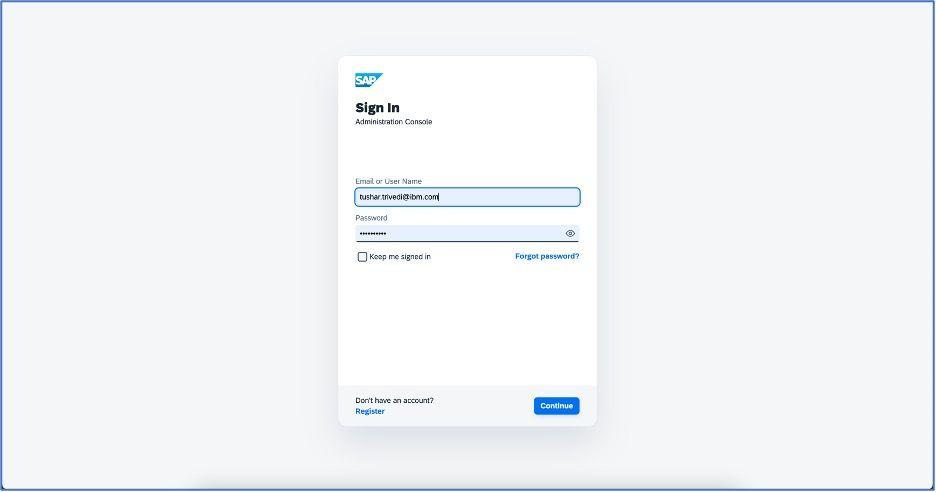
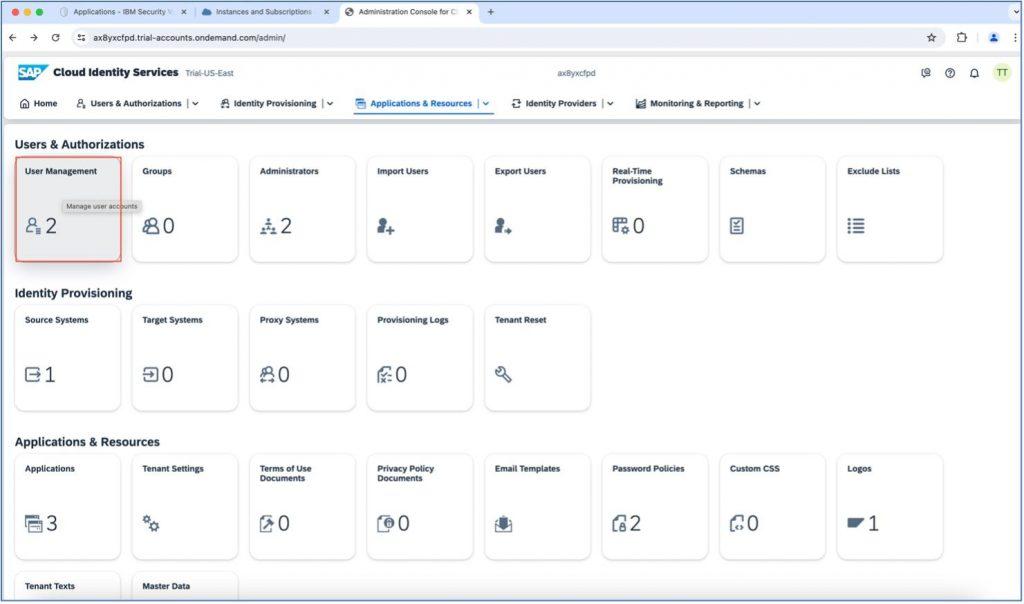
Once enabled, it will look as below. Now, click on Cloud Identity Services application and you will be redirected to the login screen of the SAP authentication screen as shown below.
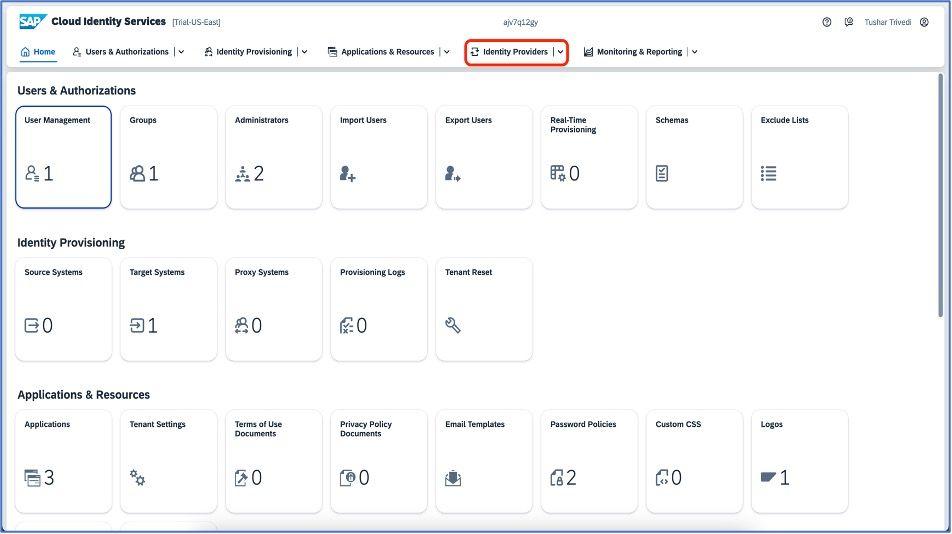
After a successful login, you can see the home screen of Cloud identity Services. Go to the “Identity Providers” as highlighted below :
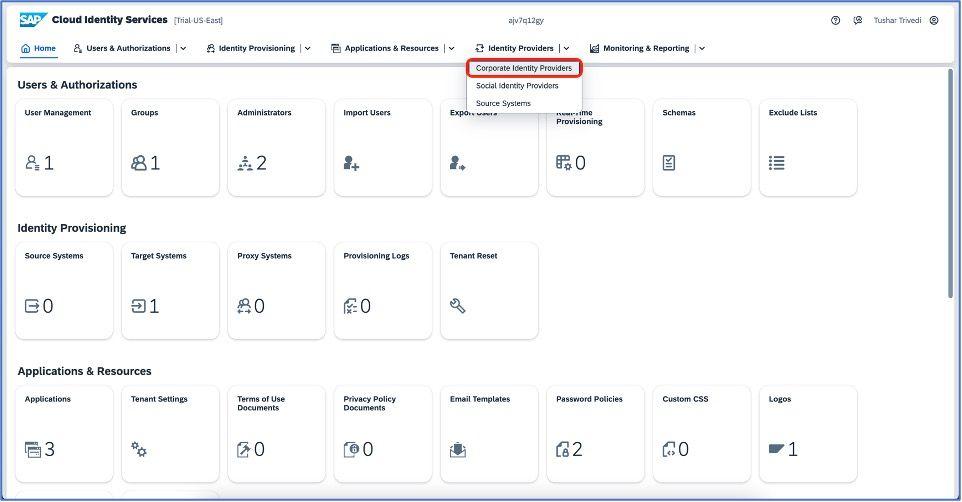
Click on the Corporate Identity providers and create new identity provider.
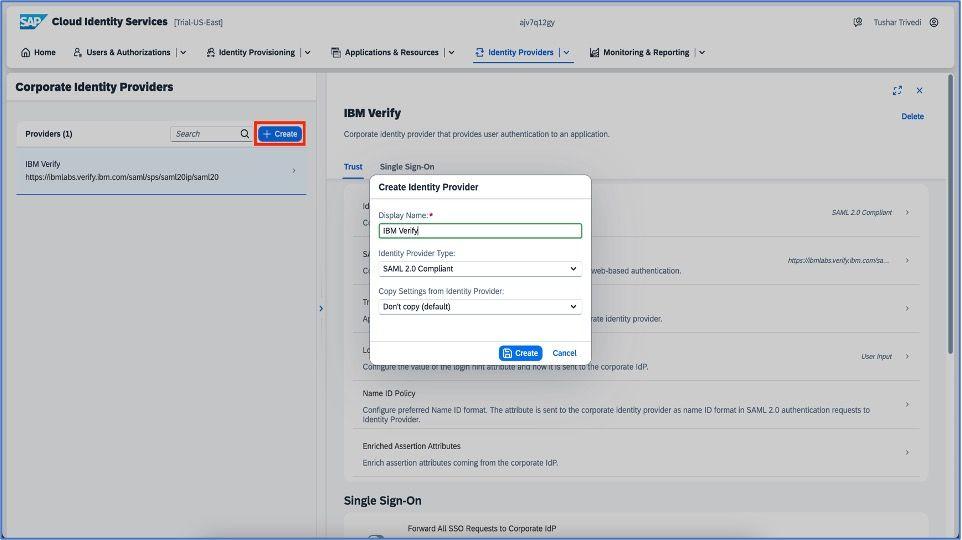
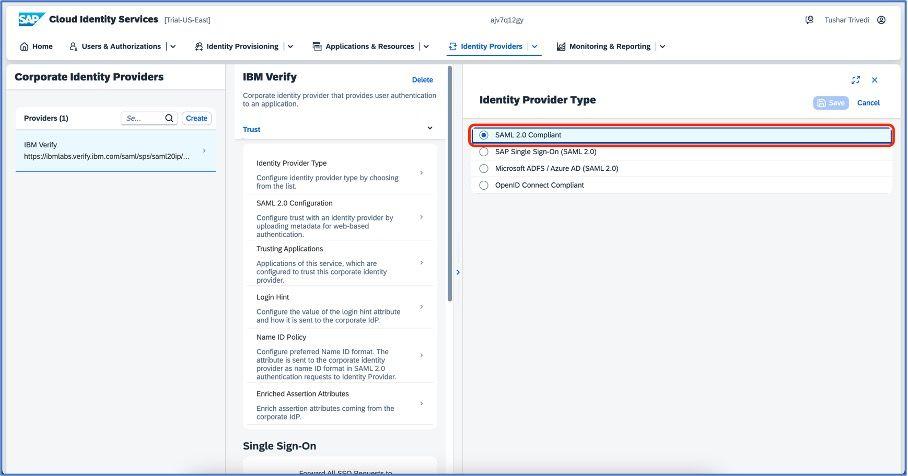
Once the new identity provider is successfully added, click on the identity provider type and select SAML 2.0 compliant, as shown below:
Go to the SAML configuration section and fill in the information as shown below:
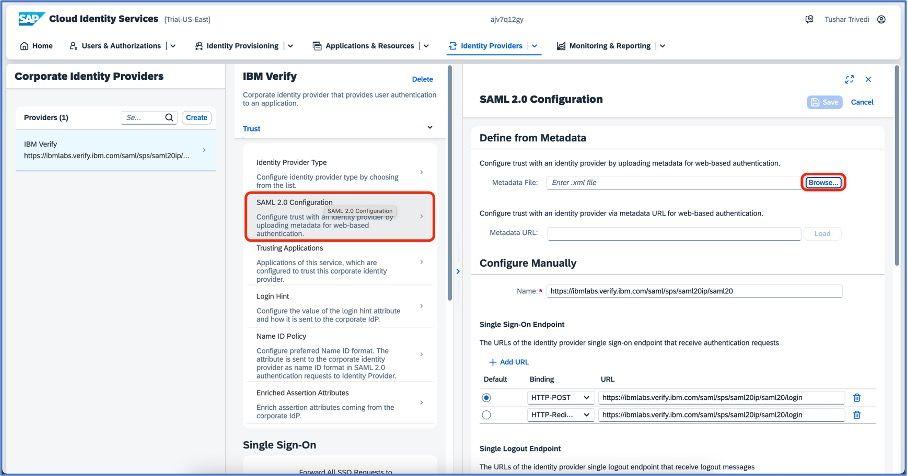
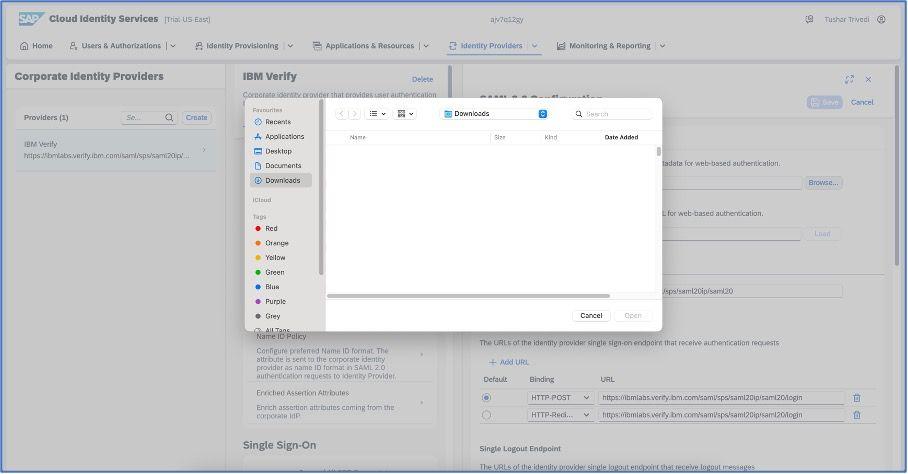
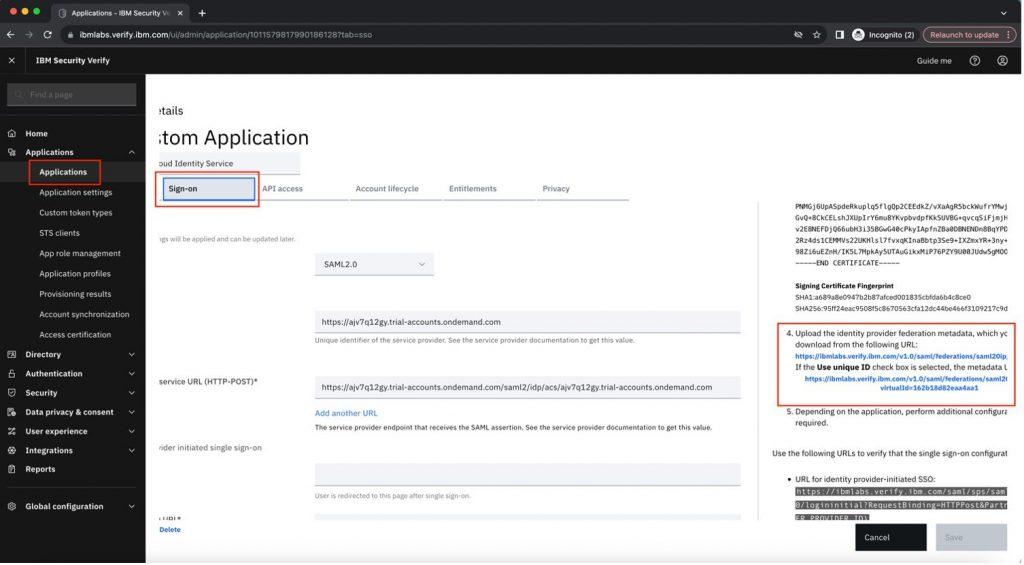
You can browse the “Metadata” file from your device once you download it from IBM Security Verify dashboard. Go to the “Sign on” section of the application and on the right side of the screen, download the file from the given URL and upload the same in SAP Cloud Identity Services as highlighted below:
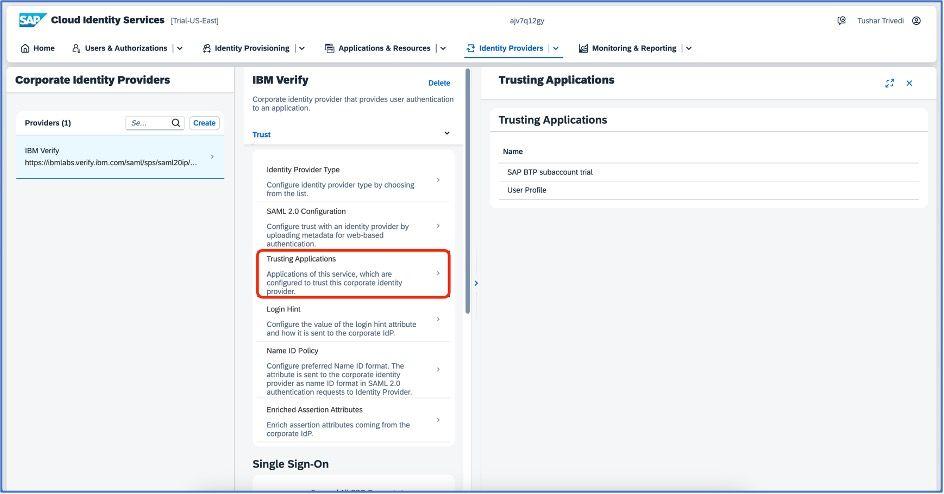
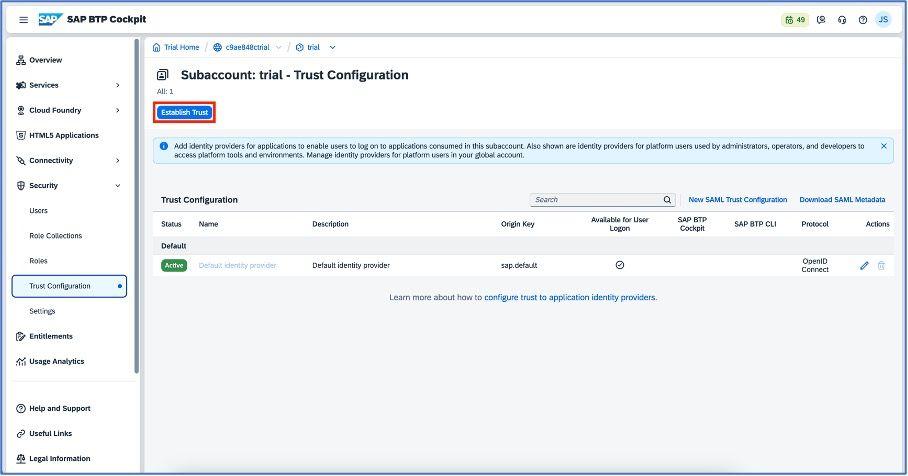
Click on the Trusting application section and add SAP BTP trial subaccount.
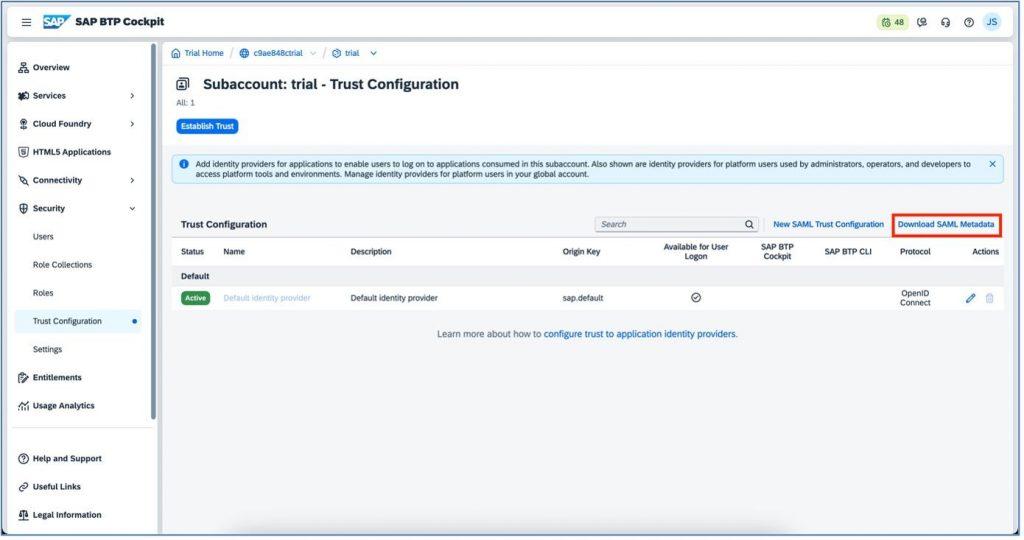
Establish the trust configuration, which is under the “Security” section for the cloud identity application as shown in the below screenshots.

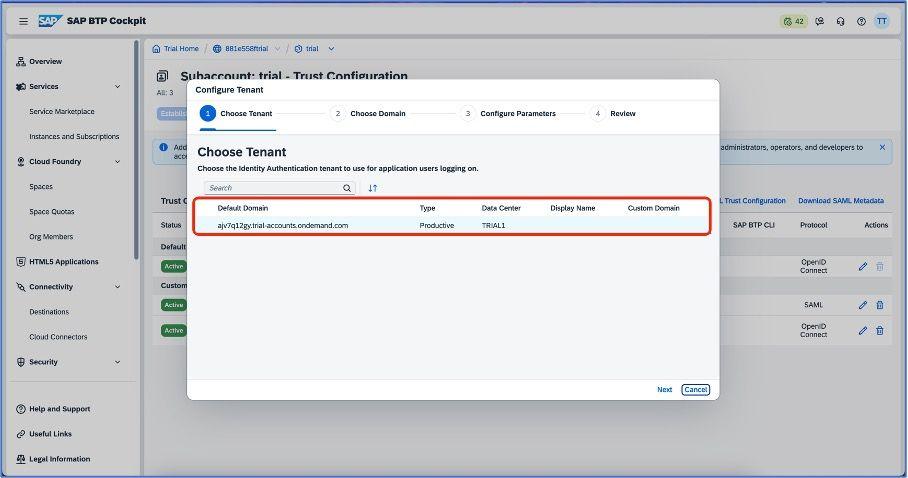
You will see the below steps once you click on establish trust. In the first step, choose tenant and click on the next.
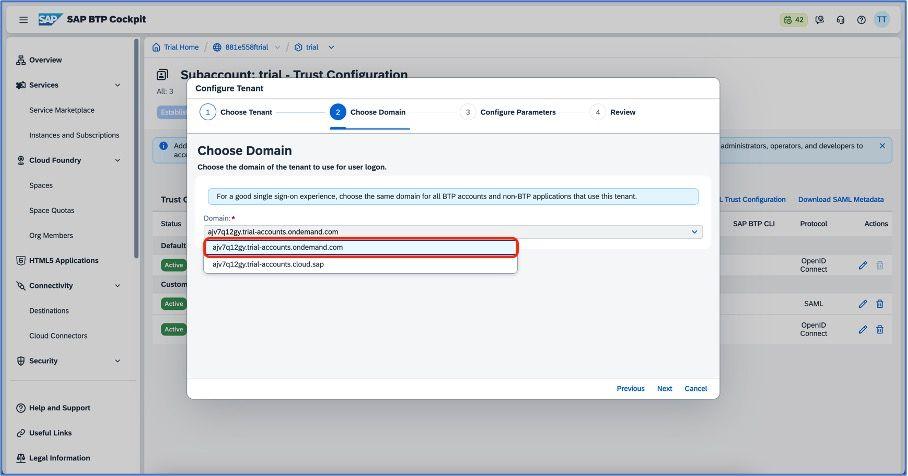
After selecting a tenant, choose domain for your SAP Cloud Identity Services application.
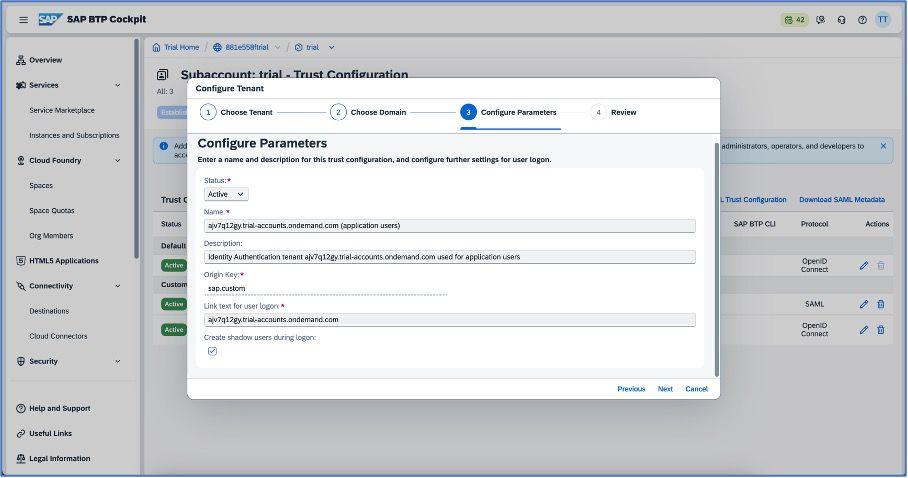
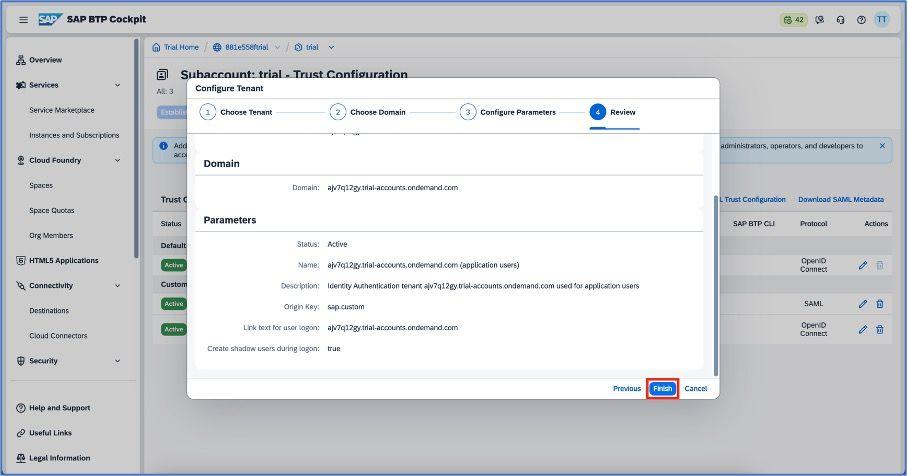
Click on the next button and configure parameters as shown in the below screenshot.
Click on the next button and review the setup that you have done while establishing the trust. Finally, click on the finish button and save the details.
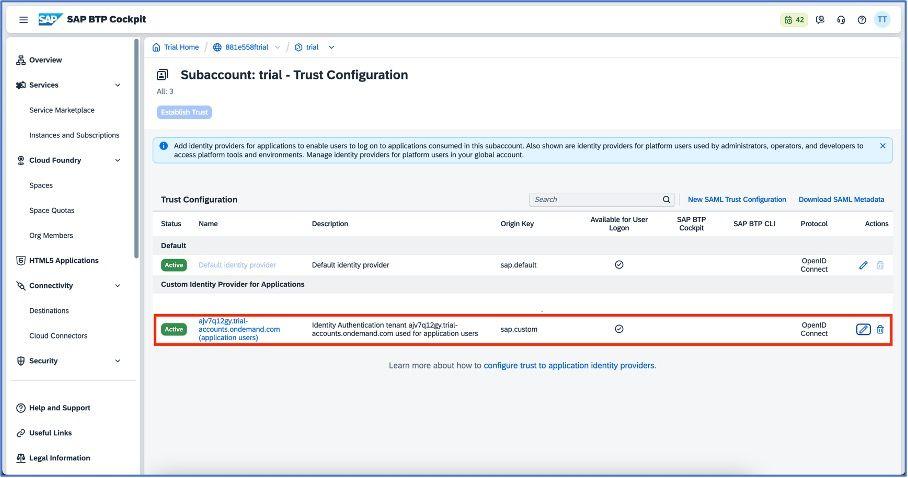
Once done, you can see the trust new active trust configuration as shown below:
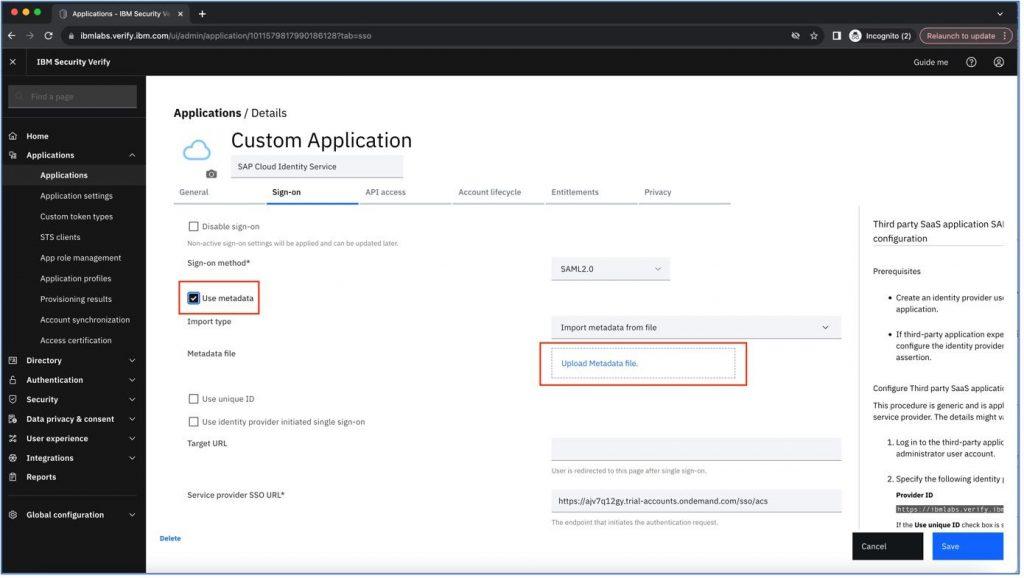
Now go back to IBM Security Verify and click on “Sign-on” section, then select “Use metadata” checkbox. It will allow us to upload the metadata file which we have downloaded from SAP BTP as shown below:
Upload the metadata file which you have recently saved on your device to IBM Verify dashboard.
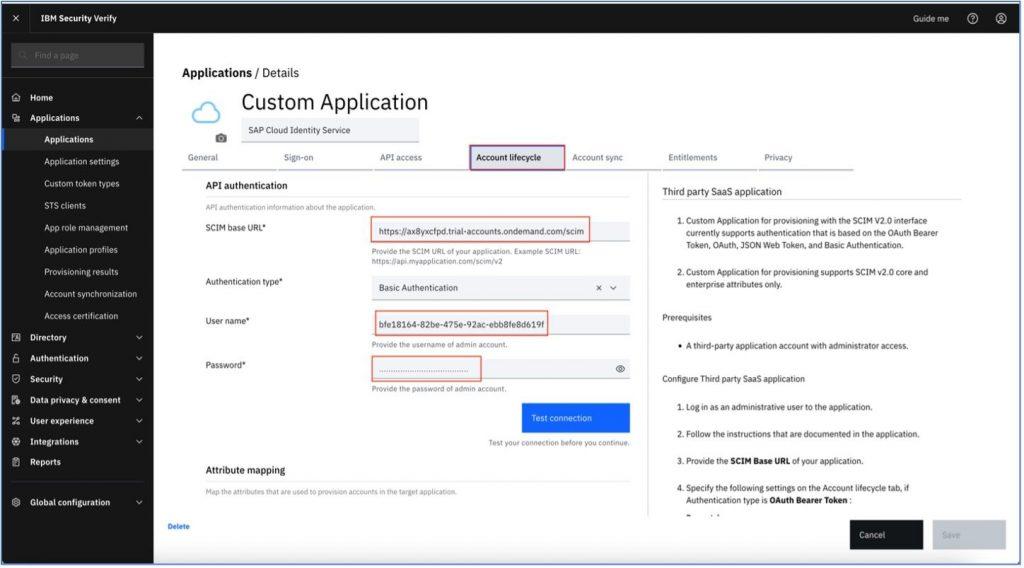
Now go to the “Account lifecycle” tab and add SCIM URL, Username and password detail as shown in below image. You can get all the details from SAP Cloud Identity Services application page.
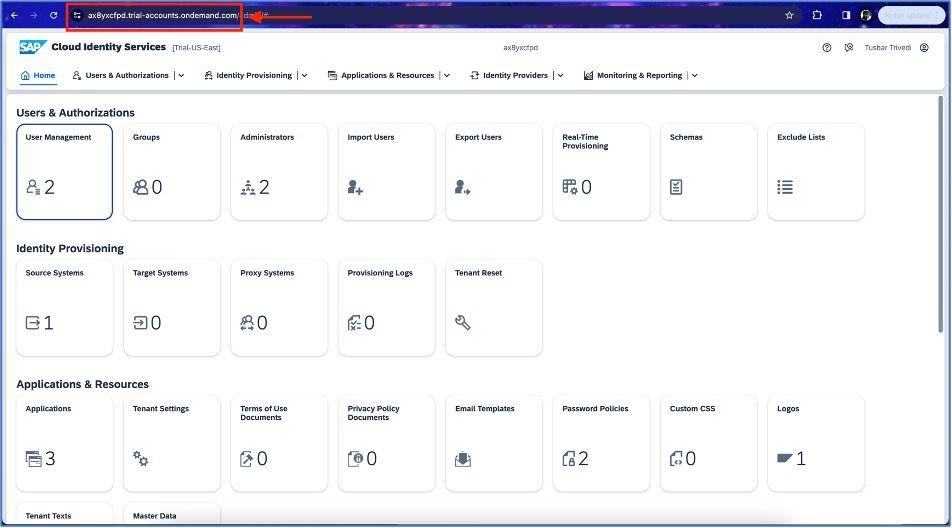
To get SCIM URL, go to SAP CIS and get the URL details from the browser and add “SCIM” at the end of URL.
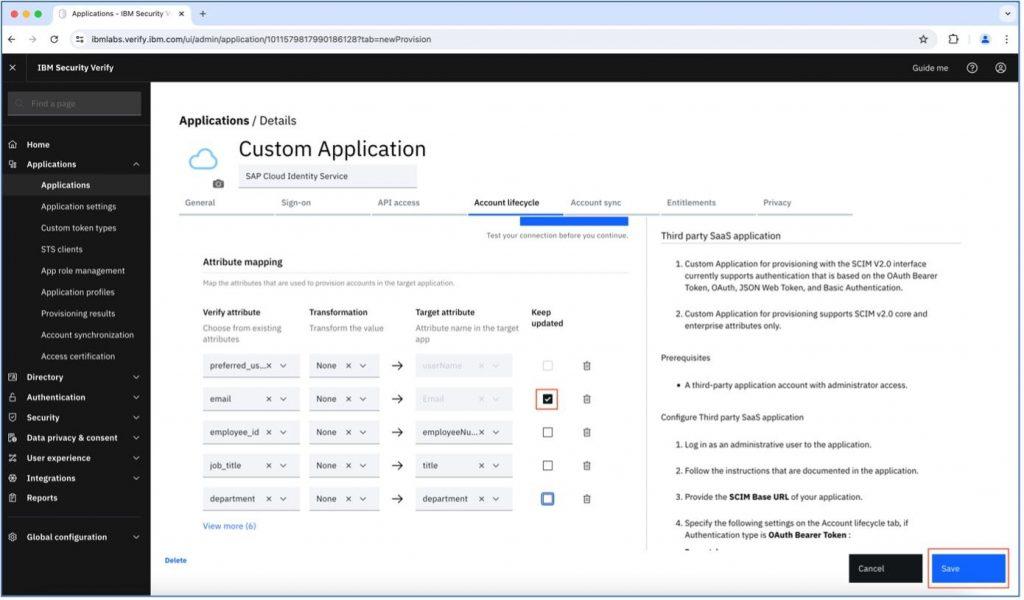
After adding the above details, scroll down and you can see “Attribute mapping” section. Click on the checkbox for which attribute you want to map from IBM Verify to SAP CIS and want to keep updated. Here we have checked email. Save this detail once changes are completed.
We have completed the configurations in IBM Security Verify and SAP Cloud Identity Services. Let’s add user with attribute into Verify and check if it is mapped to Cloud Identity Users dashboard.
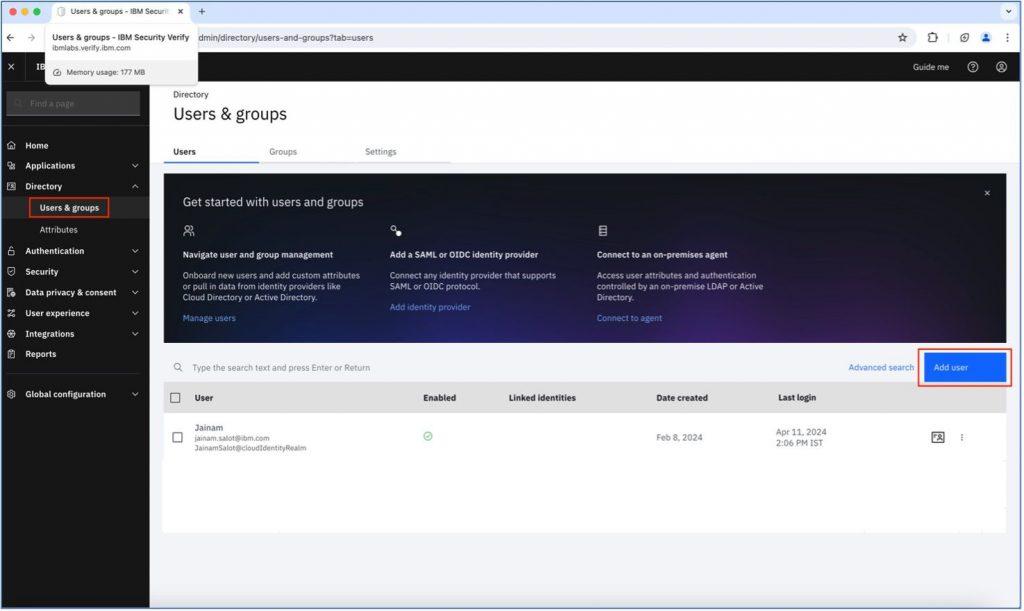
Go to the Users tab under the “Directory” section on the left side of the verify dashboard and click on the “Add User” button as shown in below screenshot.
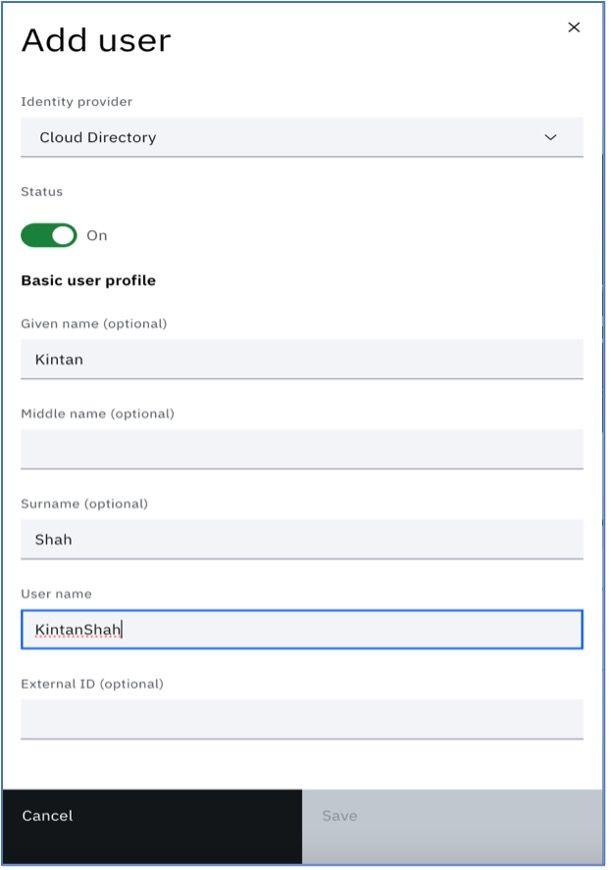
Fill out the necessary information for the user as mentioned in the below image and click on the “Save” user tab.
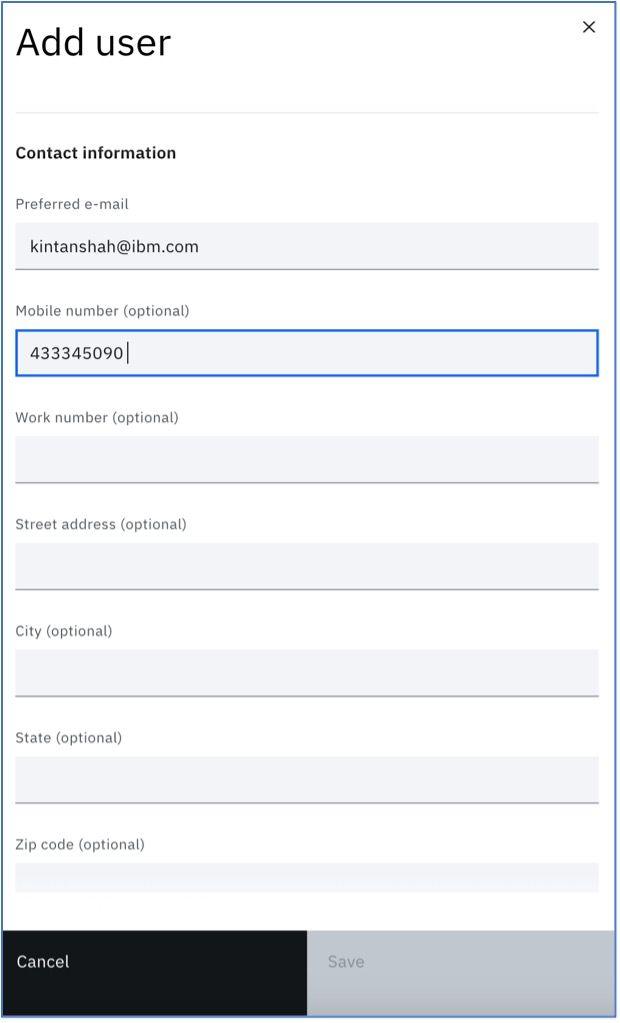
Scroll down and you can add more detail about the user. Here we have added an email ID, mobile number and user company details.
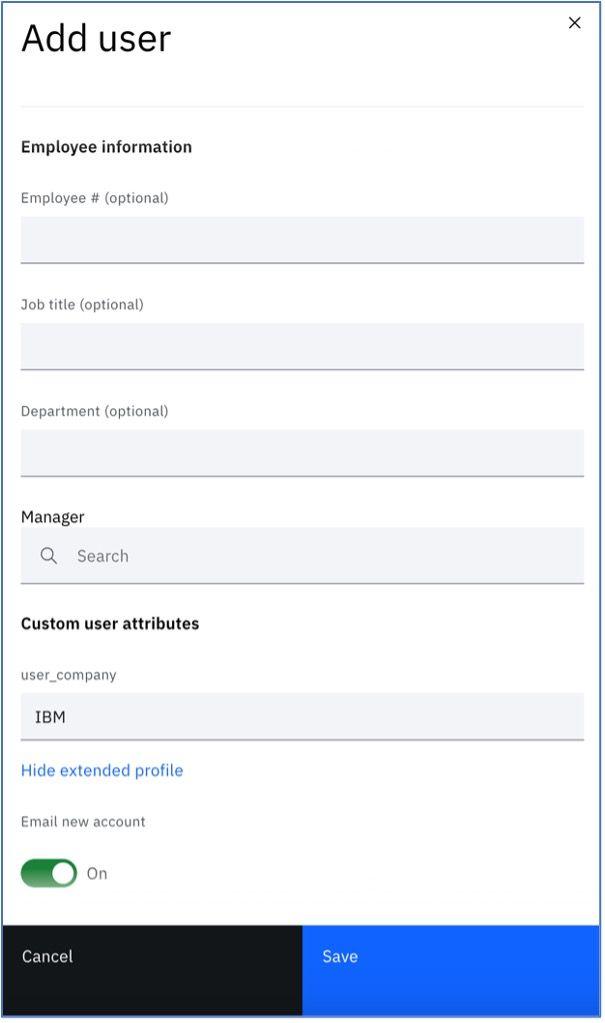
Once done, click on the Save button and the user detail will be saved.
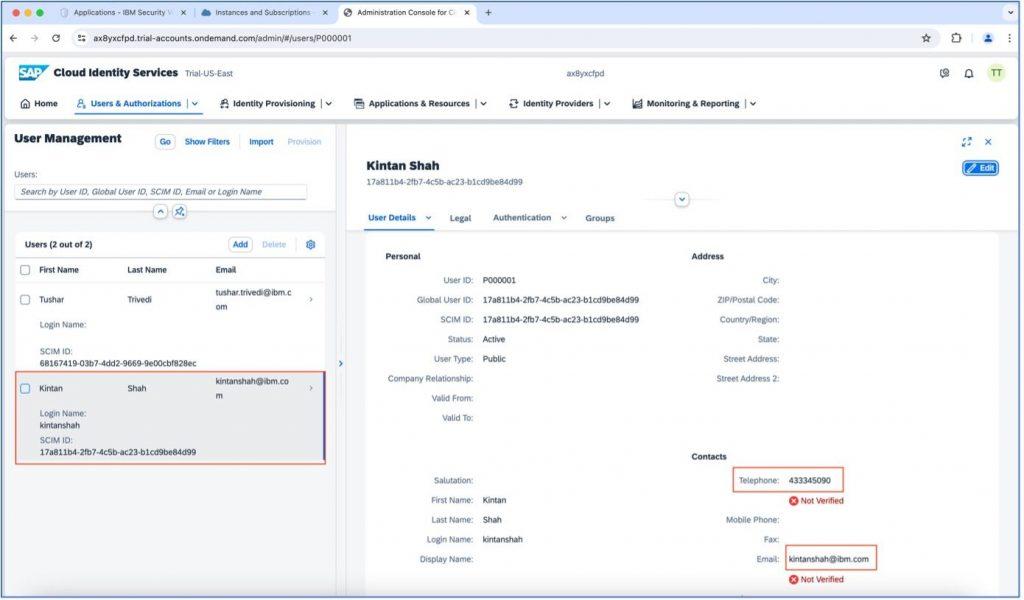
Open the Cloud Identity Services application and go to the user section to check whether the newly-created user from Verify is mapped.
Click on the “Instance and subscription” section from the “Services” section on the left menu, and once the application list is shown, click on the Cloud Identity Services application as shown below.
When the new application is loaded, click on the “User Management” tile and all the user list will be displayed.
As you can see in the below screenshot, a new user is created, which is added from Verify and mapped into SAP Cloud Identity Services. Also, the user detail is mapped into Cloud Identity Services.
Conclusion
Effective user provisioning is critical to maintaining security, compliance, and operational efficiency. Centralising identity management, improving security, and streamlining administration activities enables organisations to successfully manage user identities and access controls across their entire IT infrastructure. Embracing integrated identity management solutions is more than just convenient – – it is a strategic need for businesses looking to flourish in an increasingly linked and security-conscious environment.


