As SAP developers, we often work extensively with Core Data Services (CDS) to define data models. While CDS offers powerful capabilities, managing complex models purely through code can be challenging—especially in large-scale enterprise applications. This is where the CDS Graphical Modeler in SAP Business Application Studio (BAS) becomes a game-changer.
What is CDS Graphical Modeler?
The CDS Graphical Modeler allows developers to visually design entities, relationships, and services without manually writing .cds files. This visual approach enhances clarity, reduces errors, and improves collaboration between technical and business teams.
Step-by-Step: Creating Your First CAP Project with CDS Graphical Modeler
Lets create a dev space and then dive into the CAPM with cds:
Go to BTP COCKPIT Login
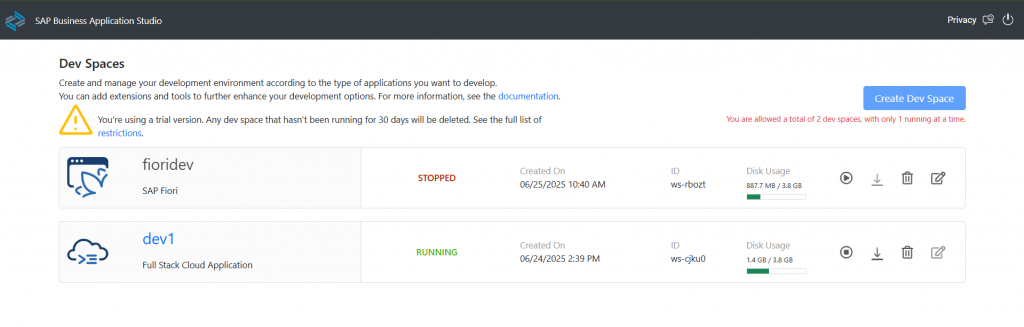
1. Start by logging into the SAP Business Application Studio via the BTP Cockpit. You’ll see a list of existing dev spaces.
- If a suitable dev space already exists, you can use it.
- Otherwise, click Create Dev Space.
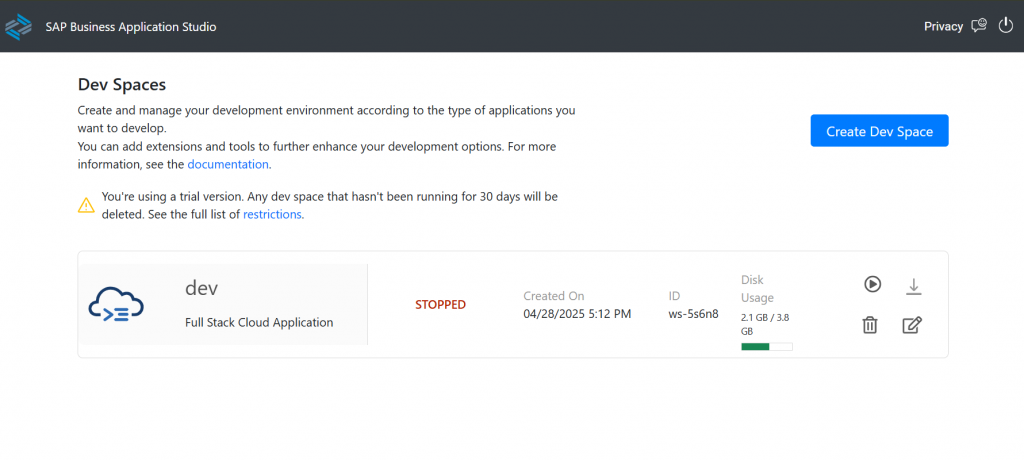
- After you click on create devspace below screen will appear:
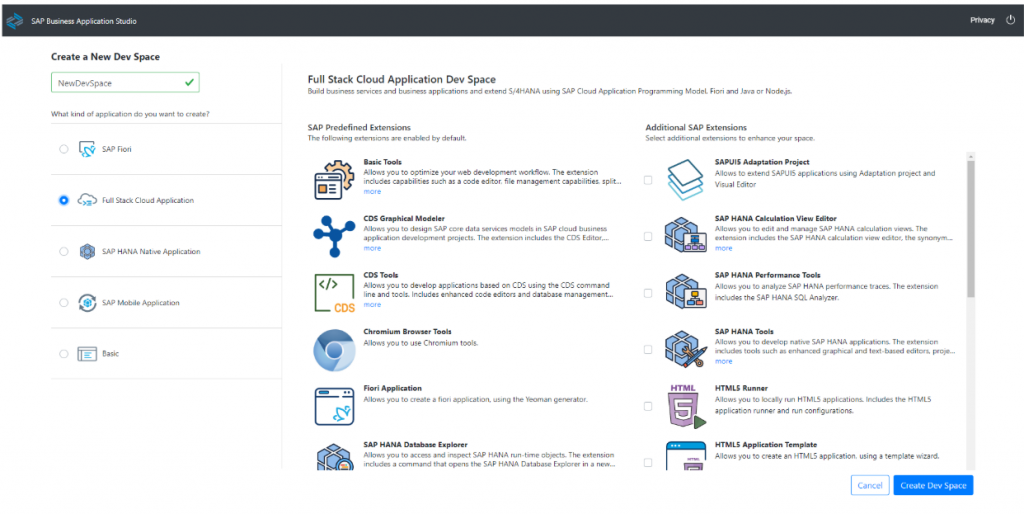
2. Create a Dev Space
- Enter a name for your dev space.
- Select the Full Stack Cloud Application category.
- Click Create Dev Space.
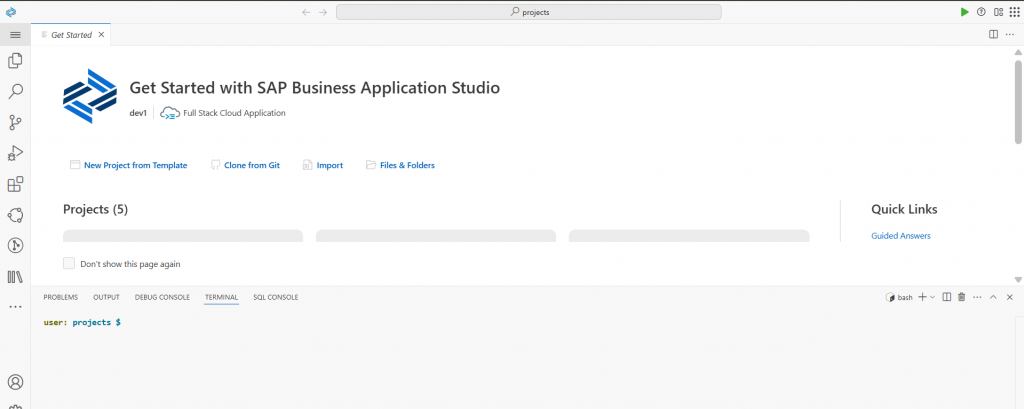
Wait until the status changes to RUNNING, then click the dev space name to enter.
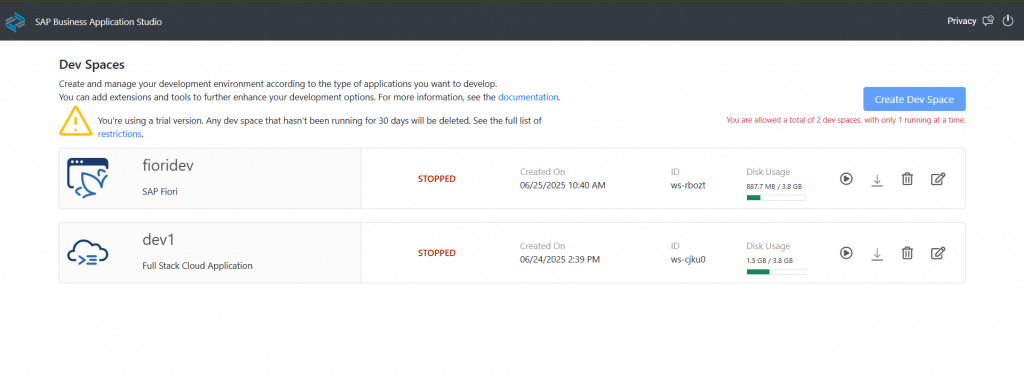
- Now, Wait until the newly created dev space is in “RUNNING” status:
- Now we can enter the dev space by clicking the dev space name:
First Create a CAP Project:
- Now let’s create a sample CAP project using the project wizard. Click “Start from template” from the welcome page and launch the project wizard.
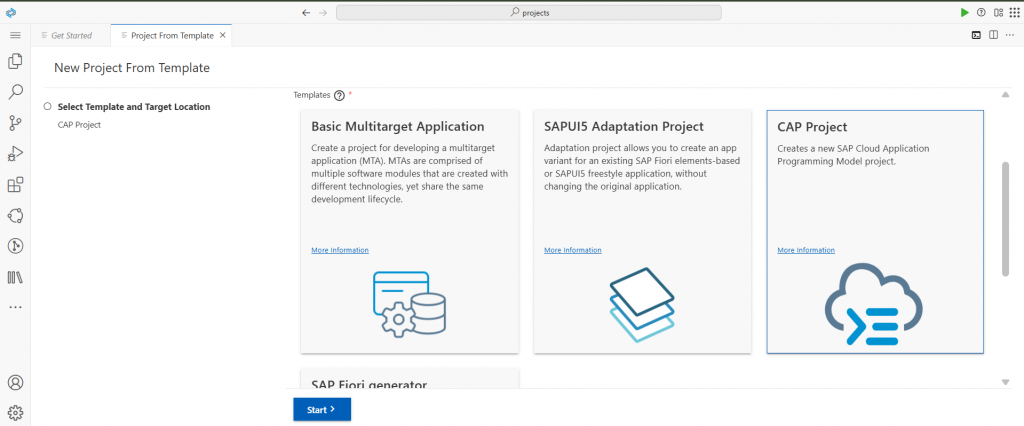
- Please select “CAP Project” from the template in the project wizard:
- Click “Start” button and enter the CAP project details in the next page of the project wizard. Please check “Basic Sample Files” and ensure the project wizard to generate sample CDS files for you.
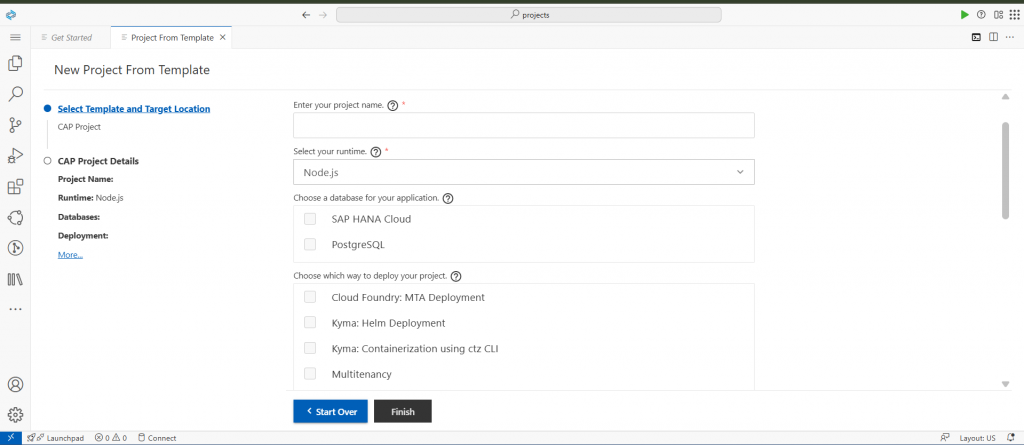
- Enter the project name, then select the desired runtime—either Node.js or Cloud Foundry. Once you’ve made your selections, click the “Finish” button to close the wizard. The development space will refresh, and you’ll see your newly created CAP project folder appear in the project tree.

You can also create the CAPM project from the terminal by using the command:CDS INIT PROJECTNAME
Let me give you a glimpse of the 3 main files showing here:
APP/:
This directory includes the UI layer of your application. Typically, it contains SAP Fiori elements or SAPUI5 applications. You may encounter subdirectories such as Fiori, webapp, or particular app names. These applications utilize the OData services provided by the srv/ layer.
DB/:
This represents the data model layer. It includes your CDS definitions (.cds files) that specify: Entities Types Associations Annotations Additionally, you might encounter a data/ folder containing CSV files utilized for loading initial data. This layer is tasked with establishing the persistence model and is deployed to a database such as SAP HANA Cloud.
SRV/ :
This represents the service layer. It includes .cds files that define services (for example, CatalogService.cds) which make entities from the db/ layer accessible. Additionally, you can incorporate JavaScript or TypeScript handlers (.js or .ts files) to execute custom logic. This layer functions as the API layer, providing OData or REST services.
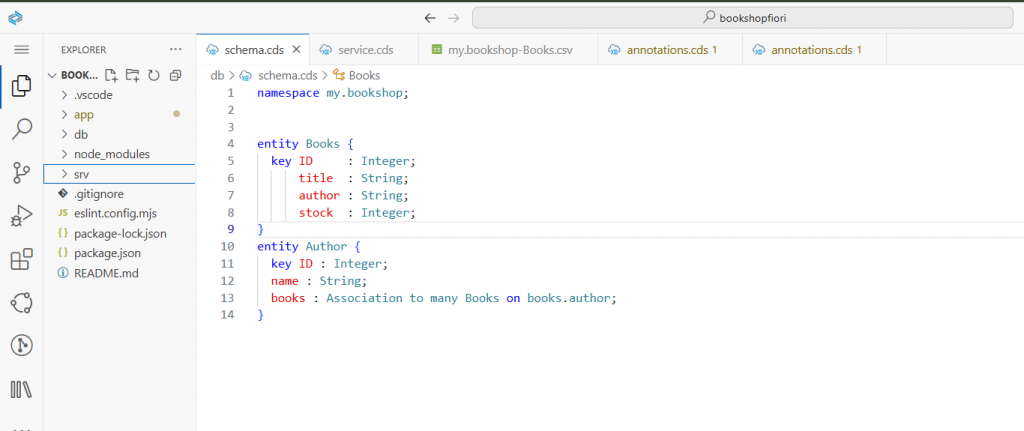
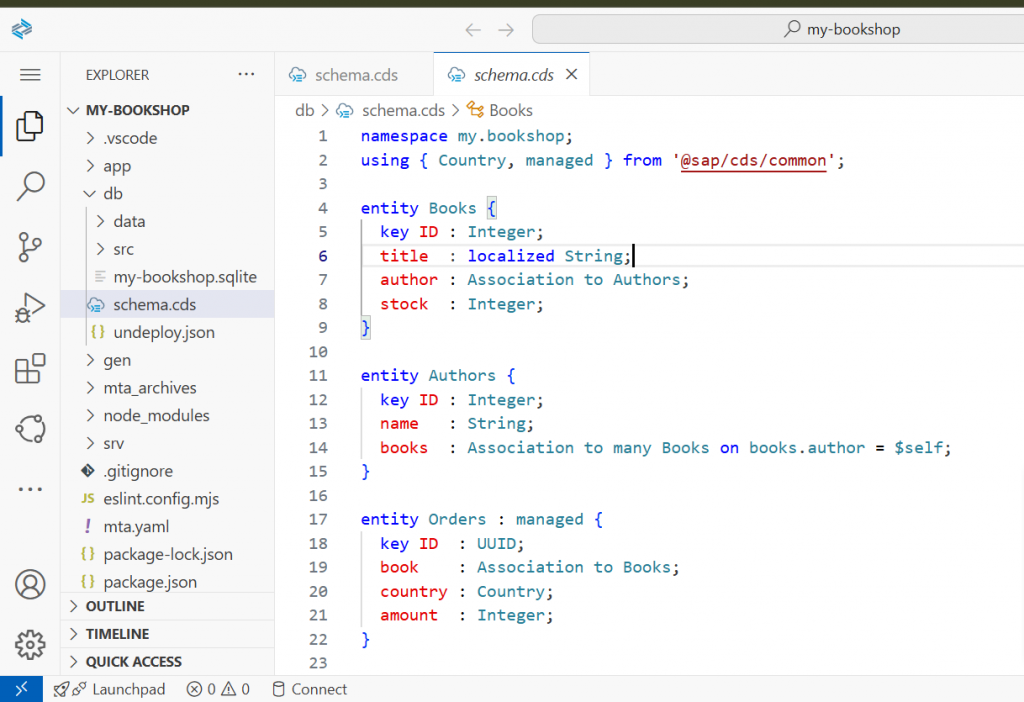
Create a new file as schema.cds in the DATA folder.
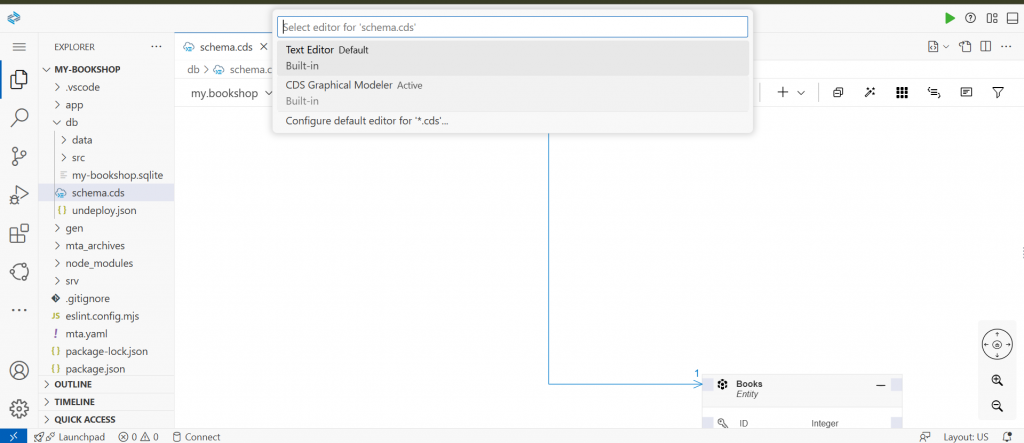
- Now right click on the schema .cds and open with CDS Graphical modeler.
- You can use the CTRL +SHIFT +P shourcut as well to open the command pallet,
then search for CDS GRAPHICAL MODELER
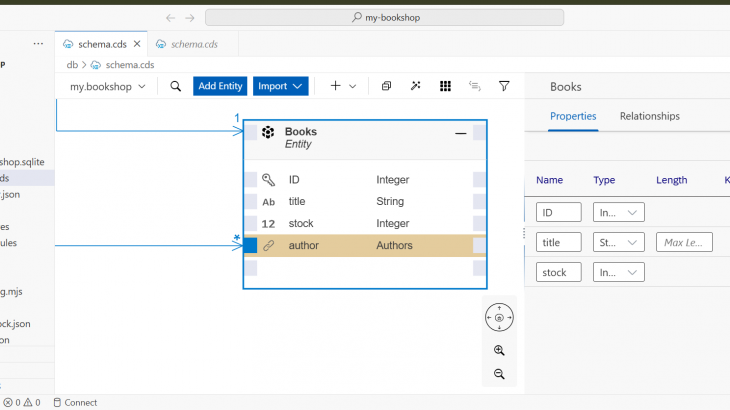
- Previously we have written some code and then we created an entity and their attributes. The same thing we can do with out writing a single line of code and manage their attributes and association and composition as well.
we can:- Create entities visually.
- Define attributes, associations, and compositions.
- Automatically generate the corresponding CDS code
- Create entities visually.
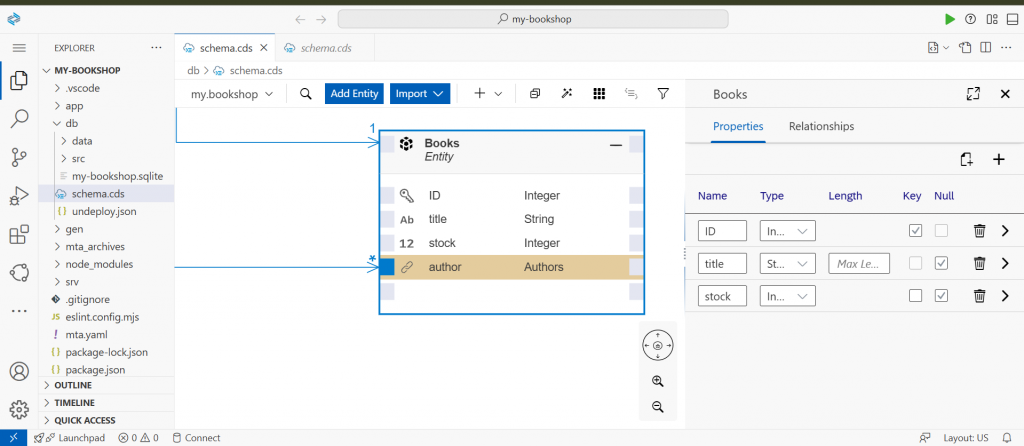
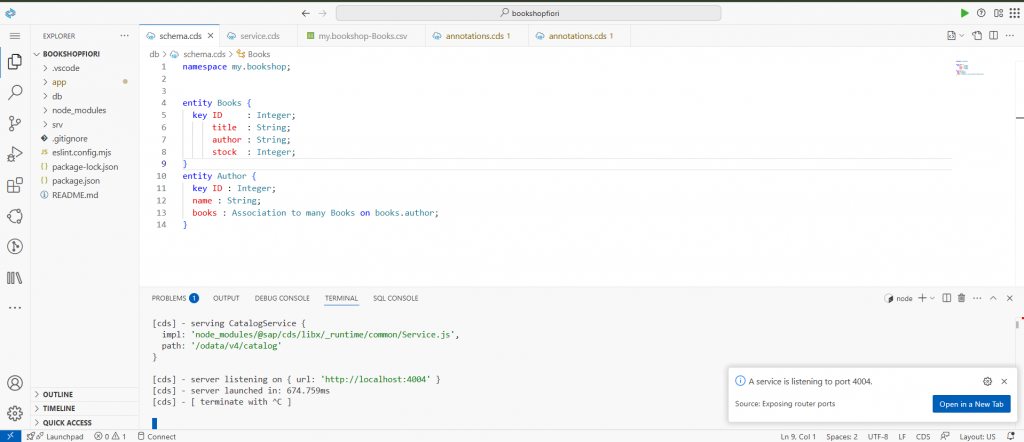
- There is only one entity books there and then i have created two more entities with the help of cds graphical modeler.
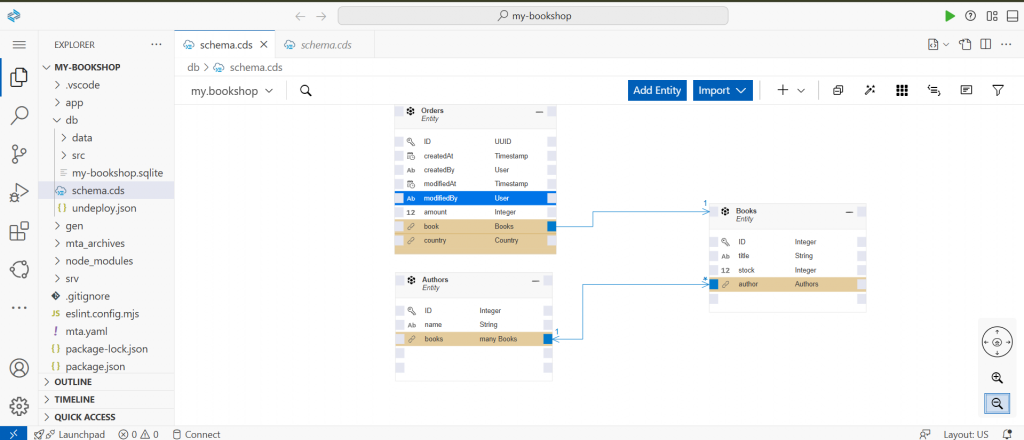
- We can also created multiple number of Entities without writing code and it automatically create the code for the entities we have created through Cds graphical modeler.
- After successfully created the we can test it locally and also deploy it in the hana cloud as well.
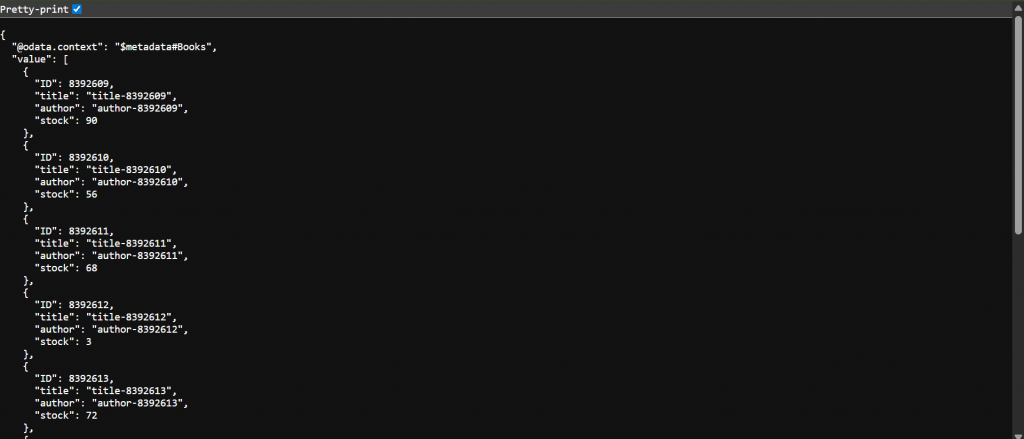
To test it locally you can run the command CDS WATCH in the terminal
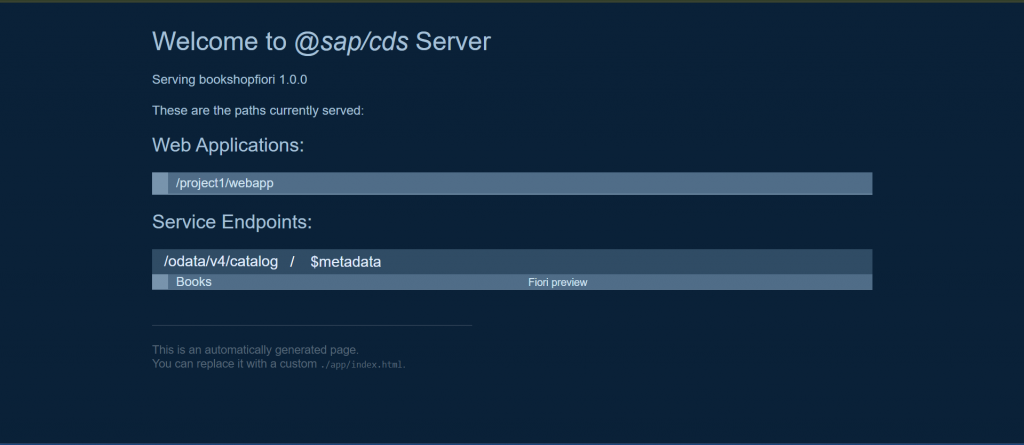
- OPEN IN A NEW TAB
- Now we can also deploy this application in the Hana cloud as well .
Conclusion: The CDS Graphical Modeler marks a major leap forward in streamlining CDS development. By bridging the gap between technical design and business insight, it empowers teams to accelerate development and collaborate more effectively.


