Introduction
The following guide is a detailed, step-by-step guide on how to cluster SAP ASCS and ERS running on Windows in the AWS cloud based upon what I have learned over the past few years.
The examples assume that there are two nodes in the cluster (SIOS1, SIOS2) and each node resides in a different availability zone in the same AWS region. When following the examples please be sure to substitute the computer names. IP address and other variables with those that are applicable to your environment.
The guide makes some assumptions that you are reasonably familiar with Windows, AWS and SAP.
Step 1: Provision Servers
- Pick an instance type
- It is important to pick an instance that has Instance Store Storage attached, also known as ephemeral disks. We will use this disk to store the DataKeeper bitmap file as described later in the documentation. A list of supported instance types can be found here.
- Add primary and secondary IP address on each instance
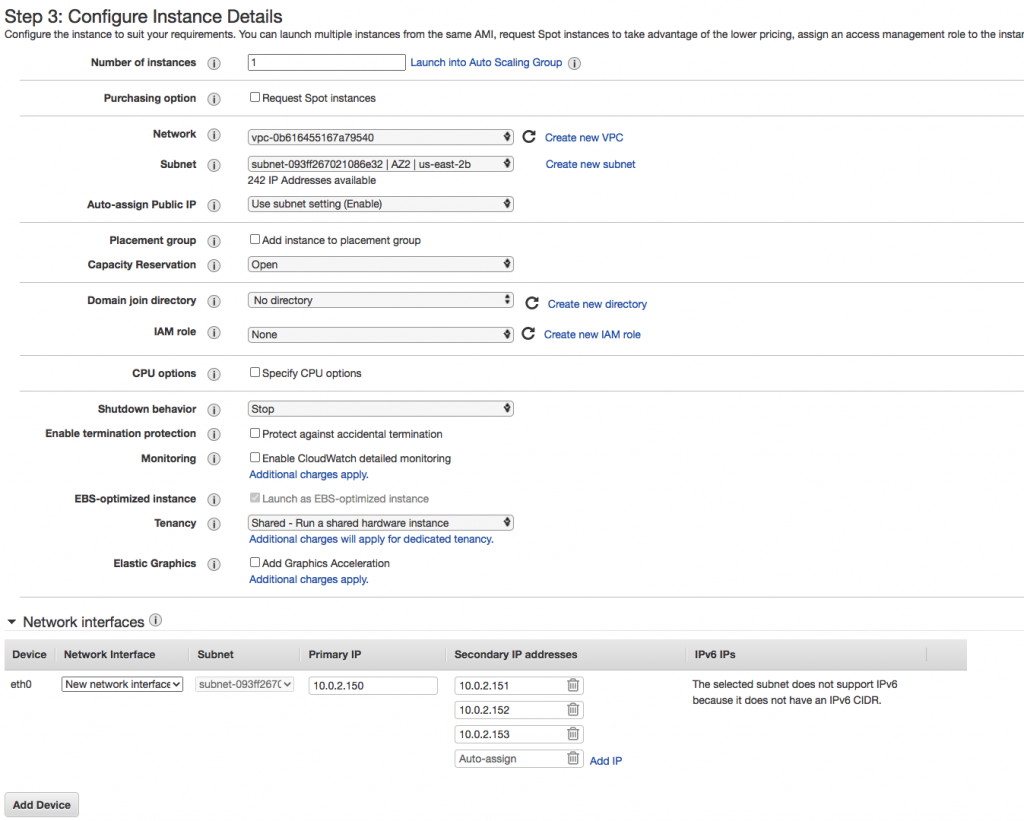
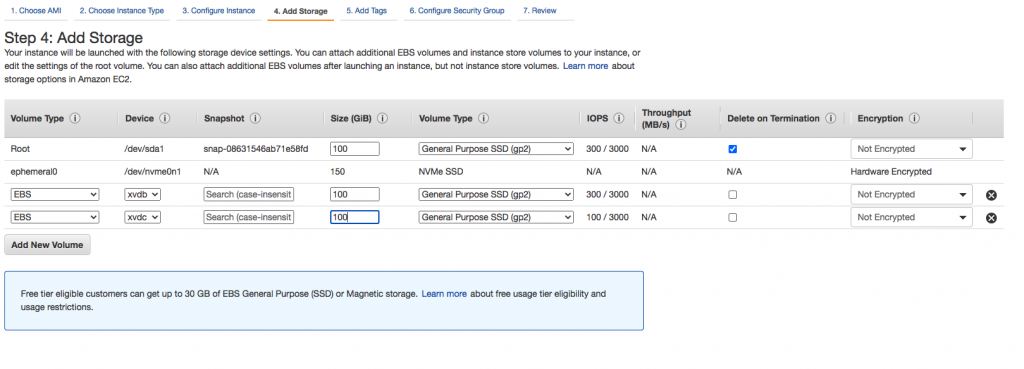
- Add EBS volumes to each instance
- When provisioning the server be sure to attach at least one additional EBS volume to each server.
- Open security groups
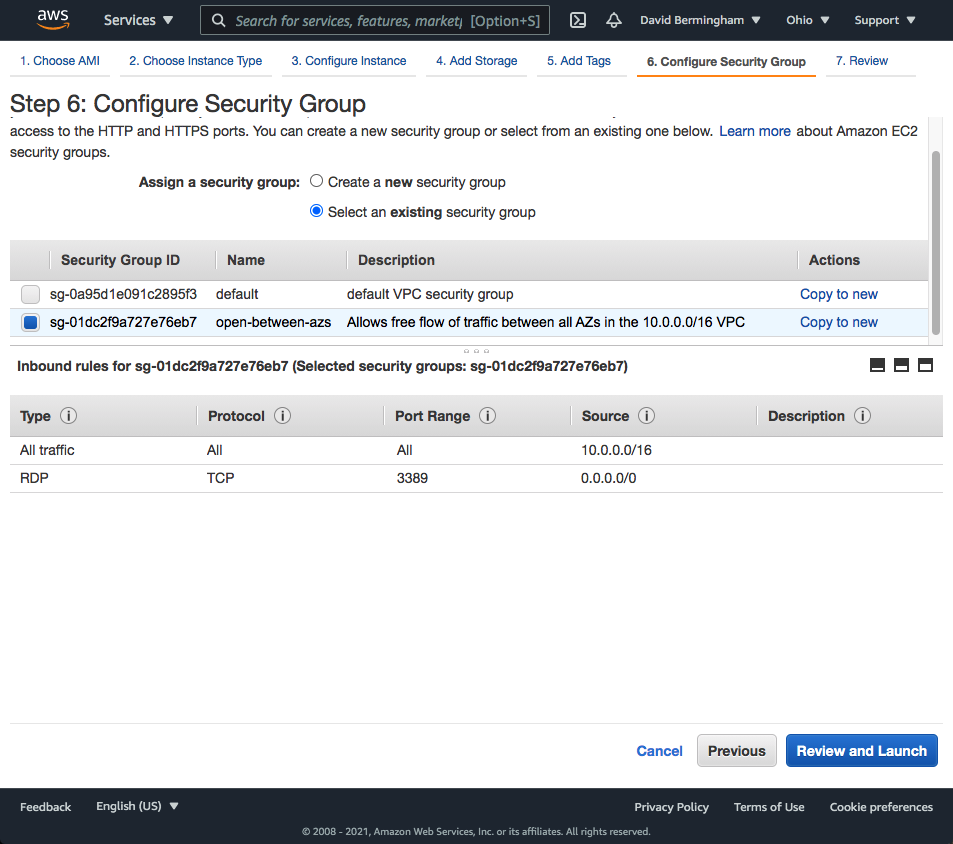
- In this example I previously created a security group that allows all traffic to flow freely between instances in my VPC (10.0.0.0/16). I also opened up the RDP port to allow remote access directly to each instance. You may want to consult with your cloud administrators to ensure you adhere to your security protocols.
Step 2: Configure Server Settings on each Cluster Node
- Rename and add it to the Domain
- Turn off Windows firewall
- Turn off IE Enhanced Security Configuration
- Install Chrome and make it the default browser
- Download the software to each server
- SAP Installer
- DataKeeper Software and License
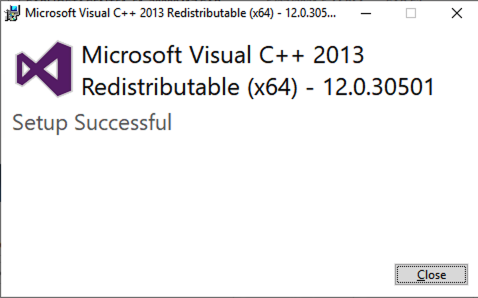
- Vcredist_x64
- SAP Installer
- Install vcredist_x64 on each cluster node
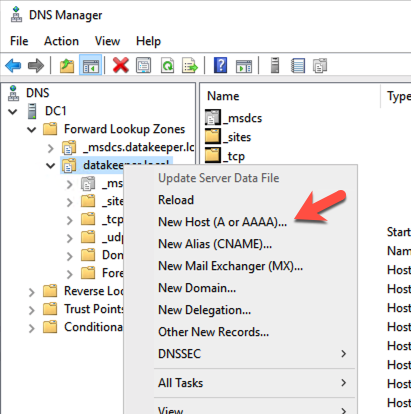
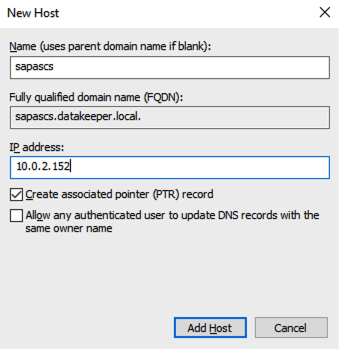
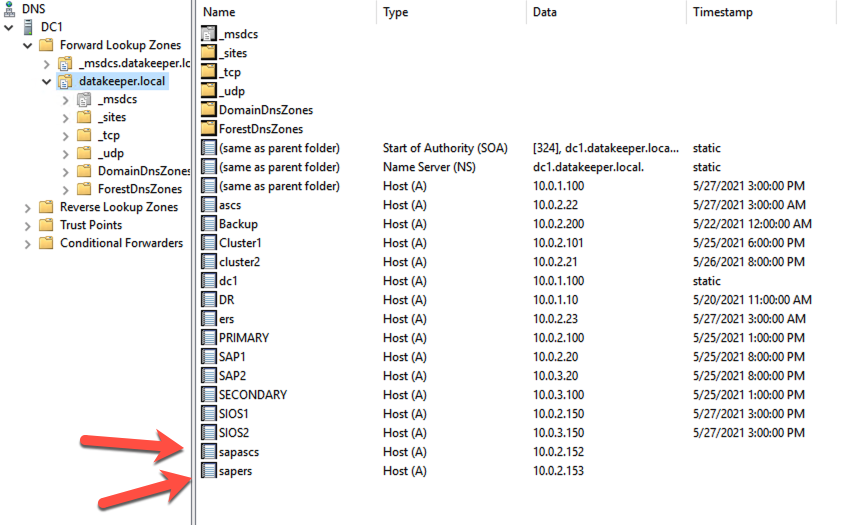
- Create DNS A Records for both the ASCS and ERS Virtual Name. In our case we will create the following records:
SAPASCS 10.0.2.152
SAPERS 10.0.2.153
Note: These addresses should have already been added as secondary addresses on the interface for Node1 in the EC2 console in an earlier step.
Step 3: Create the Windows Server Failover Cluster
Enable the Failover Clustering Feature
Run the following Powershell Script on each cluster node
Install-WindowsFeature -Name Failover-Clustering -IncludeManagementTools 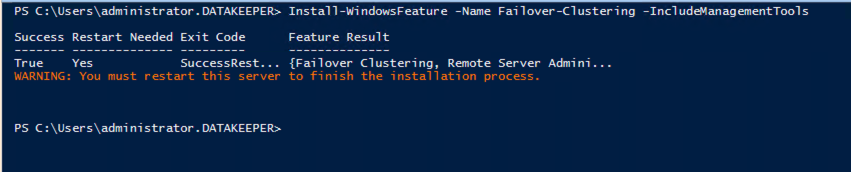
Run Cluster Validation
Run the following command on one of the nodes to validate the cluster
 Test-Cluster -Node sios1,sios2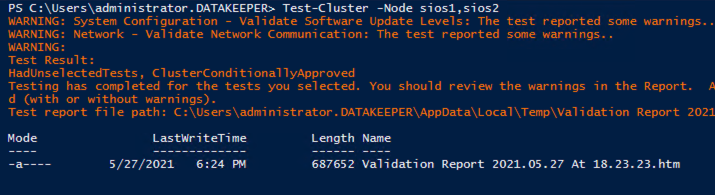
The validation report will show some warnings about a single network interface and no shared storage, you can ignore those warnings as those are expected in a SANless cluster running in AWS.
Create the Cluster
When creating the cluster in AWS it is important to do it via PowerShell rather than the WSFC interface. When we create the cluster we will use two of the secondary IP addresses we added to the interfaces in an earlier step.
Run the following PowerShell command on one of the cluster nodes.
 New-Cluster -Name sapcluster -Node sios1,sios2 -StaticAddress 10.0.2.151, 10.0.3.151 -NoStorage
Add the File Share Witness
First create a folder on another server in an 3rd availability zone. Once you have the folder created, share it and give the Cluster Name Object (CNO) Change permissions at the Share level and Modify permissions at the Security level.
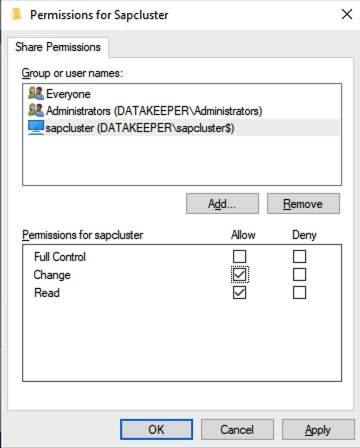
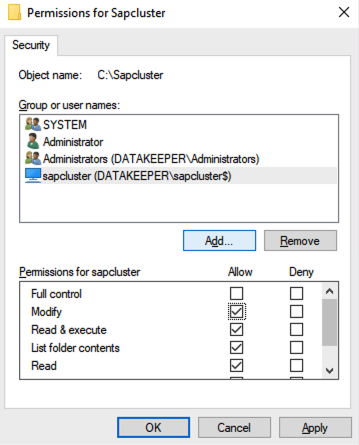
Once the permissions are assigned, run the following PowerShell command to update the cluster quorum to add this file share witness.
Set-ClusterQuorum -FileShareWitness \\dc1\Sapcluster Step 4: Format the EBS Volumes
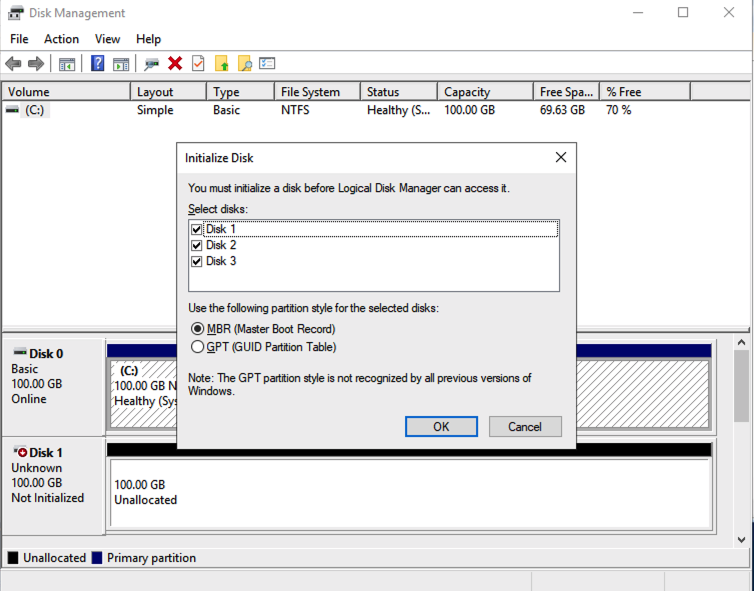
Earlier we added additional EBS volumes to each cluster node. The nodes also have an ephemeral drive attached to them. The volumes can be initialized either MBR or GPT.
Initialize the Disk
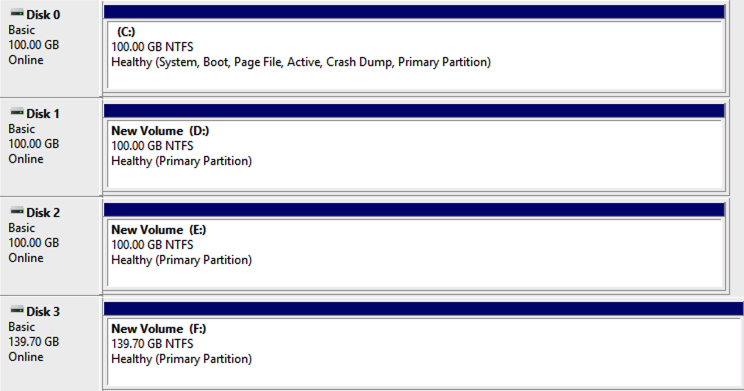
Format the Volumes
Once they are initialized, format each volume NTFS and assign them drive letters.
Configure EC2launch
The ephemeral drive will be used to hold the DataKeeper bitmap file. It is important to ensure that the ephemeral drive is mounted each time the server starts up. Configure EC2Launch to ensure this process is automated.
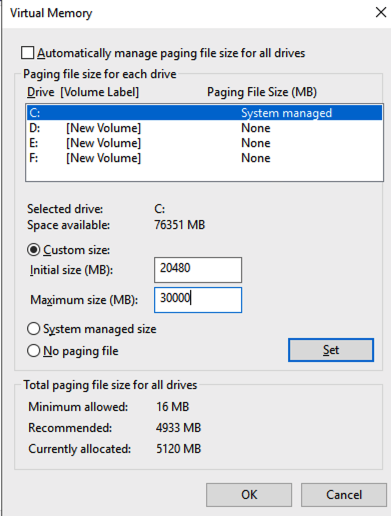
Step 5: Adjust Pagefile
Windows in AWS has automatic pagefile memory management enabled by default. We want to disable that and at the same time increase the default size of the pagefile to meet the requirements of SAP. SAP recommends a minimum size of 20480 MB.
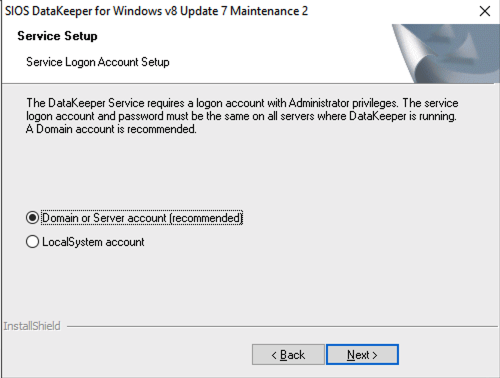
Step 6: Install DataKeeper
We are now ready to install DataKeeper. As part of the installation you will be asked to specify a service account. The only requirement is that the account must be a member of the Local Administrators group on each of the cluster nodes. Create that account and add it to the local Administrators group on each node before you continue with the installation.
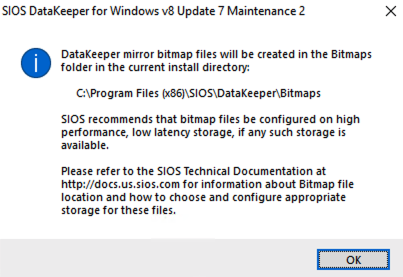
Run the DataKeeper setup on each node and accept the default options as shown below.
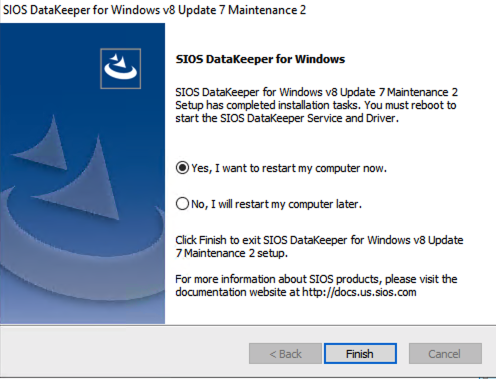
Restart each node after the installation is finished.
Step: 7 Relocate the Intent Log (Bitmap file)
For optimal performance you must relocate the bitmap file to the local ephemeral storage, aka local instance store volume. Please refer to the SIOS documentation for instructions on relocating the bitmap file.
Step: 8 Configure DataKeeper
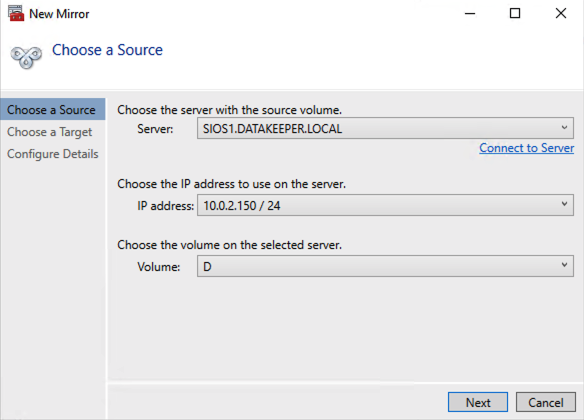
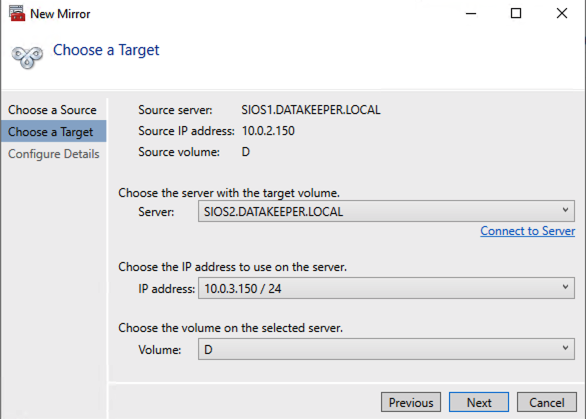
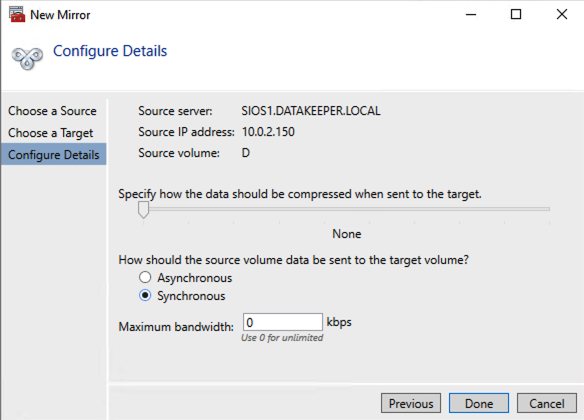
It is now time to use DataKeeper to replicate the EBS volume(s) between each of the cluster nodes and to register the DataKeeper Volume Resource(s) in the cluster’s Available Storage. The steps below only need to be run on one of the cluster nodes.
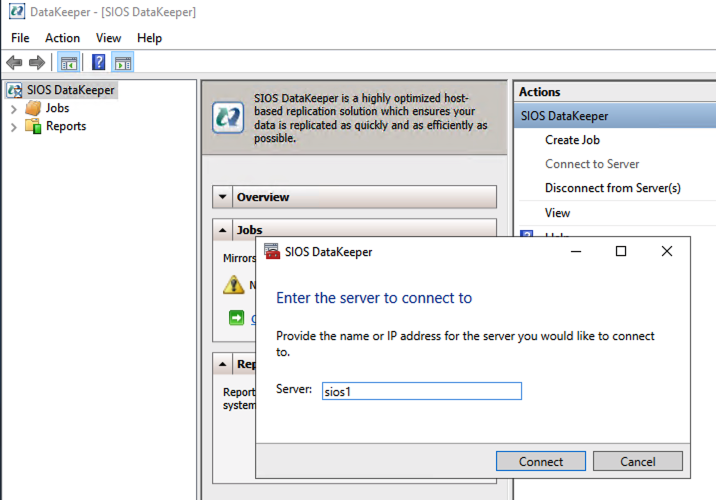
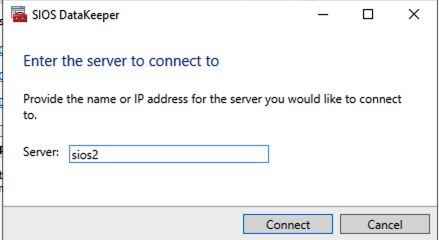
Connect to Server
Use the DataKeeper interface to connect to each of the cluster nodes. DataKeeper can be run from either of the cluster nodes.
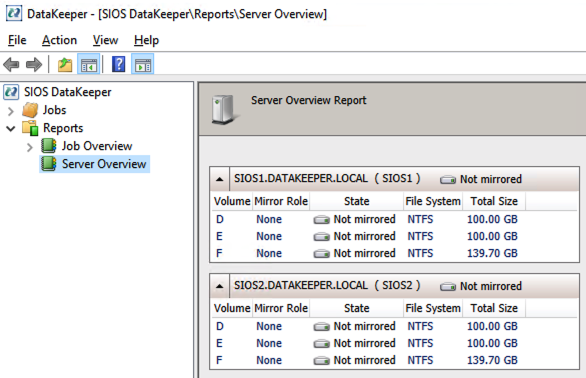
Once you connect your Server Overview report should look something like this,
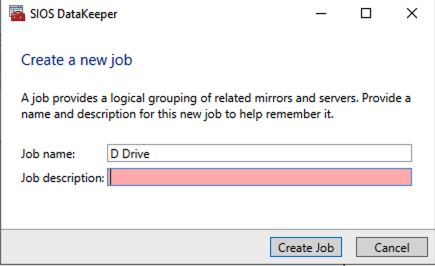
Create DataKeeper Job
You are now ready to replicate your volumes. Click on Create Job and follow the screenshots below.
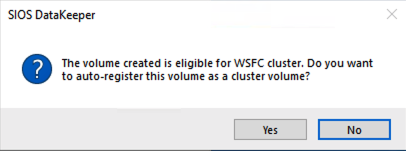
Register DataKeeper Volume in Available Storage
The last step of the Job Creation process asks if you want to register the volume in Windows Server Failover Clustering (WSFC). Click on Yes.
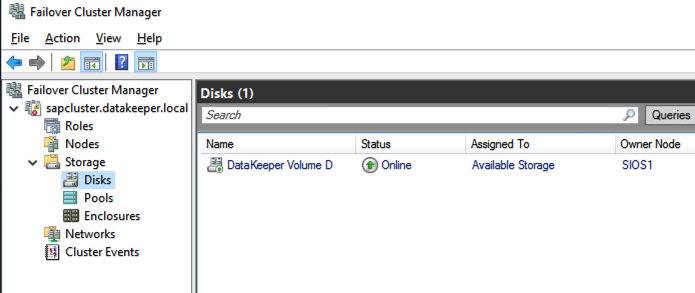
Open up WSFC Manager and you will now see the DataKeeper Volume resource in Available Storage.
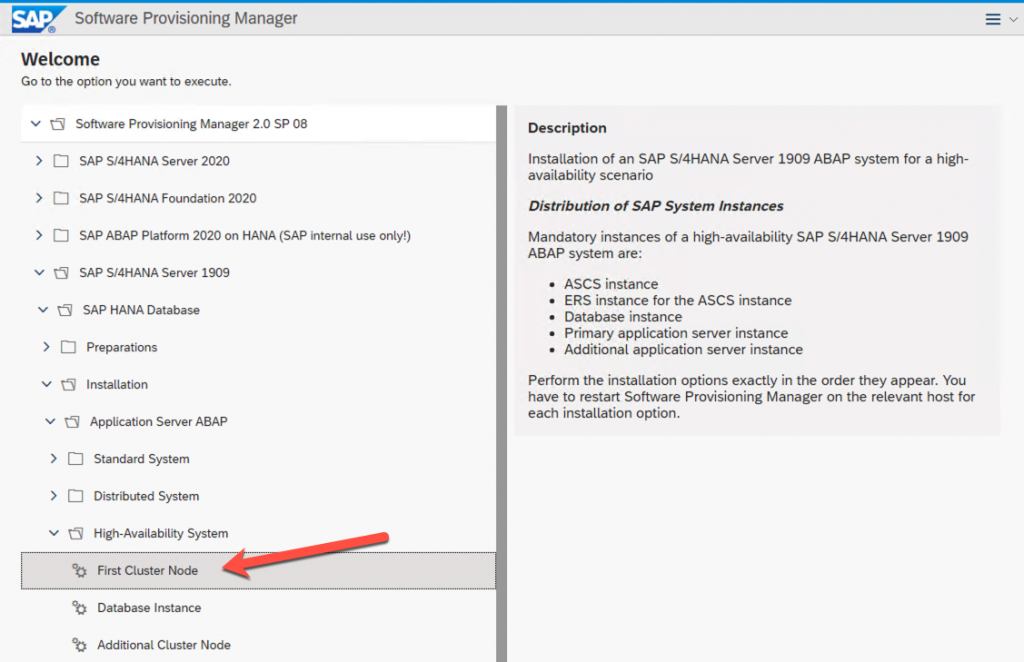
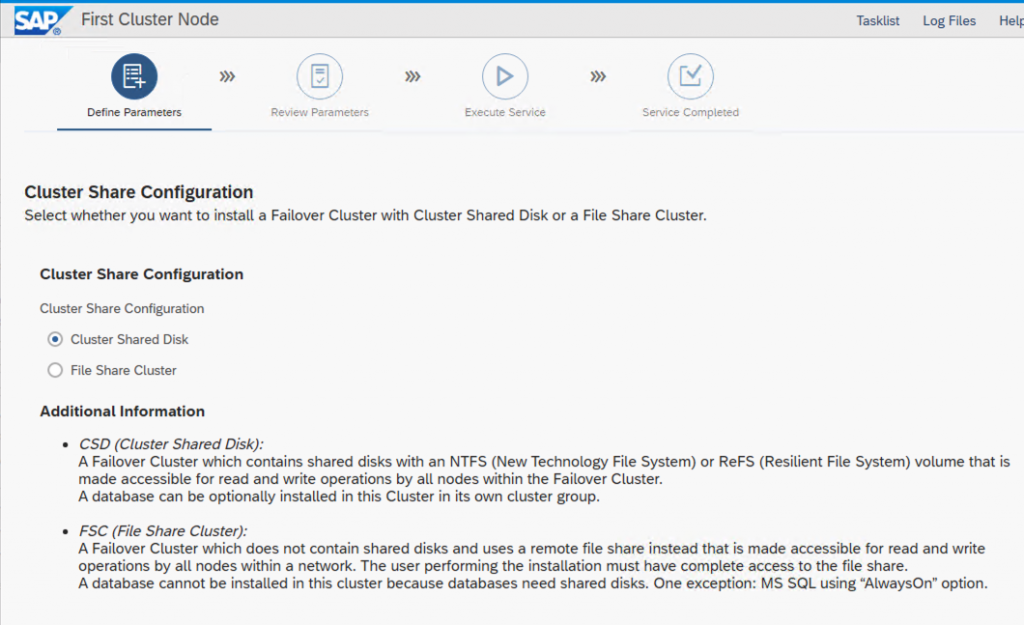
Step: 9 SAP High-Availability System Installation
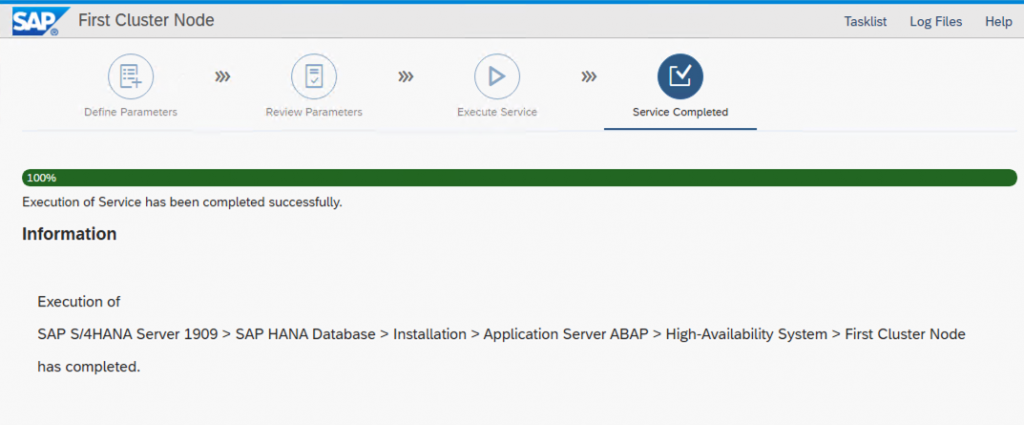
First Cluster Node Installation
Before starting the SAP Installation, make sure you created a DNS Type A record for SAP Virtual Instance Host at DNS Server as we described in an earlier step.
You will perform a regular SAP Windows Cluster installation. For more information regarding SAP installation on Microsoft Windows Failover Cluster, please refer to official SAP documentation here.
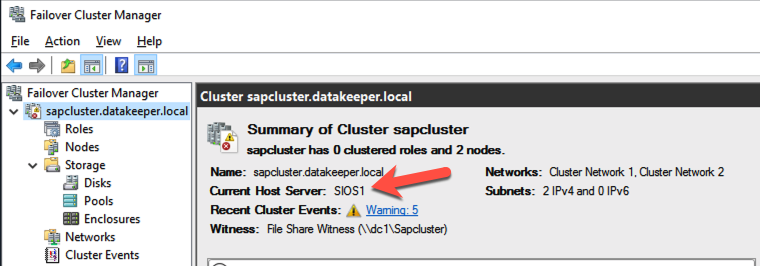
Current Host Server
Before you begin, make sure the primary server is the Current Host Server
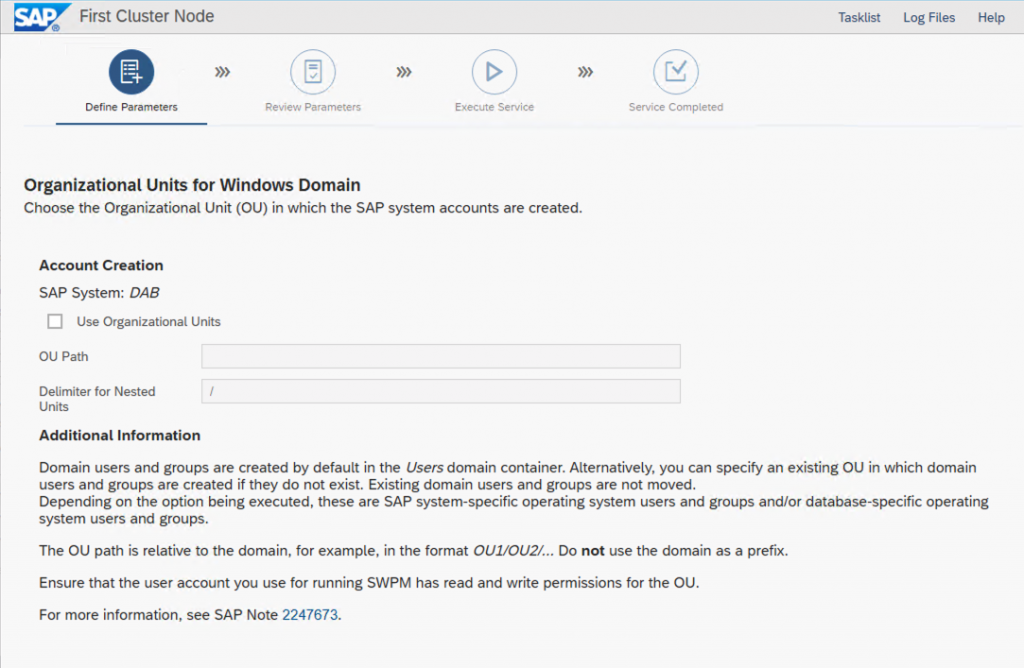
Grant the Cluster Name Object (CNO) Permissions on the OU
In order to avoid possible security issues with creating the cluster objects in the next steps it is advisable to grant the CNO permissions on the OU that contains the computer objects. This can be done on one of the domain controllers by a domain admin.

Run SAPINST
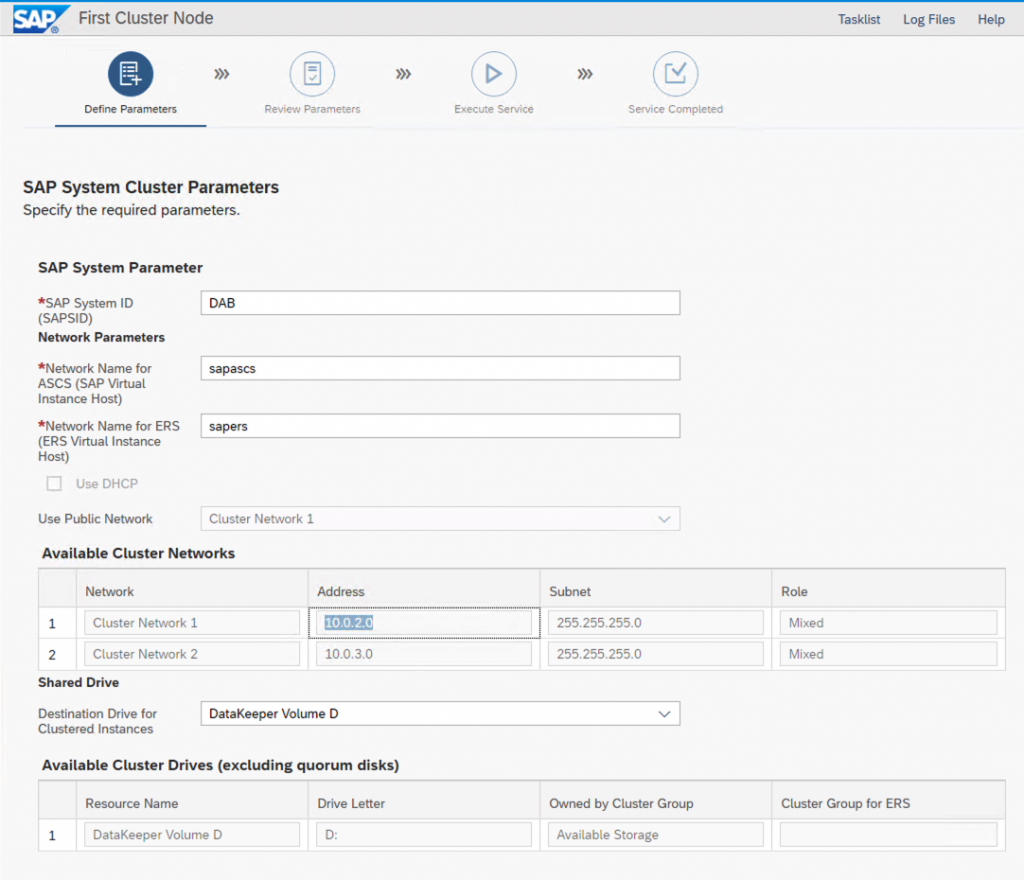
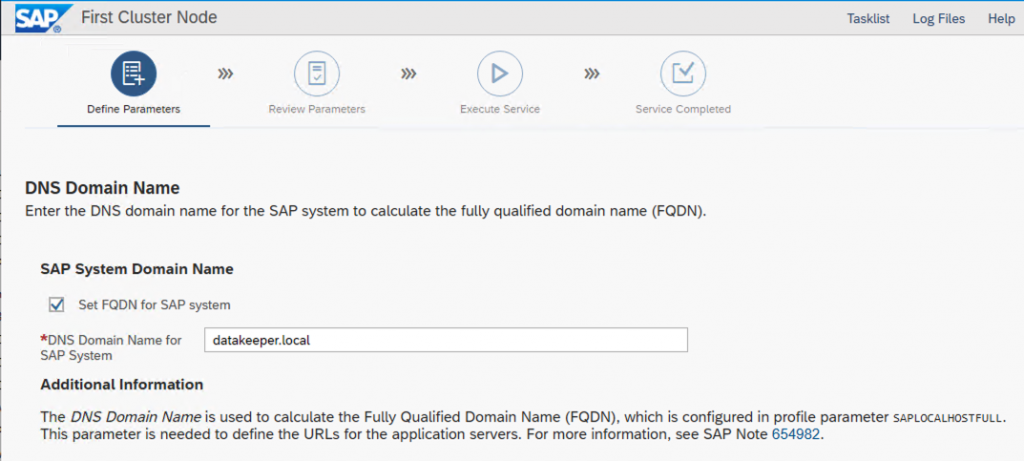
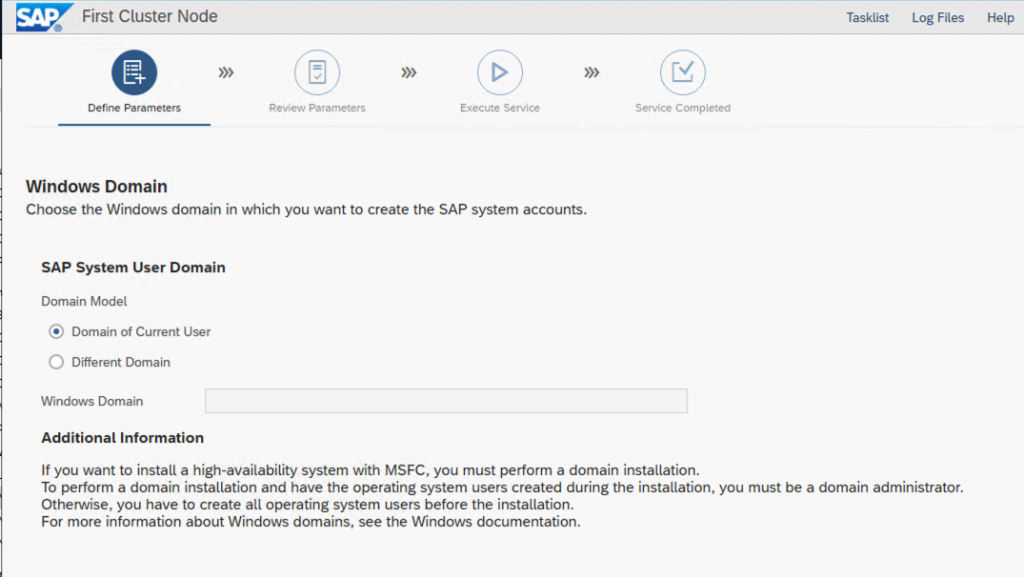
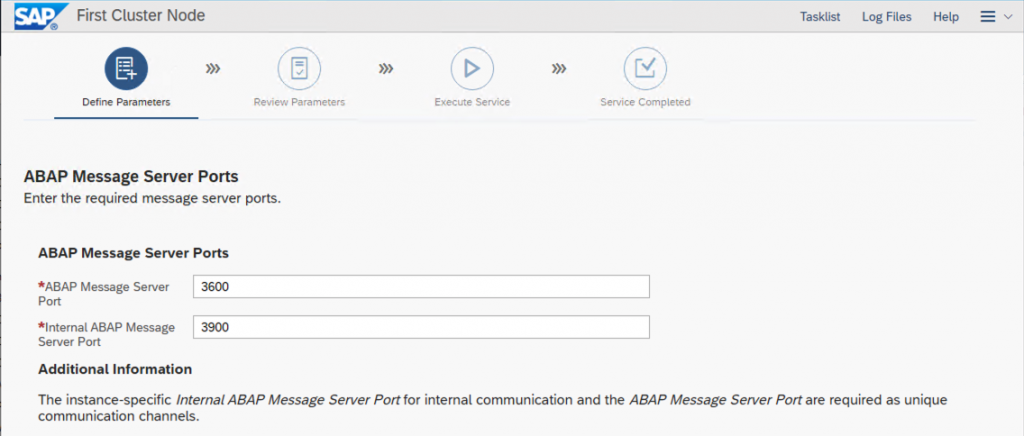
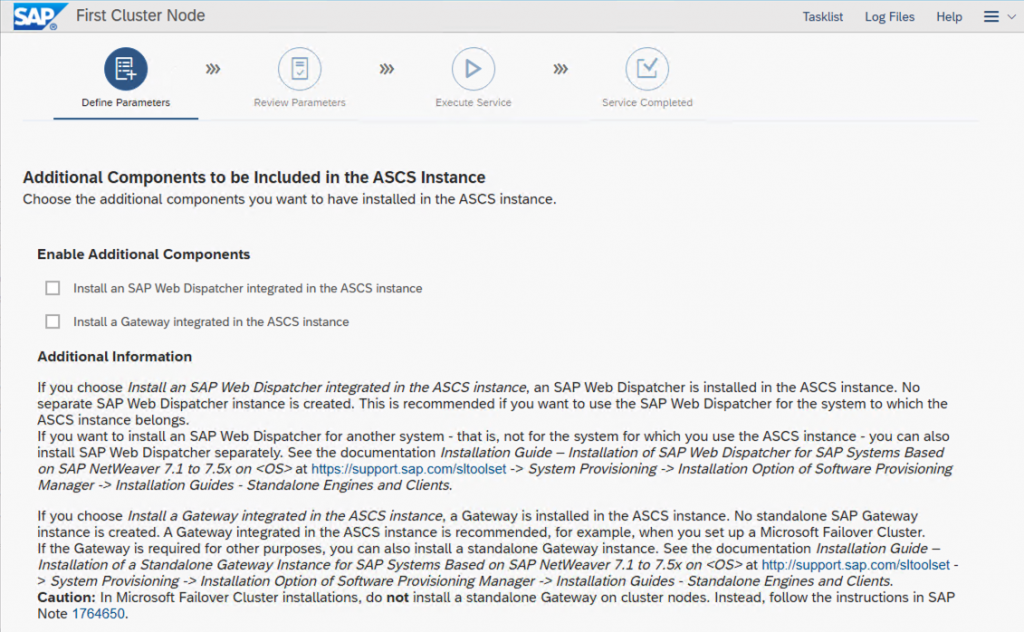
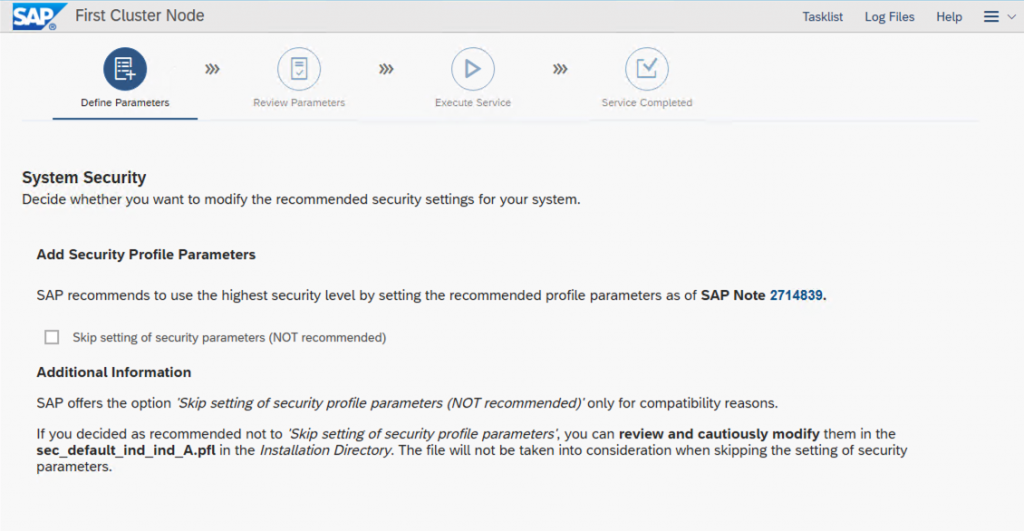
In the next steps we will install the ASCS/ERS cluster on the first cluster node. Follow along with the screenshots below.
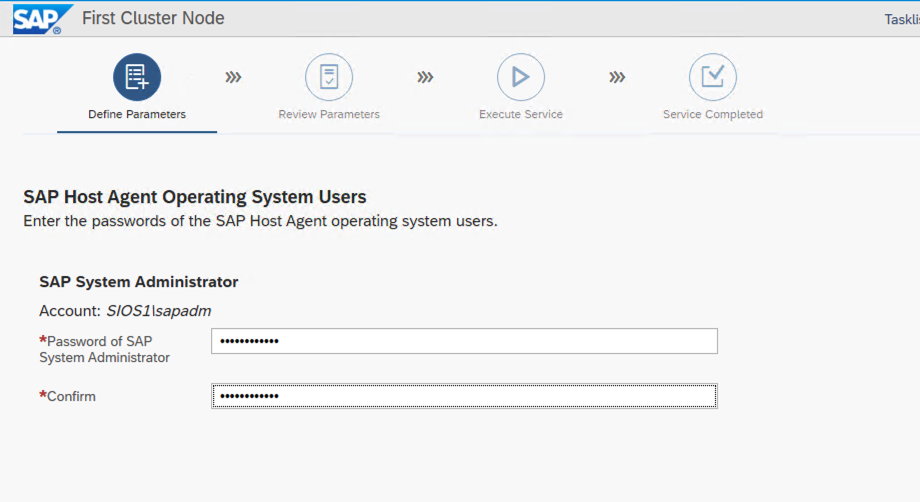
Log on as Domain Admin user at the first Windows Cluster instance and run the SAP Installation through sapinst.
Click Next
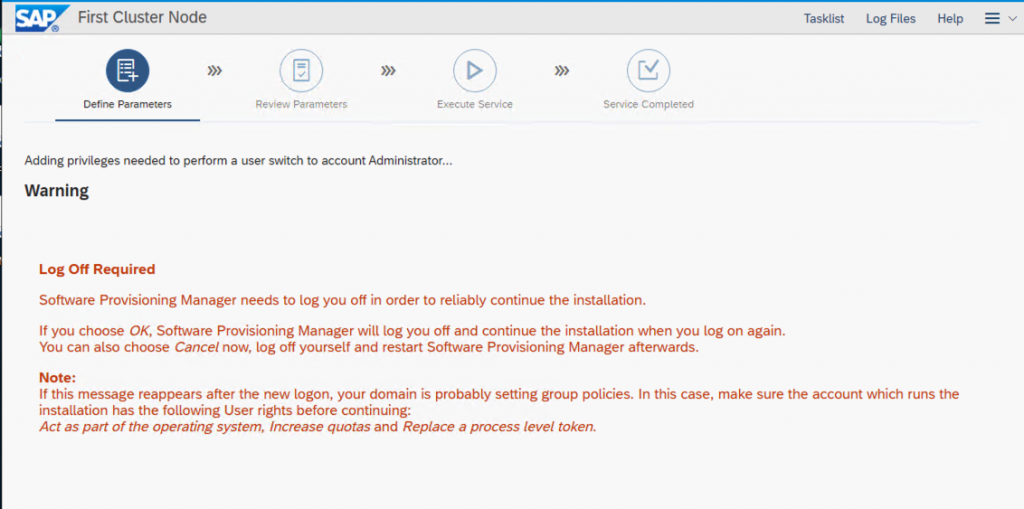
The computer will log off at this point. Log back on to continue the installation.
Be patient here, it may take a few moments before the next screen appears.
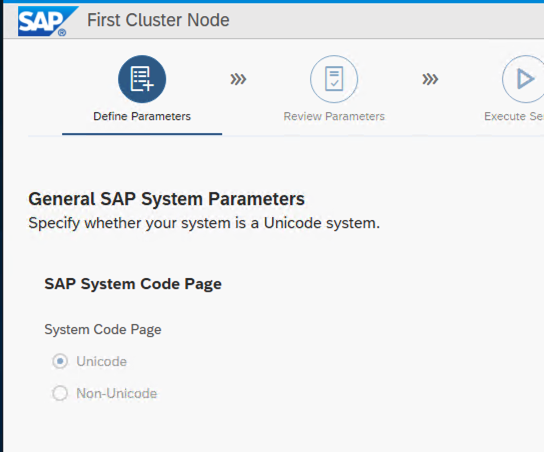
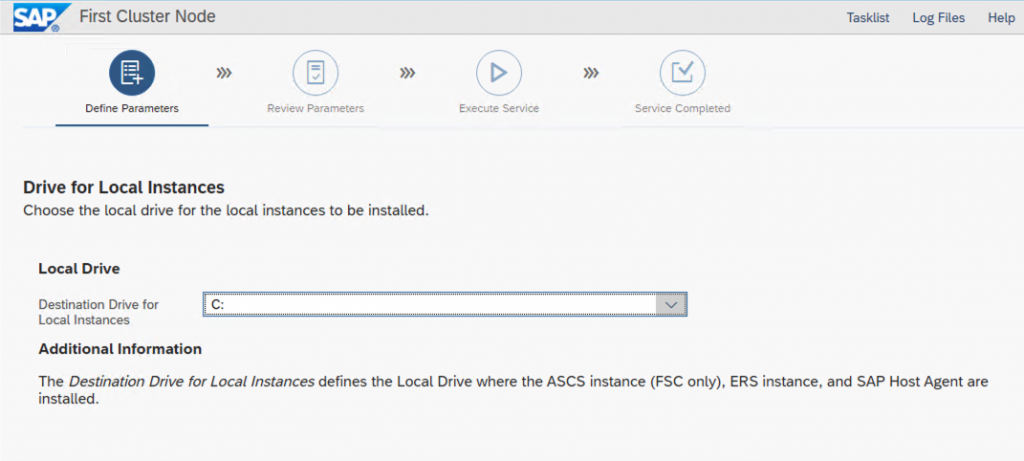
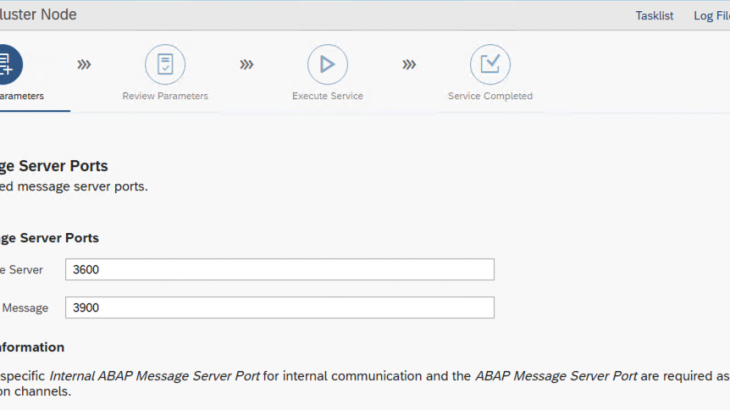
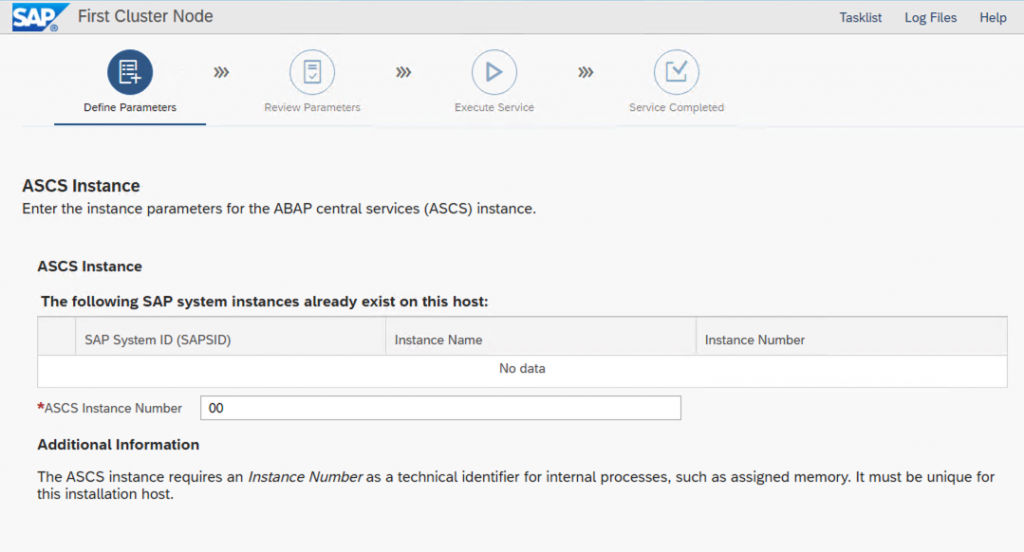
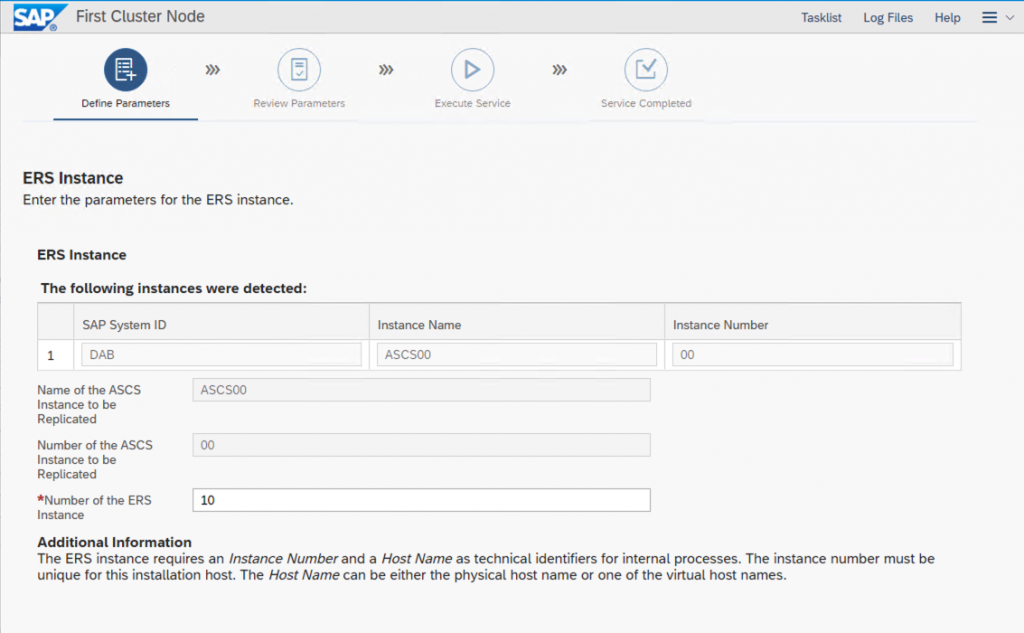
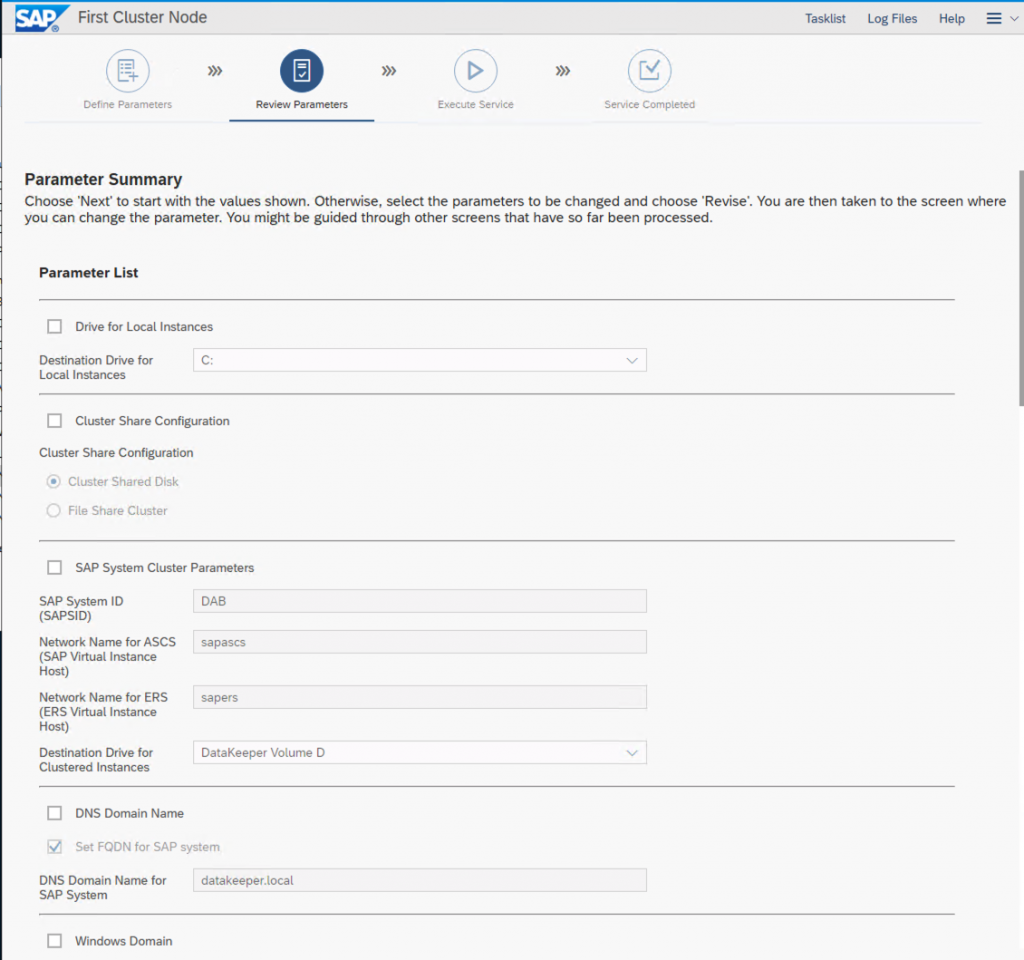
The SAP System ID is just three letters that identify this system. The Network Name for ASCS and ERS are the same as the names we entered in DNS in an earlier step. The DataKeeper Volume D is the DataKeeper Volume Resource we created earlier.

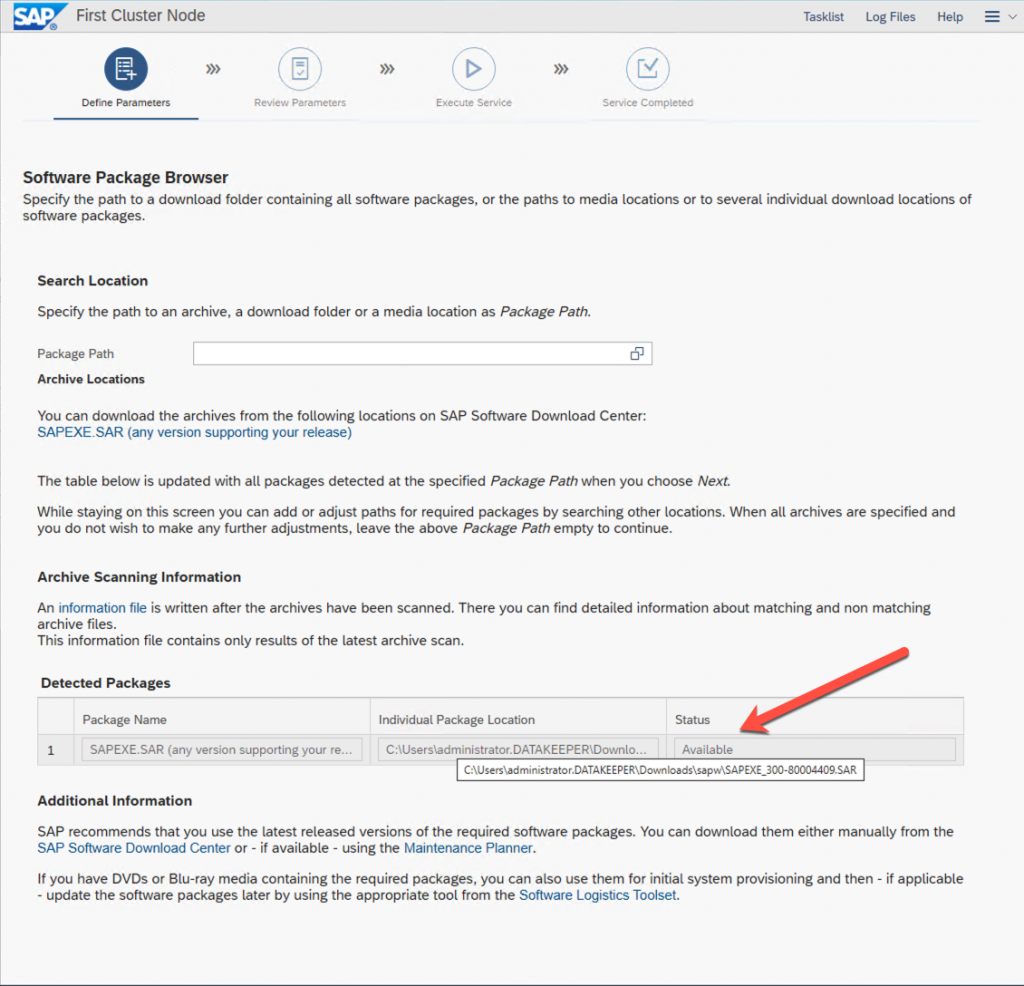
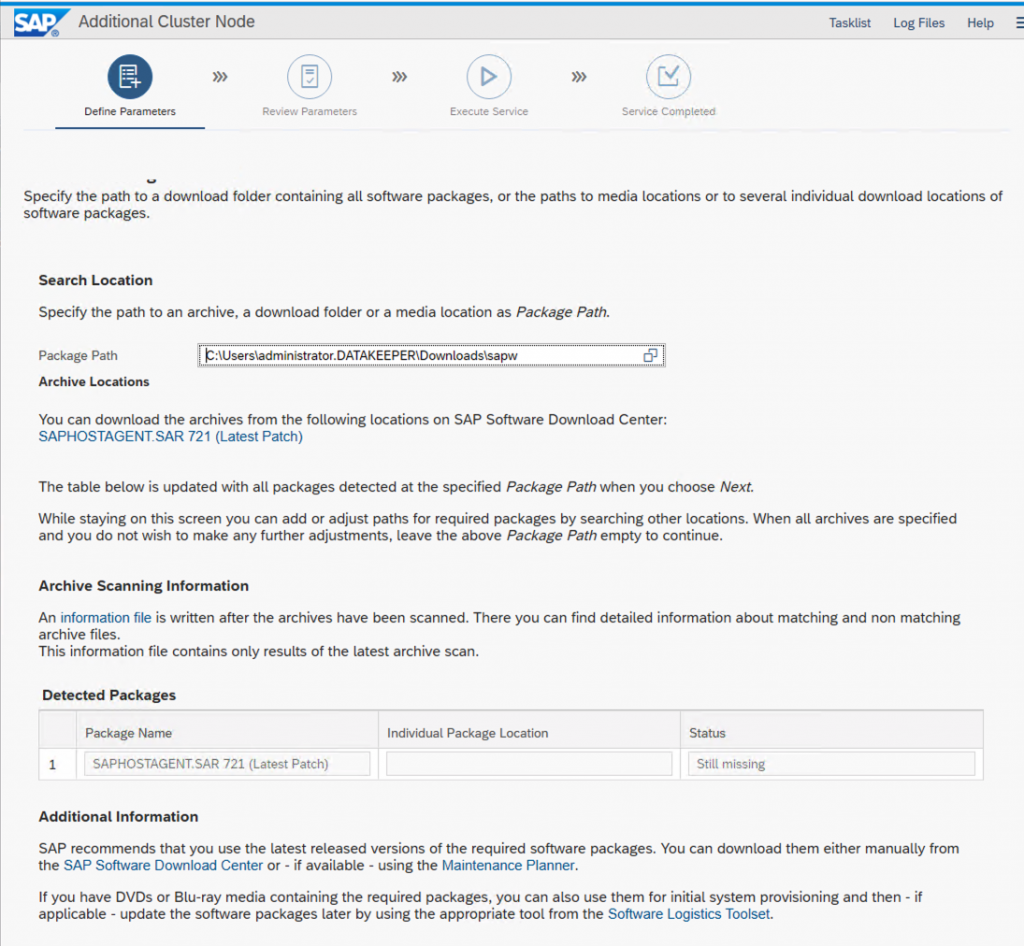
Specify the folder where you have download the SAP software
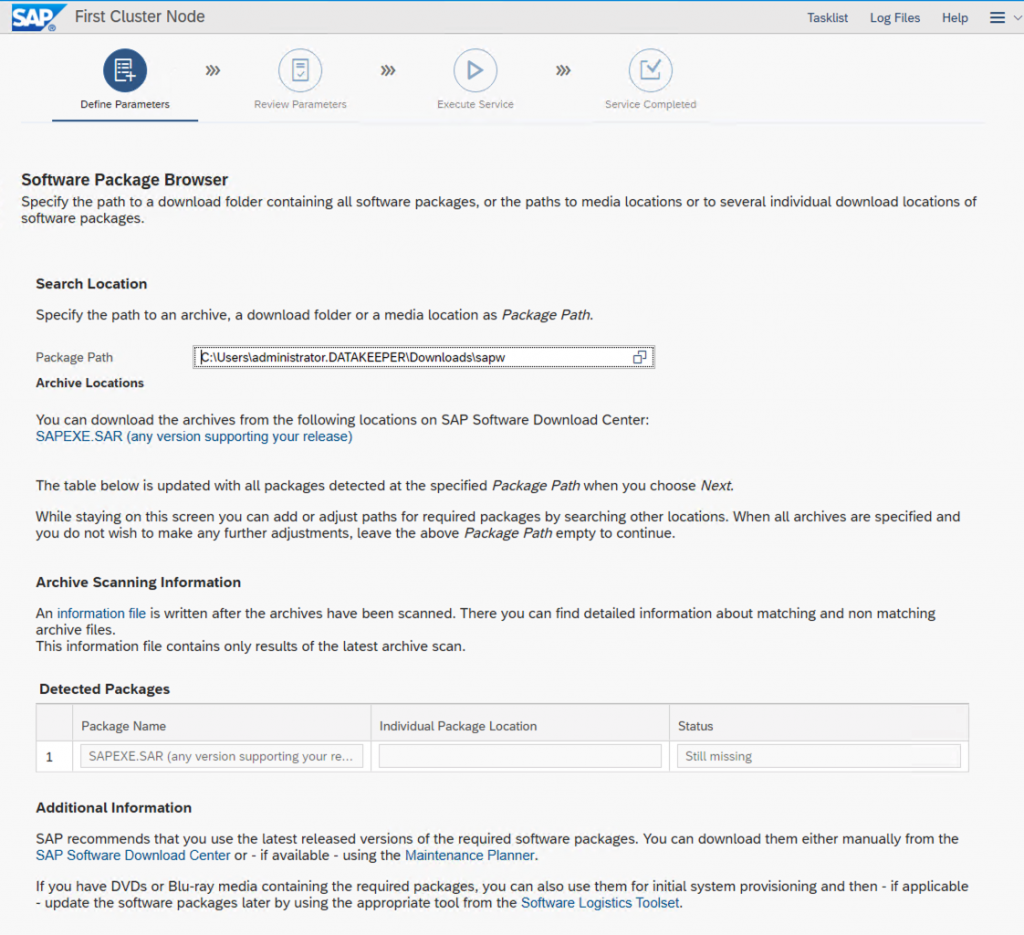
Click Next and it will find your package location.
Click Next to continue

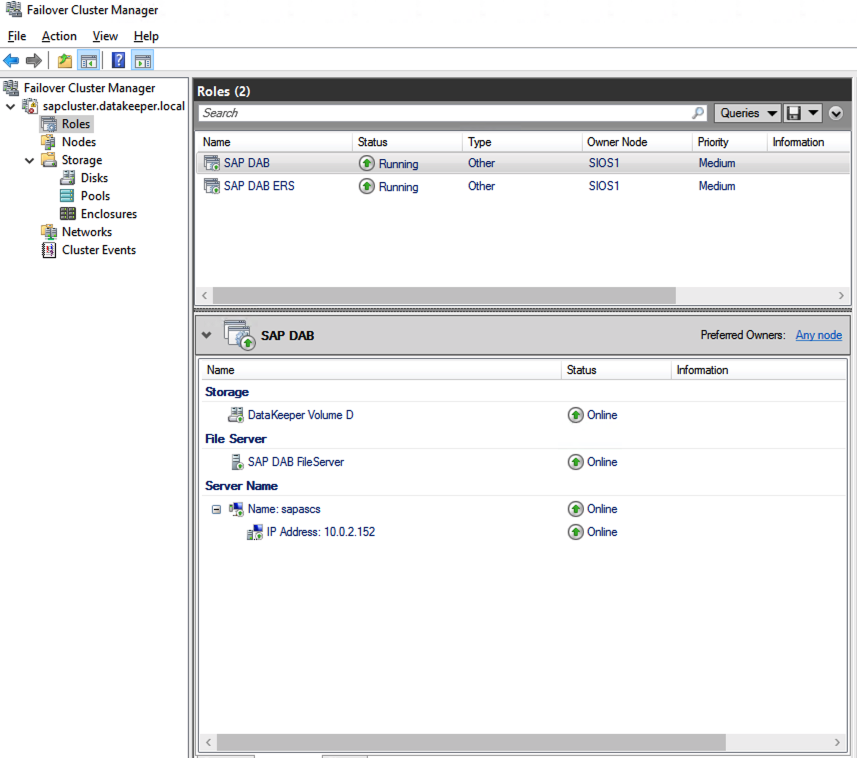
Notice at this point there are two cluster resource groups with related resources being created in WSFC.
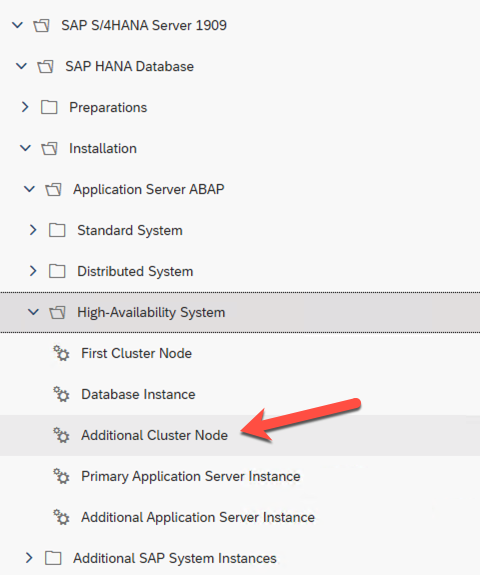
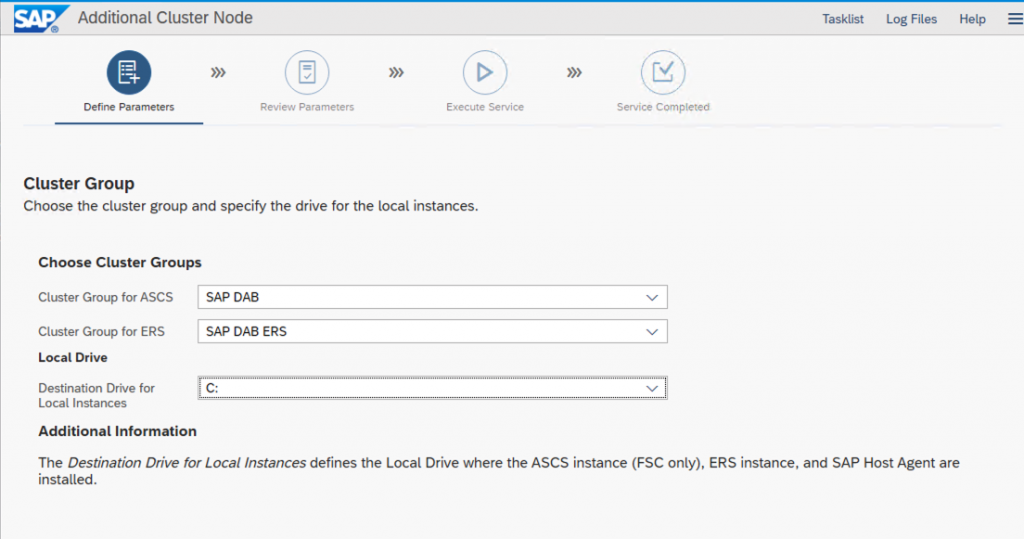
Step 10: Second Cluster Node Installation
The first cluster node installation completed without too much effort. In a normal cluster where all the cluster nodes reside in the same subnet I would think the installation of the second cluster node would run just as smoothly. However, because this is AWS and the nodes reside in different subnets, there are some steps we need to take to address the unique requirements of a multi-subnet cluster.
Update DNS
Before we proceed, we have to fix the A records we created earlier. It was necessary to create those A records so that the first SAP node could be created properly. However, you will see that those A records in DNS are “static”. Static records cannot be updated by WSFC, which is necessary in a multi-subnet cluster.
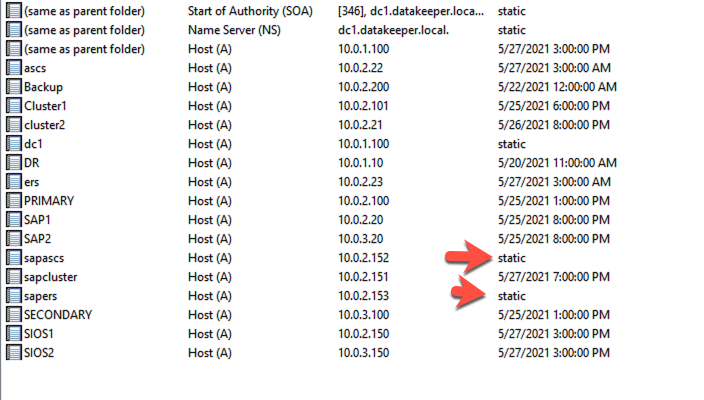
What we need to do is to delete those A records from DNS so that WSFC Manager can re-register them as dynamic records. Right click on each of the two A records we created earlier and delete them.
Notice they are gone.
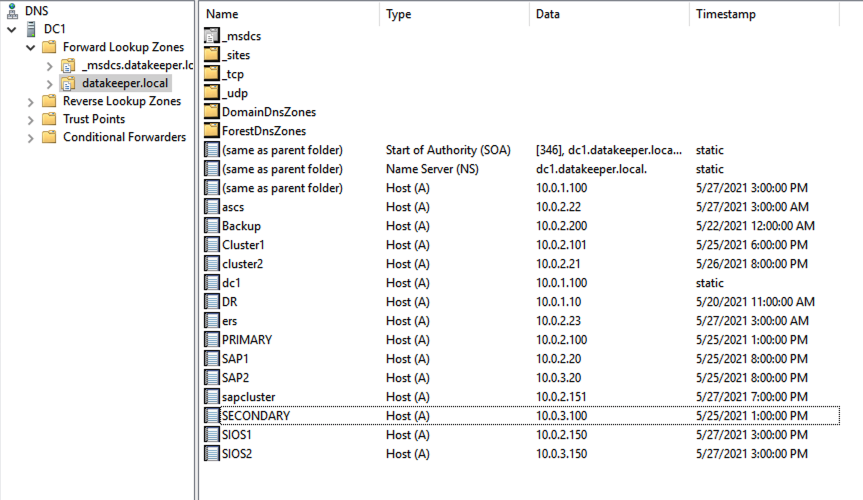
Now if WSFC Manager, bring the two name resources offline in each of the two cluster groups and then bring the resources back online. This process will re-register the two A records in DNS, but this time they will be dynamic records.
Refresh your DNS zone and it should now look like this.
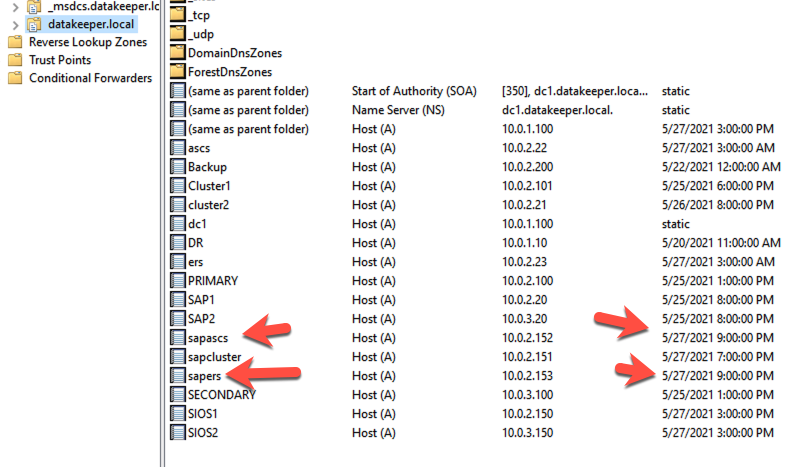
Change TTL
By default, the time to live (TTL) on each of those A records is 20 minutes. That is much too long for a client to wait after a failover to receive the new IP address. Instead we are going to adjust the TTL to 15 seconds.
To adjust the TTL on a cluster name resource you must run the following PowerShell command, once for each name resource. This command can be run from either cluster node.
Get-ClusterResource -Name "SAP DAB ERS NetName" | Set-ClusterParameter -Name HostRecordTTL -Value 15

Get-ClusterResource -Name "SAP DAB NetName" | Set-ClusterParameter -Name HostRecordTTL -Value 15 
Change RegisterAllProvidersIP
A multi-subnet cluster can handle client redirection a few ways. It’s beyond the scope of this article to discuss the differences. To handle SAP client redirection we need to ensure the RegisterAllProvidersIP property of each cluster name resource is set to 0. Run the following PowerShell command on each cluster node.
Get-ClusterResource -Name "SAP DAB ERS NetName" | Set-ClusterParameter RegisterAllProvidersIP 0

Get-ClusterResource -Name "SAP DAB NetName" | Set-ClusterParameter RegisterAllProvidersIP 0
It is important to bring both of the cluster resource offline and online again to ensure that the changes we made in the last two sections are applied.
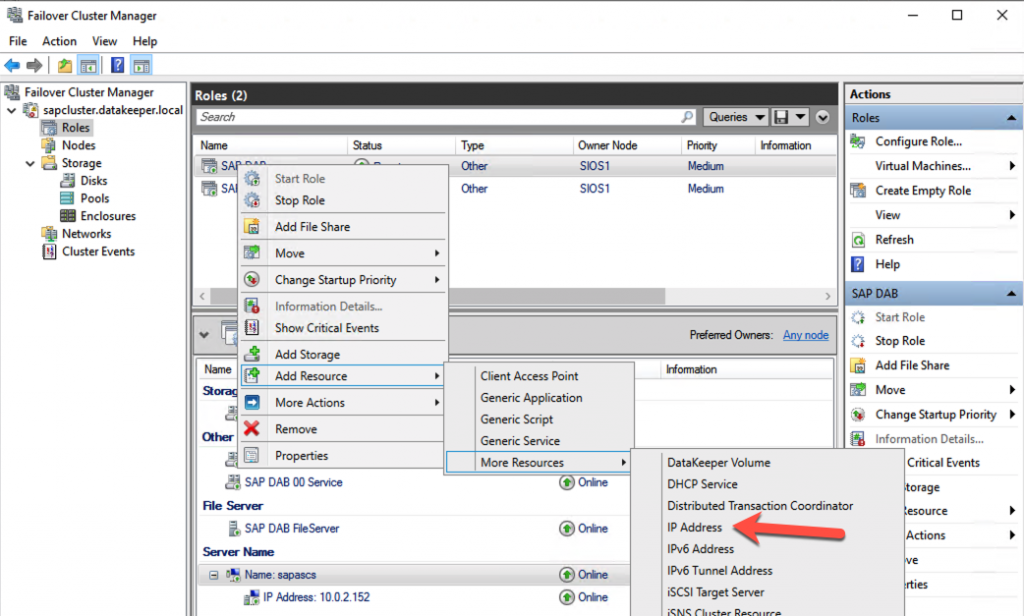
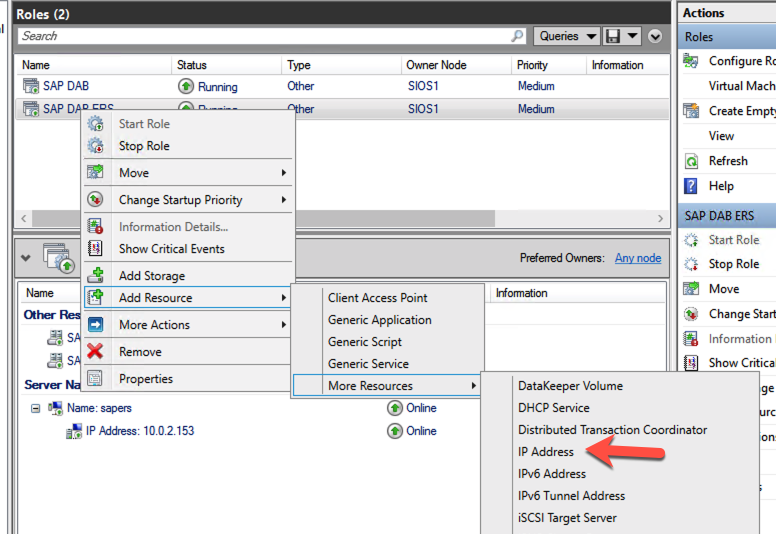
Add IP Address Resource to Support Multi-Subnet Cluster
When clustering applications like SQL Server, the installer recognizes when the cluster is a multi-subnet cluster. The SAP installer however does NOT recognize that fact, so we need to perform some of the configuration steps manually. One of those steps is to create the cluster IP address resources that reside in the subnet of the secondary node. The steps are as follows:
- Create the IP Resources
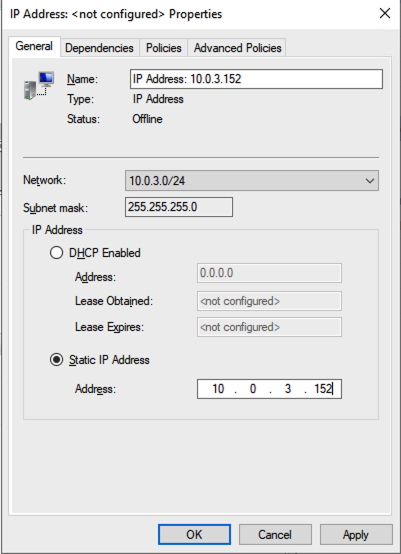
- Assign the IP Address
- Create the “Or” Dependency
Follow the screenshots below to complete these steps one of the cluster nodes for each of the two cluster resource groups.
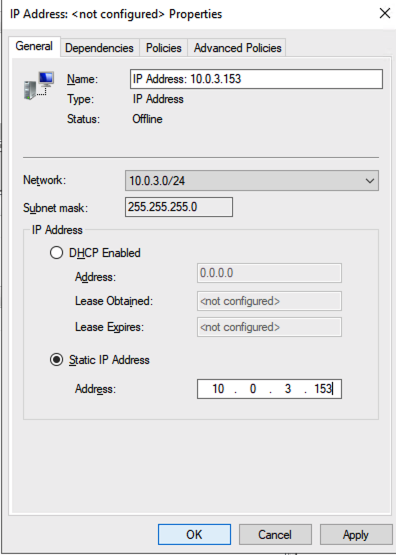
Add a new IP address.
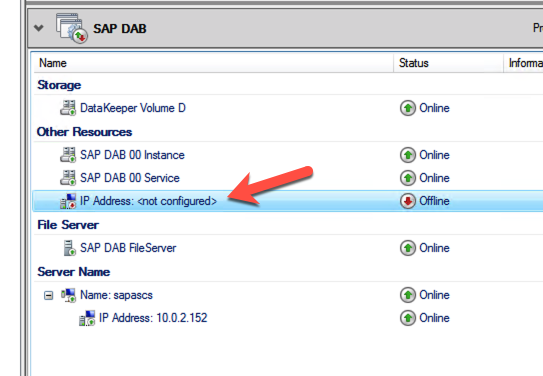
Configure the IP address so it is associated with the Network of the secondary node. Give it one of the unused secondary addresses we configured earlier.
Make the server name resource dependent on this additional IP address using the “OR” functionality.
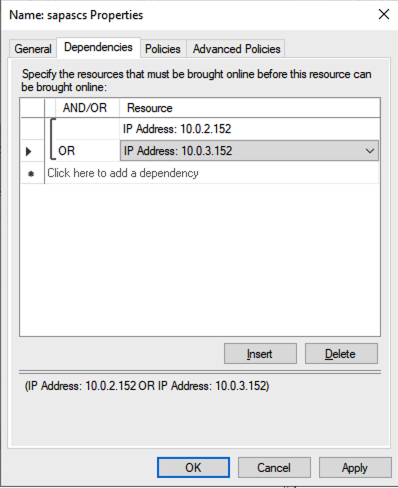
Complete the same process for the other server name resource as shown below.
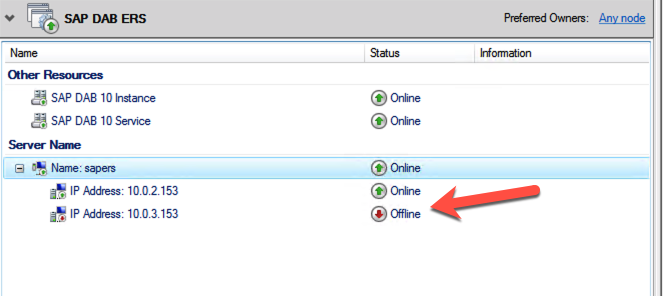
It is normal for these addresses to be offline. They will only be online if the cluster workload is running in that subnet.
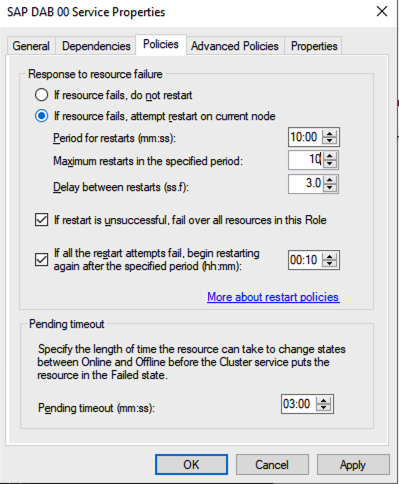
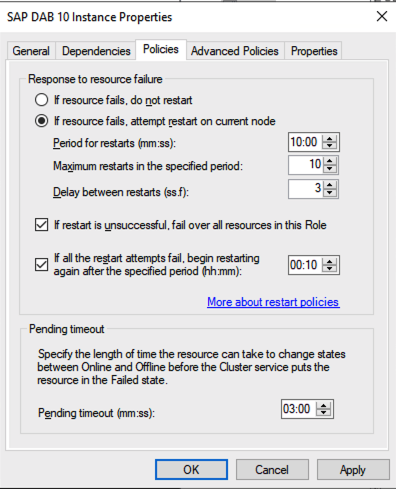
Change Cluster Resource Restart Policy
On occasion, the SAP ASCS Service will fail to start upon a switchover or failover. The reason this most often happens is that the service is dependent upon the clustered file share to be available. With the TTL set to 15 seconds I have observed on occasion that the file share is not available before the ASCS service tries to start, so it fails to come online. Simply bringing the resource online again after the failure usually fixes the problem. However, that requires user intervention and defeats the purpose of failover clustering.
The fix to this problem is to adjust the Maximum restarts and Delay between restarts properties of the ASCS Service resource to give the ASCS service a little time to come online if the file server resource IP is not yet available. The settings pictured below are some sample settings that should be more than sufficient, but if you have a large complex DNS environment you can always increase these parameters to meet the needs of your environment.
The other parameter that can impact the reconnection is the TTL. We set it to 15 seconds earlier, but if you have a large AD environment that takes time to update the DNS zones you may need to decrease the TTL even further and/or allow more restart attempts and increase the delay between restarts.
For good measure, I would do the same for your SAP Instance Resource
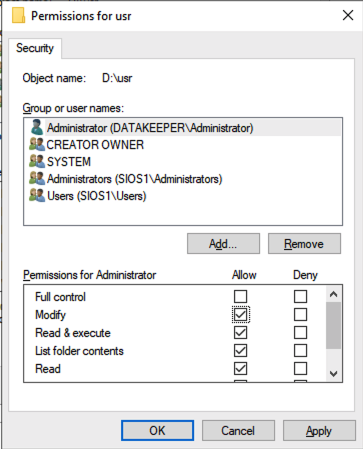
Adjust permissions on USR folder
Add permissions for the person that is doing the install to the USR folder that was created on the replicated volume. Look on the D drive (or whatever replicated volume you used) and you will see this folder.
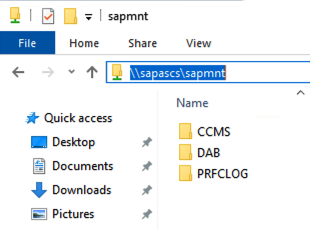
From the secondary node, confirm that you can see the file share that was created using the server name resource.
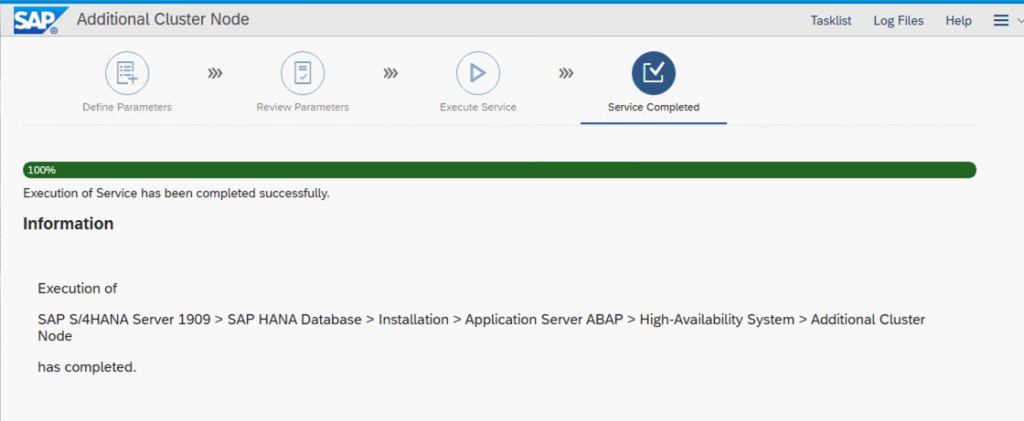
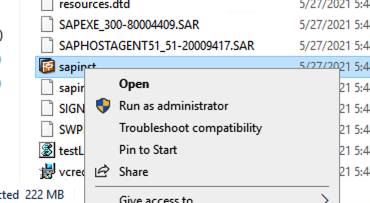
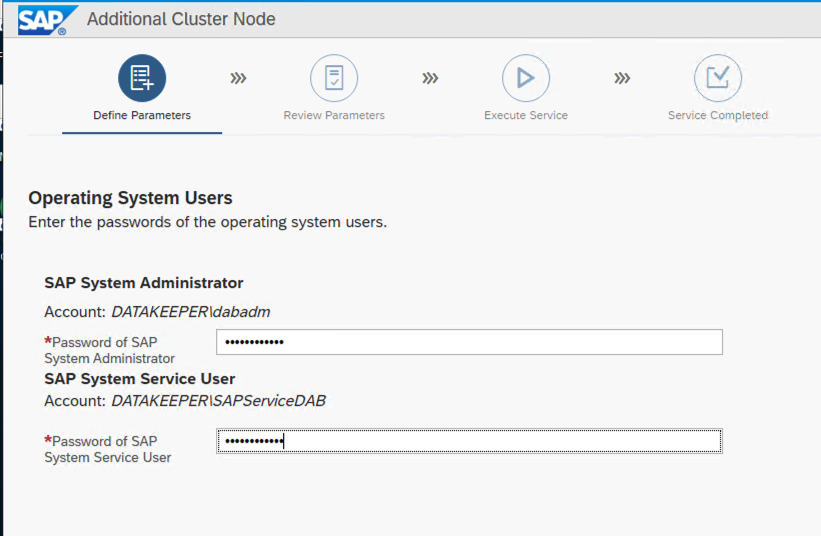
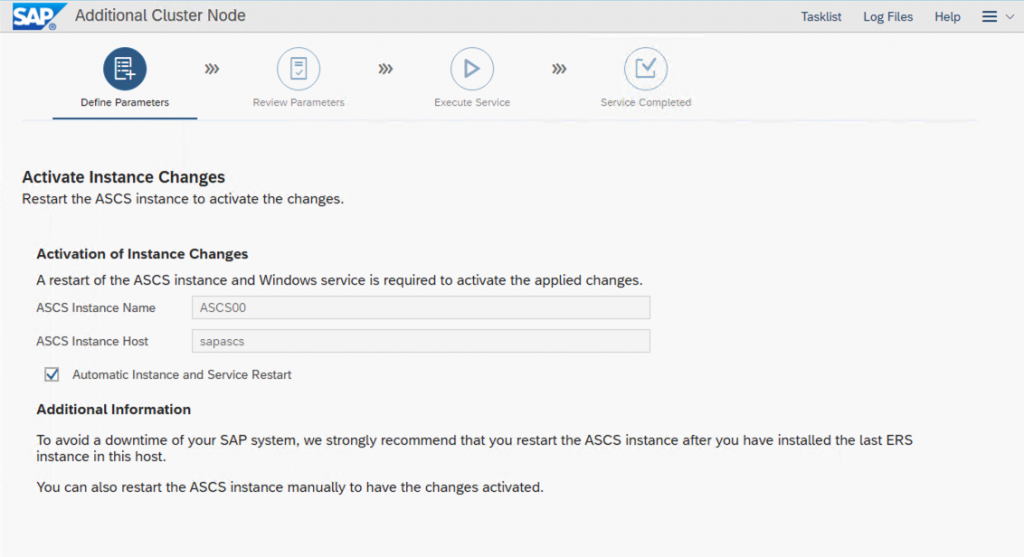
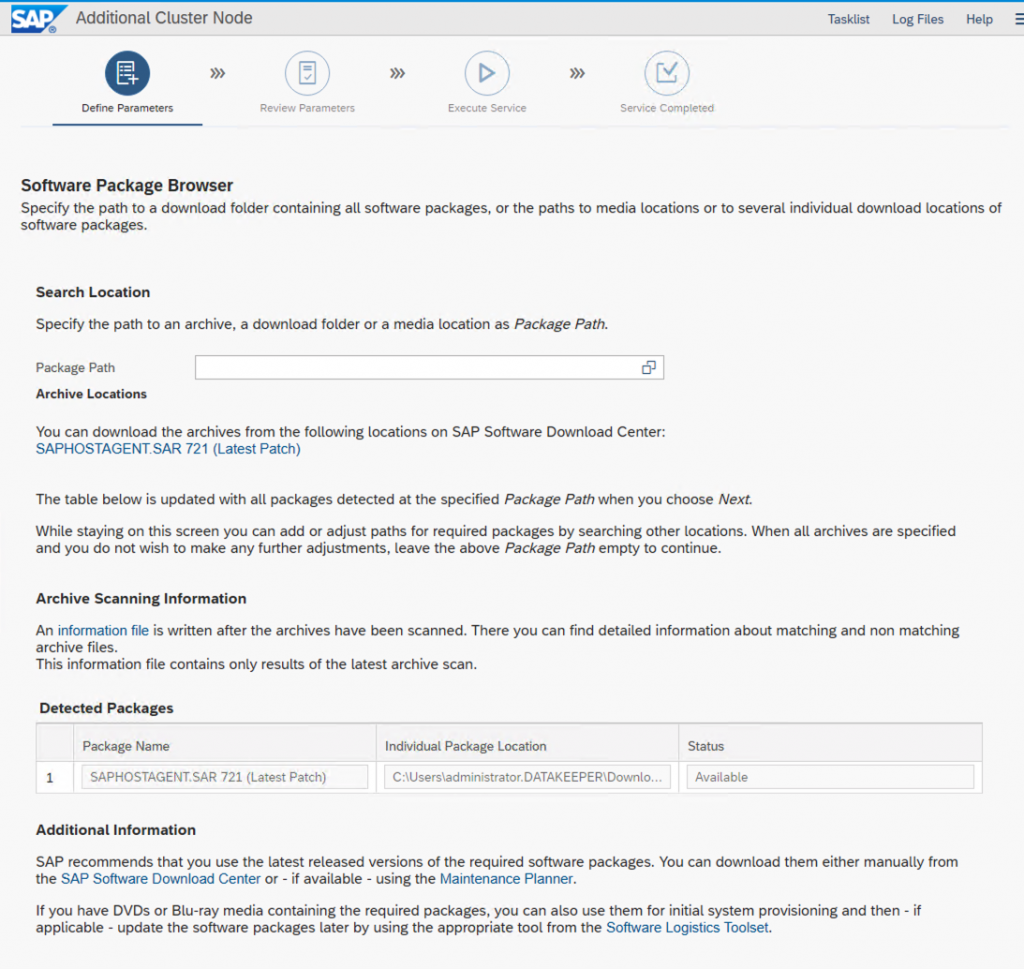
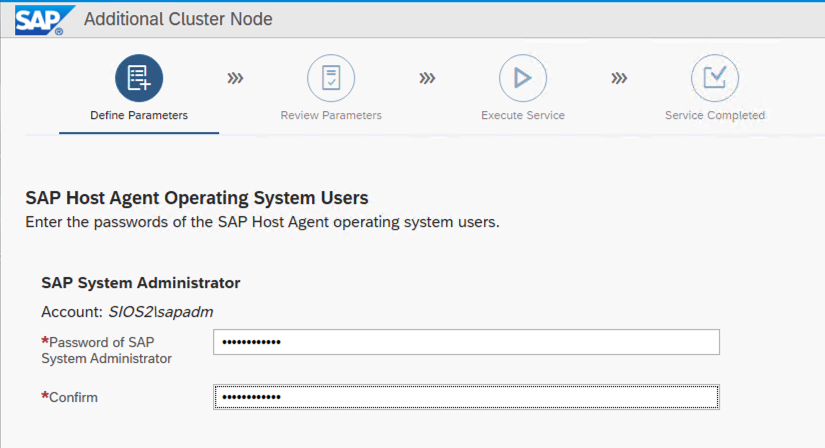
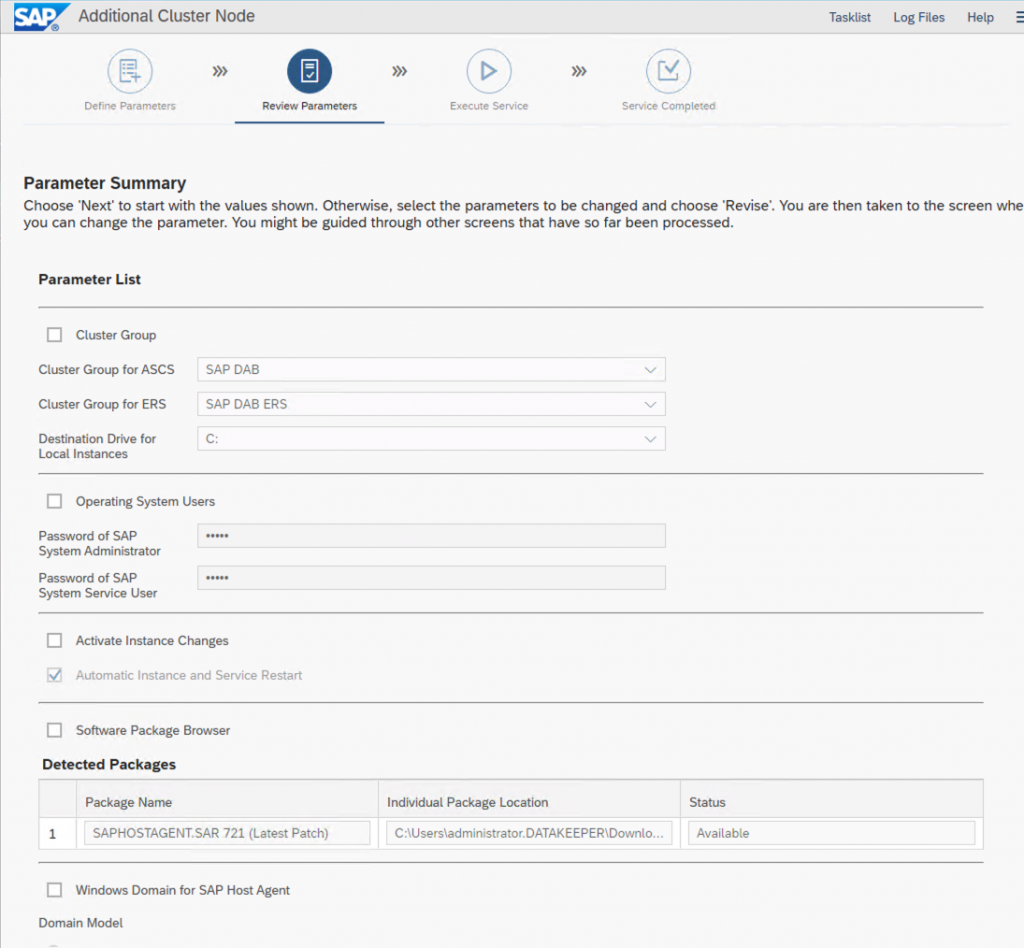
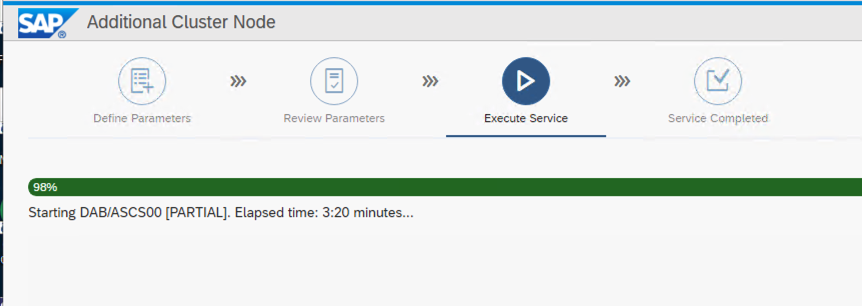
Run the SAPINST on the second node
Follow the screenshots below to complete the installation of the additional cluster nodes.
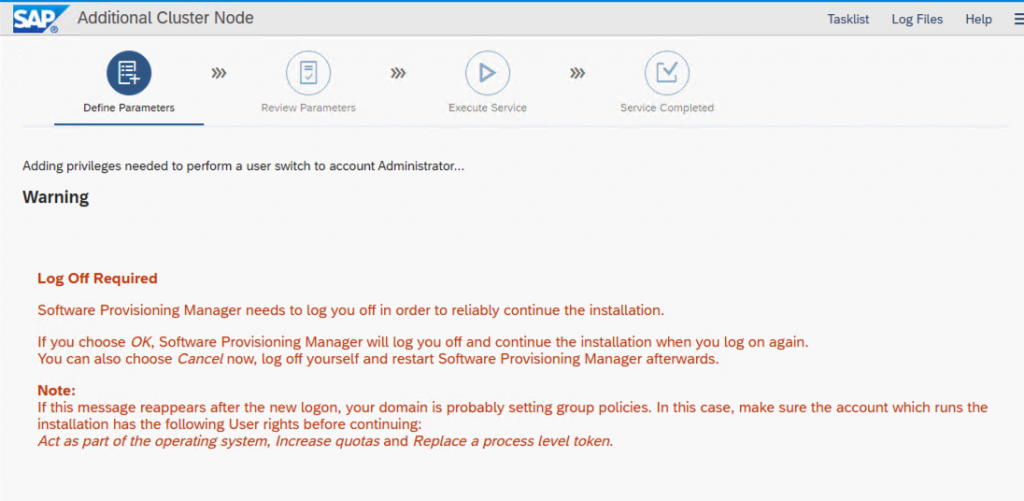

I don’t know if it was a coincidence or an installer glitch, but the above screen seems to hang here for a while. As soon as I click on the message, the installation seems to start progressing again. I only mention it because it seemed to happen to me twice, but it could be a coincidence.

The next step will timeout and fail after 5 minutes.
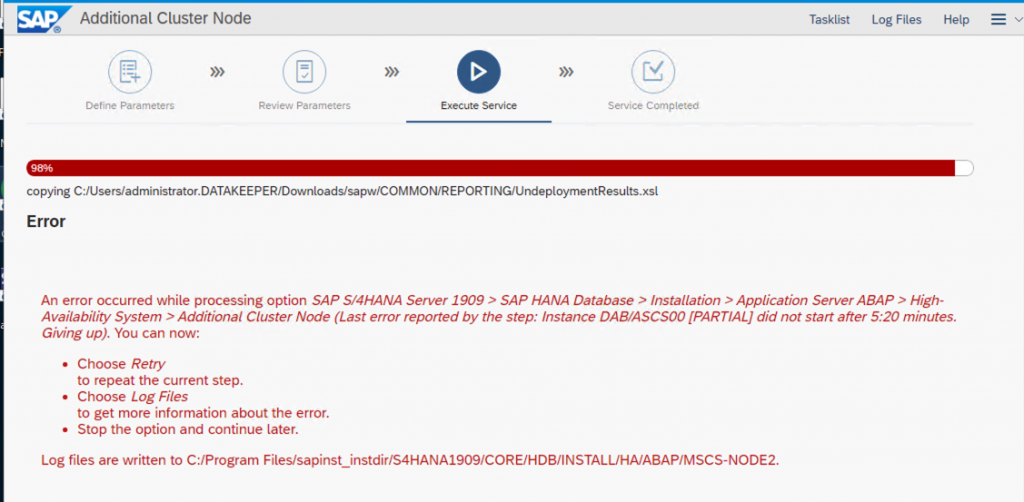
The process of installing the second node had all the resources move to the second node.
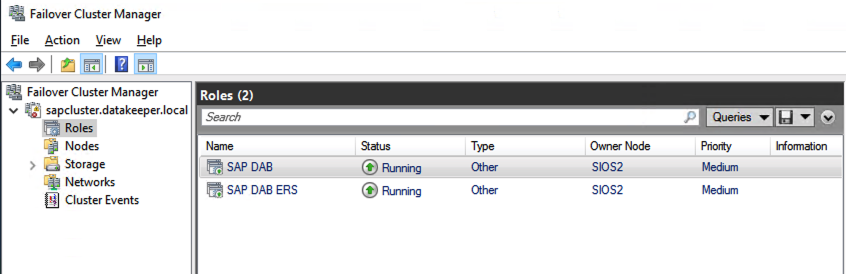
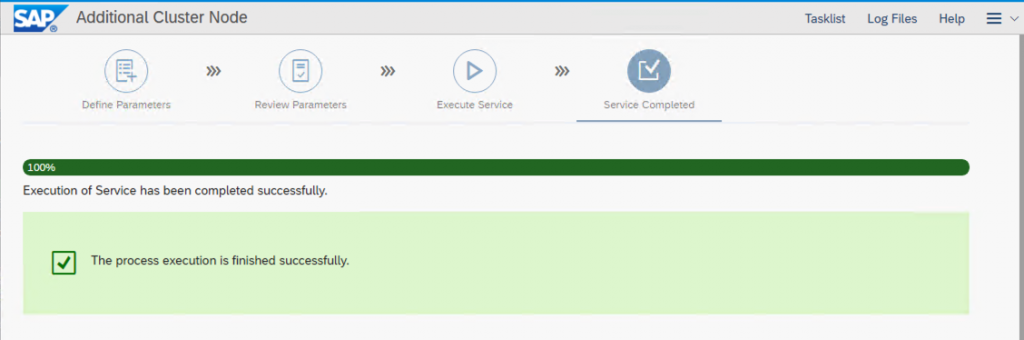
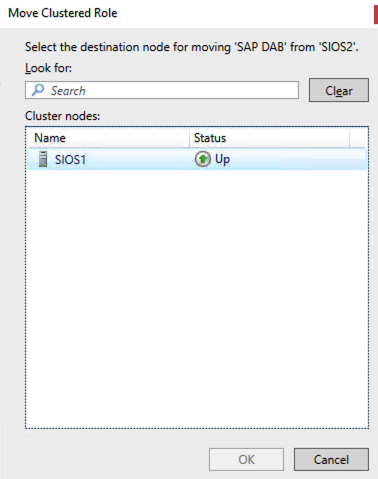
To get the installer to complete I have found that after the Error and the installer times out, you need to move both of the cluster resources back to the primary node and click on Retry to complete the installation. I’m not sure why that happens, but that is what I have had to do to get the installation to complete.
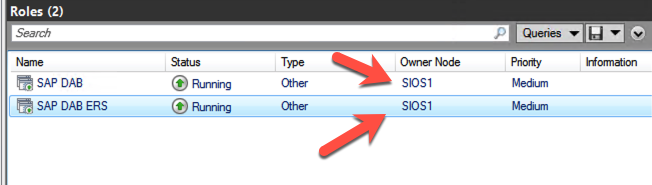
Once both cluster roles are back inservice on the primary node, click the Retry button on the SAPinstaller. The installation will then complete as shown below.