What is the Data Migration Cockpit?
The Data Migration Cockpit is an SAP Fiori-based application designed to simplify and manage the migration of both master data and transactional data into SAP S/4HANA Public Cloud during system implementation.
It provides a structured, user-friendly interface with the following key capabilities:
- Predefined Migration Objects – such as Profit center, cost center, Customer, Vendor, G/L Accounts, Asset Master, etc.
- SAP-Provided Excel Templates – for easy data input and mapping
- Built-in Validation & Error Checking – helps identify and correct data issues before posting
- Step-by-Step Guided Process – ensures consistent and accurate data migration
With the Data Migration Cockpit, businesses can reduce complexity, minimize errors, and ensure a smooth go-live by efficiently uploading clean legacy data into the SAP cloud system.
Steps to Perform Data Migration in SAP S/4HANA Public Cloud
Step 1: Access the Data Migration App
- Go to the Fiori Launchpad.
- Open the app: “Migrate Your Data – Migration Cockpit“.

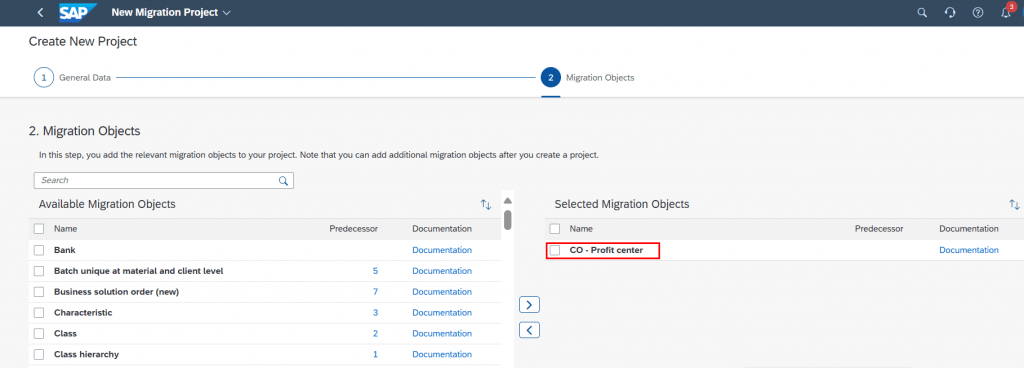
Step 2: Create a New Migration Project
Click “Create”
Enter a name for your project eg.. profit center Migration
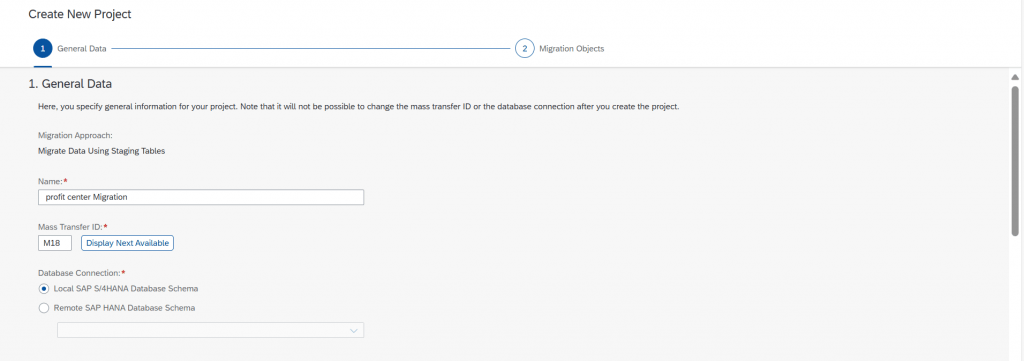
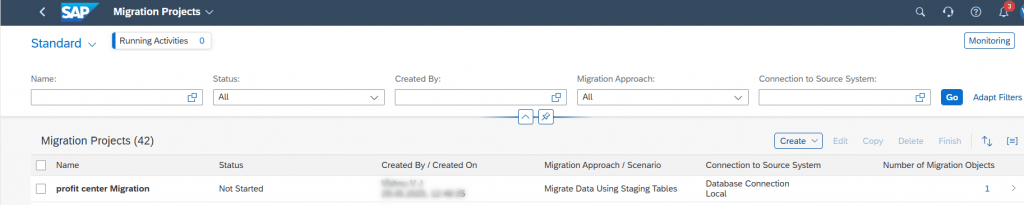
When you create a migration project, it is saved but not yet started. Once you begin working on it, the status changes to “In Progress.” After completing the migration steps, you mark the project as “Finished” and select how long the system should retain the project data. Once that time period ends, the project is automatically removed from the list. However, the data you uploaded will remain in the system and can still be used.

Important Details Before Starting Your Migration Project
After you create the migration project, there are some key points to understand before you begin:
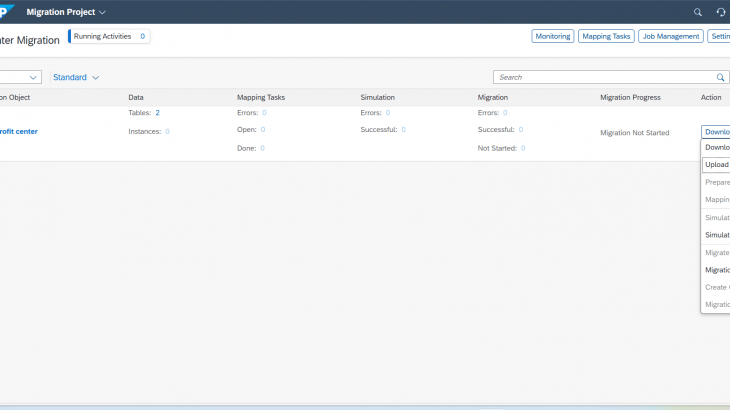
- Stage-wise Data Validation: The system performs validations at different stages. You can see how many tables are involved in the migration object and how many data records (instances) will be created in the system.
- Mapping Tasks Table: During the mapping process, you can view detailed information about your data, including any errors or successful mappings. You will also see similar reports during the simulation and actual migration steps.
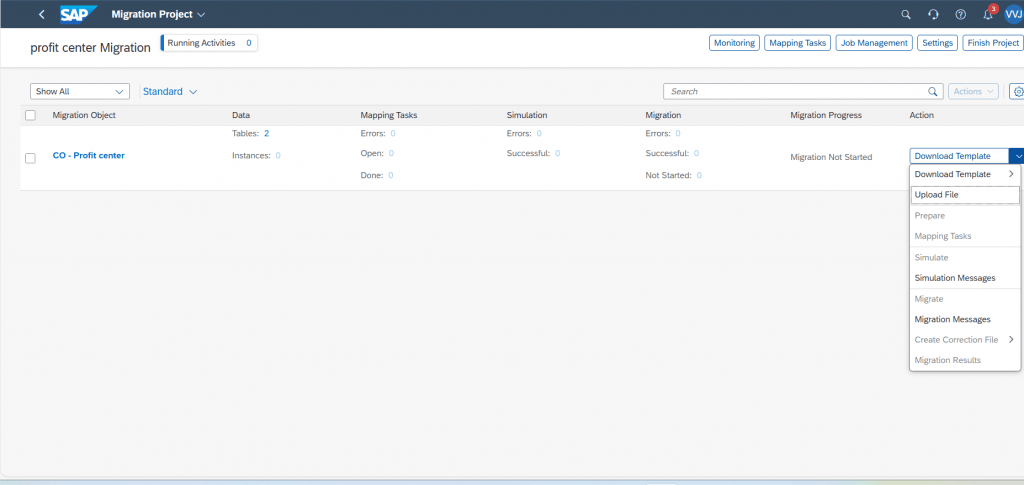
1. Download the Template
Get the Excel template provided by SAP for the migration object you want to upload.
2. Prepare the Data
Fill the template carefully with your legacy data, following the format exactly.
3. Upload the Prepared Template
Upload your completed Excel file into the Data Migration Cockpit.
4. Mapping Tasks
Review and adjust how your data fields map to SAP system fields if needed.
5. Simulation
Run a test migration to check for errors without actually posting data.
6. Migration
Execute the real data upload into SAP once the simulation is successful.
7. Correction File
If errors appear, download the correction file, fix the data, and repeat the upload process.
These are the steps in the migration process. After you finish one step, the system will take you to the next step automatically. You just need to follow and complete each step.
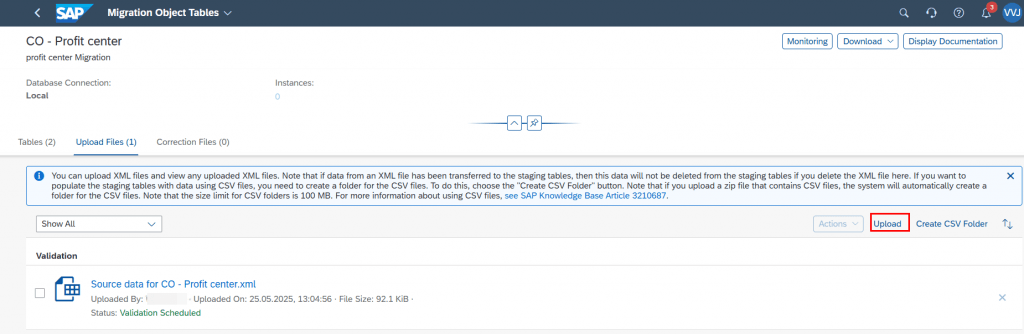
Download Template and Upload Data
Get the template as an XML file, enter the necessary data, and submit the filled template by uploading it back.
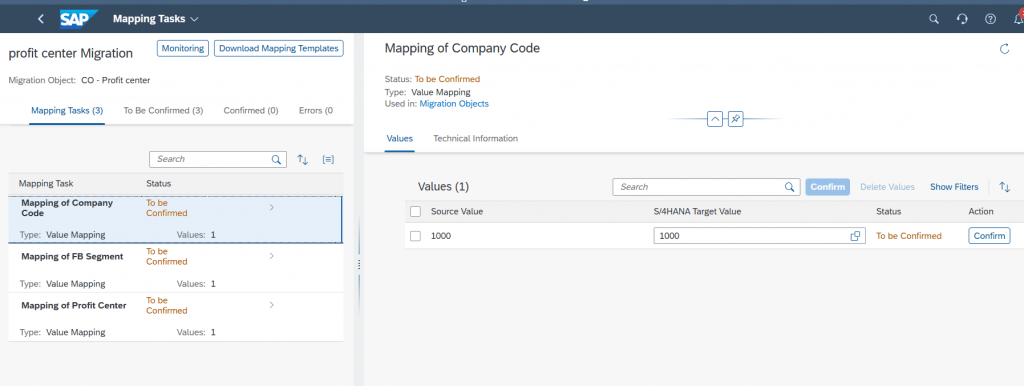
Mapping Task
The Mapping Task helps you connect the data from your uploaded file to the correct values in SAP S/4HANA.
For example:
- You may need to match company codes, currencies, or country codes from your old system to the values used in SAP.
During this step:
- The system shows you any missing or incorrect values.
- You can manually adjust or confirm the correct mappings.
- Once everything is mapped correctly, you can continue to the next step.
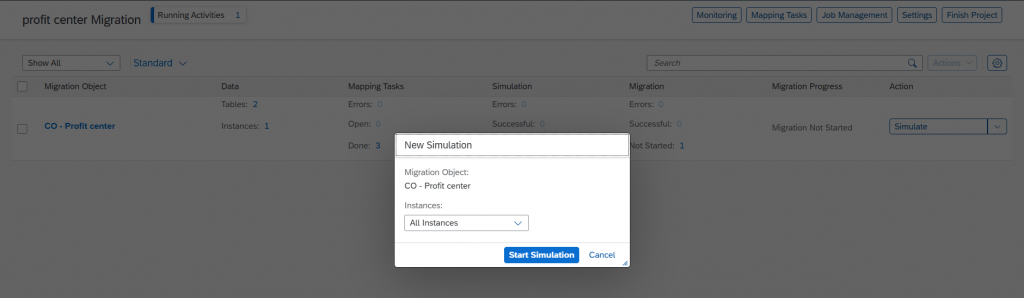
Simulation
The Simulation step lets you test the data migration without actually posting the data into the SAP system.
What happens during simulation:
- The system checks if the data is correct and complete.
- It shows any errors or warnings in the data.
- You can review the results and fix any problems before doing the actual migration.
This step helps you avoid mistakes during the real migration.
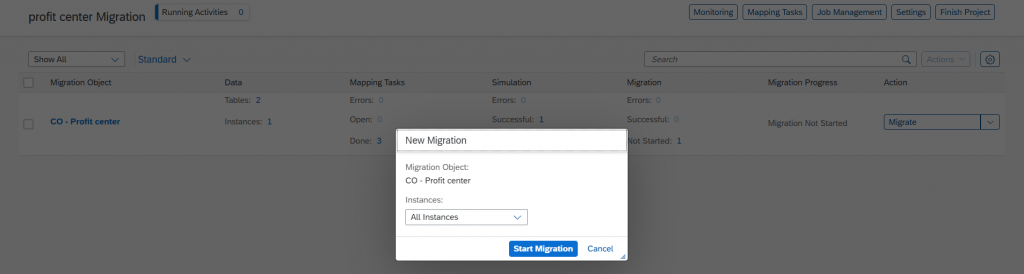
Migration
After a successful simulation, you can start the Migration step.
In this step:
- The system uploads the data from the staging tables into SAP S/4HANA.
- All valid records are posted to the system.
- You can see a summary of successful and failed records.
If there are any errors, you can fix them and repeat the migration for those records.
This is the final step where your data becomes active in SAP.
Migration Result
After the migration is complete, you can view the Migration Results to check the status of your data upload.
In this section, you will see:
- Successful Records – These records were uploaded and posted correctly into SAP.
- Failed Records – These records had errors and were not posted.
For failed records:
- The system shows error messages to help you understand what went wrong.
- You can download a Correction File, fix the issues, and re-upload the corrected data.
Reviewing the migration result helps ensure that all your data has been properly transferred into SAP S/4HANA.

The uploaded template file must be less than 100 MB in size. If your data is too large, consider splitting it into multiple files.


