With this Blog Post, I will talk about the SAP functionality of Trigger Points in production Order and how to set them up.
A trigger point is SAP standard functionality that automatically/manually triggers certain functions while we are processing a Production Order.
We can set up trigger points to carry out the following functions;
- Release next operation(s) – Setting up this function automatically releases the succeeding operations to the operation that has trigger point assigned.
- Release up to stop indicator – Setting up this function releases all operations up to and including the next operation for which Rel Stop indicator is set.
- Release earlier operation(s) – Setting up this function automatically releases all operations before the operation that has trigger point assigned.
- Create production order – When this function is set up on operation, a new production order (without material) is generated as the set status is reached on the operation.
- Insert operation – Setting up this function inserts reference operation(s) in the production order when the set status is reached on an operation where the trigger point is assigned.
- Start workflow task (for example, send mail to a user)
Process to set up “Trigger Point”
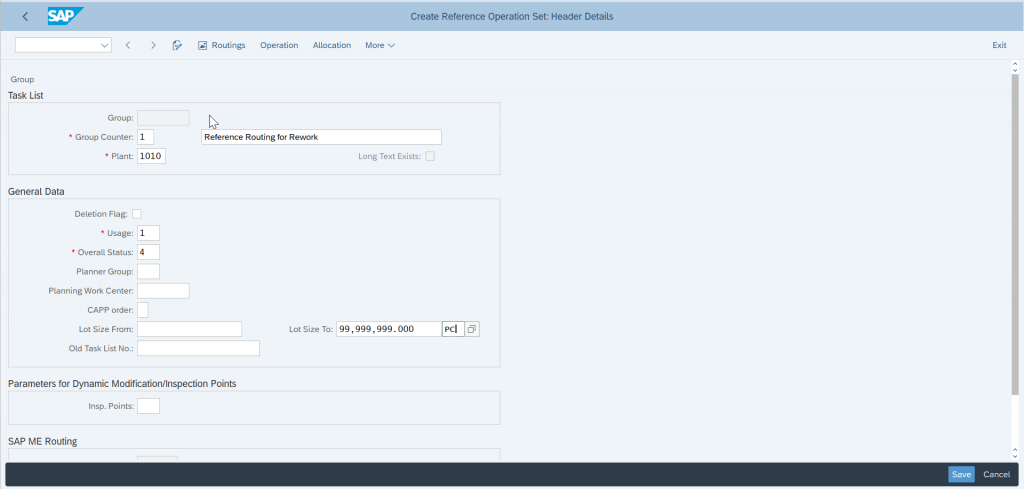
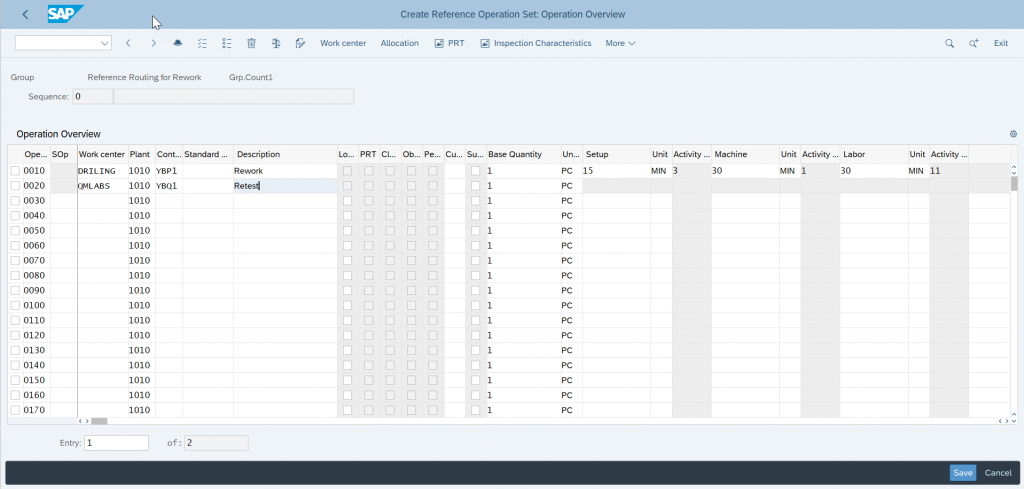
Step 1 – Create Reference Operation Set
T-code – CA11
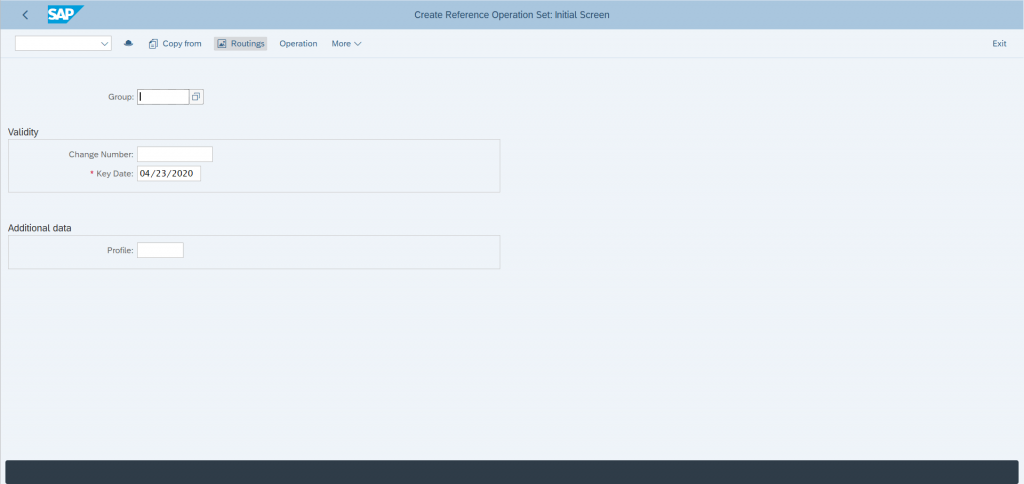
An existing reference set can be copied or a new reference set can be created.
Step 2 – Create Trigger Point
T-Code – CO31
Provide the name of Trigger Point to be created
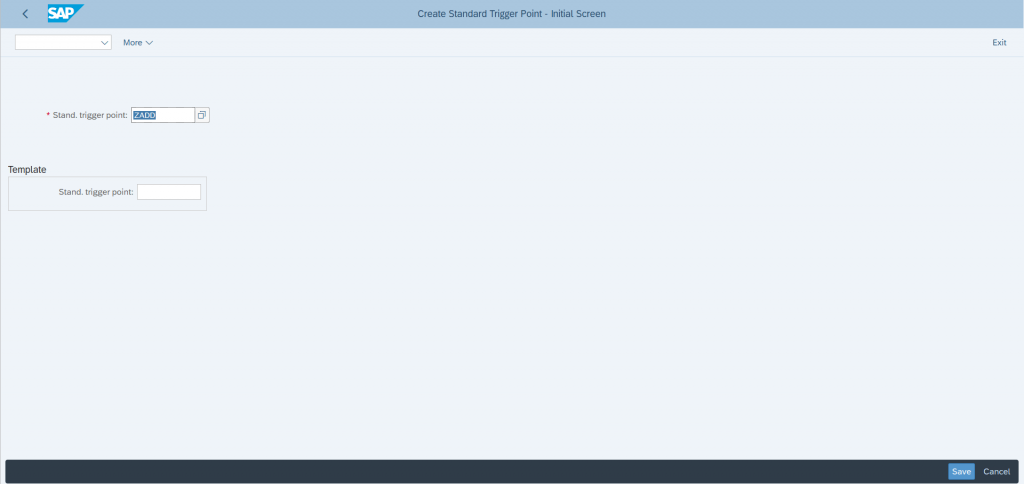
Enter
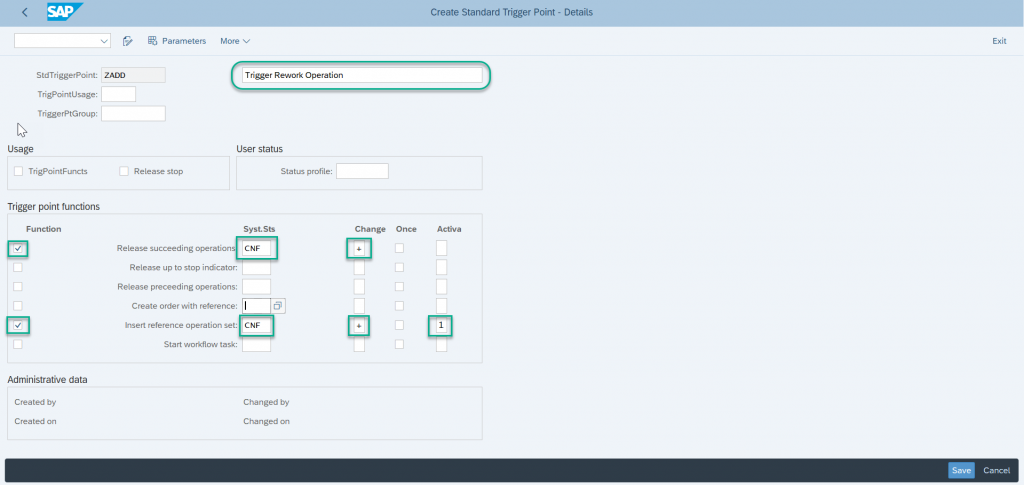
Provide a description for the Trigger Point
Check the functions that you want to execute with this trigger point. I am creating a trigger point to generate additional operations for carrying out rework. Here I have selected 2 functions;
- Release the succeeding operations – this will release the new operation sets when they are inserted.
- Insert reference operation set – this will insert new operations for carrying out rework.
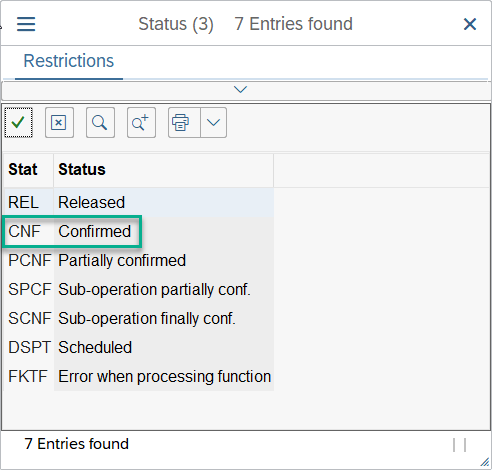
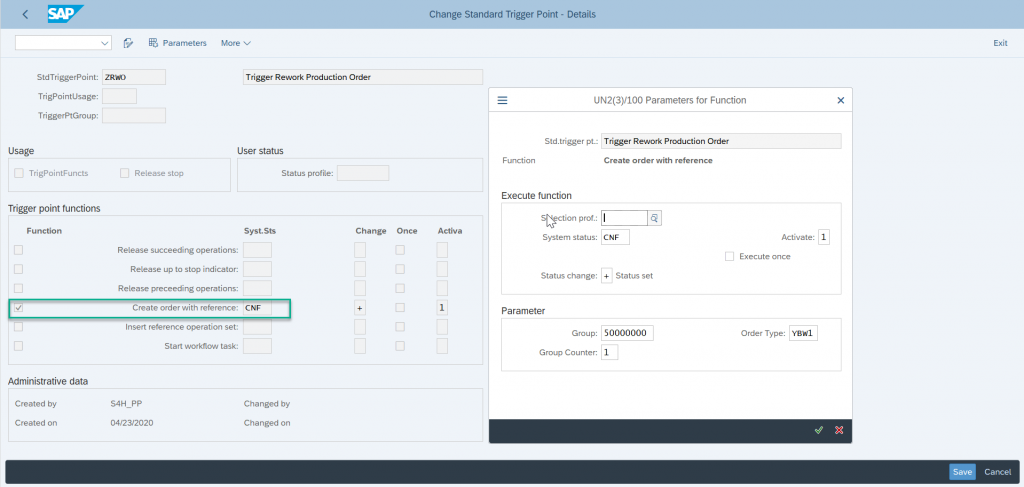
Enter the system status that should activate the Trigger Point, I have selected Confirmation CNF from the following available options. This mean trigger point will be activated when I will post confirmation of operation in the production order.
Enter the change key to specify when the predefined function is triggered
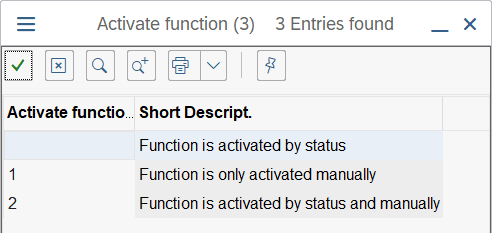
Enter Activate key to specify how you want this function to be activated, I have selected 1 – Function is only activated manually. Values can be selected from the following available options;

Confirm the pop-up message
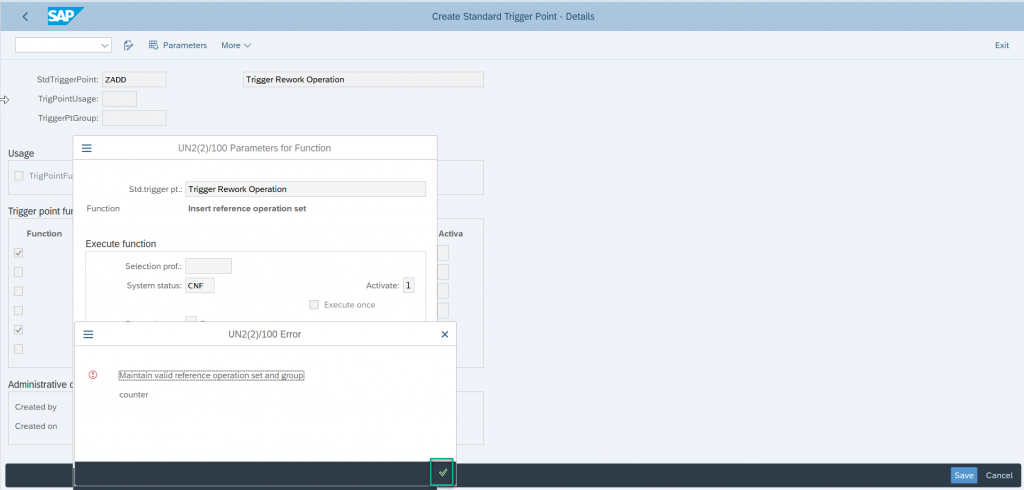
Another message will appear to enter the reference operation set. Enter
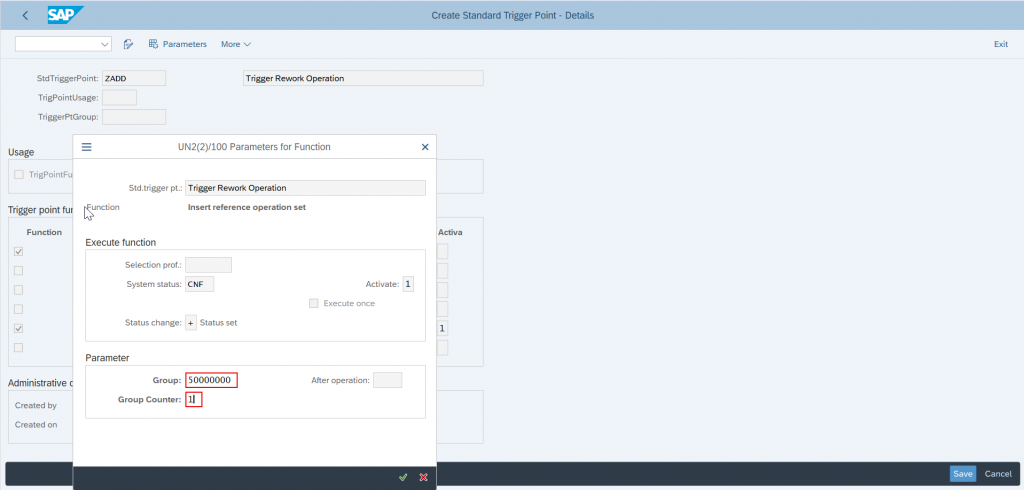
Provide the reference operation set Group and Group counter that was created in the earlier step.
Enter
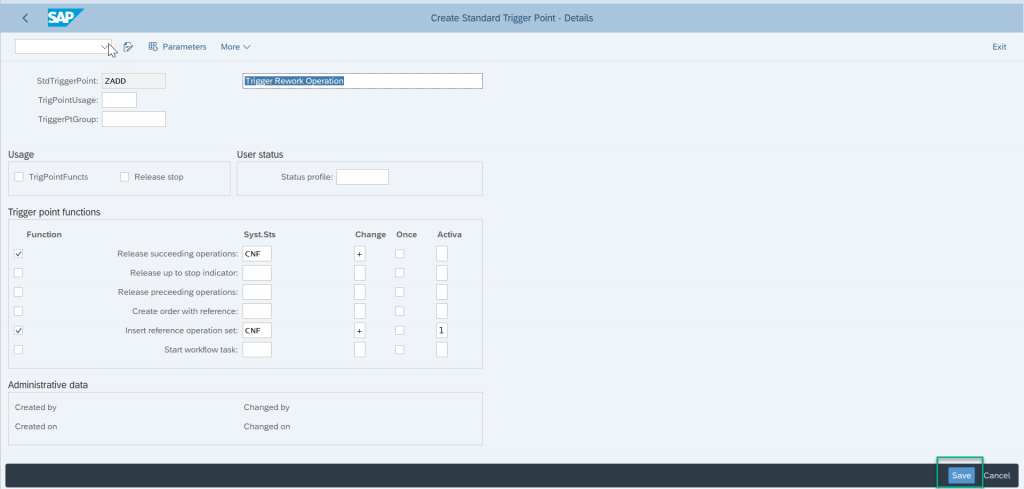
Save the trigger point.
The trigger point is now ready to be assigned to a Routing.
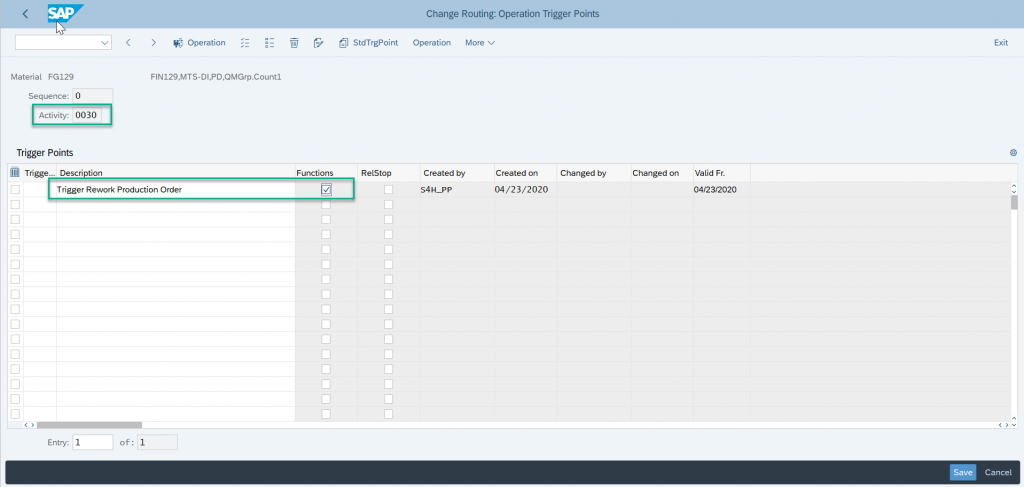
Step 3 – Assign Trigger Point to Routing
T-code – CA02
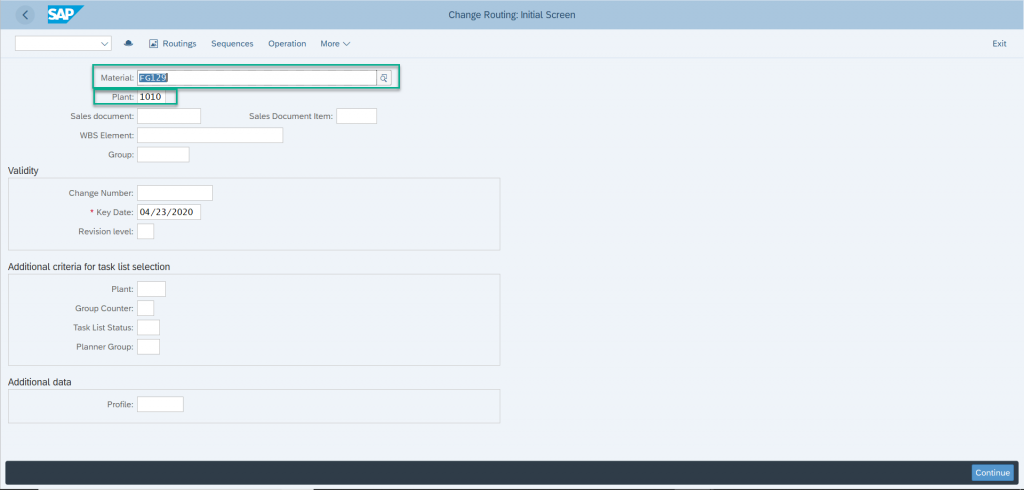
Enter a material number and plant number for which the trigger point is to be activated.
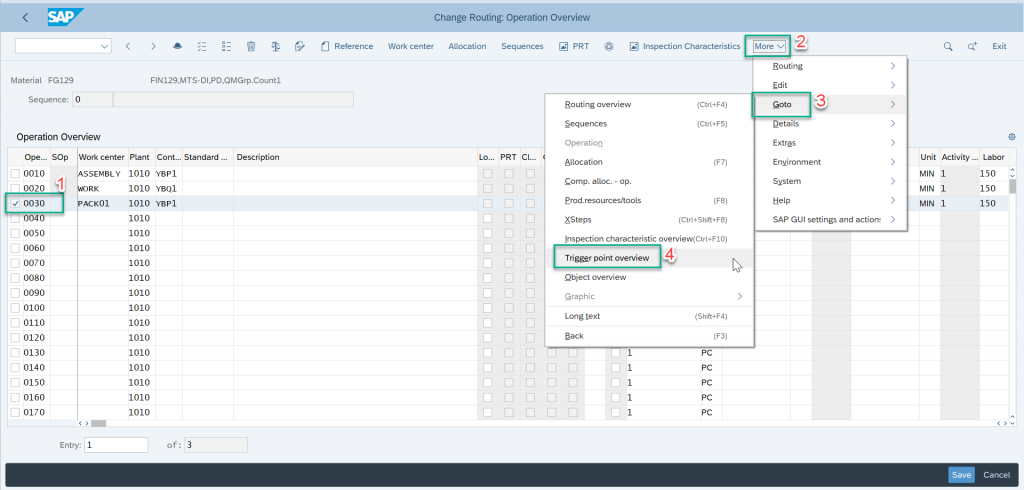
Select the operation after which you want to activate the trigger point or you want to insert additional rework operations.
As a design concept, the last operation can be a Quality operation. When the quality operation is confirmed by quality people, based on the quality results they can decide if the material produced require a rework or not. If further rework is required, quality guys can trigger new operation(s) to carry out rework.
Select Trigger point overview selecting Menu –> Goto –> Trigger point overview
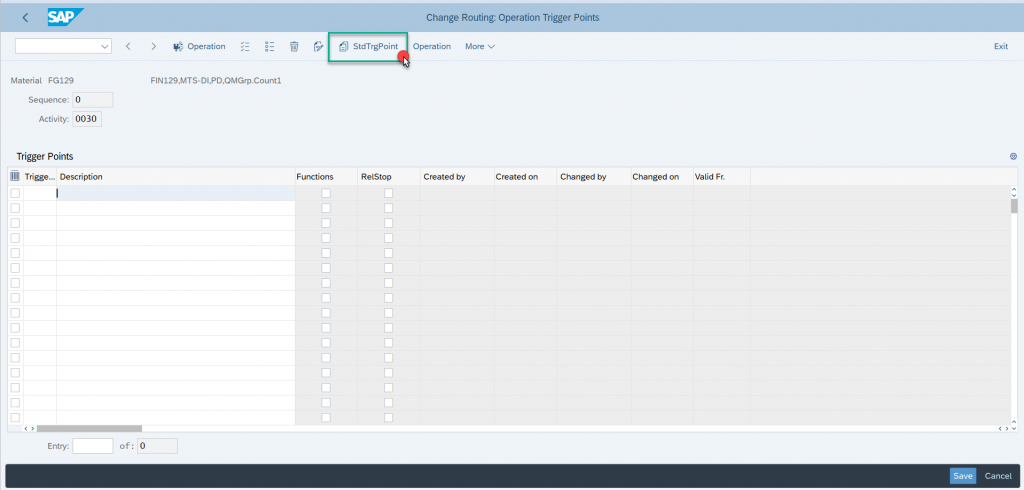
Select “StdTrgPoint” icon to call trigger point available in the system
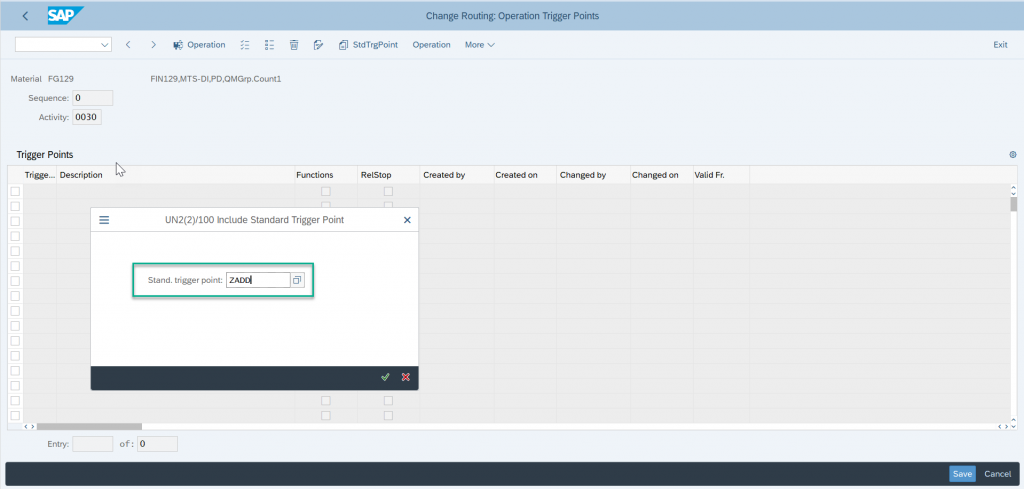
Enter the trigger point created earlier
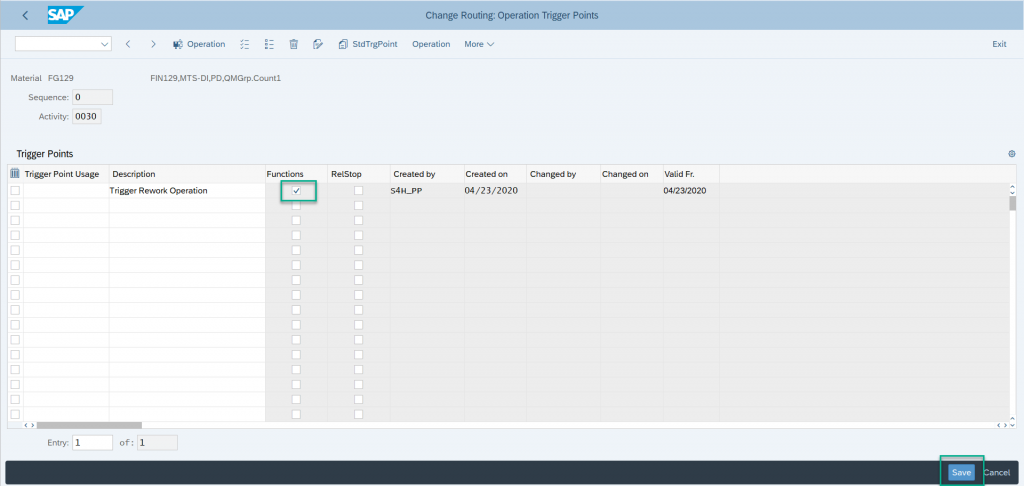
Check the checkbox in column Functions to specify that the trigger point is used to carry out certain functions.
Save
Testing the Trigger function
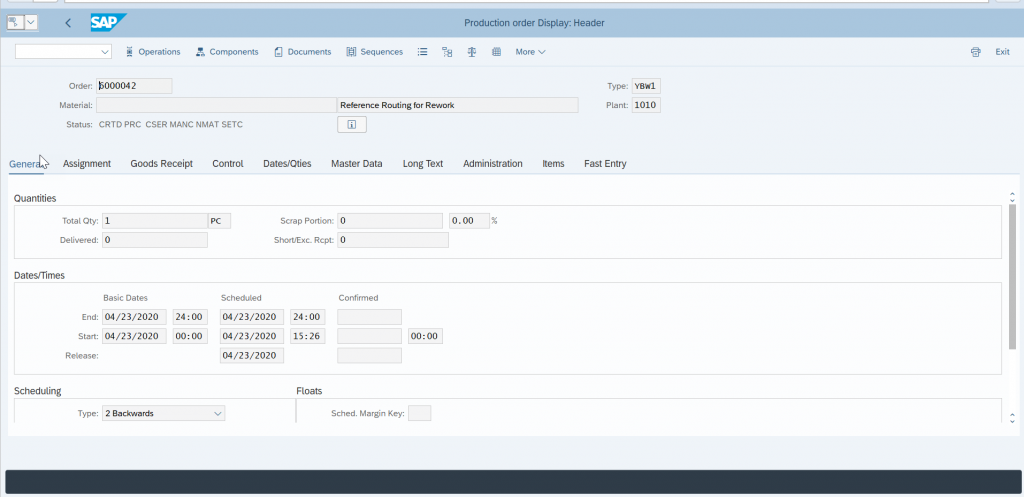
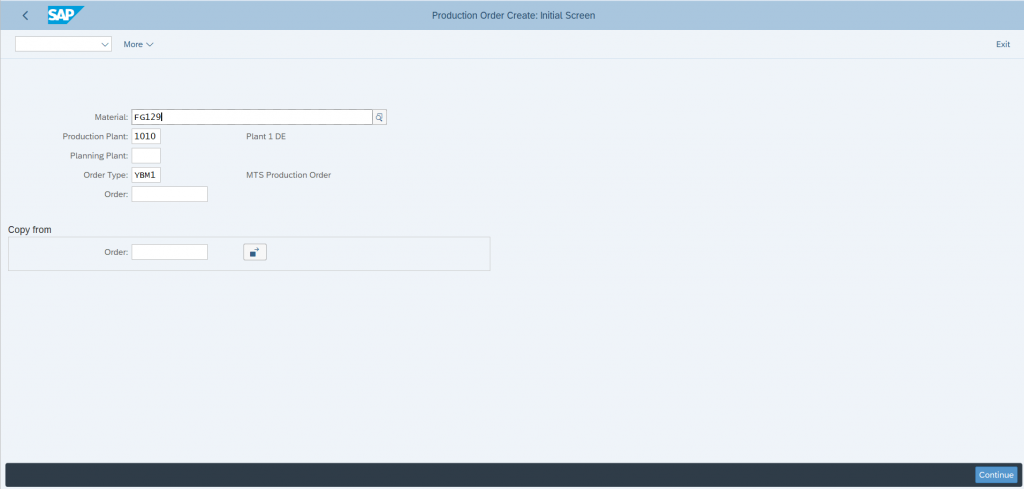
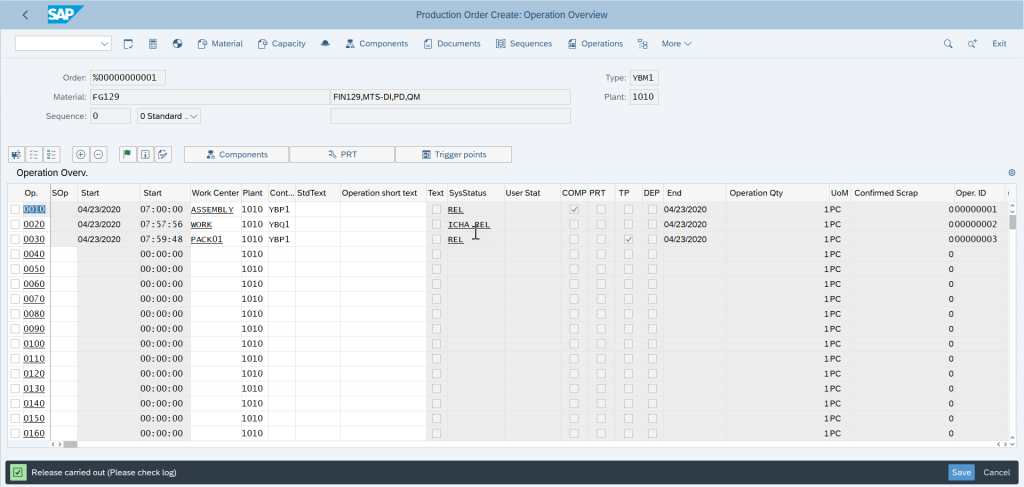
CO01 – Create Production Order
In the operation tab, we have an additional column for Trigger Point (TP) that indicates the operation is set-up with a trigger point.
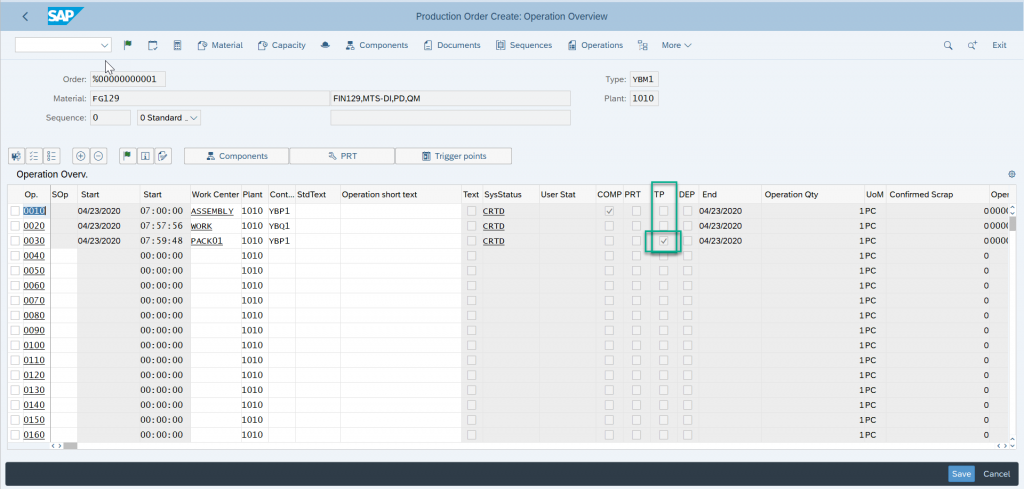
Right now we have 3 operations in the Production Order
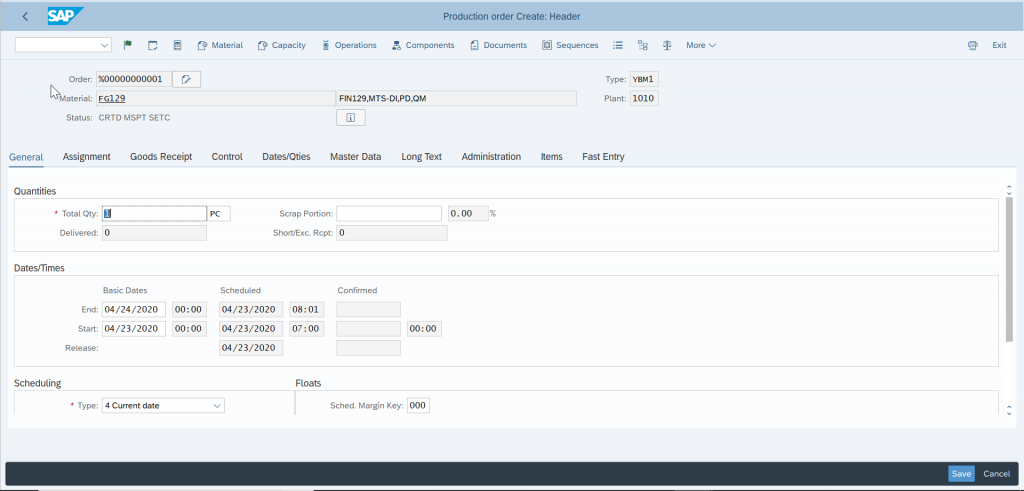
Release and save the Production Order.
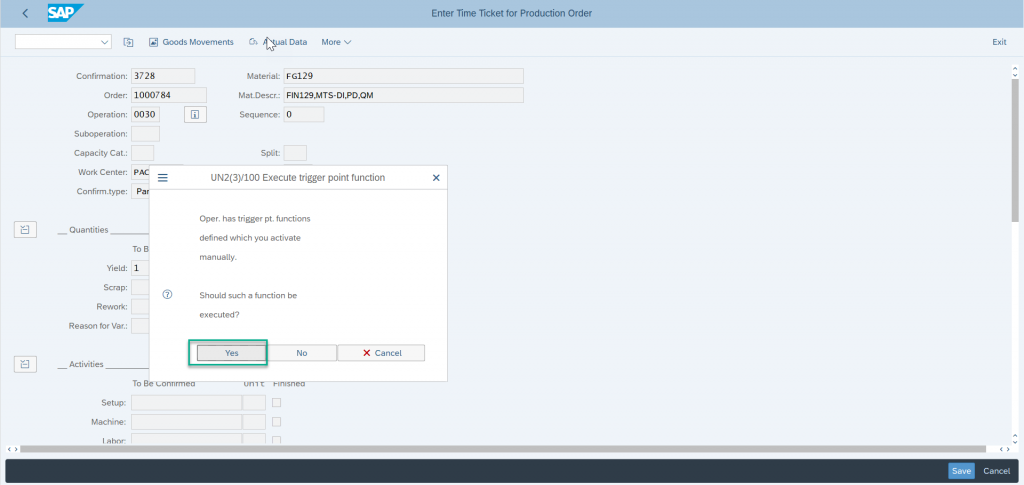
Confirm Operations;
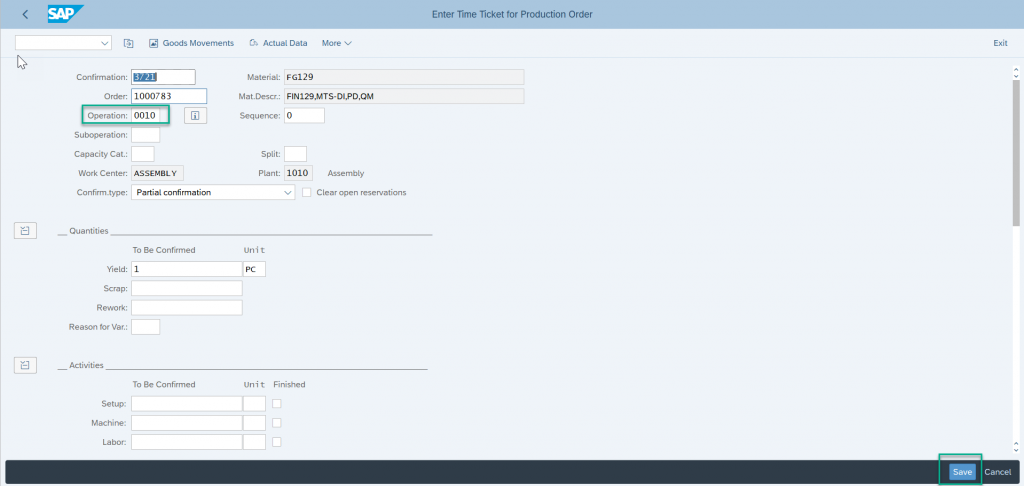
Confirm operation 0010

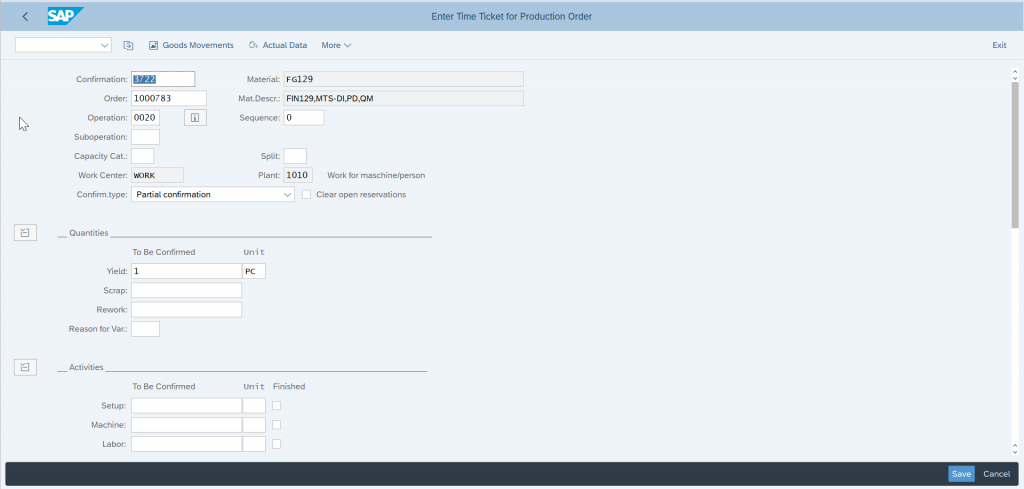
Confirm operation 0020

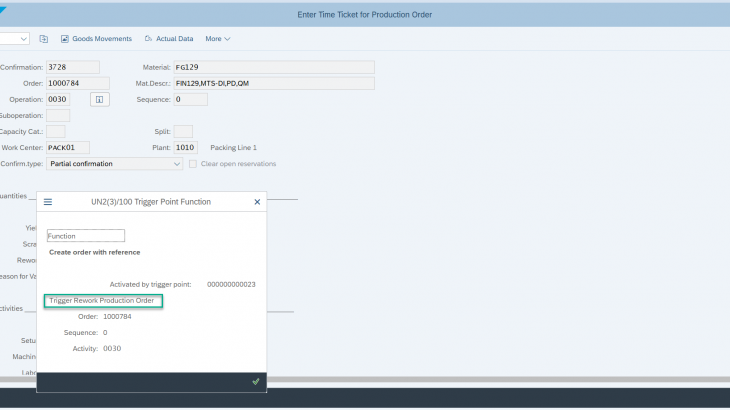
Confirm operation 0030, this is the operation where we have assigned trigger point

As we hit save, a pop-up message will appear telling we have a manual trigger point function and should this be triggered
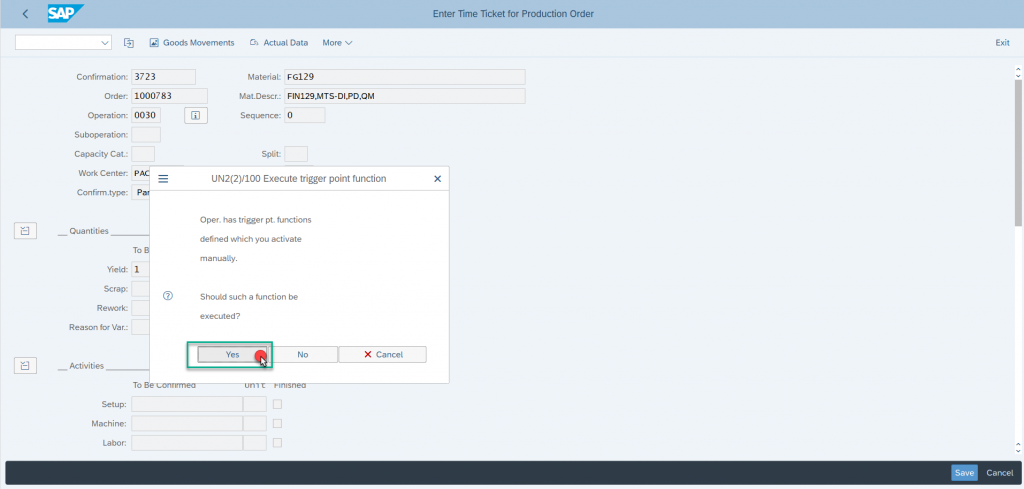
Select “Yes”
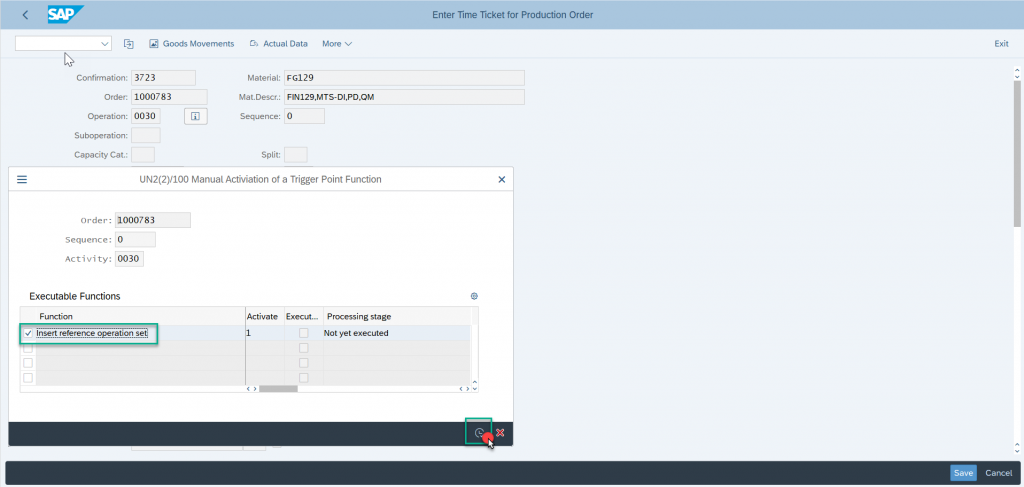
Another pop-up screen will appear prompting to select the Reference Operation set to be inserted in the production order.
Select and Execute
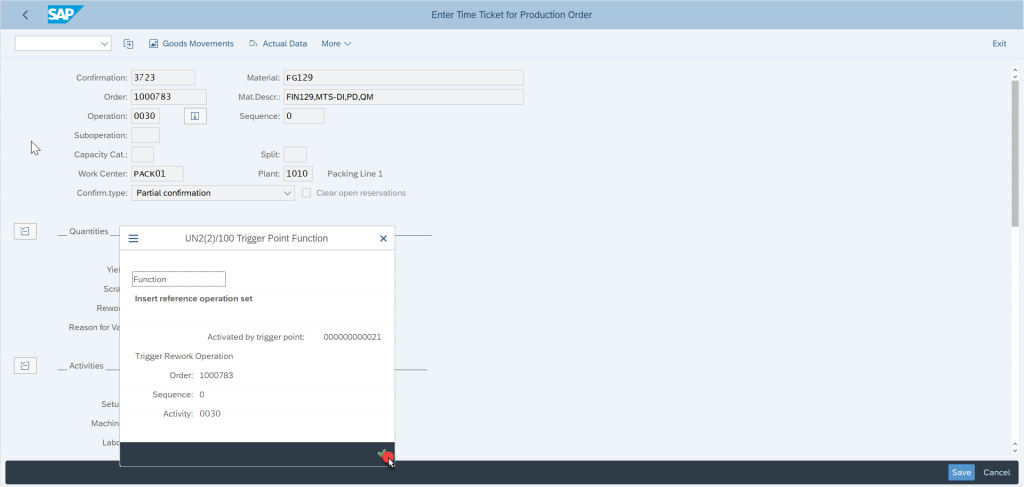
Enter
A new screen will appear with the information of new operations that the function is going to insert in the production order
Select the selection option on top of the screen

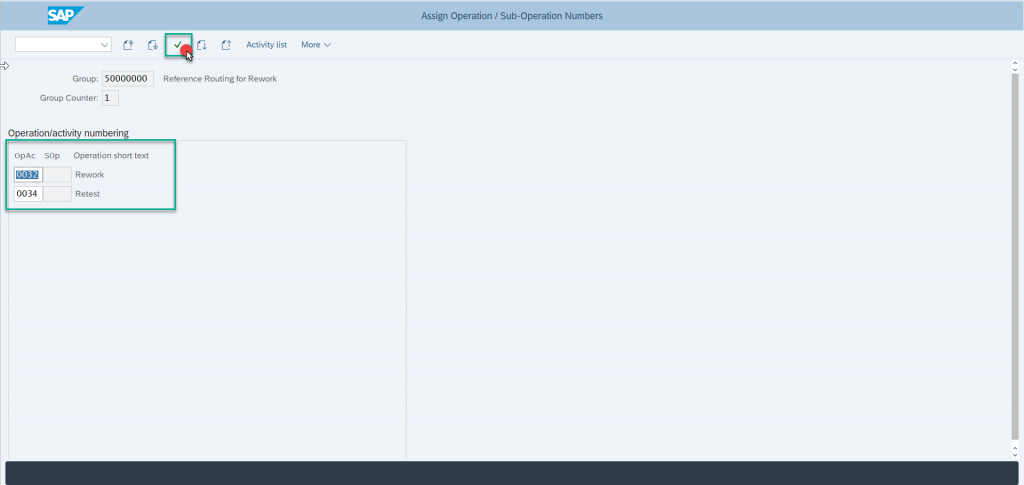
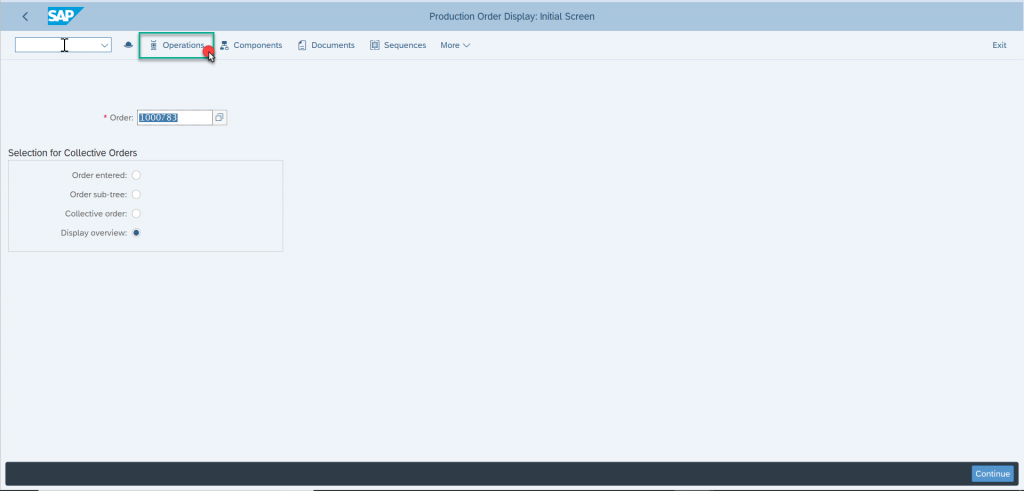
Now go to Display Production Order (CO03) and go to operations tab to check the new inserted operations
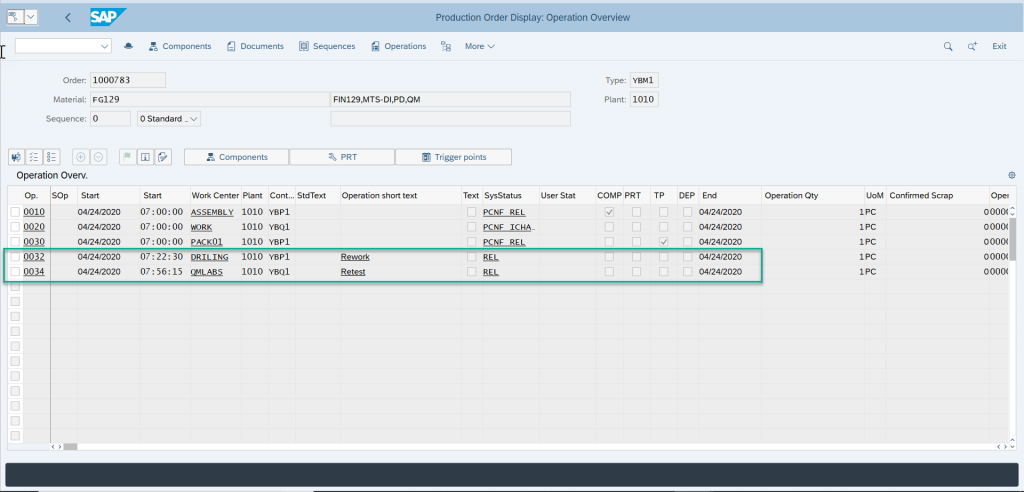
Two new operations are inserted and both operations are released as well.
Trigger Point to generate new Production Order
Similarly, a trigger point can be created to generate a new Production order (without material) out of the production order. The trigger point will be created for function “Create order with reference” and in parameters, Reference operation set and order type will be assigned.
The trigger point will then be assigned to an operation is the standard routing of the material
The normal production order is created
When confirmation will be posted for the operation with a trigger point, trigger function will get activated
Will be prompted to select the routing
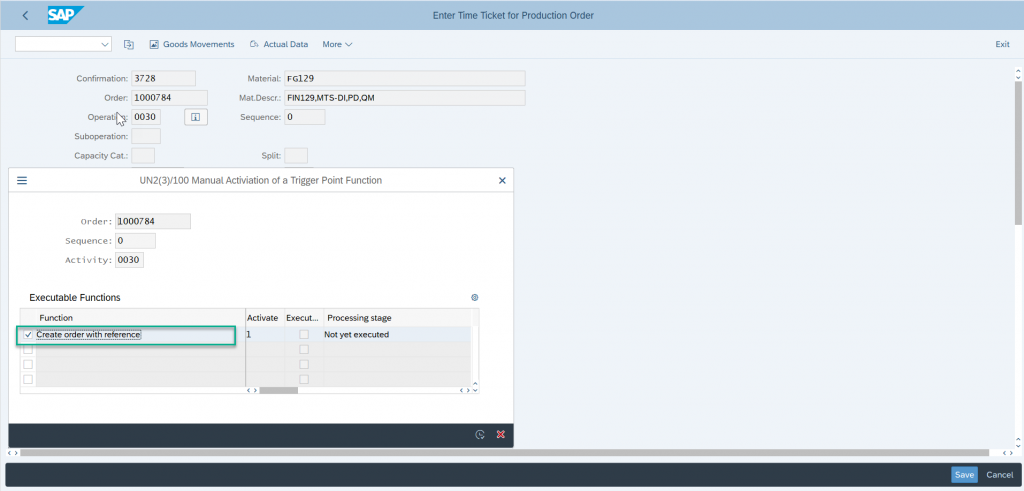
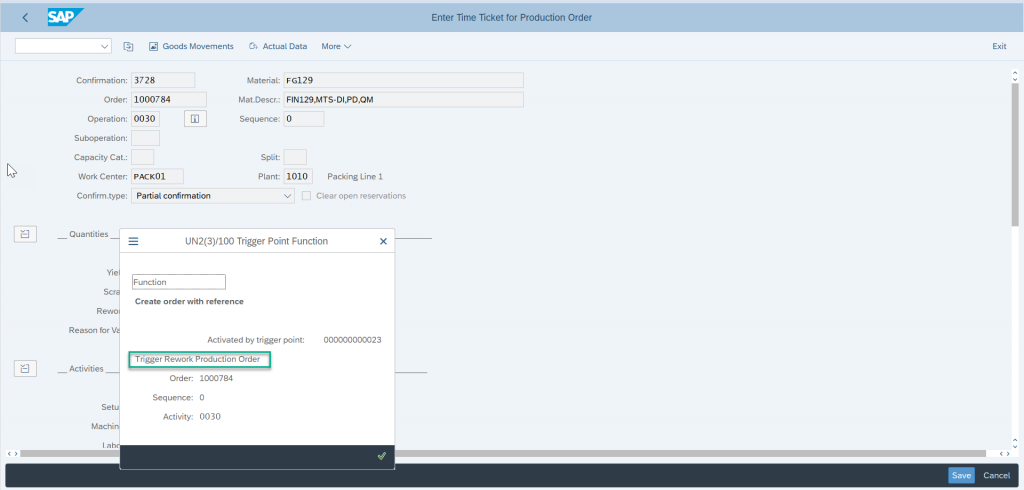
Rework Production Order creation will be triggered

Another Production Order (without material) will be created and can be checked in COOIS or CO03