Introduction
This blog post is part of the series covering SAP Mobile start app empowerment and is a continuation of the blog post “Installation and Configuration of SAP Cloud Connector” where we installed the SCC to work with a hardcoded user credentials for the backend. This works fine for verifying that the end-to-end flow is working, but it is not useful in a productive landscape, since all users will access the same backend data due to the hardcoded user credentials.
Therefore, we need to configure principal propagation to ensure that any given user only can access the backend data that they should.
This is archived by propagating the user id from the Business Technology Platform through the Cloud Connector to the backend system.
Prerequisites
You have either followed the steps in the blog post “Installation and Configuration of SAP Cloud Connector“ or you have already installed and configured your SAP Cloud Connector plus created to destinations in BTP – a Design-Time and a Runtime on your own.
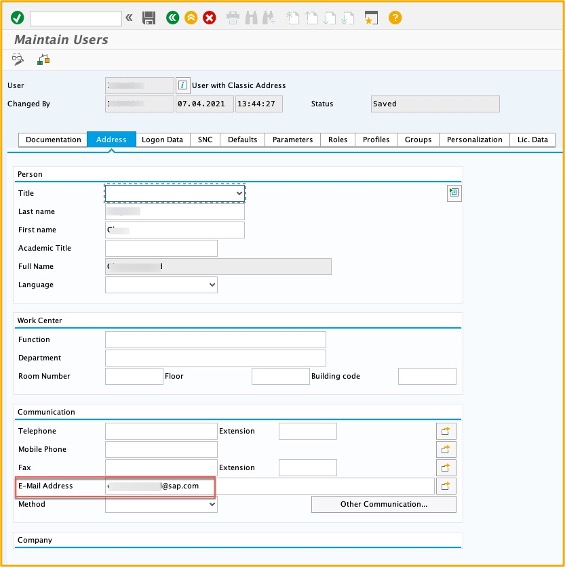
We also assume that your SU01 user has the email filled with the mail address you use to logon to BTP.
Generate Cloud Connector Certificates
In the newest versions of the Cloud Connector, it is possible to generate self-signed certificates which makes it a lot easier to setup principal propagation for a PoC for example. However, for a productive scenario, it is highly recommended to use signed certificates.
We need three different certificates to get the setup working
- System certificate
- CA certificate
- User certificate
System certificate
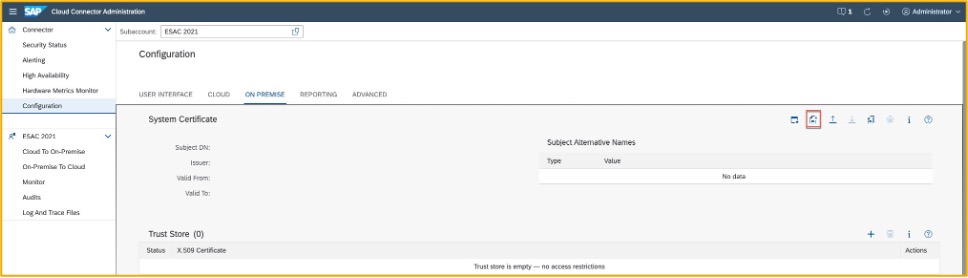
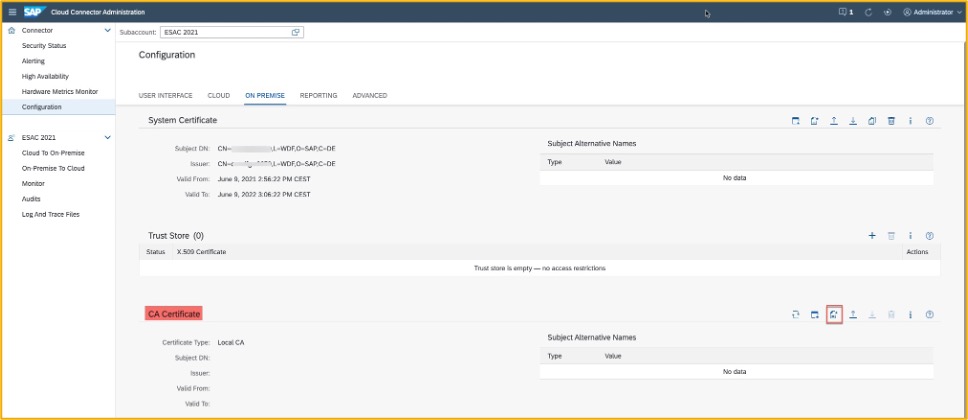
Logon to the Cloud Connector cockpit and navigate to “Configuration” and select the tab ON PREMISE. In this blog we will use the self-signed certificates but the process is the same for a signed certificate, once you get the signed certificate back.
Click on the “Create and import a self-signed certificate”
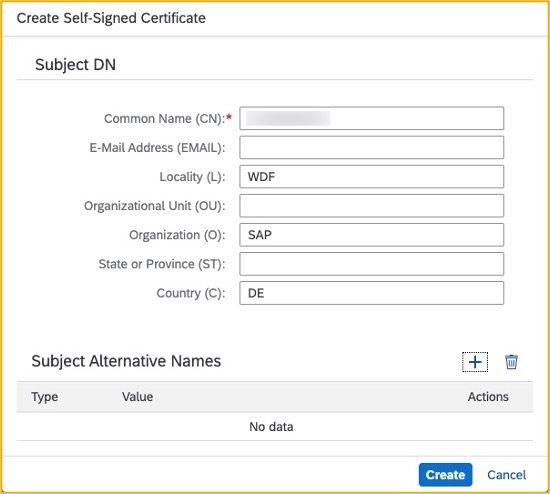
Fill in the required information, which as a minimum is the Common Name, CN is the name of the server where the Cloud Connector is installed.
Next download the new certificate and save it on your local computer. We will need it later in the SAP S/4HANA and/or SAP Business Suite system.
Tip: use the default name sys_cert.der as this is used in the rest of this homework

Now we have created the system certificate, next is the CA certificate.
Create CA Certificate
The CA certificate is used to sign all the certificates when a request is forwarded from the Business Technology Platform.
Like with the system certificate we will create a self-signed CA certificate. Under the same tab “ON PREMISE” scroll down to CA Certificate and click “Create and import a self-signed certificate”
Fill in information needed again just like with the system certificate.

The SAP Cloud Connector now acts as CA whenever a request is coming from the BTP to the onpremise system, SAP S/4HANA or SAP Business Suite. This means that every request from the BTP i.e., Launchpad in this case, is signed in the Cloud Connector with this certificate. The backend system must trust the certificate to establish the link between BTP and onpremise.
User Certificate
The last certificate is the user certificate, scroll down to “Principal Propagation” and click on “Edit”
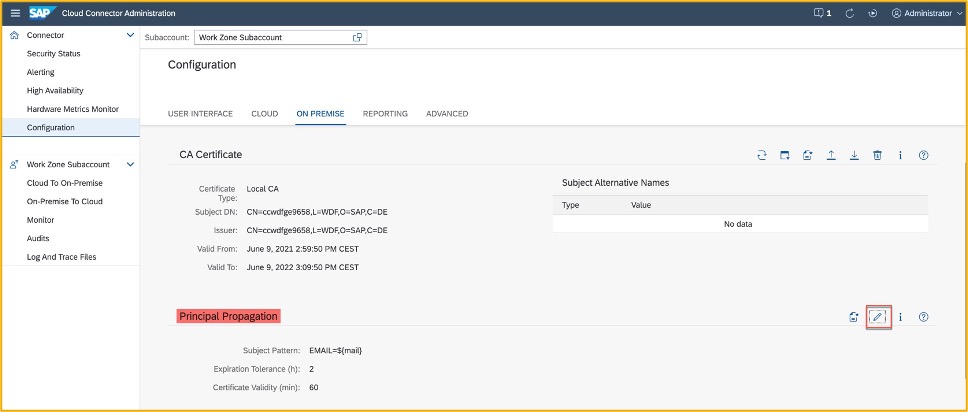
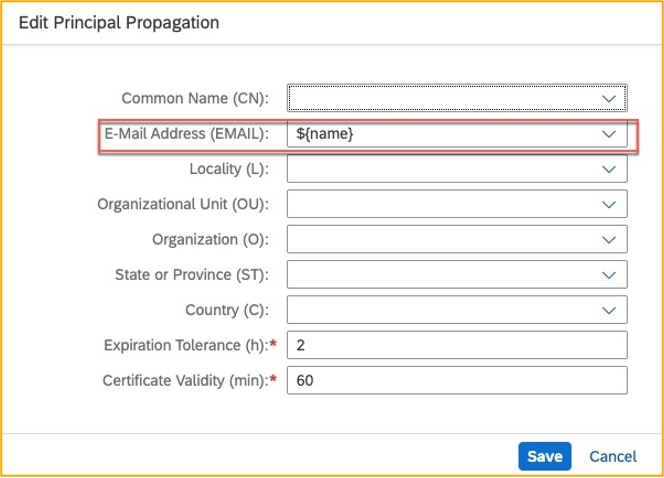
Replace the Principal Propagation template as shown below and click save
Next, we need to create a sample certificate which we will use in the backend – click on “Create a sample certificate”

Save the sample certificate in the same locations as system certificate and keep the suggested name scc_sample_cert.der
Sync the cloud trust with IDP
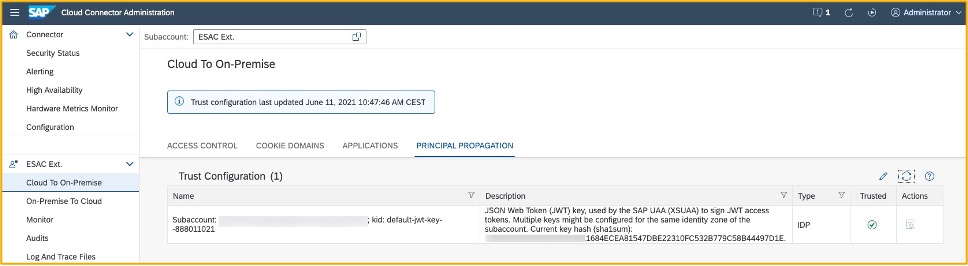
By default, the Cloud Connector does not trust any entries which issues tokens for principal propagation. For this reason, we must establish the trust between the Cloud Connector and the IDP of your subaccount on BTP.
Navigate to the “Cloud to On-Premise” and select the tab Principal Propagation. Click on Synchronise this populate the trust configuration.
Configure mapping to backend
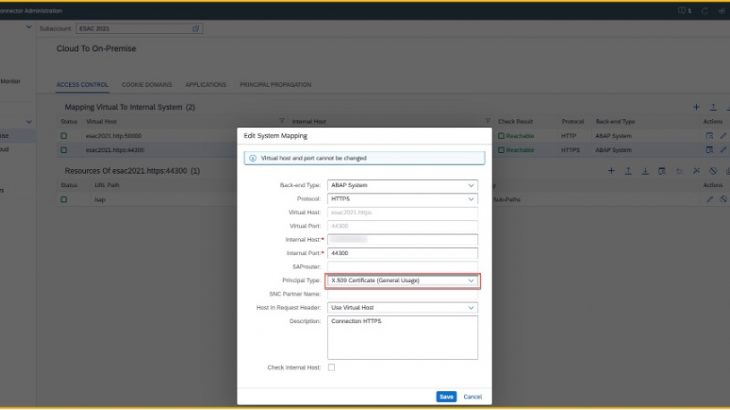
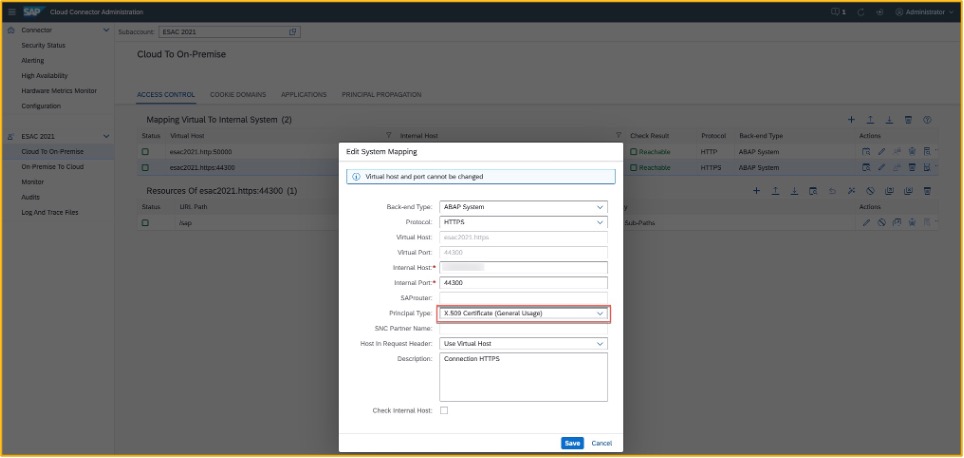
The last step in the Cloud Connector is to change the HTTPS mapping to use X.509 as principal type.
In the same page as trust sync click on “Access Control” and identify the mapping using HTTPS.
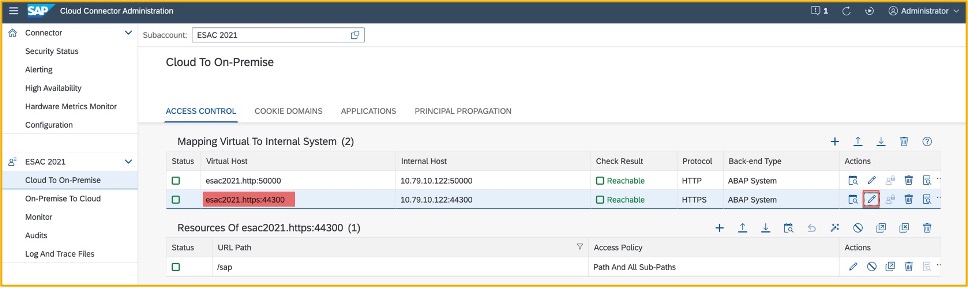
Change the Principal Type to “X.509 Certificate (General Usage)” and save the change.
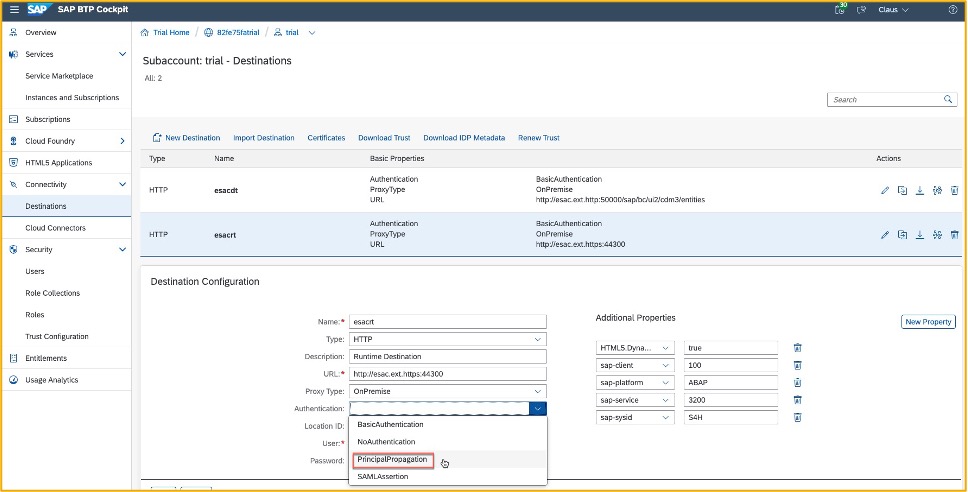
In the Subaccount we also need to change the Runtime Destination to use Principal Propagation.
Navigate to Destination and select the Runtime Destination and change the authentication to “PrincipalPropagation” and save the change.
Note if you do not have created a destination yet, you can skip this small step. The blog post “Setting Up SAP Launchpad Service and Mobile Start with Content Federation” describe the steps for creating a destination.
But remember to come back and perform this small step once your destination is created.
Setup Backend for Principal Propagation
In this section we will work on the backend which for this example is a SAP S/4HANA system. A couple of steps are needed
- Import the system certificate
- Define rule-based mapping
- Define reverse proxy parameter
- Restart the ICM
Import system certificate
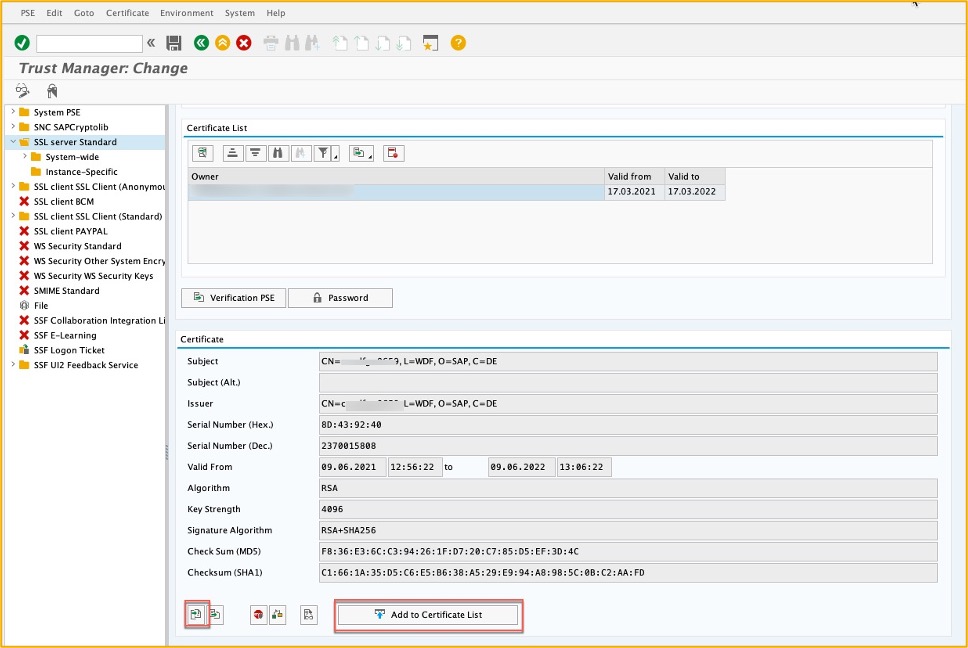
The system certificate we created in the beginning of this homework must be imported into the backend system – go to transaction STRUST and change to edit mode. Expand the SSL Server Standard. If you have not previously created an SSL Standard Server, right click on it and create a new one as first step.
Once created scroll down and click on “Import certificate” in the pop-up navigate to the location where you saved the system certificate sys_cert.der and upload it. Click on “Add to Certificate List” to include it in the list of trusted certificates.
It will show up in the box above – “Certificate List”
Save the changes and exit the transaction.
Define rule-based mapping
Since you are logging on to BTP using an email address this need to be mapped your SU01 user in the backend system. Now luckily, we don’t have to do that manual for all the users, we just create a mapping rule to handle this. Go to transaction CERTRULE.
Click on the “import certificate” and select the sample certificate you created earlier scc_sample_cert.der and import it
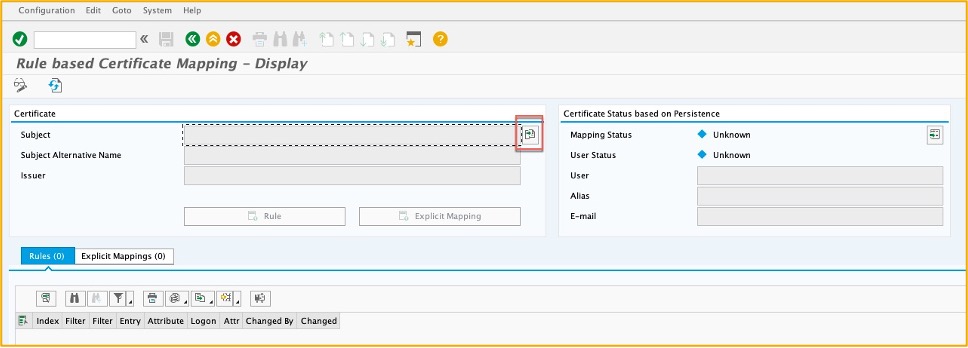
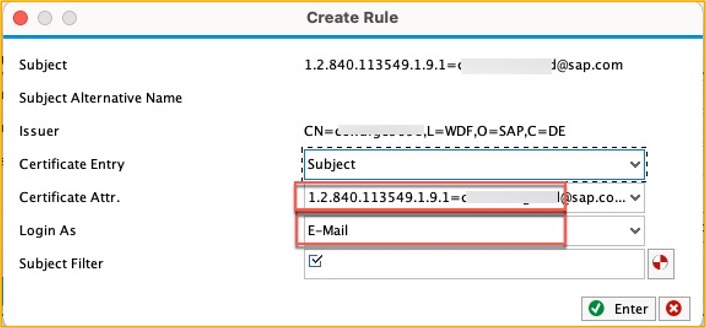
Change to change mode and click on “Rule” to create a rule which map the BTP user, i.e. email address with user’s SU01 user id

In the “Certificate Attr.” choose you attribute mapping from the drop-down menu. In the “Login As” select E-Mail and press enter.
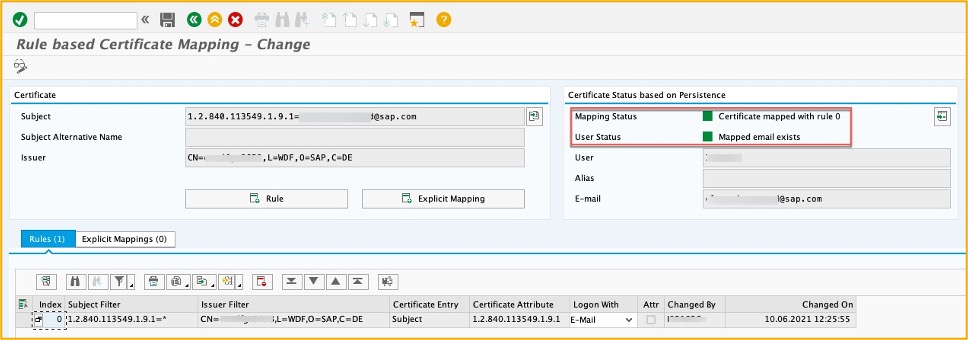
Once you save your new rule you should see a similar screen as below where the “Mapping Status” and “User Status” are both green.
Define reverse proxy parameter
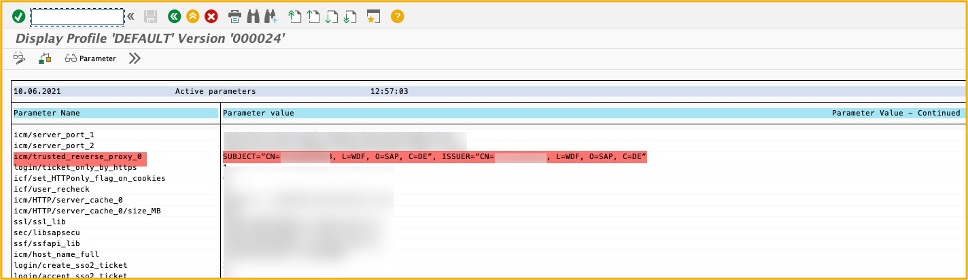
In the default parameter profile, you need to add a new parameter – trusted reverse proxy. In transaction RZ10 select the Default profile and click “Change”
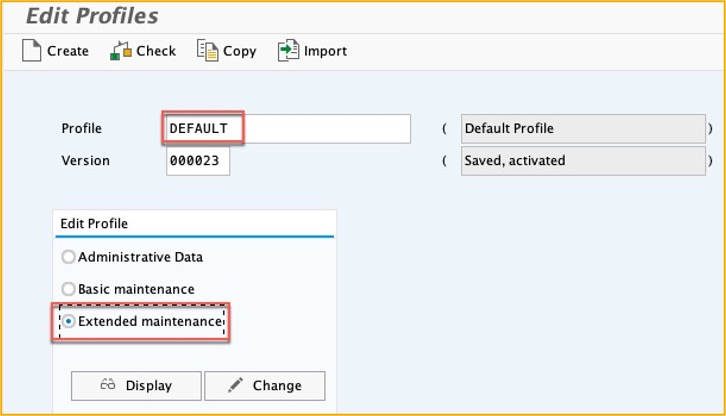
Add a new parameter icm/trusted_reverse_proxy_0 adjust the last digit in case you already use the profile for other scenarios
The value for the parameter most follows this format SUBJECT=”CN=<>”, ISSUER=”CN=<>”
For example:
SUBJECT=”CN=server1, L=WDF, O=SAP, C=DE”, ISSUER=”CN=server1, L=WDF, O=SAP, C=DE”
Save and activate the profile.
Restart the ICM
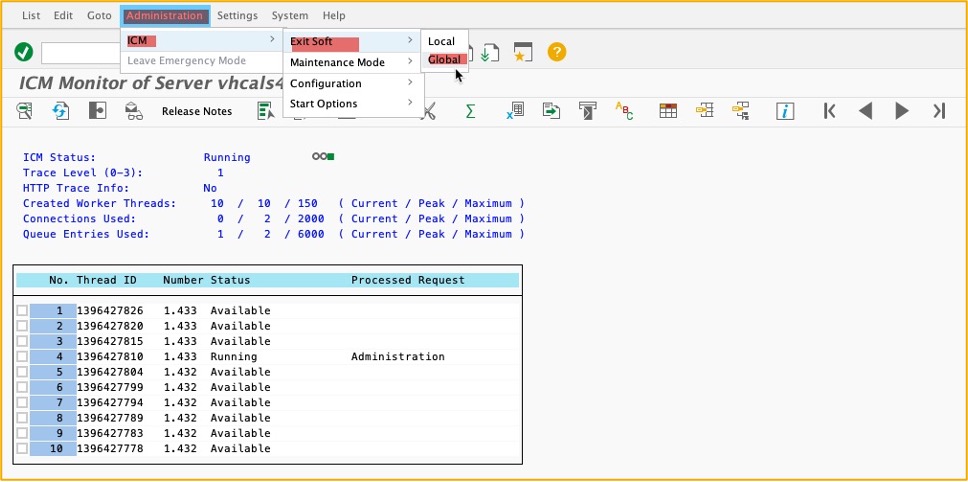
The last step is to restart the ICM so the changes can take effect. Call transaction SMICM
Administration -> ICM -> Exit Soft -> Global
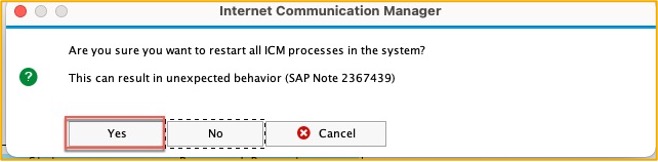
Click yes to the pop up, the restart usually only takes a minute or two, however be sure that there are no users accessing the ICM since they will be disconnected.
This was the last step.
To verify that the change to principal propagation is working correctly, log on the Launchpad service and open one of the assigned apps. If it opens correctly and show expected data, you have done everything correctly. If you get any sort of error message or is not seeing the data, please run through this and the previous blog one more time and verify that all the configuration steps were done correctly.


