Introduction
By now we know how to create SAPUI5 applications in Web IDE and integrate the OData services in any application. It is fairly understandable that we are even aware of creating SAP Master-Details applications from the available templates of SAP Web IDE and include various Navigation and Routing actions. With navigation, we landed up to different pages of the application we built. How about creating a standalone UI and reuse it where we have repetitive UI patterns? Sounds like making our life easy? Yes…SAPUI5 provide “Fragments” which can do exactly what we said above.
What are Fragments then?
Fragments are the pieces of UI, just like views. Whenever we need to use some similar UI parts many times in our applications then we create fragments.
But we could have used custom control/views also instead of that. What’s the big deal about Fragments?
Remember, all controls have Properties, Associations, Aggregations, and Events attached to them, making them eventually heavy. All views come with their controller counterpart. Fragments typically do not have their own controllers even. It is then eventually used within a View which has its own dedicated controller. Thus fragments are even more lightweight. Finally the more light weight your application pages are the less roundtrip time it will take for requests to get processed and displayed.
Point to Remember
Fragments are reusable and comparatively lightweight to views and controls.
How many types of fragments are there?
a) XML fragments
b) JS fragments
c) HTML fragments
How should we select which fragments to go with?
Well, SAP has given the agility to its customers to select the type of fragments according to their level of technical comfort. If you are a pro in XML, go ahead and create an XML fragment. On the other hand, a veteran in JS will pick JS Fragments to implement.
Let’s see how to use this in our UI5 application
Technical Environment:
• SAP Web IDE for UI development.
This is assumed that the reader of this article knows how to make the necessary setup and create Master-Detail applications using the templates available in Web IDE. This example was built in Version: 170330.
• ES4 System for oData services.
ES4 is a demo system provided by SAP to use the services available in our UI5 applications. In this example we will use TASKPROCESSING service.
The entity model diagram for the service used
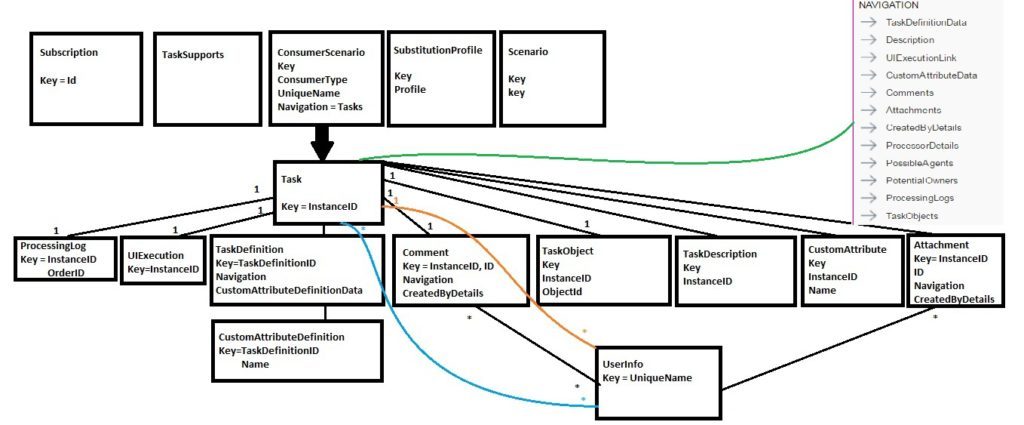
Fig-1. Entity Model Diagram
Note- This illustration is emulated from the entity model diagram. Complex types are ignored to keep the diagram simple. Cardinalities are indicated wherever necessary. All entities are labeled with Entity Name, key and navigations (if any).
Step – I :
Login to SAP Web IDE and use the following navigation path for project creation from available templates.
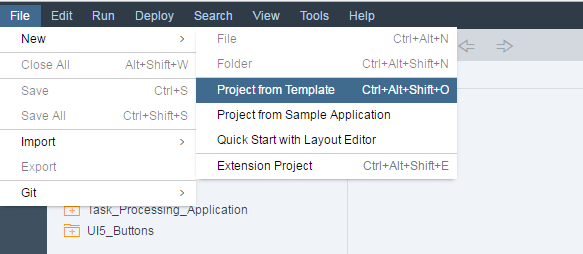
Fig-2. Create New Project
Select SAP UI master-details application and click Next.
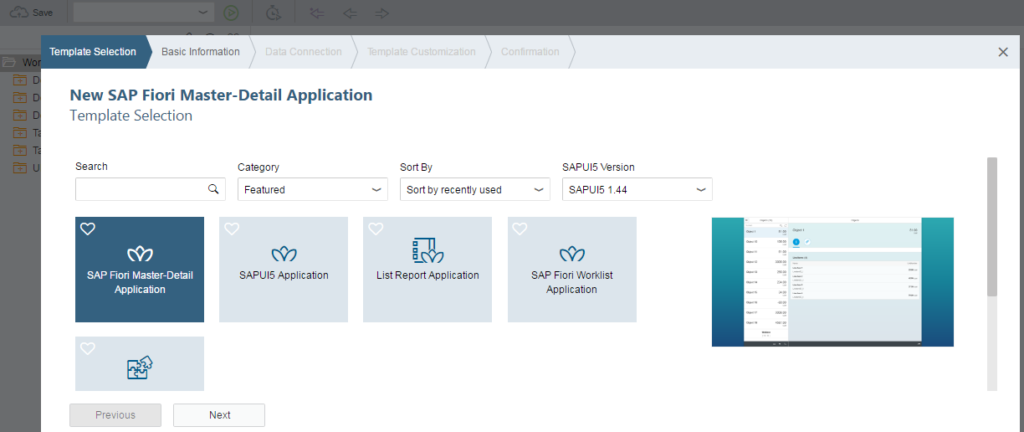
Fig-3. Select Master-Detail Application
Step – II :
Provide some project name and click on next.
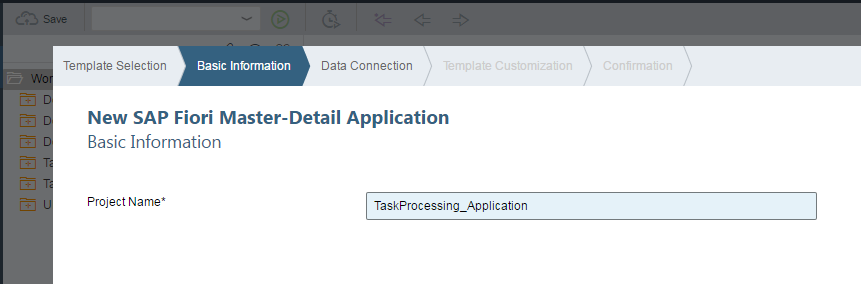
Fig-4. Project Name
Step – III :
On data connection, select ES4 system from the service catalog dropdown. Now select service TASKPROCESSING(you can take any other running service as per your convenience). Make sure the service status is running and click on next.
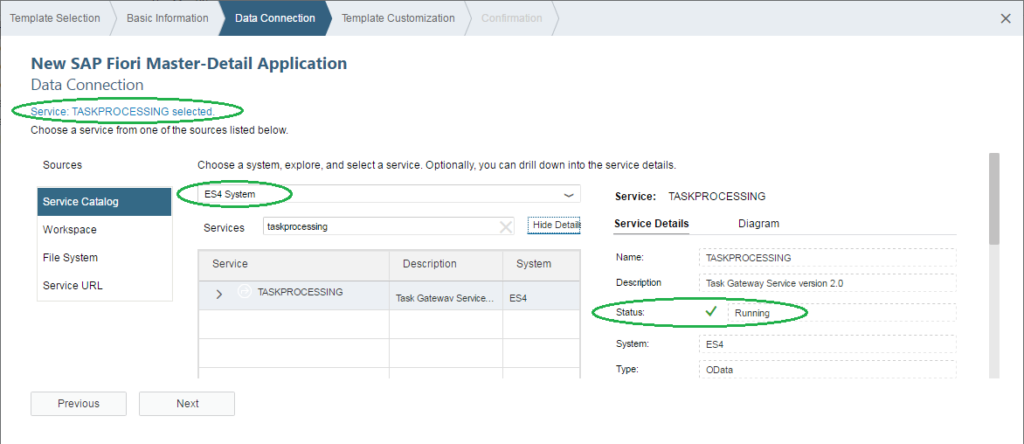
Fig-5: Data Connections
Step – IV:
Now in Template Customization section, you will have to provide the properties of the entity to be displayed. Interpretation of Data-Binding Object and Data-Binding Line Items can be better understood by the image below.
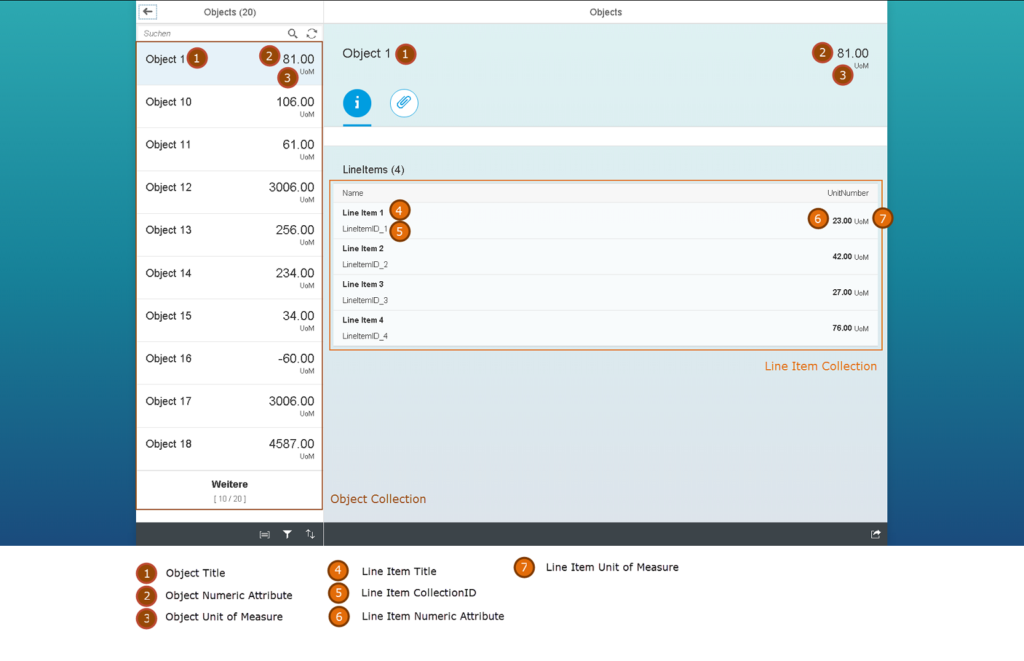
Fig-6. Template Customization
Now, let’s bind the properties for our application
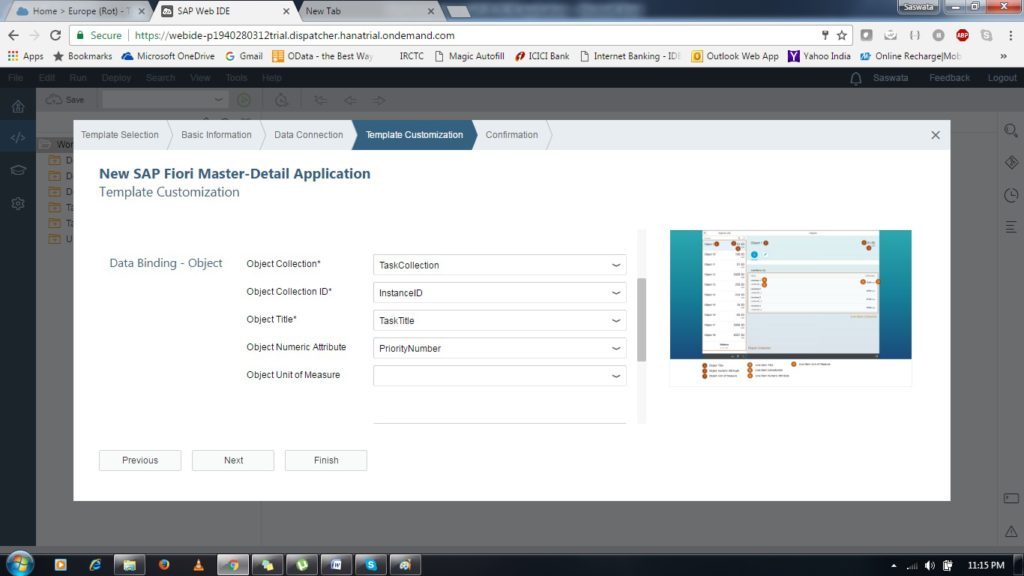
Fig-7. Data-Binding Object
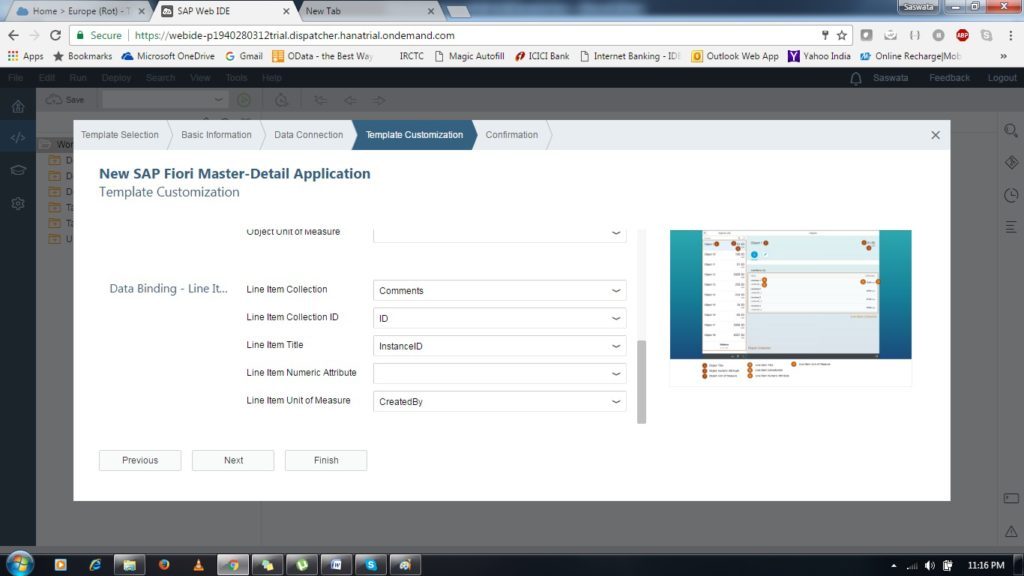
Fig-8. Data-Binding Line Item
Click on finish to create the application.
Step – V:
Voila! You have created the base of the application on which we will further customize. Let’s first see how our application is looking now.
To run your application select the mockServer.html under the folder “test” and then select Run from the application toolbar. Finally, select “Run with Mock Data”. This should give you the preview of your application and you can toggle the preview among desktop, tablet and phone views.
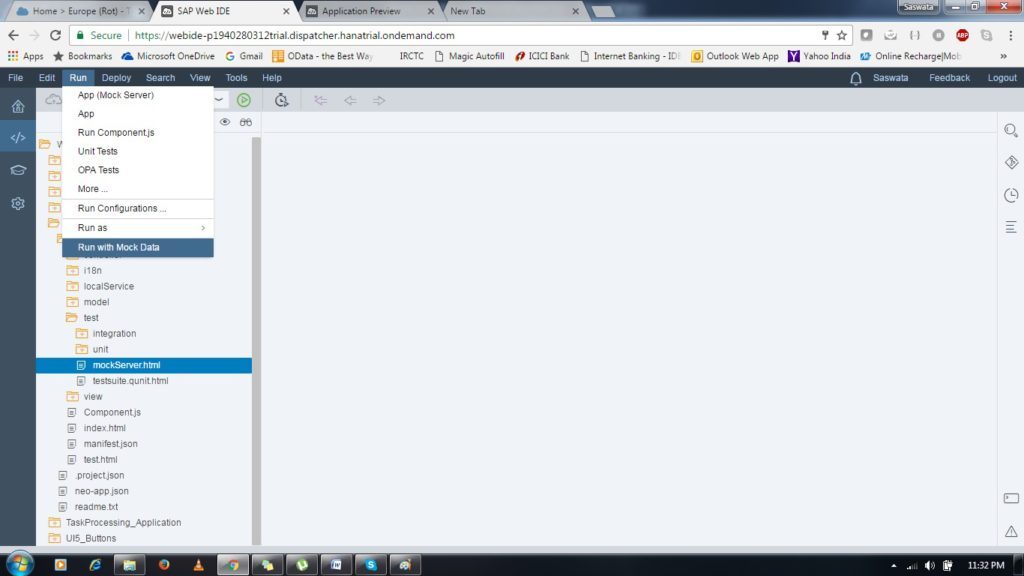
Fig-9. Run Configuration
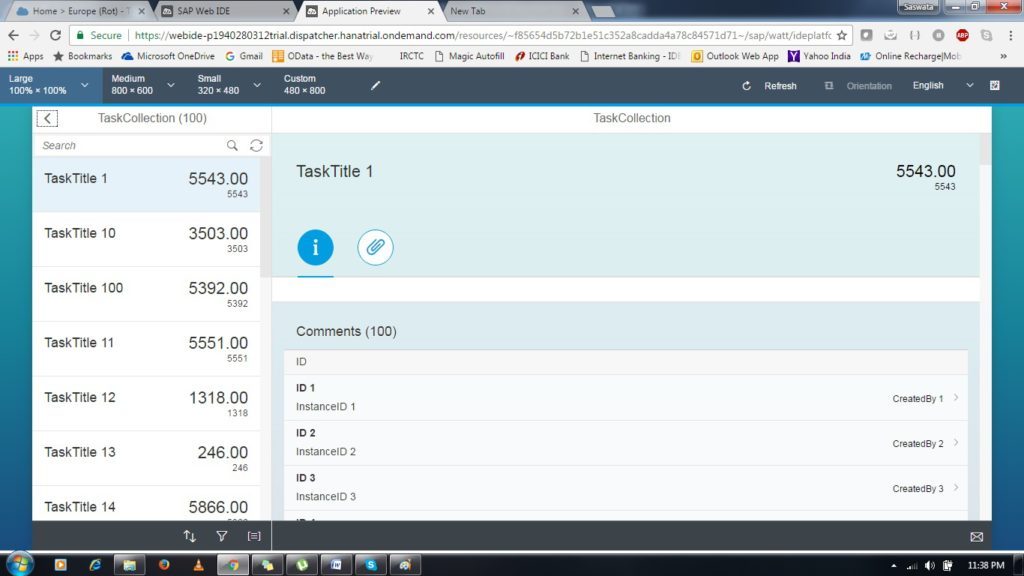
Fig-10. Application Preview
Step – VI:
Hope you have observed how the values mentioned in the Template Customization section have taken their positions on the application. Now suppose the requirement is to show a popup screen consisting of Display Name and Company Name if we click on any Comment entry in details screen. To achieve that we will use our Detail view and attach a press function on items.
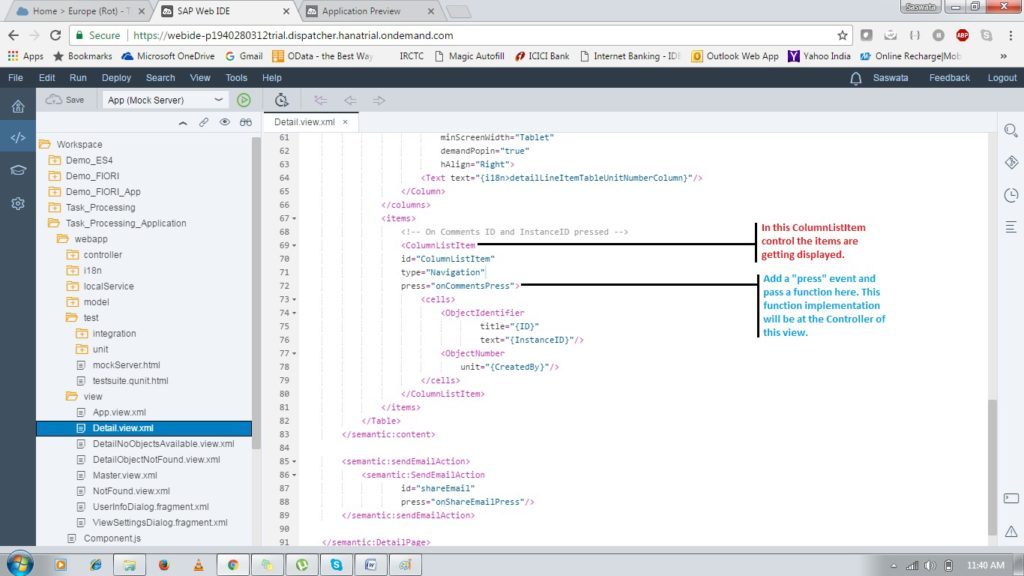
Fig-11. Detail View Coding
Step – VII:
On press of any Comments line item, you should probably have this function “onCommentsPress” triggered. Now, on this function, you should put the logic of calling the fragment. But before that, we must create our fragment. Let’s create the fragment.
Select the “View” folder and right click to select “New” and then “File”.
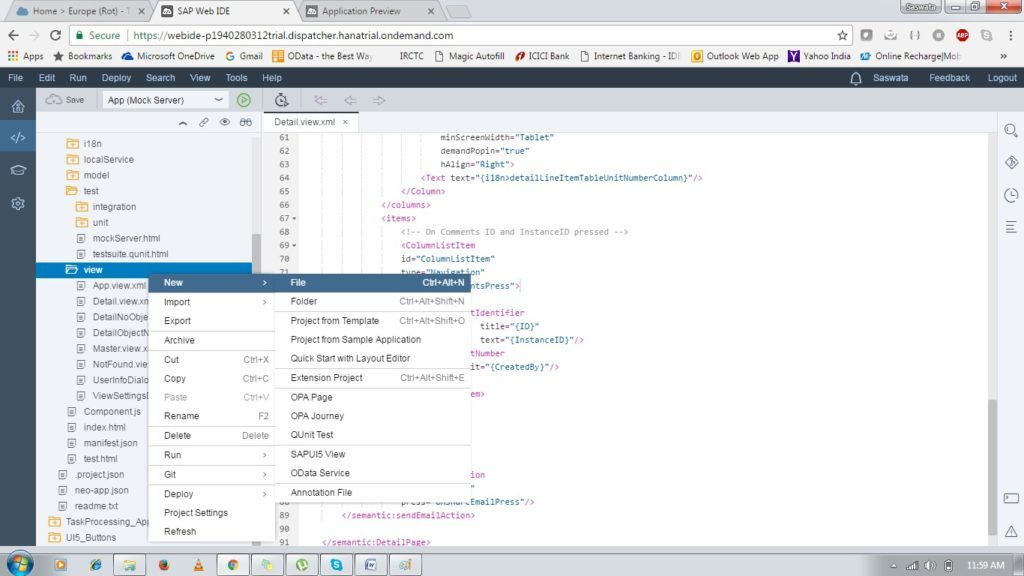
Fig-12. Create Fragment Navigation
Step – VIII:
On the subsequent prompt put the fragment name as shown in the image. Don’t forget to mention the extension “fragment.xml” after the view name.
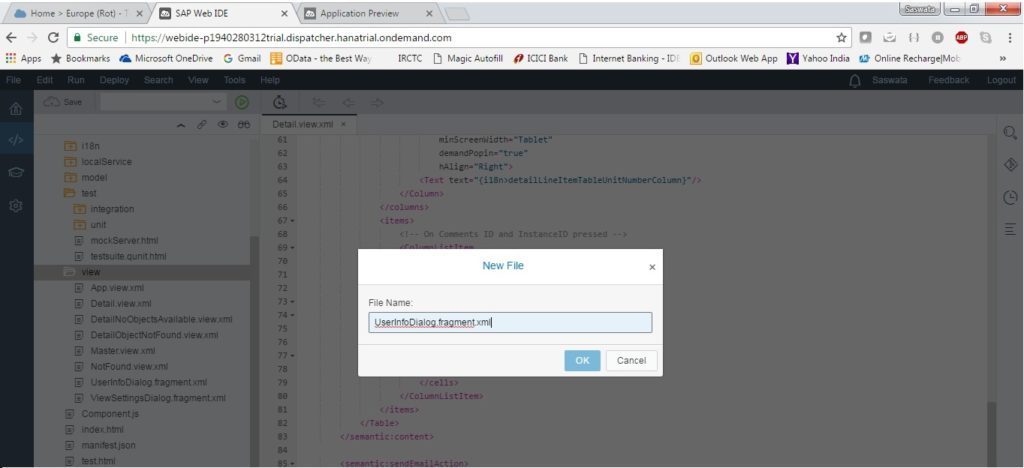
Fig-13. Fragment Name
Step – IX:
Once the fragment is ready, time is to design the popup screen. To design, we will use “SelectDialog” control and don’t forget to start the fragment with “FragmentDefinition”. FragmentDefinition is available under sap.ui.core library.
Let’s discuss in details what all properties and aggregation we used here:
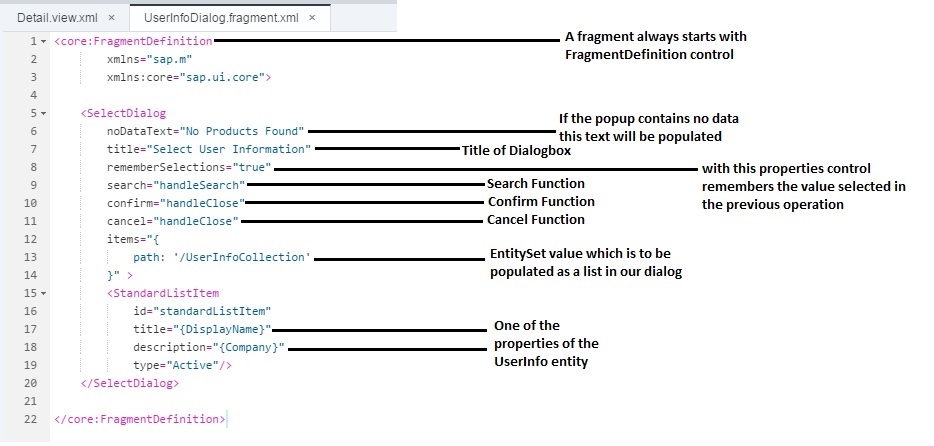
Fig-14. Fragment Coding Explained
Step – X:
You must be thinking that we have used ‘handleSearch’ and ‘handleClose’ functions but as we said earlier in this blog, there should not be any controller for this fragment, then where will we implement these functions?
The interesting part of the fragment is we will write all these functions in ‘Detail.controller.js’ file which is the controller for the ‘Detail.view.xml’. So the thumb rule is, you always write functions in the controller of the parent page from where the fragment is called.
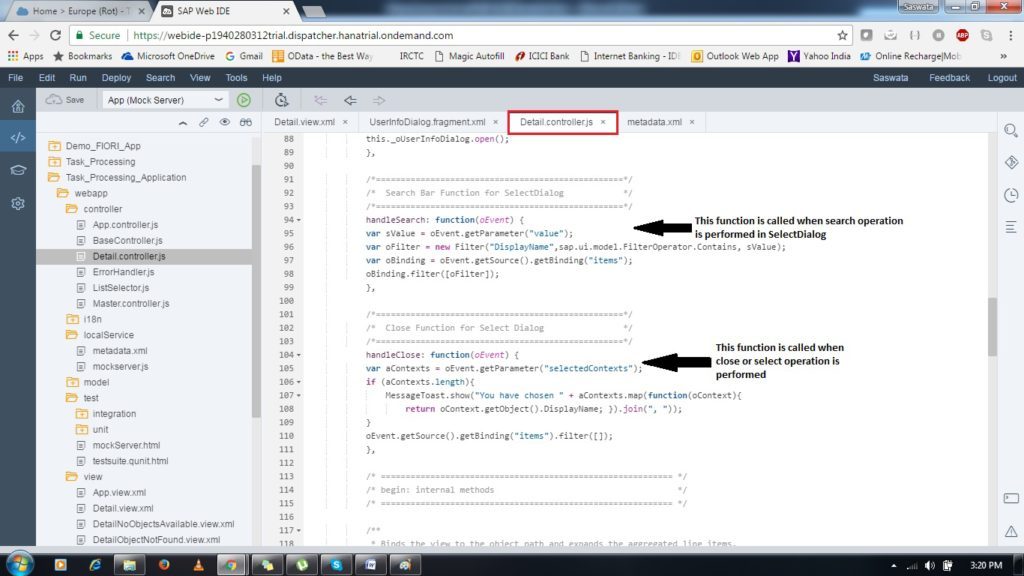
Fig-15. Fragment Functions Controller
Step – XI:
Now we should incorporate the function to be called when clicked on any comments item. Function for that is to be maintained in ‘Detail.controller.js’.

Fig-16. Fragment Calling Function
Step – XII:
You must include these global declarations in order to make your functions work.
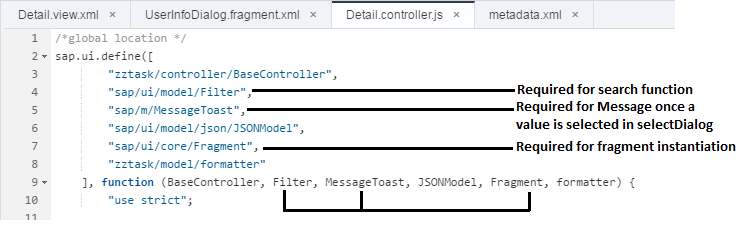
Fig-17. Global Declarations
Step – XIII:
We are all done with coding. Let’s test the solution. You can use this fragment in any other places in the application. For that, you just have to instantiate the fragment just like we have shown in onCommentsPress function.
Run it with Mock Server Data as explained earlier in this blog. Run the solution
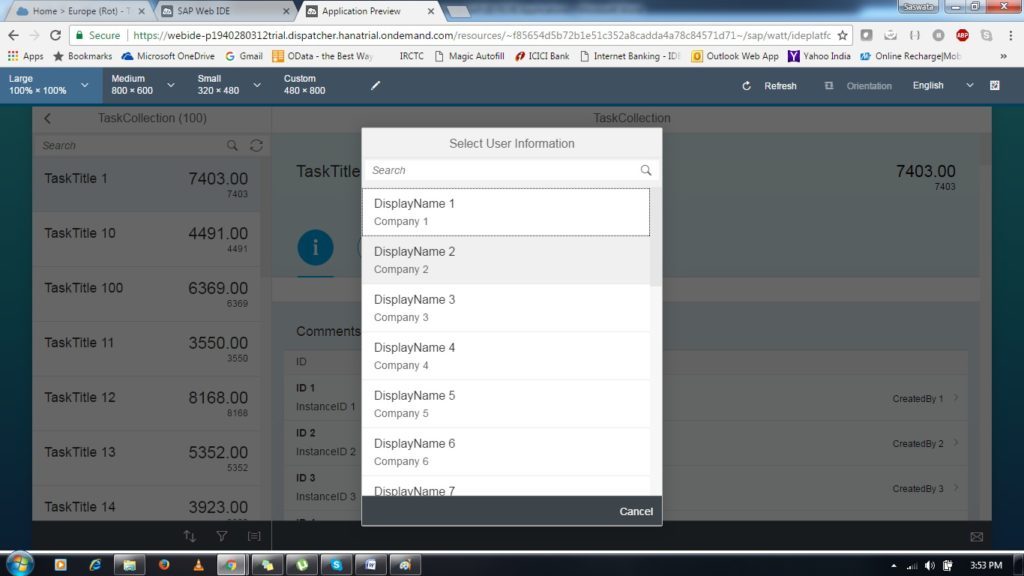
Fig-18. Test1
Step – XIV:
Now select any entry from the SelectDialog and you should see the DisplayName you selected as a MessageToast in the details screen.
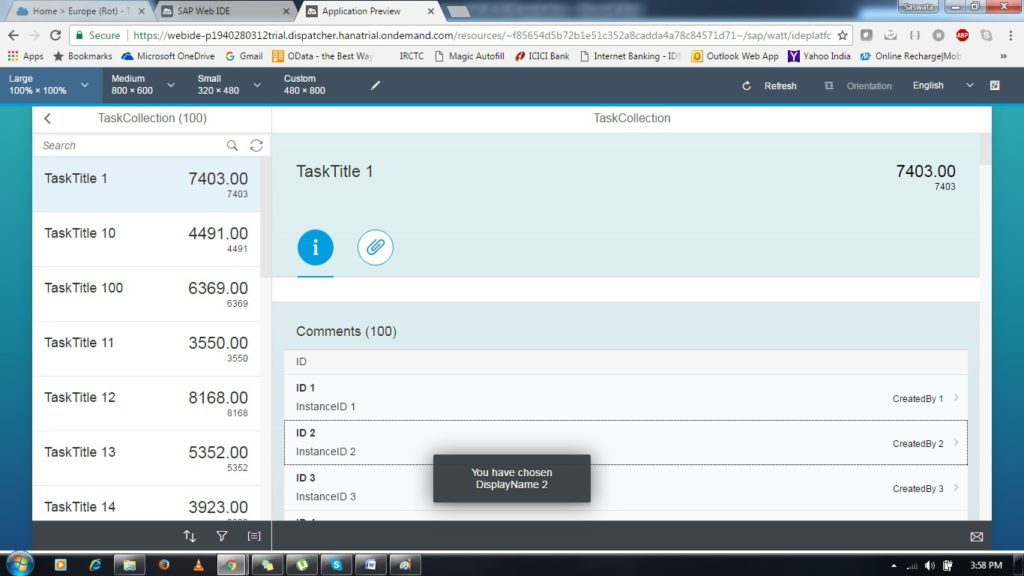
Fig-19. Test2
Step – XV:
Search with a DisplayName in the search bar of the selectDialog and hit enter to see the DisplayName.
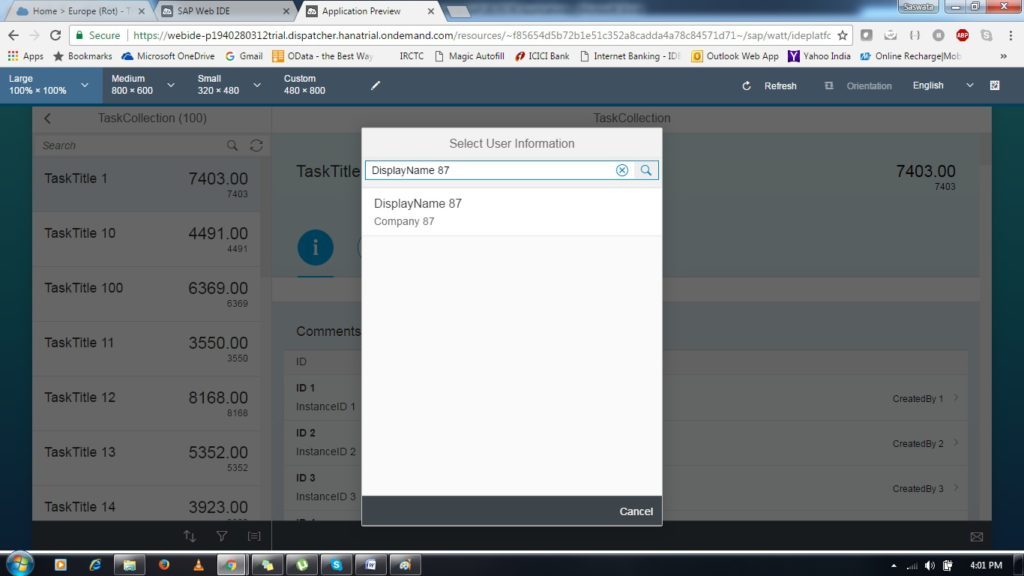
Fig-20. Test3
Further Reading
Interestingly enough, fragments can be used in Declarative Views and we can use the fragment through an XML view which is created programmatically. We will have a separate article on that in coming days.


