
Hope you are practicing the exercises we have been demonstrating in our Tutorial Series on SAPUI5. In our previous posts, we showed how to navigate from one view to other using Routers. Today we would show how to navigate without using Routers.
The idea for this post clicked us when one developer asked a question (in a WhatsApp group) how to navigate to two different Views using just one Click. As per his requirement, he can reach View 3 from View 1 and he can also reach View 3 from View 2. He needs to add just one Back button in View 3 and wants to go back to the right view when it is clicked. With the same click, he should either navigate to View 1 or View 2 depending on which screen he came from.
If you want the solution, scroll down directly to the end of this post and the solution is provided. Since we anticipate some freshers to read this post, therefore we would build up a dummy UI application (with no OData) and show in details how such scenarios can be handled.
Create a project.
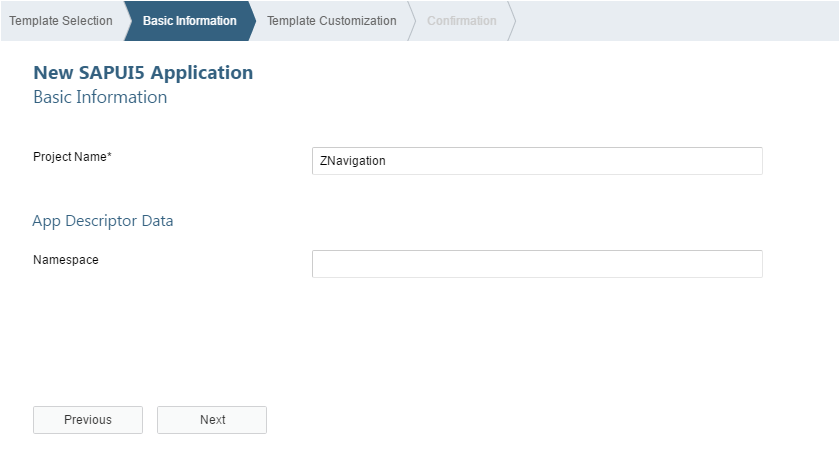
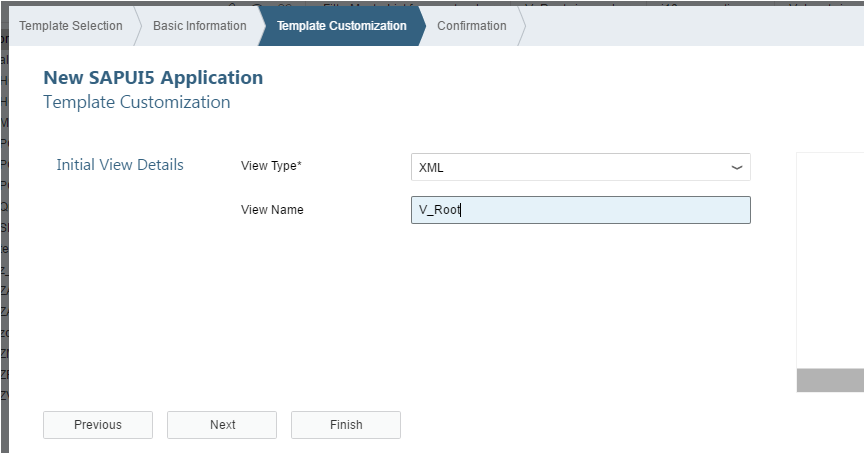
Give the Root view name as we showed in our previous SAPUI5 articles.
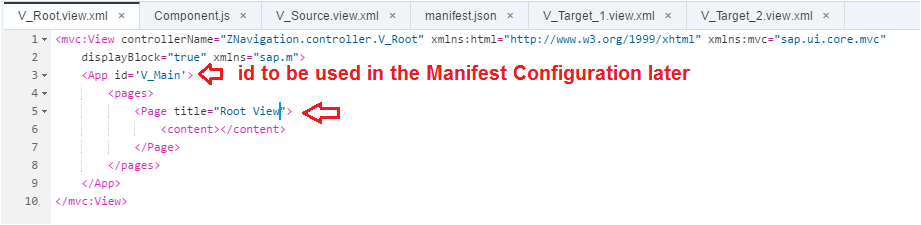
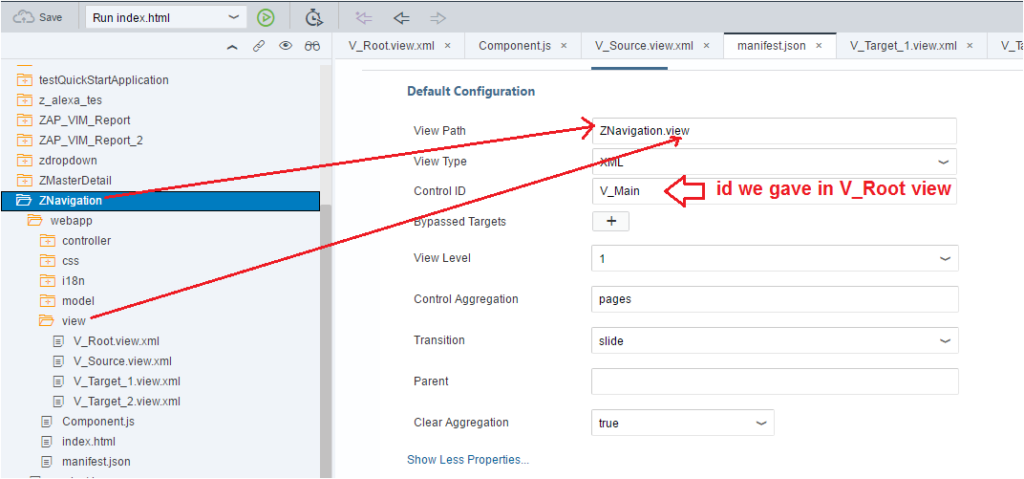
I gave the id of the Root View as V_Main (need this id in Manifest Configuration).
Let us create three more views which would help us demonstrate our experiment today.
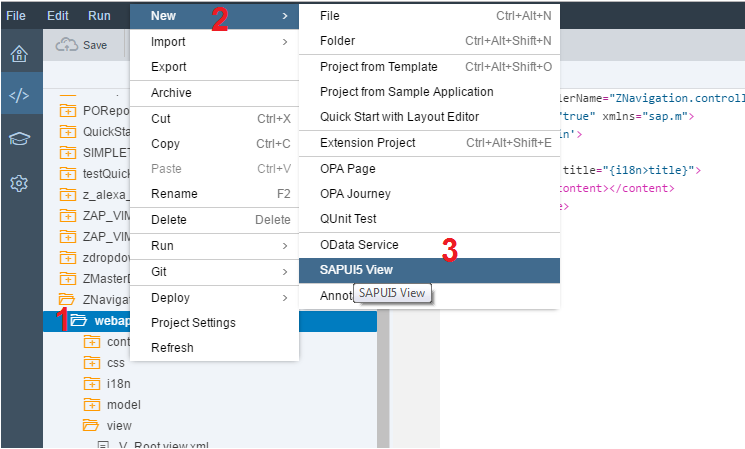
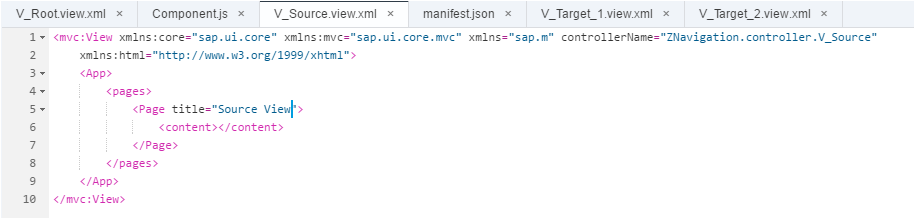
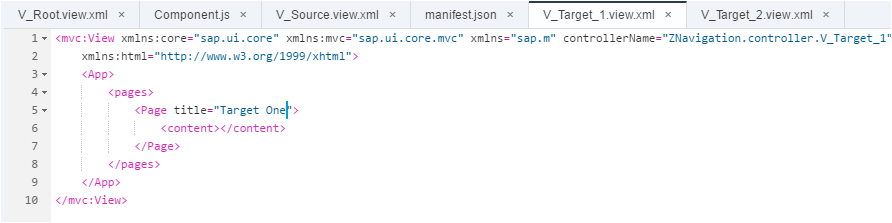
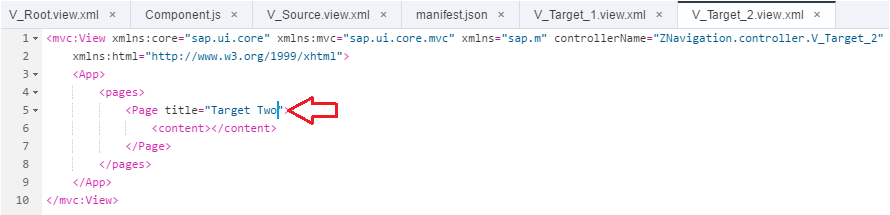
Create Views V_Source, V_Target_1 and V_Target_2
Change the default title of the Views for identification purpose.
Go to Manifest and put the Default Configuration as below:
Add the Targets and the Routes.
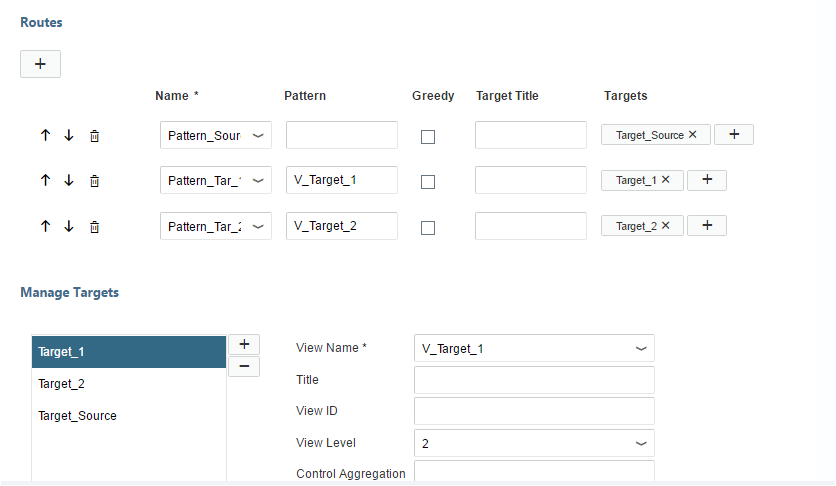
Please note the manifest auto code generator wizard has some bug. Go to manifest Code Editor and do some corrections manually.
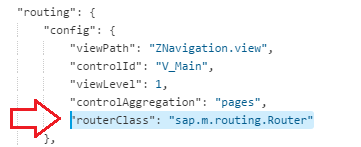
1. Add the Router Class.
“routerClass”: “sap.m.routing.Router”
2. Correct the Router name generated.
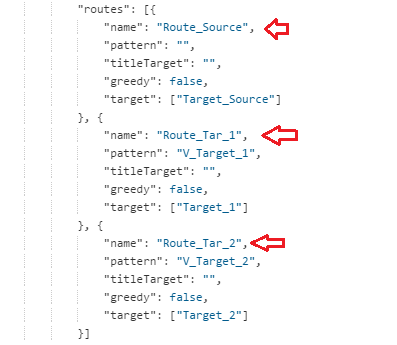
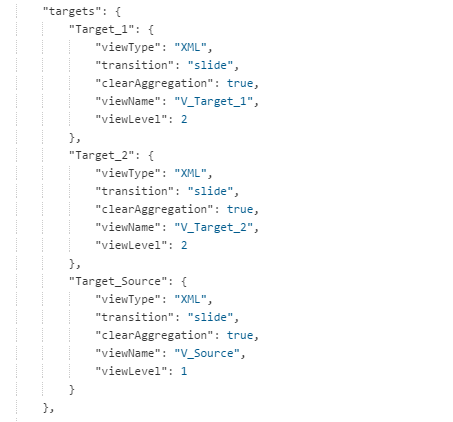
3. Check the Target definitions.
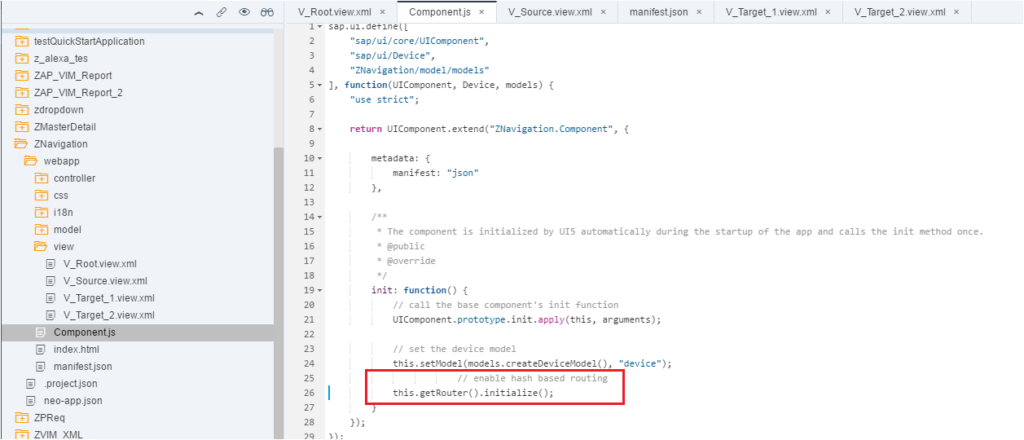
4. Go to Component File and initialize the Routers.
// enable hash based routing
this.getRouter().initialize();
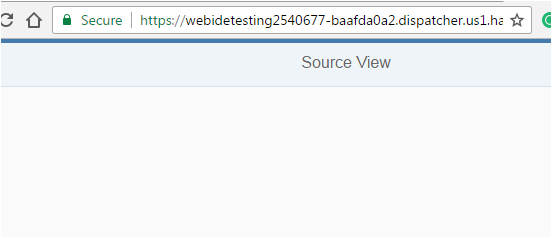
Let us test our App.
It goes to the Source View as we have embedded Source View to the Root View in the manifest file using the default (blank) pattern and stating the level in Target as 1.
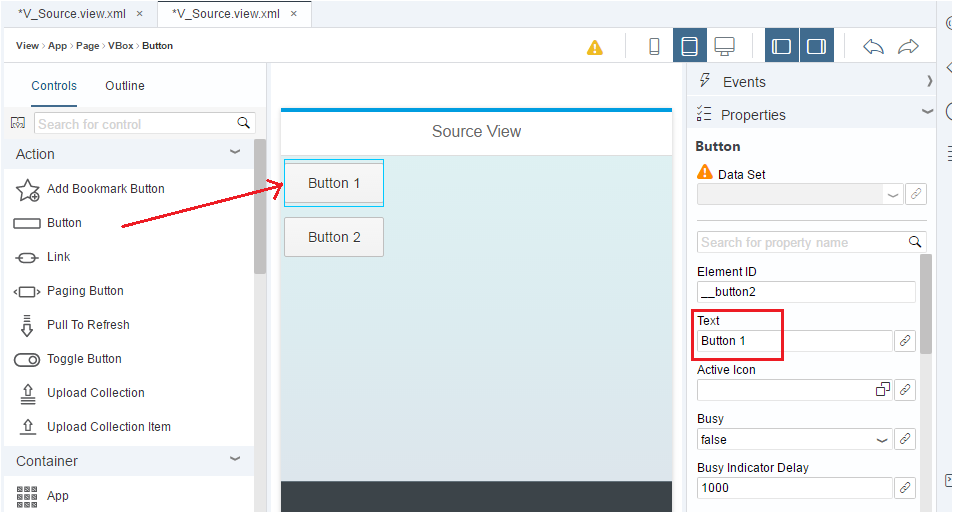
Now let us put two buttons in the Source View. Button 1 will take to Target 1 and Button 2 will take to Target 2.
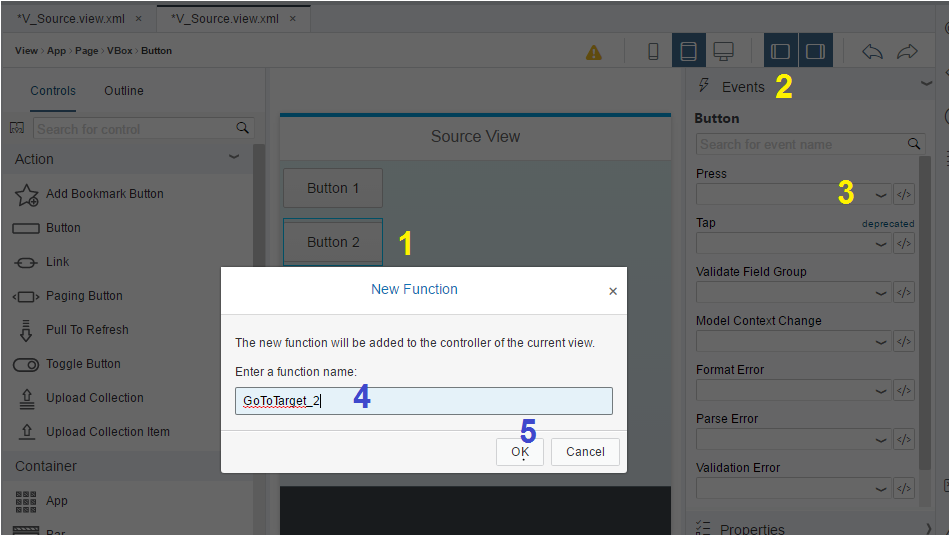
Create a new function to capture the Button events.
Let us see our Source View. It has two buttons but the buttons do not take us to the Targets. For obvious reason, as we did not write code to the GoToTarget_1/2 Functions.
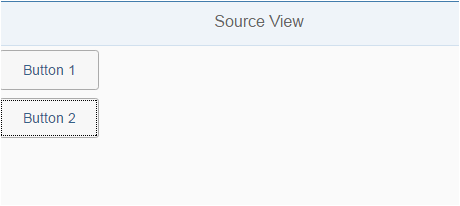
Wondering how I got the two buttons vertically aligned? I used VBox container.
<mvc:View xmlns:core=”sap.ui.core” xmlns:mvc=”sap.ui.core.mvc” xmlns=”sap.m” xmlns:html=”http://www.w3.org/1999/xhtml” controllerName=”ZNavigation.controller.V_Source”>
<App>
<pages>
<Pagetitle=”Source View”>
<content>
<VBox width=”100%” direction=”Column” id=”__vbox0″>
<items>
<Button text=”Button 1″ width=”100px” id=”__button2″ press=”GoToTarget_1″/>
<Button text=”Button 2″ width=”100px” id=”__button3″ press=”GoToTarget_2″/>
</items>
</VBox>
</content>
</Page>
</pages>
</App>
</mvc:View>
Write the below two lines of codes in the two methods. Give the Route name correctly.
GoToTarget_1: function() {
// Now Get the Router Info
var oRouter = sap.ui.core.UIComponent.getRouterFor(this);
// Tell the Router to Navigate To Route_Tar_1
oRouter.navTo(“Route_Tar_1”, {});
},
GoToTarget_2: function() {
// Now Get the Router Info
var oRouter = sap.ui.core.UIComponent.getRouterFor(this);
// Tell the Router to Navigate To Route_Tar_2
oRouter.navTo(“Route_Tar_2”, {});
}

Button 1 takes to Target 1

Button 2 takes to Target 2
Now let us add one Button in Target 1 View and when that button is clicked it should take us to Target 2.
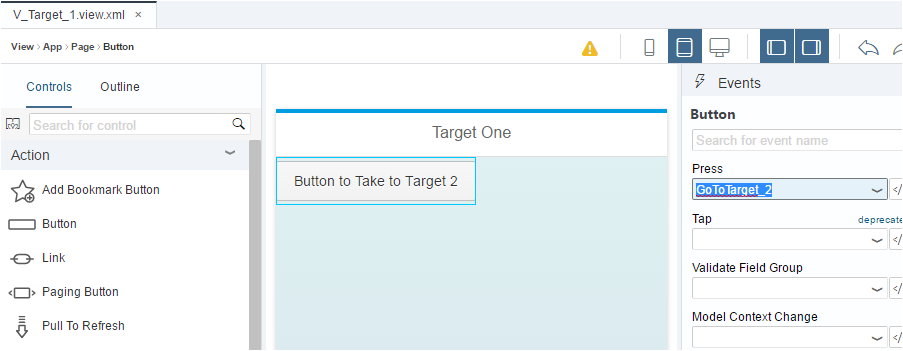
Needless to tell you, add a new Function to the Press event.
<mvc:View xmlns:core=”sap.ui.core” xmlns:mvc=”sap.ui.core.mvc” xmlns=”sap.m” xmlns:html=”http://www.w3.org/1999/xhtml” controllerName=”ZNavigation.controller.V_Target_1″>
<App>
<pages>
<Pagetitle=”Target One”>
<content>
<Button text=”Button to Take to Target 2″ width=”200px” id=”__button0″ press=”GoToTarget_2″/>
</content>
</Page>
</pages>
</App>
</mvc:View>
Add the below line of codes in the Controller of Target 1.
GoToTarget_2: function() {
var oRouter = sap.ui.core.UIComponent.getRouterFor(this);
// Tell the Router to Navigate To Route_Tar_2
oRouter.navTo(“Route_Tar_2”, {});
}
Let us test again. When we hit Button 1 it takes to Target One. When we hit the Button in Target One, it takes us to the Target Two.


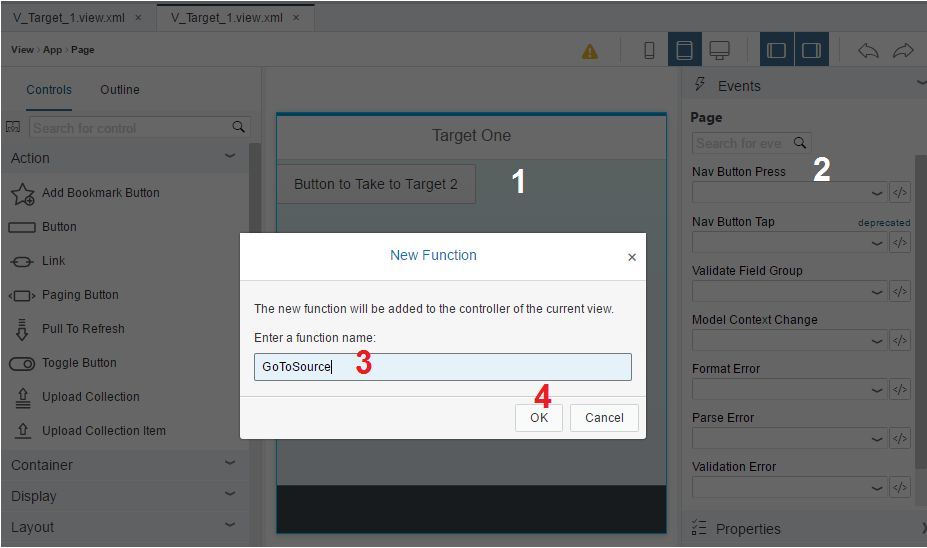
Now let us put Back Navigation button in the Target Views.
Make the Nav Button Property True.
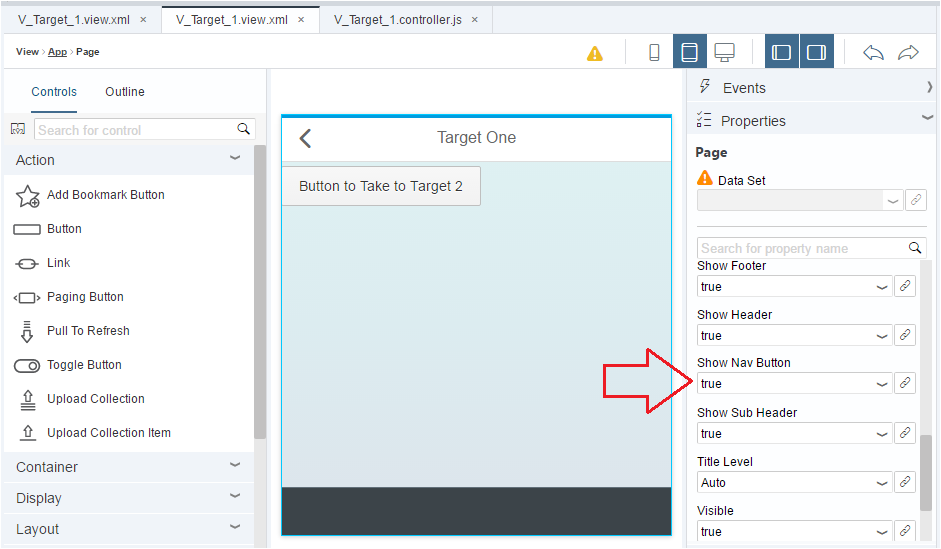
In the Events section, create a new function.
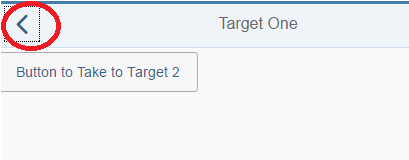
Let us test it. The Back Navigation button appears and it takes us to the Source Screen.
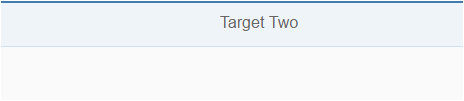
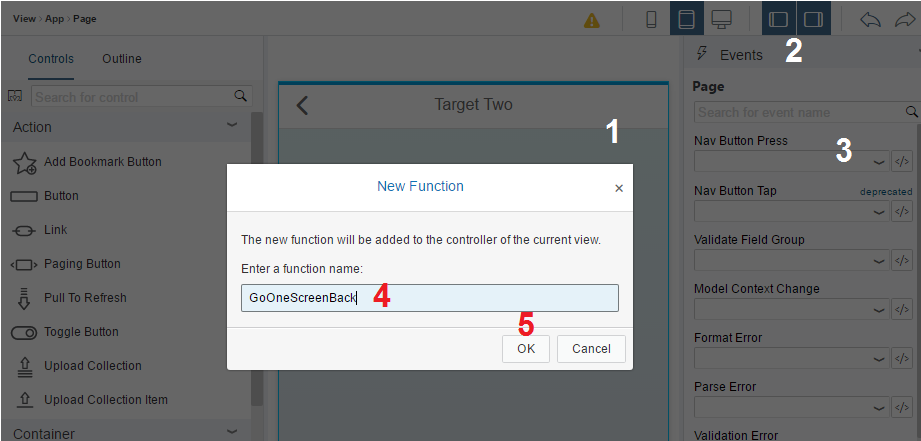
Now let us put a Back Navigation button on the Target Two screen.

Now add an Event for the button.
Now comes the actual part of our article. This is what we wanted to show in this post. A user can reach to Target Two screen from V_Source and V_Target_1 views. But he wants only one Button to go Back to the same screen from where the user reached Target Two.
V_Source ->V_Target_2->V_Source
V_Target_1-> V_Target_2 -> V_Target_1
There might be multiple ways to handle this scenario and we can really think and make it complex. But the easiest solution we found was to go one screen back. If the previous view is Source view than it would take there and if the previous view is Target 1 then it should take us there.
For this, we need to use another library class called “sap/ui/core/routing/History” and Function “History”.
Get the instance of the history and check the previous hash. If a hash is found, go one screen back, else take to the default first screen.
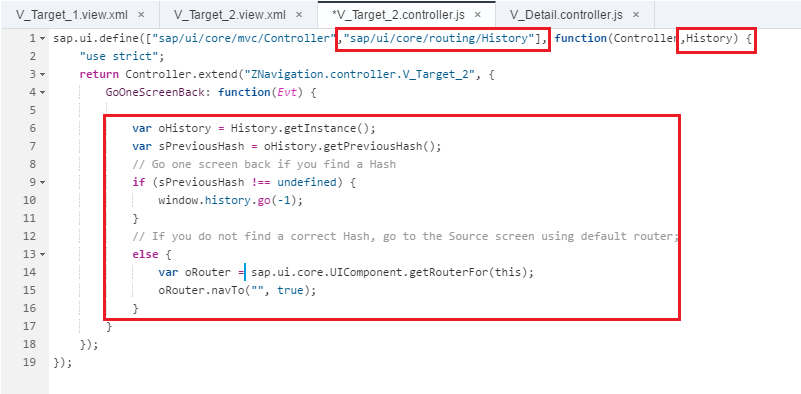
sap.ui.define([“sap/ui/core/mvc/Controller”,”sap/ui/core/routing/History”], function(Controller,History) {“use strict”;
return Controller.extend(“ZNavigation.controller.V_Target_2”, {
GoOneScreenBack: function(Evt) {
var oHistory = History.getInstance();
var sPreviousHash = oHistory.getPreviousHash();
// Go one screen back if you find a Hash
if (sPreviousHash !== undefined) {
window.history.go(-1);
}
// If you donotfind a correct Hash, go to the Sourcescreenusingdefault router;else {
var oRouter = Sap.ui.core.UIComponent.getRouterFor(this);oRouter.navTo(“”, true);
}
}
});
});
Let us test it one final time.
Scenario 1

Scenario 2

Hope we were able to explain the usefulness of this History Class. One button takes us to different screens/views based on the history. If you reach to a screen from multiples places, this History Class and function comes handy to take you back to the source. We call it Navigation without the Router.


