
Trying anything for the first time is always challenging. Do you remember how many times did you fall off your bike (bicycle) before you learned how to balance and ride it without any help? In the same way learning any new technical area or for that matter any area, there are lots of obstacles. Most ABAPers would also have similar problems when venturing into SAPUI5, especially with no prior Javascript knowledge.
For my first SAPUI5 Application for my current project, there was a requirement to provide a dropdown of Purchase Order numbers to the users. The requirement seemed very straight forward. But you won’t believe, I had to spend more than 18 hours to surf the internet, reading help documents, demo codes/tutorials etc before I could figure out how to bind the dataset to the view element. Believe me, it took more than 18 hours. But I learned what not to do in SAPUI5 in those hours of struggle.
And at the end, I figured out that not only can I code the javascript commands and get my drop down list but also could achieve the drop down functionality with just Drag and Drop with no custom code.
Today, I would show you two methods to design drop down on your SAPUI5 screen. First with a couple of lines of codes in my view file and view.component file. The second method is my preferred method, just drag, drop and some clicks. And you get the same result as from the first.
I am positive all ABAPers would want to know the second method first. But, I will show you the first method first.
Assuming, you have been following our posts diligently, you should be comfortable creating OData services in t-code SEGW and re-defining the methods to select and populate EntitySet. Also, you know how to Register the Backend OData service in Gateway system (t-code /iwfnd/maint_service).
In SEGW, I created the OData Project ZDROPDOWN with the zponumber as Entity Type and zponumberSet as the Entity Set.
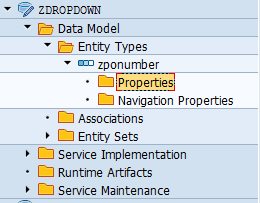
Since I just wanted to show the PO numbers in my drop down, therefore I selected just the PO numbers. For other projects, you might want to select more fields which would be used in your applications.
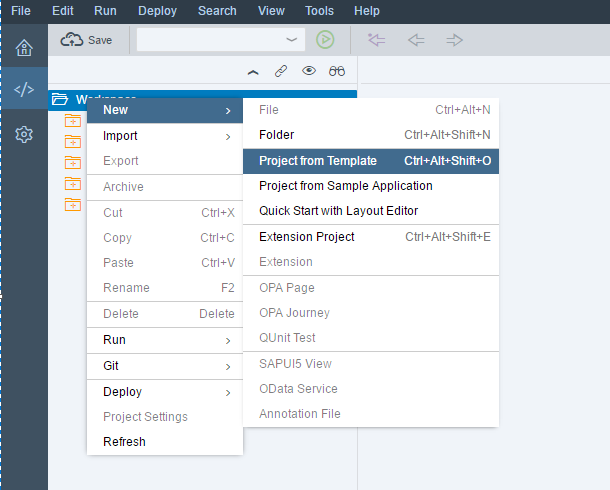
Assuming our Backend OData is ready. Now it is time to design our frontend SAPUI5 screen. We would log into our WebIDE system and create a new project.
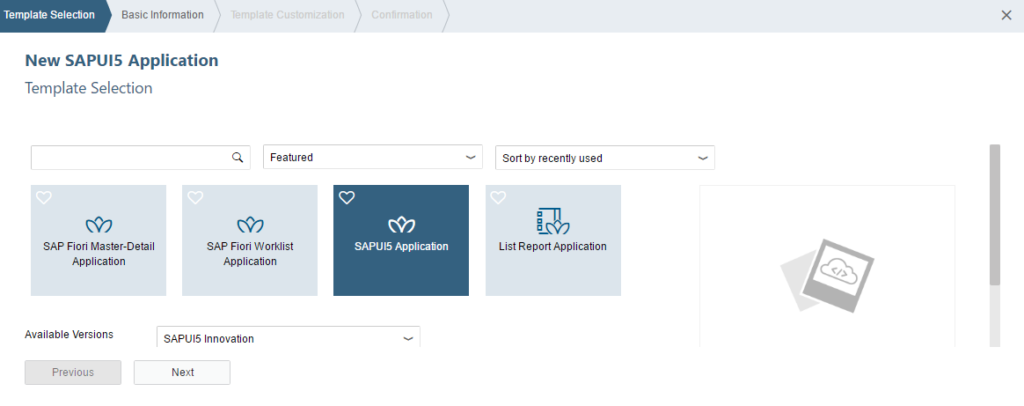
Select SAPUI5 Application Template.
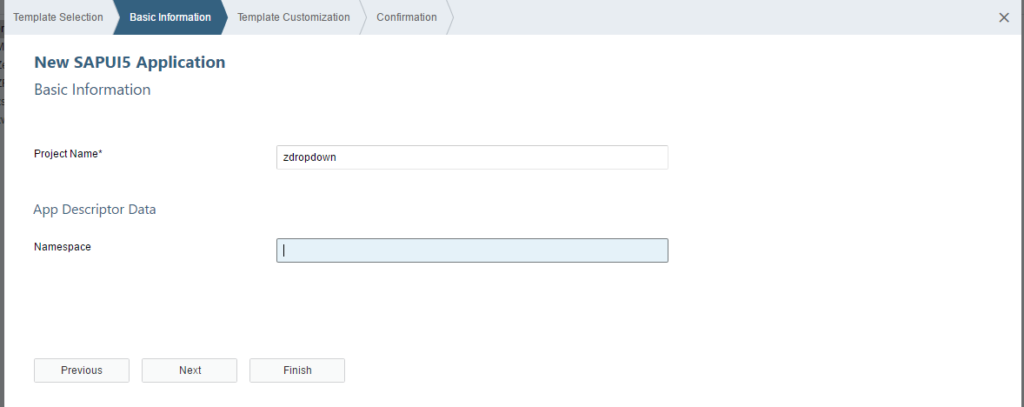
Provide the project name.
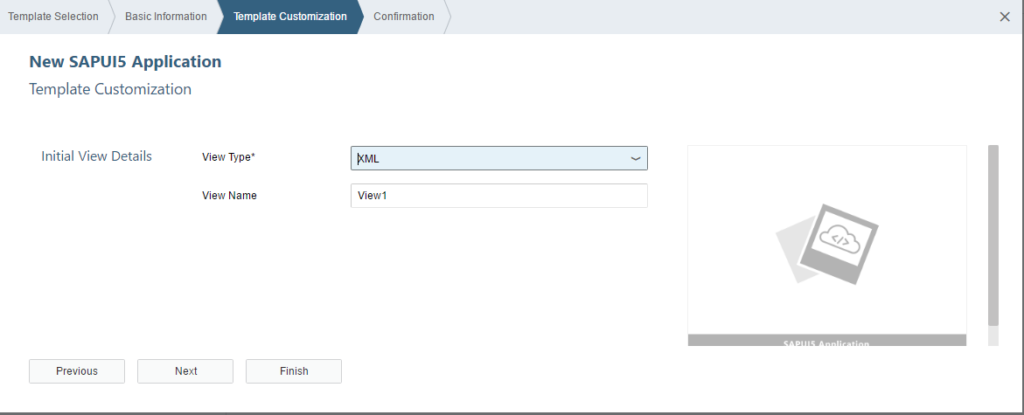
Provide view name and click finish.
Since we are fetching data from OData service we should make sure that Application knows the source of data. Go to manifest.json file in Descriptor Editor and Add the Source of Data. Check our SAPUI5 Part II Tutorial for more details on the manifest.json Source, Models and Routings.
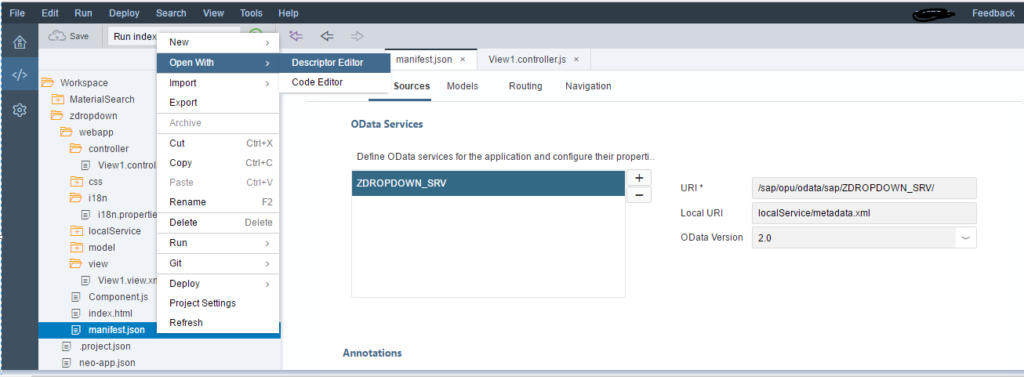
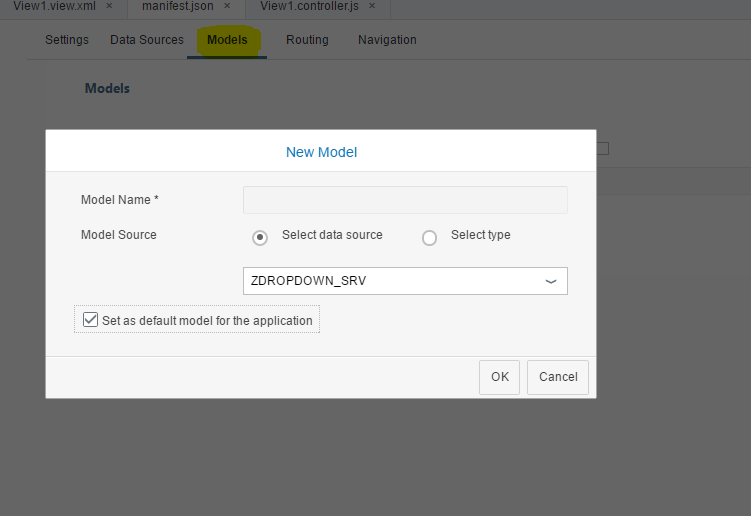
Also, let the application know the Default Model (OData Service) which would help to fetch data from Source.
Choose “Select data source” and set as default model (model name not needed).
Open View1.xml file and View1.component.js file to check the default code generated by WebIDE.
Take a note, the section is empty.

Also note, the return function section has the second parameter empty.

Method 1: Dropdown in SAPUI5 with some code in View and Controller files.
a) Add the below line of codes on the View1 file.
<mvc:View controllerName=”zdropdown.controller.View1″ xmlns:html=”http://www.w3.org/1999/xhtml” xmlns:mvc=”sap.ui.core.mvc”displayBlock=”true” xmlns=”sap.m” xmlns:c=”sap.ui.core”>
<App>
<pages><Pagetitle=”{i18n>title}”>
<content>
<Selectid=”oSelect” maxWidth=”300rem” items=”{/zponumberSet}”>
<c:Item text=”{Ebeln}”/>
</Select>
</content>
</Page>
</pages>
</App>
</mvc:View>
I tried creating a dropdown using “Select” tag instead of “ComboBox”.
If xmlns:c=”sap.ui.core” is not added to the view, then it raises an error as “Unexpected namespace ‘C’ ”.
Since “Items” is an Aggregation of sap.m.select and which belongs to library sap.ui.core, we need to add the reference of it on the first line.
Provide an Id (for example oSelect) to Select tag and in items provide the EntitySet name (/zponumberSet).

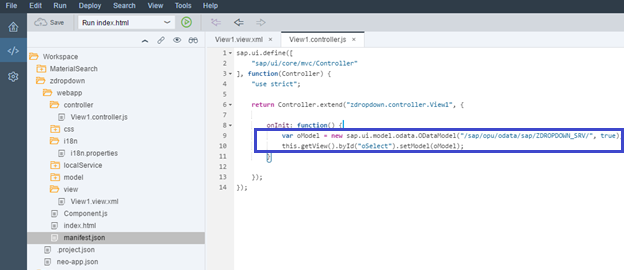
b) In View1.controller file please bind the data to view based on Id.
To Bind the data from Controller to View we need to create an OData model (for our example it is oModel) and bind it to view based on Id. In our case it is “oSelect”.
sap.ui.define([
“sap/ui/core/mvc/Controller”
], function(Controller) {
“use strict”;
return Controller.extend(“zdropdown.controller.View1”, {
onInit: function(){
var oModel = new sap.ui.model.odata.ODataModel(“/sap/opu/odata/sap/ZDROPDOWN_SRV/”, true);
this.getView().byId(“oSelect”).setModel(oModel);
}
});
});
Now our development is complete. Let us test the UI5 Application to check the output.
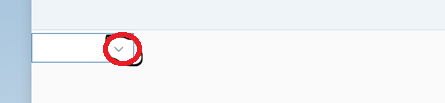
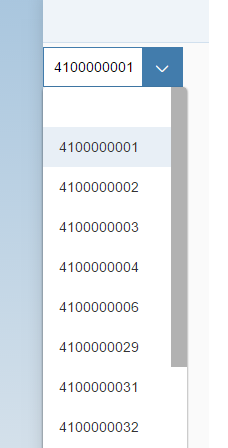
Below is the initial screen which we developed to display all the Purchasing Document Number values as drop down. When the user clicks on dropdown control it will show all Purchasing Document Numbers.
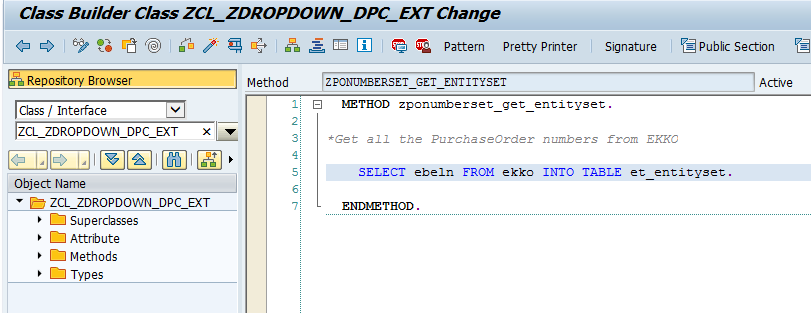
Here is the list of Purchasing Document Numbers from EKKO which is fetch using OData Service.
Method 2: Dropdown in SAPUI5 with just drag and drop with no custom javascript code
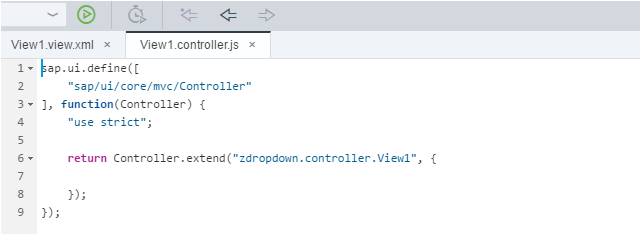
After you create your SAPUI5 project, your View file and Controller file would look like below by default.

Go the View1 file in Layout Editor Mode. Right click on the View1 file and choose Layout Editor.
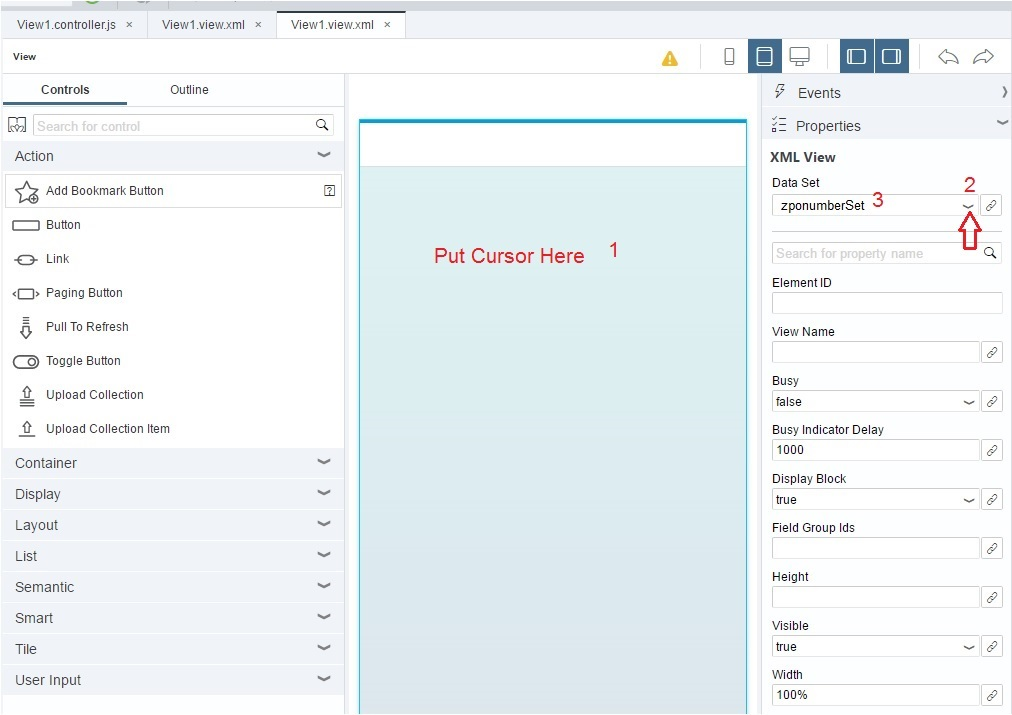
Put the cursor on the View Page and bind it to the DataSet of the OData Service.
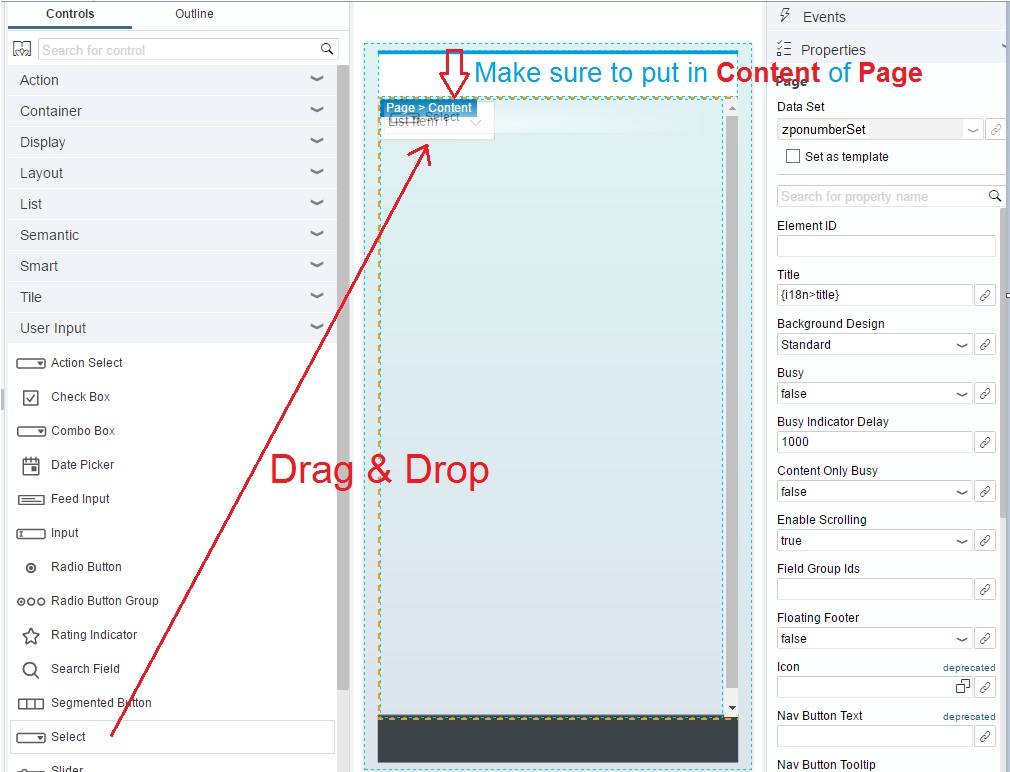
Now drag the “Select” User Input UI element on to the Page Content. Make sure to put it on the Page->Content area. If you drag too high, it might go to the Page Header.
Now set the zponumberSet DataSet as the “Template” for the view. This is a very important step. If you do not Set as Template, the UI elements do not recognize it.
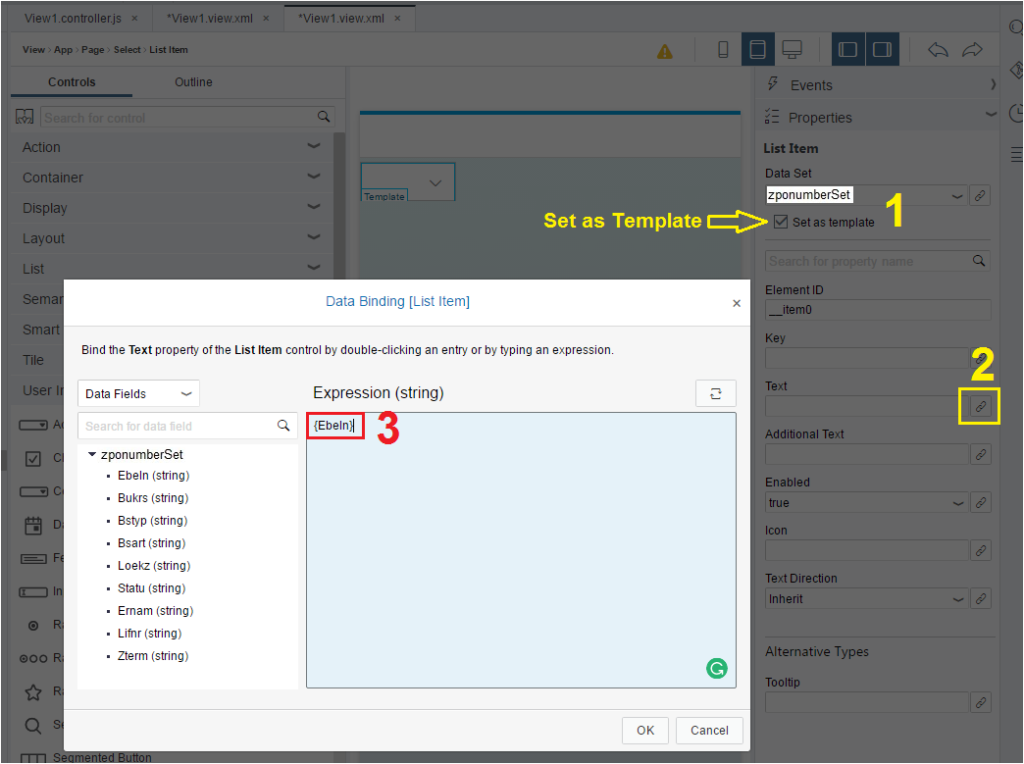
Bind the Select UI element’s text to the Data Source Field Ebeln. Just click on the property/field name of the EntitySet of the OData Service and it would put the Expression in curly braces { }. Anything within curly braces is dynamic and would be determined at runtime.
Let us check the View1 in Code Editor mode. The following four lines of code are added.

<mvc:View xmlns:html=”http://www.w3.org/1999/xhtml” xmlns:mvc=”sap.ui.core.mvc” xmlns=”sap.m” controllerName=”zdropdown.controller.View1″displayBlock=”true”>
<App>
<pages>
<Pagetitle=”{i18n>title}”>
<content><Select xmlns:sap.ui.core=”sap.ui.core” id=”__select0″ items=”{/zponumberSet}”>
<items><sap.ui.core:ListItem id=”__item0″ text=”{Ebeln}”/></items>
</Select>
</content>
</Page>
</pages>
</App>
</mvc:View>
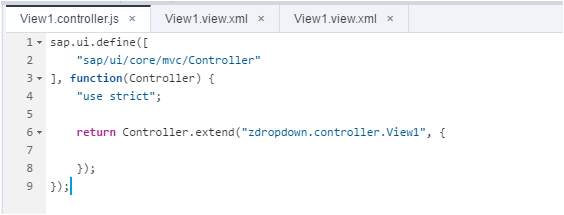
There is no change in default View1.controller.js file. It remains as it is.
Now, let us test the Application again. You would find the same output as Method 1.

What is the difference you see in the above 2 methods? Do you think the Binding part is handled differently? Why was the model not bound to the view element in method 2? Please leave your thoughts in the comment section.
As stated above, I am a fresher in SAPUI5 and this is my first SAPUI5 development, so there might be blunders in my understanding. If any experts can guide me better, I would be obliged. Which is a better way to achieve the functionality? Is there a better way?


