
We have created our custom OData Service. We learned how to perform CRUD Operations using the OData. We tested the URI stand alone in SAP GW_Client (t-code /IWFND/GW_CLIENT) and Browser. But in the actual project, we do not execute the OData services as stand-alone links. OData always finds their soulmate (effect of Valentine’s day this week) in the form of SAPUI5 Applications. SAPUI5 Applications can connect to the backend database and read information from the system and also create/modify information into the backend database. We have been repeating that Netweaver Gateway is the window (Gate) and OData services are the medium for non-SAP Applications to connect to the SAP backend.
In this tutorial, we would not bore you with the MVC Architecture of SAPUI5 and difference between SAPUI5 and Fiori. We would also not show you how to install Eclipse in your system or how to get your free trial SAP WebIDE. We would also not bother to speak about Cloud Connector and how the backend destination is configured in SAP WebIDE. There are plenty of detailed documents present in SCN, SAP sites and other blogs.
This would be a hands-on exercise with little or no theory. We would be using SAP WebIDE today. The exercises would help us learn and implement the below points:
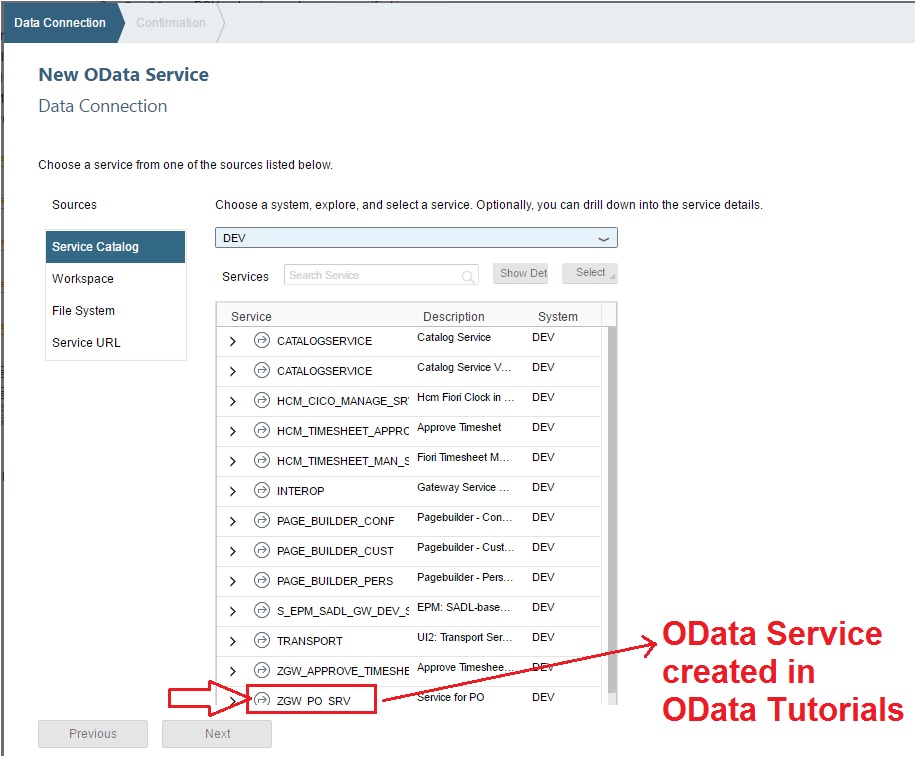
- Define the Data Source (backend SAP) and configure OData Service (ZGW_PO_SRV created in OData Tutorials) for the SAPUI5 Application.
- Create the Default Service Model and configure the Model Type, Data Source and URI.
- Design the First View Layout of the SAPUI5 Application to show PO Number and PO Type.
3.1. Use List UI Control to display the PO Number and PO Type in the Application.
3.2. Bind the OData Service Data Set (POHeaderSet created in OData Tutorials) to the first View of the Application.
3.3. Bind the OData Service Entity Type Properties (fields) to the first View’s fields (screen elements). EBELN and BSART would be bound to the View UI fields.
And the good news is, we would NOT write a single line of code ourselves. Yes, you read it right. We will NOT write a single line of code to perform all the above 6 activities. If we would not write the code then who would do it for us? The answer is SAP WebIDE. We would drag/drop and exploit the Layout Editor and Descriptor Editor features of WebIDE to achieve the above functionalities. The beauty of modern days programming/development technology is that it tries to make the life of developers easy and the experience of end users intuitive.
This does not mean that we would never need any programming in SAPUI5. I am an ABAPer with some knowledge of C, C++ but no knowledge of Javascript and Java. Are you an ABAPer like me? You would understand my feeling. So you might guess correctly, how scared am I when I hear that ABAPers would need to have good knowledge of Javascript to be good front end SAPUI5/Fiori developer. Hopefully, with time, I would have a better grasp of Javascript needed for SAPUI5 developments. But currently, I have no real experience in Javascript. Still, I was able to create an SAPUI5 Application which connected to backend SAP system and fetched data from the database using OData Service and displayed them on the frontend SAPUI5 screen.
If you are an ABAPer like me, this post would be a good moral booster for you. Ultimately, all ABAPers would have to metamorph and attain additional skillsets, but today we would create our first SAPUI5 Application with just our ABAP knowledge, a little drag and drop and some common sense.
Log into WebIDE link and Create a New Project from Template.
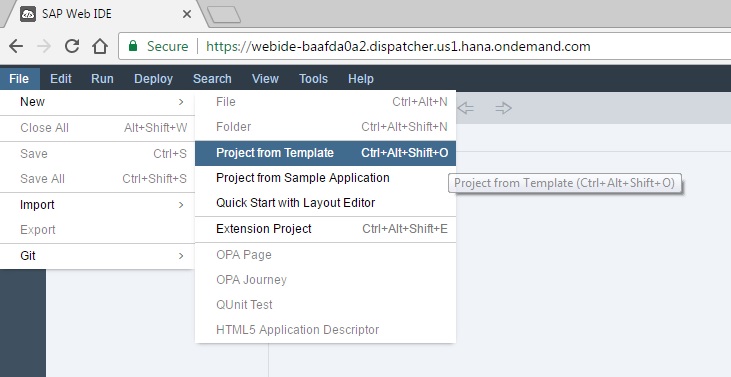
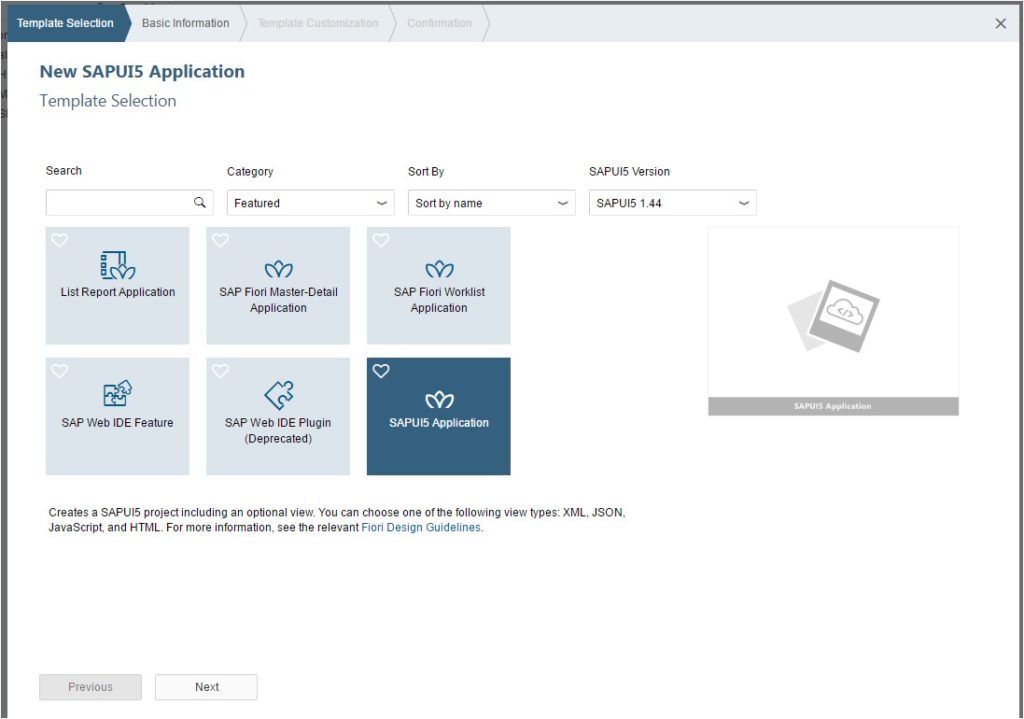
We would use SAPUI5 Application Template.
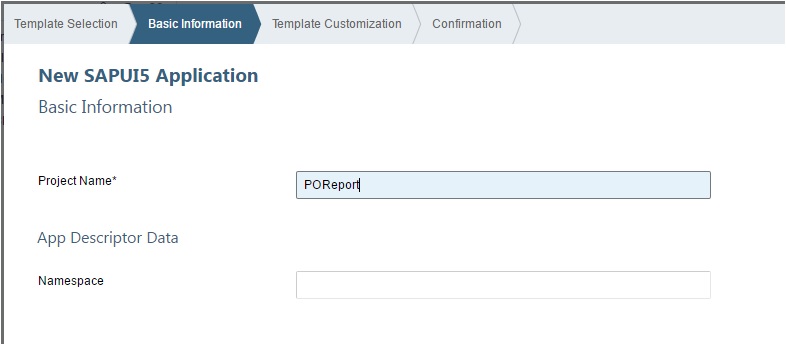
Provide a name. Check it need not start with a Z or Y.
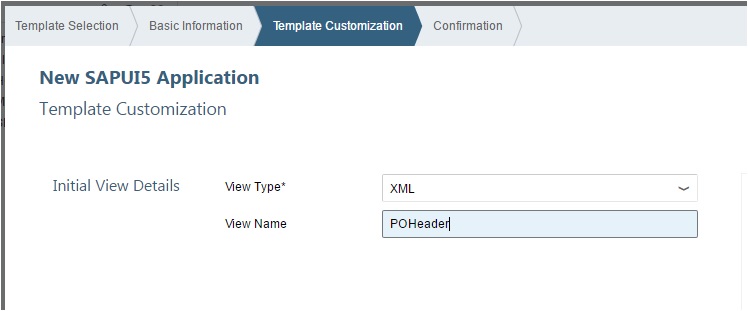
Give the View Type and Name.
Hit next and Finish. You would be able to see your application in the Workspace like shown below.
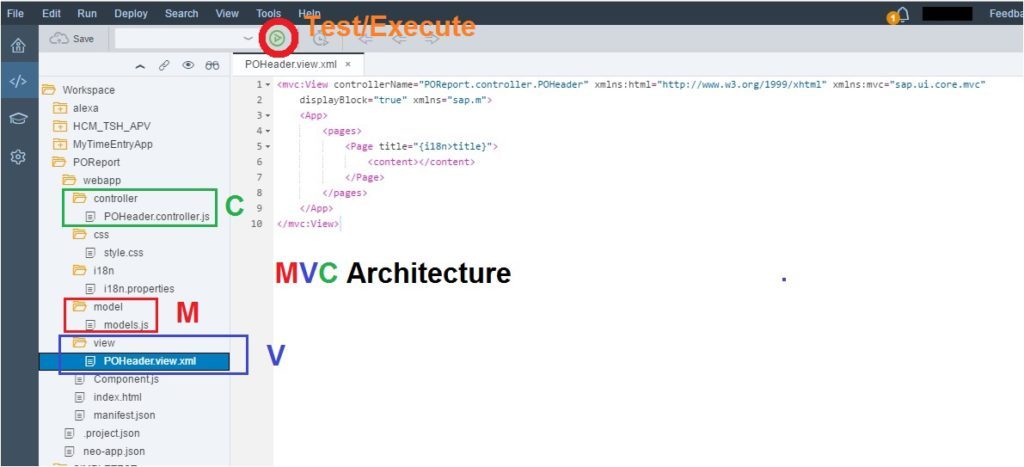
Model, View and Controller have dedicated folder. It is enough to suggest, SAPUI5 like all modern days applications follow MVC Architecture.
Let us test how this skeletal application looks like. Hit the Execute button (or right click on the application, Run -> Run As -> Web Application). You should see a blank page with the title as “Title”.

We have created our Project. Now let us start the 6 short Exercises which we talked above.
Exercise 1. Add Data Source:
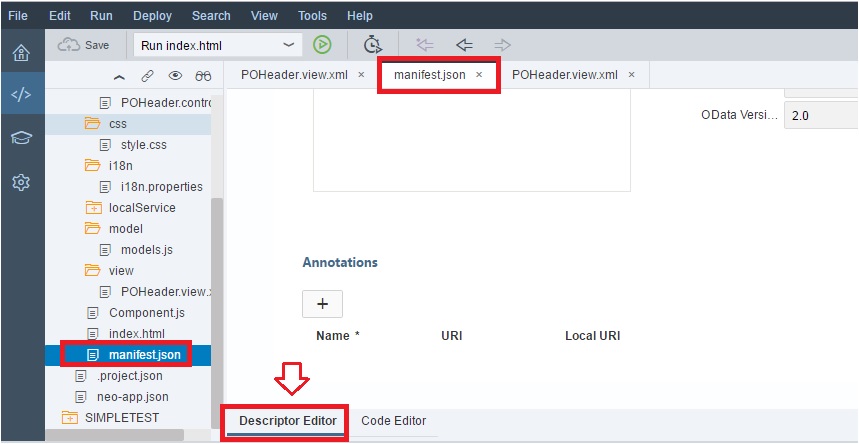
The first step for any SAPUI5 Application design is to let the Application know the source of Data. Whether you would have local data or from some database. ABAPers would be interested in pulling and pushing data from and to SAP backend system. So SAP has provided the Gate (Netweaver Gateway) and OData Service as the medium to communicate with SAP backend. Click on the manifest.json file. Please check the bottom of the manifest.json file. There are two Editors Descriptor and Code Editor.
You can also Right Click on the manifest.json file and Open With -> Descriptor Editor.
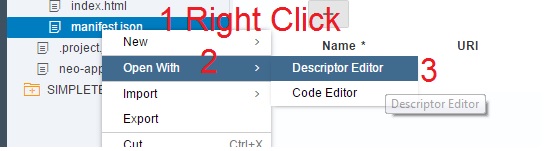
As our aim is to develop our Application with minimal code, we would choose Descriptor Editor for our study today.
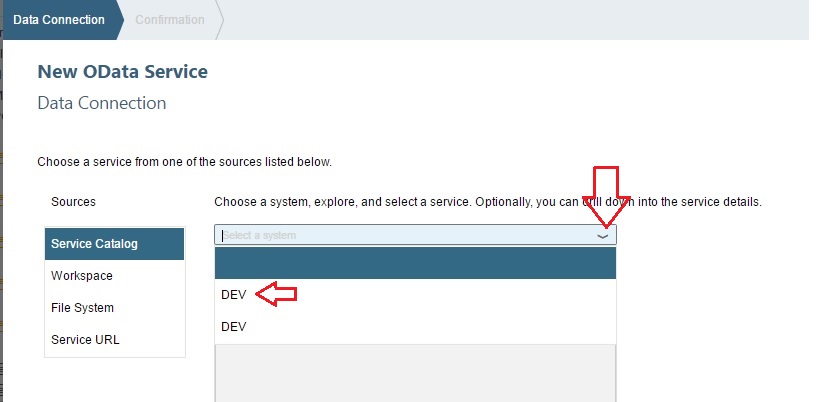
In the Descriptor Editor, go to Data Source Tab. Here we need to specify, from where and how you want the application to fetch data. Hit the “+” icon below OData Services. Choose your SAP Client/System. For my case, it is named as “DEV”. This is the backend source.
Now from the list of Services, choose the OData Service which you want to consume in this Application. If you do not have any custom OData Service then we would suggest it would be beneficial if you go through our OData Tutorials and create one OData Service. But you can still continue this post to learn how SAPUI5 application consumes the OData Services.
Hit Finish.
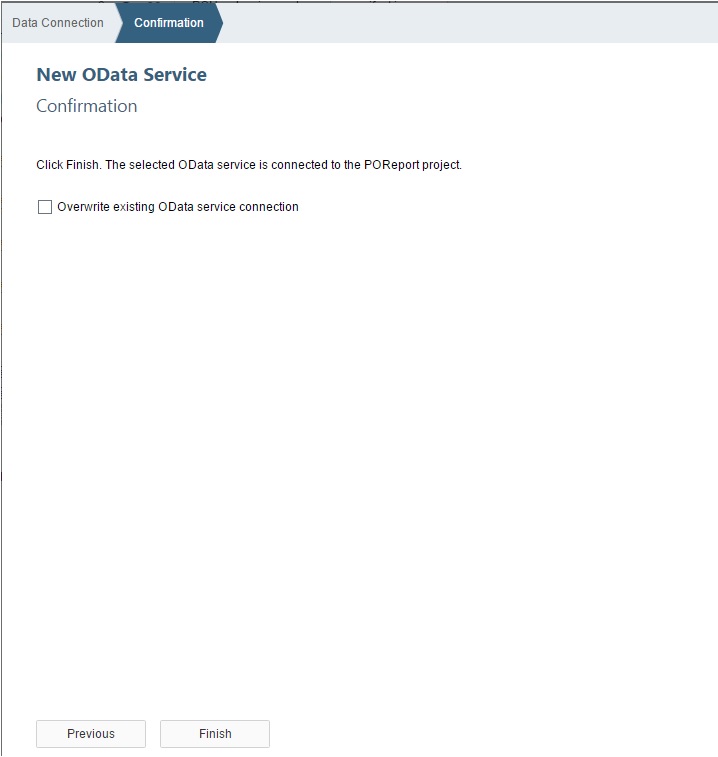
You would see something like below.
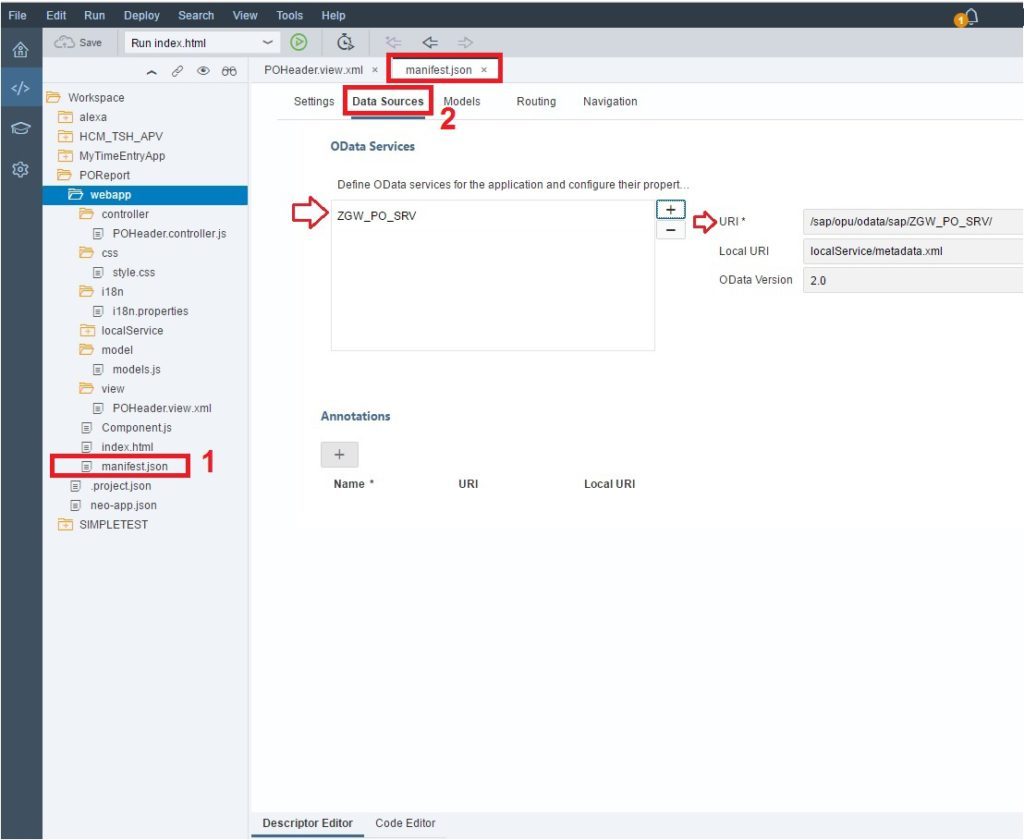
Take note of OData Service and URI.
Exercise 2. Create Default Service Model
Go to the Models tab in the manifest.json file. By default, i18n model is already present.
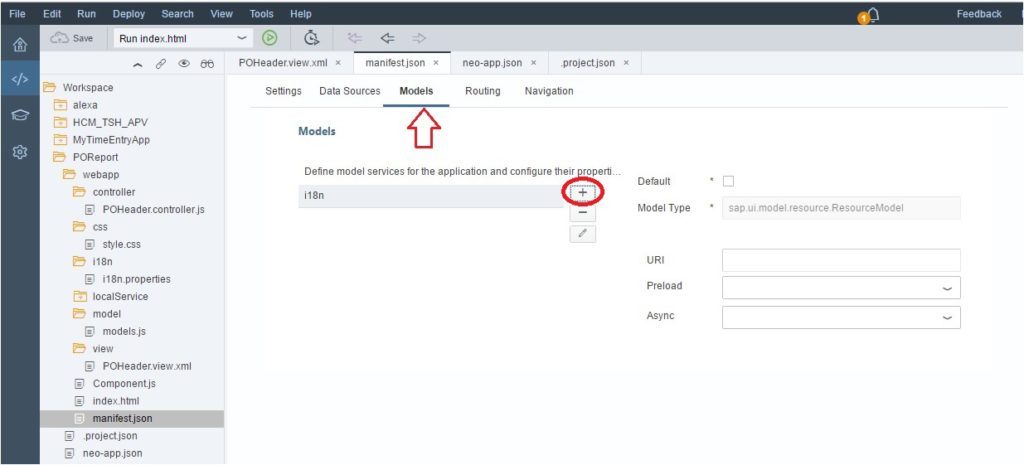
Hit the ‘+‘ icon to add another Model. Choose Model Source as Select Data Source and Set as Default model for the application.
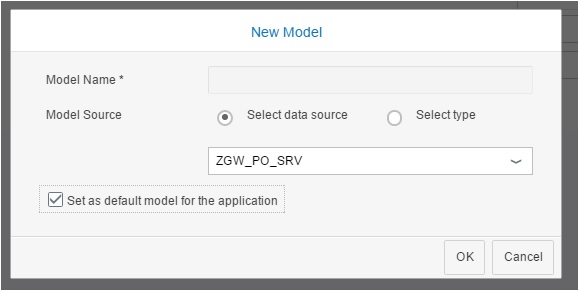
Looking at the above image you must have made a calculated guess that even though Model Name has an asterisk (*) meaning mandatory, when you Set it as Default Model for application, Model Name input field is grayed out. So for default model, we need not give any Model name. Fewer names, less confusion.
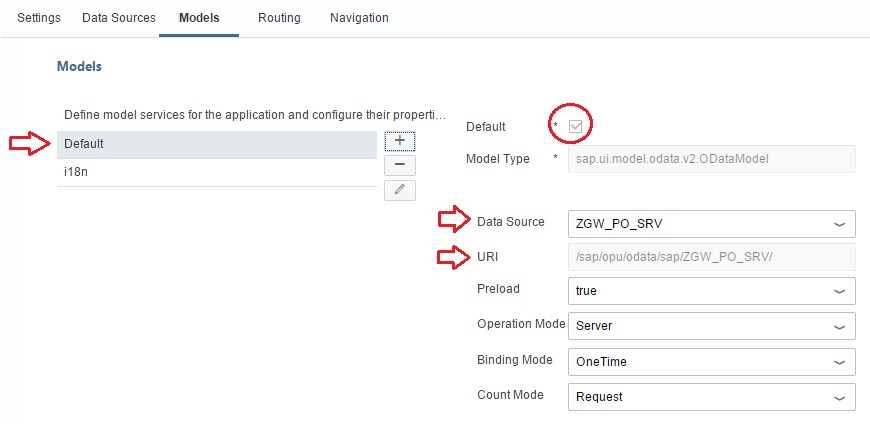
After you add the model, it would look like below. So the Default Data Source and URI are configured.
We promised, we would not write any code ourselves. But if you open the manifest.json file in Code Editor, you would realize, WebIDE has written a bunch of codes for us.
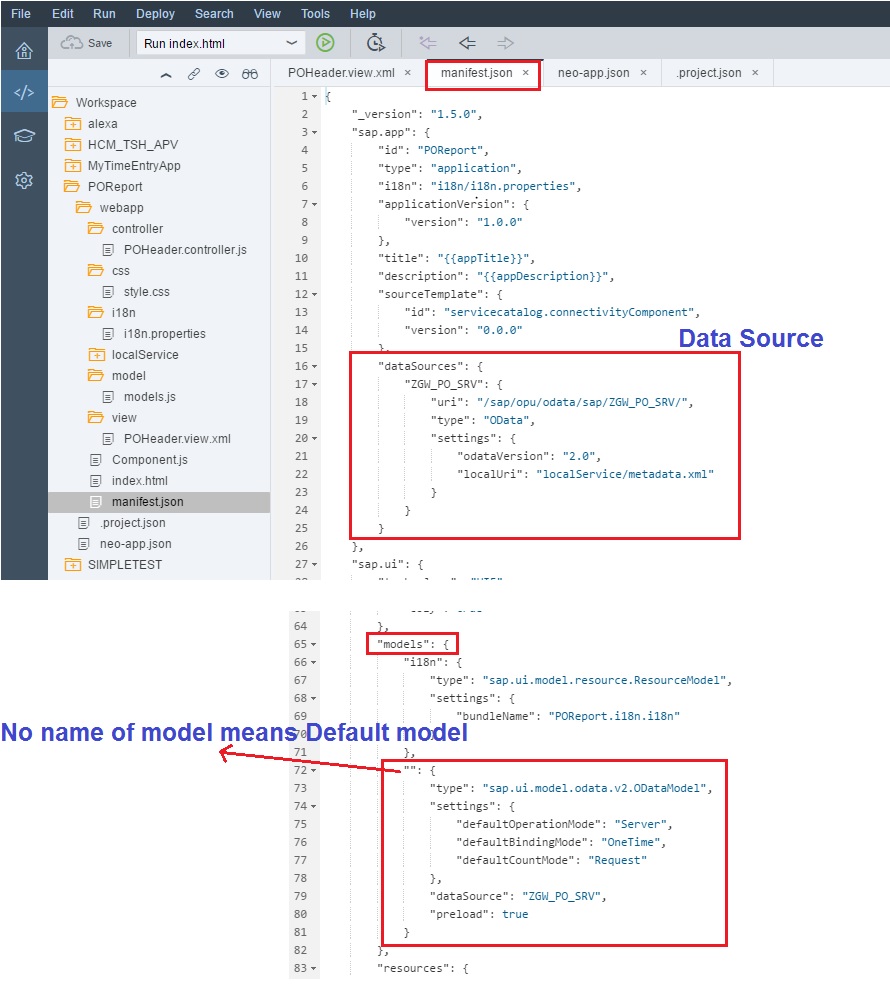
With time when you would be expert in javascript programming, you could go directly to Code editor and write your own code. But I do not see a point, why would I go and write codes when I can do the same in the Descriptor editor. I am lazy ABAPer.
Please note: Everyone would speak about the importance of index file, view, controller and models. But very few would stress the importance of manifest.json file. Manifest files are like the traffic control room. They are the descriptor of any SAPUI5 Application. The manifest file holds the Source, Destination, Models, Routes and Navigation information of the SAPUI5 Applications. In the subsequent part of this tutorial series, we would learn more about Routes and Navigations when we would need to traverse from one view to another and pass data to and fro.
Exercise 3. Design the First View Layout of the SAPUI5 Application:
If we want to be frontend developer, Screen/View design is an integral part. Like in Web Dynpro ABAP, we can drag and drop UI elements to the views. Like Web Dynpro, we have standard containers, buttons, input fields, labels etc. If you have ever worked in Web Dynpro, you would easily co-relate the View design in SAPUI5 with that of Web Dynpro ABAP.
If you have never worked in Web Dynpro ABAP, please do not be disheartened. It is not a rocket science. Follow the below steps and create your first view.
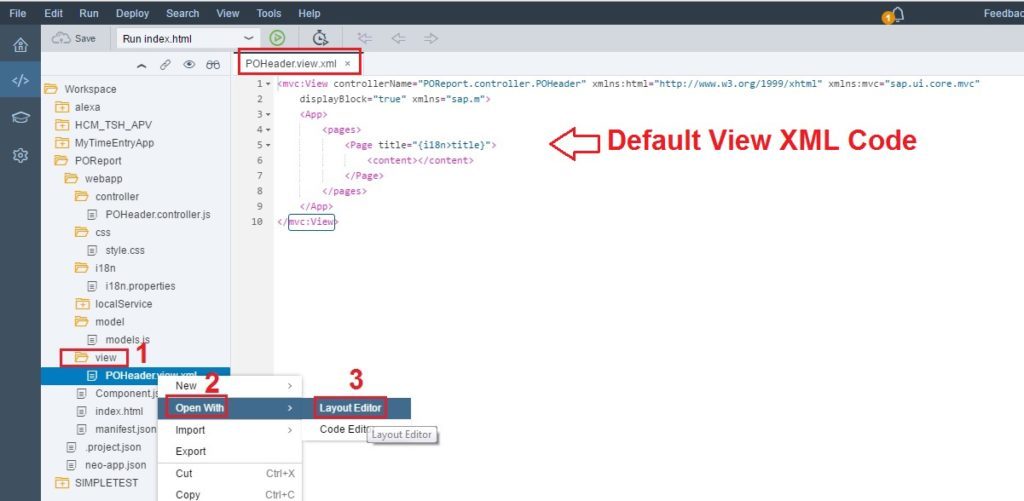
Like manifest.json file, View files can also be opened in Code Editor and Layout Editor (instead of Descriptor Editor in manifest). Which editor would you choose? Without a second thought, my heart goes with Layout Editor.
Exercise 3.1. UI Control to display the PO Number and PO Type in the Application
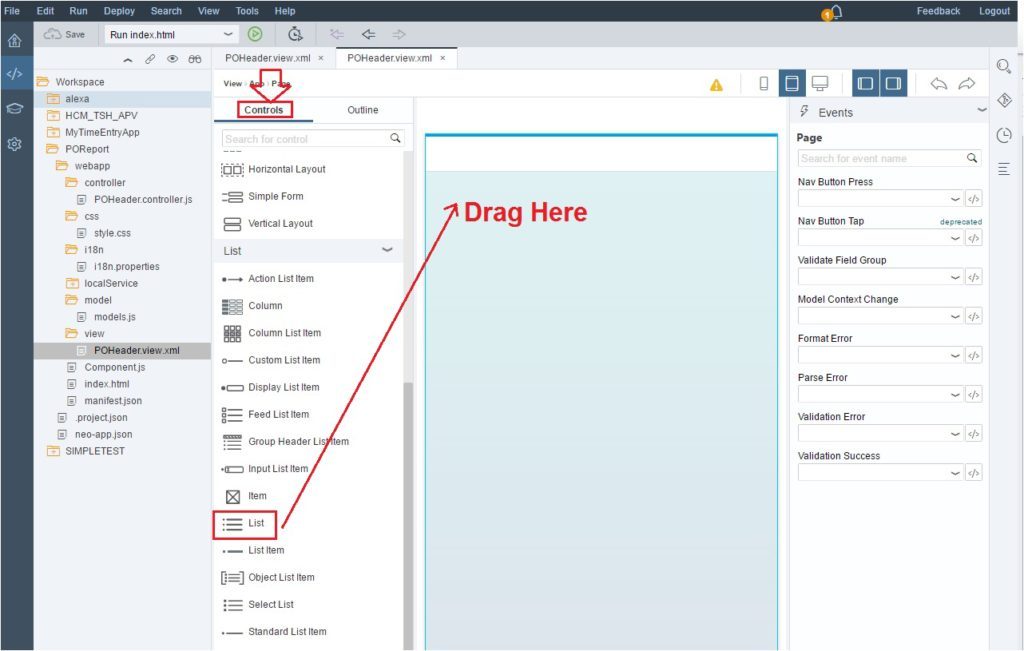
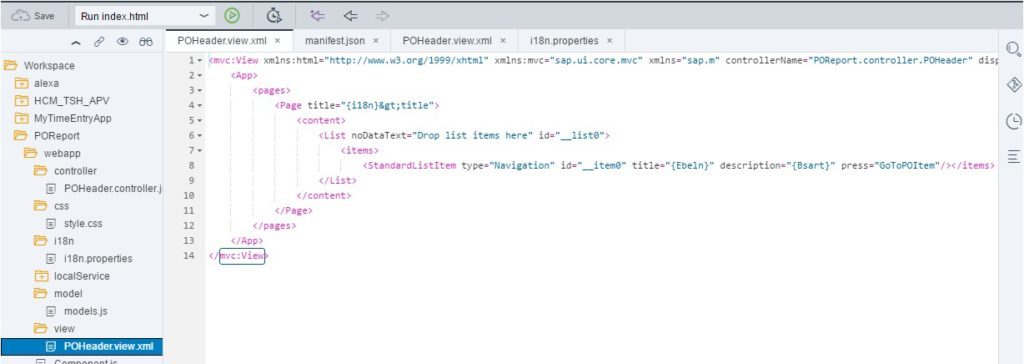
Choose the Controls Tab and go through all the available controls. SAP has provided all necessary UI elements in WebIDE for the developers. For our exercise, we would you the simple List Control to show the PO Number and PO Type. Drag the List Control to the View area.
By default, three List Items are saved. We want our List to be dynamic. Therefore, we would delete lower two items and design in such a way that the list would show the required numbers of rows depending on the data retrieved from the OData Service.

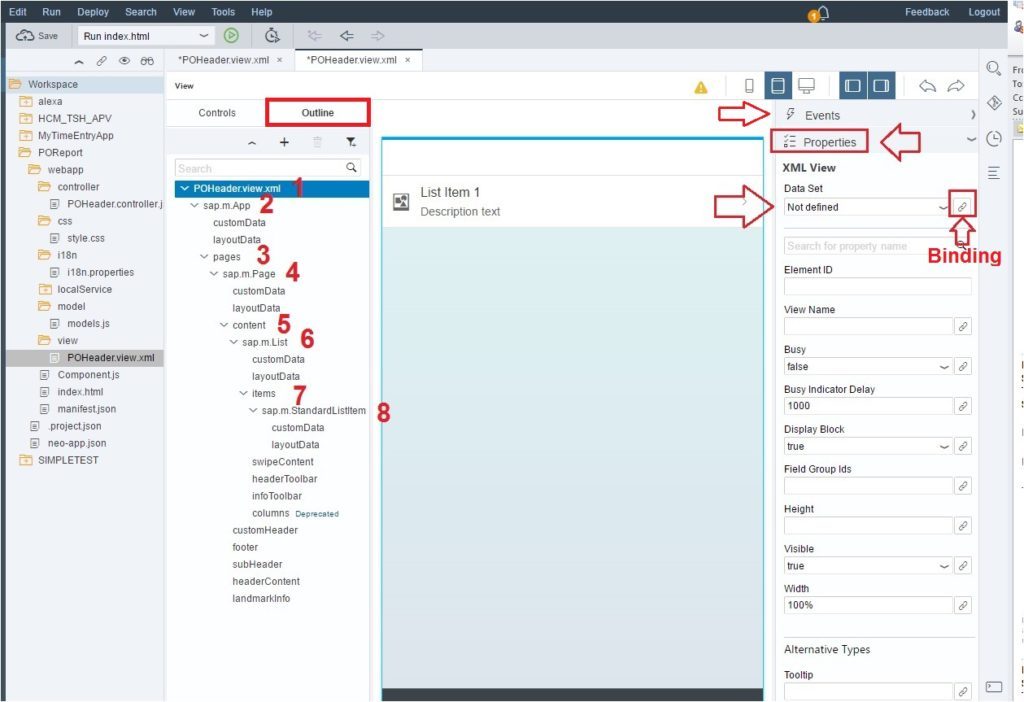
Let us go the POHeader.view.xml in the Outline Tab of the view. Treat it as the root xml for this view. Check the hierarchy of the View. Roughly it is as App->Pages->Content->List->Items.
3.2. Bind the OData Service Data Set (POHeaderSet) to the first View of the Application:
Also, check the right-hand side. It has Events and Properties section. Under Properties of XML View, there is a field for Data Set which is “Not defined” by default. Also take note of the chain like icon on the right. It is for Binding. Just like in Web Dynpro, all UI elements of the screen has to be bound to some data source if we want to display some value at run time. For our exercise, we want to show PO Header information in this view. Click on the chain/bind icon.
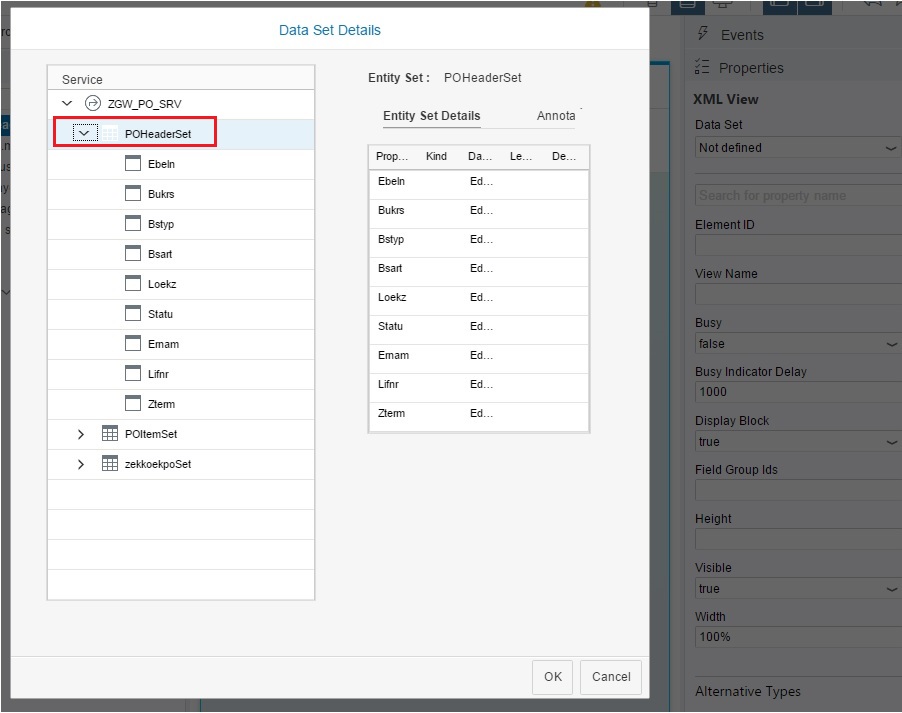
List of EntitySet from the OData Service would be available. If you remember, in our OData Tutorials, we created three Entity Types and Entity Sets. For our first View, we would map POHeaderSet to the XML View.
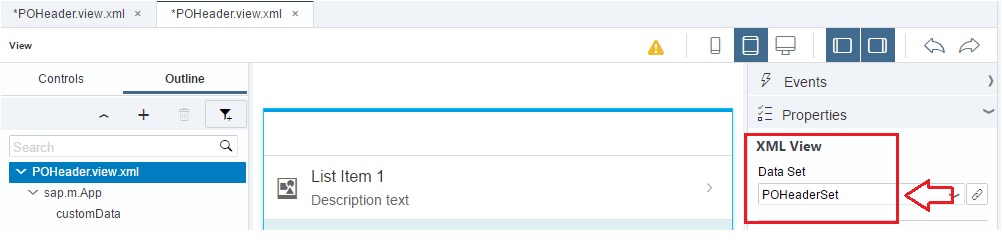
Now the root XML View is bound to POHeaderSet. This means all the properties (elements/fields) of the DataSet can be used in the View. It is just like passing parameters to the sub-routines. All the parameters passed to the subroutines (performs) can be used and manipulated in the sub-routine.
3.3. Bind the OData Service Entity Type Properties (fields) to the View’s fields (UI/screen elements).
Now let us check the Standard Item List. By default, the Title of this List is hard-coded as List Item 1.
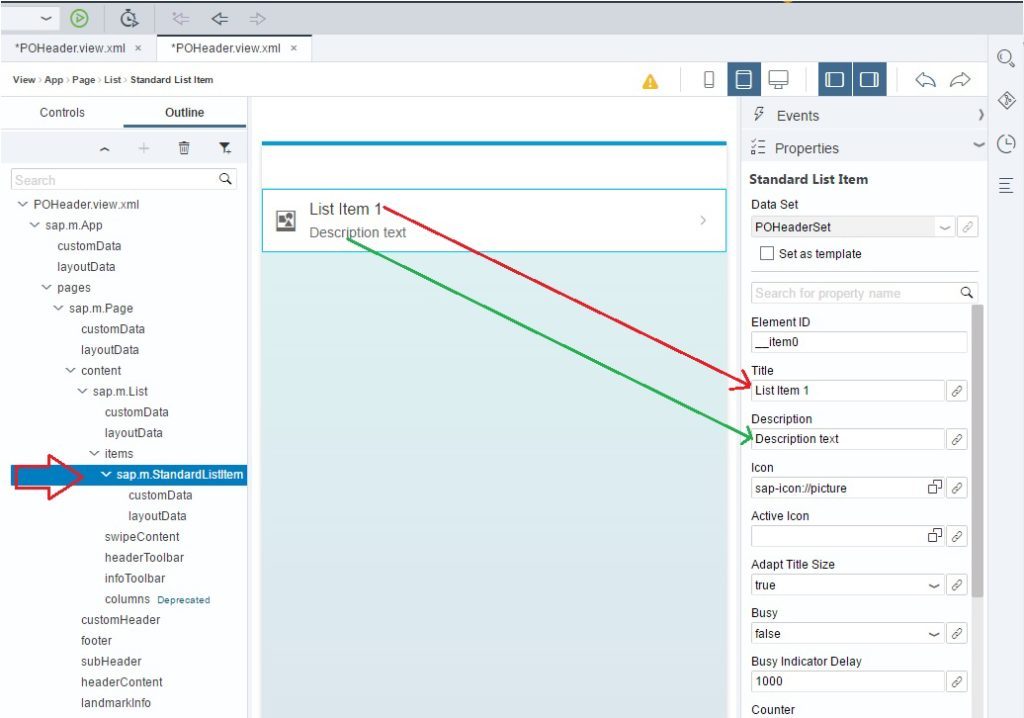
We would use this fields to show the PO Number from the OData Service. Similarly, we would display PO Type in the Description field.
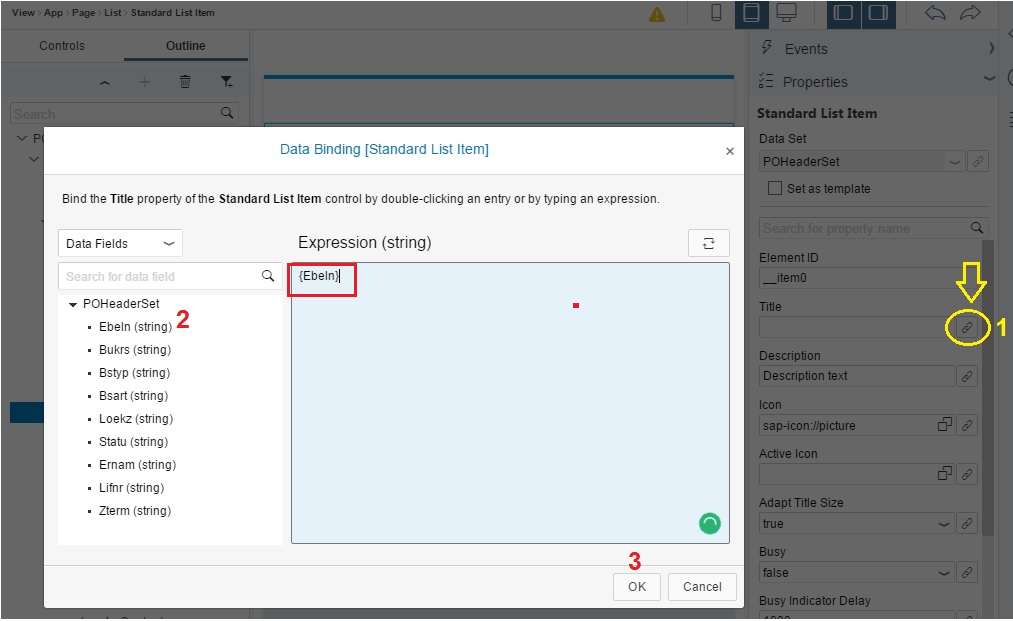
Click on the chain/binding icon. Since we have set the DataSet to POHeaderSet, all the field of this entity set is available for us. We would select the field Ebeln (PO Number). Similarly, choose Bsart (PO Type) for the description field. We have removed the icon field.
Now, let us test our SAPUI5 Application.

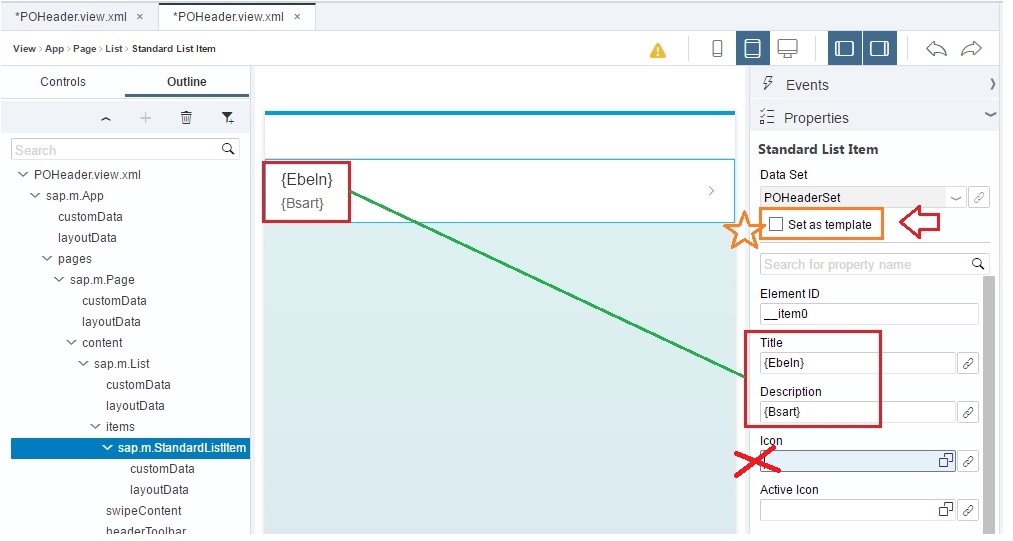
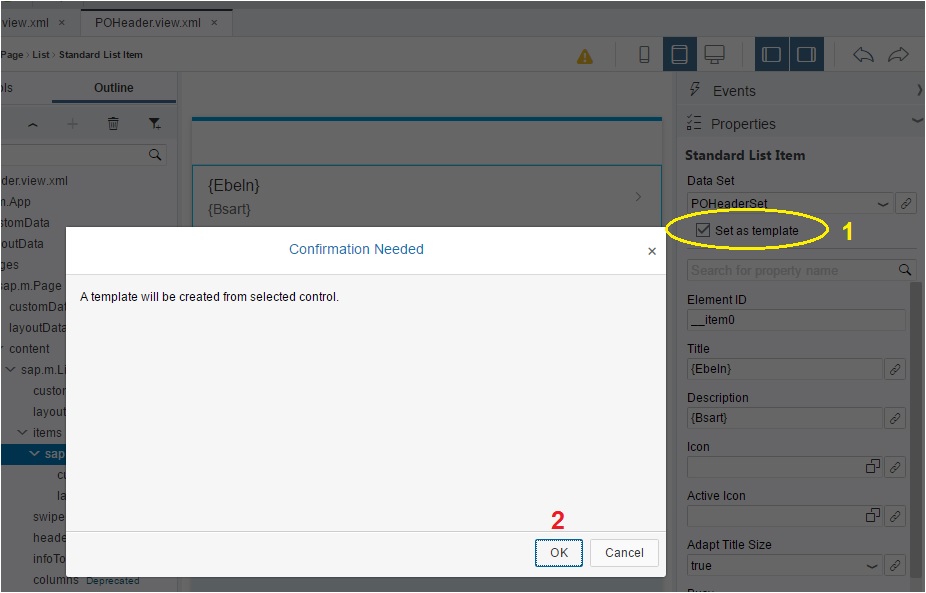
Oops!! No output yet. I have deliberately missed one step to show you the issue. We need to Set POHeaderSet as Template of the Standard List Item.
Let us check the View code without setting the Template in the List Item.
After we Set it as default, check the View code again.
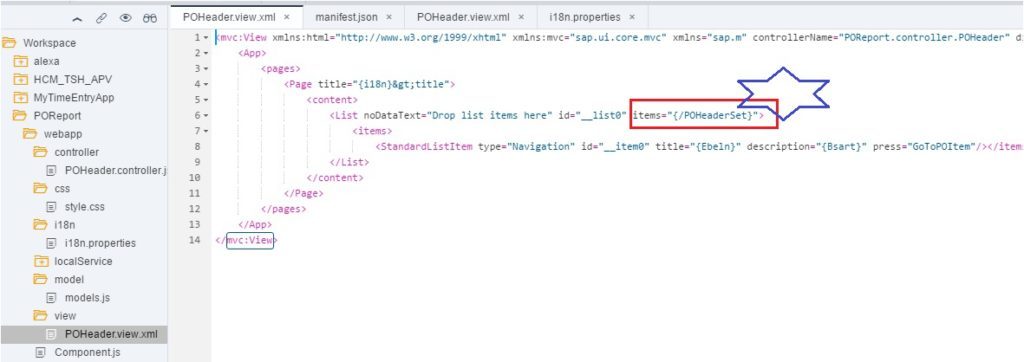
Did you notice, {/POHeaderSet} is mapped to items? This means, now the Item has the Source of data.
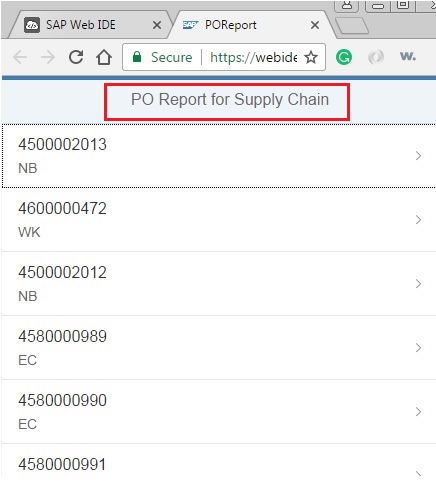
Now let us test again.
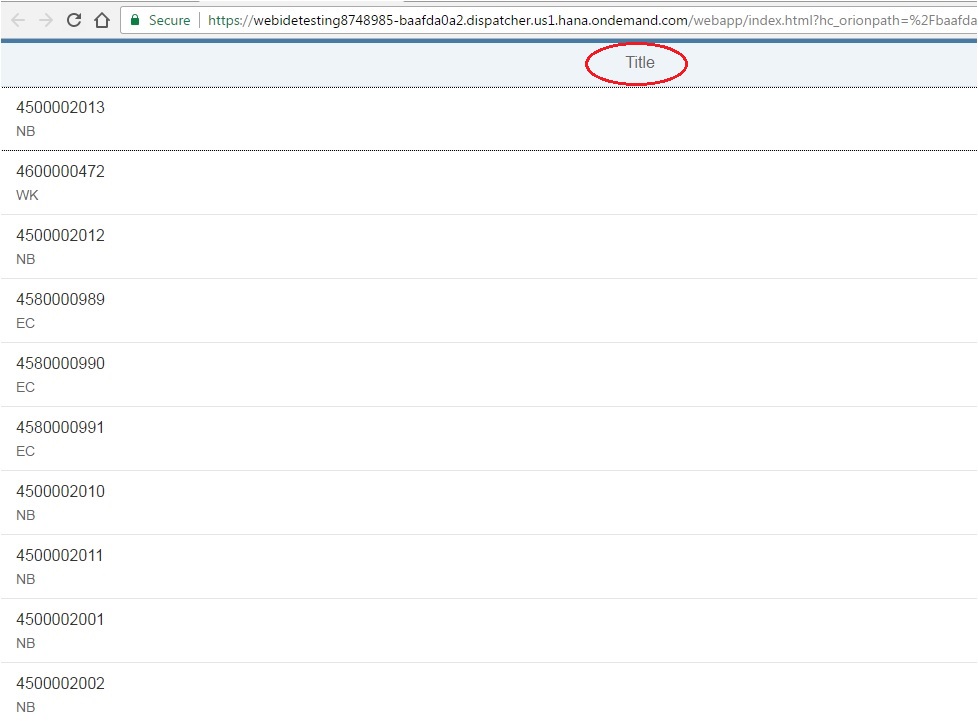
Abracadabra. Our Application has pulled PO Header Info from SAP system using the OData Service. Did we write any code of line yet? Isn’t it cool?
In the about output, the title still shows as “Title”. This is because the i18n has the title mapped to Title.

We can either update the title to our title in i18n (which is the right thing to do), or we can hard code the title on the Page itself.
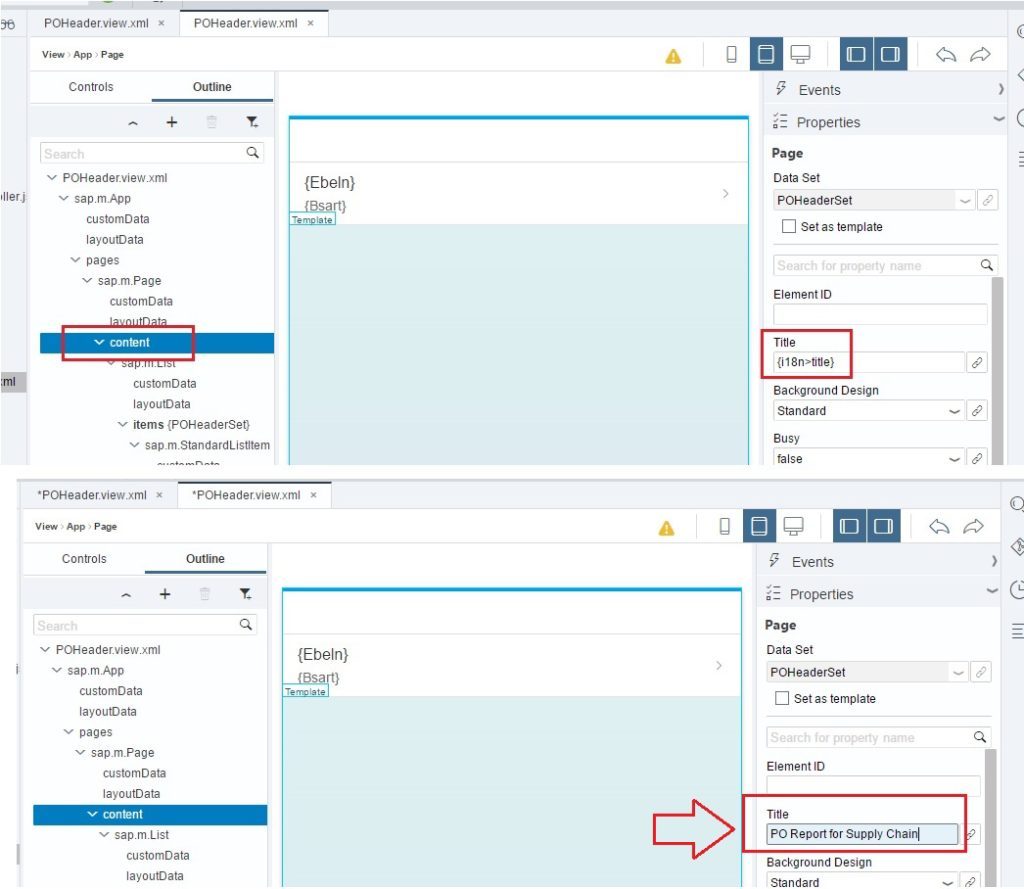
Being a lazy ABAPer, I have decided to hard code. Navigate to the content section of the Page and write your Title. Test your application again.
Events in SAPUI5
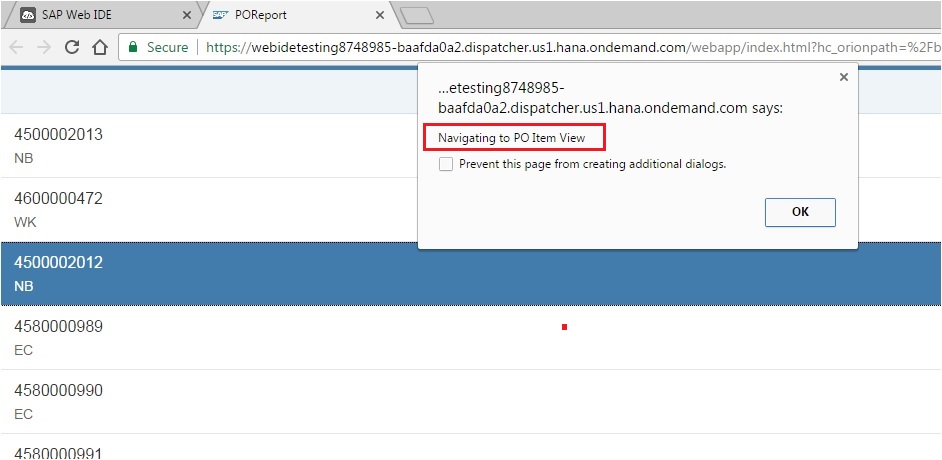
We could have stopped our article here, today. But we wanted to show the Events section of the View. You guessed it right, Events trigger Functions. Let us give a pop-up message to the users whenever any line of the PO Header is clicked.
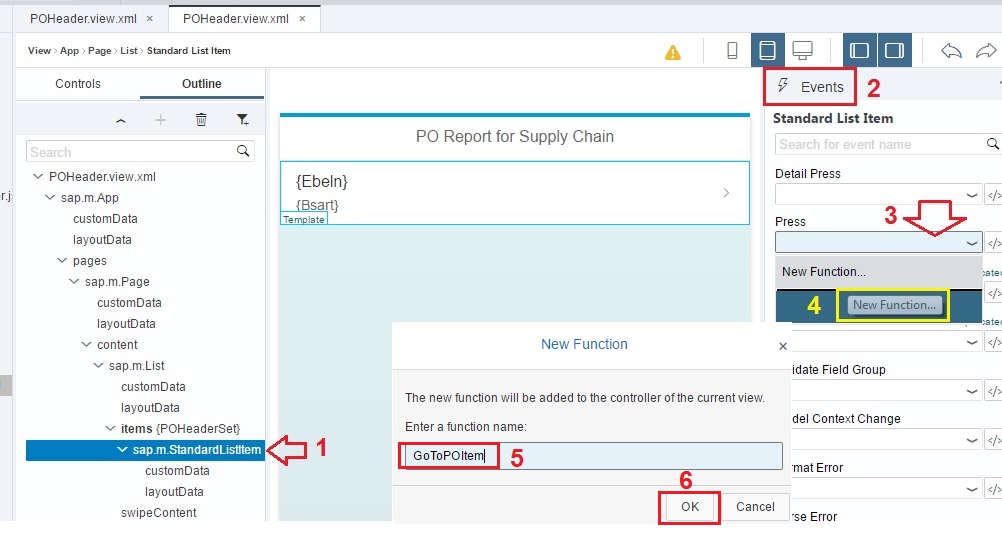
Click on the Press field and select New Function. Give the function name you like. We christened it to GoToPOItem. The function which we created on the Layout editor gets written in the controller file.
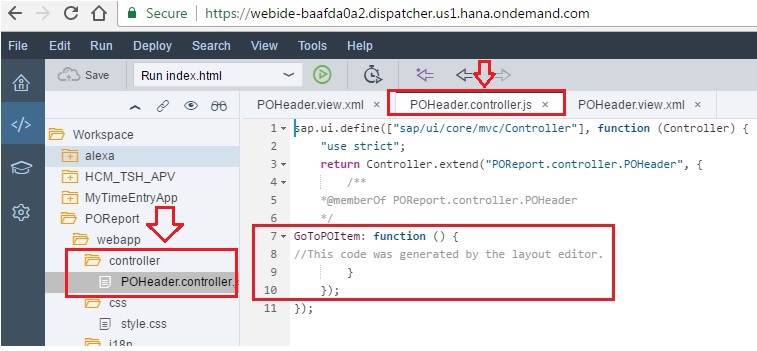
Go to POHeader.controller.js file. Check, the code skeleton for the GoToPOItem function is auto generated. Let us write one line of code to show the pop-up(alert) message. Not really a good practice, but this is just for demonstration. In subsequent parts, we would show how to handle message better.
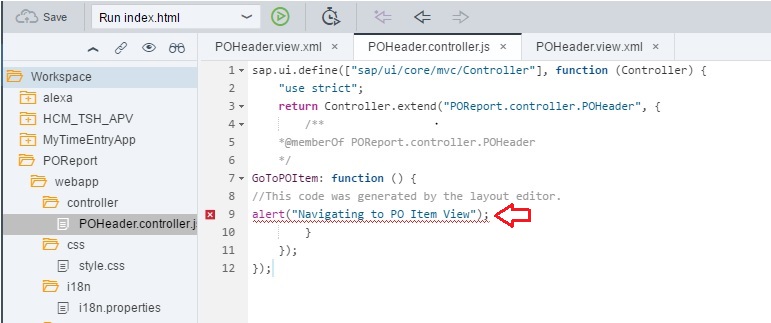
There is a red cross (x) mark which says it is obsolete. Please ignore it for now. Test the application again. On the first View output, click on any PO. You would see the alert with the message “Navigating to PO Item View“. Congrats, you just triggered an Event in SAPUI5.
Some useful tips for SAPUI5 Beginners (ABAPers).
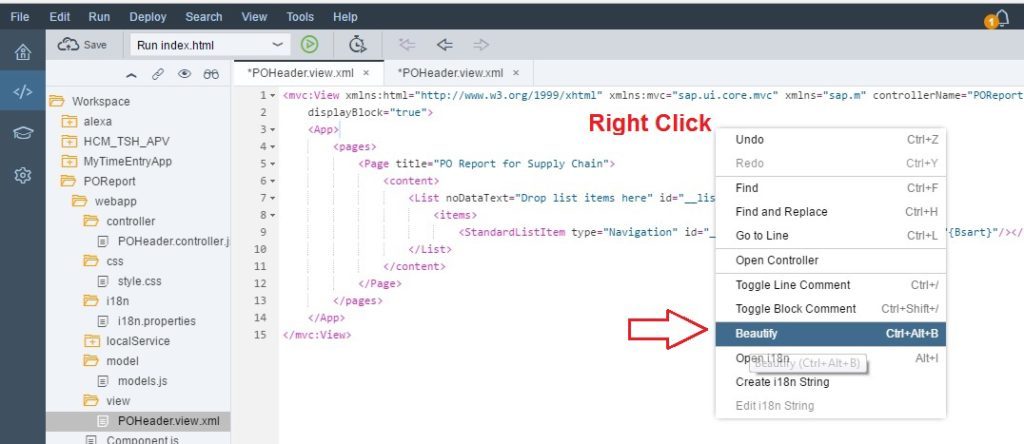
1. If you are missing Pretty Printer of ABAP Editor, use Beautify feature to format your SAPUI5 code.
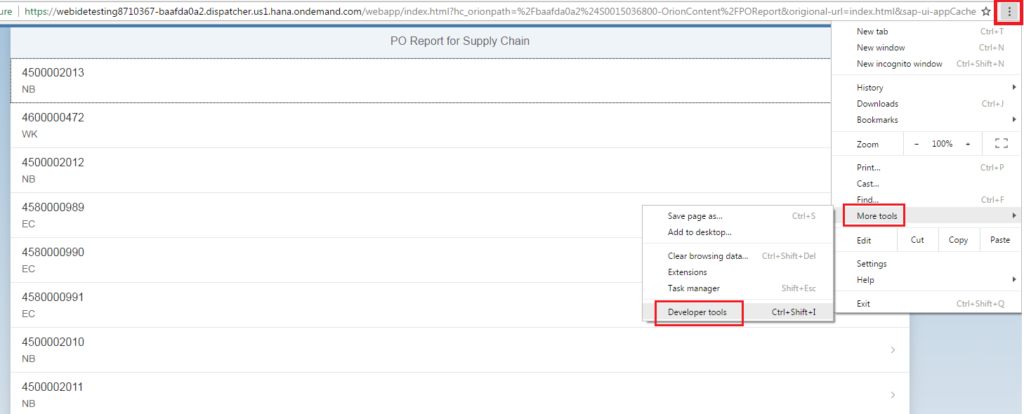
2. How to debug and check what is happening behind the scene in SAPUI5 App?
Ans: In Chrome browser, go to the More tools ->Developer tools.
3. How to know the sequence of calls when SAPUI5 Application is launched?
Ans: In the Developer tools, go to Network and choose All. You would see the names of all the files called in the order.
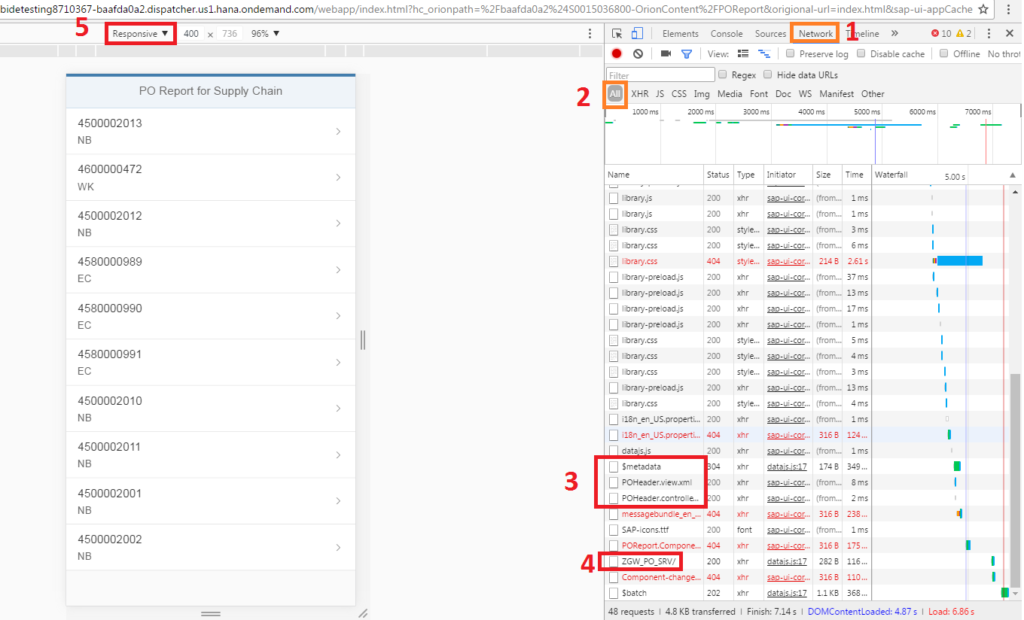
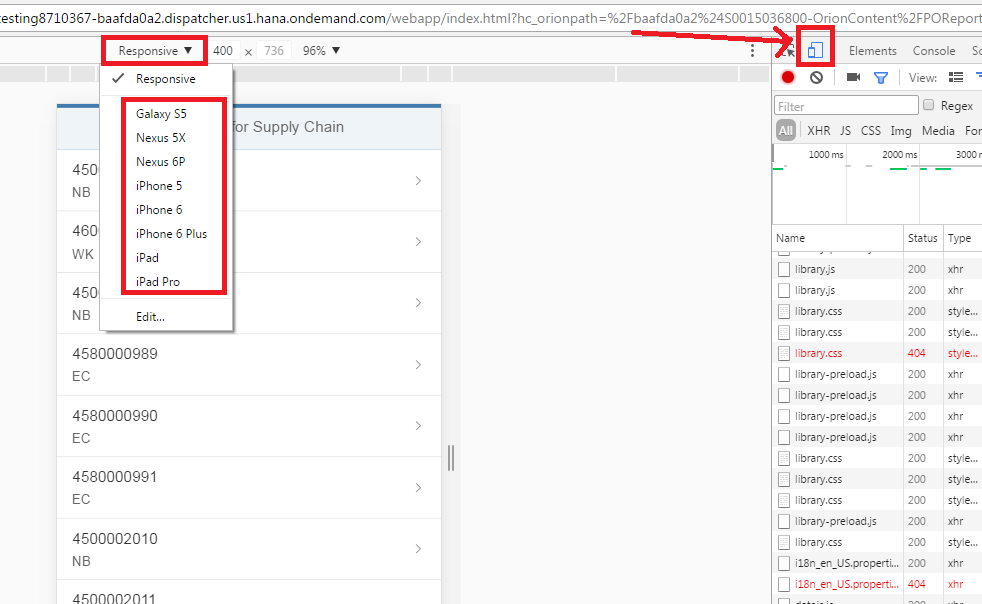
4. Do you know how your application would look in Android Galaxy S5 and IOS iPhone 6 Plus?
Ans: From the Developer tools, select the Responsive section.
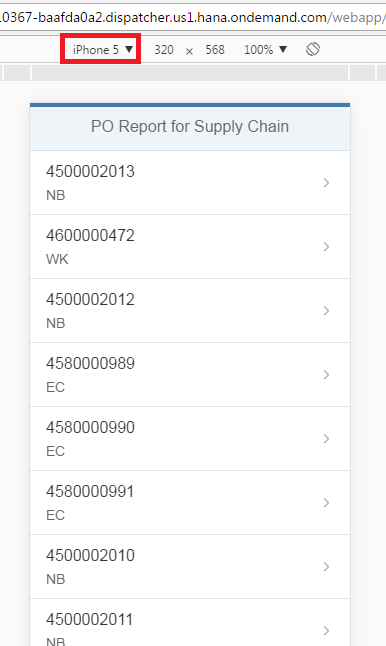
This is how it would look in iPhone 5
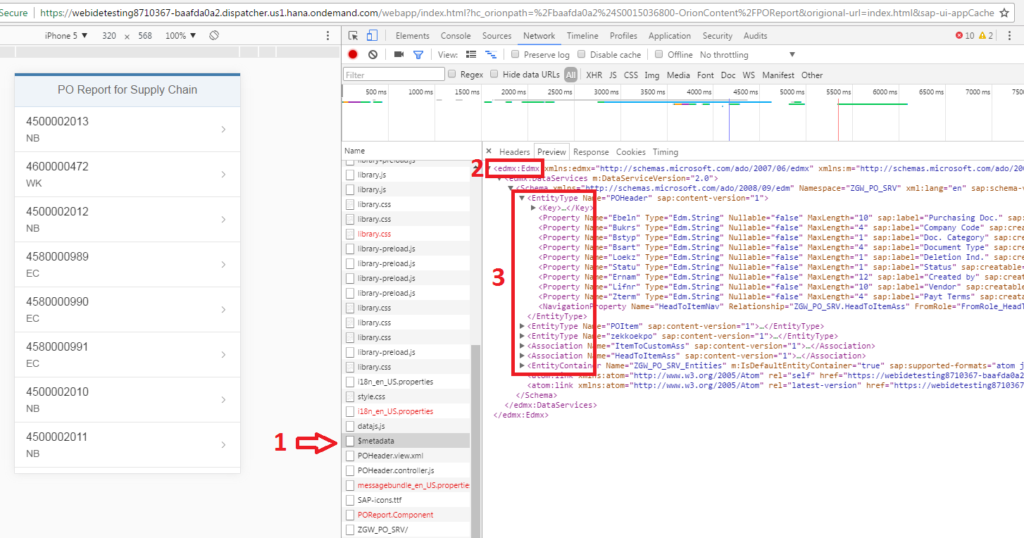
5. Is there a way to check the metadata (skeletal) of the OData Service?
Ans: Yes. Developer tools->Network->All->$metadata->Edmx
Hope this post would give you a necessary boost to dive deeper into SAPUI5. It is not that difficult for ABAPers like us to learn, implement and use it for real projects. Without any custom code, if we can design one screen, then imagine with little more knowledge of Javascript we would be ready to build beautiful and responsive interfaces for our end users. Keep your mind open to learning new areas even if you are a hardcore ABAPers.


