This article is the continuation of our earlier write-up SAPUI5 Part II. We would try to improve the same application which we worked last time. If you are new to SAPUI5 or Routing, we would suggest you take a glance of our Part II and then come over here to get the maximum benefit.
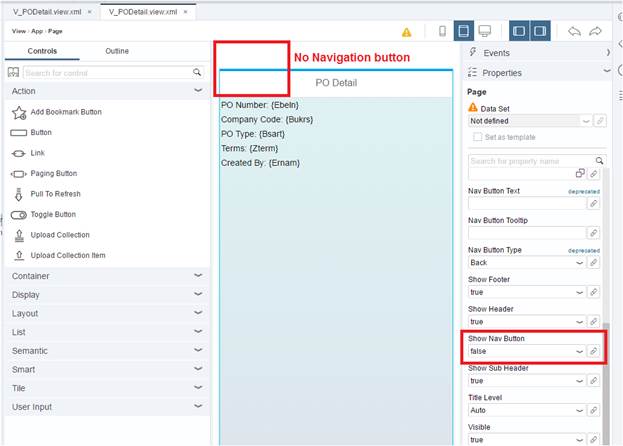
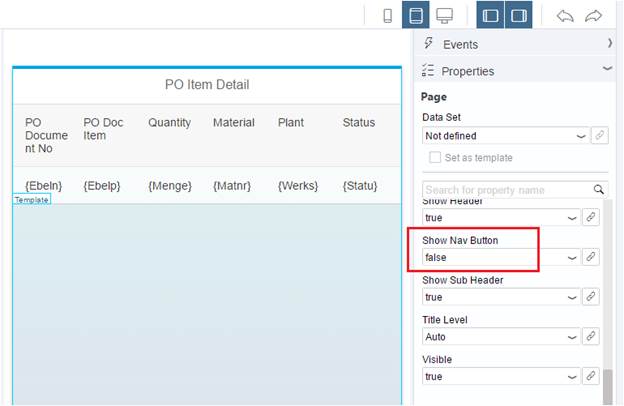
In the previous application, our PO Detail View has no Navigation Button to go back to PO Header View as the Show Nav Button property is False.
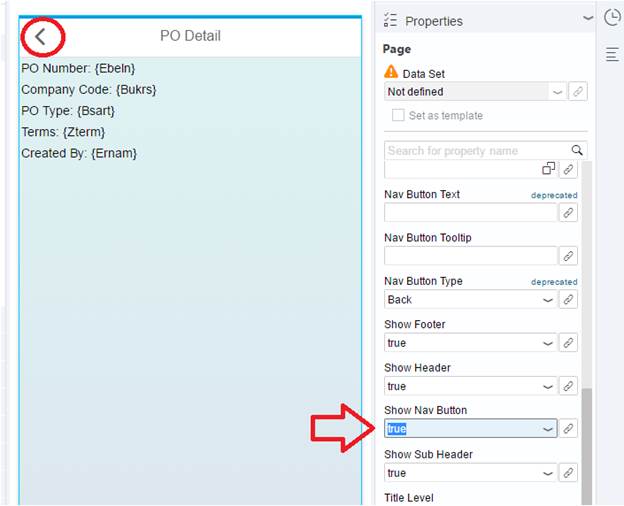
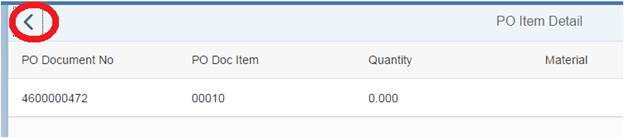
Let us set the property to True. Check the Back Navigation button is visible.
Let us test.
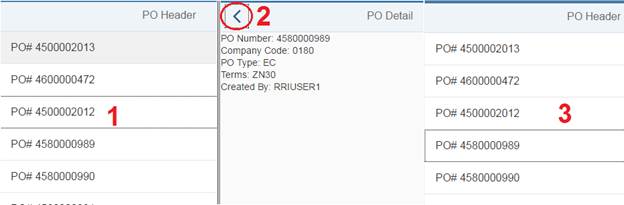
When we click any item of the first screen it goes to the PO Detail screen which has the Back button.
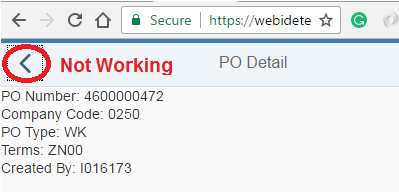
But when we hit the Back navigation button, it is not working. Why? We have not told the Back button to do any action. We just created the button with no Event.
Let us create an Event Function and order the button to take us back to the PO Header screen.
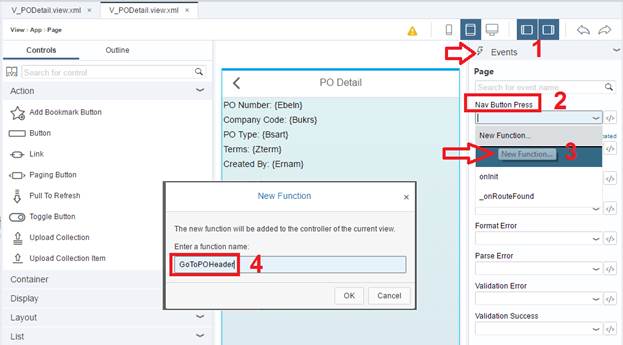
Save and go to PODetail.Controller.js file. The below function code would be auto written by the WebIDE wizard.

Like we did in Part II of our SAPUI5 Tutorial, we would create a Router object and pass the Router name in the getRoute function. Where will we find the Router name? In the manifest.js file. Let us check our manifest file in Descriptor mode.
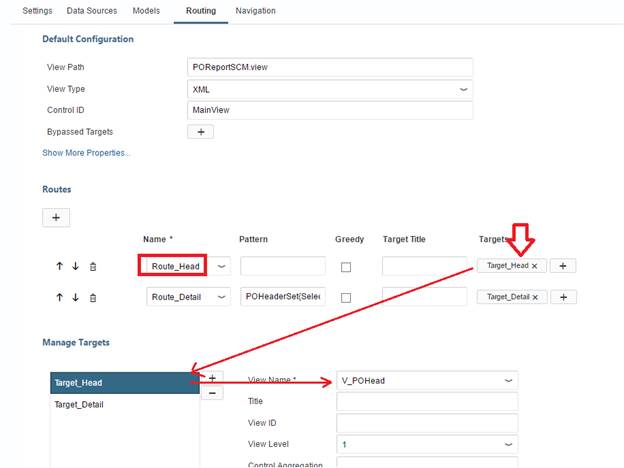
Route_Head is the router name which points to target Target_Head which in turn points to View V_POHeader. So we need to pass router name Route_Head.
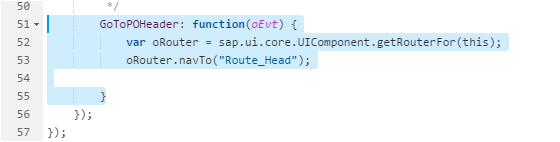
var oRouter = sap.ui.core.UIComponent.getRouterFor(this);
oRouter.navTo(“Route_Head”);
Do not forget to pass the Event (oEvt) object to Function.
That is it. We are good with Back Navigation button. Let us test it.
Till now we displayed two views: POHeader and PODetail. The data for both the views were obtained from EntitySet POHeaderSet. Suppose when we click on any PO number in PODetail screen, the user wants to get the PO Item Information for that PO.
How would we handle this?
Ans: Create another View (POItem) and on Click of PO number in PO Detail view Navigate to PO Item View. Simple right? Let’s do it.
PODetail has PO Header Details while POItem will have PO Item Details. Just for clarification.
Also, POHeader and PODetailed consumed POHeaderSet Entity Set while POItem would consume POItemSet of our OData Service.
Let us get started.
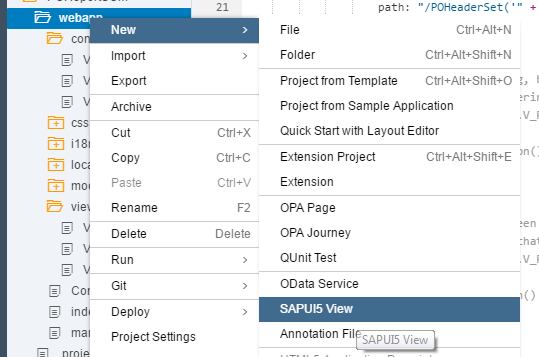
Right click and create SAPUI5 View.
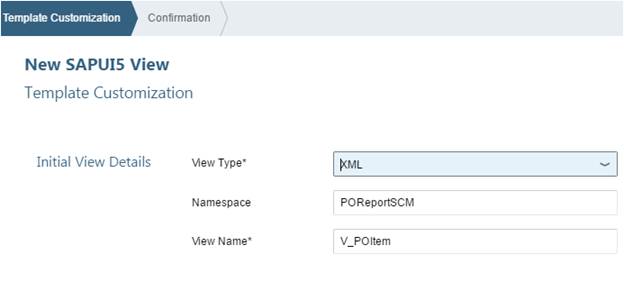
We have named the view as V_POItem.
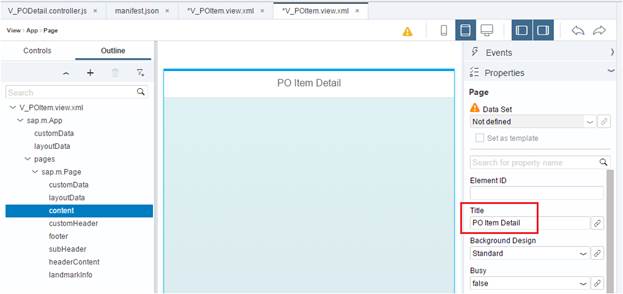
Go to Layout Editor and change the title to PO Item Detail.
Go to Manifest file in Descriptor Editor and create a Target to new View V_POItem.
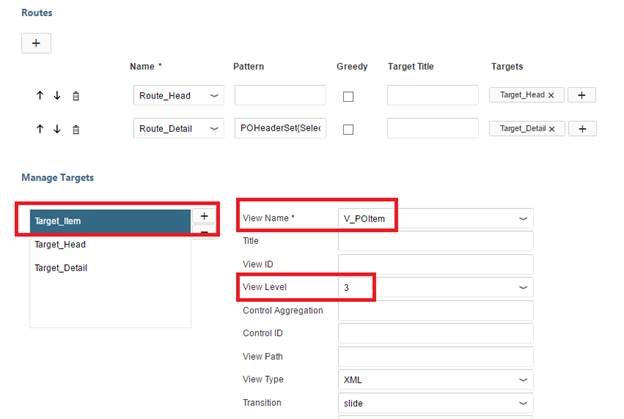
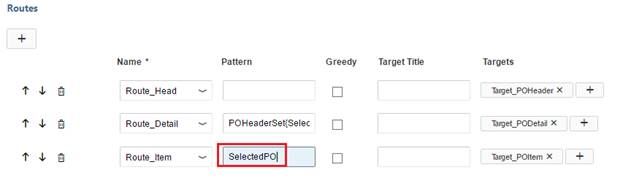
Create a Route to point to V_POItem view.
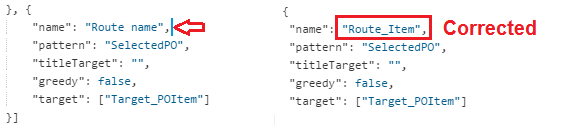
Let us check the manifest file in the code editor. As informed in earlier posts, the auto code generator does not write the Route name correctly. We need to do our bit manually here.
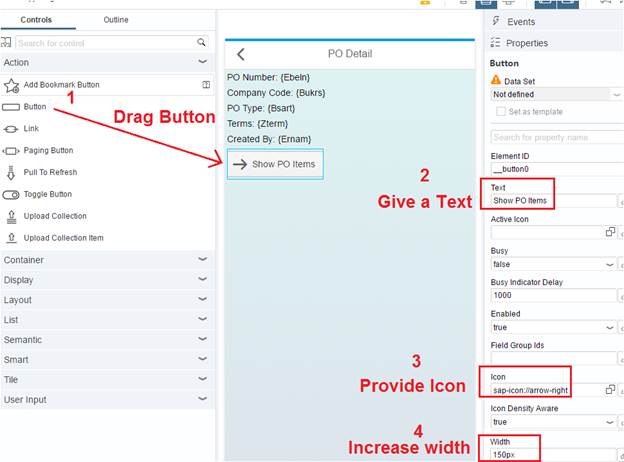
The next step is to provide a button to go to PO Item Details.
Add an Event to the Button.
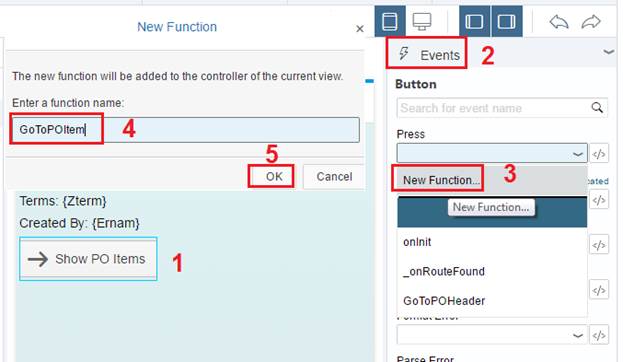
In PODetail Controller file we would add two lines of code in the GoToPOItem function.
GoToPOItem: function(oEvt) {
var oRouter = sap.ui.core.UIComponent.getRouterFor(this);
oRouter.navTo(“Route_Item”);
}
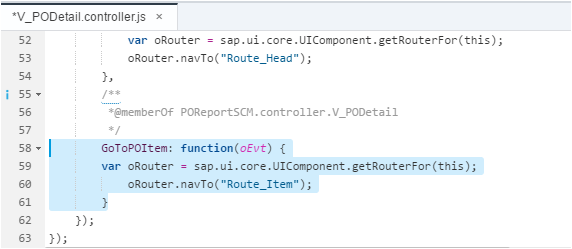
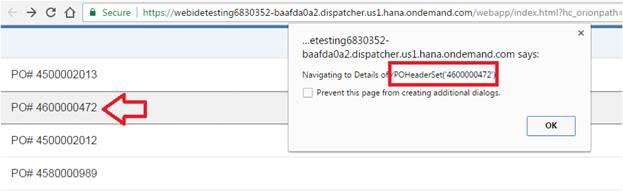
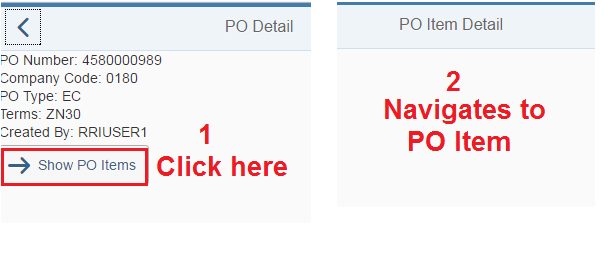
Save and Test our App. Our Routing works fine as the click of the button takes us to the Item screen.
But in the actual scenario, ideally, we would need to capture the PO number present in the PO Detail view and pass it to the next View so that we can show its details.
Therefore, we need to get the PO number (or any other field you want) and pass it in the Pattern argument of the Router. Check below, we caught PO number in v_res and passed it the pattern parameter SelectedPO in the Router argument which we defined in the manifest.js file.
GoToPOItem: function(oEvt) {
var v_res = oEvt.getSource().getParent().getBindingContext().getObject().Ebeln;
var oRouter = sap.ui.core.UIComponent.getRouterFor(this);
oRouter.navTo(“Route_Item”, {SelectedPO: v_res});
}
We already checked above that the button works. It takes us to the Next View (V_POItem). Now we need to pass data and show the details of the PO whose items we want to display.
For that, we need to design a table in the V_POItem view and then populate it in the V_POItem controller file.
Let us go to the Layout editor of the PO Item View and drag a Table Control.
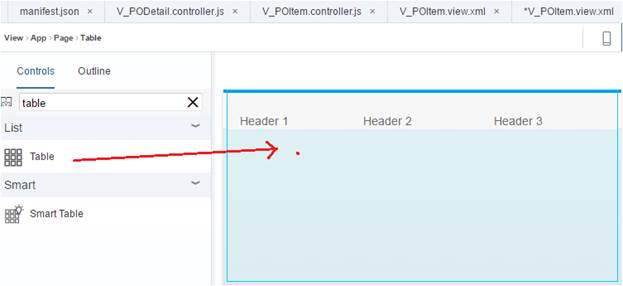
It would generate a bunch of code like below.
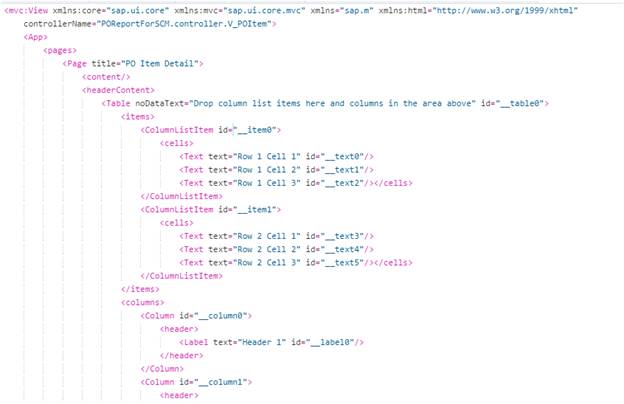
Let us clean it and replace it like below. Please note we have given the Table id as “it_item” and items of the table is mapped to path {path: ‘/POItemSet’} of the OData Model. We will need the table id in Item View Controller where we need to populate this table.
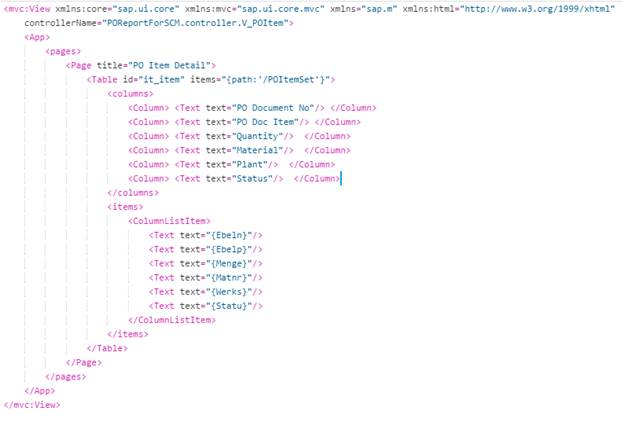
<mvc:View xmlns:core="sap.ui.core" xmlns:mvc="sap.ui.core.mvc" xmlns="sap.m"
xmlns:html="http://www.w3.org/1999/xhtml" controllerName="POReportForSCM.controller.V_POItem">
  <App>
       <pages>
             <Page title="PO Item Detail" showNavButton="true" navButtonPress="GoToFirstView">

                  <Table id="it_item" items="{path:'/POItemSet'}">

                      <columns>

                         <Column> <Text text="PO Document No"/> </Column>
                         <Column> <Text text="PO Doc Item"/> </Column>
                         <Column> <Text text="Quantity"/>  </Column>
                         <Column> <Text text="Material"/>  </Column>
                         <Column> <Text text="Plant"/>  </Column>
                         <Column> <Text text="Status"/>  </Column>

                      </columns>

                      <items>
                           <ColumnListItem>
                                 <Text text="{Ebeln}"/>
                                 <Text text="{Ebelp}"/>
                                 <Text text="{Menge}"/>
                                 <Text text="{Matnr}"/>
                                 <Text text="{Werks}"/>
                                 <Text text="{Statu}"/>
                            </ColumnListItem>

                       </items>

                    </Table>

                 </Page>
               </pages>
        </App>
Now we need to write logic in Item View Controller to catch the router arguments and display the data in the table.
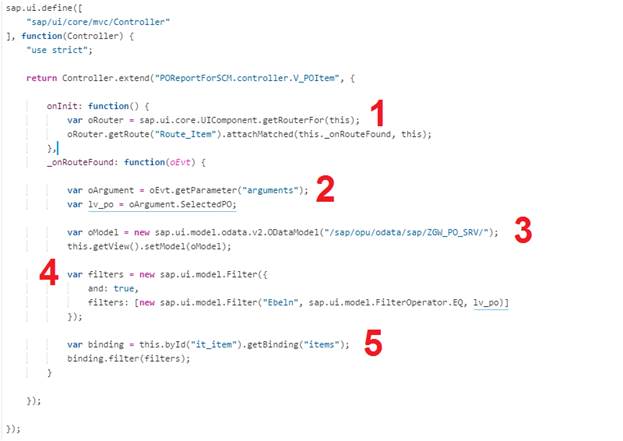
Please do not be scared of the code. It checks for the Router name, reads the argument in the click event and calls the OData model and filters the data for the PO selected (passed in the click) and then binds it to the table name defined in the POItem view.
You just learned how to Filter data in the OData model.
In case you need to pass multiple fields in the Filter, you can do as below. Please note the below snippet is not related to the example we are working on this post.
_onRouteFound: function(oEvt) {
var oArgument = oEvt.getParameter(“arguments”);
var lv_belnr = oArgument.p_belnr;
var lv_bukrs = oArgument.p_bukrs;
var lv_gjahr = oArgument.p_gjahr;
var oModel = new sap.ui.model.odata.v2.ODataModel(“/sap/opu/odata/sap/ZGW_VIM_APP2_SRV/”);
this.getView().setModel(oModel);
var filters = new sap.ui.model.Filter({and: true,filters: [new sap.ui.model.Filter(“Belnr”, sap.ui.model.FilterOperator.EQ, lv_belnr),
new sap.ui.model.Filter(“Bukrs”, sap.ui.model.FilterOperator.EQ, lv_bukrs),
new sap.ui.model.Filter(“Gjahr”, sap.ui.model.FilterOperator.EQ, lv_gjahr)]});
var binding = this.byId(“list”).getBinding(“items”);
binding.filter(filters);
},
Let us test it.
Oops, there is No Data.

Let us debug. When you reach the below screen, press F12 in chrome or right click and hit “Inspect” to go to Developers Tool (debug).
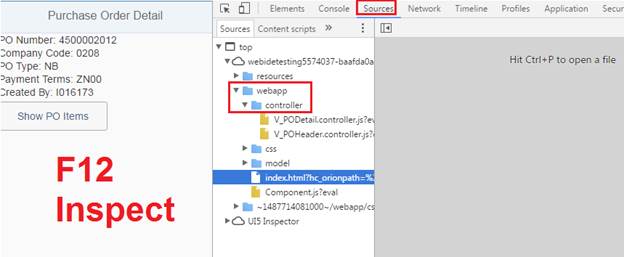
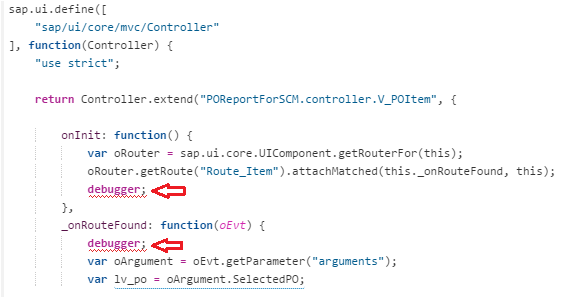
Once you are in Developer Tool, look for Sources Tab and then Controller. If you come here for the first time, you would not see V_POItem.controller (like above, since the controller is not instantiated yet). So a good idea is to put a hard break-point (debugger) in your code (if your application is still in development system) and then go in F12 mode.
Hard Breakpoint at PODetail Controller

Hard Breakpoint at POItem Controller
After you have set the breakpoints, hit the Show PO Items button. F10 is the short key to go step by step. F8 is to execute without stop till next breakpoint (if any).
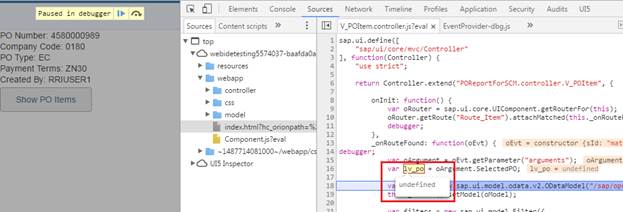
Check the variable lv_po. PO number is expected here, but it did not show up. It means the way we are passing data in the Pattern is not correct.
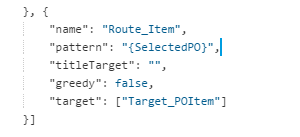
Let me make the below change. I added SelectedPO inside curly braces {} i.e now the pattern is {SelectedPO}. Anything in {} is considered mandatory parameter and has to be passed to the Router (else the destination view would not be reached).
Let us test again.
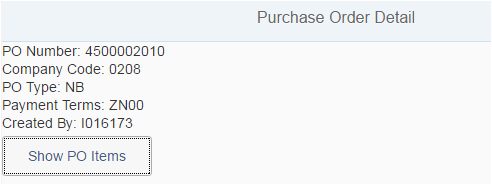
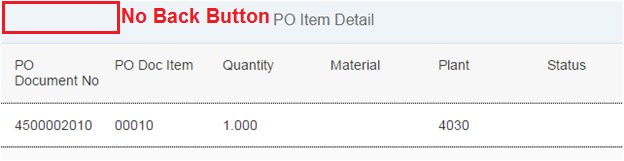
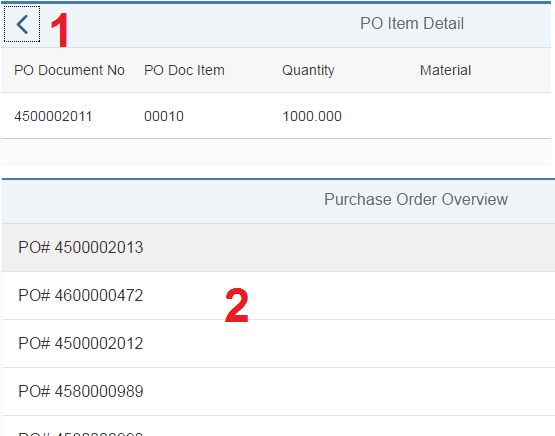
Finally, the details of the PO item is displayed successfully. Hope you understand the importance of Pattern parameters and how to use and consume it.
You must have noticed, there is no Back Button (navigation) in PO Item Detail view. Let us put a button which would take us to the first screen. The method is exactly same as we did for PO Detail View where the button took us to the first screen.
Go to Layout mode in the View and make the Show Nav Button property as “True”.
Test again. This time the Navigation Button is visible but it is not functional as we have not attached any function to the event.
Hope by now you know that we need to assign a function to this event and write code in the controller to route it to the destination screen we want to. For our example, we would like to route to the first View.
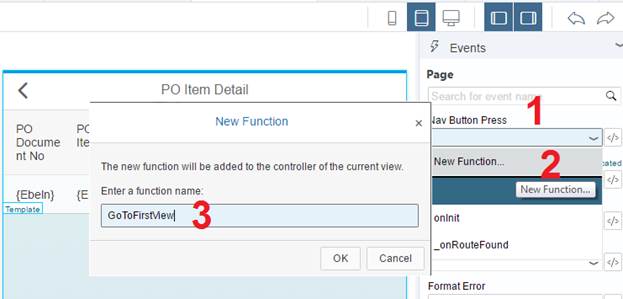
Check the POItem controller, there is new method created.

Write below two lines of code.
GoToFirstView: function(oEvent) {
var oRouter = sap.ui.core.UIComponent.getRouterFor(this);
oRouter.navTo(“Route_Head”);
}
Test again. This time the button would take us to the first screen.
Hopefully, you learned something out of this post. This is a very basic tutorial for complete beginners in SAPUI5. We have tried to jot down every minute details so that the freshers in SAPUI5 could understand or create one working SAPUI5 application.


