Going through the tutorial and delivering actual project requirements are two different ball games. The real world scenarios are quite challenging than the demo exercises we do for learning. Recently, I had the requirement to display the color of one cell of the row dynamically based on some conditions. It might be a simple task for SAPUI5 veterans, but for someone who is still learning the tricks of the UI5 trade, it was quite asking.
After I was able to achieve the end result, I thought of sharing the same to the larger audience so that our ABAP (new UI5) fraternity do not need to go through the same grinds which I had to. Hopefully, someone would find a ready-made solution from this article which would save their valuable time and they can focus more on some other quality work.
Since, many of you might still not have access to OData Services; therefore, I am using the free Northwind’s V2 OData Service for this demonstration. You can also use it if you do not have access to any SAP OData system.
Let’s understand our requirement by creating a simple SAPUI5 Project. Follow the below steps:
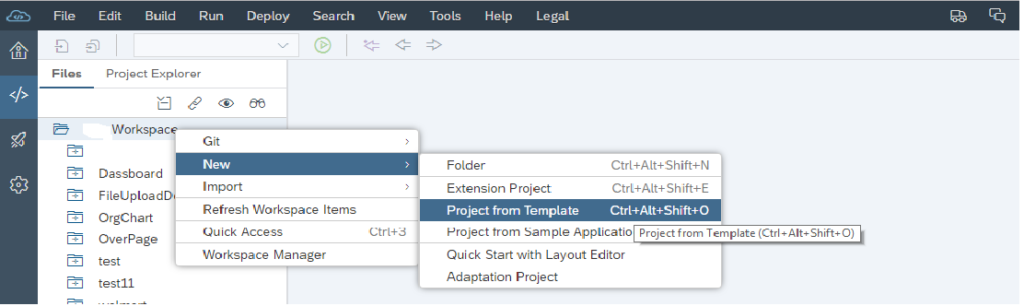
1. Right click on Workspace -> New -> Project from Template.
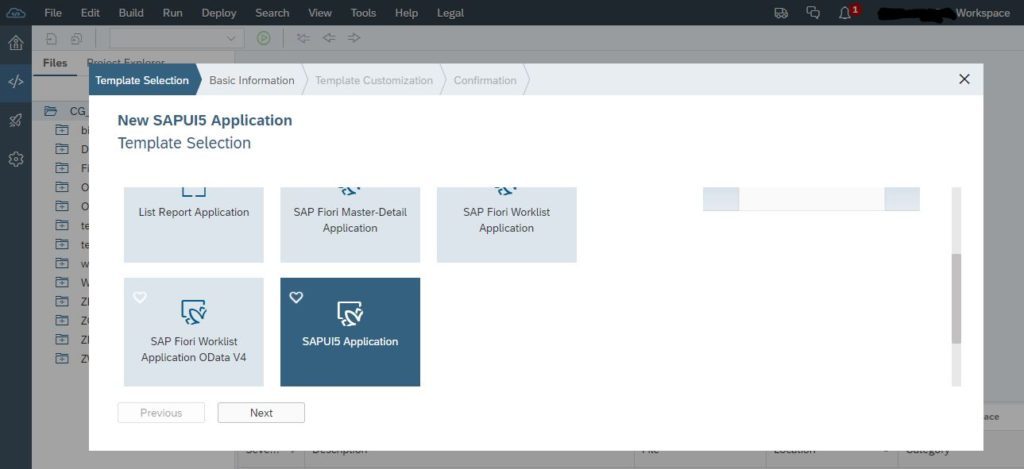
2. Select SAPUI5 Application -> click Next button.
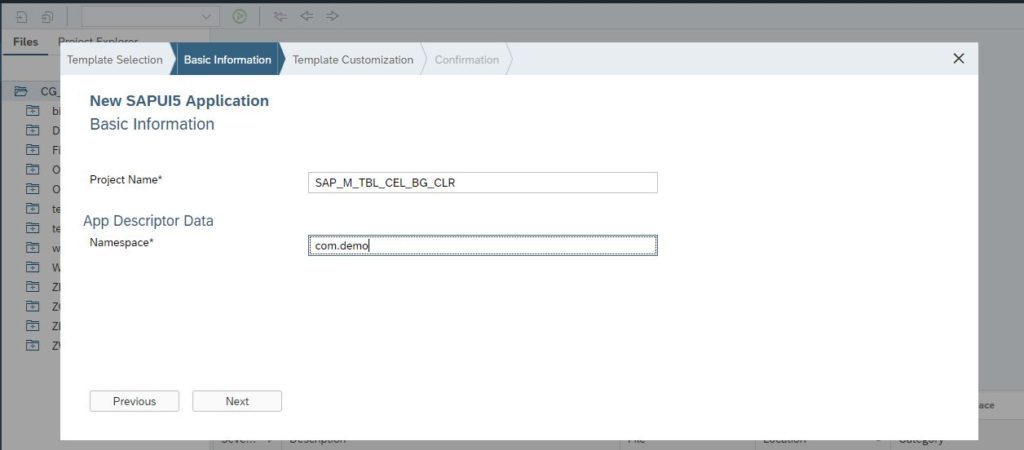
3. Enter Project Name and Namespace -> click Next.
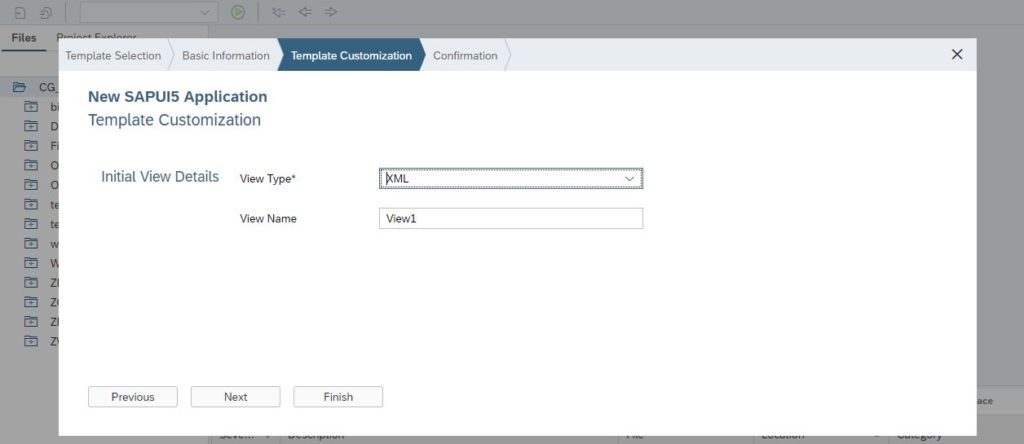
4. Select the View Type and enter View Name -> click Finish button.
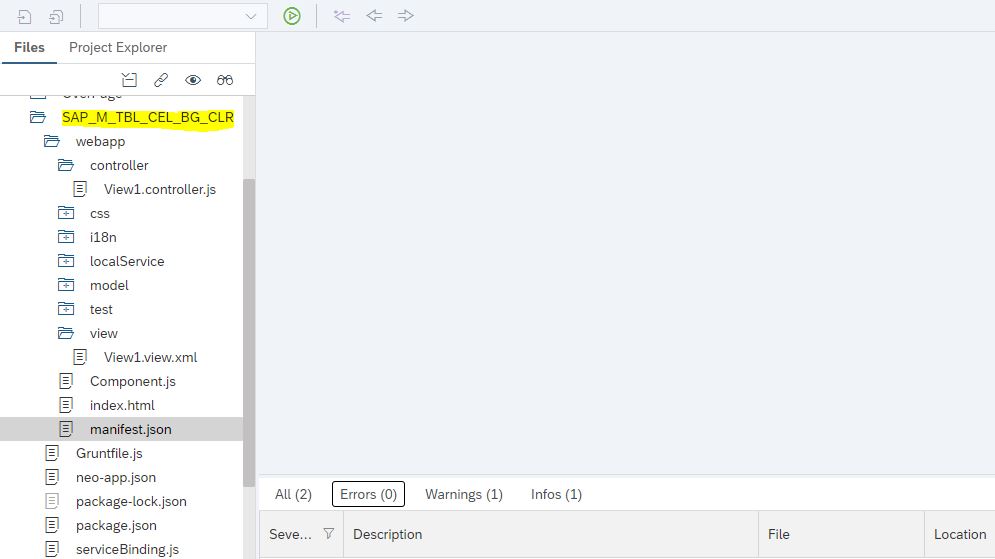
5. Below is our created project structure.
6. Create Destination to Consume OData Service.
Now we create a destination to consume the OData Service. In our case we will be using the Northwind’s V2 OData Service. Below is the link for OData Service:
https://services.odata.org/V2/Northwind/Northwind.svc/
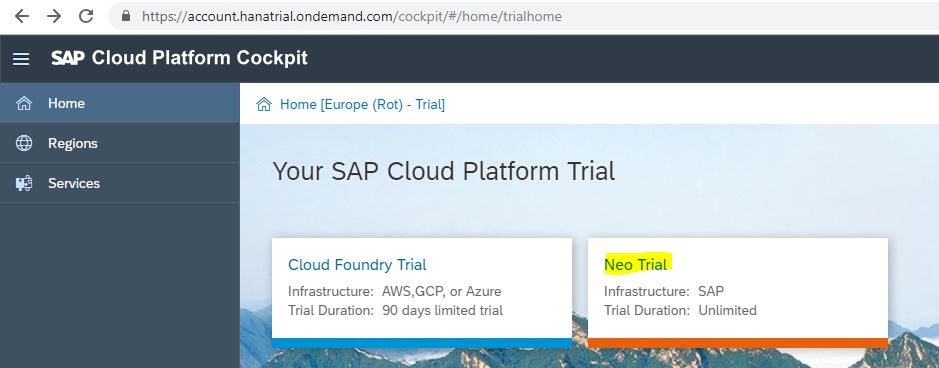
6.1 Log into SAP Cloud Platform Cockpit.
Click on Neo Trial.
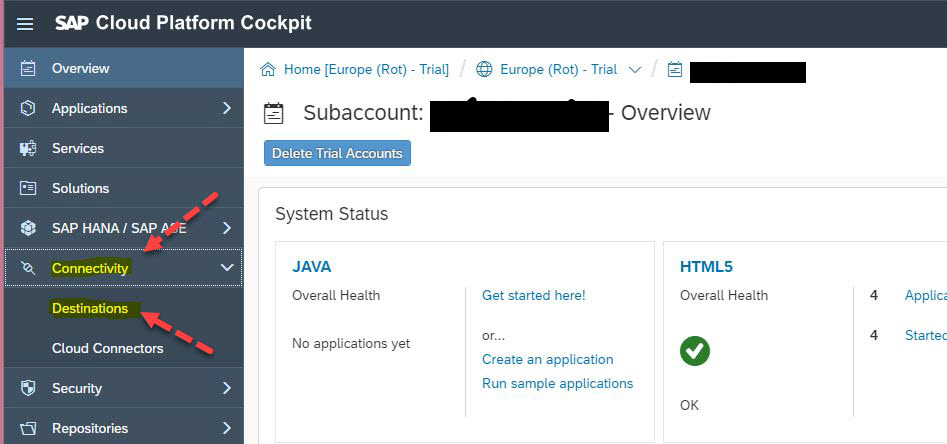
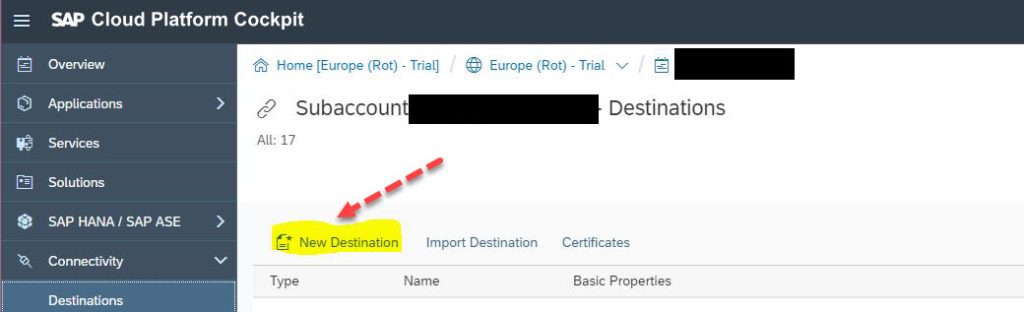
6.2 Click on Connectivity in the right hand side master list and expand it.
Click on Destinations.
6.3 Click on New Destination.
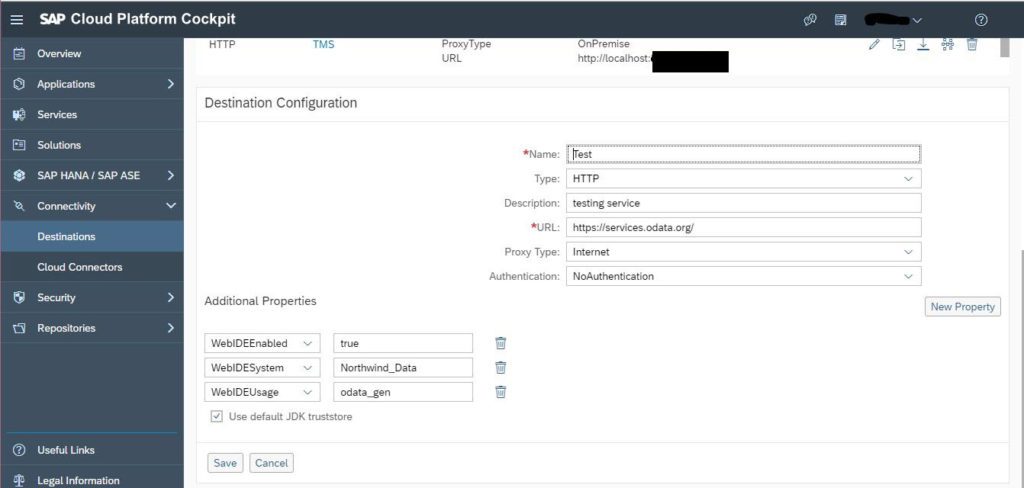
6.4 Enter all the details as show in the below screenshot.
Add the Additional Property by clicking on New Property button.
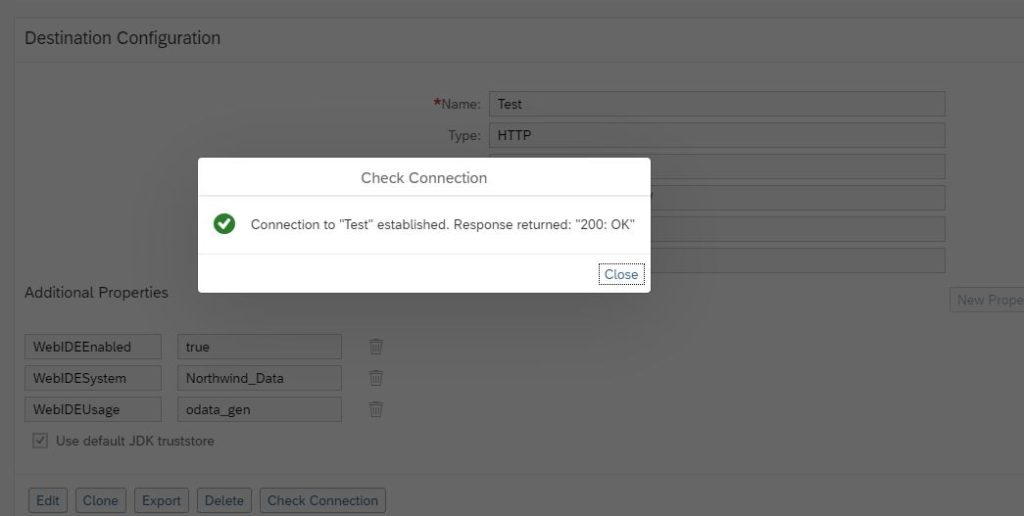
6.5 Click on Save button -> Click on Check Connection button.
6.6 Refresh your SAP Web IDE.
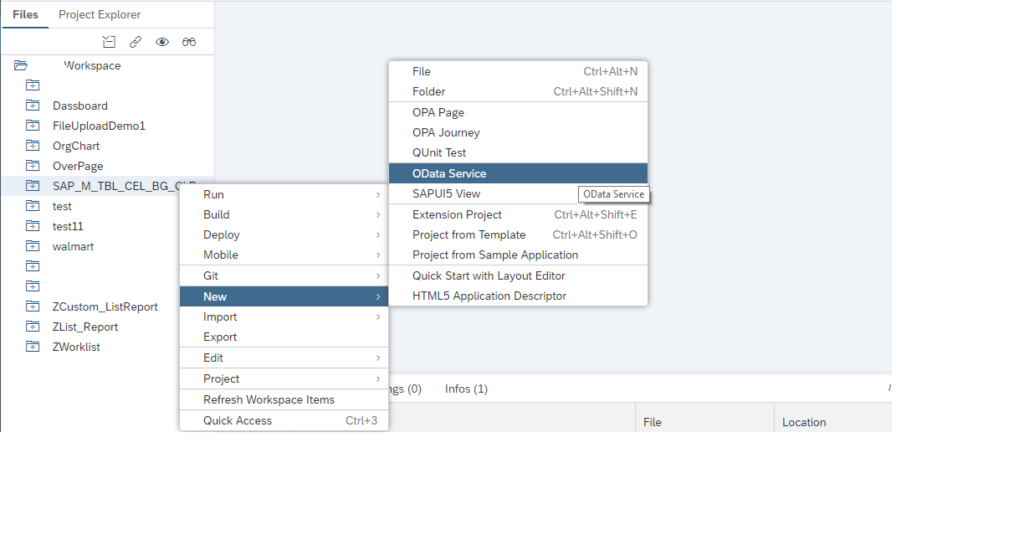
7. Now we will create the OData Service for our project.
Right click on project -> New -> OData Service.
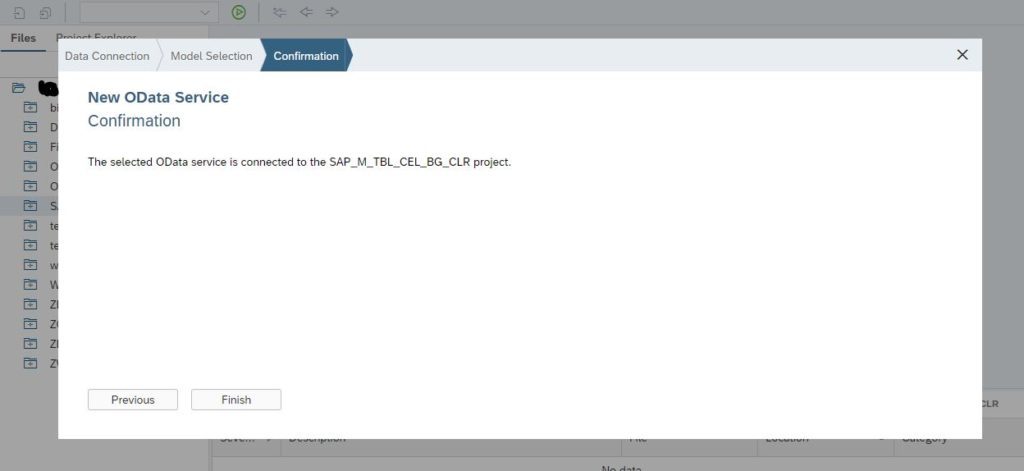
8. Data Connection, Model Selection and Confirmation
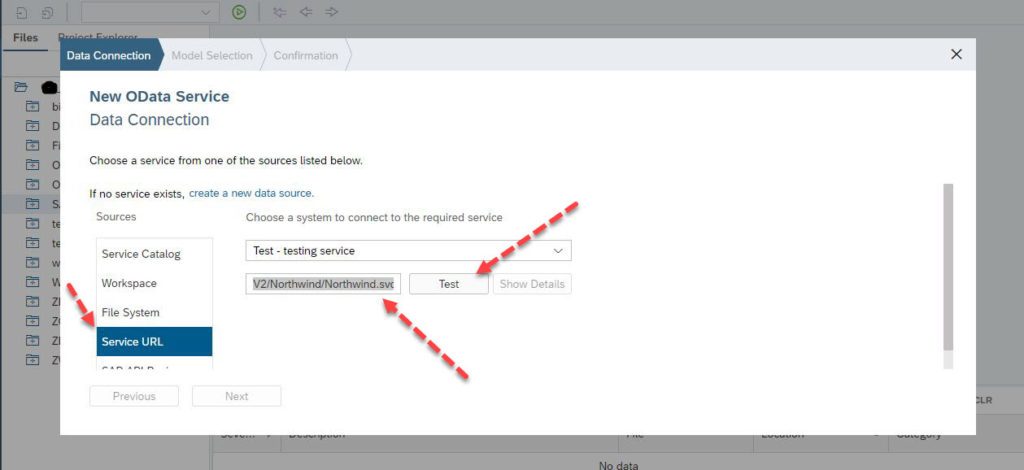
We will get a Pop Up consisting of 3 tabs. Data Connection, Model Selection and Confirmation. Under the Data Connection tab Select Service URL from the Sources, Choose a system from drop-down to select the service.

9. Data Connection
Paste V2/Northwind/Northwind.svc/ in the corresponding Service URL field and click on the Test button to test the service.
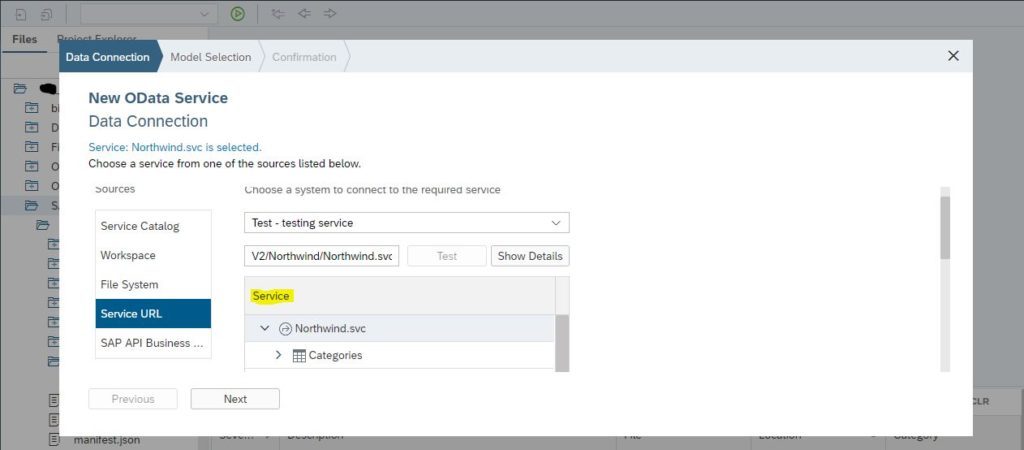
10. List of Available OData Service to Consume
After testing the service, if the connection is successful then you will get a list of services. Select your service. In our case we will select Northwind.svc -> click Next button.
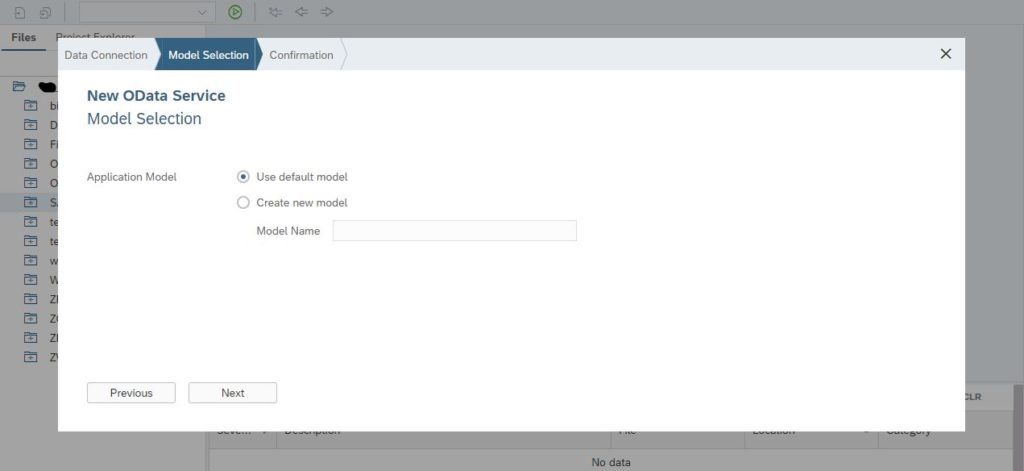
11. Model Selection
In the Model Selection Tab we have 2 options: “Use default model” and “Create new model“.
In our case we will select “Use default model” -> click Next -> click Finish.
You can also select “Create new model” but you will have to keep in mind to bind the data in views using your model name. For example, if you created a new model named “myModel”, then your data binding in view would look like this below:
<code><Table id="idProductsTable" inset="false" items="{ path: 'myModel>/Products'}" updateFinished="onUpdateFinished"></code>And for default model data binding in view would look like this below:
<code><Table id="idProductsTable" inset="false" items="{ path: '/Products'}" updateFinished="onUpdateFinished"></code>How, you now understand the difference between how to handle default and your new model.
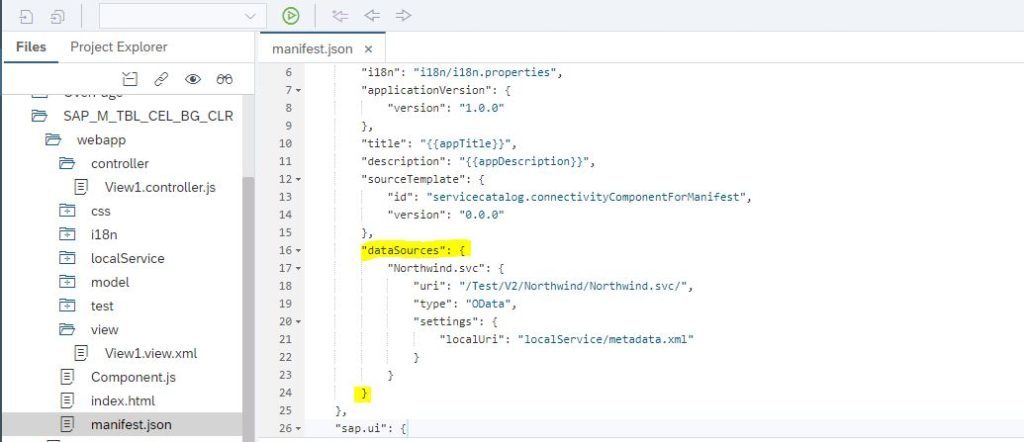
12. Data Source
After creating the OData Service dataSources property will be added under the sap.app namespace. See in below screenshot how it would look like.
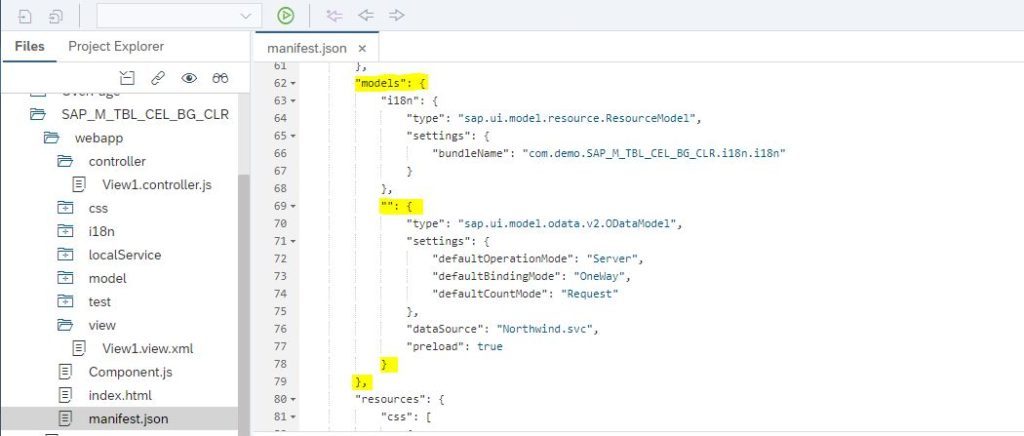
13. Manifest.json
Also an unnamed model object will be added inside the model property. See in below screenshot how it would look like.
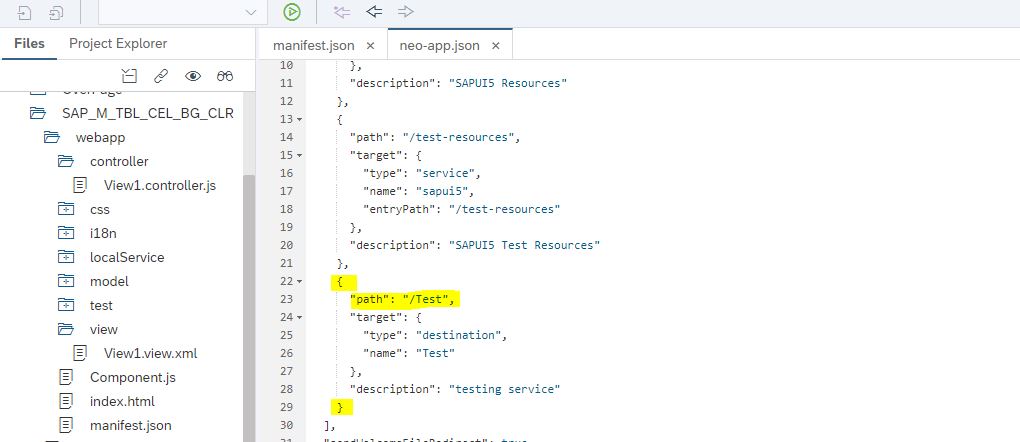
14. Neo-App.JSON
Also in neo-app.json file an object will be added against our datasource in manifest.json file. See the below screenshot how it would look like.
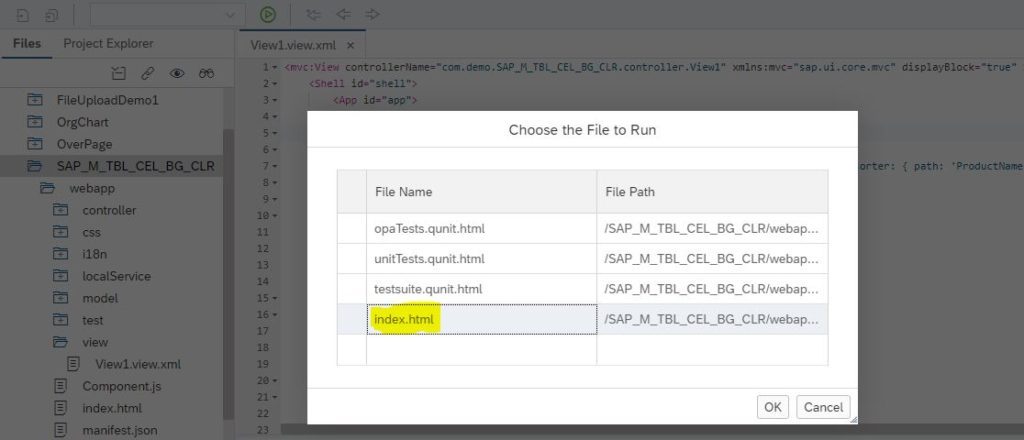
15. Test the Index.html
Now right click on the project -> click on Run -> Run as index.html.
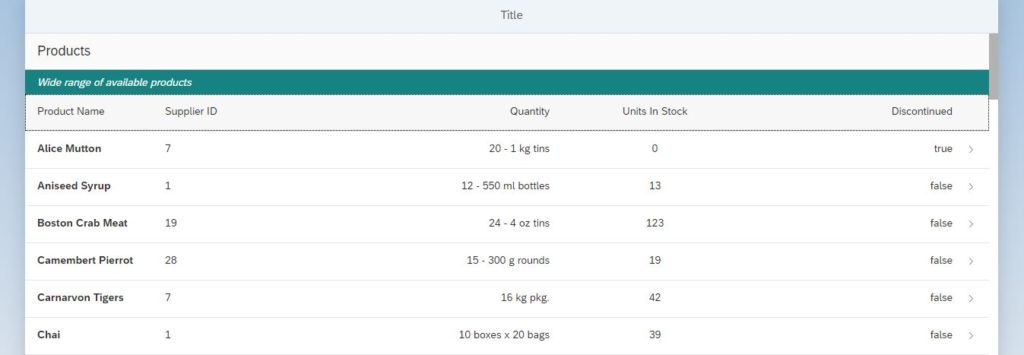
16. First Look of the Output
Wooohoooo!! Below is our output screen. Wait, Wait… grrrrrrr… We have still not achieved our goal of coloring the cells based on conditions.
17. Business Logic in Controller.js
SAPUI5 is not magic. We need to write our logic to change the cell color of the rows differently. We will write the logic in the View1.controller.js to get our required result. Below is the controller code for your reference.
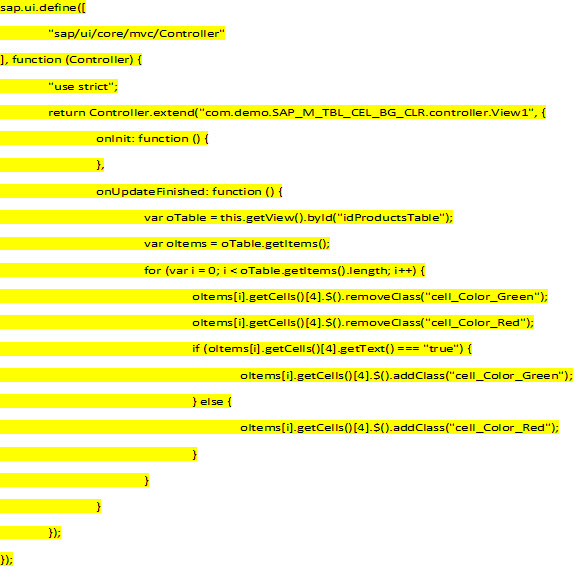
- updateFinished is the event of sap.m.Table which is fired after items binding is updated and processed by the control. Now let us understand the code inside the function onUpdateFinished line by line.
<code>var oTable = this.getView().byId("idProductsTable");</code>oTable holds the object of sap.m.Table having id idProductsTable
<code>var oItems = oTable.getItems();</code>oItems holds the table items. getItems() method returns the items contained within this sap.m.Table control.
- Using the for loop (for (var i = 0; i < oTable.getItems().length; i++) we are iterating the table the length of items, i.e. till the no. of rows. And inside the loop we do following condition checking.
<code>oItems[i].getCells()[4].$().removeClass("cell_Color_Green");</code>
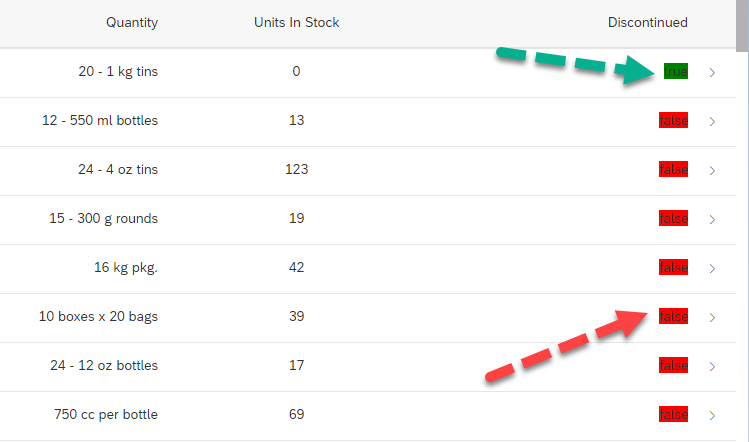
<code>oItems[i].getCells()[4].$().removeClass("cell_Color_Red"); </code>Now we have to fulfill the condition that if the discontinued column (or cell) of each row of the table has value true then the cell background color should be Green and if it has value false then the the cell background color should be Red.
For each of the background color we have two separate classes. So initially we are removing both the classes then adding it based on the condition. Below if the code for condition based coloring of cell in each row of table.
<code>if (oItems[i].getCells()[4].getText() === "true") {
     oItems[i].getCells()[4].$().addClass("cell_Color_Green");
}</code>
Here getCells()[4] contains the discontinued column and getText() returns the text in that cell. If the text in the cell is true then for that row’s cell we will add the class “cell_Color_Green”
Else we will add the class “cell_Color_Red”.
<code>else {
	oItems[i].getCells()[4].$().addClass("cell_Color_Red");
     }</code>
Finally, we are done with the coloring. Fewwwww!!!
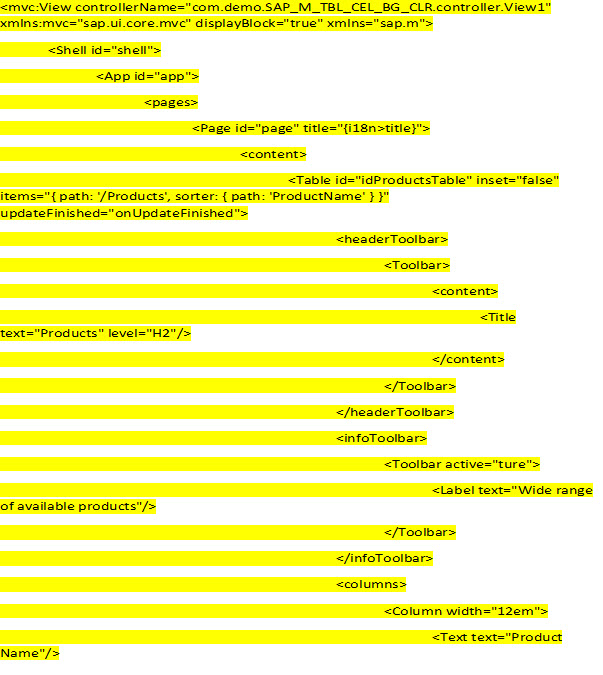
18. Below is the code in View1.xml.
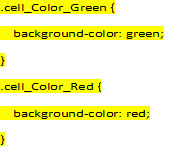
19. Below is the code from style.css file.
20. Time for Output
Now it’s the time to see our desired output screen.
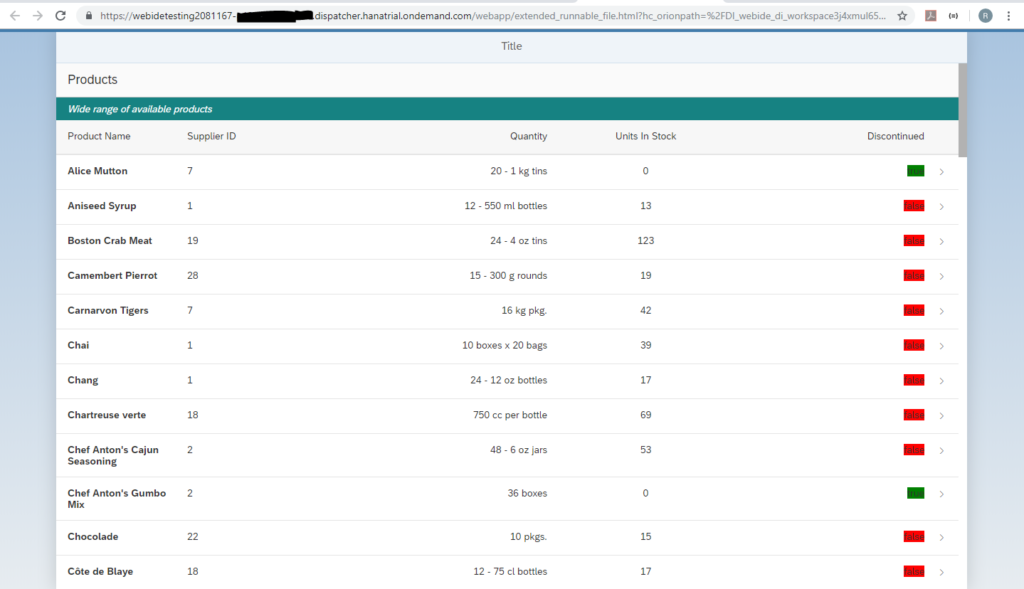
For your clarity sharing few more screens shots.