SAPUI5 applications have the flexibility to contain reusable blocks of UI called as Components. These components are fully functional SAPUI5 applications. So in other words, SAPUI5 applications can contain other SAPUI5 applications using the concept the Component Containers. If you have worked in SAP Web Dynpro Applications, this should ring some bells (Component Usage).
Imagine, there is a frequent requirement of displaying a PDF document in an iframe.
WHAT SHOULD BE OUR STRATEGY?
Developing an application for ‘Displaying PDF in an iframe‘ separately and then reusing this PDF Displaying app in multiple other applications as and when required. This should be our design!! You may relate it to the Sub-Routines (PERFORMs) or Function Modules or Class Methods. What are their use? Re-usability.
Similarly there can be a scenario like document upload and download which is useful in multiple applications. So such small and self-contained piece of application can be developed separately to be consumed in various other applications.
In this tutorial, I will try to show step by step process of consuming one UI5 component in another UI5 application and more importantly, passing data between the two. We shall take a simple example of a Child Component accepting name of color from its Parent Application and displaying received color name on the UI.
ON YOUR MARK, GET SET, GO..
Prerequisites:
- You have Eclipse installed on your computer and you have installed ‘SAP development for Eclipse’ as a new software in your eclipse installation.
- You have access to SAP front end server onto which you are going to deploy your SAPUI5 application for testing
Step 1: Create Child Component (UI Application)
Create Child Component which accepts color name as parameter from Parent Application and displays that name on the UI.
On Eclipse, go to File->New->Project…
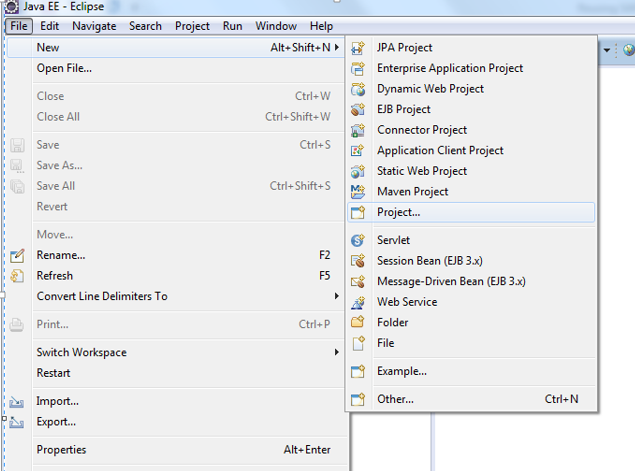
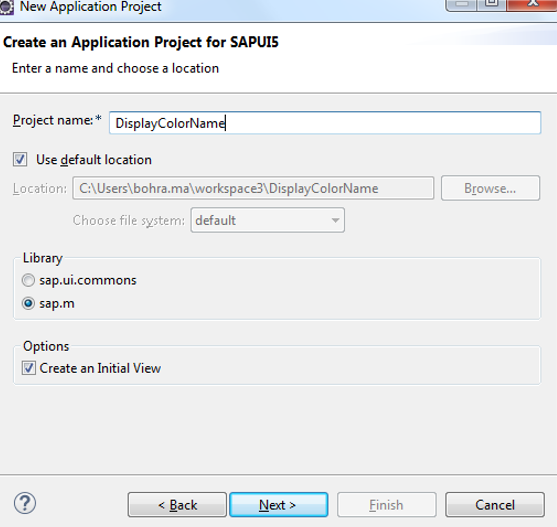
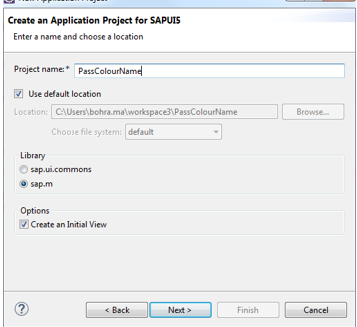
Select SPAUI5 application project from the Wizard
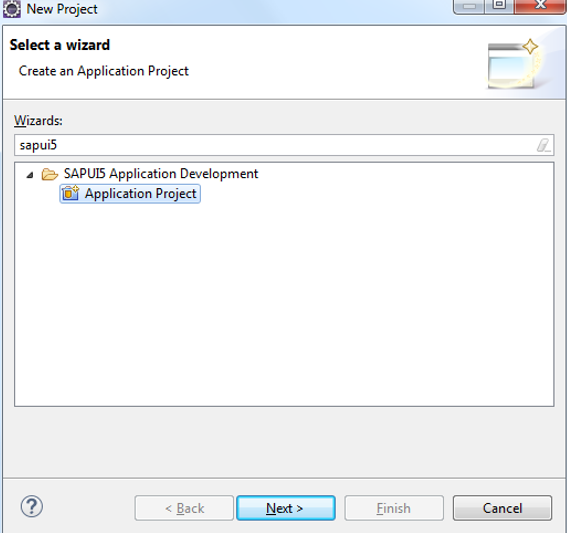
Enter project name, let the default selection be the same and click on next.
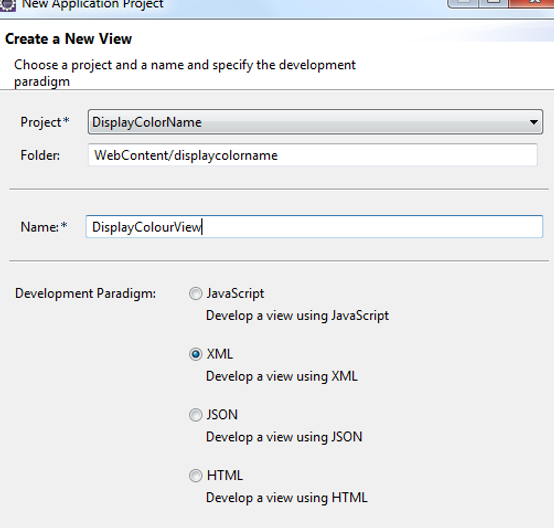
Enter name of the view to be created. Select Type of the view. I’ve selected XML for view type.
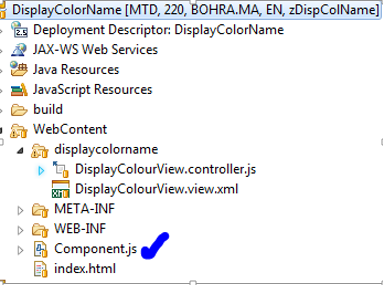
Click Finish. A new project will start appearing the project explorer view of Eclipse shown below.
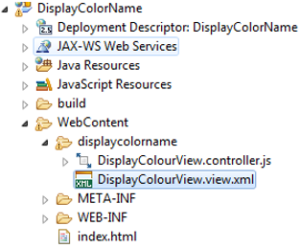
DisplayColourView.xml will be opened by default and will wait for developer to write xml code.
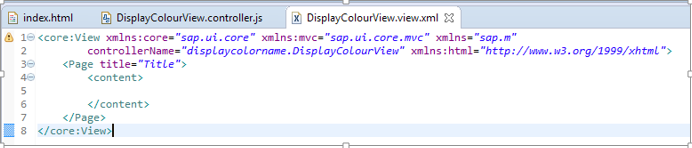
Within the content section, you can write xml code to display a name of the Color received as input from Parent component which we will create in the subsequent section of this tutorial.
HOW TO PASS DATA FROM ONE COMPONENT TO ANOTHER
There are 3 ways of passing data from one component to another
- Through eventBus
- Through a core Model
- Through a propagate Model
In this tutorial, we will use eventBus mechanism to pass data between the 2 Components.
Through eventBus
Write below code in onInit() hook method of DisplayColourView.controller.js
onInit: function() {
sap.ui.getCore().getEventBus().subscribe("exchange",
"data", function(channel, event, oEventData){
jsonModel = new sap.ui.model.json.JSONModel({
colour : oEventData
});
this.getView().setModel(jsonModel, "myModel");
}, this);
},
Are the above lines of code Geeky for you ABAPers? Do not worry, I am here at your rescue to make you understand each line of syntax. Just read the below section.
In the above code, we are reading data from the eventBus by subscribing to an event called ‘exchange‘. This event will be raised by Parent component and will pass data to its subscriber. And then we are setting eventData to colour variable of jsonModel. Then we are setting jsonModel to DisplayColourName view and giving it a name called myModel.
Binding
Now we should bind attributes from myModel to the view as shown below.
<core:View xmlns:core="sap.ui.core" xmlns:mvc="sap.ui.core.mvc" xmlns="sap.m"
controllerName="DisplayColorName.displaycolorname.DisplayColourView"
xmlns:html="http://www.w3.org/1999/xhtml">

		<html:style>
		#__xmlview1--id{
		margin-left: 39rem;
    	margin-top: 9rem;
    	font-size: 10rem;
    	font-style: italic;
		}
		</html:style>
		 <App id="fioricontent">
	<Page title="Display Colour Name">
		<content>
	<Text xmlns="sap.m"
	id="id"
	busy="false"
	busyIndicatorDelay="1000"
	visible="true"
	fieldGroupIds=""
	text="{myModel>/colour}"
	textDirection="Inherit"
	wrapping="true"
	textAlign="Begin"
	validateFieldGroup="">
	</Text>
		</content>
	</Page>
	</App>
</core:View>
Did you take notice of the line text=”{myModel>/colour}” above?
Next we will create a Component to encapsulate the functionality of this child application. To do this, create a JS file by the name Component.js in WebContent folder of the project as shown below.
In the Component.js file, write below code.
sap.ui.core.UIComponent.extend("DisplayColorName.Component", {

	metadata: {
	    "name": "DisplayColorName",
	    "dependencies": {
	      "components": []}
	    },
createContent: function() {
    var oViewData = {
      component: this
    };
    var oView = sap.ui.view({
      viewName: "DisplayColorName.displaycolorname.DisplayColourView",
      type: sap.ui.core.mvc.ViewType.XML,
      viewData: oViewData
    });
     return(oView);
  },
  init: function() {
    // call super init (will call function "create content")
    sap.ui.core.UIComponent.prototype.init.apply(this, arguments);

    // always use absolute paths relative to our own component
    // (relative paths will fail if running in the Fiori Launchpad)
    var sRootPath = jQuery.sap.getModulePath("DisplayColorName");
  },
});
Next, we will tell index.html file to load Component.js when the application is run. By default, when the application project is created, an app entity is created and a page entity is created in index.html file and the app entity is placed in the body of index.html.
We need to comment default generated code and write our code to load Component.js in the html body of index.html file. Refer below code to do this.
<!DOCTYPE HTML>
<html>
<head>
<meta http-equiv="X-UA-Compatible" content="IE=edge">
<meta http-equiv='Content-Type' content='text/html;charset=UTF-8'/>
<script src="resources/sap-ui-core.js"
id="sap-ui-bootstrap"
data-sap-ui-libs="sap.m"
data-sap-ui-theme="sap_bluecrystal"
data-sap-ui-xx-bindingSyntax="complex"
data-sap-ui-resourceroots='{"DisplayColorName": "./"}'>
</script>
<!-- only load the mobile lib "sap.m" and the "sap_bluecrystal" theme -->
<script>
//sap.ui.localResources("displaycolorname");
//var app = new sap.m.App({initialPage:"idDisplayColourView1"});
//var page = sap.ui.view({id:"idDisplayColourView1", viewName:"displaycolorname.DisplayColourView", type:sap.ui.core.mvc.ViewType.XML});
//app.addPage(page);
//app.placeAt("content");
sap.ui.getCore().attachInit(function() {
new sap.m.Shell({
app: new sap.ui.core.ComponentContainer({
height : "100%",
name : "DisplayColorName"
})
}).placeAt("content");
});
</script>
</head>
<body class="sapUiBody" role="application">
<div id="content"></div>
</body>
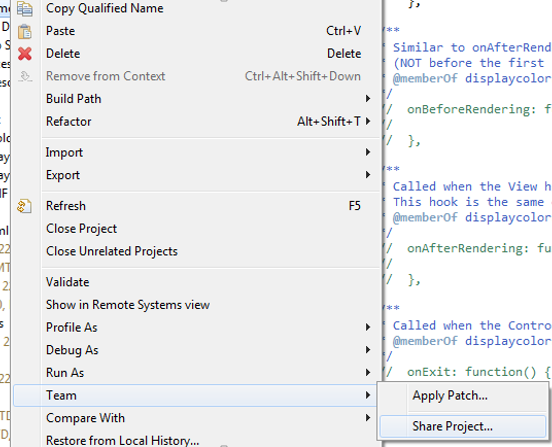
</html>Next we will deploy this component on server and then we will consume it another SAPUI5 application. Right Click on Project->Team->Share Project.
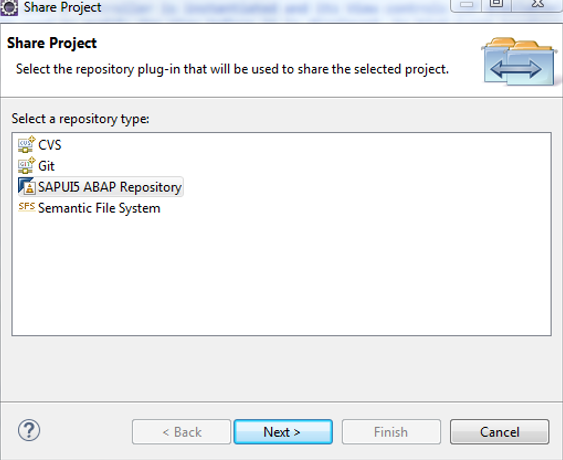
Select SAPUI5 ABAP Repository, click Next.
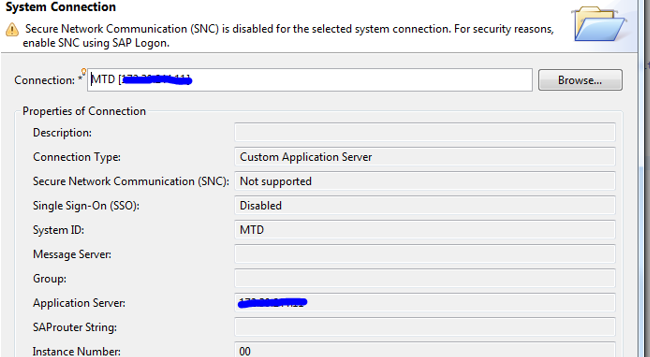
Select System connection
Give technical name to the project using which it will create BSP application in the system.
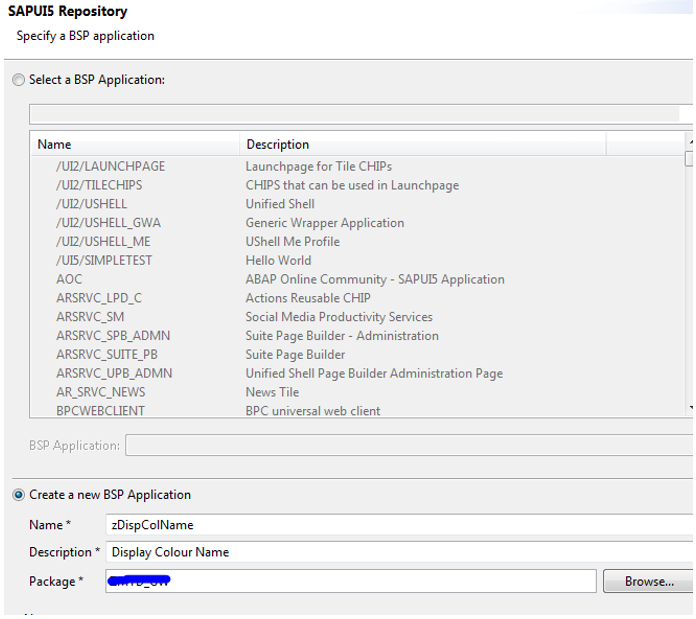
Create TR to capture this activity of creating a new SAPUI5 application in the server.

Submit the changes to the server.
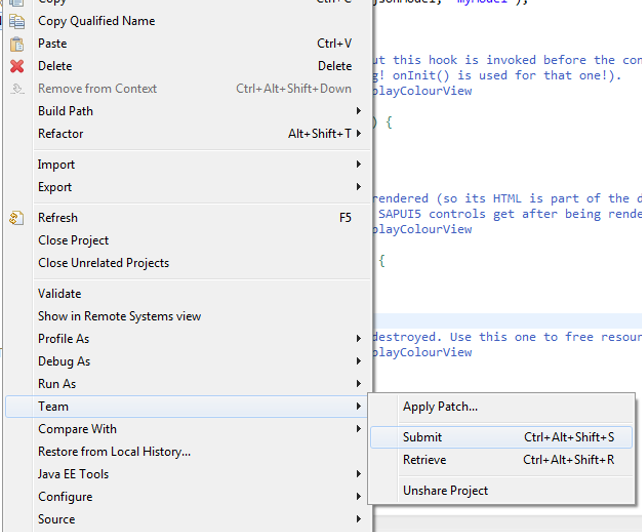
Save and submit the changes to the server and test. Right click on project, Select Run As->Run on ABAP server, below URL will open in browser.
http://hostname.domain:8000/sap/bc/ui5_ui5/sap/zdispcolname/index.html
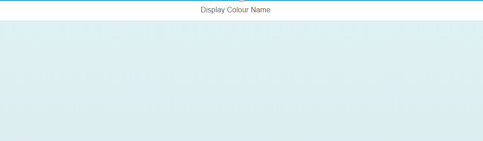
Output.
Step 2: Create Parent Component (UI Application to Consume the Child Component)
Create Parent Component which will have 3 buttons viz Red, Green and Blue. On click on button, respective colour name will be passed to the child component and displayed on child component.
Create a new SAPUI5 application (Parent) project called PassColourName.
Follow the same steps as followed while creating the child component in Step 1. Write below code in Component.js
sap.ui.core.UIComponent.extend("PassColourName.Component", {
	metadata: {
	    "name": "PassColourName",
	    "dependencies": {
	      "components": []}
	    },
createContent: function() {
    var oViewData = {
      component: this
    };
    var oView = sap.ui.view({
      viewName: "PassColourName.passcolourname.PassColourName",
      type: sap.ui.core.mvc.ViewType.XML,
      viewData: oViewData
    });
     return(oView);
  },
  init: function() {
    // call super init (this will call function "create content")
    sap.ui.core.UIComponent.prototype.init.apply(this, arguments);
    // always use absolute paths relative to our own component
    // (relative paths will fail if running in the Fiori Launchpad)
    var sRootPath = jQuery.sap.getModulePath("PassColourName");
  },
});
Write below code in index.html
<!DOCTYPE HTML>
<html>
	<head>
		<meta http-equiv="X-UA-Compatible" content="IE=edge">
		<meta http-equiv='Content-Type' content='text/html;charset=UTF-8'/>

		<script src="resources/sap-ui-core.js"
				id="sap-ui-bootstrap"
				data-sap-ui-libs="sap.m"
				data-sap-ui-theme="sap_bluecrystal"
				data-sap-ui-resourceroots='{"PassColourName": "./"}'>
		</script>
		<!-- only load the mobile lib "sap.m" and the "sap_bluecrystal" theme -->

		<script>
				//sap.ui.localResources("passcolourname");
				//var app = new sap.m.App({initialPage:"idPassColourName1"});
				//var page = sap.ui.view({id:"idPassColourName1", viewName:"passcolourname.PassColourName", type:sap.ui.core.mvc.ViewType.XML});
				//app.addPage(page);
				//app.placeAt("content");

				  sap.ui.getCore().attachInit(function() {
				    new sap.m.Shell({
				      app: new sap.ui.core.ComponentContainer({
				        height : "100%",
				        name : "PassColourName"
				      })
				    }).placeAt("content");
				  });
		</script>
	</head>
	<body class="sapUiBody" role="application">
		<div id="content"></div>
	</body>
</html>
Write below code in PassColourName.view.xml file
<core:View xmlns:core="sap.ui.core" xmlns:mvc="sap.ui.core.mvc"
	xmlns="sap.m" controllerName="PassColourName.passcolourname.PassColourName"
	xmlns:html="http://www.w3.org/1999/xhtml">
		<Page title="Parent Component">
		<content>
			<VBox xmlns="sap.m" id="vboxid">
		<items>
		<Button xmlns="sap.m" id="redid" text="Red" press="clickbutton"></Button>
		<Button xmlns="sap.m" id="greenid" text="Green" press="clickbutton"></Button>
		<Button xmlns="sap.m" id="blueid" text="Blue" press="clickbutton"></Button>

			<core:ComponentContainer id="conpcontid"
			name="DisplayColorName" manifestFirst="true" component="zdispcolname">
			</core:ComponentContainer>
		</items>
			</VBox>
		</content>
	</Page>
</core:View>
In the above code of Parent Component’s view, we have added 3 buttons and a Component container in a vBox. VBOX arranges all its items in a vertical manner. Component Container renders the child Component we created in Step 1 of this tutorial. We have associated press event of buttons to an action handeler called ‘clickbutton‘. Let us write controller code now.
sap.ui.controller("PassColourName.passcolourname.PassColourName", {
/**
* Called when a controller is instantiated and its View controls (if available) are already created.
* Can be used to modify the View before it is displayed, to bind event handlers and do other one-time initialization.
* @memberOf passcolourname.PassColourName
*/
	onInit: function() {
	jQuery.sap.registerModulePath("DisplayColorName", "../zdispcolname");
	},
	clickbutton:function(oEvent)
	{
		sap.ui.getCore().getEventBus().publish("exchange",
				"data", oEvent.oSource.mProperties.text);
	}
In the controller code above, in the init method, we are telling Parent Component the technical name of Child component which is already deployed on the server. So that at runtime Parent Component should be able to find Child Component and render it within Component Container UI element. In the clickbutton action handeler, we are publishing an event called ‘exchange’ and passing the text of the Button which was clicked. This event has already been subscribed by Child Component in its default view’s onInit() method.
<core:ComponentContainer id="conpcontid"
name="DisplayColorName" manifestFirst="true" component="zdispcolname">
</core:ComponentContainer>
The above piece of code with ComponentContainer in the View and the below line of code in the controller do all the Magic..
jQuery.sap.registerModulePath("DisplayColorName", "../zdispcolname");Next, let us deploy Parent Application on the server and test. Once deployed, you should be able to access Parent Application using below URL (replace host name with your server’s host name)
http://hostname:8000/sap/bc/ui5_ui5/sap/zpasscolor/index.html
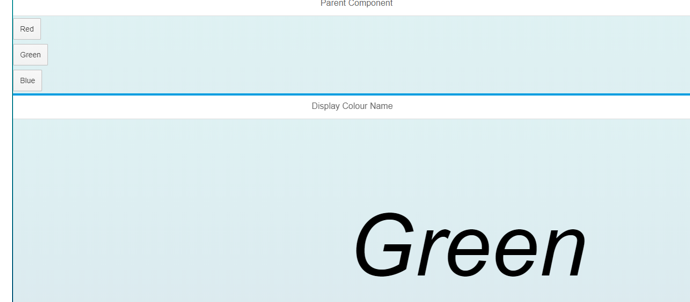
Output
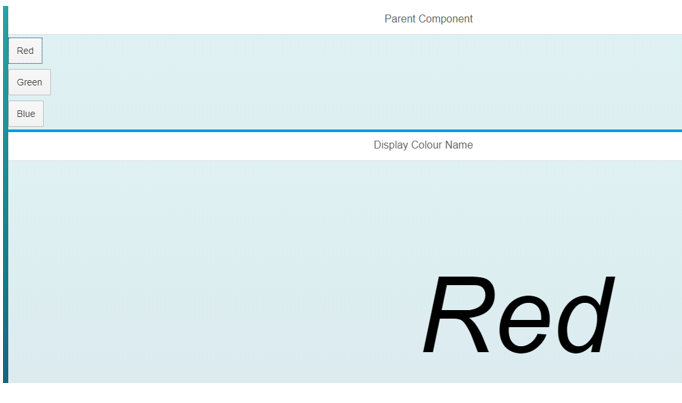
Click on Green button, ‘Green’ text will be passed to Child Component and will be displayed a text like below.