Are you one of them who is hearing Factory functions for the first time? Do not feel left out. Not many know about this term. Everyone is gradually learning and evolving. In this tutorial, we would understand Factory Functions and perform a hands on exercise using Factory Functions.
Let check what SAP says about factory functions?
Instead of hard-coding a single template control, we will use a factory function to generate different controls based on the data received at runtime. This approach is much more flexible and allows complex or heterogeneous data to be displayed.
Let me make it simple for you….Factory in general terms, Consumes the raw material and Produces something good out of it.
So our main motive here is same …give our model data one by one to our factory function and then based on dynamic data we can display our controls or make our control more appealing.
The factory function is a more powerful approach for creating controls from model data. The factory function is called for each entry of a control’s aggregation, and the developer can decide whether each entry shall be represented by the same control with different properties or even by a completely different control for each entry.
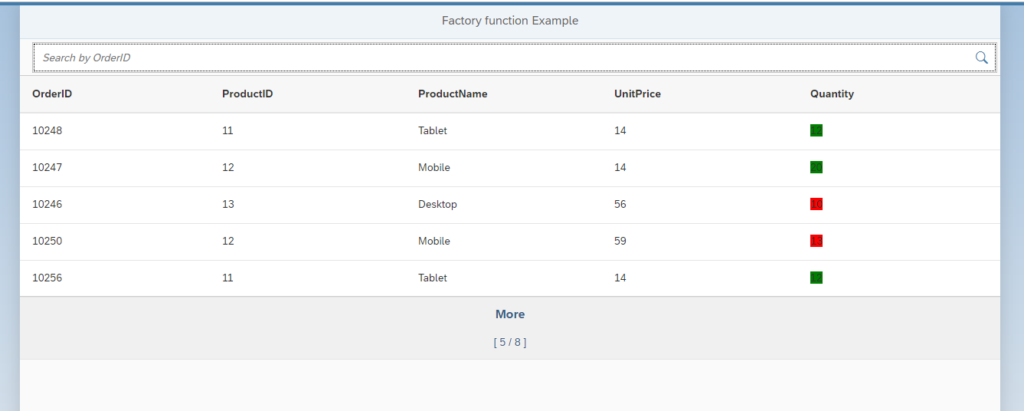
Let me consider a case where we want to display a table with one column where it will highlight the row or display some more control in same column.
The factory function comes with the parameters sId, which should be used as an ID for the new control, and oContext, which is for accessing the model data of the entry. The returned object must be of type sap.ui.core.Element.
Exercise Time!!
Enough of theory part: let’s produce something out of this factory. ?
Create a project using template.
STEP1: Create UI5 Project from Template
Create project from template -> select SAPui5 Application.
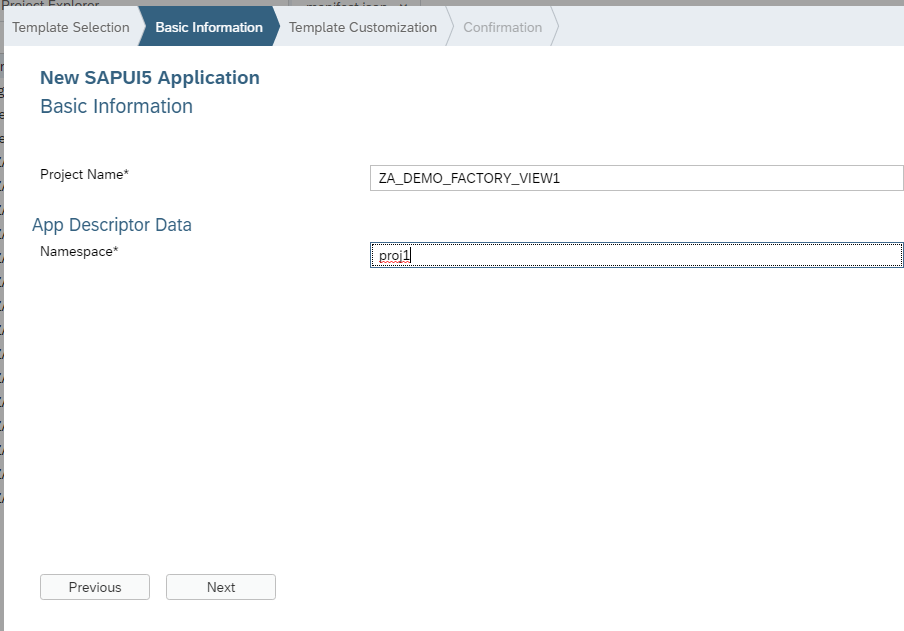
Enter view details.
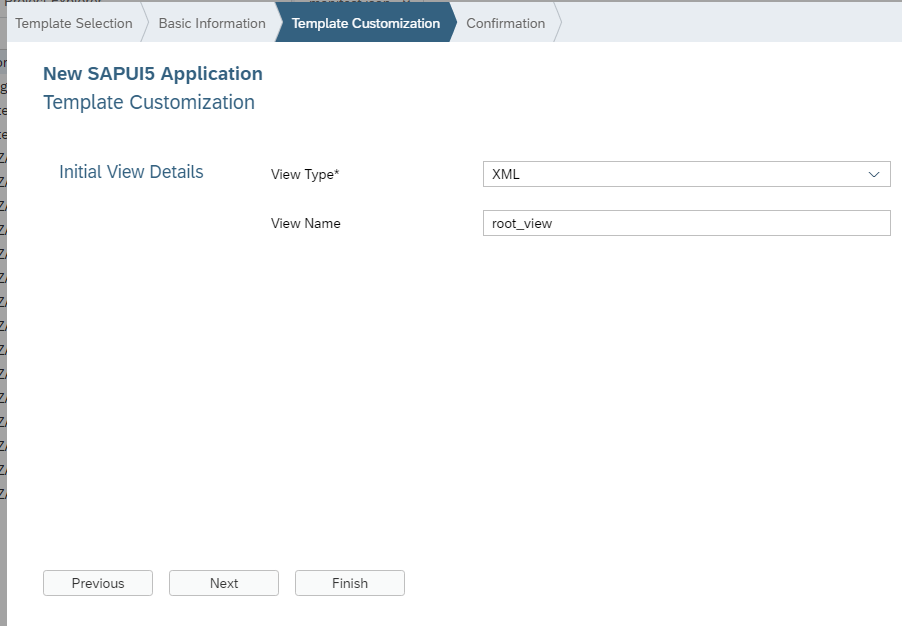
Click on finish.
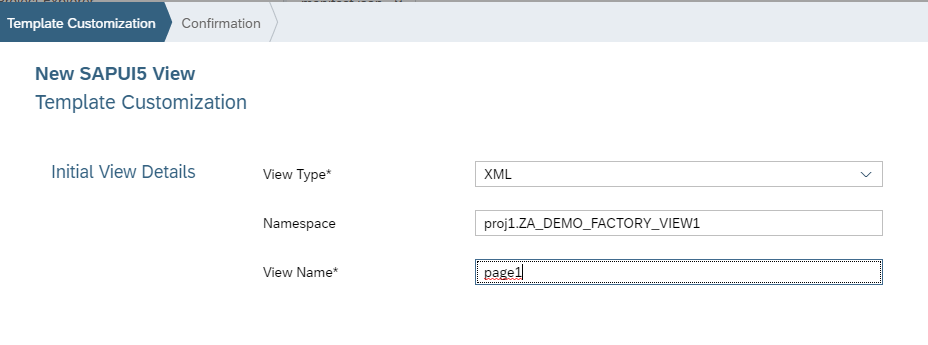
STEP2: Create one more View.
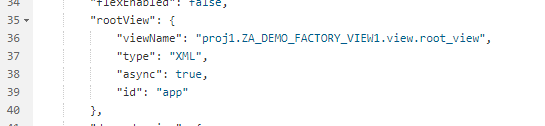
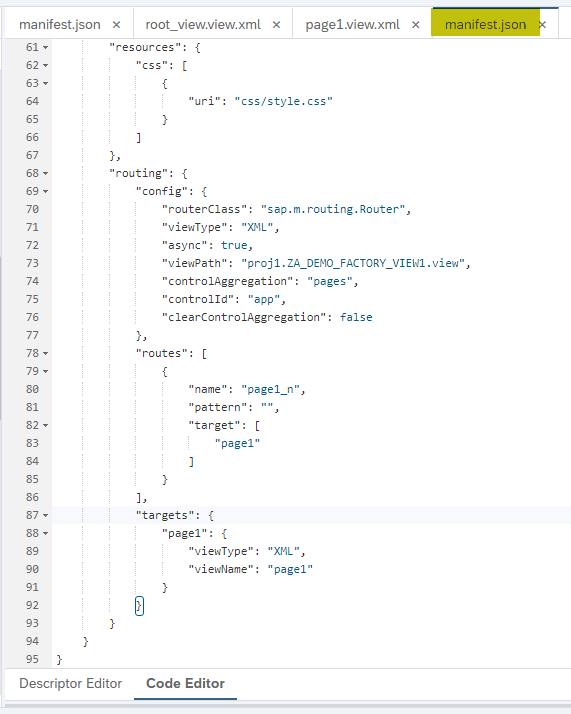
STEP3: Configure routes, routing and target in manifest. json:
RootView :
Routing and target:
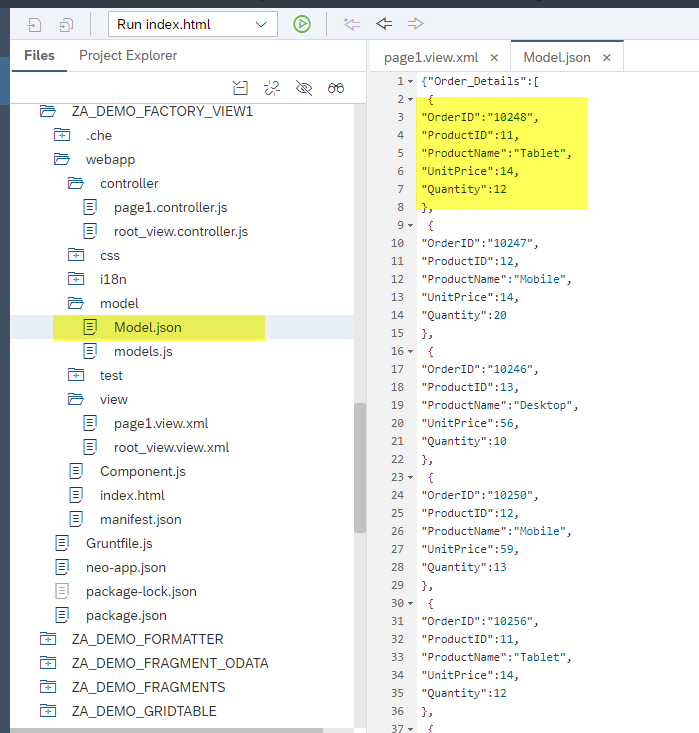
STEP4: Configure data model:
4.1 Create a file in under Model folder:
4.2 configure our model file in manifest.
As highlighted below.
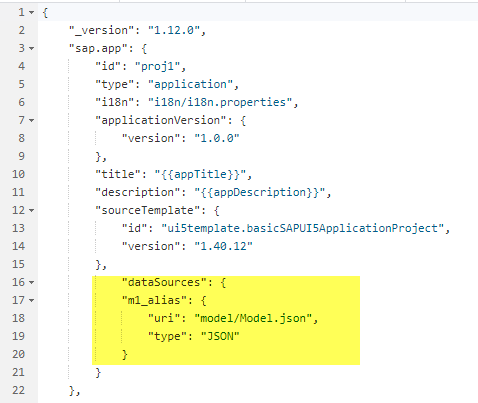
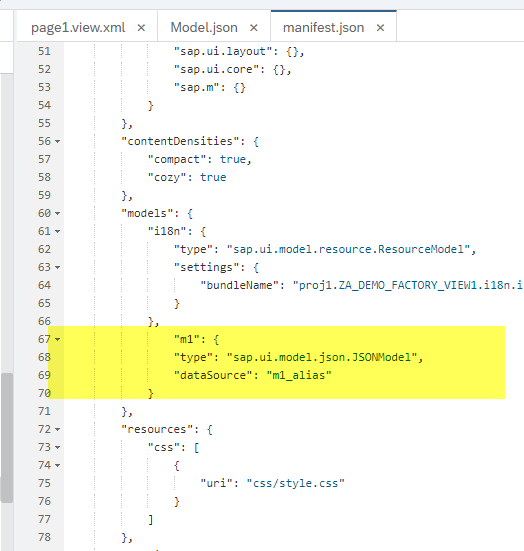
Since I gave my model name m1 we will use it in view to display data.
Let’s make few changes in our two viewS which we have created:
- root_view
- page1
My root_view looks like this:

My page1 view looks like this.
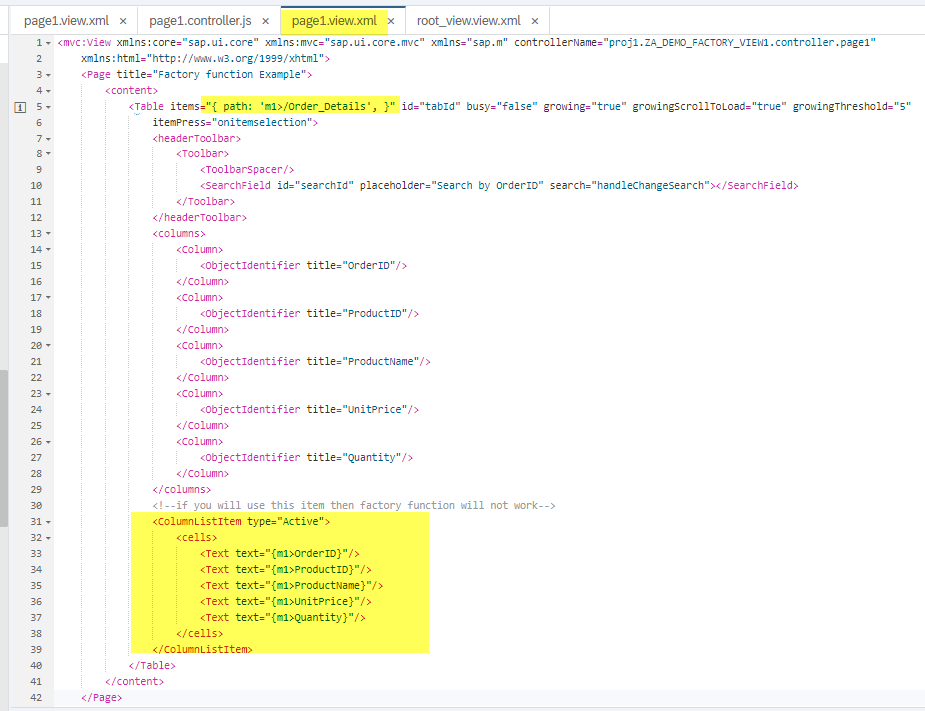
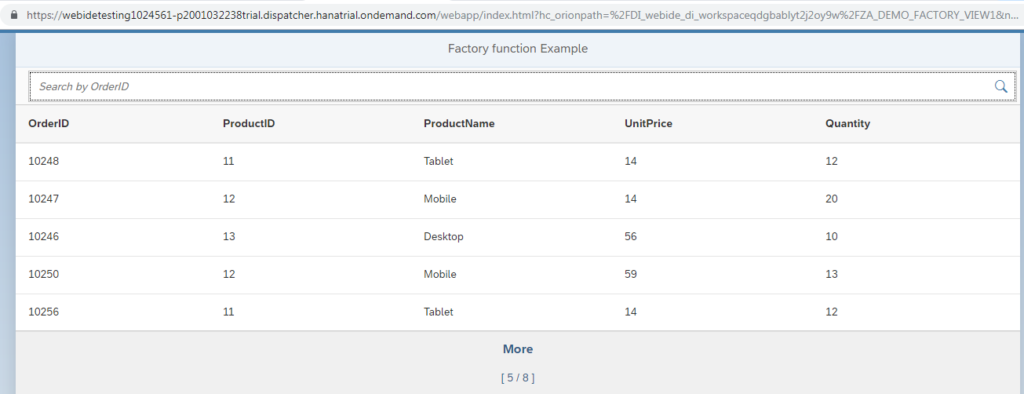
So I have specified the path for item and the output will be.
Now apply our factory function in view:
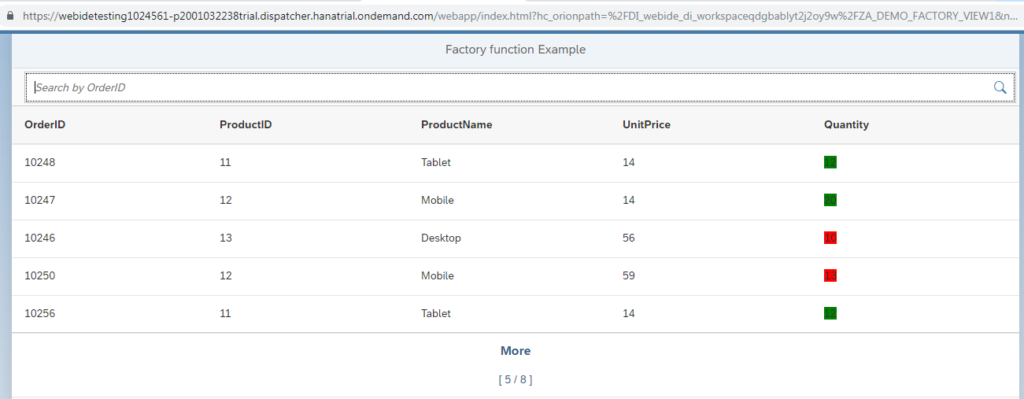
The requirement here is set color in Quantity column based on Unit price value. If the Unit price is more than 20 then display Quantity as red otherwise display as green.
Something like this.
First step is to create style to highlight.
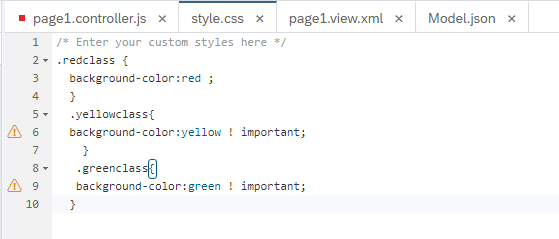
Make changes in View:
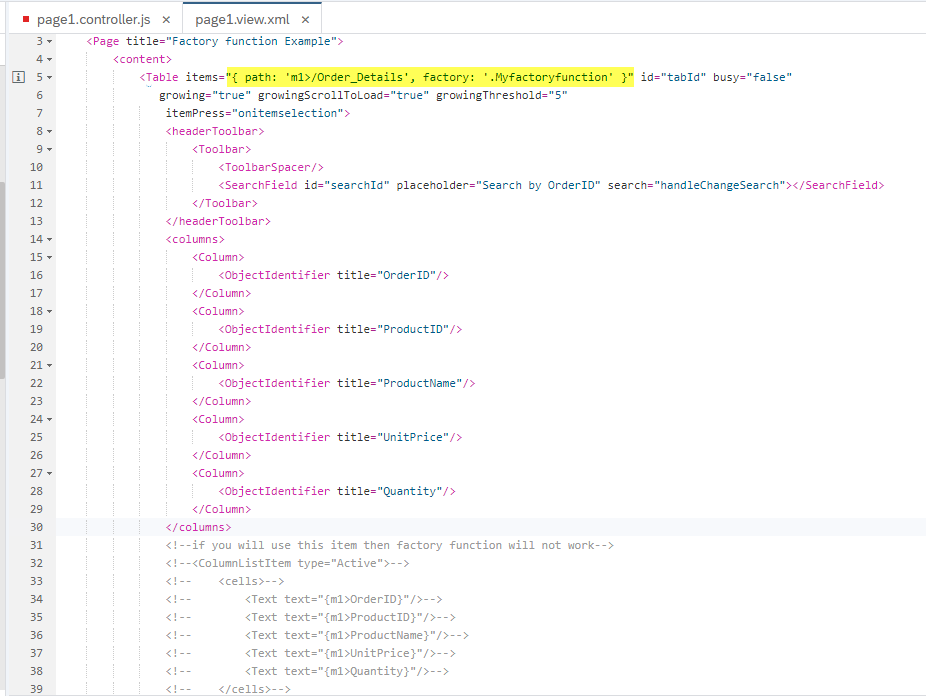
Path: Indicates the path for aggregation binding.
Factory: .Myfactoryfunction (create this function in page1’s controller with two parameters)
Note: Did you notice we have commented our Item bindings from View (lines 31 and below) … Why?
Because we will write the logic in our factory function.
Lets call this function in controller.
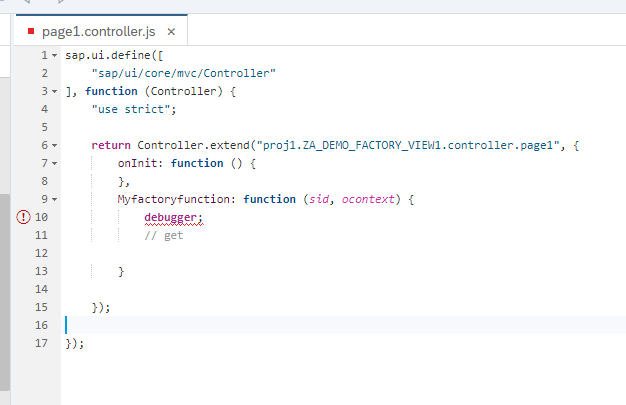
Put a debugger to check whether our factory function is working or not.
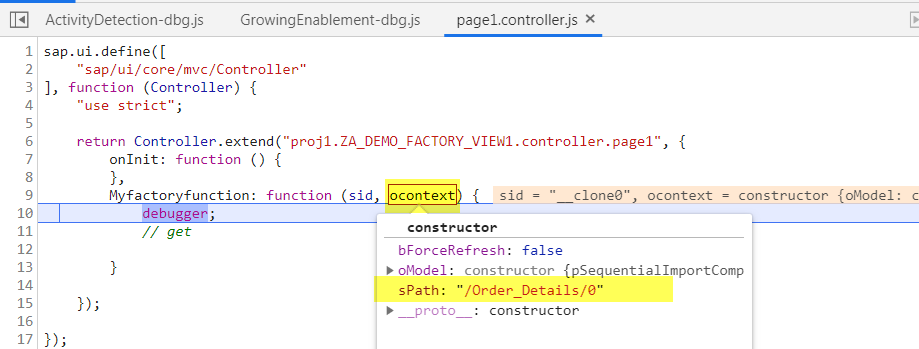
Cheers!!! It is going for first record.
Now you might face an error because factory function has a return parameter ….remember I have said factory is meant to produce something good from raw material.
So lets modify our code in our Myfactoryfunction in controller, bind our data here and see how it checks for one by one record.
Change the controller :

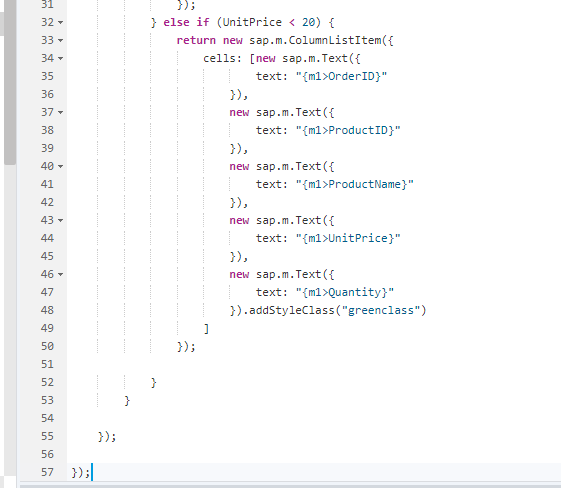
Here I have the parameter Ocontext which holds property value and we can compare this with some other property or static value like I have used 20 or more for unit price. The code above in IF ELSE clause is self-explanatory.
Check the output: