
This is our third part in our Binding Series in SAPUI5 and second part in Element Binding. By now we believe you know that element binding is used for binding single row. They are like binding a structure or work area in ABAP. In previous approach 1, we made use of the local JSON model. Today, we will look into the router method.
Scenario remains the same:
We are having a table displayed in a view. When user clicks on any item of the table, it should navigate to next view which should display a simple form. Basically, item is one row as work area in normal ABAP program. We are trying to display the item using Element Binding in SAPUI5(approach 2).
Element Binding: Approach – 2
Pass the Path in Router & Bind the Path to the Form
Steps:
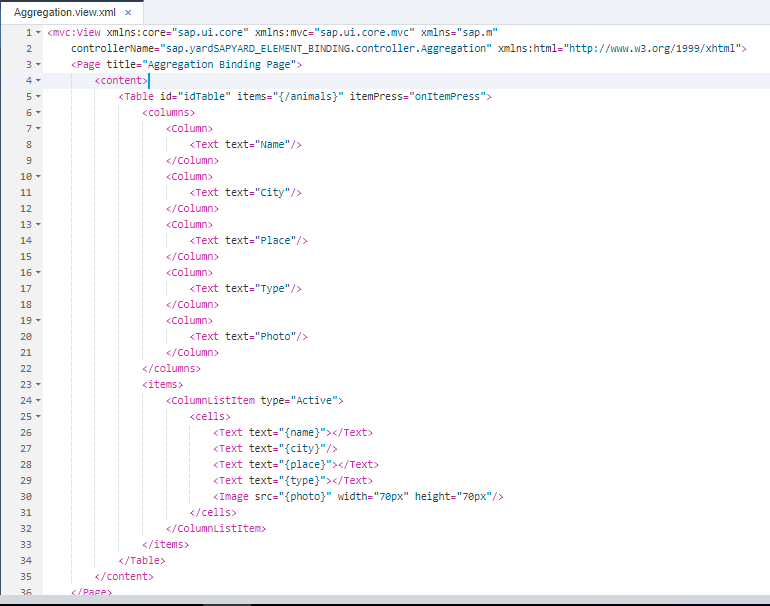
- Create view1 (Aggregation view) which contains table
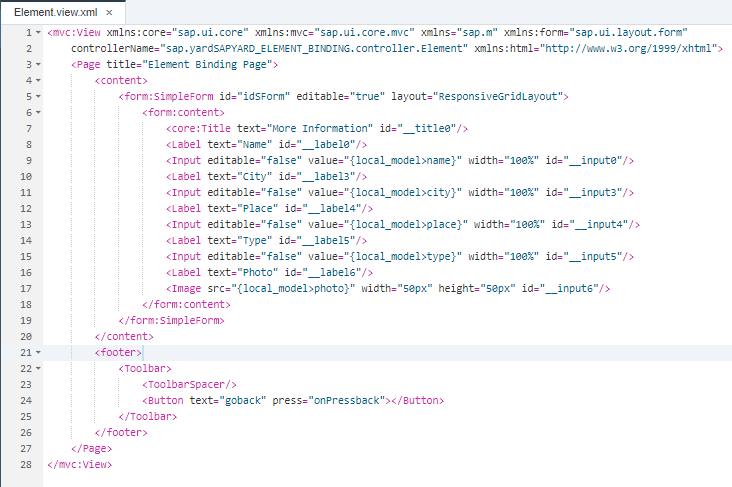
- Create view2 (Element view) which contains simple form
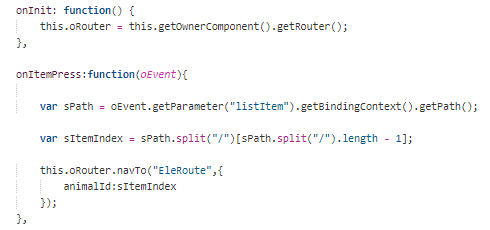
- Pass the path of the item pressed in table to router in view1
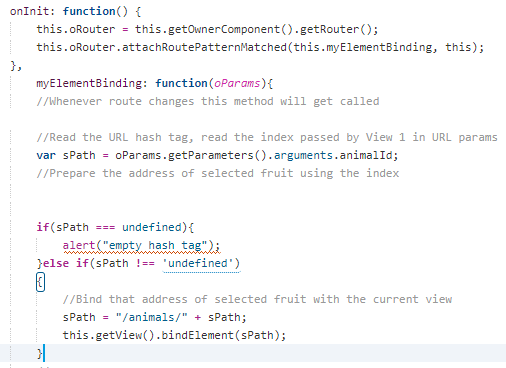
- Get the path and bind the path to the form in view2
- Execute the application
Step – 1: Create view1 (Aggregation view) which contains table control
Controller.js – view1:
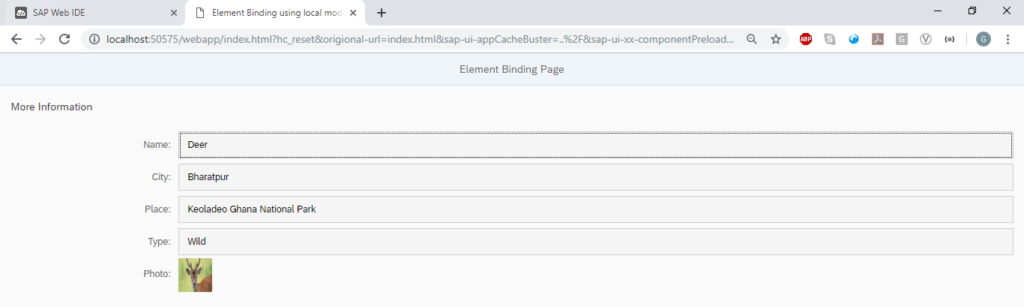
Step-2: Create view2 (Element view) which contains simple form
Controller.js – view2:
Step – 3: Pass the path of the item pressed in table to router in view1
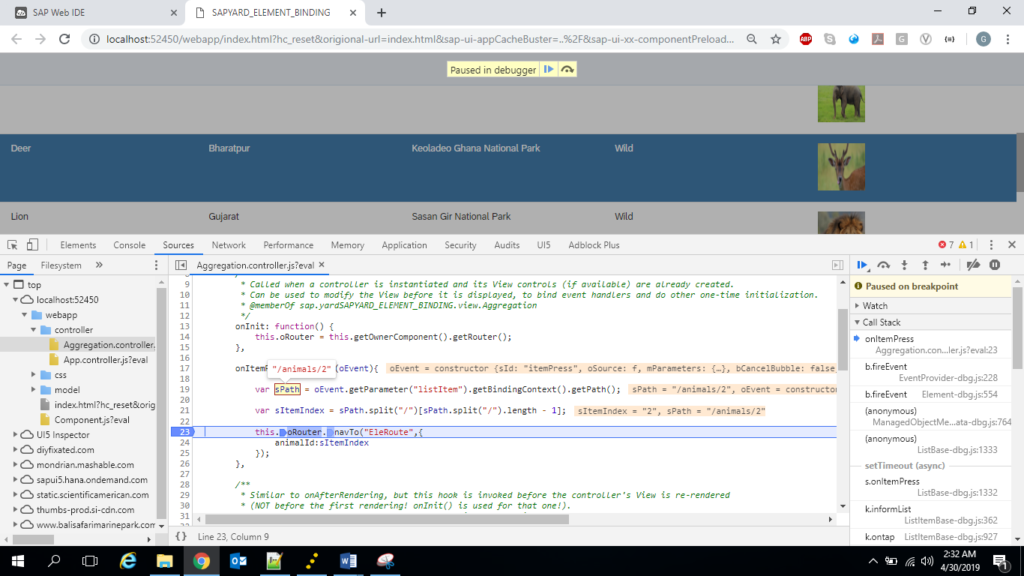
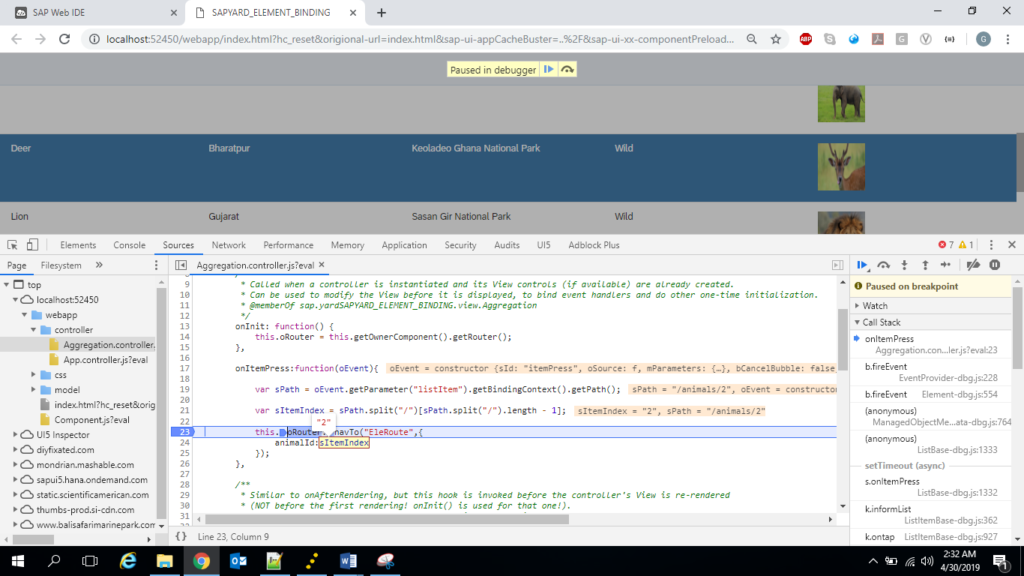
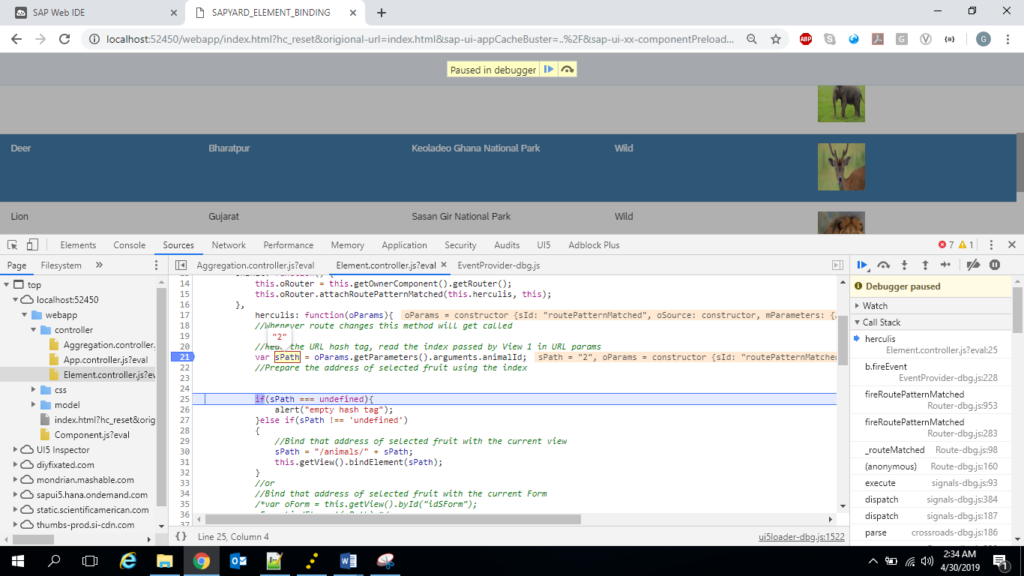
Step – 4: Get the path and bind the path to the form in view2
Step – 5: Test
Execute the application. The table should display the data as per step1.
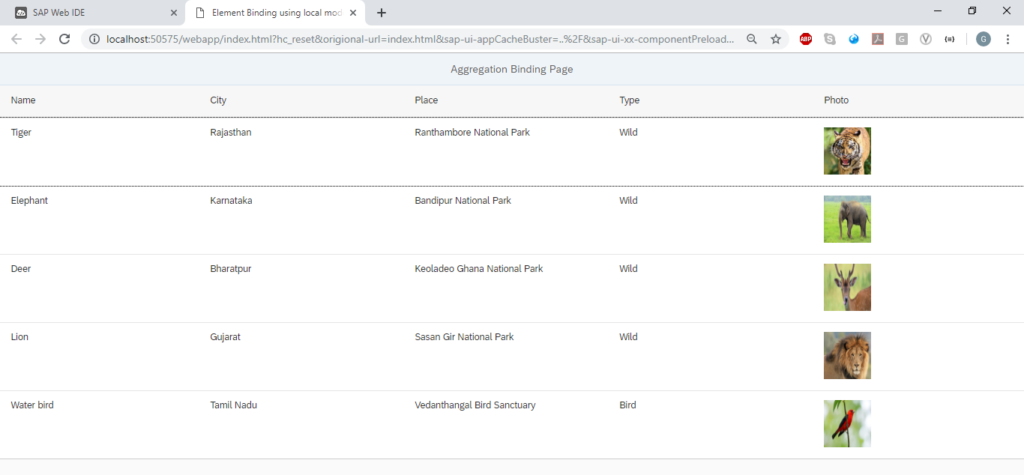
Now press an item in the table, I am going to press 3rd record. Check the elements of rows are bound and displayed.
Our target audience to these Binding Series is the newbies in UI5, mostly ABAPers (seasoned and fresh) who are venturing into UI5. Just like in any programming language, there can be multiple ways to achieve the same functionality. We show cased two approaches, but there can be other better ways. If you know of more optimized way, please share it with us and our readers. It would help everybody.


