
We have starting our series on Binding in SAPUI5 from our last article. In this tutorial we would look into the next binding, i.e. Element Binding. As mentioned already in previous article, element binding is used for binding UI5 controls to display single record. ABAP developers can relate them to work area. If you are still confused, please go through the scenario and steps explained below and it would start clarifying your doubts.
Scenario:
We are having a table displayed in a view. When user clicks on any item of the table, it should navigate to next view which should display a simple form. Basically, item is one row as work area in normal ABAP program. We are trying to display the item using Element Binding in SAPUI5.
Approaches:
The above scenario can be done in multiple approaches. We are going to demonstrate two approaches:
- Approach – 1 (Set and Get using local JSON Model)
- Approach – 2 (Pass the path in router and bind the path to the form)
In this article, we would dive deep into approach 1 where we use Json Model.
Element Binding: Approach – 1
Set and Get Using Local Json Model
Steps:
- Create view1 (Aggregation view) which contains table
- Create view2 (Element view) which contains simple form
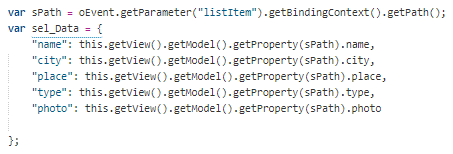
- Create local json model in view1 to hold the value of item pressed in table
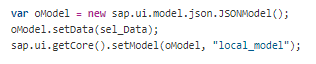
- Set the model globally in view1
- Get the model in view2
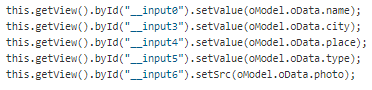
- Set the value to the simple form
- Execute the application
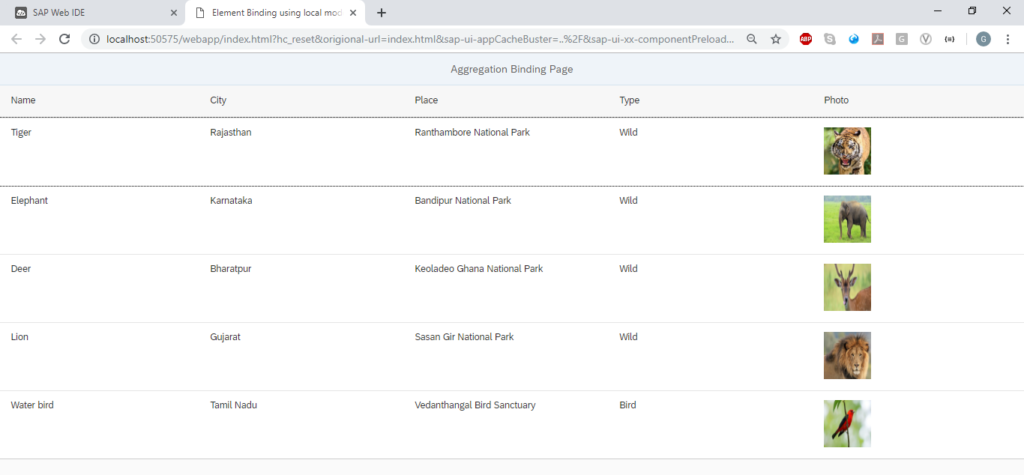
Step – 1: Create view1 (Aggregation view) which contains table control.
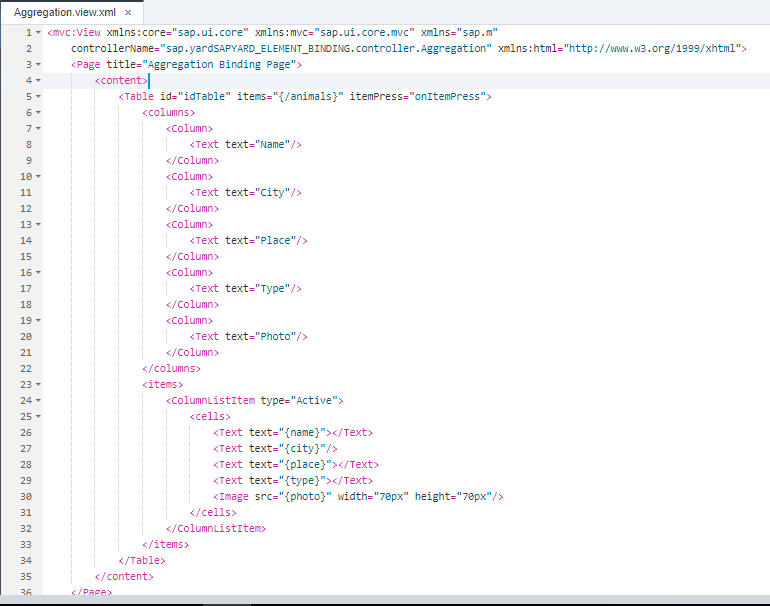
As explained in last article, entityset name “animals” is bound as aggregation with table “items”.
Controller.js – view1:
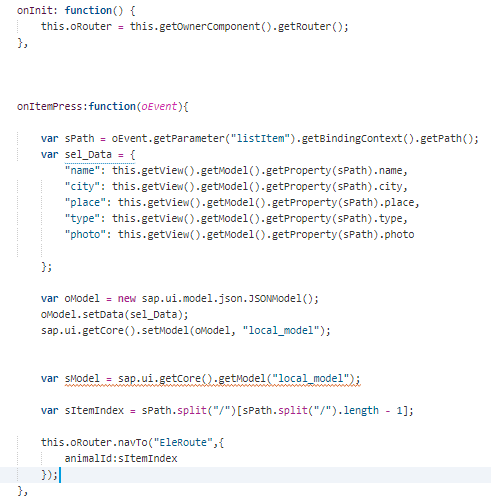
Wondering what is sItemIndex?
We are getting the path from binding context which would look like /animal/0. We need to pass this path to the next view in router, and the path has ‘/’ slash character which could not be sent in router as it accepts only data type string. So, we are splitting the path and sending only the number ‘0’ from the path.
“EleRoute” is the name of the Router which is used for navigating to the next view. You can name it anything.
As explained above, sItemIndex has value ‘0’ or the index of the line item.
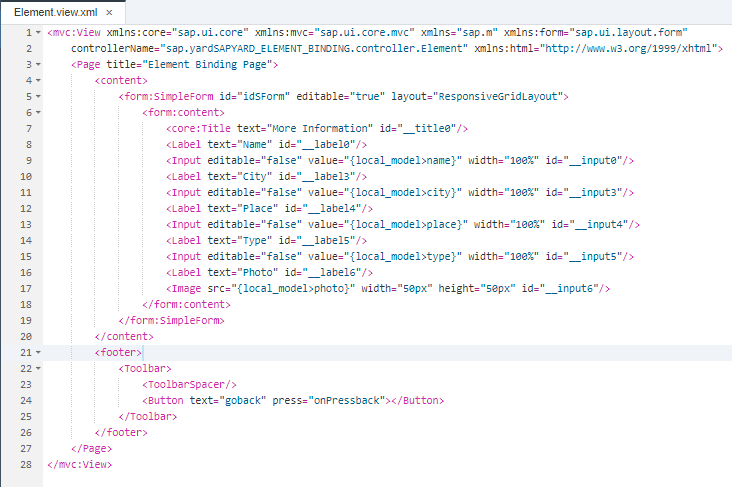
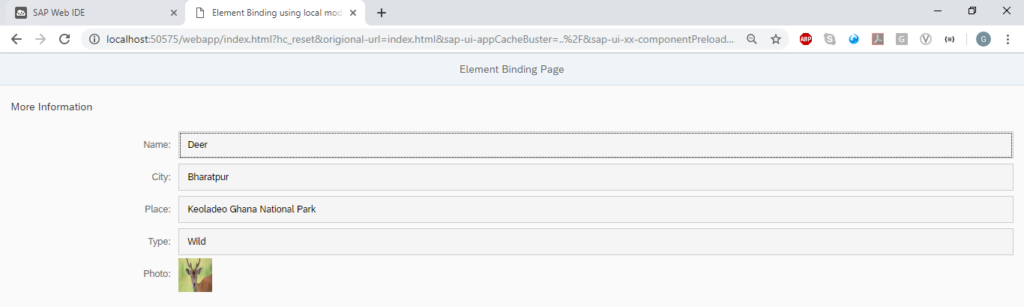
Step-2: Create view2 (Element view) which contains simple form.
Take a note of the {local_model>name} or {local_model>city} etc. These are element binding. A model named local_model is bound to each element viz name, city, place, type and photo.
Controller.js – view2:
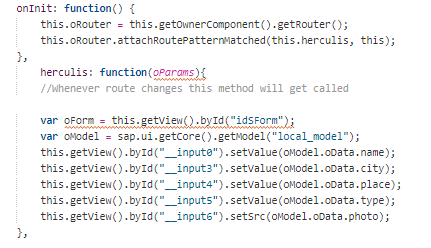
Do not be puzzled with the word “herculis”. You may name it as my ElementBinding.
Once the route matched pattern is reached, we have to take the path value say ‘0’ which we have passed from the previous view. After receiving the value, we will concatenate the string path and do the element binding. In order to perform this activity, we are using event handler and writing the logic inside it (we have named the function herculis, you can name it atlas).
Step – 3: Create local json model in view1 to hold the value of item pressed in table
Step – 4: Set the model in globally in view1
Step – 5: Get the model in view2

Step – 6: Set the value to the simple form
Step – 7: Execute the application
Now the table should display the data as per step1.
Now press an item in the table, I am going to press 3rd record which should put the data in local json
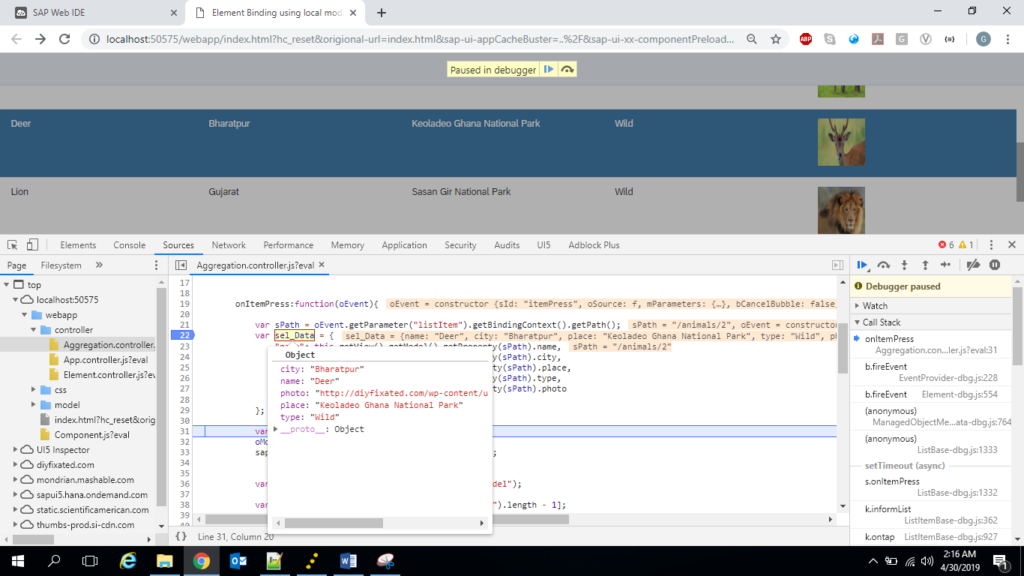
Note: Item press is the event handler function of pressing a record in table
Now we are setting the data in local json. Check the debugger screen below.
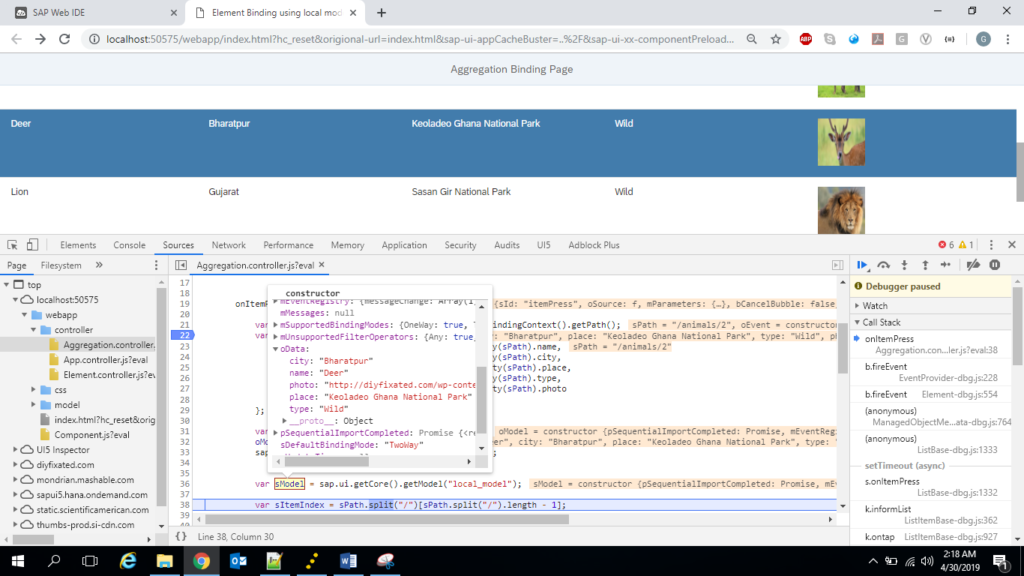
Keep the debugger in our view2 controller to get the data from the local model as below.
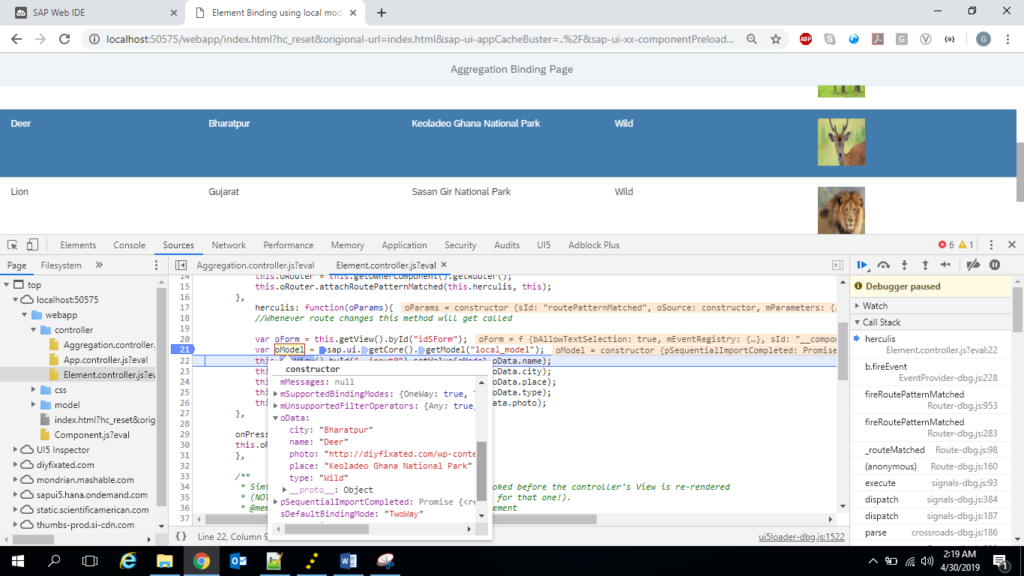
Now execute the debugger to see the final output. Check the simple form which has element binding, is displayed.
This was a very simple example for beginners. We did not overwhelm the beginners with more complex scenarios. You are learning the ABCs of UI5 with us. If you have the fundamentals, you can design complex UI5 applications yourself.


