In this blog post I will cover end to end Open Enrolment process.
1. Steps to create open enrolment programme
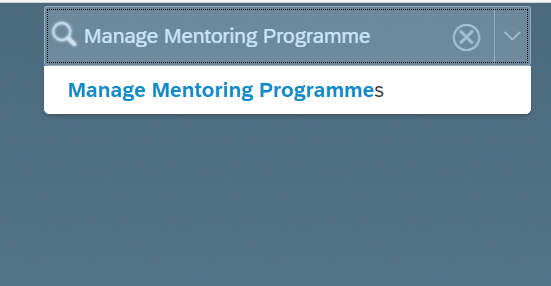
1.1 Admin creates an ‘Open Enrolment Programme’. To create new programme go to ‘Manage Mentoring Programmes’.
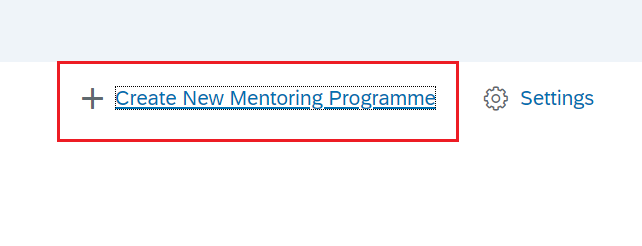
1.2 Click on ‘Create New Mentoring Programme’
1.3 Select ‘Open Enrolment’ and click on ‘Continue’.
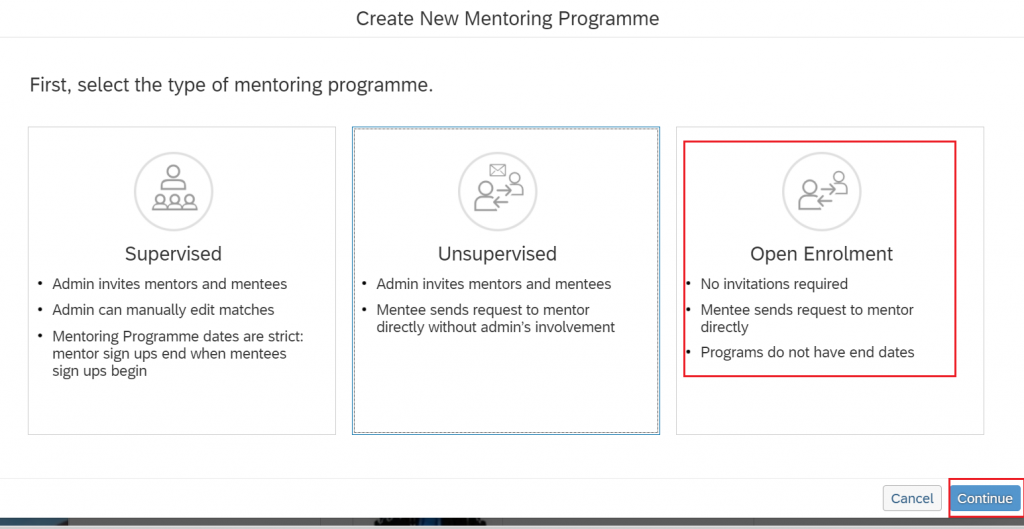
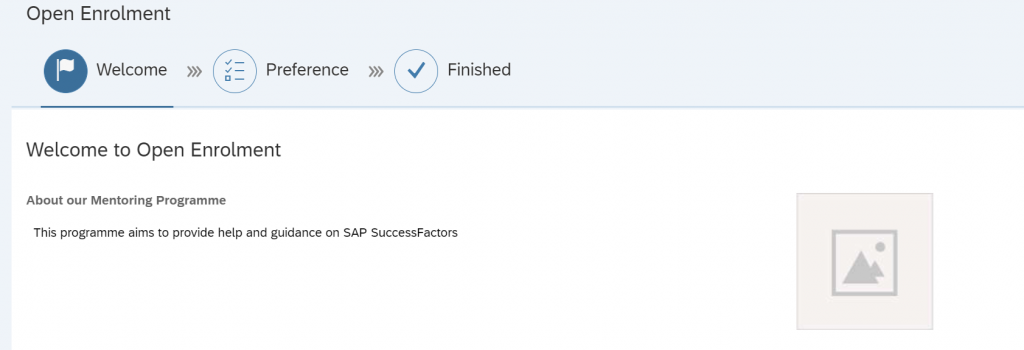
1.4 There are three sections in ‘Open Enrolment Programme’.
a) Mentoring Programme Details
b) Sign Up Form
c) Summary
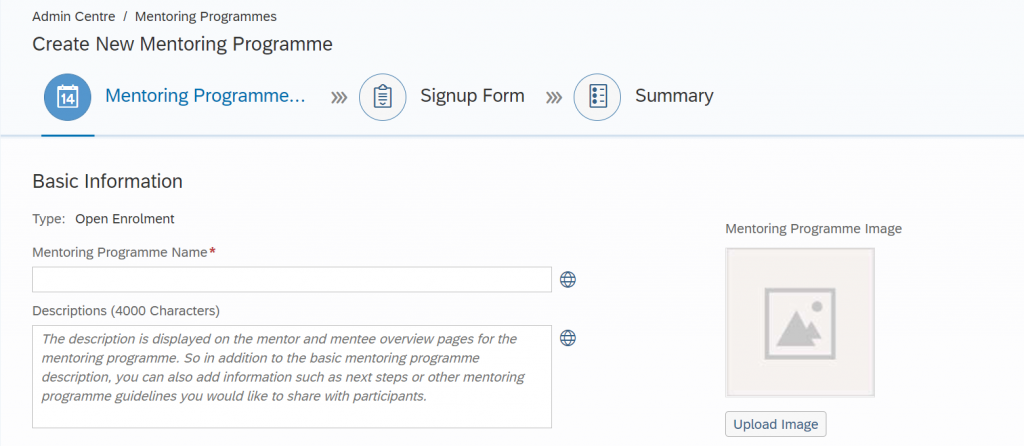
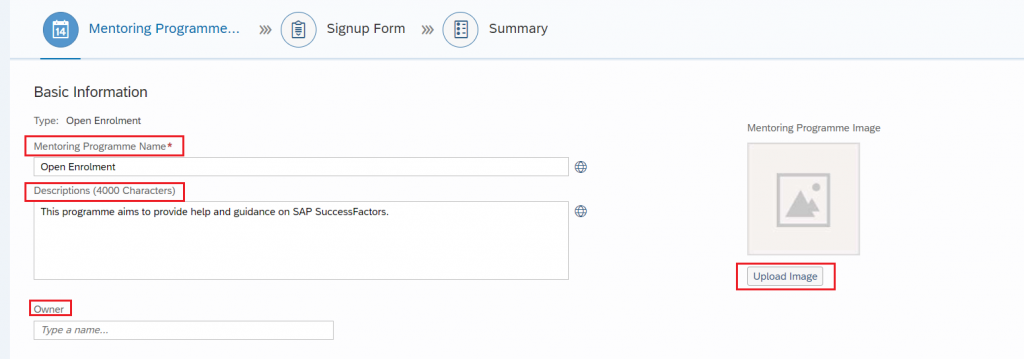
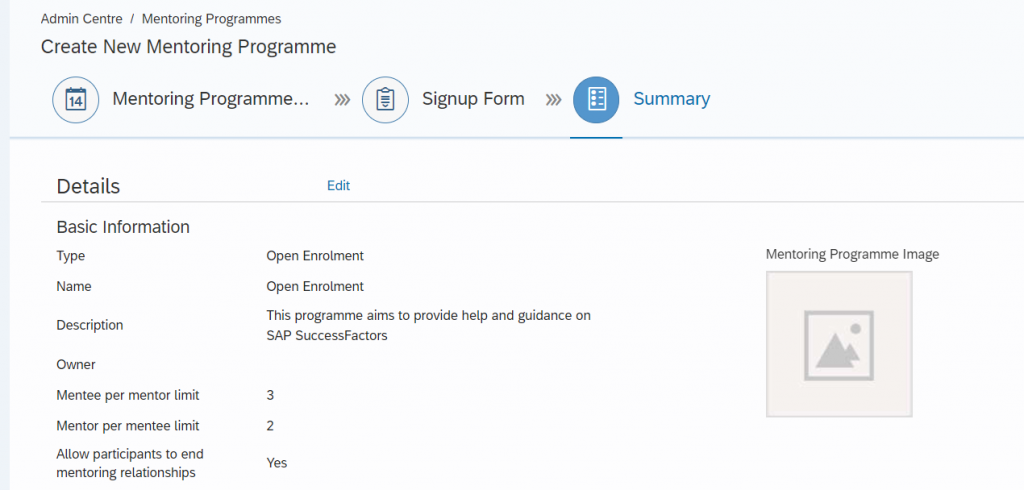
1.5 Enter ‘Mentoring Programme Name’, ‘Description’, upload image using ‘Upload Image ’option, add ‘Owner’.
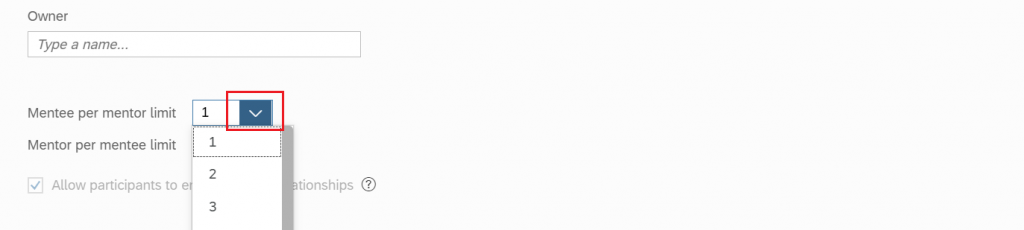
1.6 Set ‘Mentee per mentor limit’ and ‘Mentor per mentee limit’. Mentor can decrease this limit while signing up.

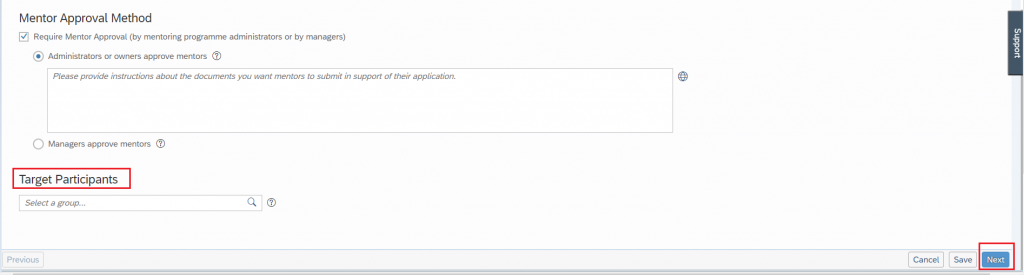
1.7 Select ‘Mentor Approval Method’ if required. if ‘Mentor Approval Method is ‘Administrators or owners approve mentors’ admin or owner needs to approve mentors request and mentor needs to upload documents whiles signing up.
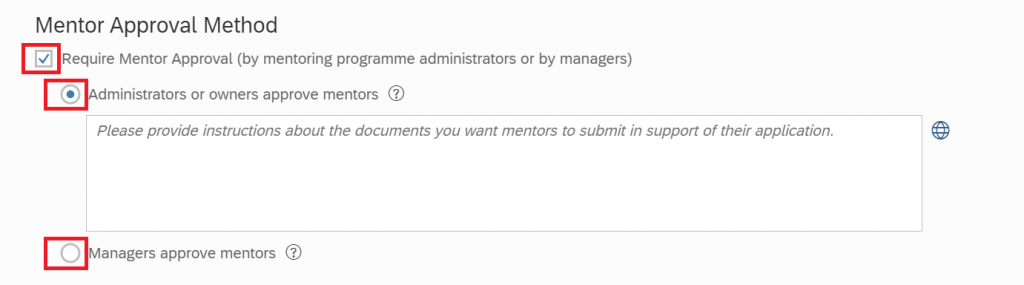
Mangers receive email request to approve mentor application if ‘Mentor Approval Method’ is ‘Managers approve mentors’ .
1.8 Add ‘Target Participants’ group if required. Programme visibility is controlled by ‘Target Participants’ group.
1.9 Click on ‘Next’.
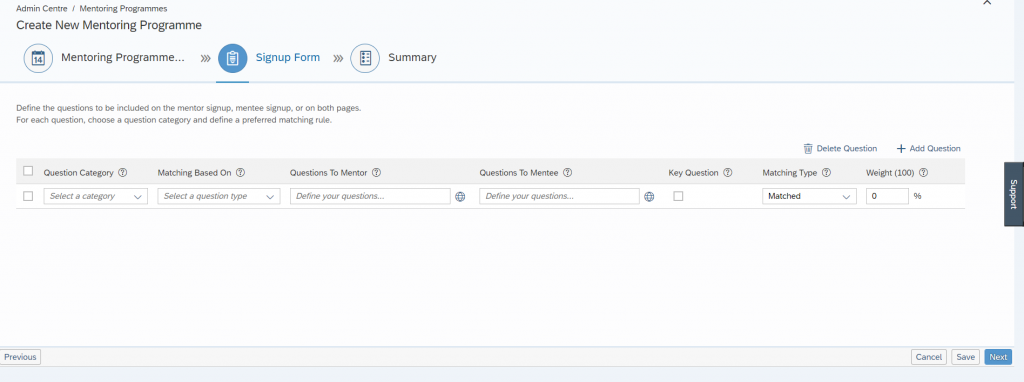
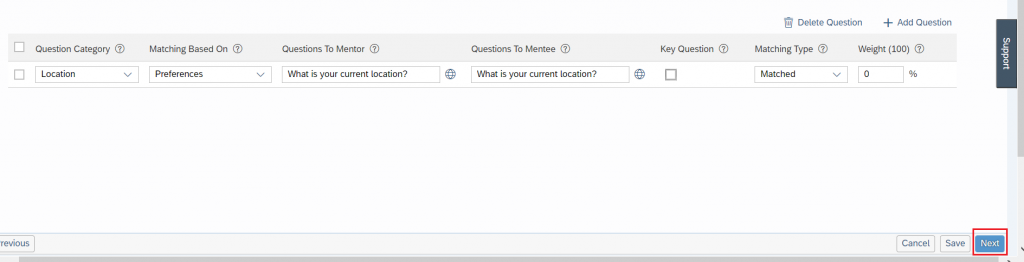
1.10 In Signup form section we need to add questions for mentors and mentee. Mentor/Mentee needs to answer these questions while signing up for the programme. Matching will be based on answers. We can configure custom question categories as per our requirement.
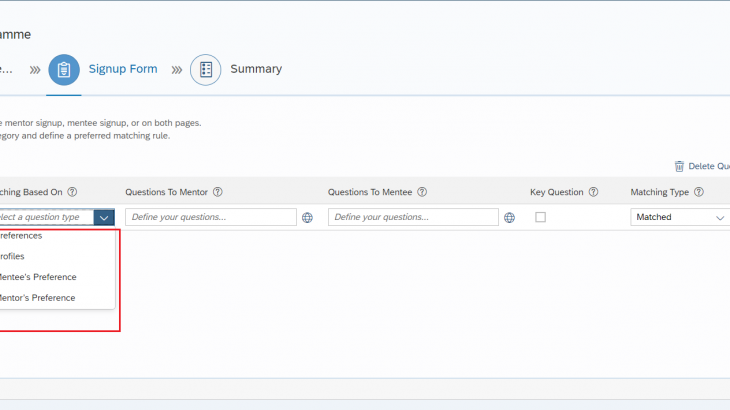
1.11 Select ‘Question Category’. We have four options for ‘Matching Based On‘.
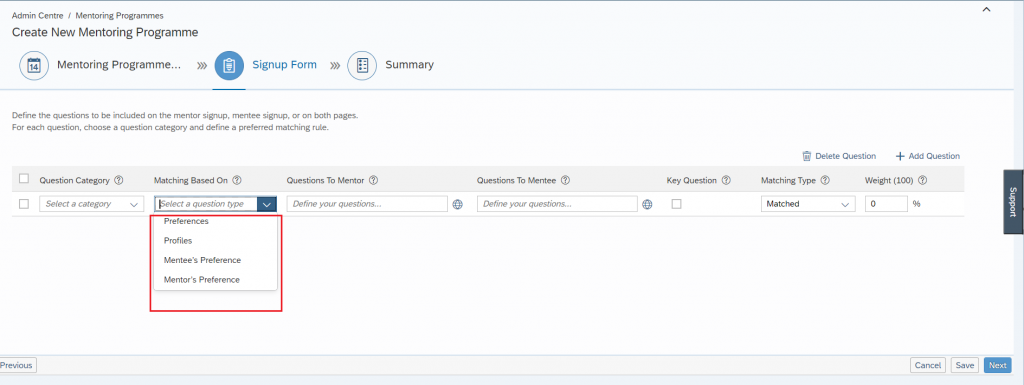
a) Preferences: Mentors and mentees are matched based on the answers to the question.
b) Mentee’s Preference: Mentors and mentees are matched based on mentee’s answers and mentor’s employee profiles.
c) Mentor’s Preference: Mentors and mentees are matched based on mentors’ answers and mentee’s employee profiles.
d) Profiles: Mentos and mentees are matched based on employee profiles.
1.12 Define questions to Mentors and Mentee and select key questions if required. For matching to happen mentors and mentee needs to satisfy criteria of key questions.
1.13 There are two types of Matching Type.
a) Matched : If we select Matching Type as ‘Matched’ then mentors and mentees answers should match for matching to happen.
b) Not Matched: If we select Matching Type as ‘Not Matched’ then matching will happen only if mentor’s and mentee’s answers are different.

1.14 Add weight if required.
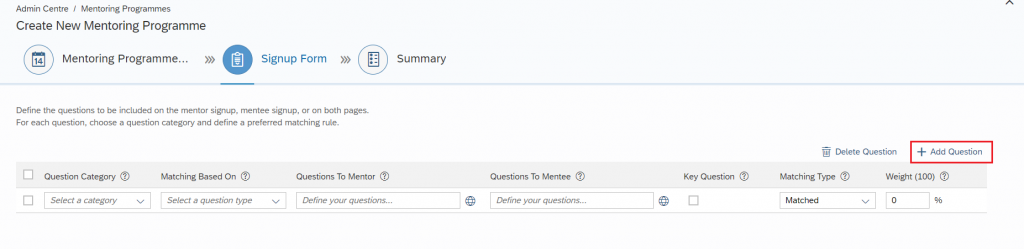
1.15 To add new question click on ‘Add Question’.
1.16 To delete question select the question which needs to be deleted and click on ‘Delete Question’.

1.17 Click on ‘Next’
1.18 Check all the details and make changes if required.
2. Mentor Sign Up
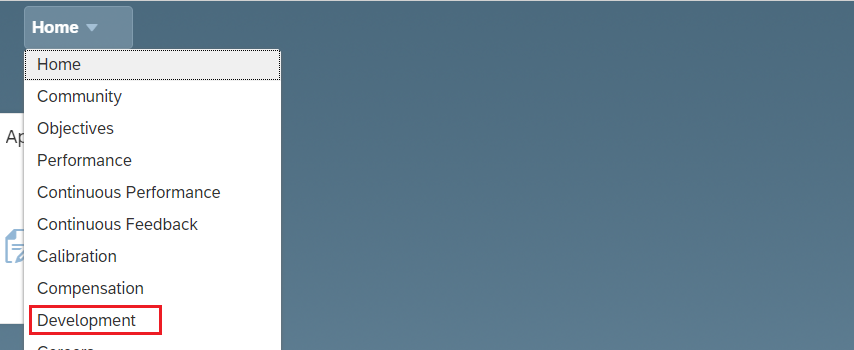
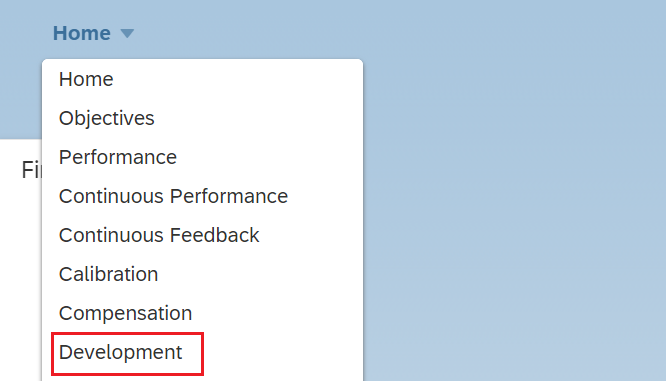
2.1 To sign up as a mentor go to ‘Development’ from Home drop down.
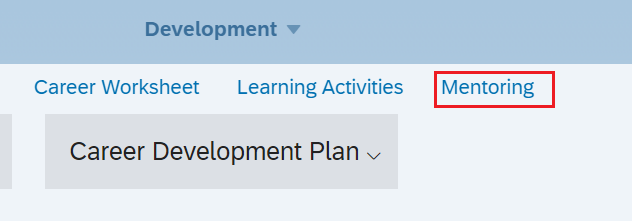
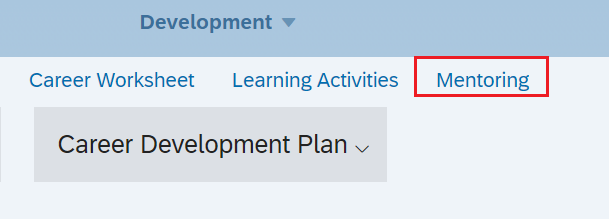
2.2 Click on ‘Mentoring’ tab.
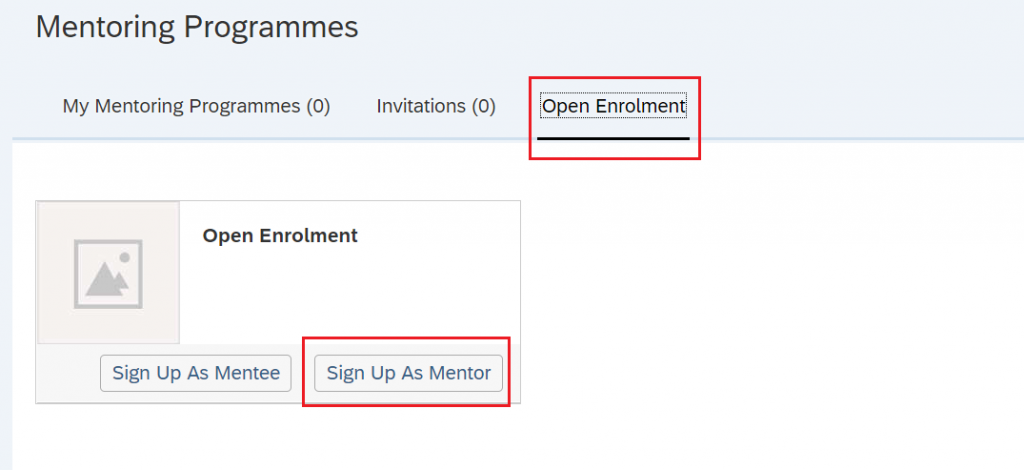
2.3 Click on ‘Open Enrolment’ and ‘Sign Up as Mentor’.
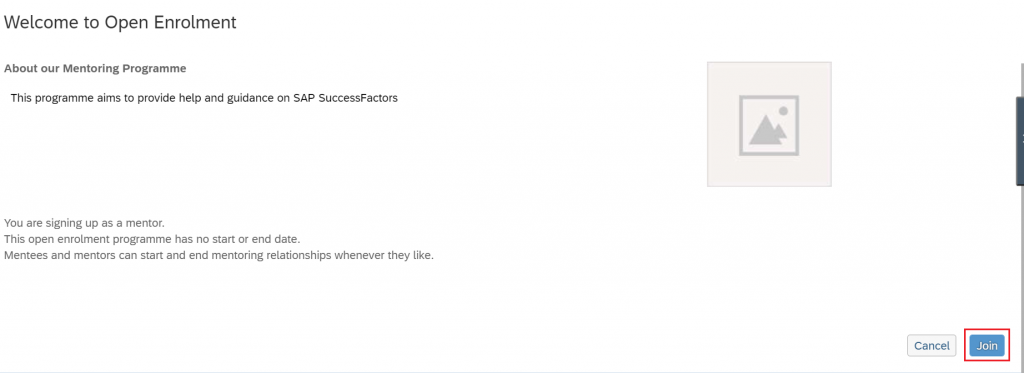
2.4 Click on ‘Join’.
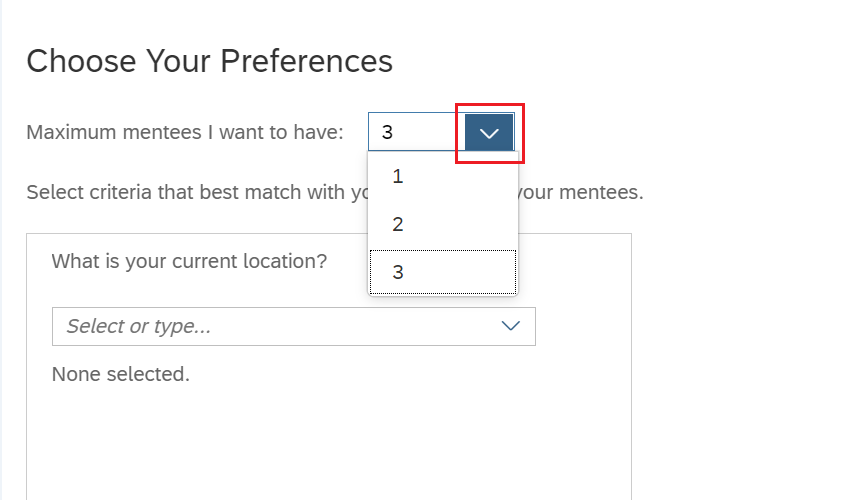
2.5 Mentor can decrease the mentee limit.
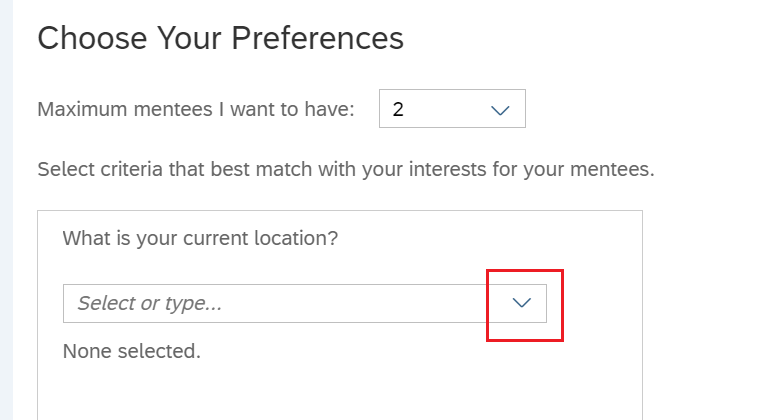
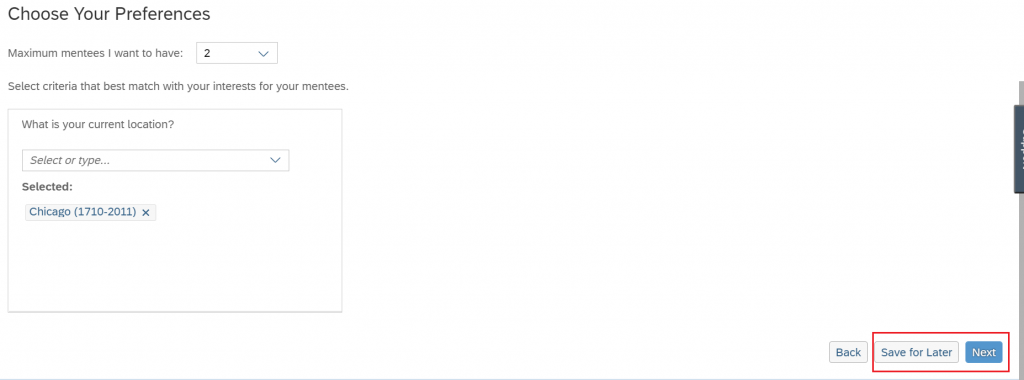
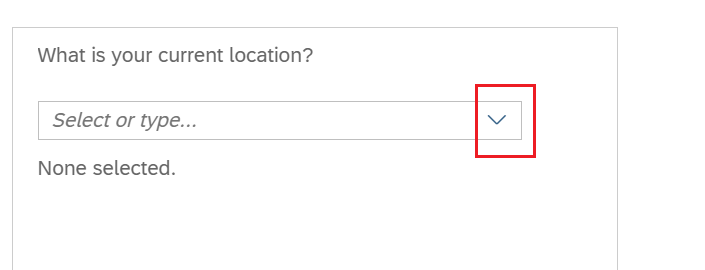
2.6 Select answers from drop down.
2.7 Mentor can click on ‘Save for Later’ to save the answers and continue sign up later. Click on ‘Next’.
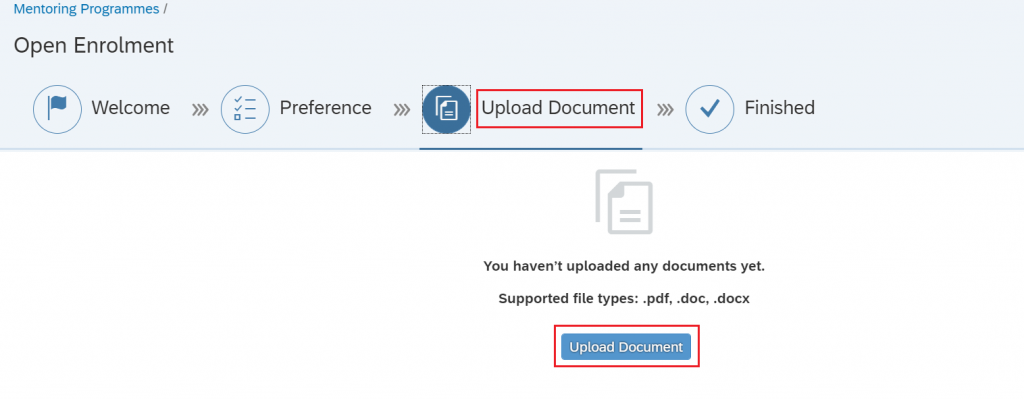
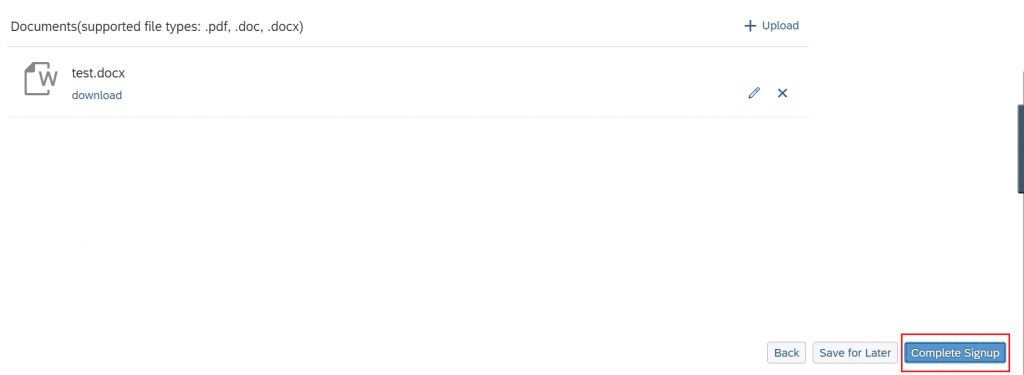
2.8 Additional step ‘Upload Document’ will be added during sign up process if ‘Mentor Approval Method is ‘Administrators or owners approve mentors’. Click on ‘Upload Document ‘.
2.9 Click on ‘Complete Signup’.
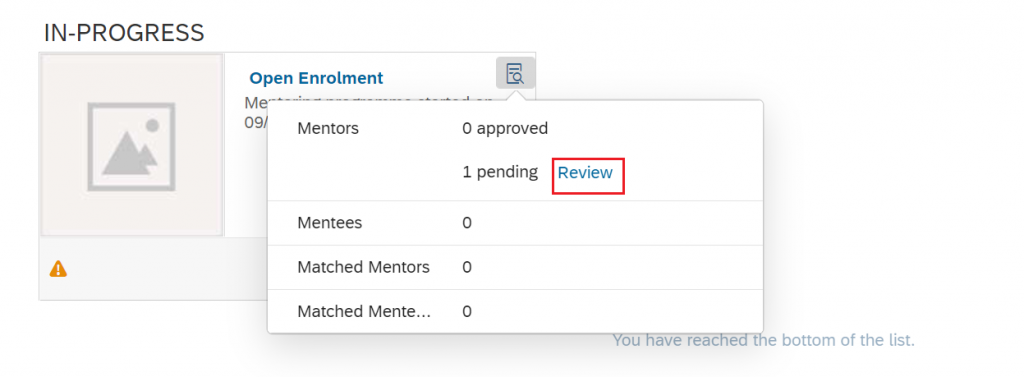
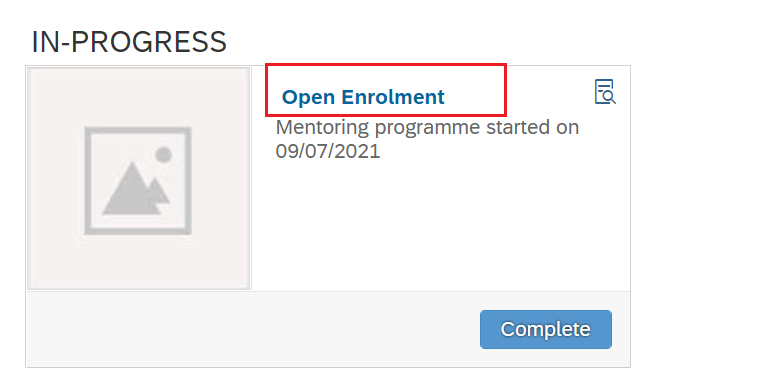
3. Once mentor’s sign up is completed admin or manager needs to approve mentors request if ‘Mentor Approval Method is ‘Administrators or owners approve mentors. Once launched Open Enrolment Programmes are available under ‘IN-PROGRESS’ step .
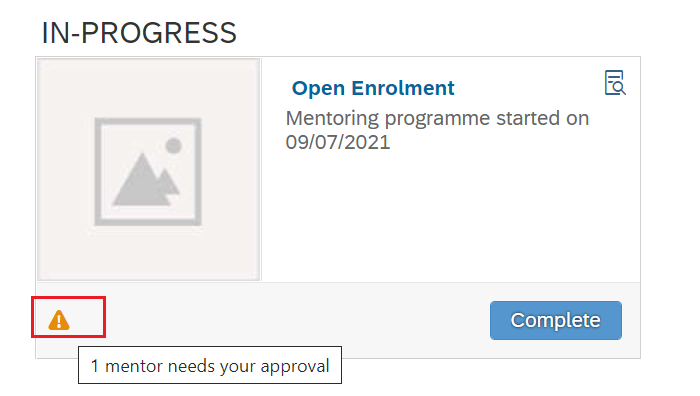
3.1 Click on ‘Review’.
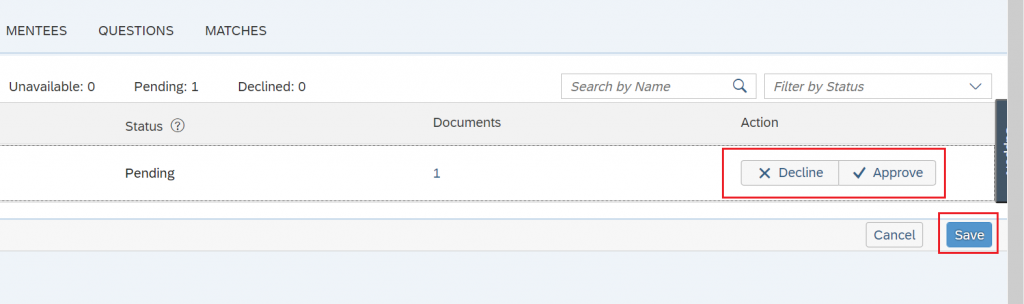
3.2 Click on ‘Approve’ or ‘Decline’ and then click on ‘Save’.
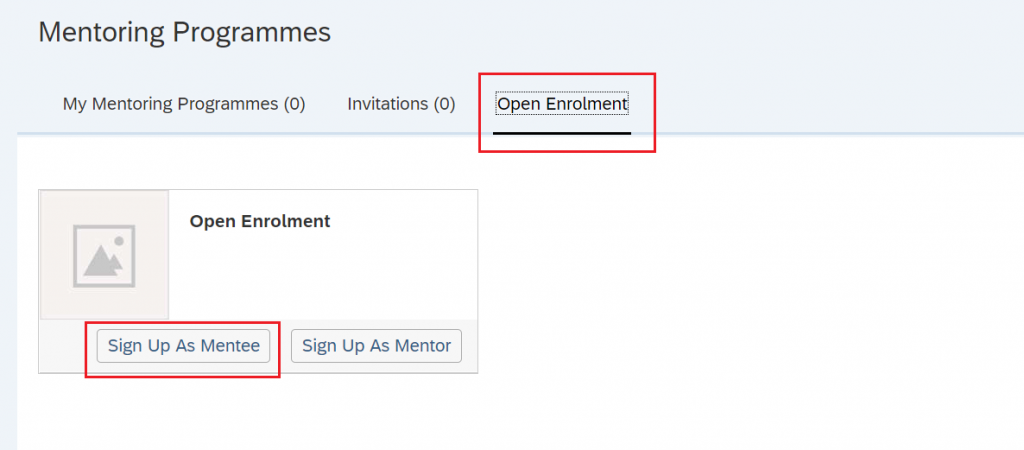
4. Mentee Sign Up
4.1 From home drop down click on ‘Development’.
4.2 Click on ‘Mentoring’ tab.
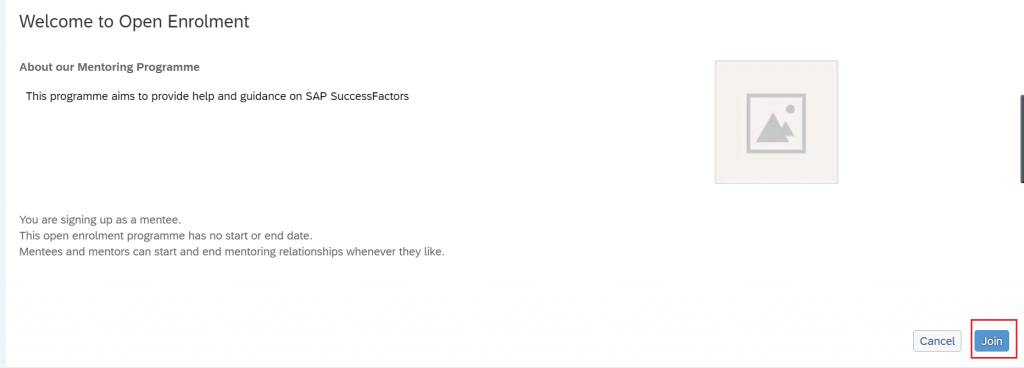
4.3 Click on ‘Open Enrolment’ and ‘Sign Up As Mentee’.
4.4 Click on ‘Join’.
4.5 Select answer from drop down.
4.6 Click “Show Recommended Mentors”. Mentee can also search for a desired mentor.
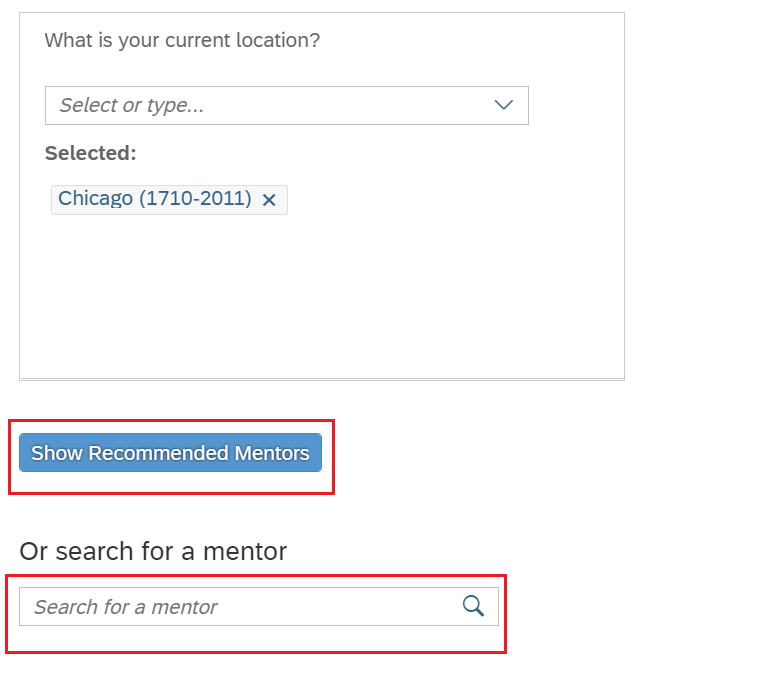
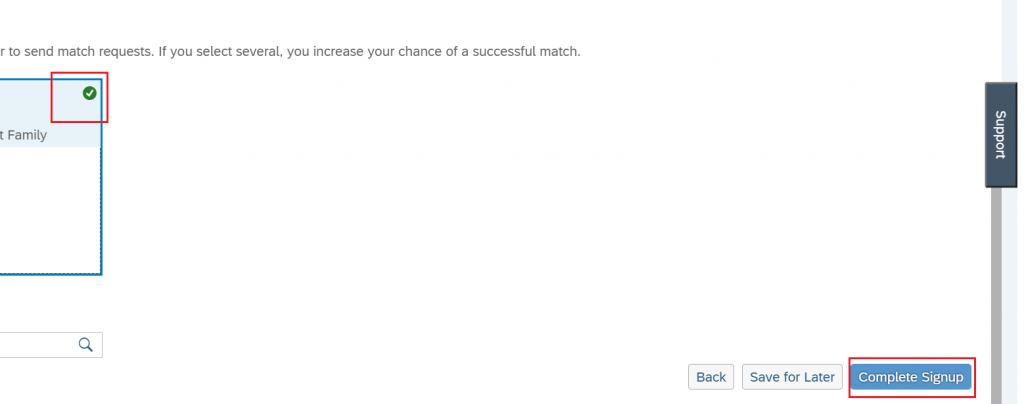
4.7 Select mentor and click ‘Complete Signup’.
5. Mentor approves Mentee’s request.
5.1 To approve mentee’s request. Go to ‘Development’ from Home drop down and click on ‘Mentoring’.
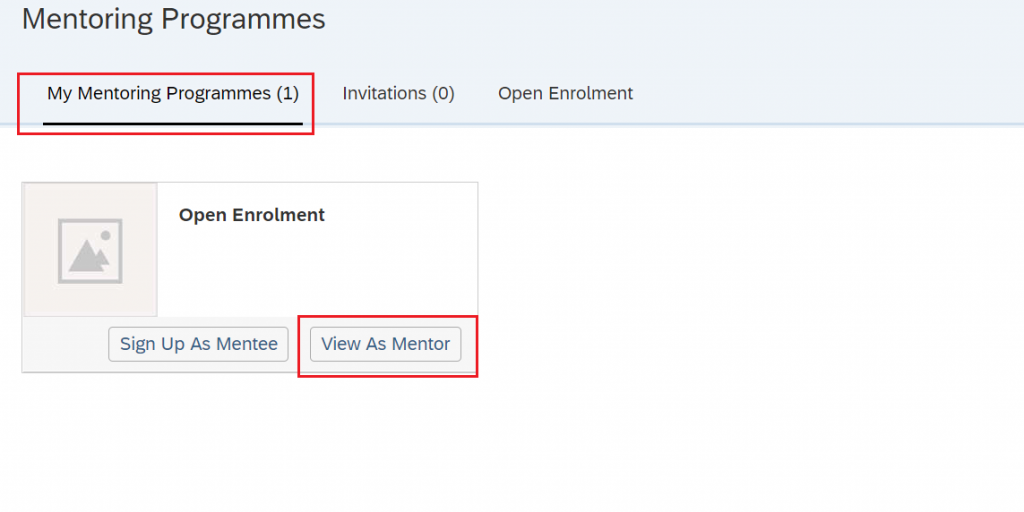
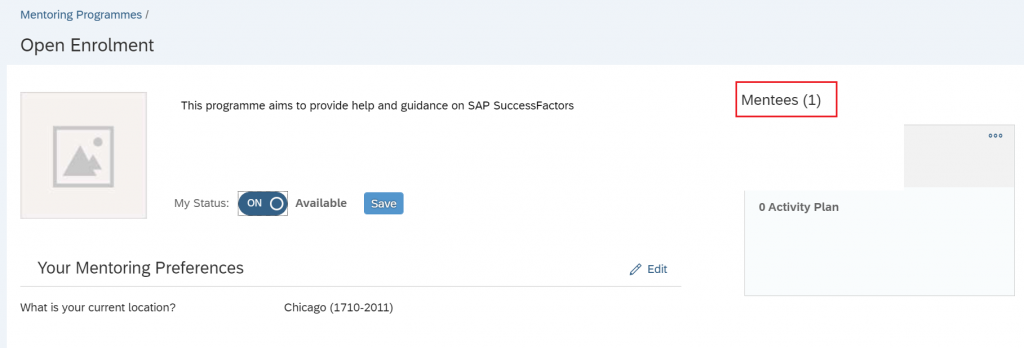
5.2 Programme will be visible under ‘My Mentoring Programmes’ after signing up. Click ‘View As Mentor’.
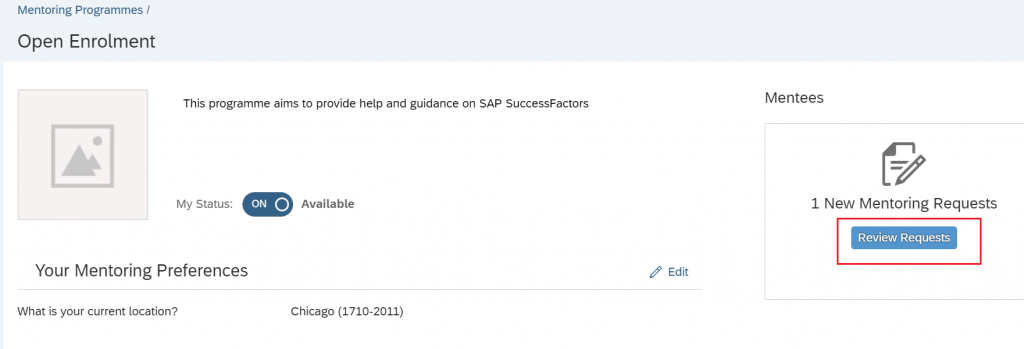
5.3 Click on ‘Review Requests’.
5.4 Click on ‘Accept’ or ‘Decline’.
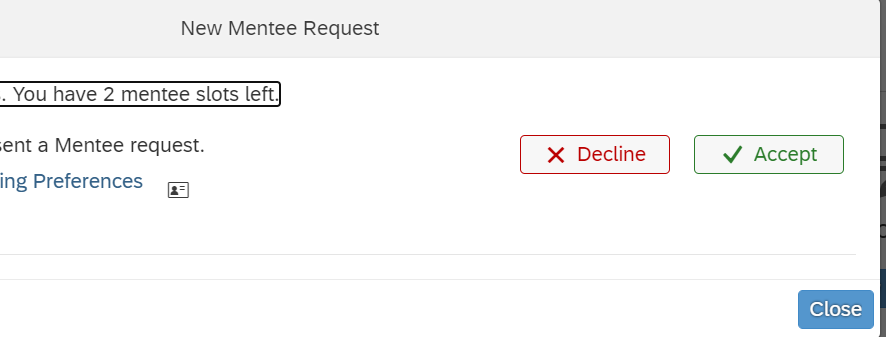
5.5 Mentor can check Accepted Mentee.
5.6 Mentor can set their status (Available/Unavailable). Mentors can select the date till when they are not available. Select unavailable until date and click on ‘Save’.

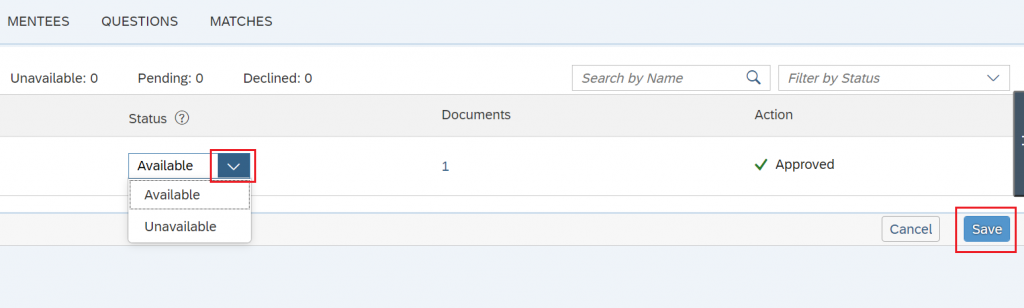
5.7 Admin can also set availability of mentors. To set the availability, admin needs to go to ‘Manage Mentoring Programmes’ and select programme.
5.8 Click on ‘Mentors’ tab.

5.9 Change the status and click on ‘Save’.
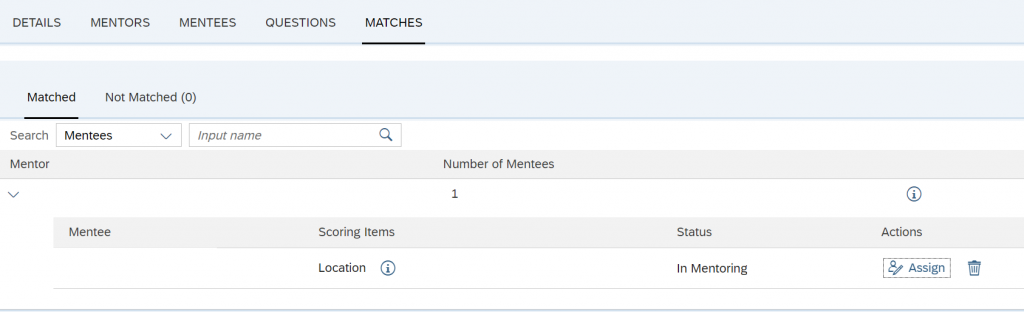
5.10 Admin/Owner can check the matches in ‘MATCHES’ tab where they can see ‘Matched’ and ‘Not Matched’ mentor/mentee. Admin/Owner can edit matches as per requirement.
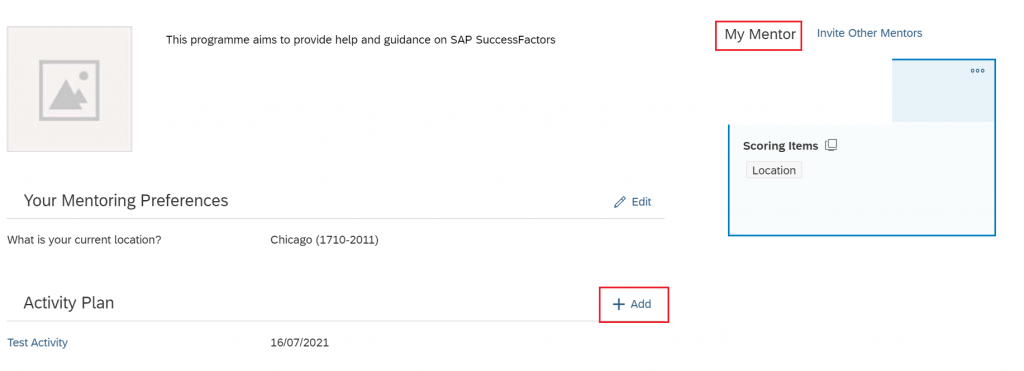
6. Once matching happens, Mentor/Mentee adds activities to track progress.
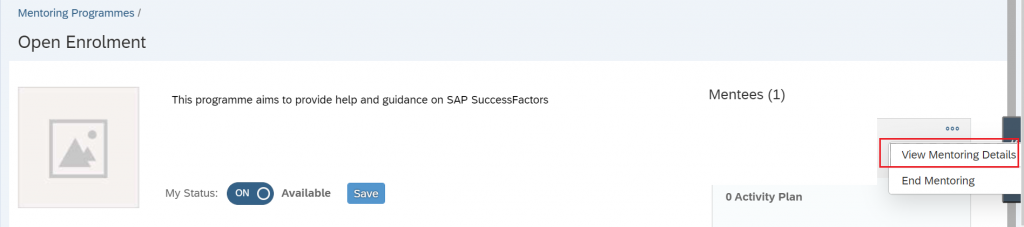
6.1 To add activity from mentors side. Click on ‘More’ and ‘View Mentoring Details’.
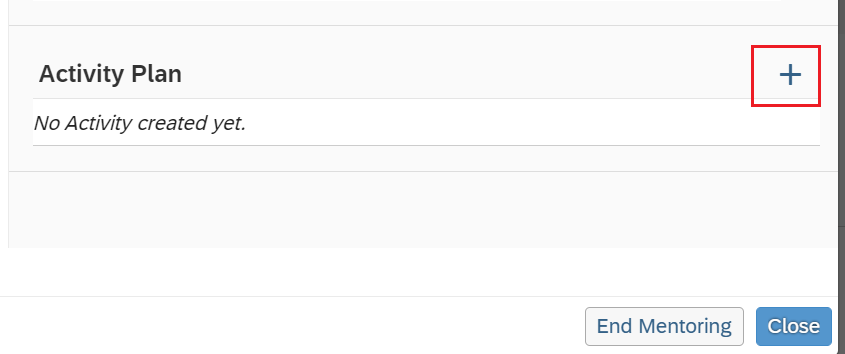
6.2 Click ‘Add’.
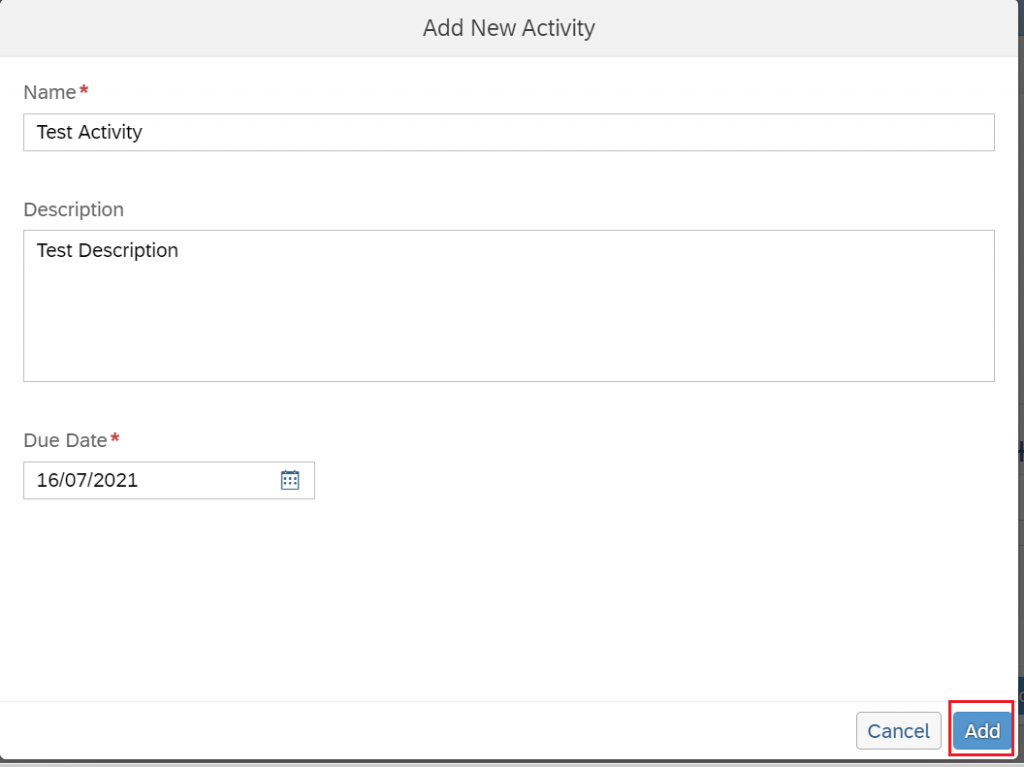
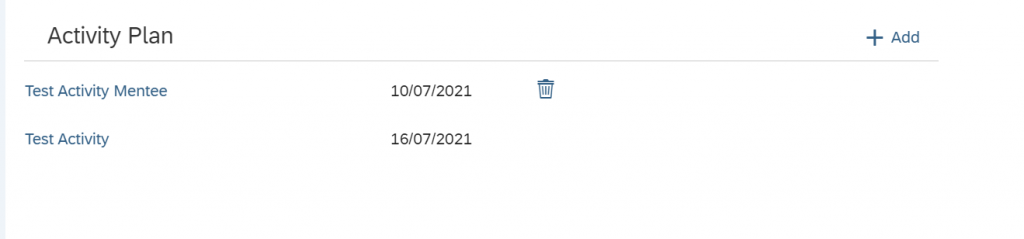
6.3 Enter ‘Name’,’ Description’, select ‘Due Date’ and click on ‘Add’ .
6.4 Activity can be deleted using delete icon. To edit activity, click on that activity.
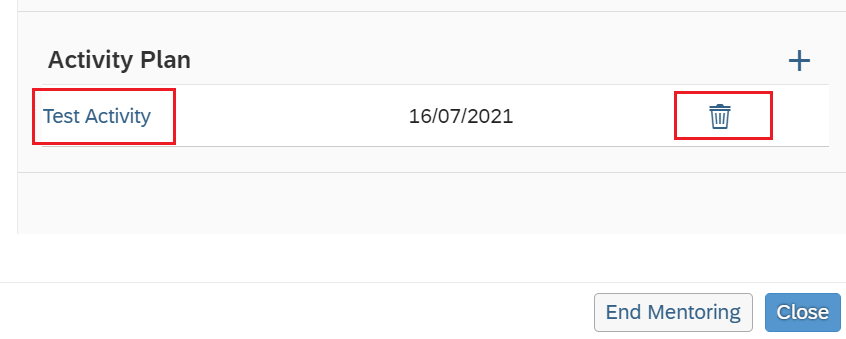
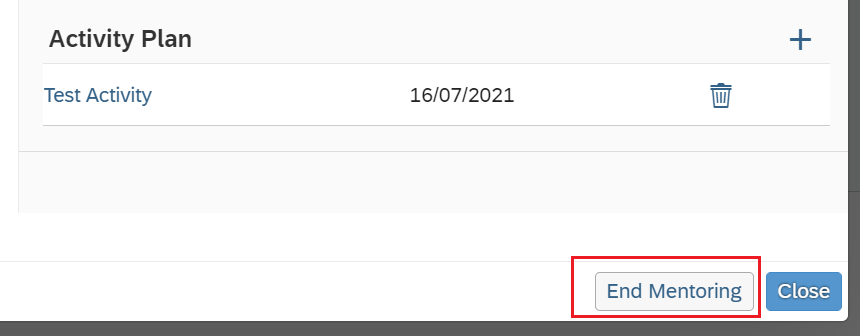
6.5 Mentor can end the relationship by clicking on ‘End Mentoring’.
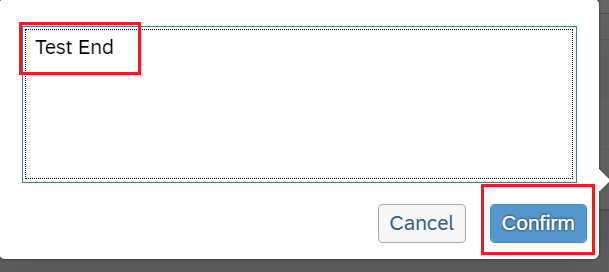
6.6 Add comment and click on ‘Confirm’.
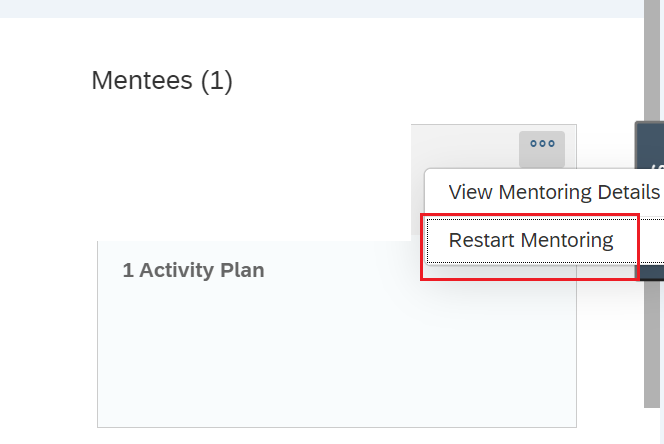
6.7 Mentor can again restart the relationship by clicking on ‘Restart Mentoring’.
6.8 Mentee can also add the activities, end the relationship, restart the relationship. Mentee can Invite Other Mentors If ‘Mentor per Mentee limit’ is not reached. Matched mentors will be displayed as ‘My Mentor’.
6.9 Mentee can check activities added by mentor and vice versa. Mentee can’t delete activities added by mentor and vice versa. Mentor/Mentee can delete the activities created by themselves.
Admin or Owner ends the Programme.


