
In this blog I am going to cover in details the following:
- Enable the usage of spaces/pages
- Create a space using Manage Launchpad Spaces app
- Assign a space to a PFCG role
- Create a page using Manage Launchpad Pages app
- Switch to the spaces mode in the launchpad user settings
So let’s begin.
Enable the usage of spaces/pages
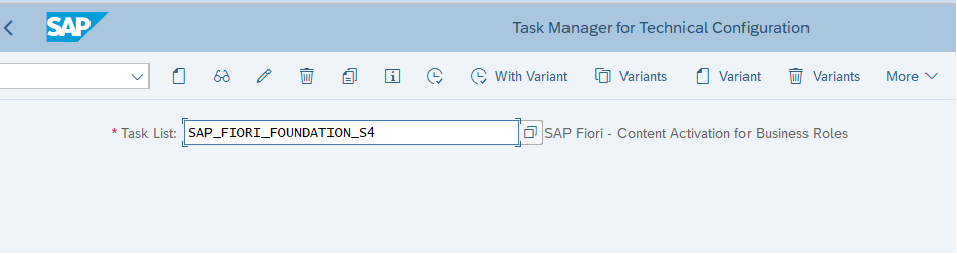
To start with, we need to first enable the usage of SAP Fiori launchpad spaces and pages. We can do so by executing the task list SAP_FIORI_FOUNDATION_S4.
- GoTo tcode STC01, input the task list SAP_FIORI_FOUNDATION_S4 and execute
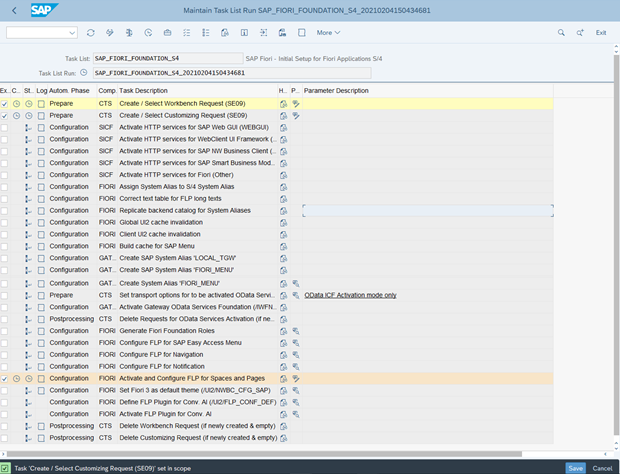
- Unselect all the tasks and select the task “Activate and Configure FLP for Spaces and Pages”. First 2 task of Workbench and Customizing request will be added to scope as those are must for this activity.
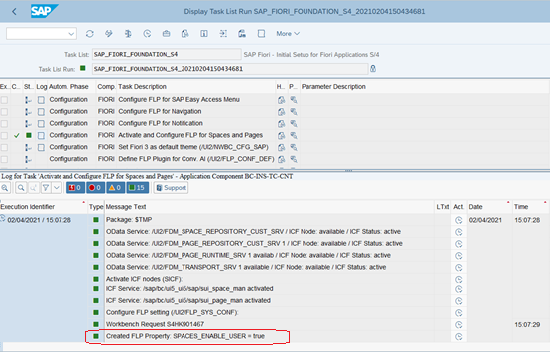
- Start the Task list. The result will show the steps in green. The Spaces and Pages activation step log will show the details of activated OData and SICF services and the FLP Property SPACES_ENABLE_USER has been set to TRUE. This property controls the availability to switch to the SPACES mode in the end user settings in SAP Fiori launchpad.
Create a space using Manage Launchpad Spaces App
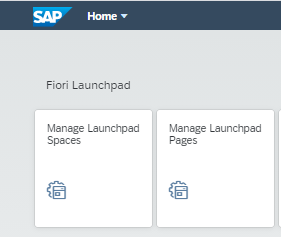
- With S/4HANA 2020 release, two new fiori apps are available i.e. “Manage Launchpad Spaces” & ” Manage Launchpad Pages“. Role “SAP_FLP_ADMIN” is required to be able to access these apps.
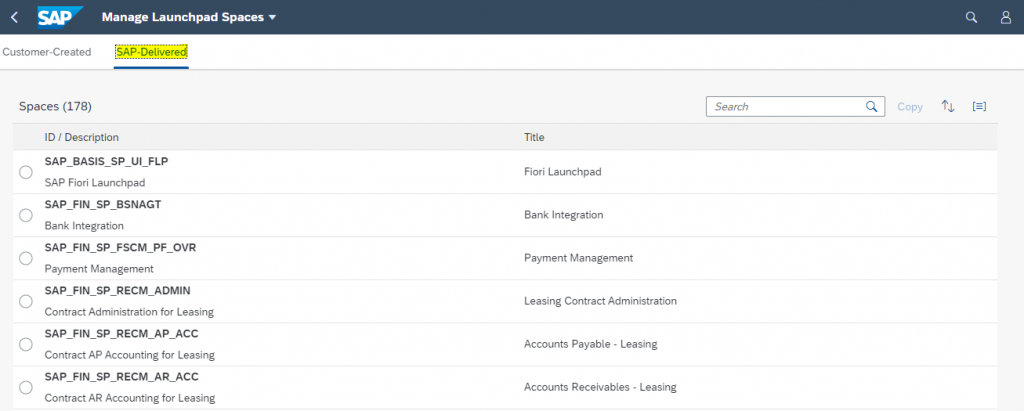
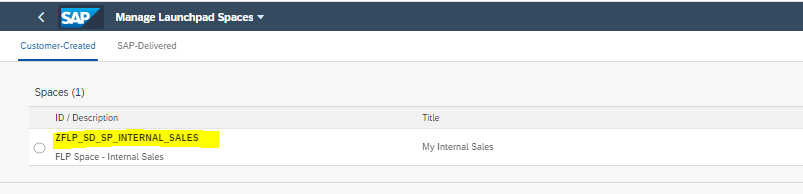
- Open “Manage Launchpad Spaces” App. On the landing page there are two tabs, customer-Created & SAP-Delivered. SAP-Delivered shows the list of spaces which are delivered by SAP
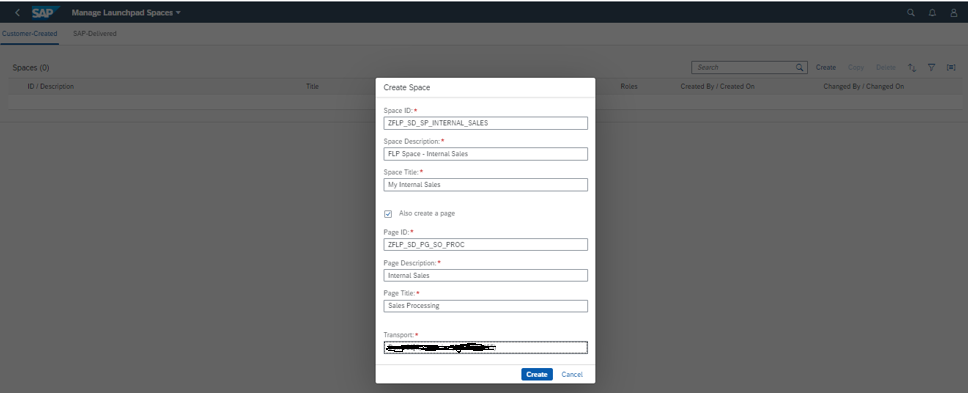
- As we are going to create one, GoTo Customer-Created tab and click on Create

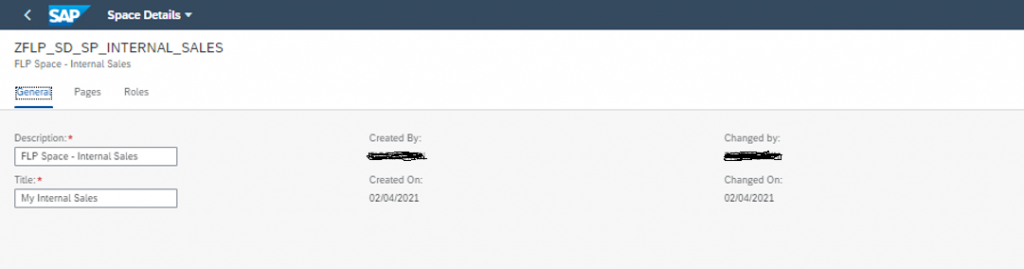
- Enter the details like Space ID, Description and Title. The space title is the text which is displayed in the space menu on the SAP Fiori launchpad to identify a space.
- There is an option to create a page also (we will see how to create from Manage Launchpad Pages at later point in this blog). Check the checkbox and input the page details also and click on Create.
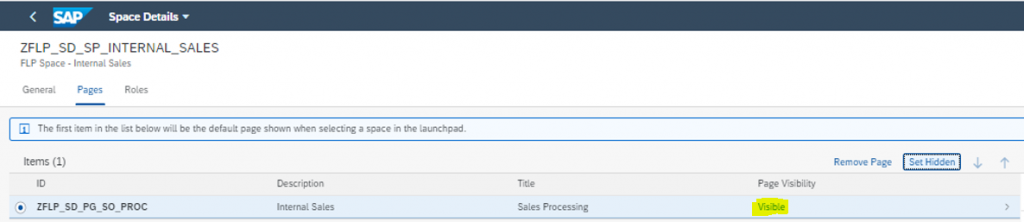
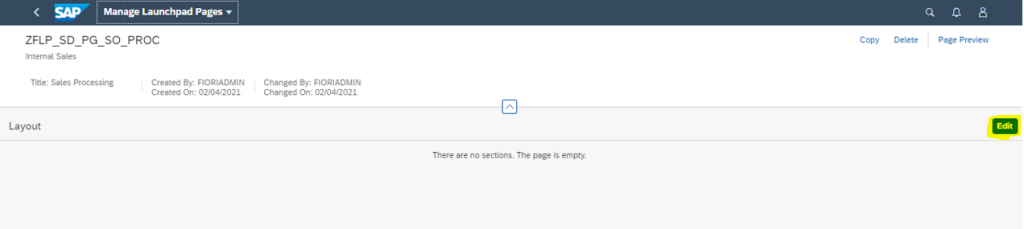
- On the Space Details screen you can find all information related to a space. With the new space, you have already created one page, which is shown as list item on the Pages tab.
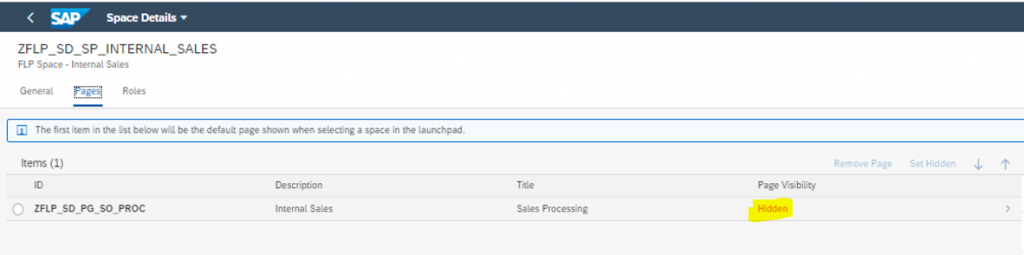
- By default the newly created page is Hidden. Select the page and click on “Set Visible” to make it visible to end users.
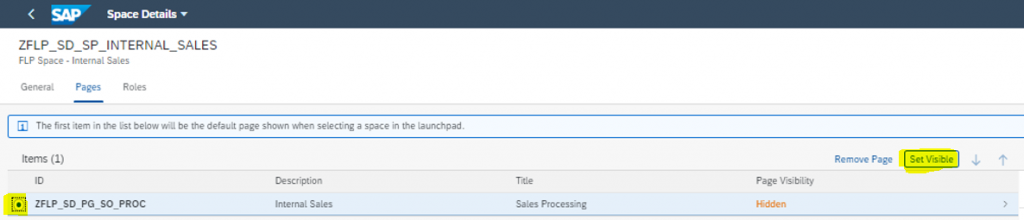
- The page is now visible.
- Space title or Description could be changed under General Tab.
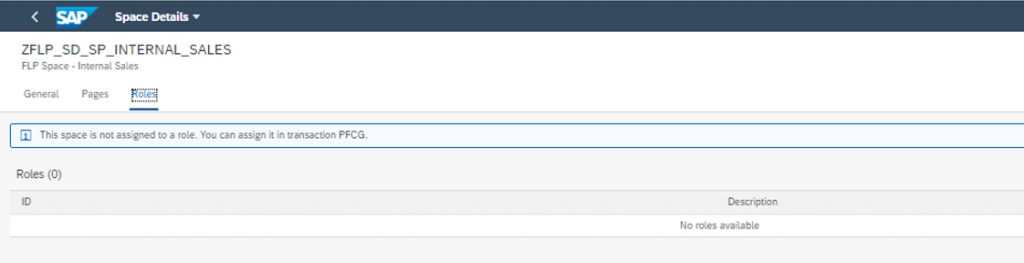
- Under the roles tab, we can see the roles to which this space is assigned. Currently it is not assigned to any role (we will see the assigned in further steps). Click on save to save the space created.
Assign a Space to a PFCG role
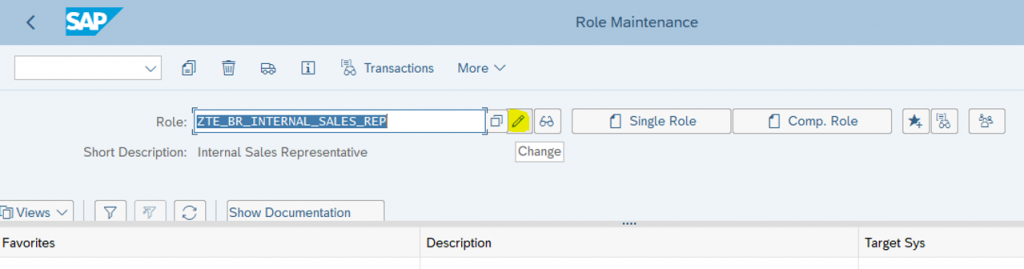
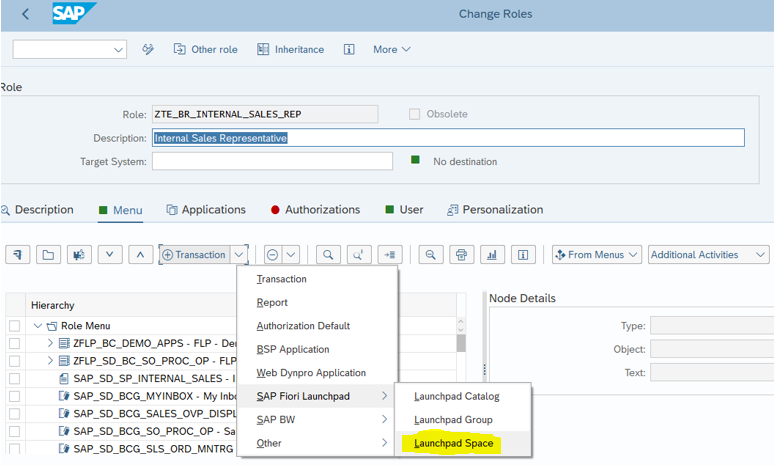
- Next we need to assign the created Space to the Role. GoTo transaction PFCG and open the role you want to assign it to.
- GoTo Menu tab and select the Fiori Launchpad Space to add the Space created above.
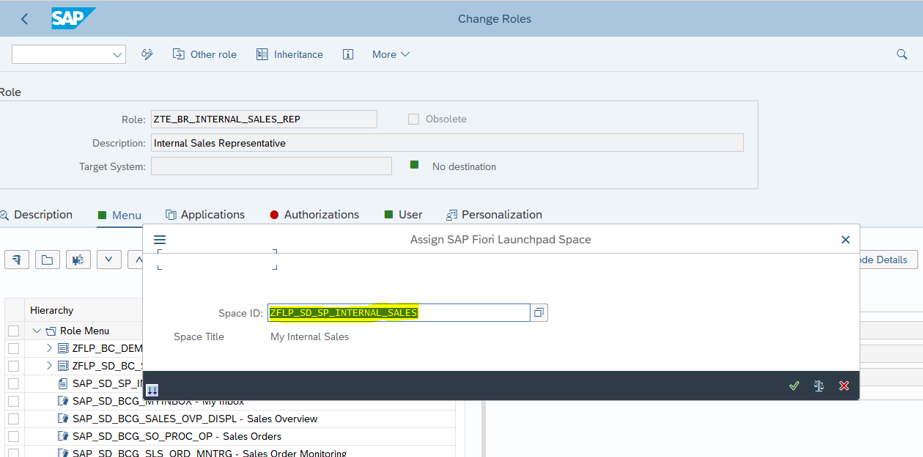
- Select the space using the value help and add
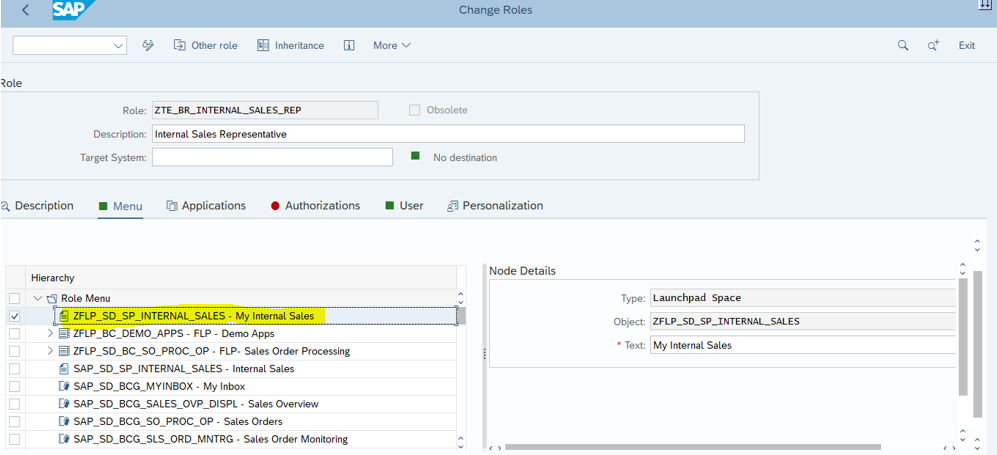
- The space is now added to the role as shown below
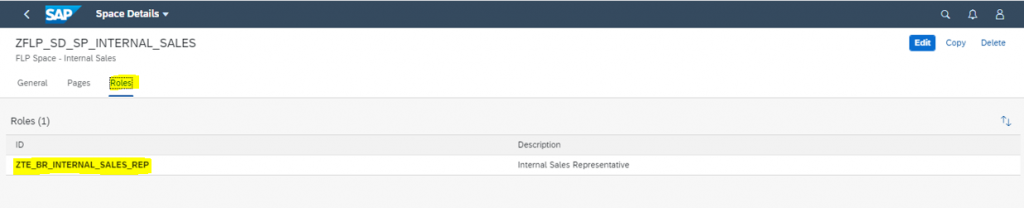
- Save and open the Manage Launchpad Spaces app to validate if the Role is assigned to it.
Add content to the page
- We have created Space and default page with it and assigned the space (hence page also) to the role, but page is not designed yet. Let’s design the page
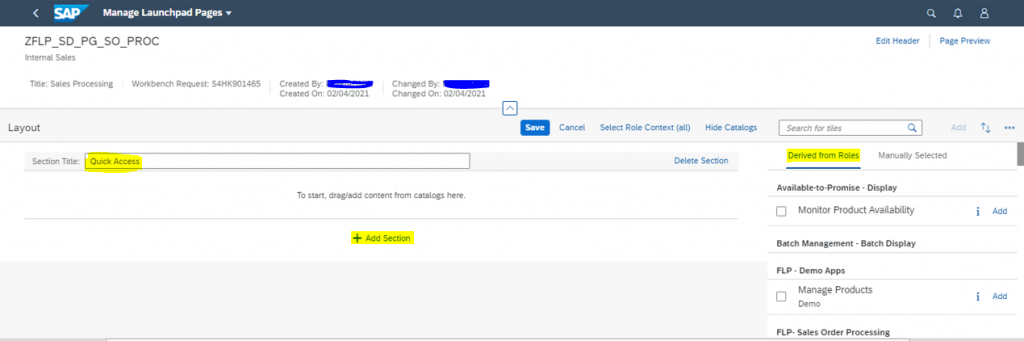
- Open the Page from the “Manage Launchpad Spaces” Pages tab and click on Edit and assign the TR in the popup.
- The page will be in edit mode with Option to maintain section name. Input the section name ” Quick Action” . There is option to add Section. On the right side, there are Apps displayed derived from the role to which space is added.
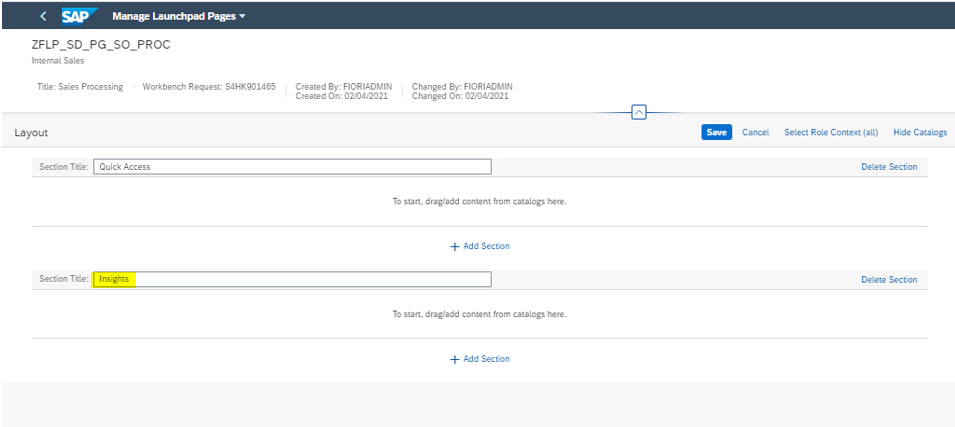
- Lets create another section ” Insights”
- Next select the apps , to be added to page, from the right side and click on Add button and select section to which apps should be added. In this case “Quick access”.
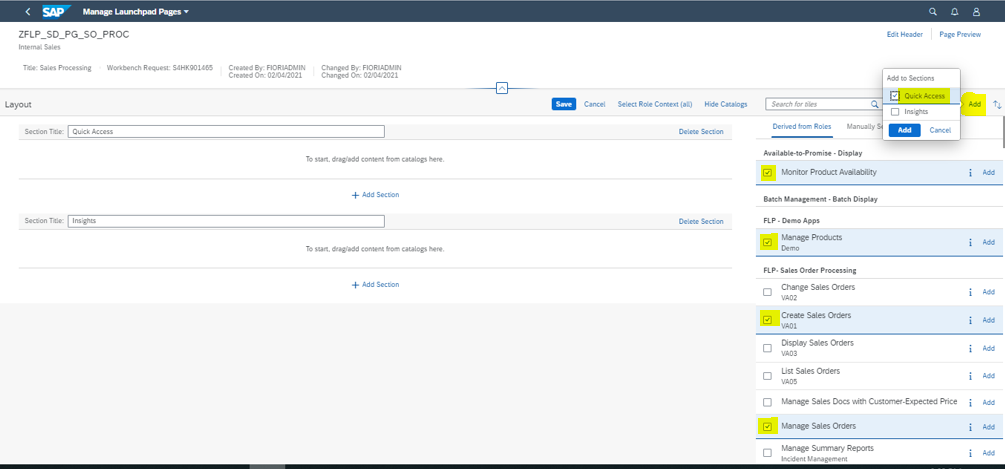
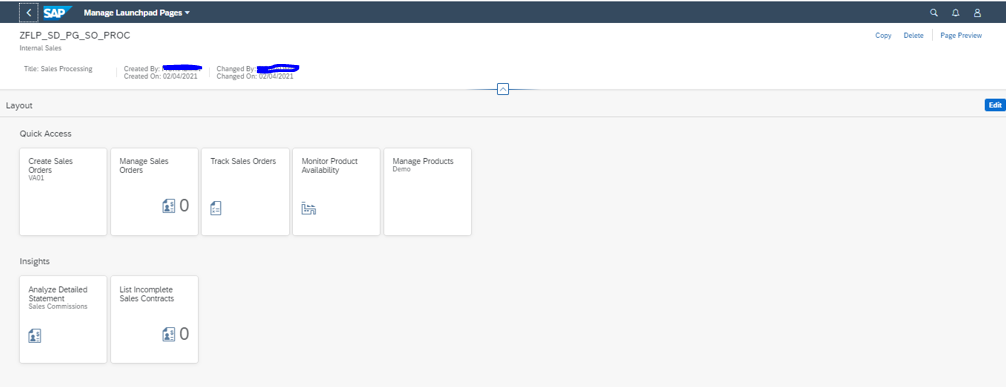
- Similarly, add apps to Insights section also. Apps can be added by dragging and dropping individual apps to the respective section also. Once done, save the page and and will look like as below
Create a page using Manage Launchpad Pages App
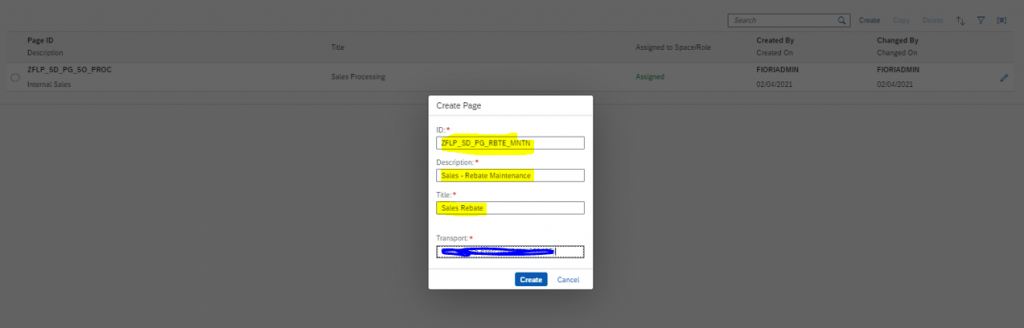
- Lets create another Page but this time using “Manage Launchpad Pages” App. Open the the App from Launchpad.

- Enter the page details and click on create
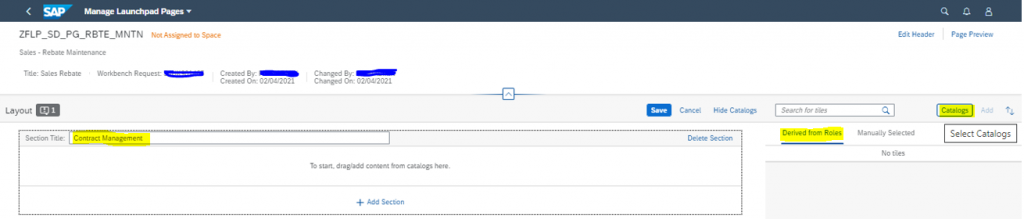
- A blank page is create. Click on Edit and pass the TR Request in the popup.

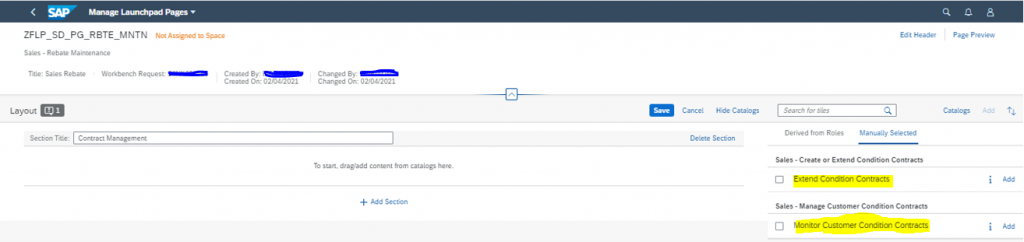
- Enter the Section name, in this case ” Contract Management”. Also you will notice that there are no derived apps available as the page in not assigned to any space or role. Also, there is option to select apps from available catalogs. Click on Catalog.
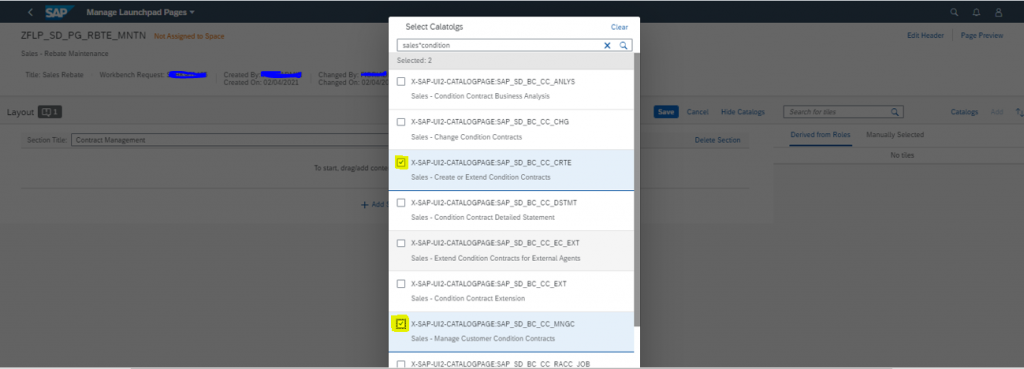
- Select the Apps, to be added, from the listed catalogs
- Now the selected apps are available under manually selected apps and can be added to sections. Add the apps to “Contract management” section.
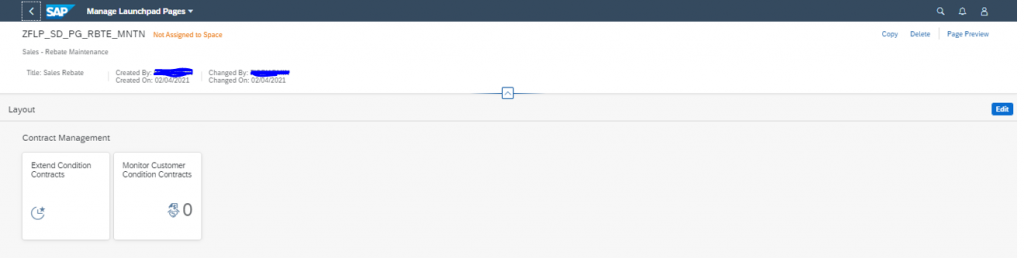
- Once added, save the page and it will look like below.
Assign the page to the Space.
- Now we have created the page , but it is yet not assigned to any space. Lets do that. Open the “Manage Launchpad Spaces” App again and Open the Space we previously created
- Navigate to Pages tab and click on Edit and enter the TR number in the popup that appears

- On the right hand side, we can see the available SAP Delivered pages along with customer created pages. Search for the page we created in previous step.
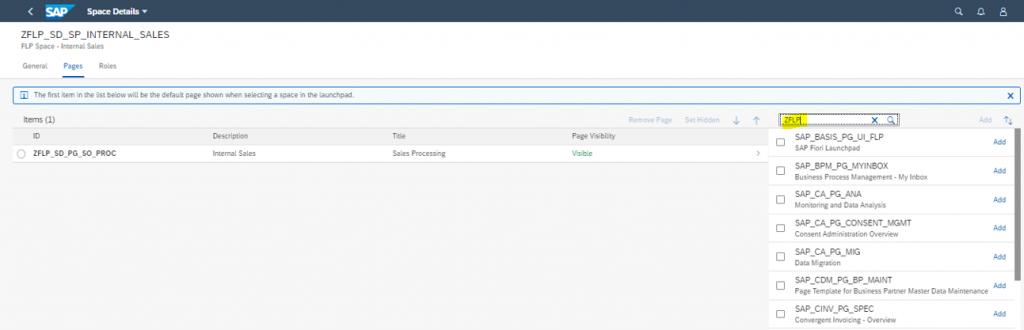
- Select the page and add it and save

- Now ,we have two pages assigned to the Space.

With this we are done with the creation Of Space and Pages and the same has ben assigned to the role also. Page Layout if also designed. Now let’s see how as an end user we switch from old Launchpad view to the New Spaces and Pages Layout.
Switch to the spaces mode in the launchpad user settings
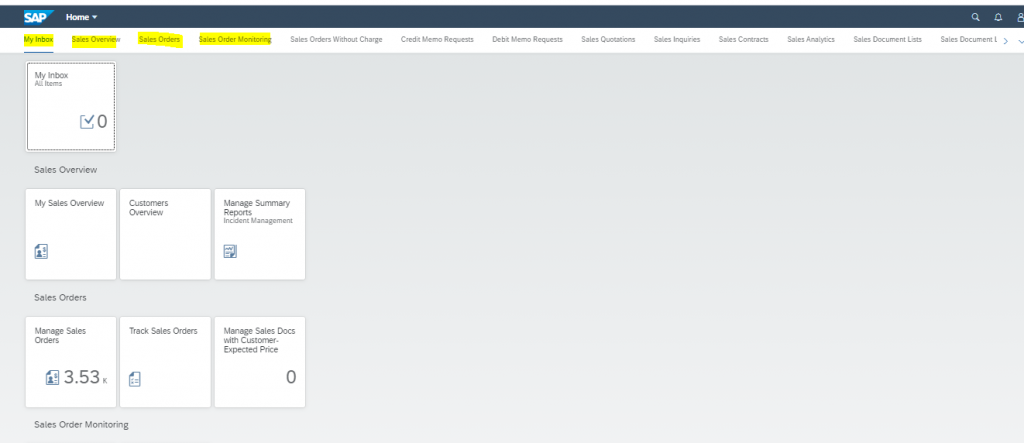
- After login to Launchpad, before switching to Spaces, the launchpad will be same with the groups defining the structure of the page. On the top-level menu bar, you can navigate to the different groups, which are all on this single page
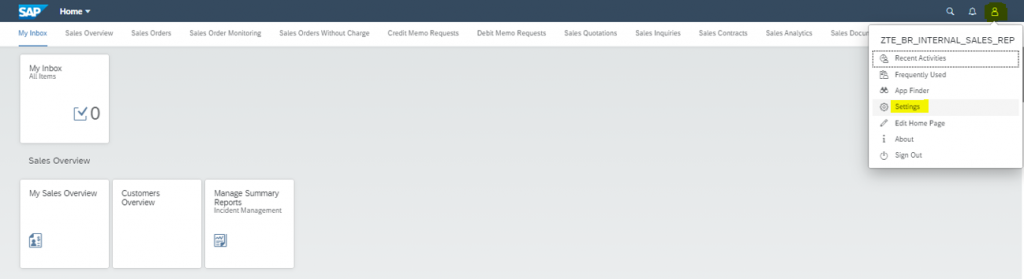
- Next, goto setting under the User Menu
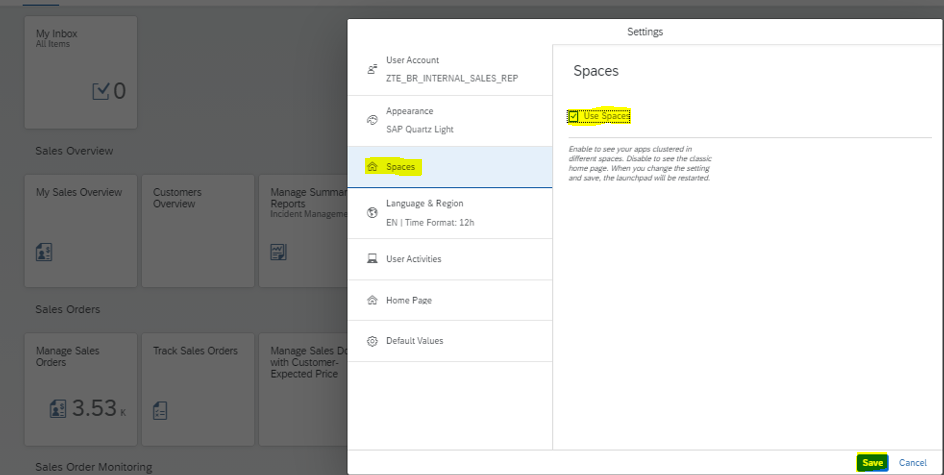
- Select Spaces and check the “Use Spaces” checkbox and click on Save.
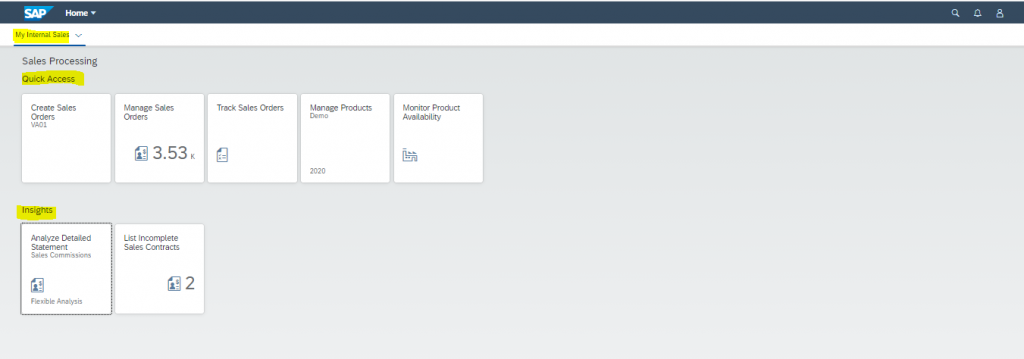
- And here we go… we can see the new Spaces and Pages layout .
- By default it shows the First page ” Sales Processing” with sections “Quick Access” and Insights”. We can change the Page sequence under the “Manage Launchpad Spaces” App.
- We see a drop down with the Space as we have multiple pages assigned to the space. Click on the drop down and we can see both pages.
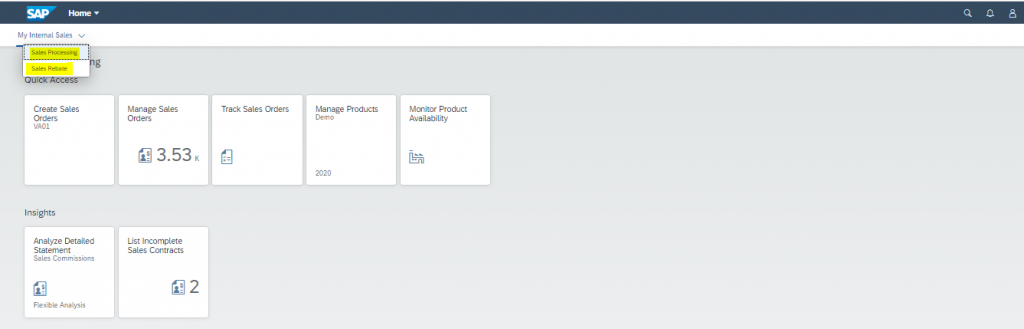
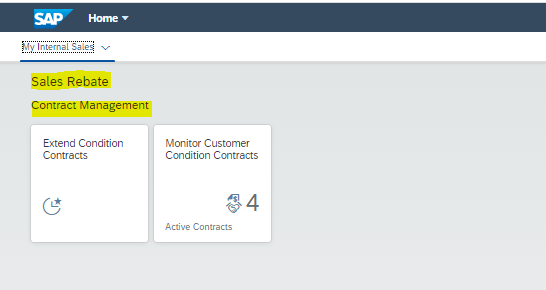
- Select the “Sales Rebate” page and we can see the apps assigned to it.
Rating: 0 / 5 (0 votes)


