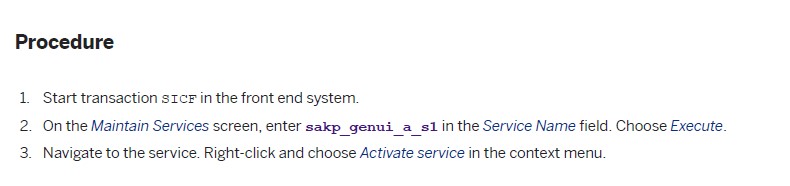
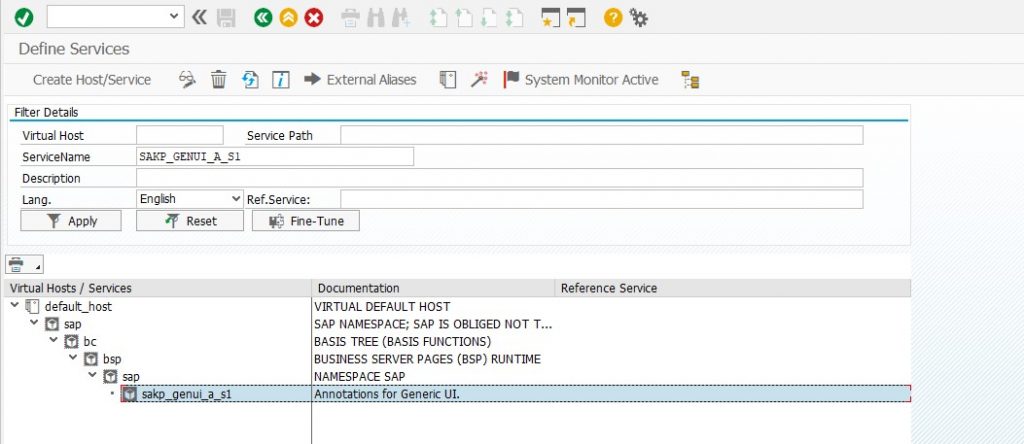
13. Setting up SAP S/4HANA attachment services (front end system)
5) Carrying Out Settings for Implementation
- Providing/create Users for Content Activation
Also Read: SAP S/4HANA Business Process Integration Certification Preparation Guide
1) User must have SAP_ALL profile
2) Open the Defaults tab and enter the following values:

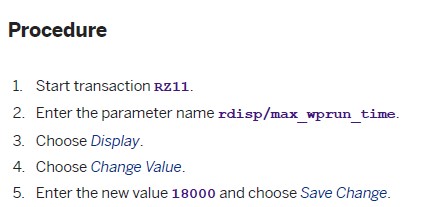
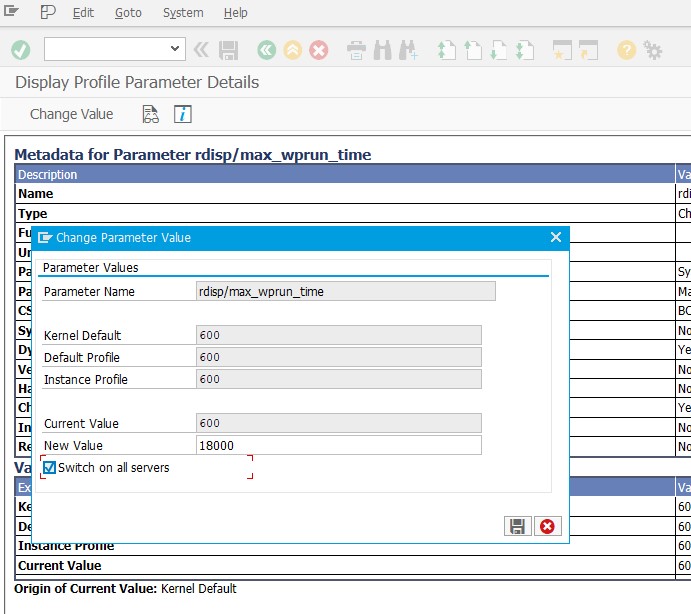
- Preventing Time Out Short Dumps
6) Pre-Activation Settings for EWM Scope Items
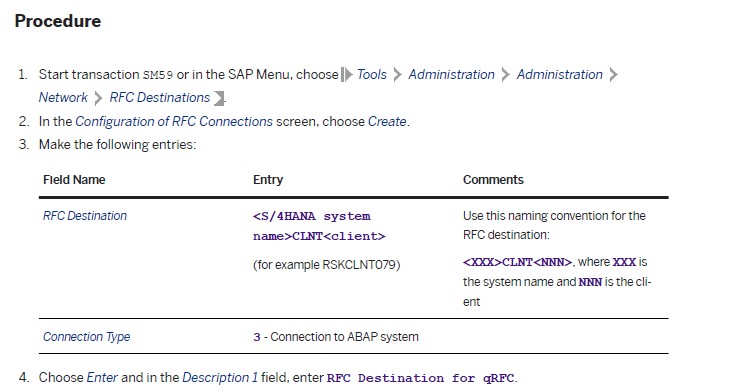
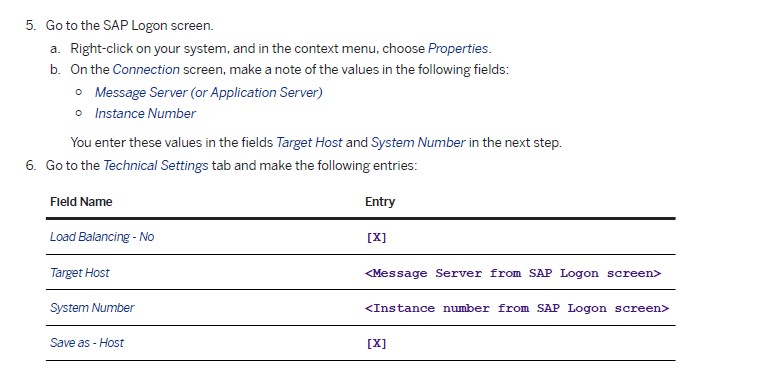
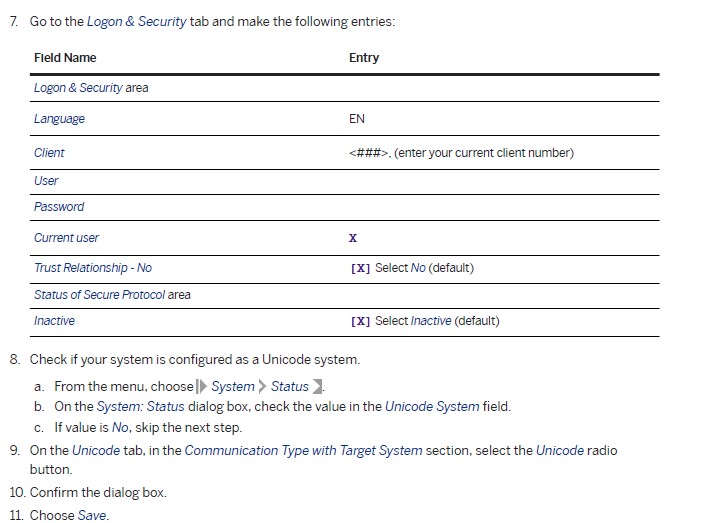
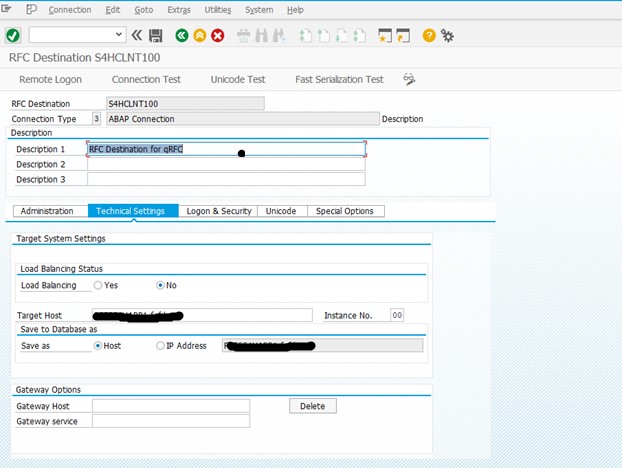
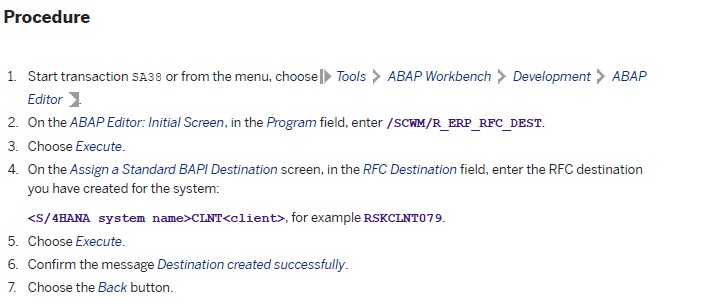
14. Defining RFC Destination

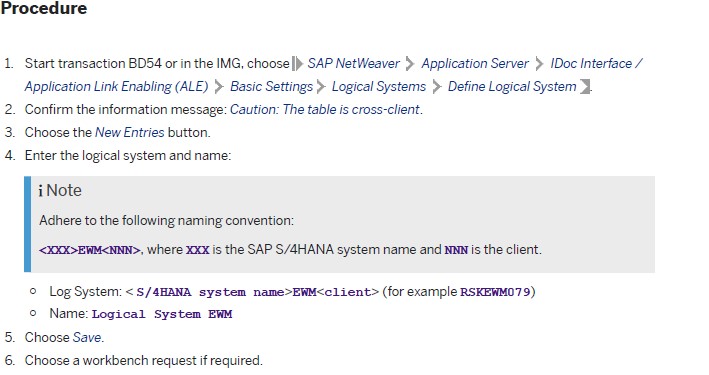
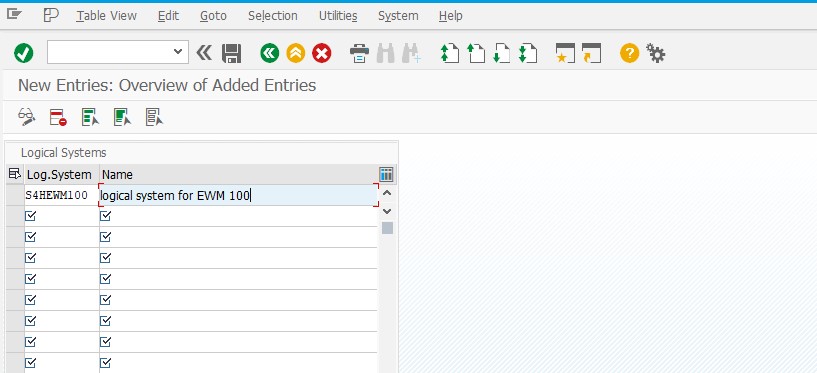
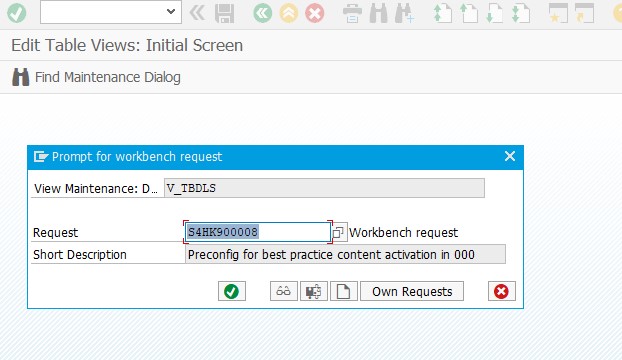
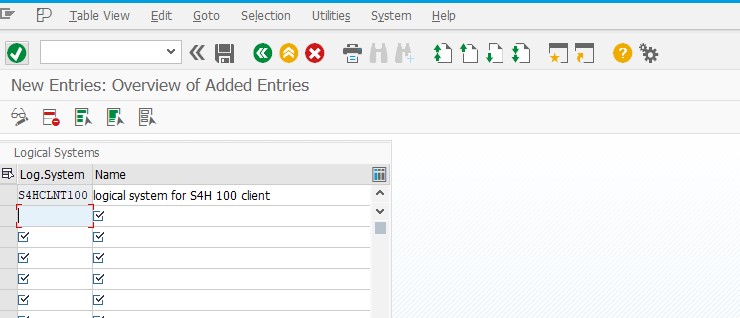
15. Defining Dummy Logical System
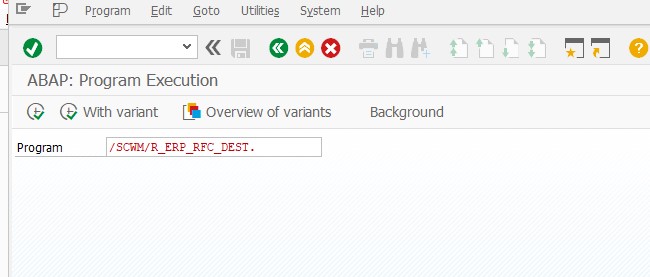
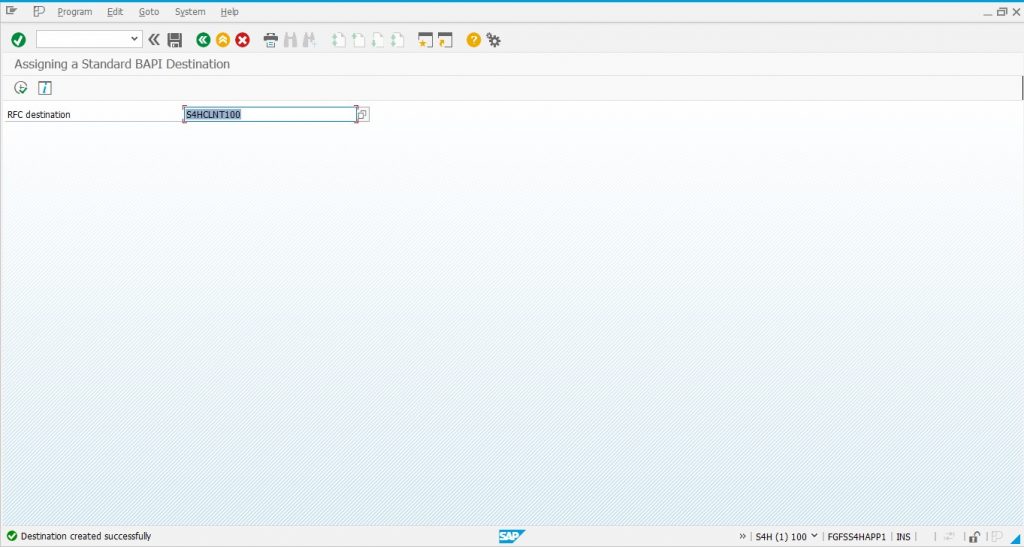
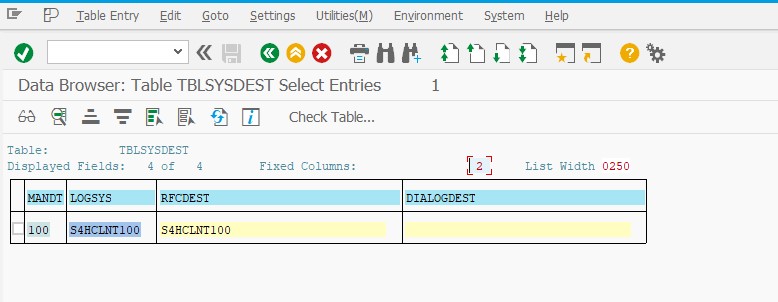
16. Determining RFC destination for method calls

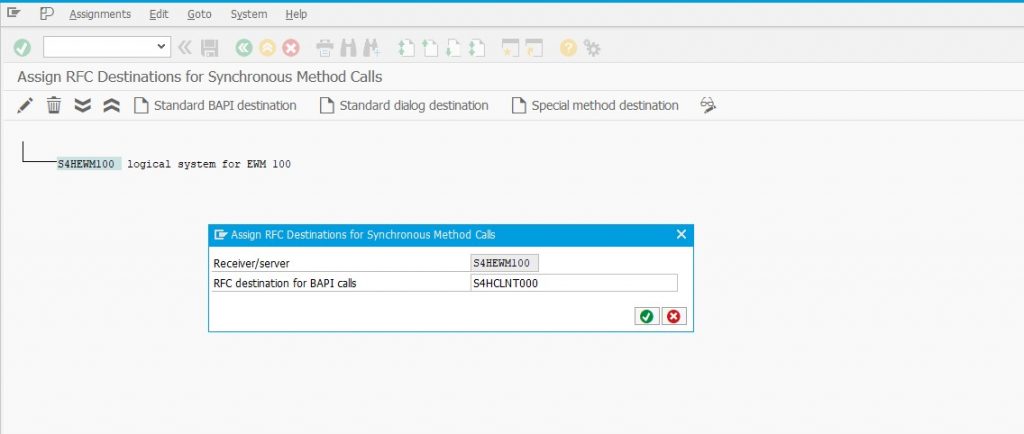
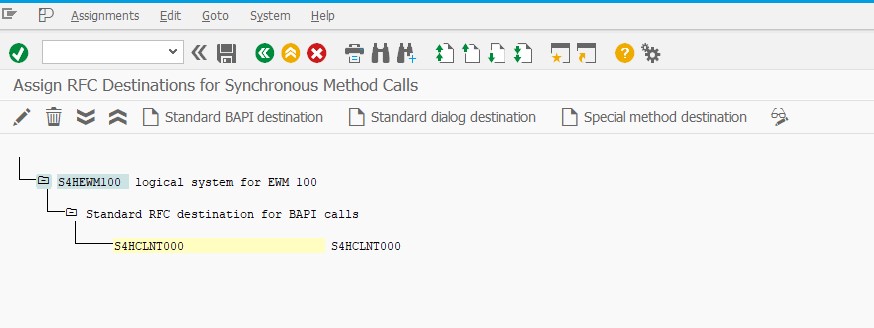
17. Determining RFC destination for method calls from S/4HANA EWM
First create logical system name for client 100
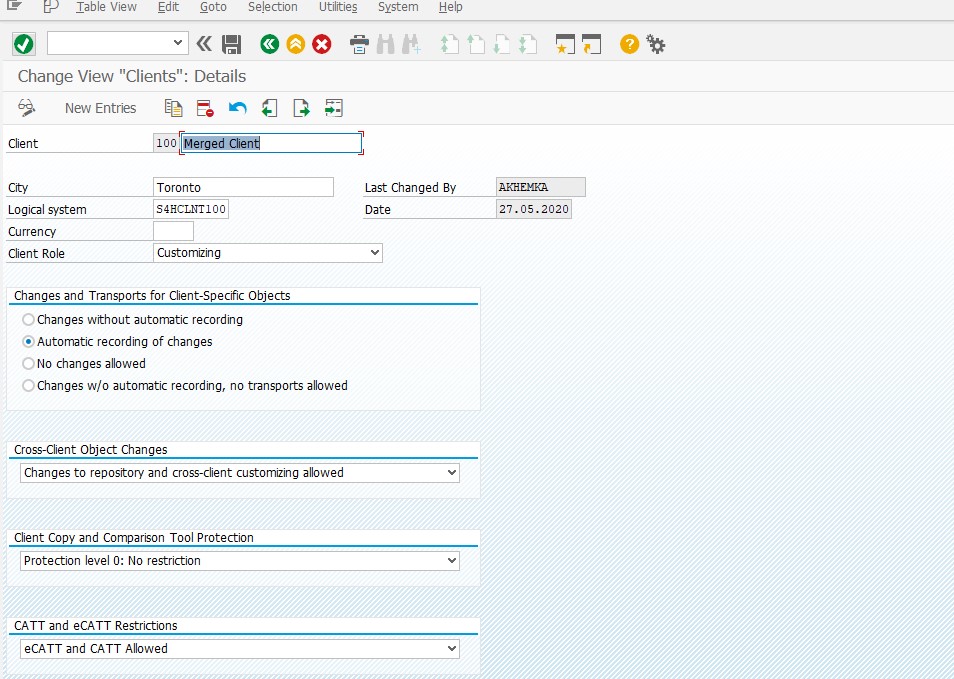
Then proceed
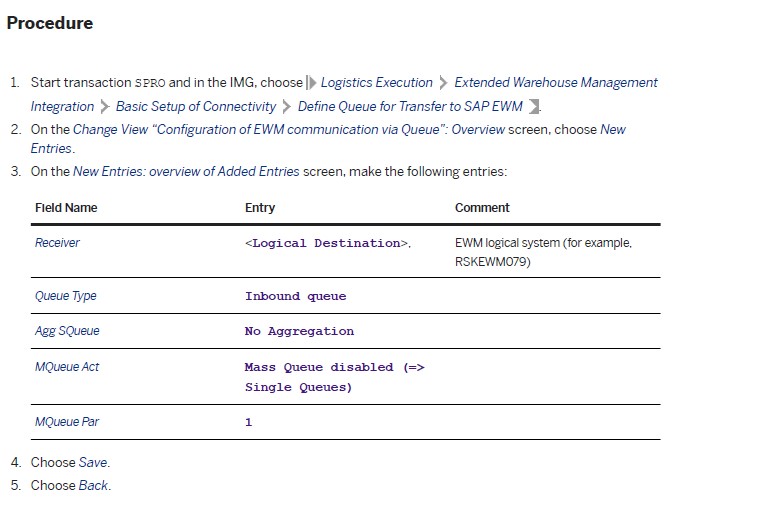
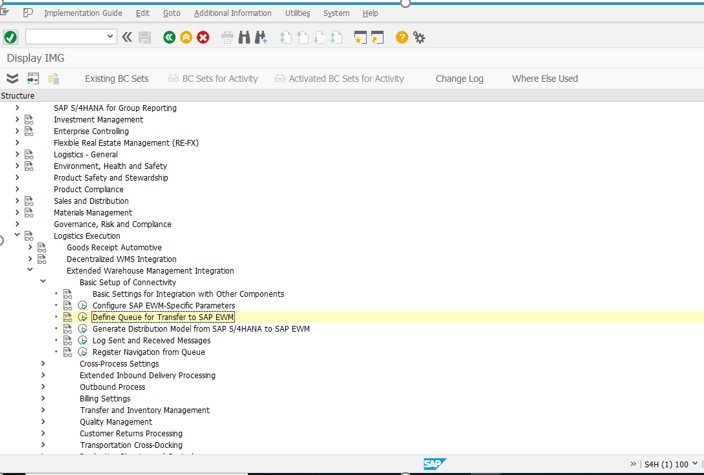
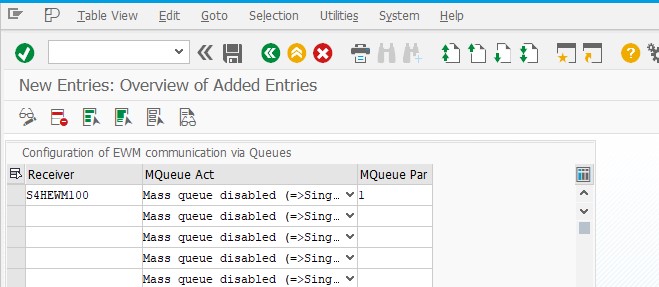
18. Defining Queue for Transfer to SAP S/4HANA EWM
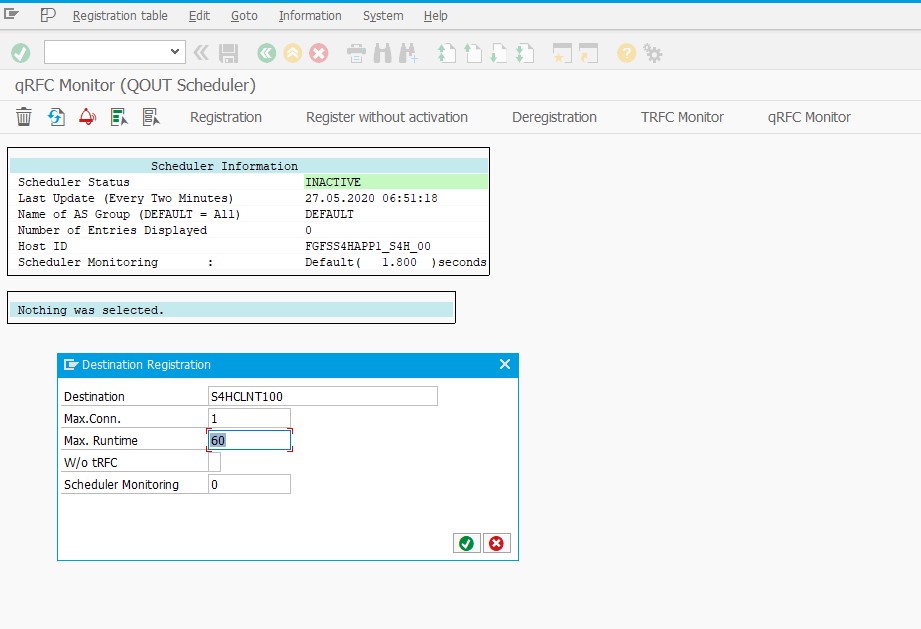
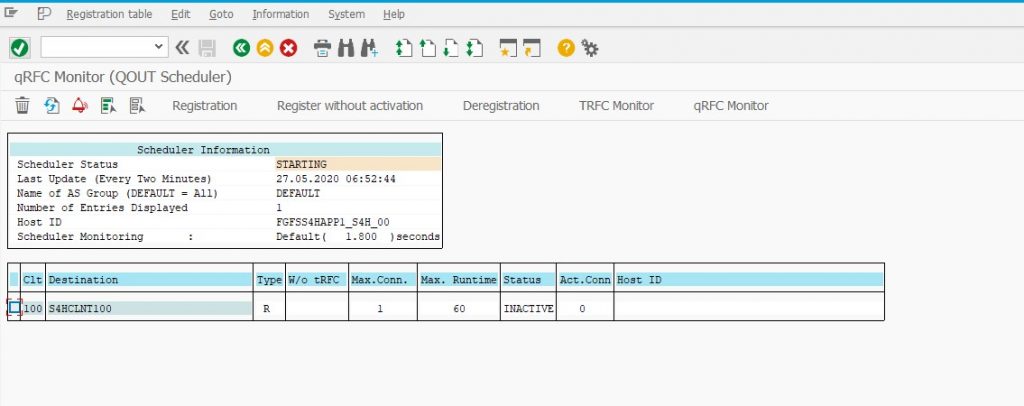
19. Setting the QOUT Scheduler

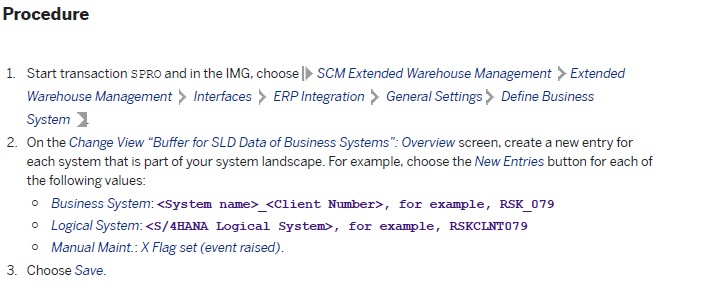
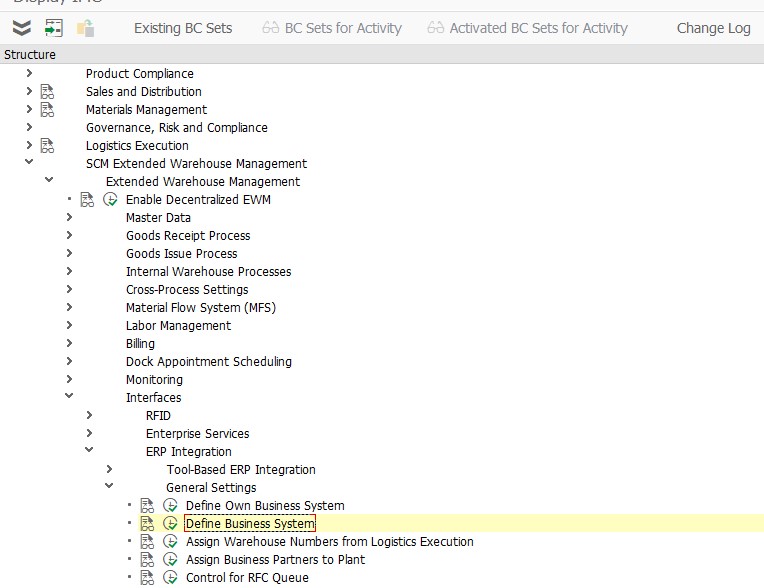
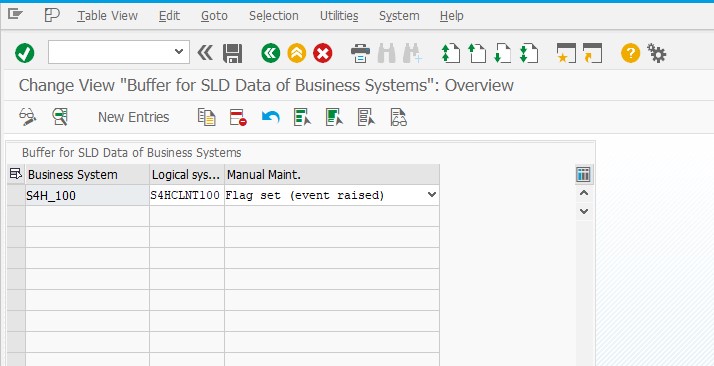
20. Defining the Business System

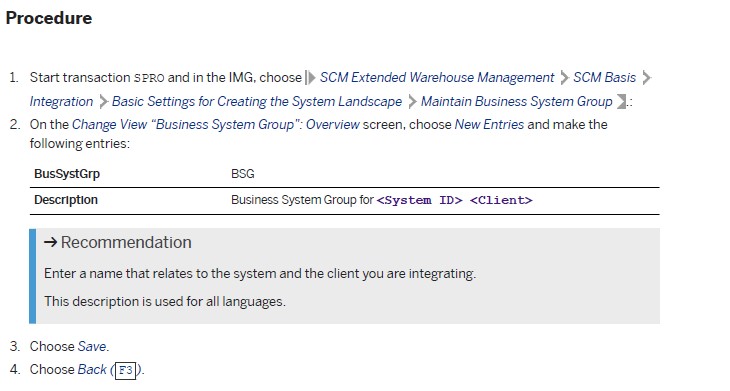
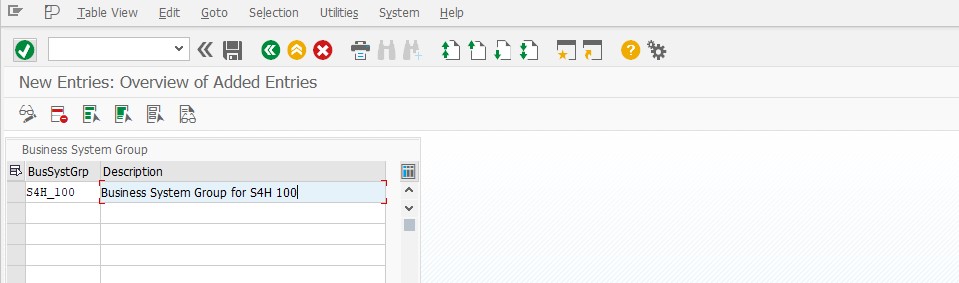
21. Maintaining Business System Group
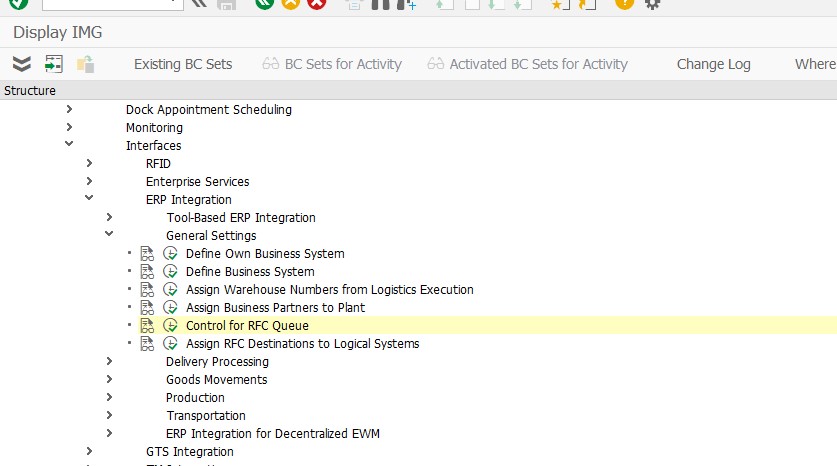
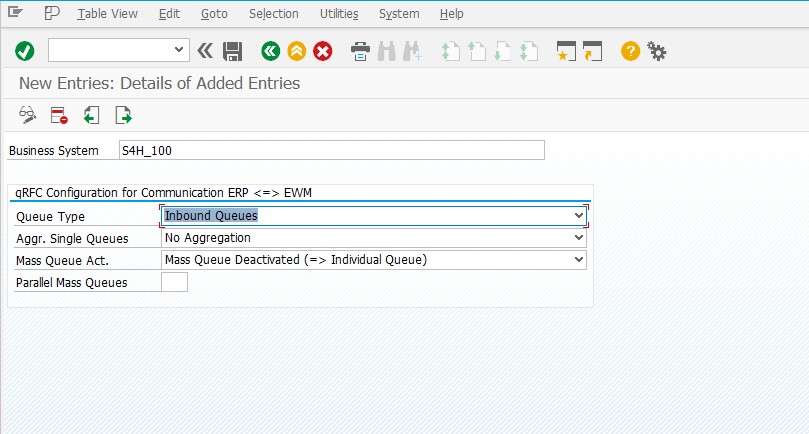
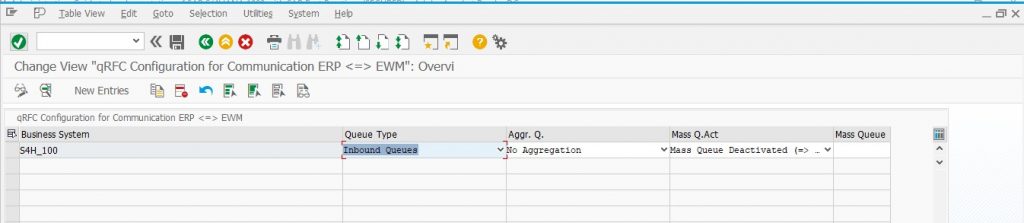
22. Assigning Logical System and Queue Type
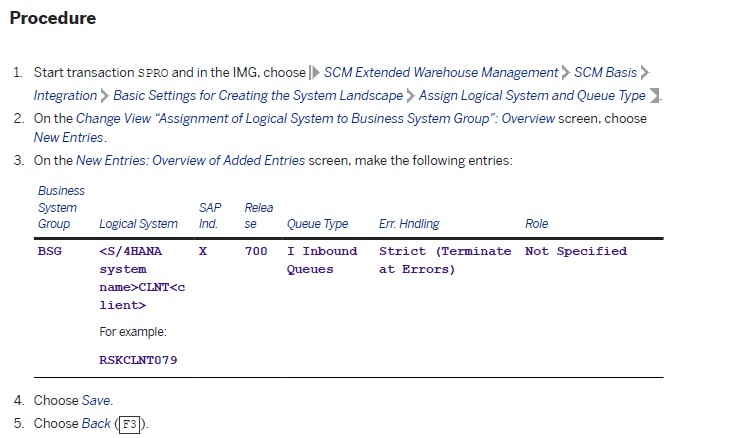
23. Assigning Logical System and Queue Type

7) Implementation
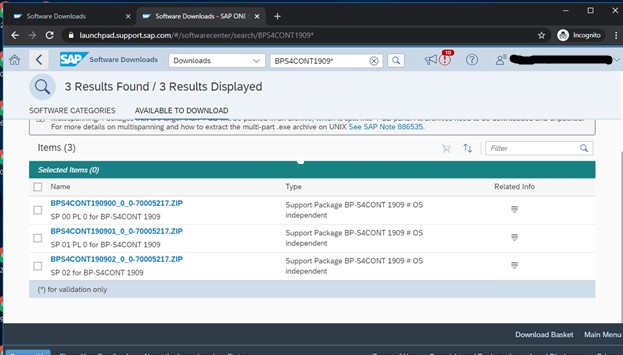
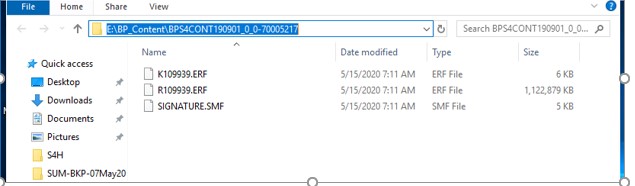
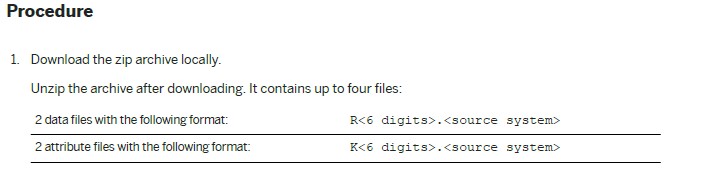
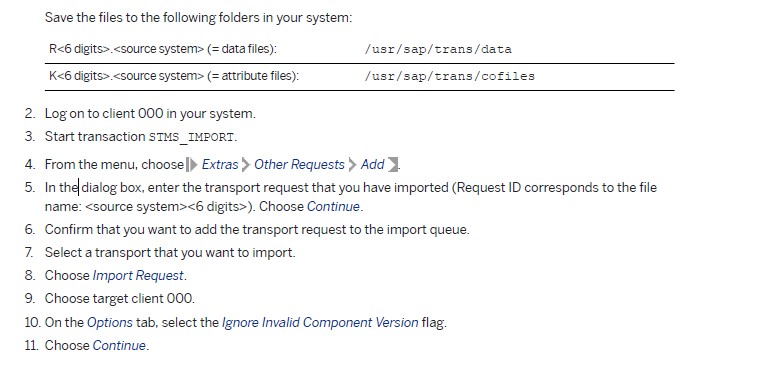
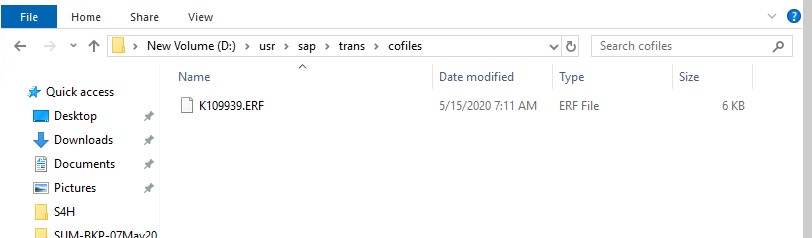
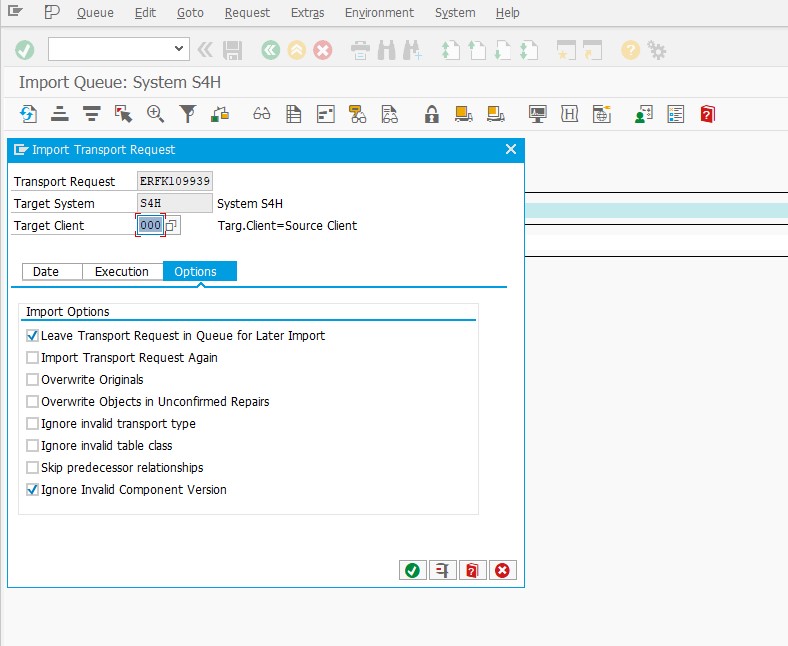
24. Importing BP content in 000
Before activating a solution, you should always get the most recent SAP Best Practices content. This content is attached to SAP Notes, which are integrated into the central content activation note 2776548. You download transports containing the data files with the content from the SAP Note and import them manually to client 000.

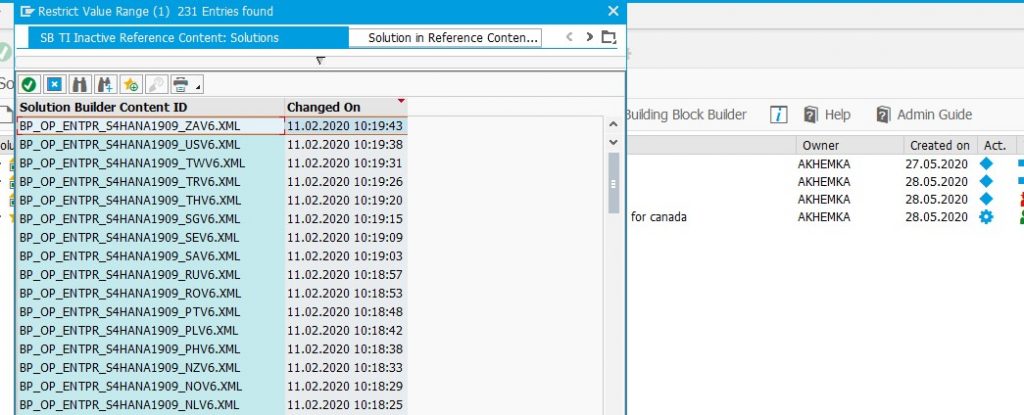
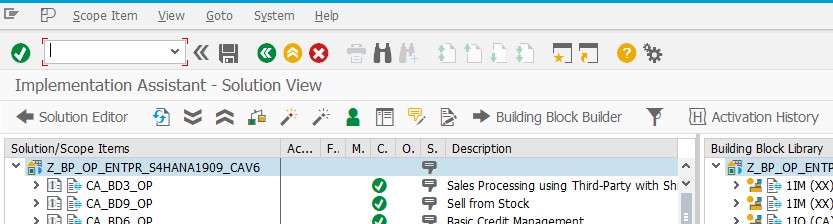
25. Loading Solutions from SAP Best Practices Content


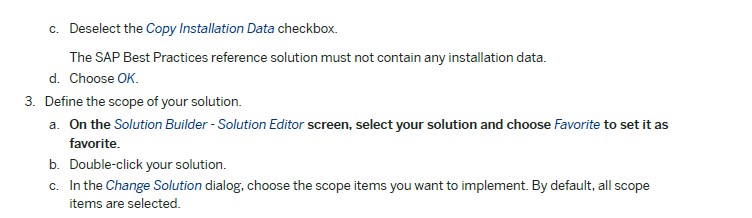
26. Defining the Scope of Your Solution


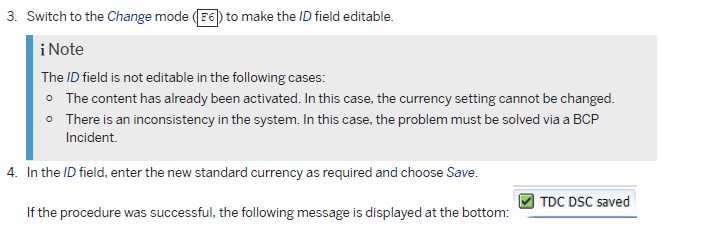
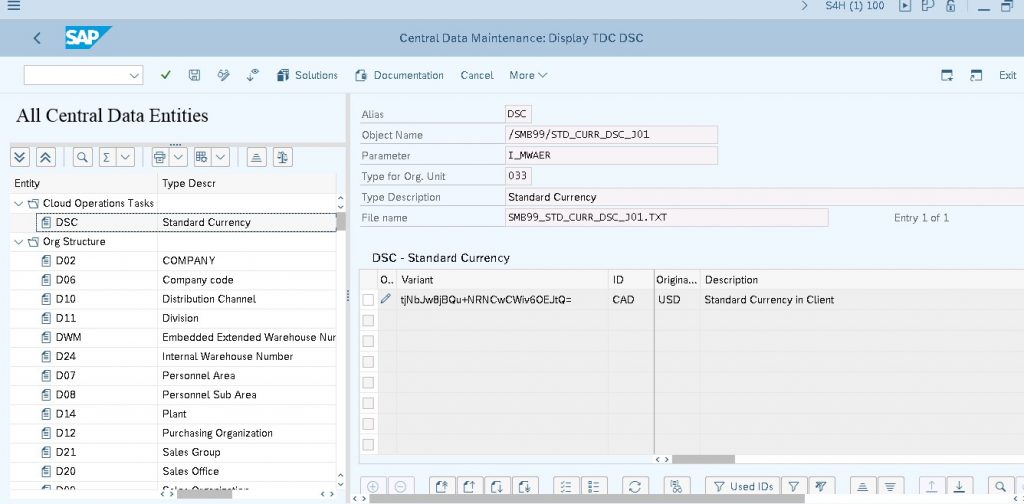
27. Changing Group Currency from USD to Another Currency
The default group currency delivered with the SAP Best Practices content is USD. If you want to use another currency (for example for the material ledger), adapt the setting directly in Solution Builder before beginning with the content activation.
You change the value in the corresponding test data container in Solution Builder.

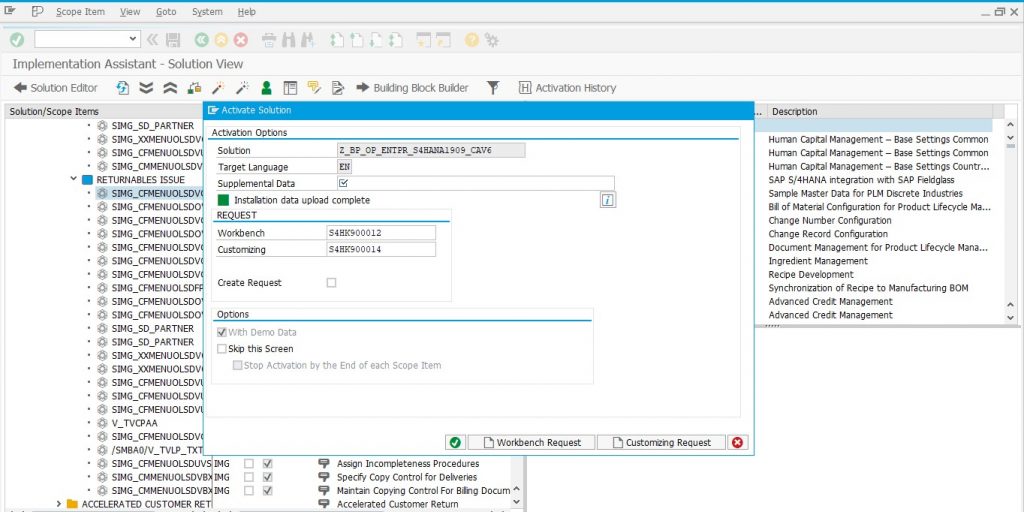
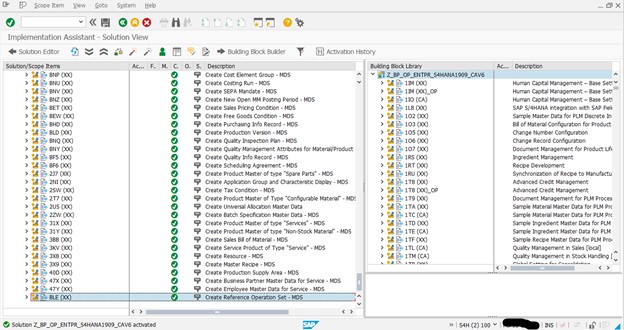
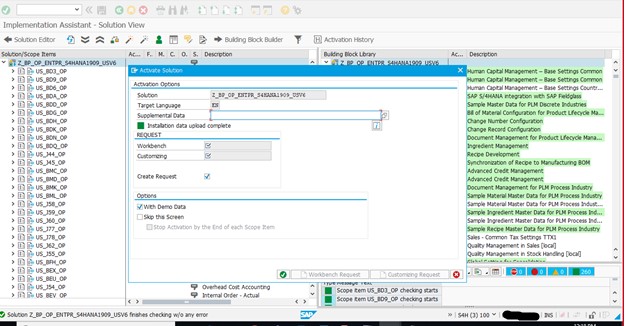
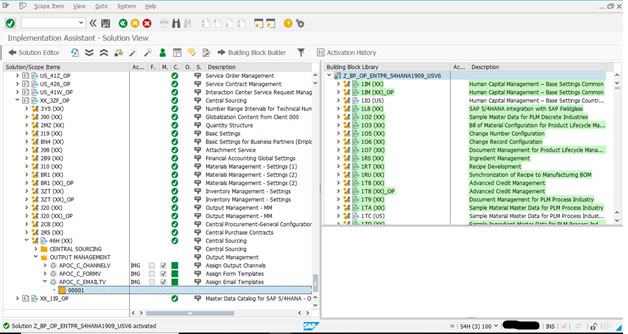
28. Activate Your Solution
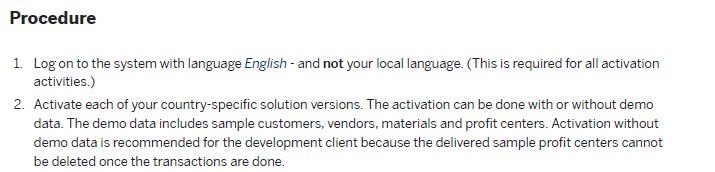

29. Activating Several SAP Best Practices Country Solutions

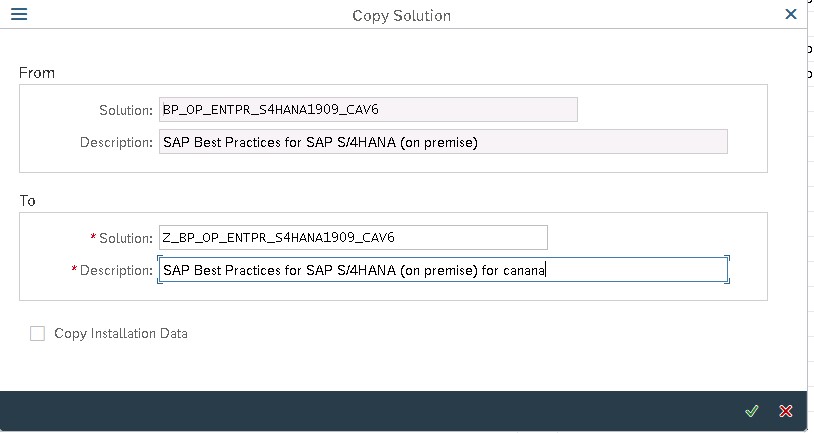
- Copy the solution to your Customer Z solution.
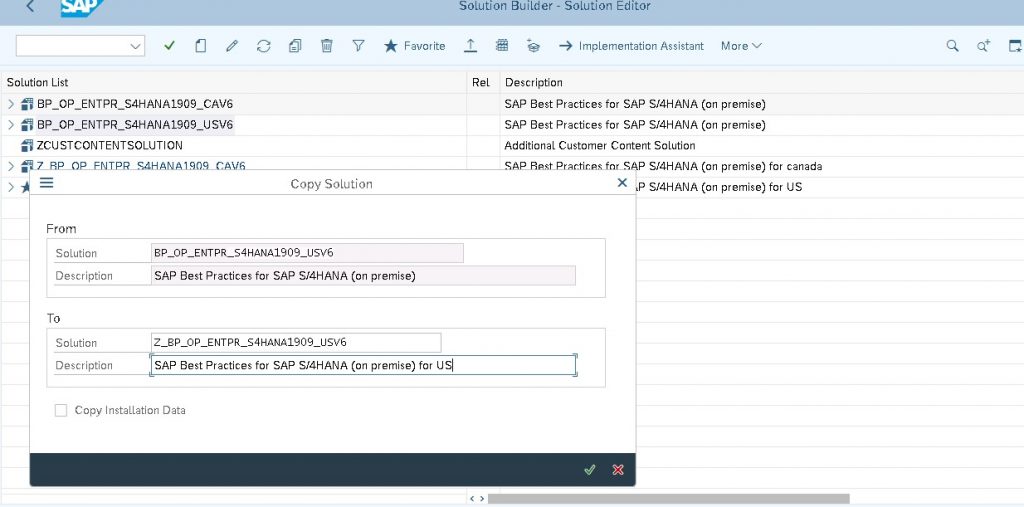
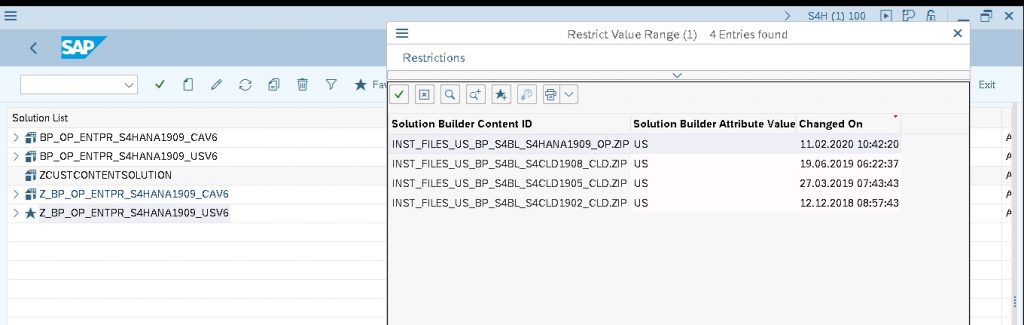
- Import Installation Data
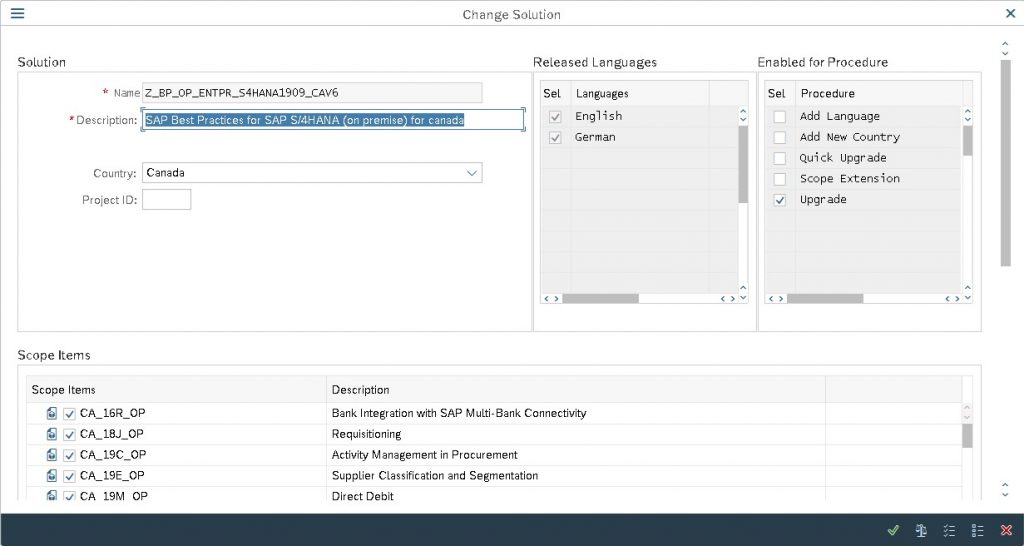
- Select the Scope of the solution
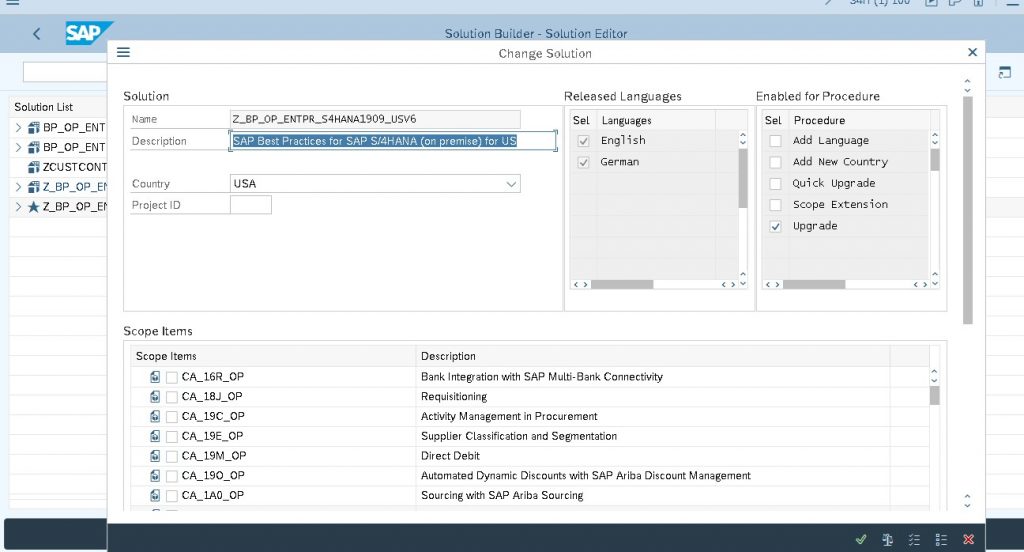
- Adding the Scope
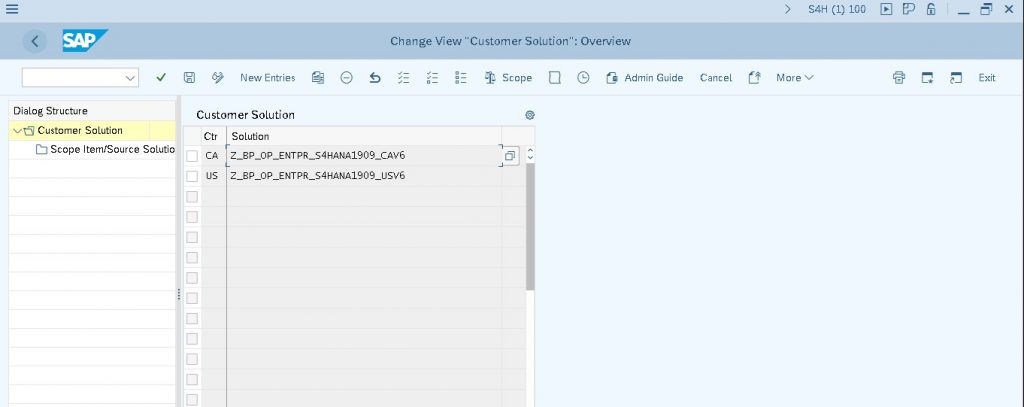
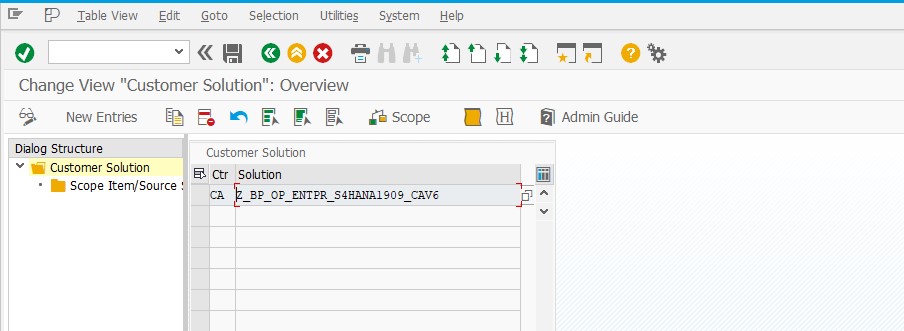
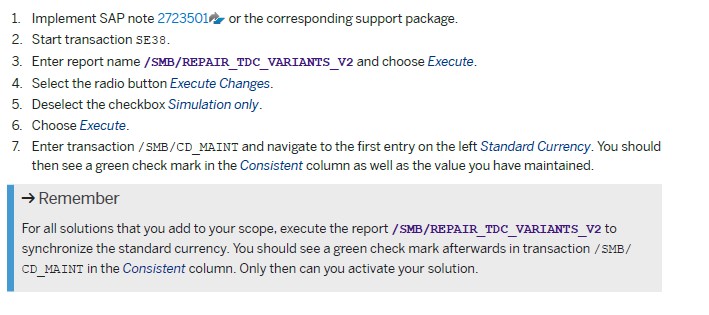
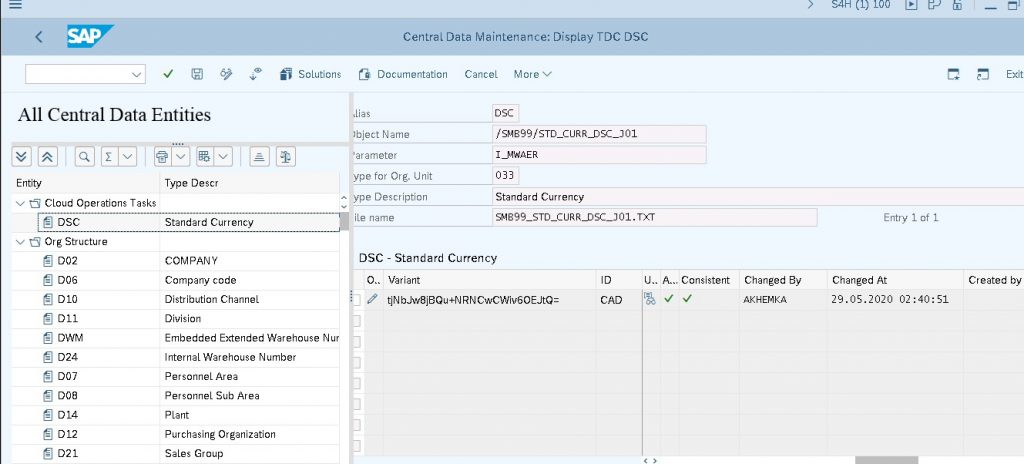
If you are activating multiple country solutions, perform the following steps before activating the additional solutions. This copies the changes made in transaction /SMB/CD_MAINT when there was only one solution to all other solutions that were added later, listed in transaction /SMB/SCOPE. Afterwards the client currency is consistent in all solutions.

30. Activate the Best Practice content for US(UnitedStates)
8) Errors during Activation
31. Errors during first best practice (Canada) activation
Error1:
J67 (US)_OP
Just choose Activate again to pass the error.

Error 2: Choose Enter on the information popup, the activation will continue for some time on a different screen. (It is in BLG (XX) Building block, you will not be able to see as the activation is running in a different screen now)
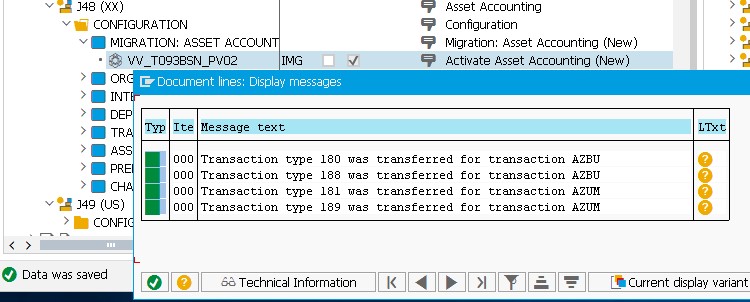
Error 3: Choose Enter on the Document Lines: Display messages pop up.
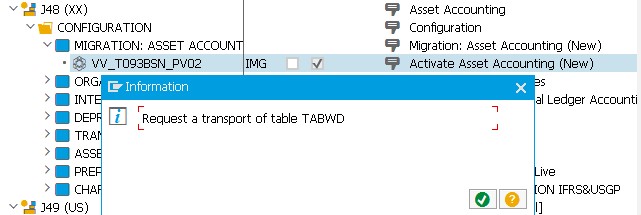
Again, choose Enter on the next popup coming up on the same step to continue with the activation:
Error 4: J30 (XX) SIMG_SD_PARTNER
Entry already exists for the step due to client 000 copy. Skip the error and continue with the activation.

Choose C button (change status) and then confirm status as “entry already exists from client 000, skipped)
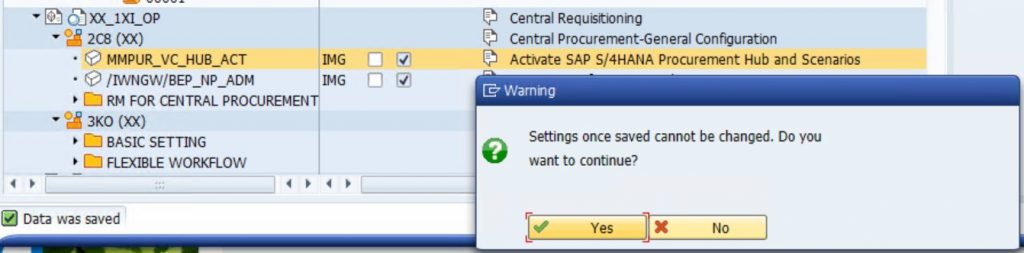
Error 5:
Choose Yes on the warning dialog box to proceed with the activation.
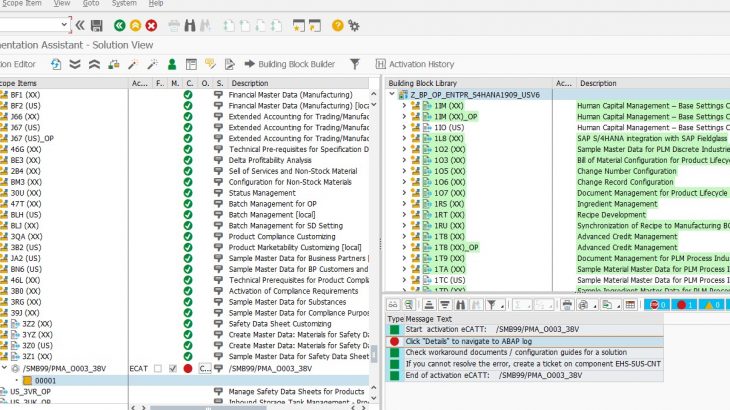
32. Errors during US best practice activation
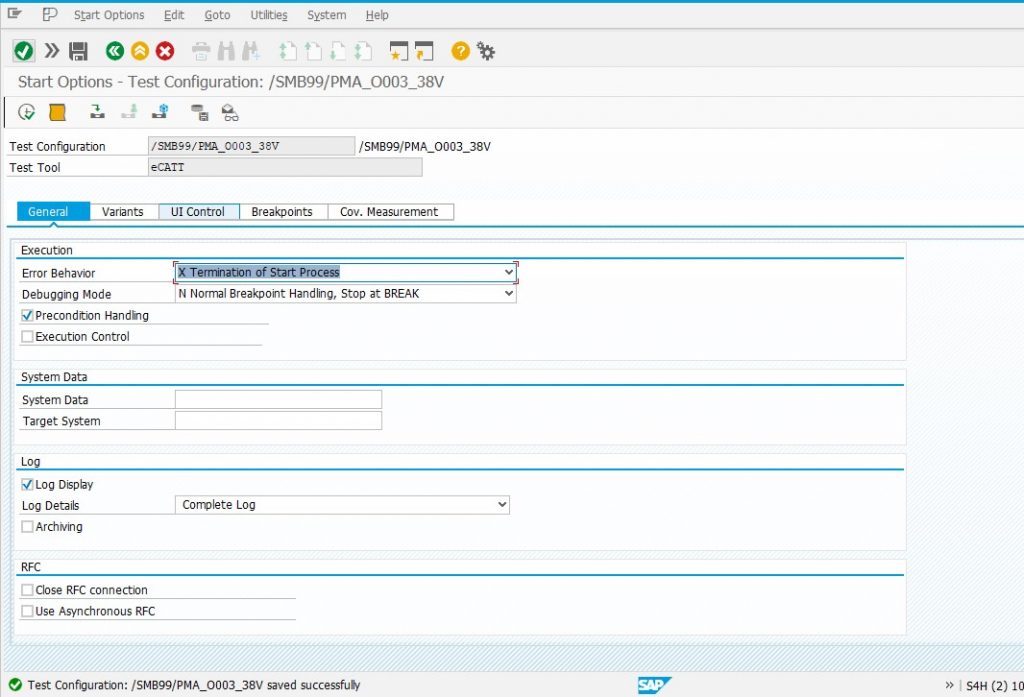
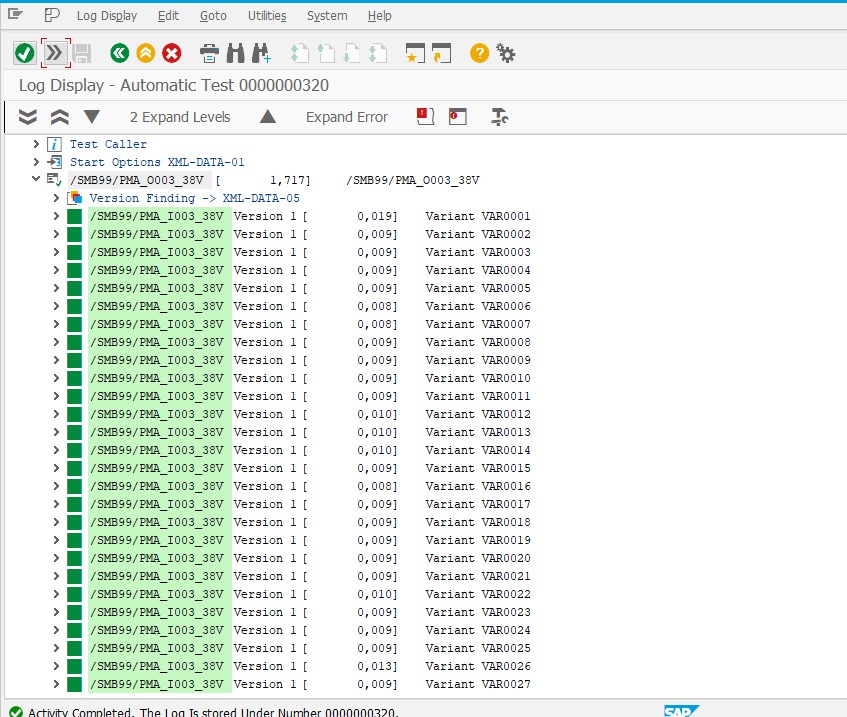
Error 6
There was Secatt error for object /SMB99/PMA_O003_38V
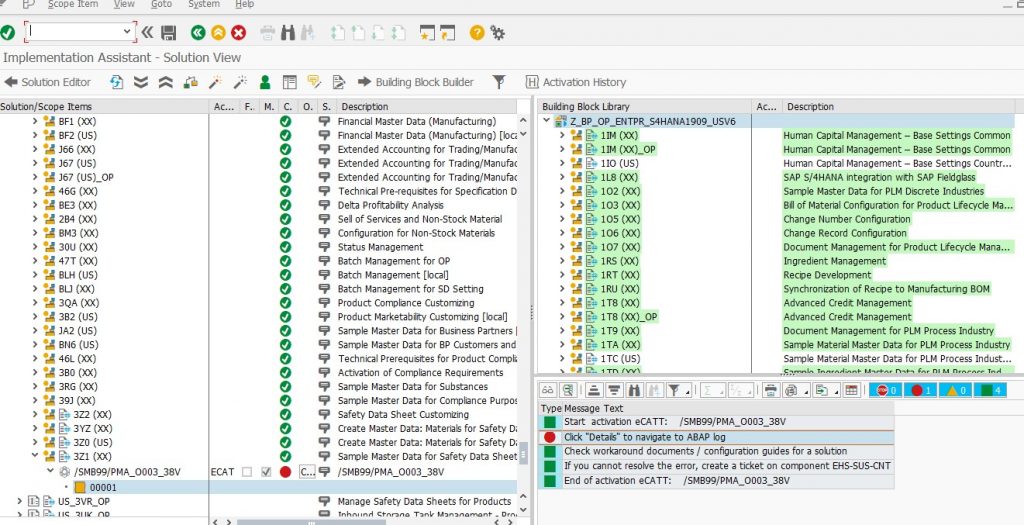
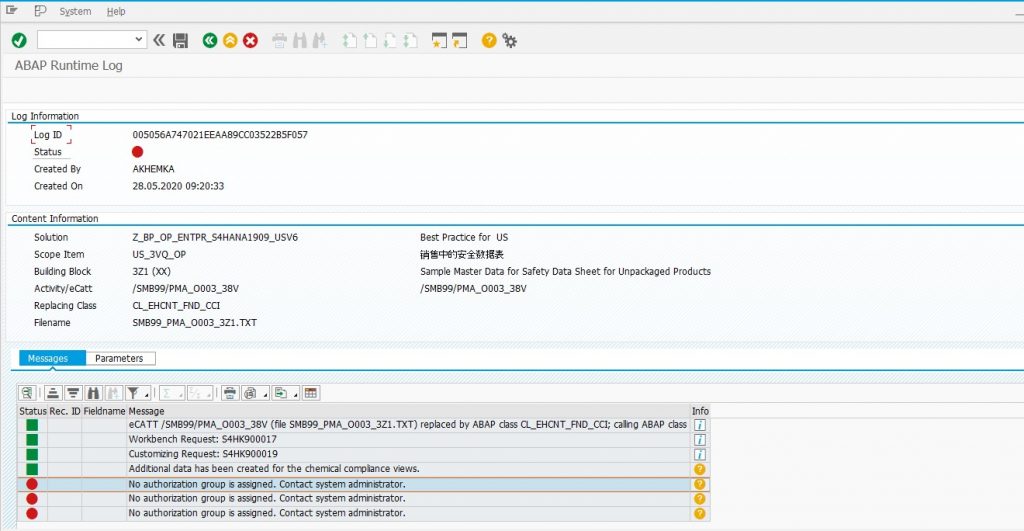
Resolution
Run the Secatt with the variants manually by copying all the variants one by one from the error details to the SECATT tcode.

Save the variants and Run the configuration
Error 7
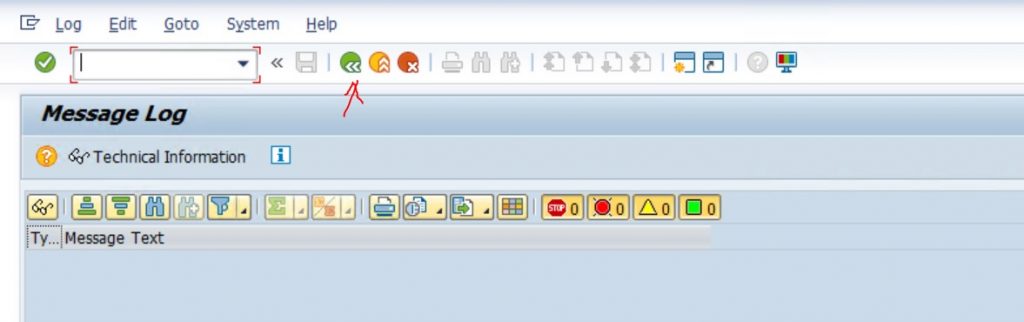
If your scope includes US_3F7_OP, then on 3L0 (XX) BB /SMB99/JVA_CLIENT_ACTIVE_GJAC activity, the activation stops on the Message Log screen.
Choose Back button and the activation will continue with the same screen for some time.
9) Issues Post-handover
33. Issue 1
Below error while posting material document
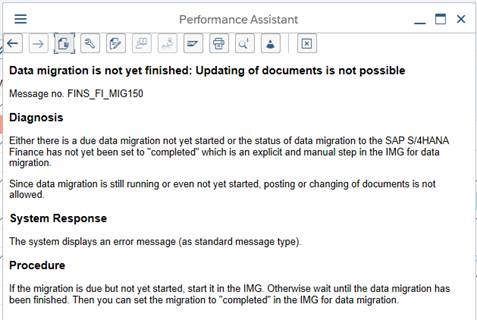
Resolution –
SAP NOTE – 2579200 – Data Migration is not yet finished: error FINS_FI_MIG150
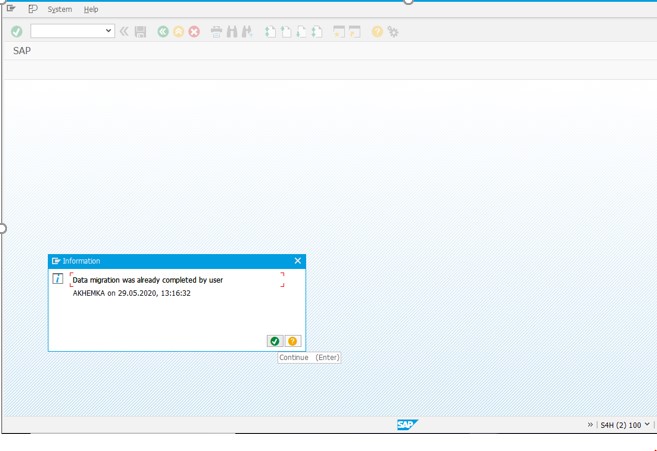
In the migration tool (transaction FINS_MIG_FINISH) set the migration to complete, ensuring you are happy with the migration and it is actually complete.
34. Issue 2
For the feasibility check of this request, user was trying to edit the screen via SE51 in S4H. But was getting the below error,
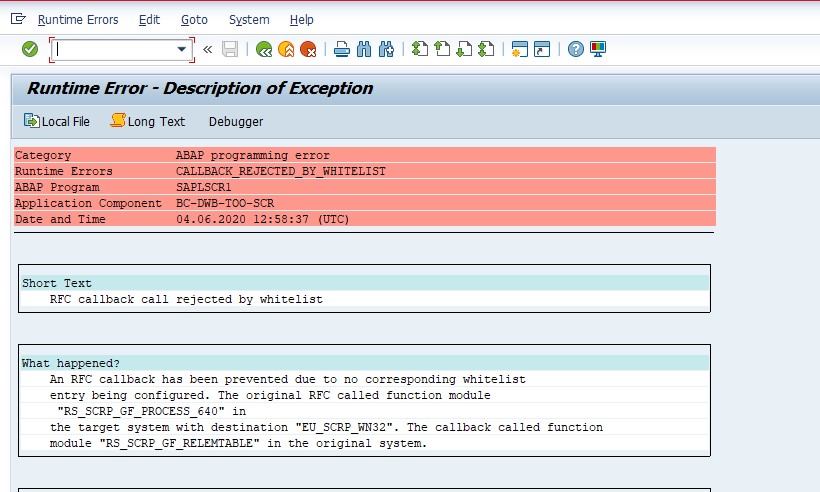
Resolution
2251931 – Runtime error CALLBACK_REJECTED_BY_WHITELIST in graphical Screen Painter
You can use the alphanumeric editor instead of the graphical layout editor; the former does not required RFC callbacks. To do so, adjust your personal settings in the ABAP Workbench accordingly: In the menu of SE80, choose “Utilities -> Settings…”. Then go to the “Screen Painter” tab and deselect the “Graphical layout editor” checkbox.
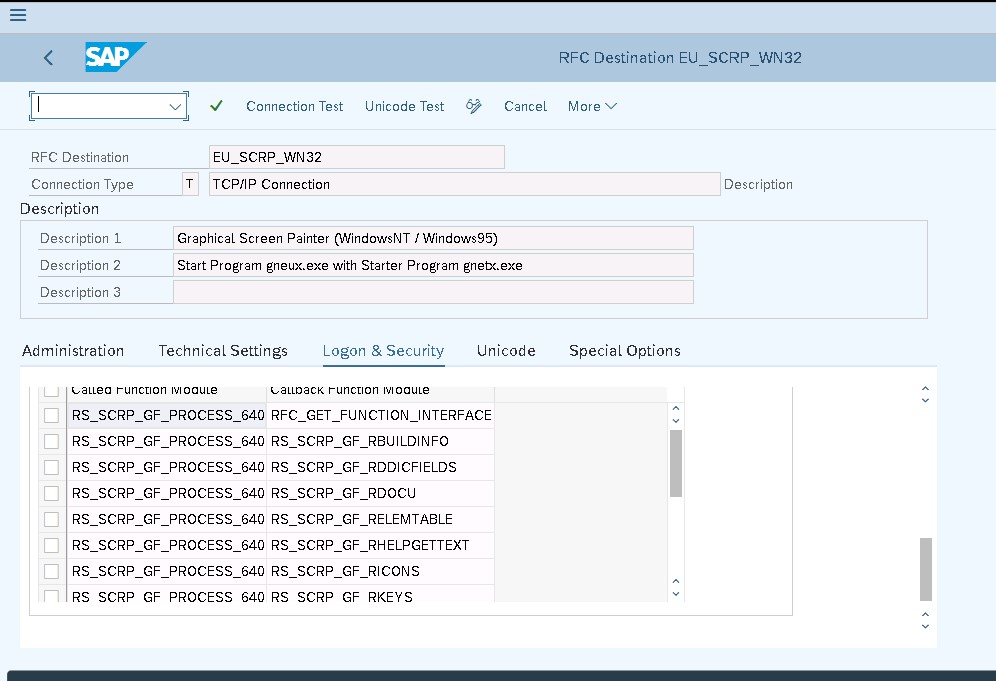
If you want to use the graphical layout editor, the RFC callback for the graphical layout editor must be enabled in transaction SM59 for the TCP/IP connection “EU_SCRP_WN32” by means of the specification of a positive callback list. (See SAP Note 1971118.)
Enter the following value pairs into the callback positive list for the RFC destination EU_SCRP_WN32:
Called function module / callback function module
RS_SCRP_GF_PROCESS_640 RFC_GET_FUNCTION_INTERFACE

RS_SCRP_GF_PROCESS_640 RS_SCRP_GF_RBUILDINFO

RS_SCRP_GF_PROCESS_640 RS_SCRP_GF_RDDICFIELDS

RS_SCRP_GF_PROCESS_640 RS_SCRP_GF_RDOCU

RS_SCRP_GF_PROCESS_640 RS_SCRP_GF_RELEMTABLE

RS_SCRP_GF_PROCESS_640 RS_SCRP_GF_RHELPGETTEXT

RS_SCRP_GF_PROCESS_640 RS_SCRP_GF_RICONS

RS_SCRP_GF_PROCESS_640 RS_SCRP_GF_RKEYS

RS_SCRP_GF_PROCESS_640 RS_SCRP_GF_RKEYTEXTS

RS_SCRP_GF_PROCESS_640 RS_SCRP_GF_RMESSAGES

RS_SCRP_GF_PROCESS_640 RS_SCRP_GF_RPROPTABLE

RS_SCRP_GF_PROCESS_640 RS_SCRP_GF_RPROP_DELETE

RS_SCRP_GF_PROCESS_640 RS_SCRP_GF_RSHLP

RS_SCRP_GF_PROCESS_640 RS_SCRP_GF_RSTATUS_40

RS_SCRP_GF_PROCESS_640 RS_SCRP_GF_RTEXTS
35. Issue 3
In SMQ2 there were Idocs failing with SYSFAIL error.

In SLG1 there error related to ADS printing.
Resolution
887495 – Note Assistant: Call contained error(s): ADS (2)
Configure or install ADS (Adobe Document Service)


