This will be a guide to create a bot that can log into the SAP SuccessFactors admin page. I will guide you through creating the project, capturing the required pages, then building the workflow. At the end I will include some debugging tips I learned while building this for the first time myself.
Read More: SAP Cloud Platform Certification Preparation Guide
Requirements to follow along with this guide
- Desktop Studio
- Desktop Agent
- The zoom level of the web page (Chrome) and Display (I.e. Change the size of text, apps, and other items) should be 100% to ensure a good capture.
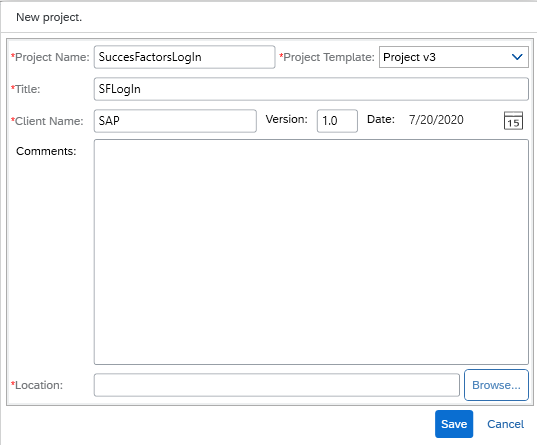
1. Creation of new project [File->New project]
2. Open https://salesdemo.successfactors.eu/login?company= (where is your SF ID) in Chrome
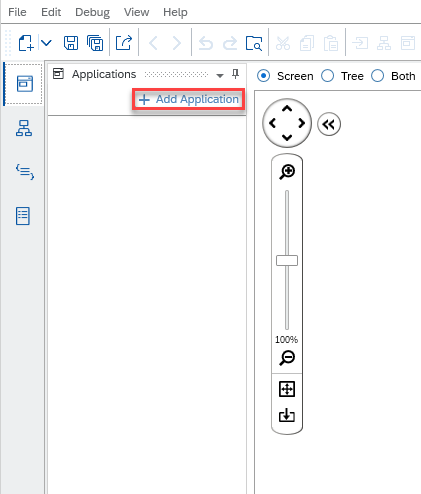
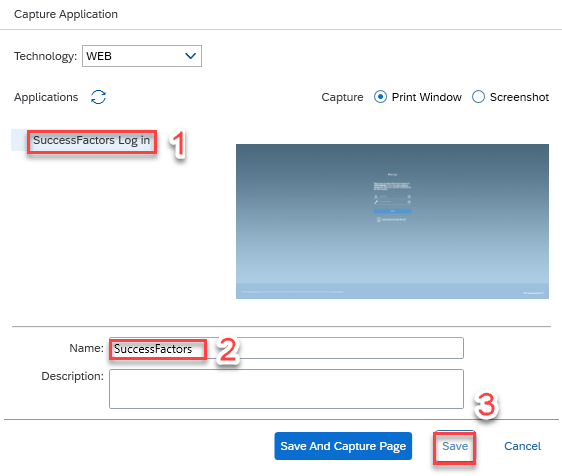
3. Select Add Application in the Desktop Studio.
4. Select the page we navigated to in chrome (it will appear in the capture application screen). If the page does not appear, click on the refresh button. Edit and change the Name as highlighted below. I changed it to ‘SuccessFactors’ because this is the application name and not the page name (We will add the page next). Click on the Save option.
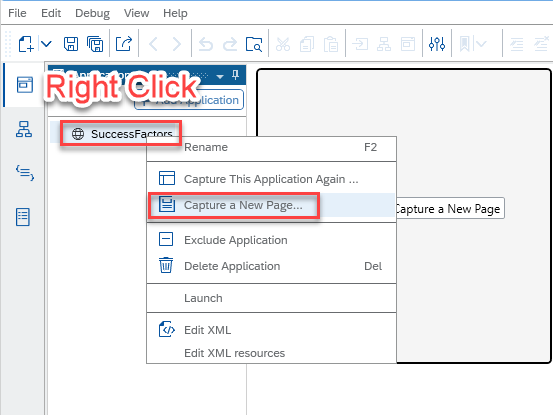
5. The capture page window should pop-up, if it doesn’t, Right-click on SuccessFactors and click on Capture a new Page.
6. Select the login page – If the page is not shown, click on the refresh icon. Then click on Scan and Capture.
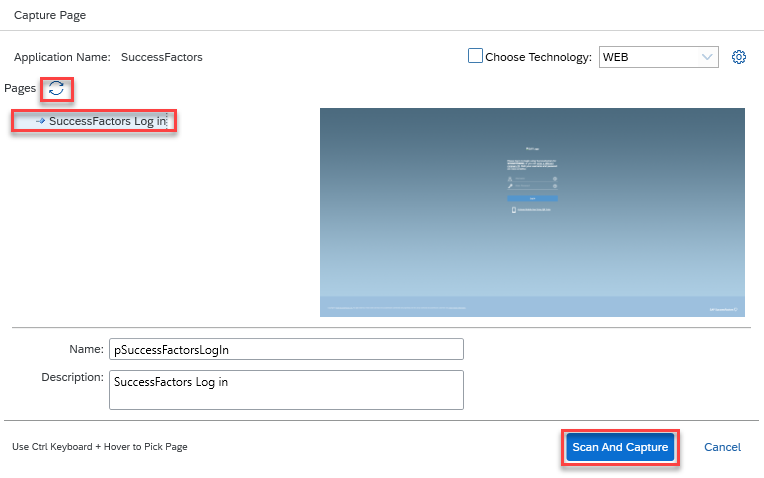
Note:- If the target zoom level is more than 100 percent, it will not fully capture the page. The zoom level of the web page and Display (I.e. Change the size of text, apps, and other items) should always be 100% as mentioned earlier in the prerequisite.
7. Once the capturing is completed the below page will be seen. Notice how the pSuccessFactorsLogIn is shown in red we will resolve that in the next step.

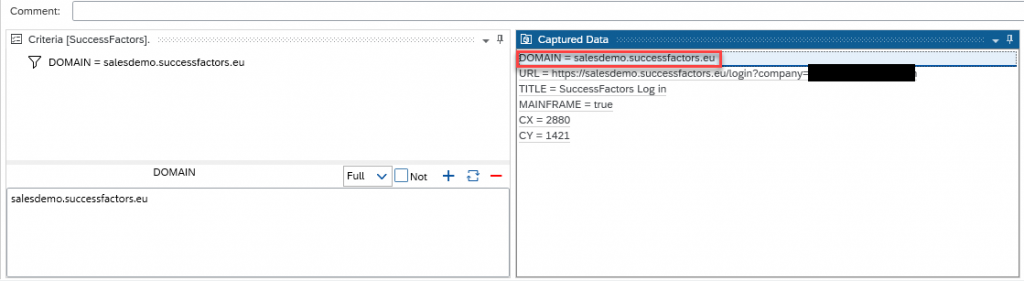
8. Double click on the highlighted domain in the “Captured Data” panel to set the criteria, then double click on the title to add it as well.
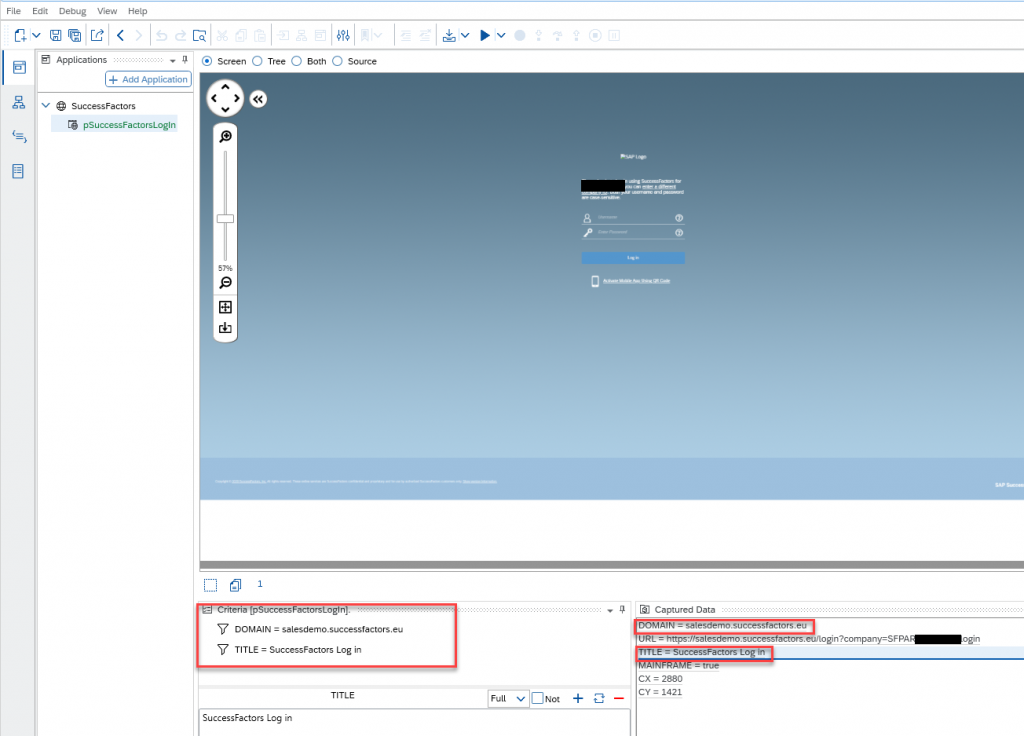
Once the criteria is set, the highlighted page will turn into green, this will let you know that the criteria is properly identifying the captured page.

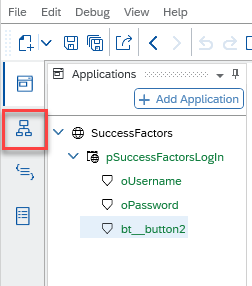
Click on the SuccessFactors Application and then double click on the domain in captured data to add it as a criteria for the overall application of SuccessFactors
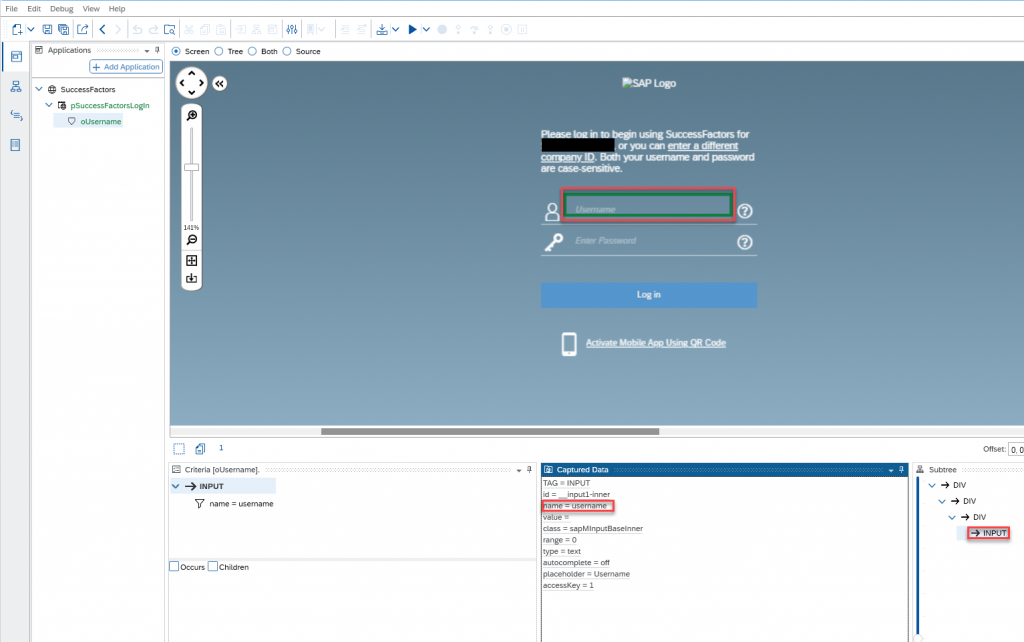
9. Select the ‘username’ field by clicking on it. Upon selection, it will turn dark blue. After this the DOM structure is shown in the Subtree. Select input from the subtree to show the captured data, then double click on ‘name = username’ to add it to the criteria for the object. It can be renamed, but I will keep it as ‘oUsername’. Once the criteria is set, the highlighted object will turn green.
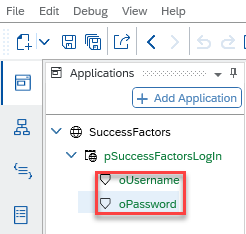
Follow the same steps for the password field
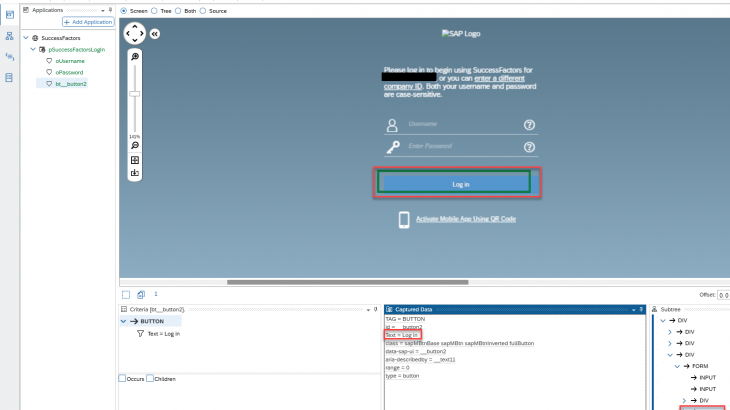
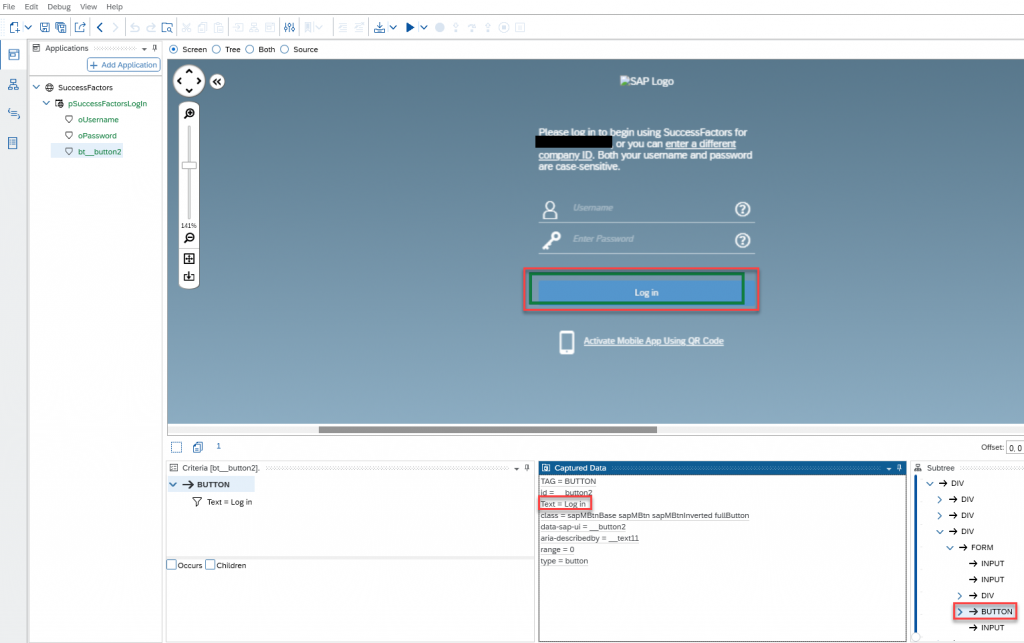
10. Select the Login button by clicking on it. From the DOM structure in the Subtree select the Button tag, then in the capture data section double click on Text = Log On. Initially, it will be red, but after setting the criteria it will turn green.
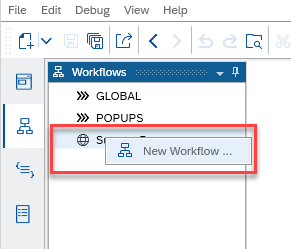
11. Now click on the workflow.
12. Right-click on SuccessFactors and then click on New Workflow
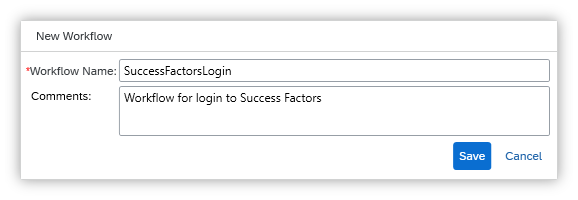
13. Now enter the Workflow Name and Comments and click on Save.
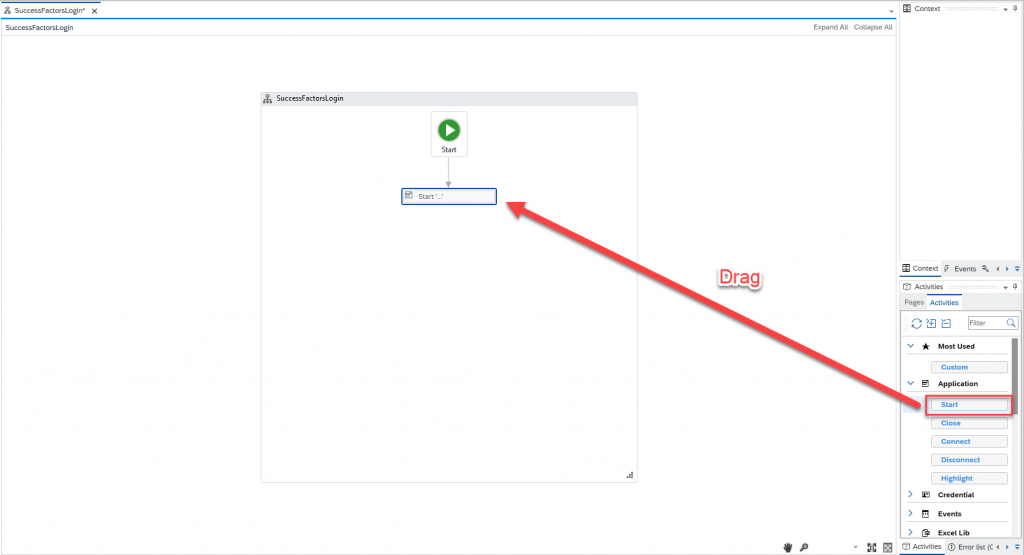
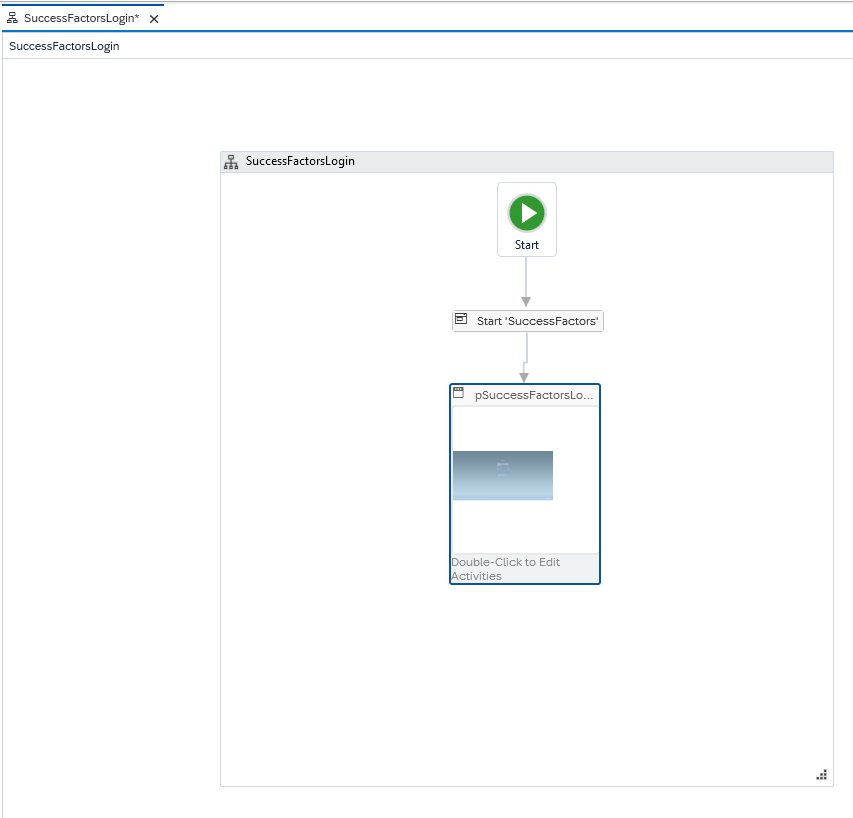
14. Choose the workflow SuccessFactorsLogin and then in the Activities pane, select Start Application and drag and drop in the workflow to connect with the Start as shown below.
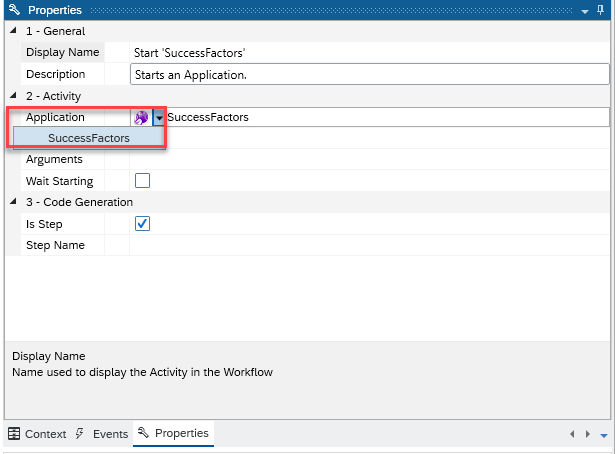
15. Then, in the properties select the drop-down arrow in the application parameter field and select SuccessFactors, the activity display name will be updated to reflect that application it will be starting
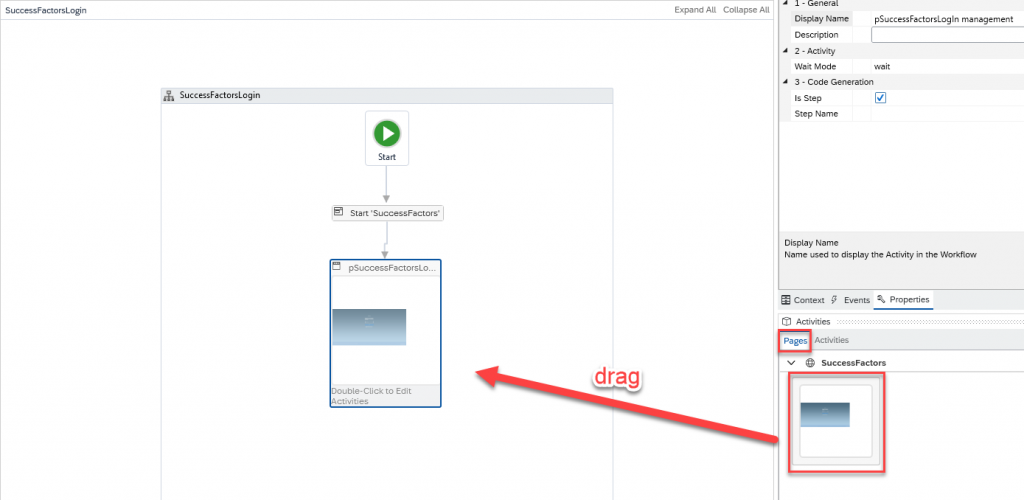
16. Now drag and drop the login page into the workflow and connect it with arrows to be after the ‘Start ‘SuccessFactors” activity.
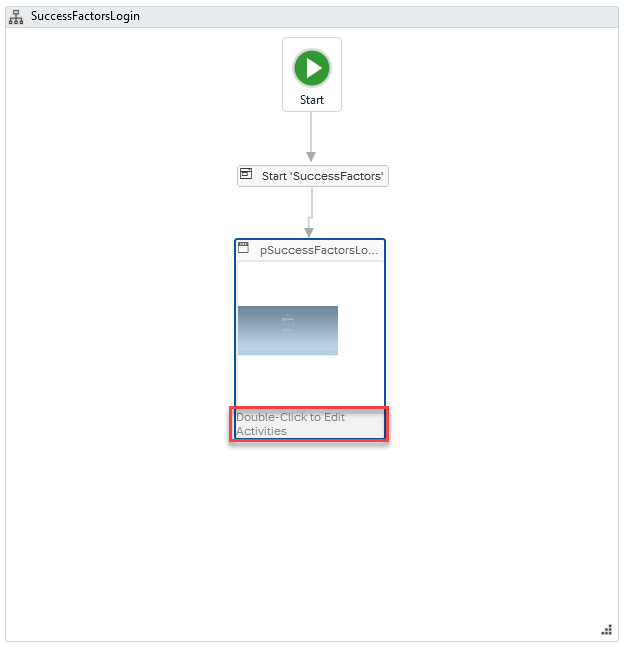
17. Double click on the page activity.
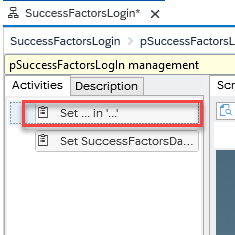
18. Drag the set activity to the highlighted item for the username and password.
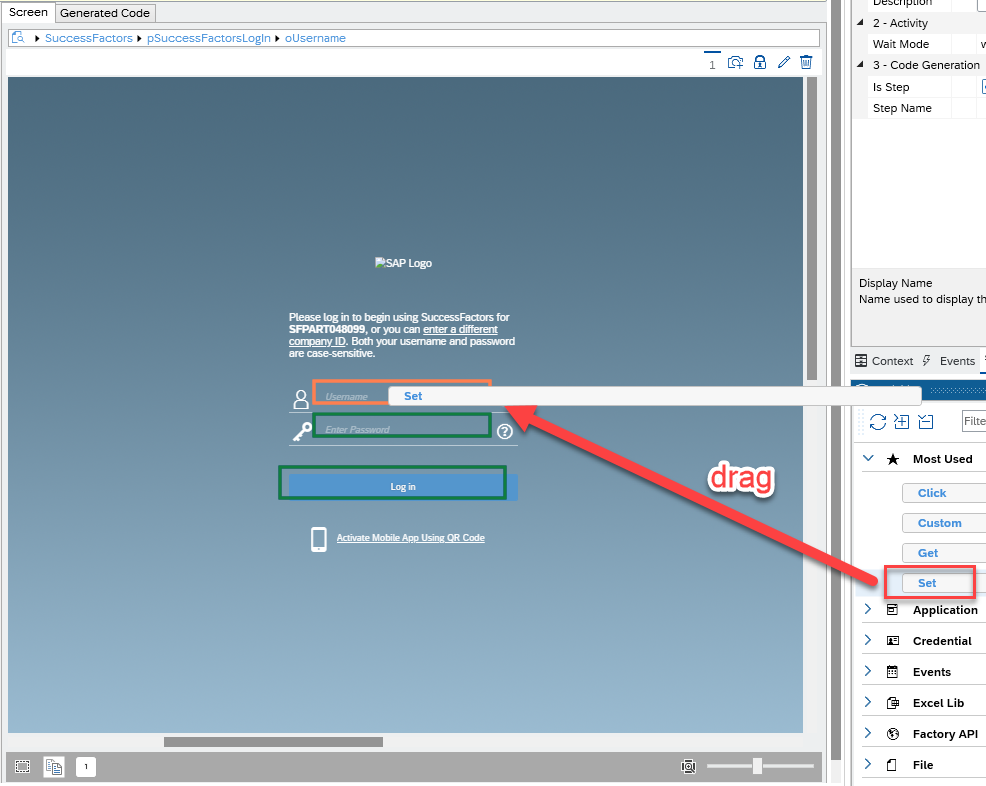
19. Click on the highlighted Set activity
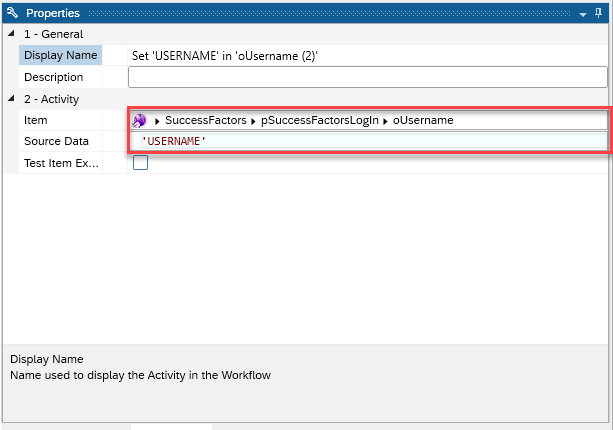
20. Enter the below detail in the properties. Put your username instead of “USERNAME”, but be sure to surround it with ‘’.
Do the same for the Set Password activity
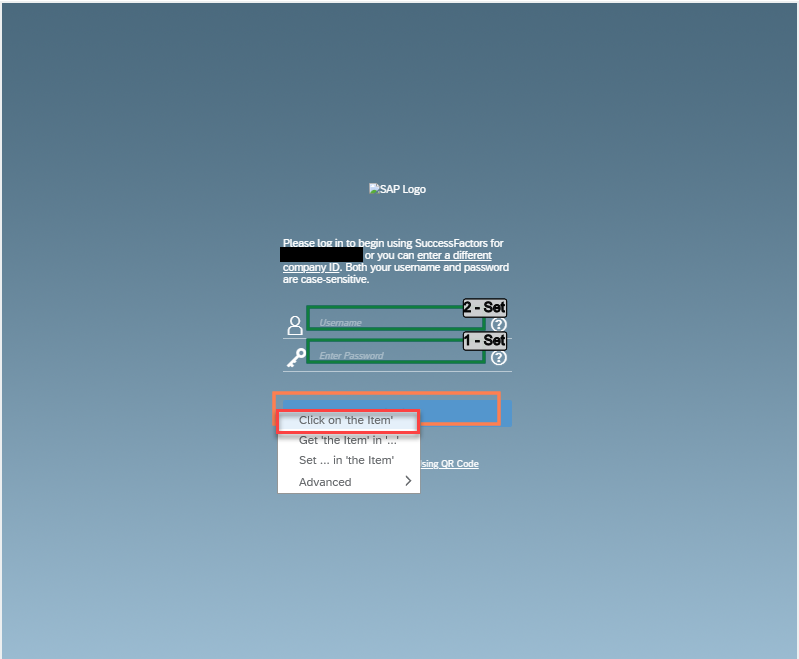
21. Right-click on the Log In Button item and select Click on ‘the item’.
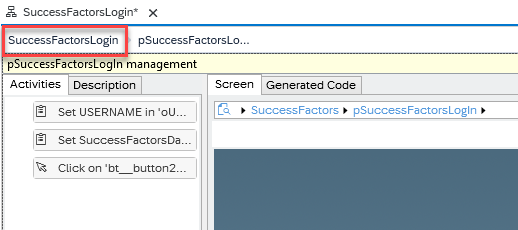
22. Now click on the ‘SuccessFactorsLogin’ to return to the main workflow
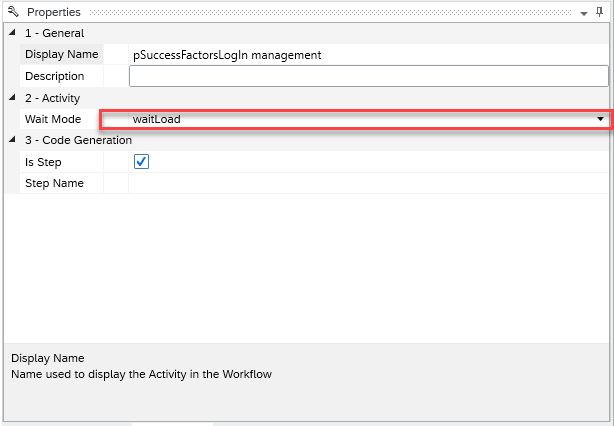
23. Next, click on the page activity and set the wait mode to ‘waitLoad’ which will make the activity start once the page has loaded and is ready
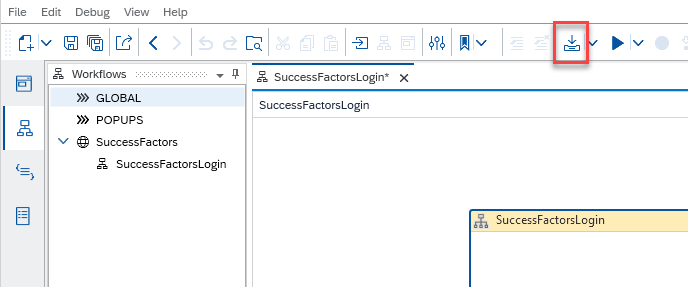
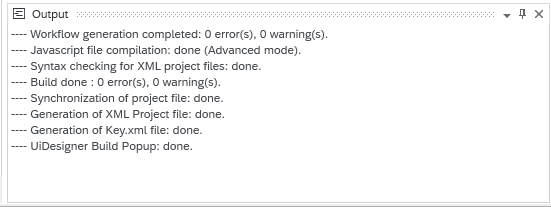
24. Now lets build the workflow by clicking the build button
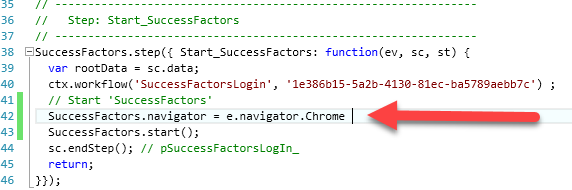
25. Now that the workflow has been built we will go to the code to make some changes, first lets set chrome as the default navigator.
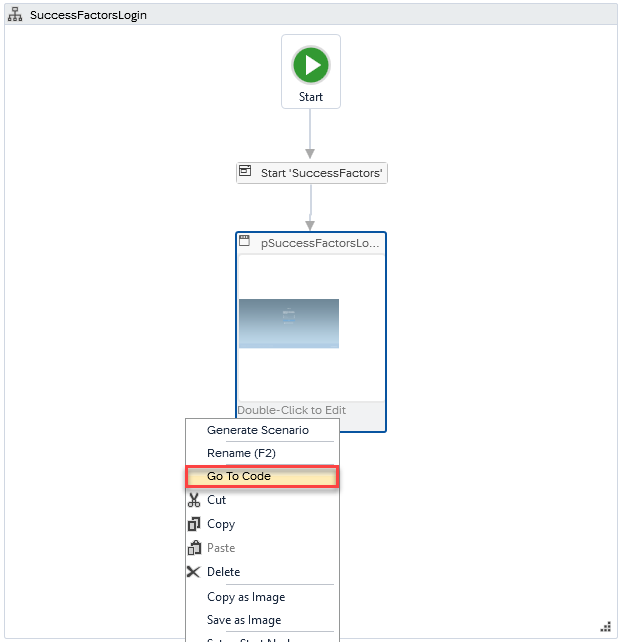
Go to the start application activity and right click it and select ‘Go to code’

26. Now enter “SuccessFactors.navigator = e.navigator.Chrome” to set the browser as chrome. Make sure it is before the .start() line
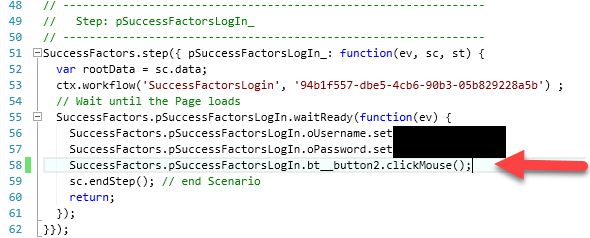
27. Go to the code for the Login Page activity in the workflow
28. Now edit the click() function to be a mouse click by adding ‘Mouse’.
29. Now click on the build option to build the project again.

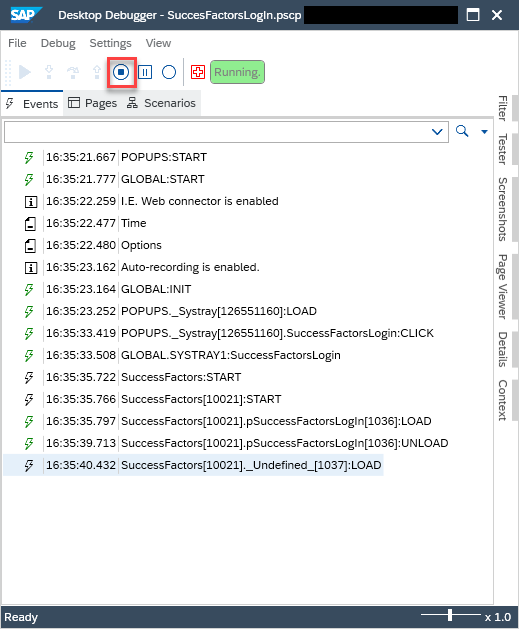
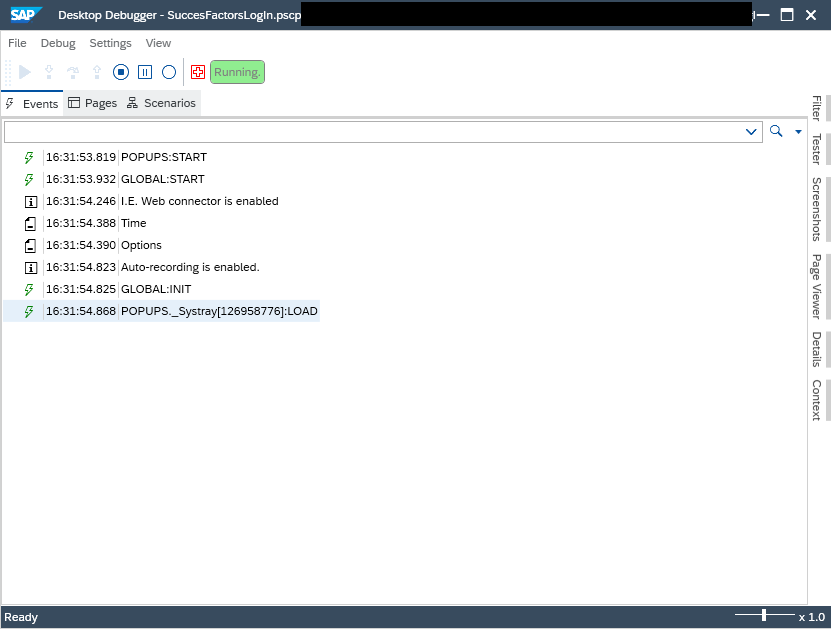
30. Click on the debug option.

31. Debugging has started.
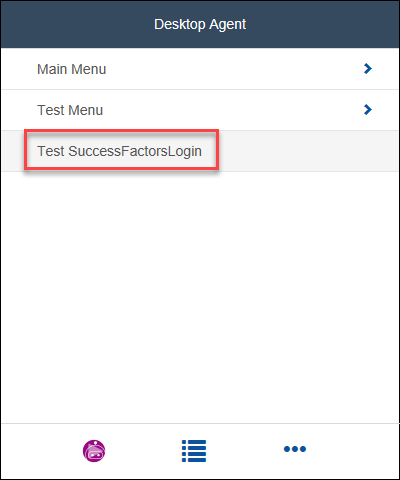
32. Now desktop agent will appear in the taskbar. Click on the highlighted Desktop agent.
33. Click on the Test SuccessFactorsLogin.
34. The end result is a successful log in.
35. Stop the debugger.