
In this article, we would introduce you to the steps to be followed for Hybris Marketing Segmentation Configurations.
In Hybris Marketing, Segmentation is a module which is used to segment the total customers based on any specific conditions. A lot of standard scenarios are already provided by SAP but not much is there for custom. In case of specific customer requirements, which is always the case, we have to develop SAP HANA Views (calculation view, attribute or analytic Views) in Hana Studio and use them in Hybris Marketing SPRO Configurations.
Not familiar with Attribute View, Analytic View, and Calculation View?
How to create calculation views or analytic or attribute views will be covered in another tutorial. Here we are concentrating on how to configure the Hana Views which are called Data Sources in Hybris Marketing.
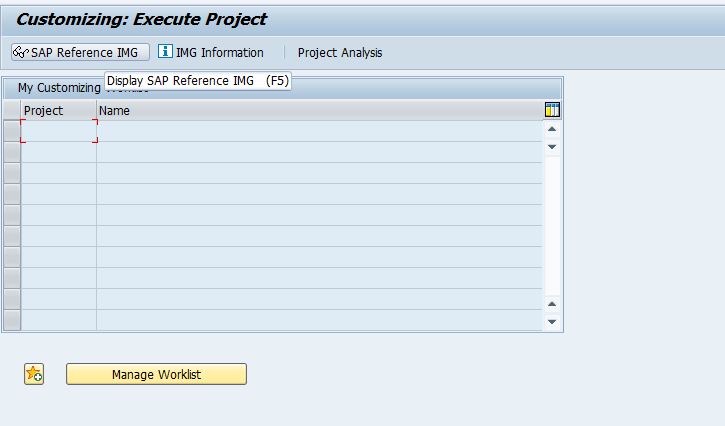
Login to Hybris Marketing System system and enter Tcode SPRO and Click on SAP Reference IMG.
Click on SAP Customizing Implementation Guide->SAP Hybris Marketing->Segmentation as shown below:
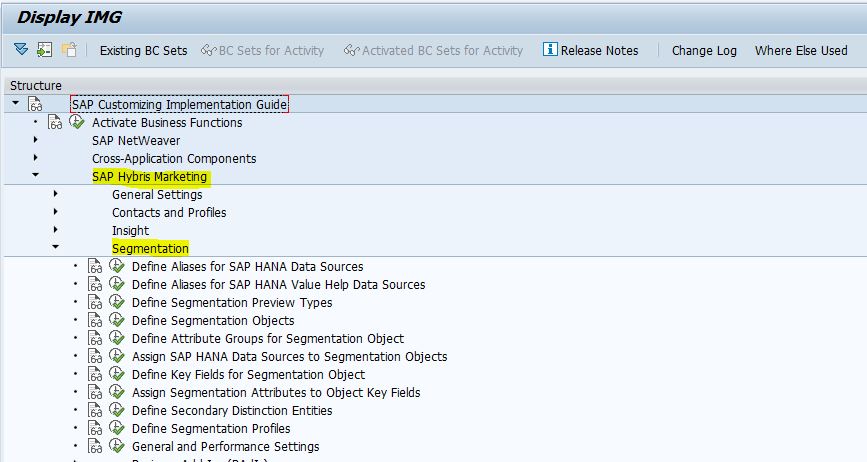
Now you can see the list of configuration activities under Segmentation.
We have listed the Important and Mandatory activities which should be performed for Segmentation to work correctly.
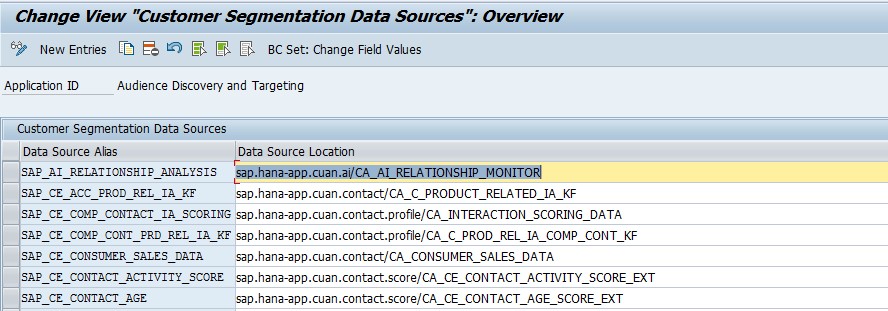
1. Define Aliases for SAP HANA Data Sources
Here we define the Data Source Alias for the Hana Views which acts as shortcuts and will be used in the further configuration steps.
For example, SAP_AI_RELATIONSHIP_ANALYSIS is the data source alias for the calculation model sap.hana-app.cuan.ai/CA_AI_RELATIONSHIP_MONITOR where sap.hana-app.cuan.ai is the path for the model in Hana Studio and CA_AI_RELATIONSHIP_MONITOR is the actual Calculation View Name.
For creating new Data source alias, click on New entries and provide the alias name, path and save.
2. Define Segmentation Objects
In this activity, we will define the segmentation object and assign the business logic to the segmentation object.
For creating new Segmentation object, click on new entries and provide a name for the segmentation object, for example, ZCUSTOMER and a description for the segmentation object. If applicable, specify the name of the consumer class for additional logic and click save.

3. Assign SAP HANA Data Sources to Segmentation Objects
In this activity, we assign SAP HANA data sources to segmentation objects using the aliases we have defined before.
For assigning Data sources to Segmentation object click on new entries and Choose the Segmentation object from the F4 Help and the data source alias we have created earlier and press enter.
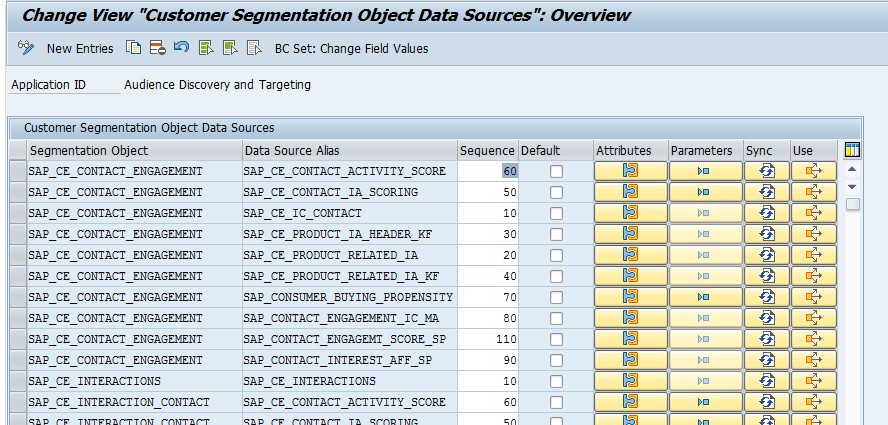
Then we can enter the sequence in which it will appear in the front end UI
In case of any metadata changes, we have to first Synchronize the models by clicking on the Sync button. In case of any input parameters we can set the properties like it is mandatory or not etc by entering inside parameters button and for setting the column properties we can enter inside Attributes column and set .
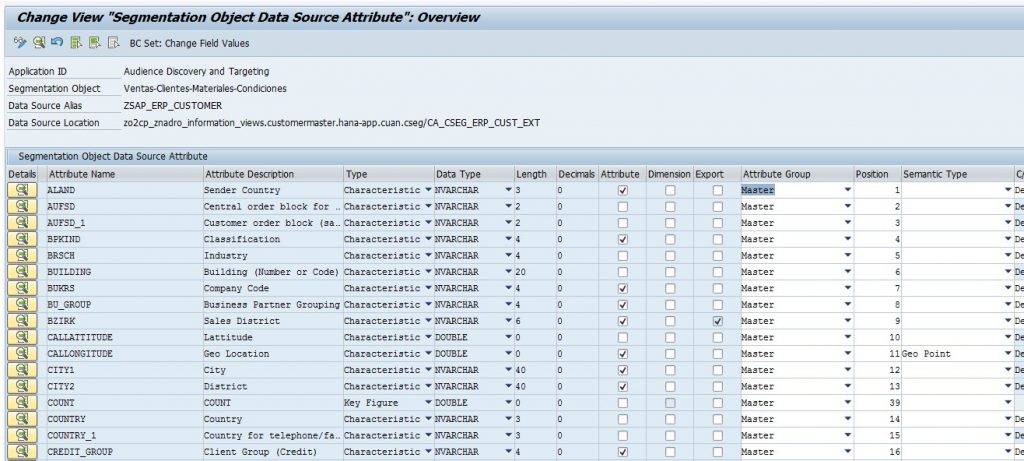
Here we will have two types of fields either Characteristics or Key figures. Key figures are the fields like amount, quantity etc and all other fields appear as characteristic fields.We can choose which all fields we require as attributes and which fields as conditions in the segmentation front-end UI by choosing the checkbox Attribute and Dimension.
Here we can also mention the attribute group if any required and also the position in which the fields should appear in UI and also the semantic type for each field like Date for Date fields, Geo Point for Coordinates etc as shown above.
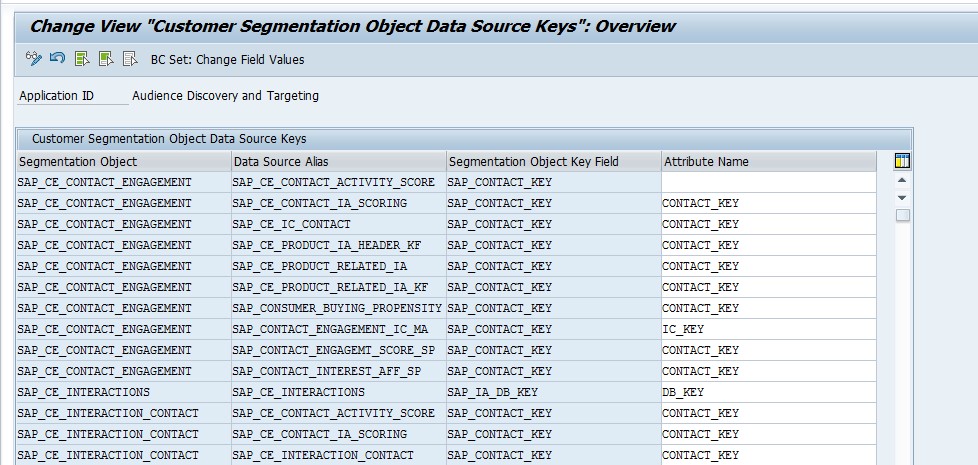
4. Assign Segmentation Attributes to Object Key fields
In this activity, we can assign the attributes (characteristics and key figures) originating from the SAP HANA data sources to segmentation object key fields.
Here we choose the key field which will be used from the Attribute Name field F4 help like CONTACT_KEY or DB_KEY etc which depends upon the requirement.
5. Define Segmentation Profiles
In this activity, we define segmentation profiles. This enables us to determine the pre-selection of data from which the segmentation starts.The segmentation application is based on specific segmentation profiles. A segmentation profile determines the population of the first segment when we start the application.
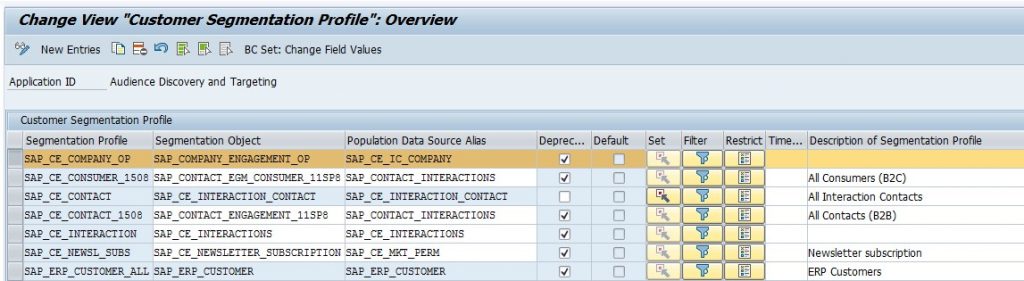
Click on new entries and provide a Segmentation profile name and choose the Segmentation object we created earlier and choose the Population Data Source Alias created earlier and save.
Here we can choose the default segmentation profile by clicking the Set button and can depreciate any profile by choosing the checkbox and apply the filter if any.


