Introduction
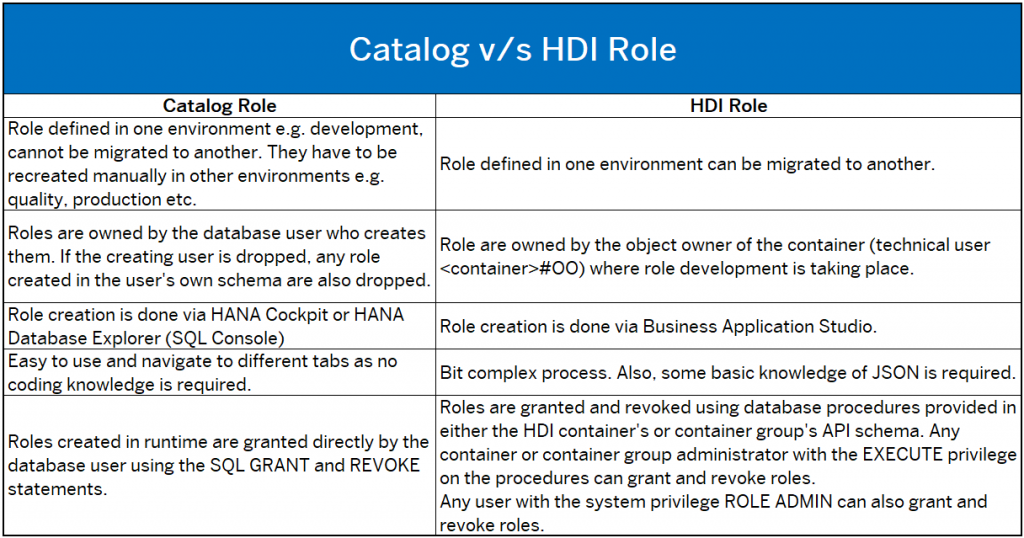
Roles defined in SAP HANA Cloud using HANA Cockpit or HANA Database Explorer (SQL Console) are called Catalog based roles whereas roles defined using Business Application Studio (BAS) are called HDI roles. Catalog and HDI both have their own advantages and disadvantages, some of the key differences are as follows:
HDI Role Creation:
Pre-requisite:
- BTP Onboarding.
- User has access to Business Application Studio.
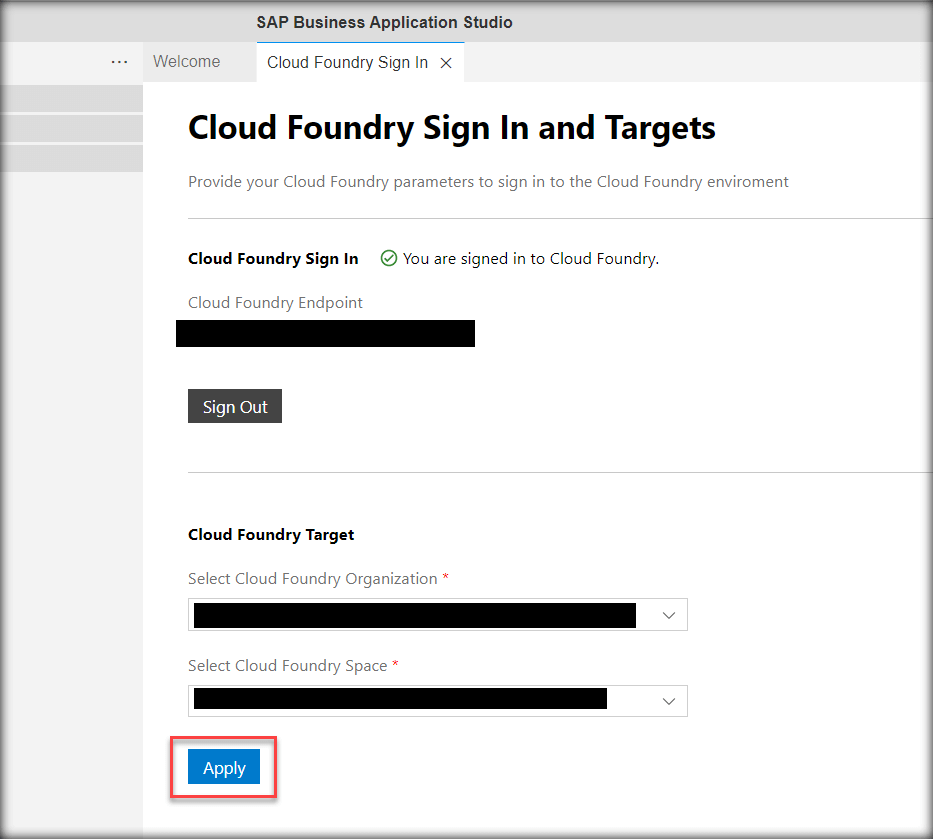
Step1: Login to Cloud Foundry
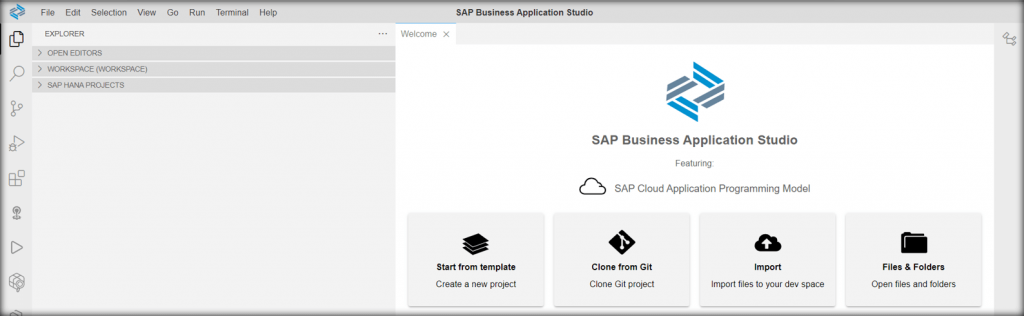
Open Business Application Studio (BAS)
Login to Cloud Foundry (Navigation: View -> Find Command -> Search CF: Login to Cloud Foundry)
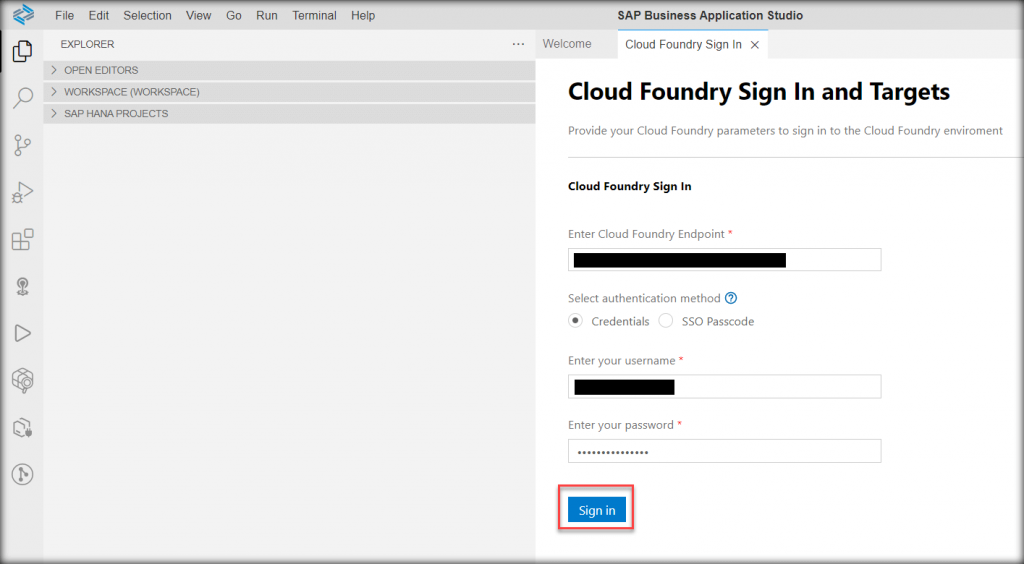
Note: Make sure your cloud foundry endpoint is correct.
Select Cloud Foundry Organization and Space, click Apply.
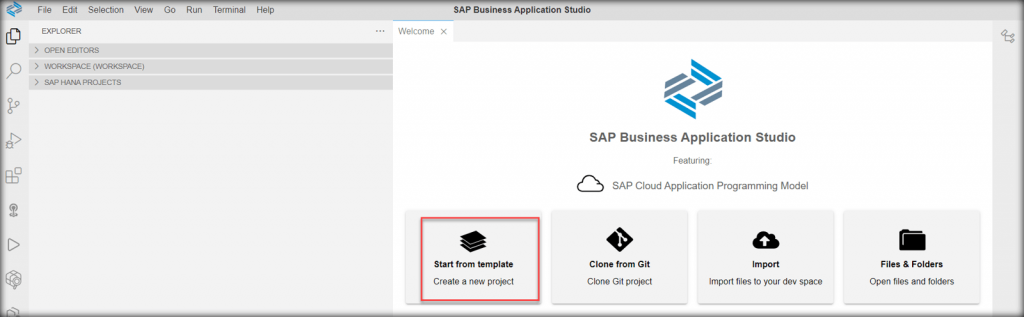
Step2: Create Project
In Business Application Studio home page, click Start from template.
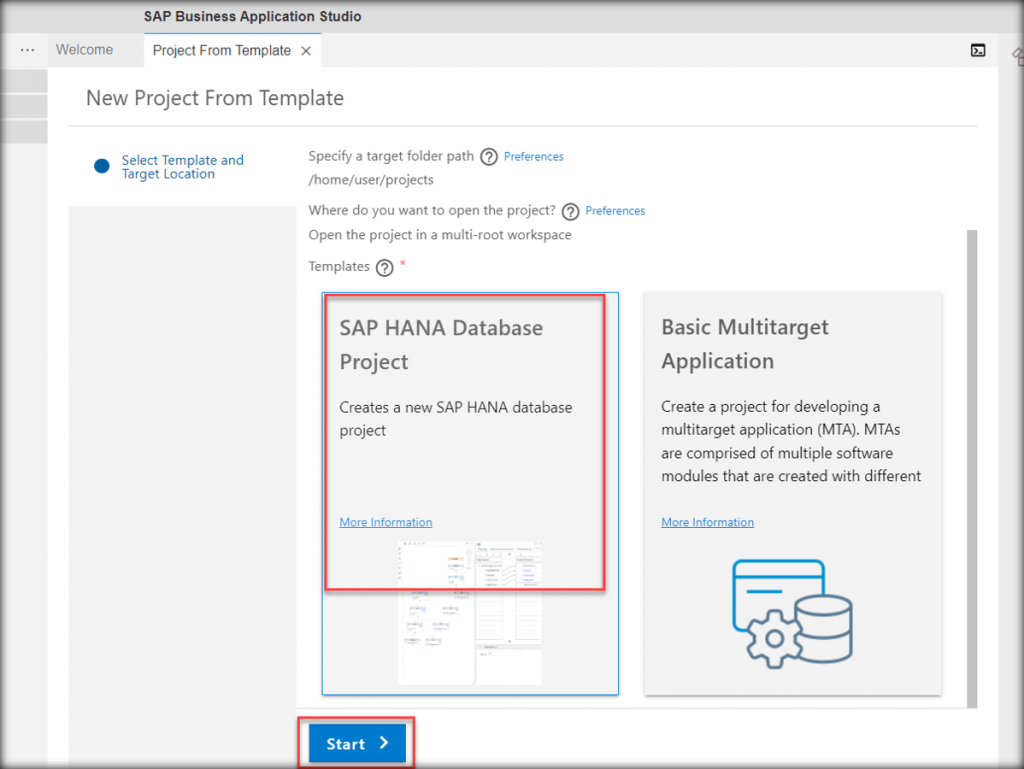
Select SAP HANA Database Project, click Start.
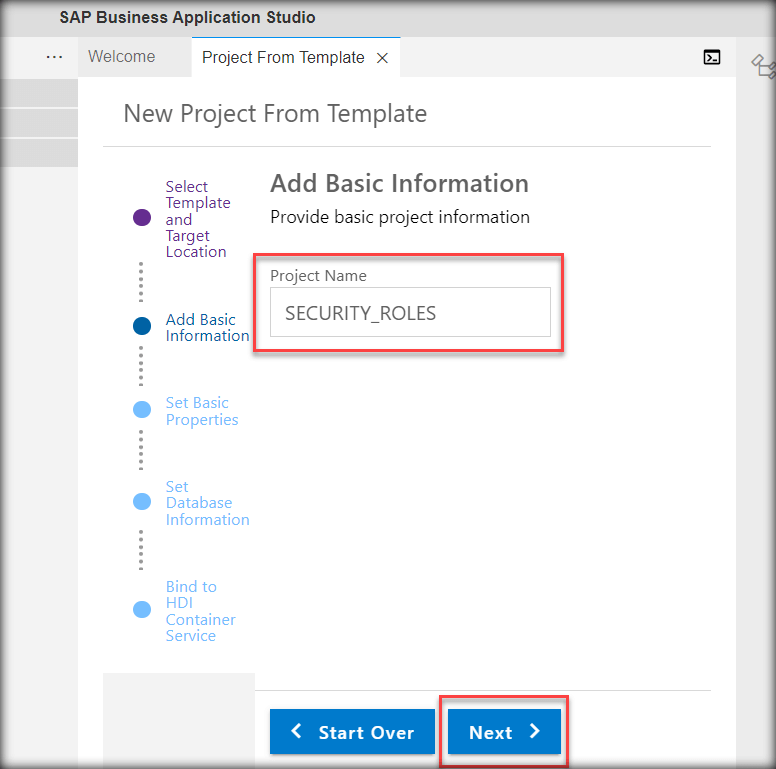
Enter Project Name, click Next.
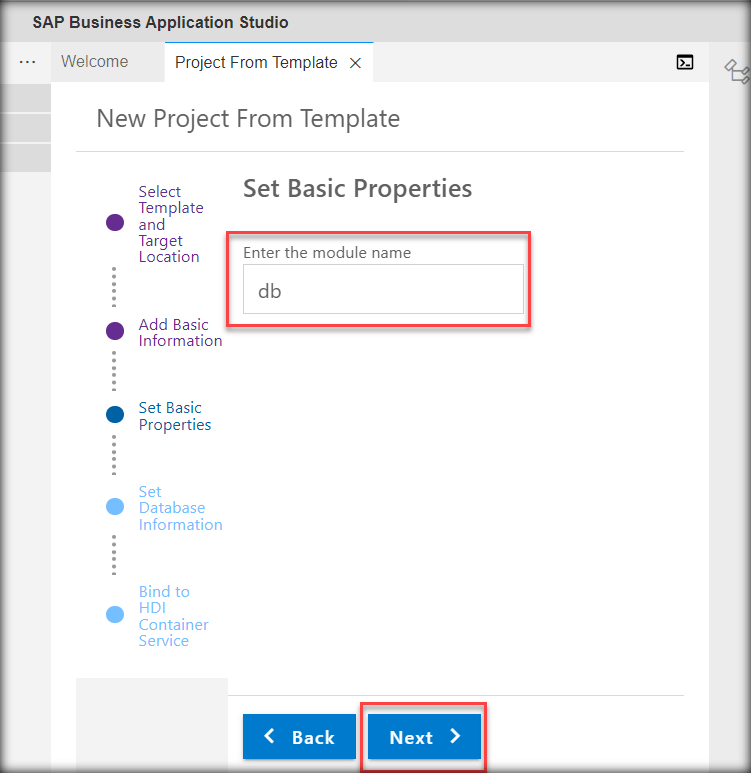
Enter Module Name db, click Next.
Enter Schema Name and Database Version, click Next.

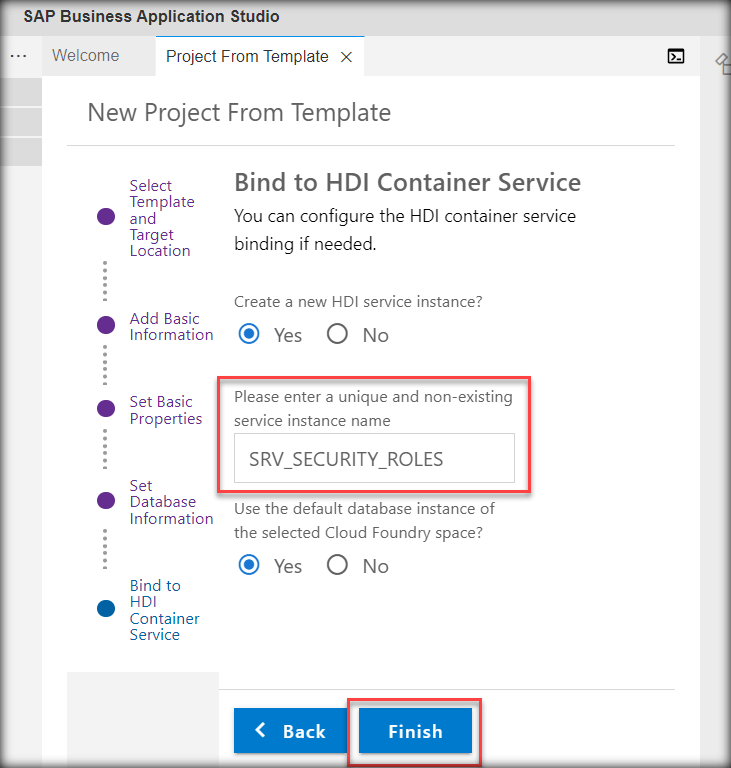
Enter Service Instance Name, click Finish.
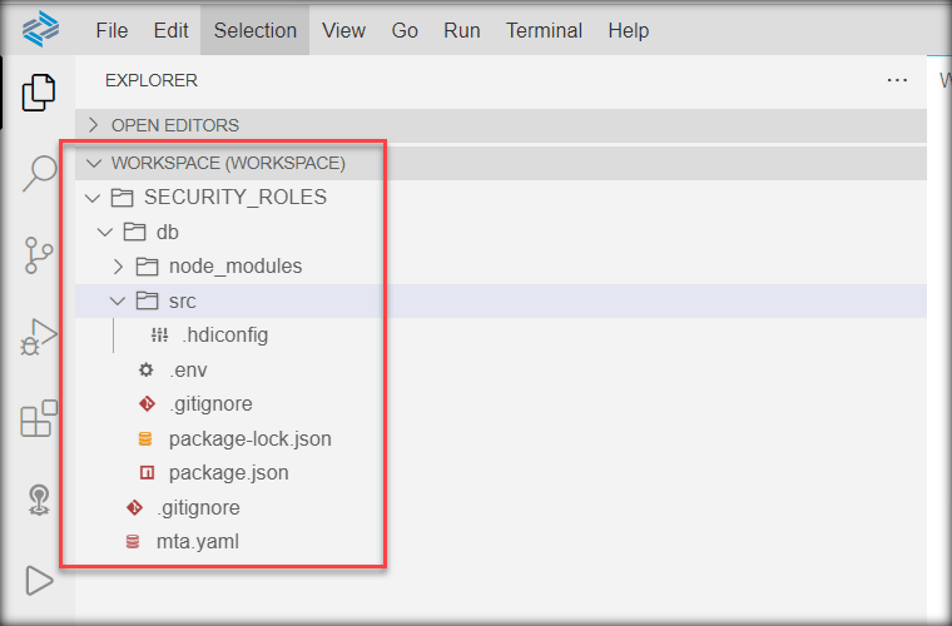
Created project available under Workspace folder.
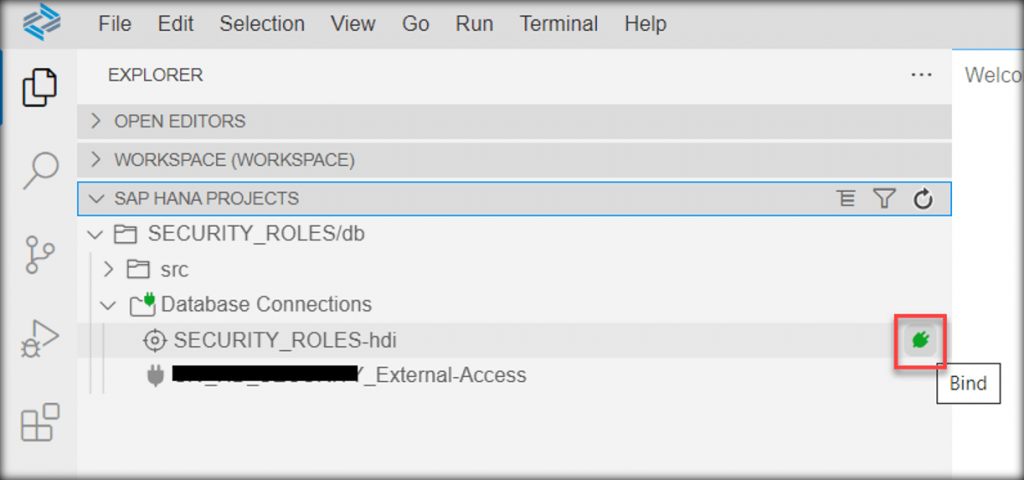
Step3: Maintain mta.yaml file and bind Database Connections
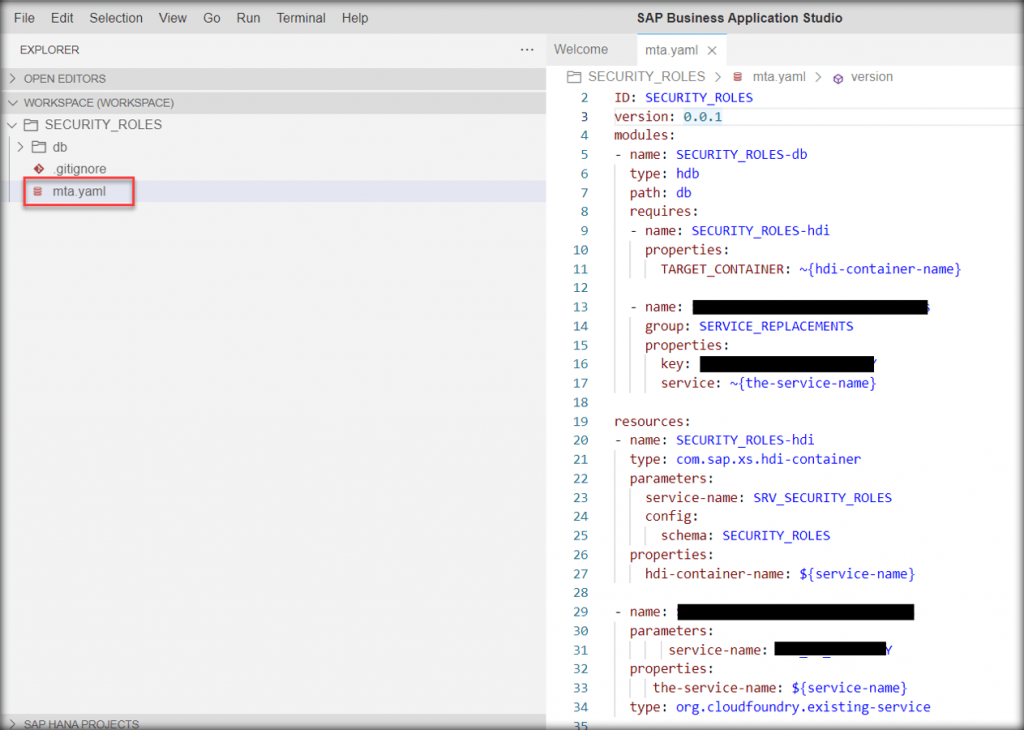
Open mta.yaml file under created project (SECURITY_ROLES) and make the changes as required e.g. add service for UPS, cross container access etc.
Bind all required Database Connections (Navigation: SAP HANA Projects -> SECURITY_ROLES/db -> Database Connections)
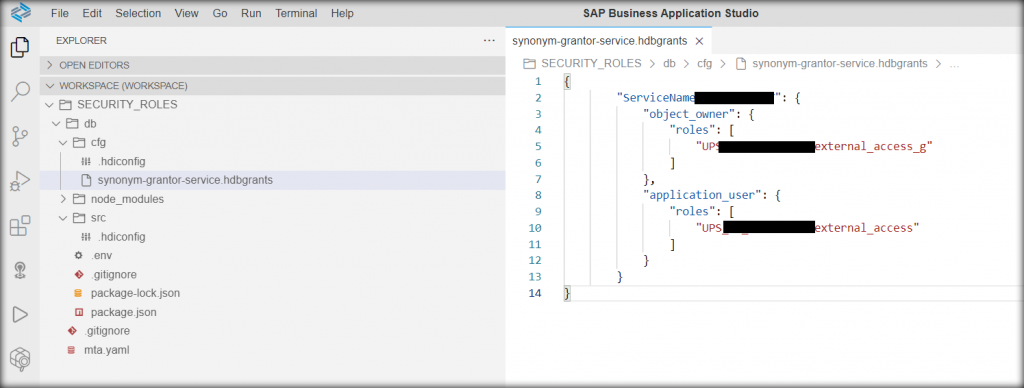
Step4: Define .hdbgrants
Create a cfg folder under db and create synonym-grantor-service.hdbgrants file.

Maintain the entries to grant external access to Container Object Owner and Application User, deploy the file.
Step5: Define .hdinamespace
Create .hdinamespace file under cfg folder, maintain the entries for role name convention, deploy the file.

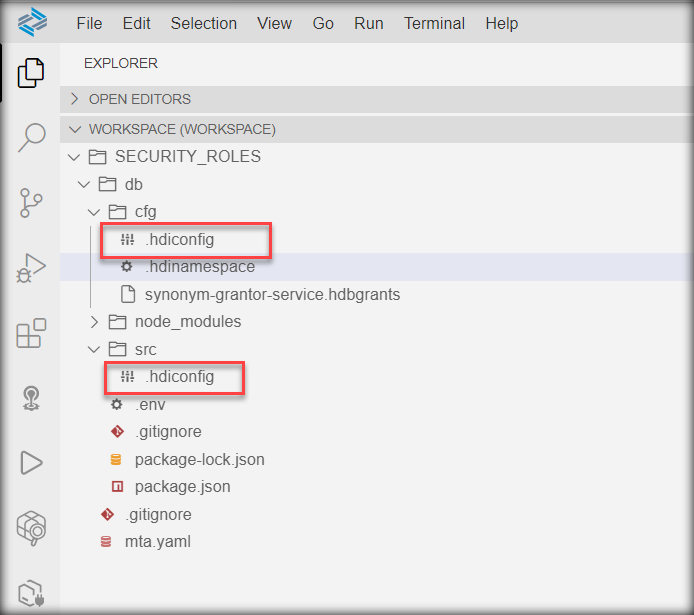
Step6: Define .hdiconfig
Copy .hdiconfig file from src folder and paste it in cfg folder.
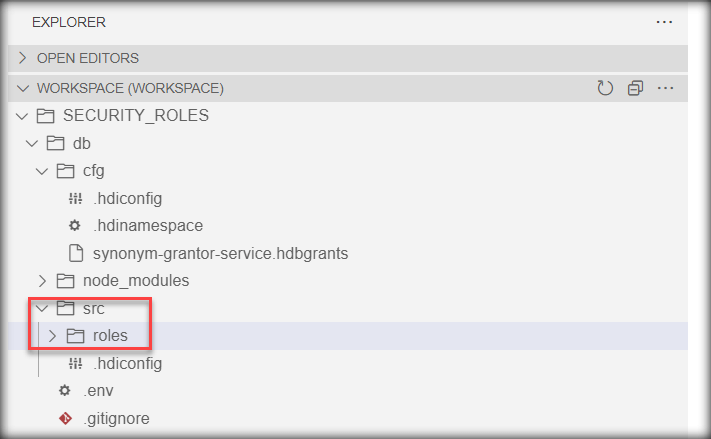
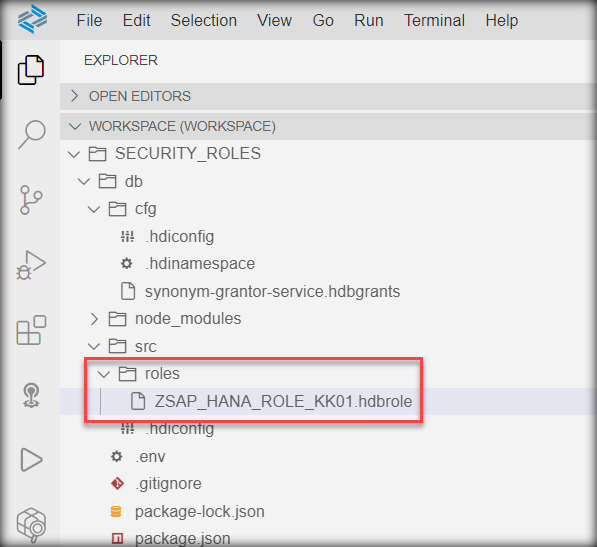
Step7: Create roles folder under src
Right click on src folder, select New Folder and enter roles.
Step8: Create .hdbrole
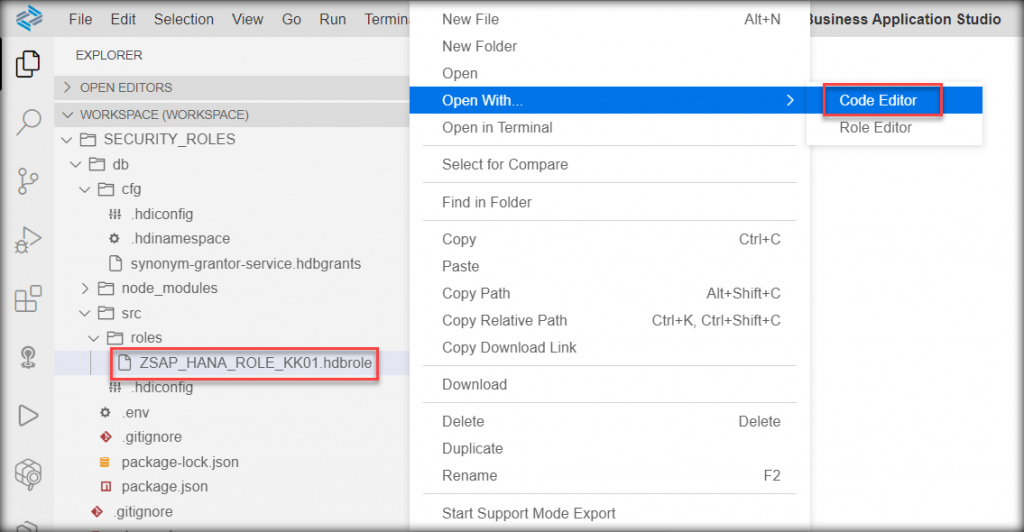
Right click on roles folder, click New File and enter .hdbrole name.
Right click on .hdbrole and select open with Code Editor.
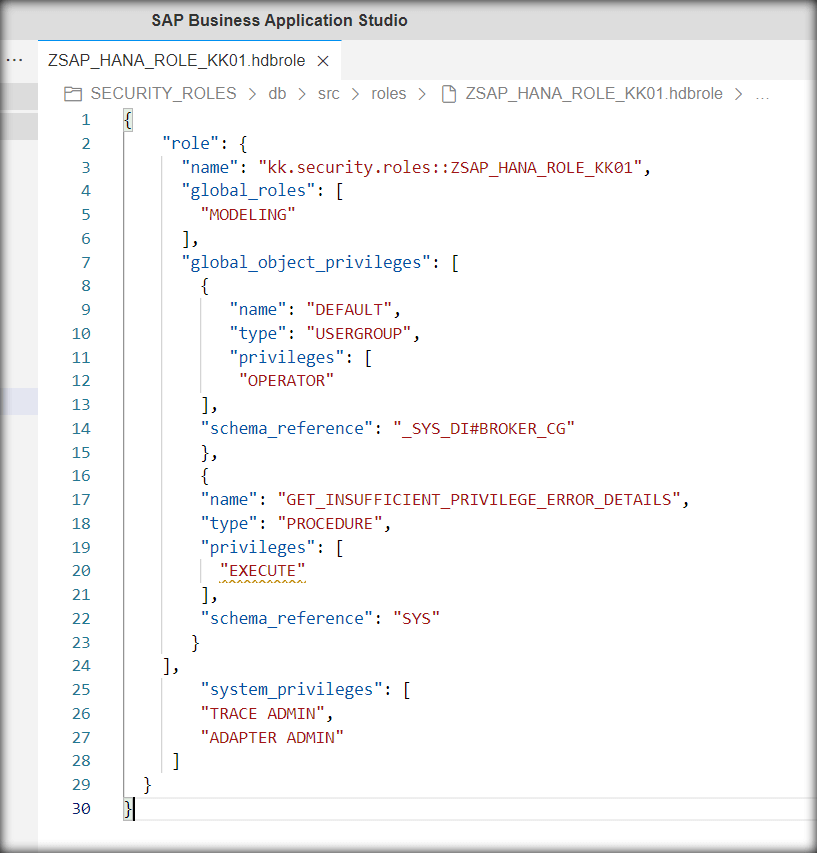
Define JSON for roles and privileges.
Note: Using Role Editor mode, role can be created without defining JSON manually, system automatically defines JSON based on selection of role attributes.
Some useful JSON codes:
-> Global Object Privileges:
“global_object_privileges”: [
{
“name”: “DEFAULT”,
“type”: “USERGROUP”,
“privileges”: [
“OPERATOR”
],
“schema_reference”: “_SYS_DI#BROKER_CG”
}
]
-> Global Roles:
“global_roles”: [
“MONITORING”
]
-> System Privileges
“system_privileges”: [
“ADAPTER ADMIN”
]
-> Schema Privileges
“schema_privileges”: [
{
“reference”: “_SYS_BI”,
“privileges”: [
“SELECT”
]
}
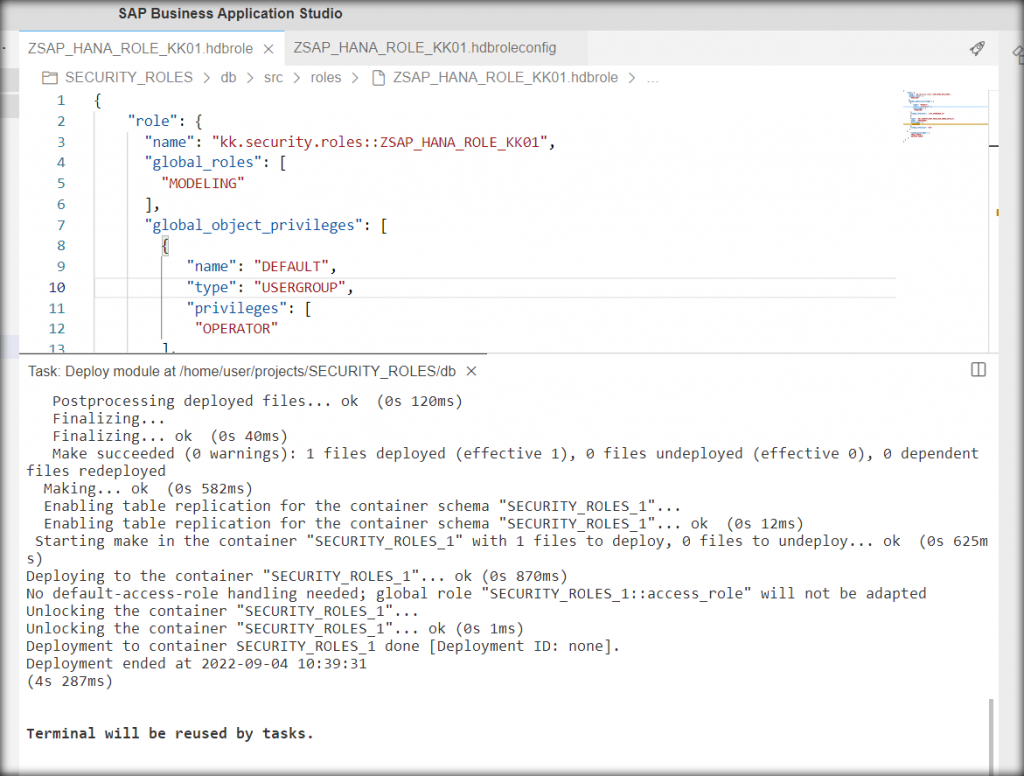
]Right click on roles folder, select New File, enter .hdbroleconfig file and define reference schemas.

Deploy .hdbroleconfig file first and then .hdbrole file.
Step9: Validate role in HANA Cockpit
Deployed role available on HANA Cockpit for assignment.
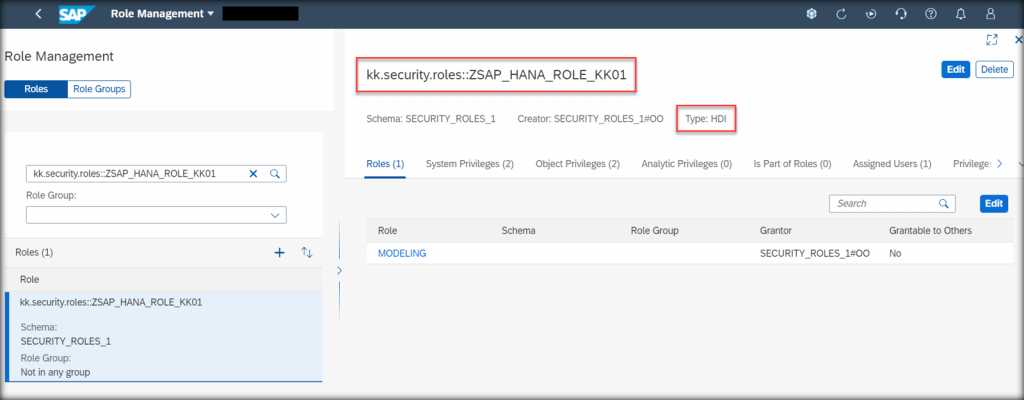
HDI Role created successfully using Business Application Studio.
Catalog Role Creation: Using HANA Cockpit
Pre-requisite:
- BTP Onboarding.
- User has ROLE ADMIN System Privilege to create role and other system/object privilege as required.
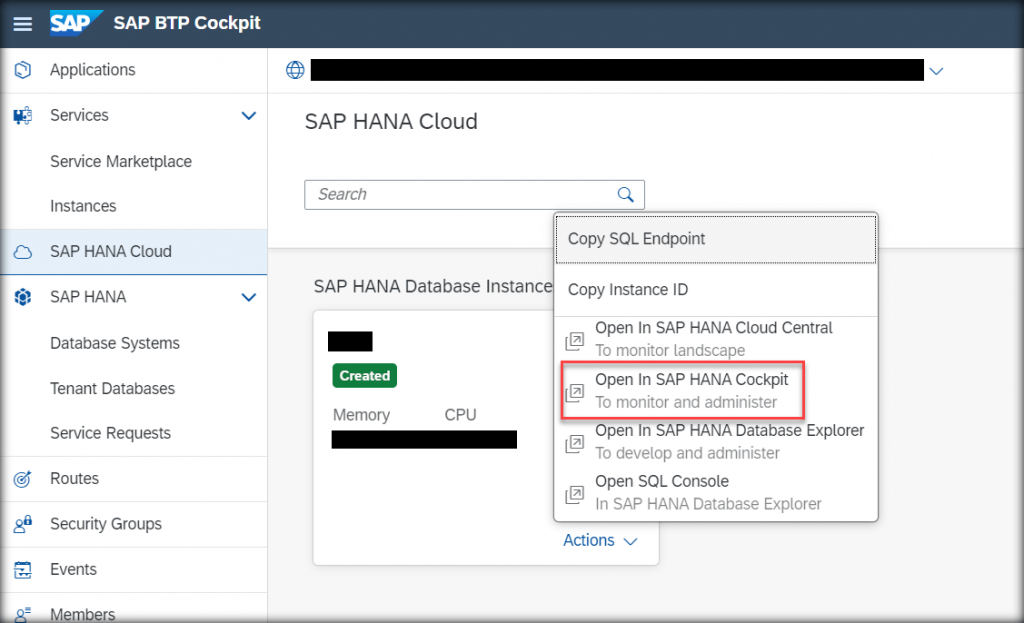
Step1: Login to SAP HANA Cockpit
Open SAP BTP Cockpit and Launch SAP HANA Cockpit.
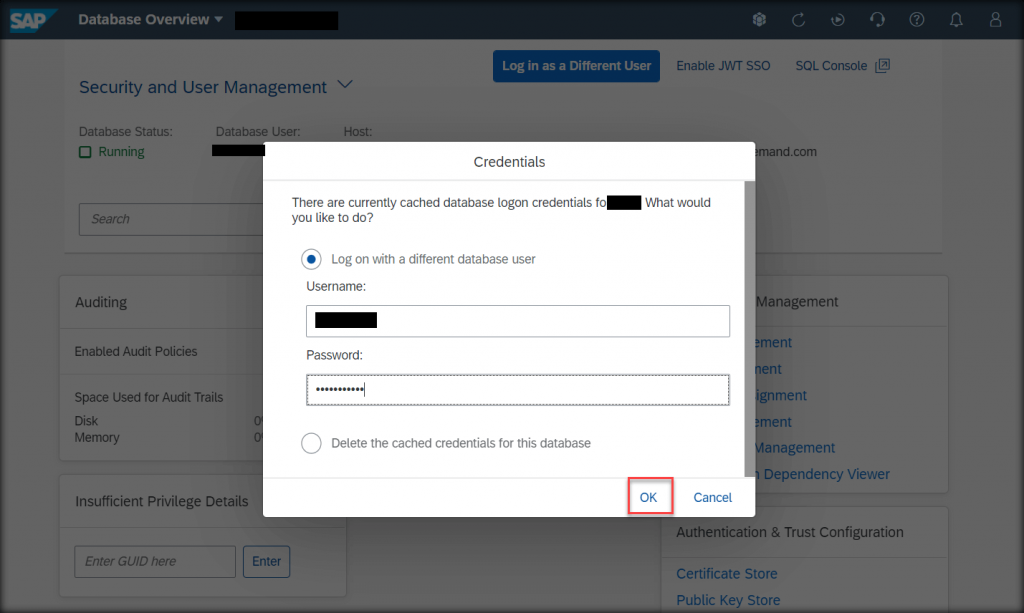
Enter username and password.
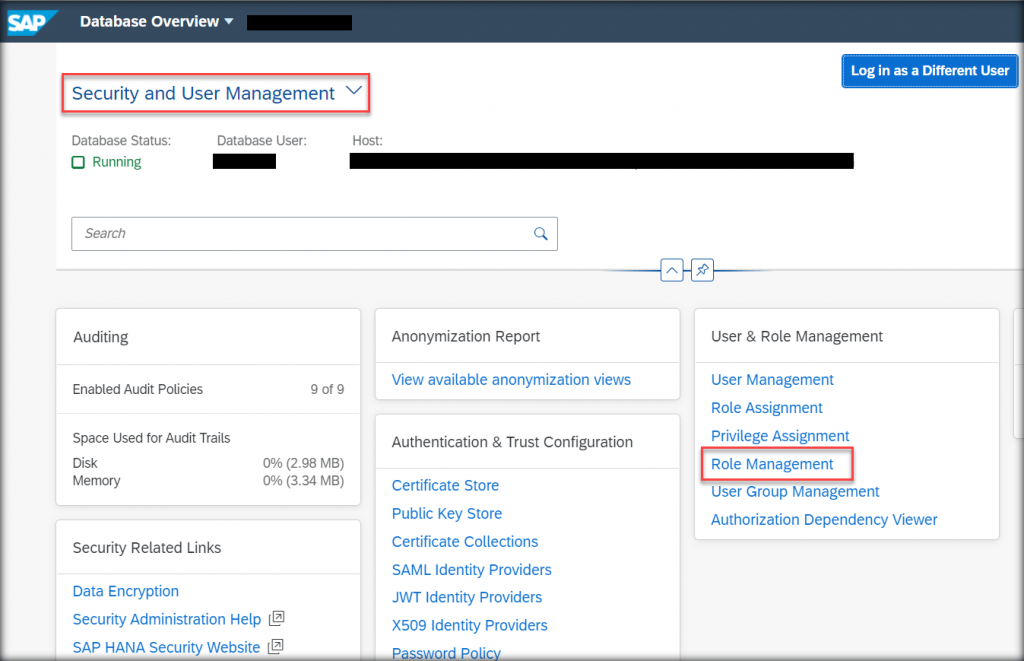
Step2: Open Role Management
Select Role Management under Security and User Management.
Step3: Create Role
Click Create Role button.
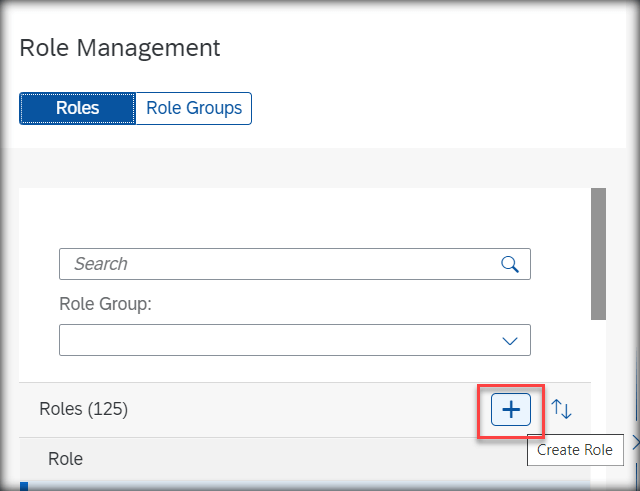
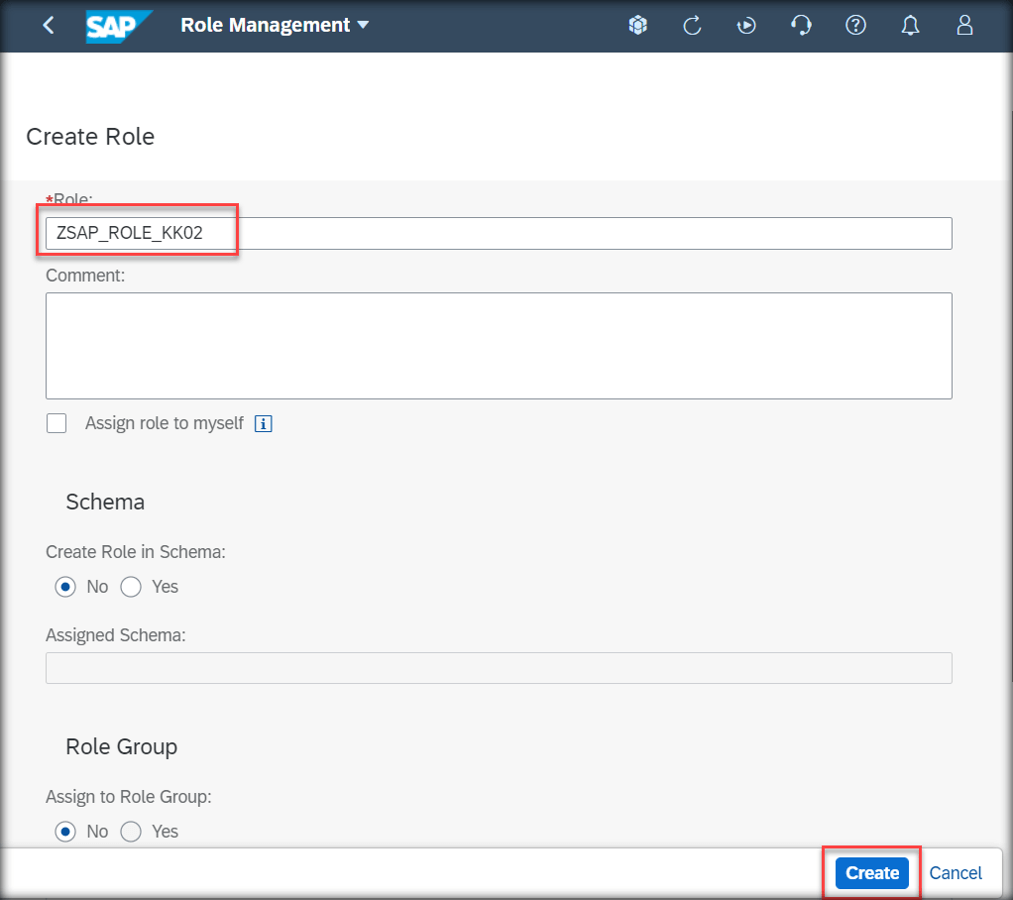
Define Role Name, click Create.
Navigate to required tab i.e. Roles, System Privileges, Object Privileges etc and add the roles / privileges as required.
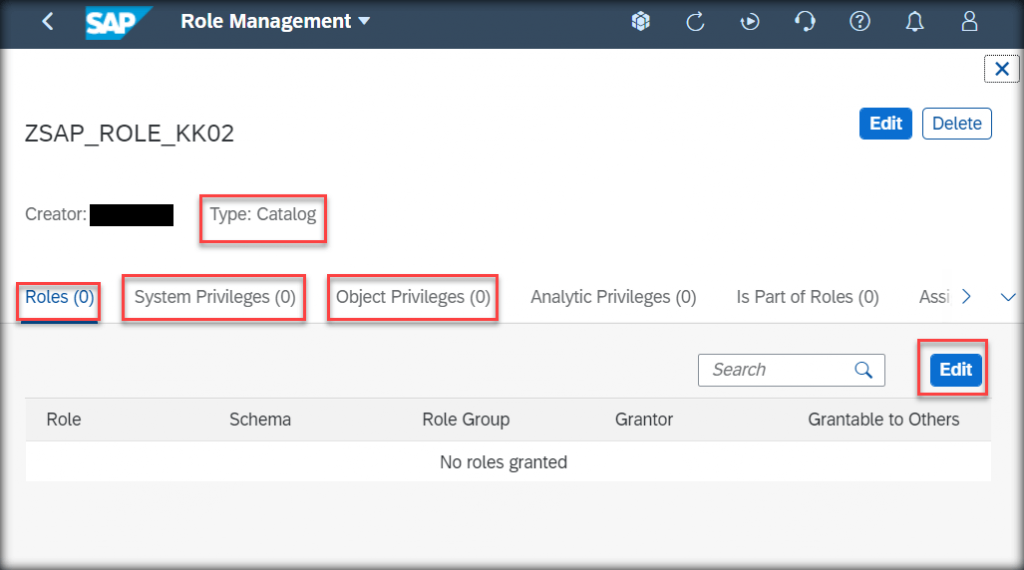
Catalog Role created successfully using SAP HANA Cockpit.
Catalog Role Creation: Using HANA Database Explorer
Pre-requisite:
- BTP Onboarding.
- User has ROLE ADMIN System Privilege to create role and other system/object privilege as required.
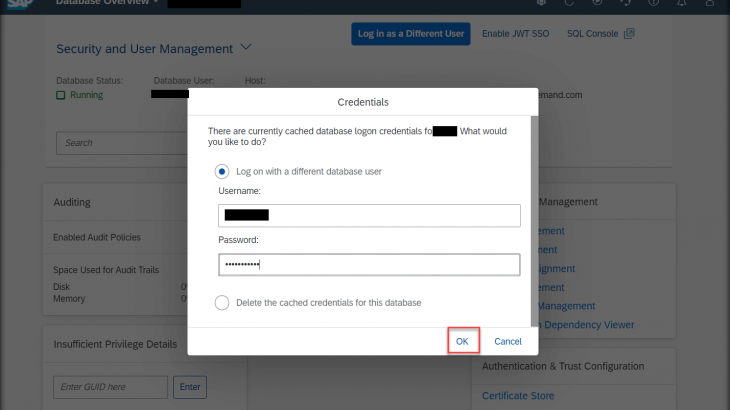
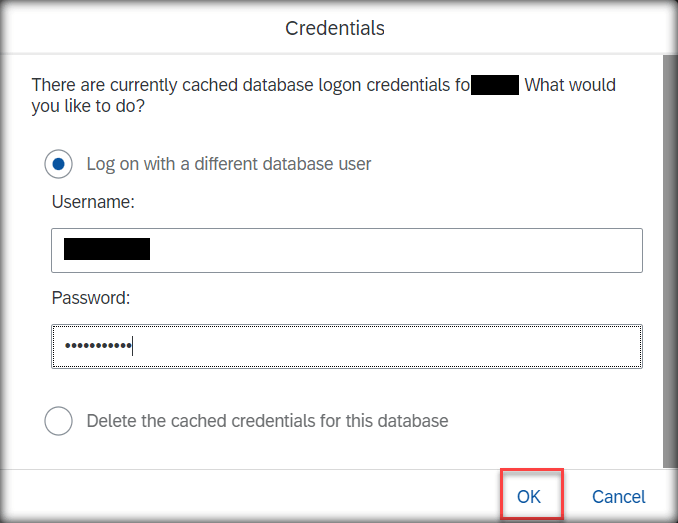
Step1: Login to SAP HANA Cockpit
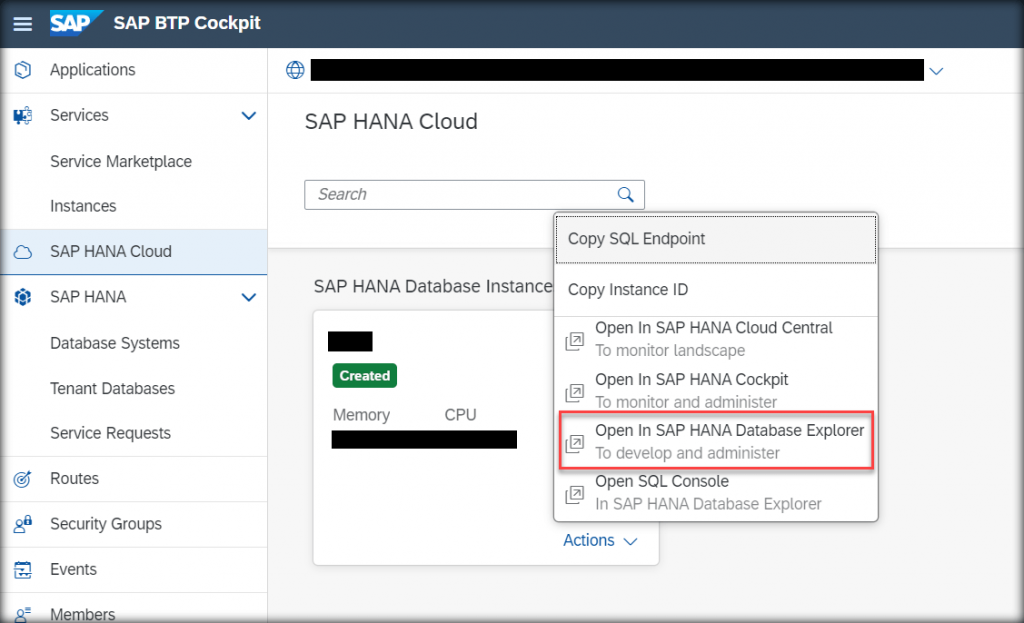
Open SAP BTP Cockpit and Launch SAP HANA Database Explorer.
Enter username and password.
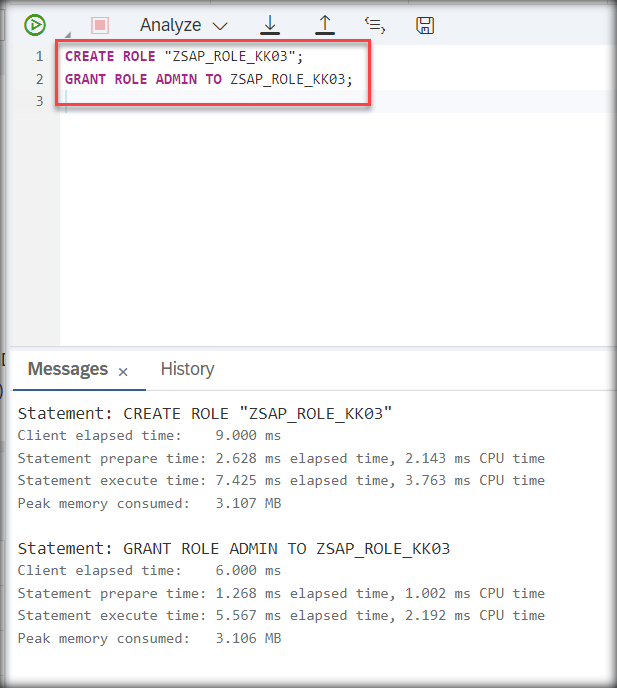
Step2: Open SQL Console & execute commands
Open SQL console, enter SQL command to create role and assign the privileges.
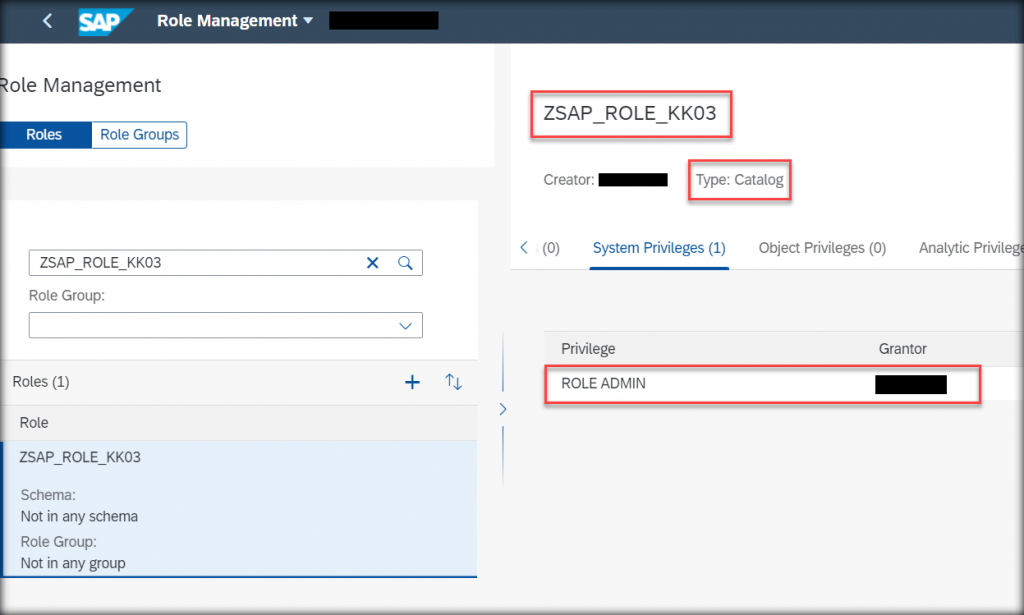
Step3: Validate role in HANA Cockpit
Created role available on HANA Cockpit for the assignment.
Catalog Role created successfully using SAP HANA Database Explorer (SQL Console)


