Introduction:
In this blog post we explain step by step process to set up integration between SAP FSM & ECC. SAP Integration provides seamless integration between SAP and non-SAP applications within the organization A2A (Application to Application) or even outside the organization B2B (Business to Business). SAP Field Service Management software is meant to help your company boost the effectiveness of service and maintenance. Message broker (MB) should be installed on a Windows Server with .NET 4.7.2 or higher. The MB files are simply copied to a folder.
- System Prerequisite
- Architecture
- E4C Message Broker Installation & Configuration
- SAP ECC Installation & Configuration
- Integration Setup
System Prerequisite:
- Data Processor: SAP Netweaver version 7.0 SP14.
- Message Broker: Any Windows system, with .NET Framework 4.0 (client profile) installed, 256MB RAM about system requirements, 50GB HDD about system requirements and remote access.
- Network connectivity (ports)
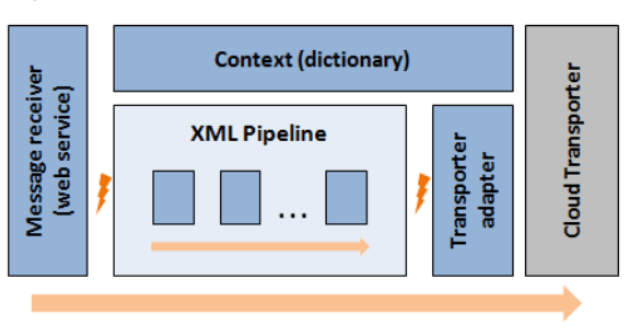
Architecture:
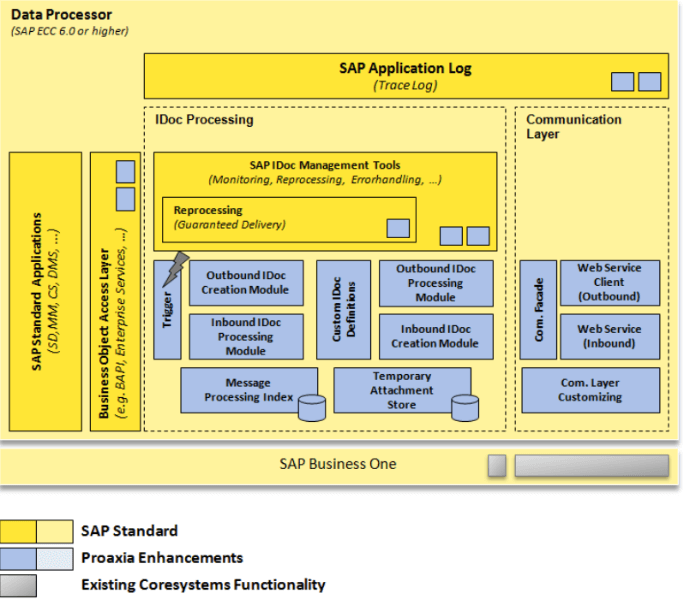
Data processor Architecture
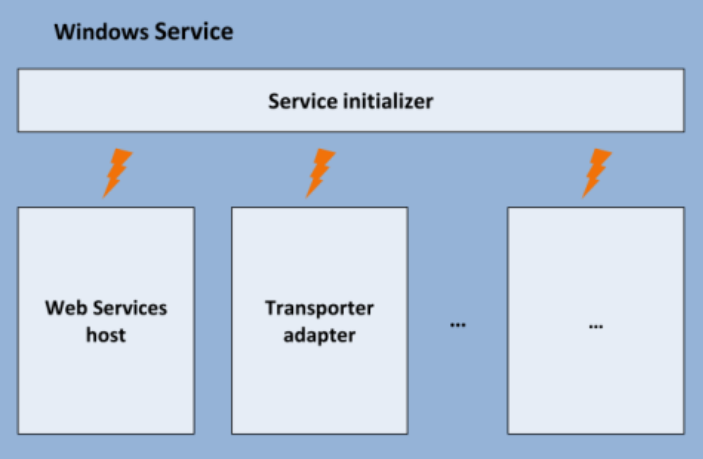
Message Broker:
Windows Service Architecture
Message Processing pipeline Architecture
E4C Message Broker Installation & Configuration:
Installation:
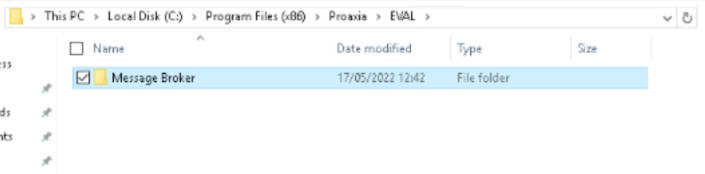
Message broker is zip archived file and it should be extracted to target directory on the server (i.e., C:\Program Files (x86)\proaxia).
Configuration:
Message Broker is by default set-up to handle a single Cloud company.
Web service setup:
E4C Message Broker needs to be executed as a Windows service.
To create a service, open command line as administrator and run a command:
sc create E4CEVALmessageBroker DisplayName= “E4C EVAL Message Broker” binPath= “C:\Program Files (x86)\proaxia\EVAL Message Broker\ E4CwinService.exe” obj= “NT AUTHORITY\LocalService”
The path in the above command changes depending on the directory, to which you extracted the Message Broker archive.
Above command creates a windows service named E4CmessageBroker, with display name E4C Message Broker and registered to run in context of LocalService user.

After having configured the Message Broker and having run the service successfully. On general tab change the startup type to automatic

On recovery tab set first, second and subsequent failures to “Restart the Service”, so that the work is uninterrupted.

URL Namespace Reservation:
E4C Message Broker runs as a web service server, which is used to send messages to FSM Cloud.
This service must be available on a certain TCP port and is registered with a certain URL in the system.
To register the URL, open command line as administrator and run a command:
Netsh http add urlacl url=https://localhost:9697/proaxia.e4c.eval.msgbrkr.Outbound.WebService/SendOutboundMessageService/ user=LocalService

The service URL and user, in whose context the service is configured to run should be used to match the actual values.
Cloud Management:
To exchange messages between ECC and FSM Cloud, you have to register an account, create a company and generate access tokens.
Account Registration:
Account management is performed in FSM admin with a web browser.
Cloud Company Registration:
Start E4C Cloud Management.exe and login with Cloud account and password entered during account registration. On the companies tab you can add or remove companies.
Cloud access token:
Access token can be generated with the use of E4C Cloud Manager.exe. After logging in switch to the access token tab where we can generate or test the access token.
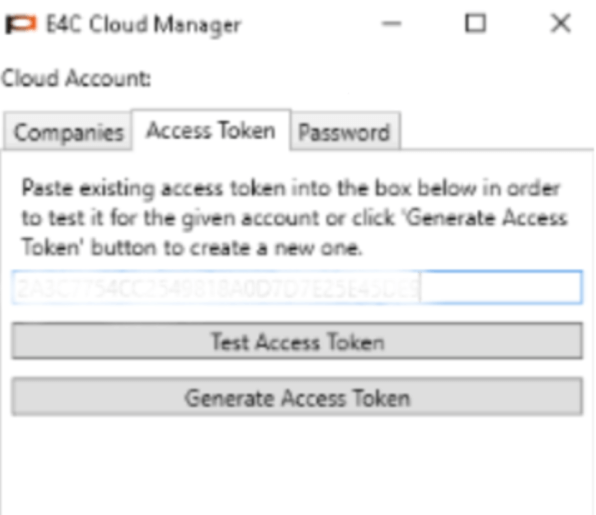
New token can be generated as well as an existing token can be tested here.
Application Config File:
Message Broker configuration file can be found in the main application directory. The file name is E4CwinService.exe.config. The file has an XML format and contains sections related to web services, some .NET environment settings, etc. For Message Broker configuration there are two important sections. Application settings are grouped under <appSettings> section and the other important section is Logging.

SAP ECC Installation & Configuration:
E4C transport: The 1st step is import of E4C Transport. Ask your SAP administrator to copy the transport files into SAP transport directories. In transaction STMS in your development system add the transport to your transport queue. After adding transport to the transport queue, E4C transport should be imported.
ALE & IDOC:
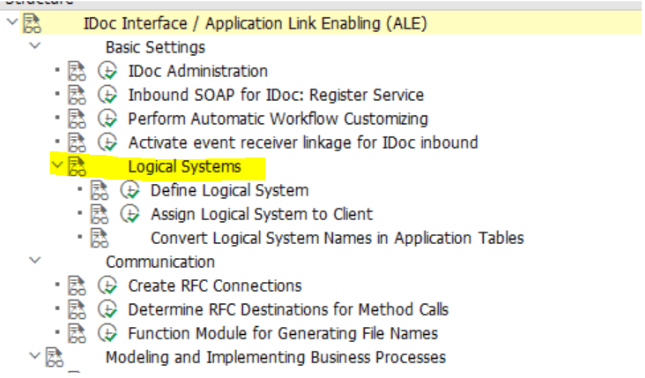
Logical systems:
For each FSM company a logical system has to be created. SALE transaction code is used to maintain Logical systems.
Port Definition:
For each FSM company a port has to be defined. Transaction WE21 is used to define the port.
Partner profile:
For maintenance of partners please use transaction WE20. E4C uses Partner type LS. For each FSM company there should be a partner.
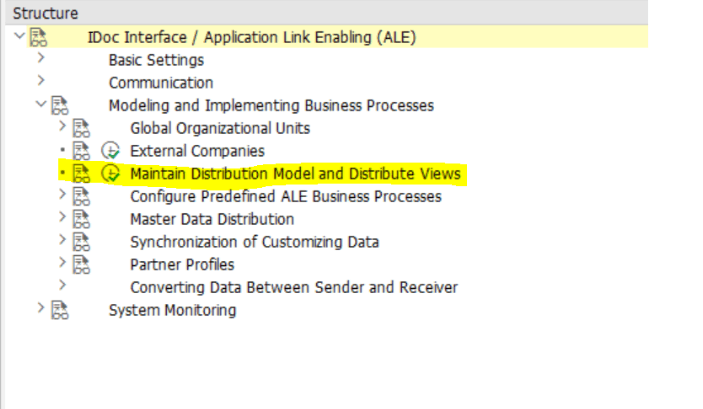
ALE Distribution Model:
SALE transaction code is used to maintain ALE distribution Model. After starting the SALE transaction move to change mode. Define one distribution model for one FSM company.
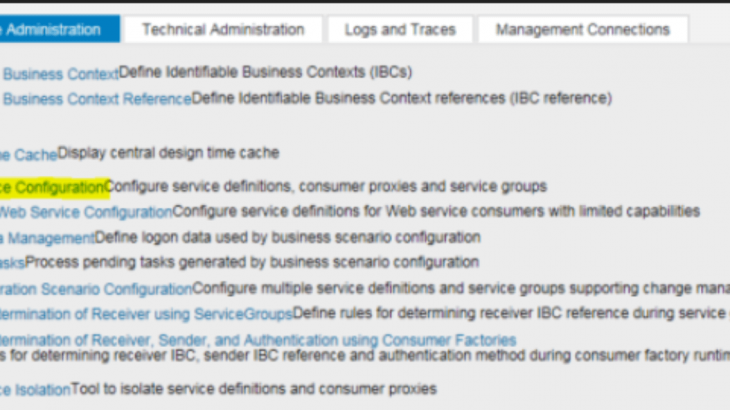
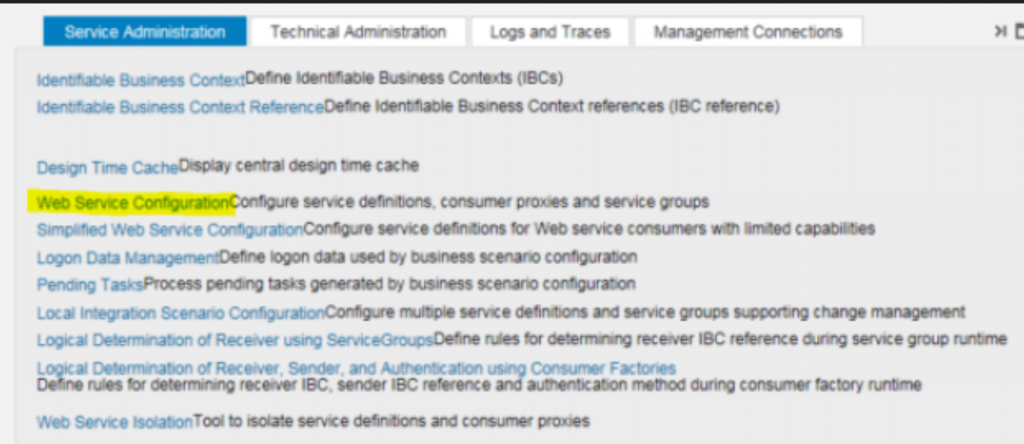
Web Service Configuration:
Incoming service (FSM-ECC):
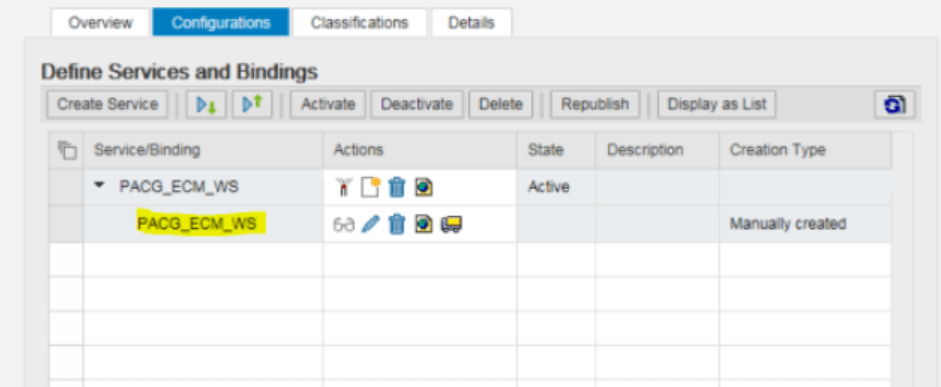
Run transaction code SOAMANAGER, then click on web service configuration.

Select /PACG/ECM_WS service definition.

Then create a service named PACG_ECM_WS.
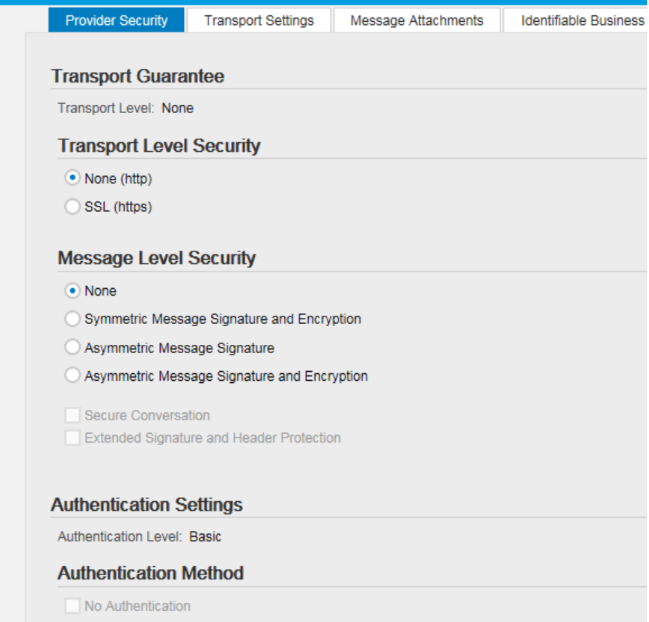
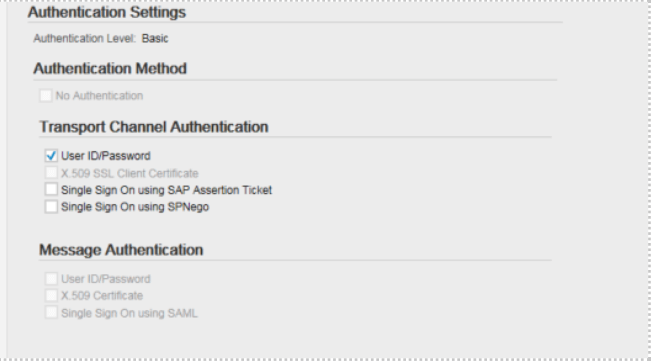
Select the following values on provider security tab
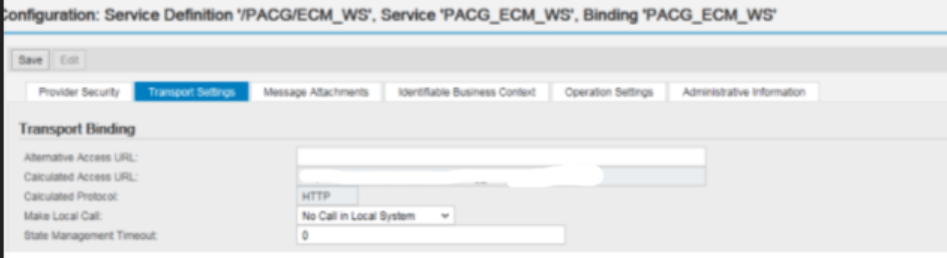
Select the following values on the transport settings tab
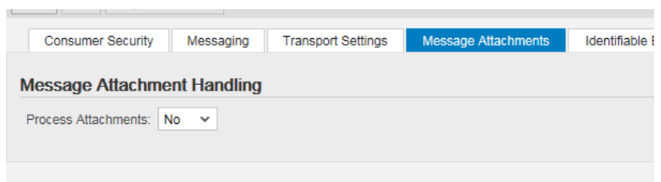
Select the following values on Message Attachments tab

Select the following values on IBC tab

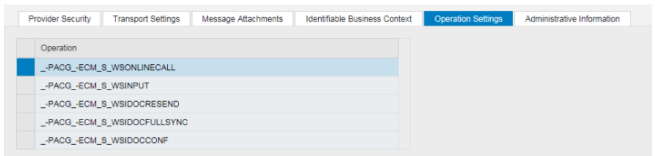
Select the following values on Operation Settings tab
Then save it.
Outgoing service (ECC-FSM):
Run transaction code SOAMANAGER, then click on web service configuration.
Select /PACG/CO_ECMISEND_OUTBOUND_MES Consumer Proxy.
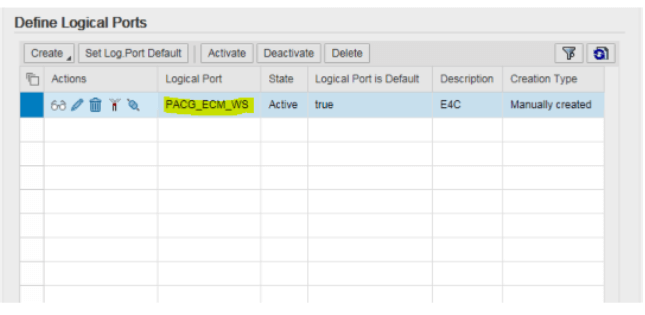
Then create a Logical port named PACG_ECM_WS.
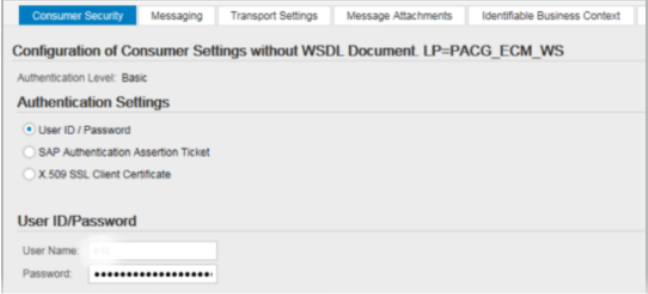
Select the following values on the consumer security tab and enter your username and password.
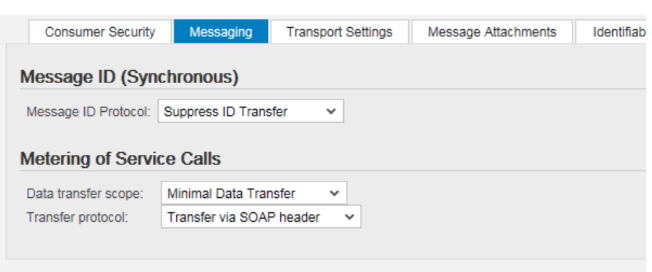
Select the following values on Messaging tab
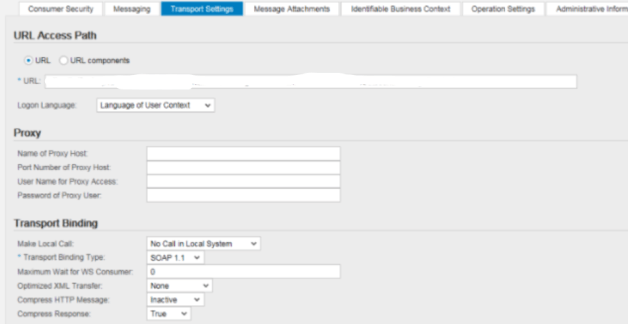
Select the following values on Transport Settings tab and Enter the reserved URL.
Select the following values on the Message attachment tab
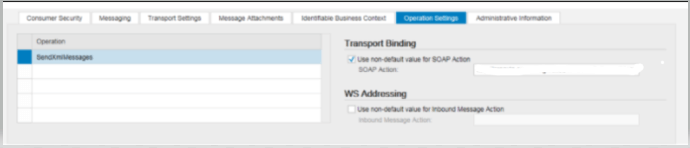
Select the following values on Operation Settings tab
Integration Set up:
E4C Program Set up:
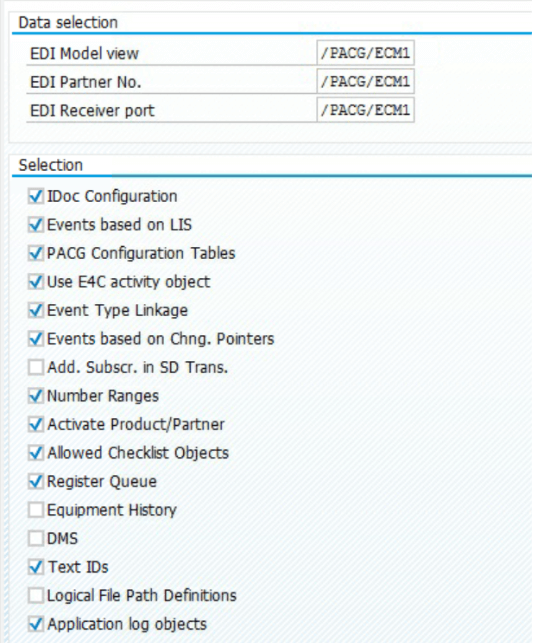
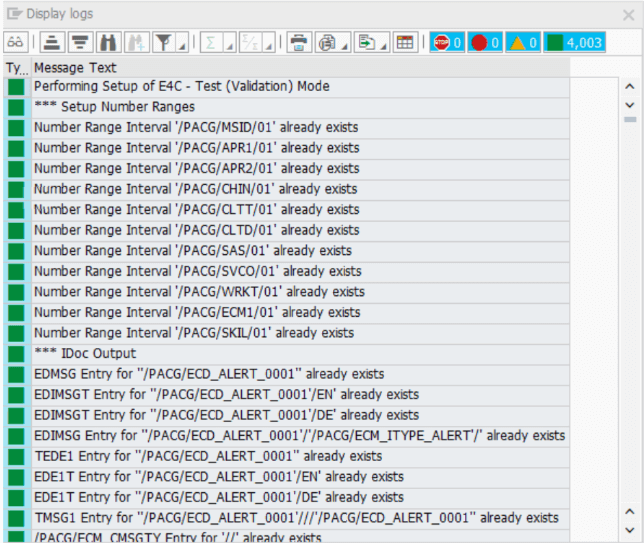
Run /n/PACG/ECM_SETUP transaction code for E4C set up.
Set EDI Model view, Partner No, Receiver port to /PACG/ECM1
Update the tick boxes according to the screenshot and click on execute. Set up program should be started for each FSM company.
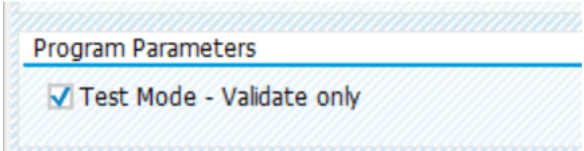
Unmark “Test Mode” to perform an actual configuration. Once you execute the program the protocol will be presented
Once you execute the program the protocol will be presented. Review the protocol, check if there are no errors or warnings.
Cockpit configuration:
Run /n/PACG/ECM_COCKPITCON transaction code. Configure the fields as shown in the screenshot below.

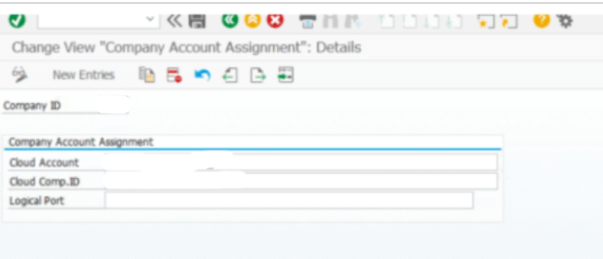
Company Account Assignation:
Run /n/PACG/ECM_CACC transaction and navigate to company account assignation and select the following values
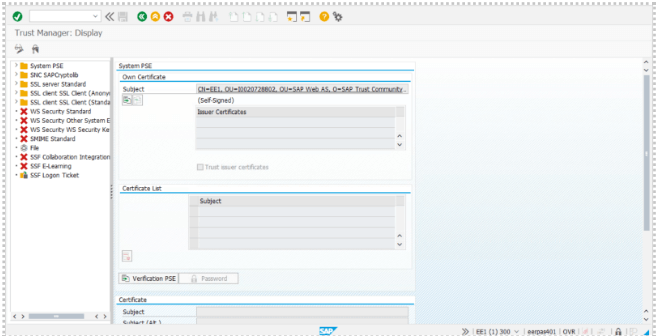
Server certificate:
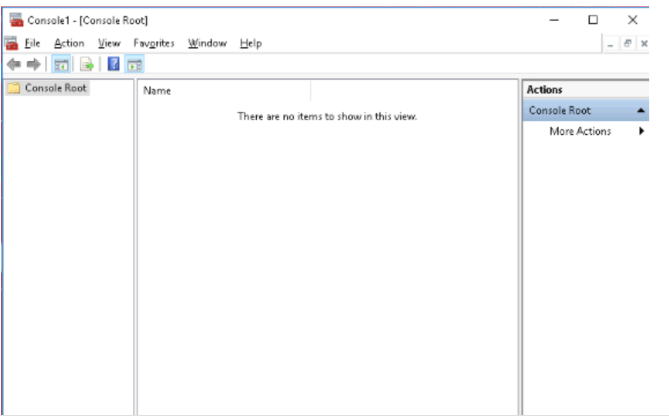
Open MMC
Open file menu and select “Add/Remove Snap-in”
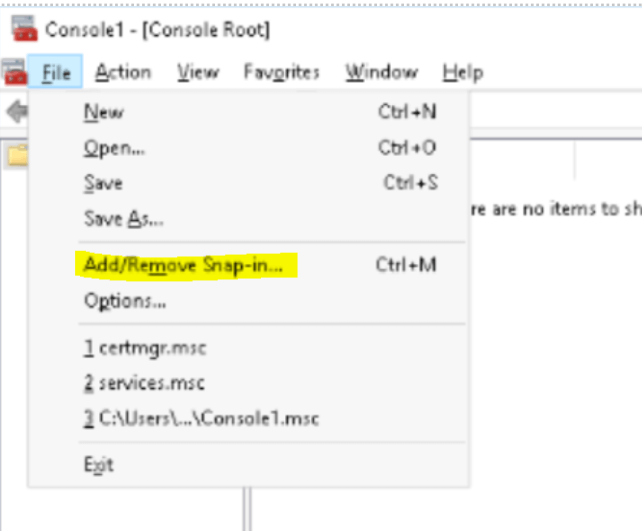
Open file menu and select “Add/Remove Snap-in”
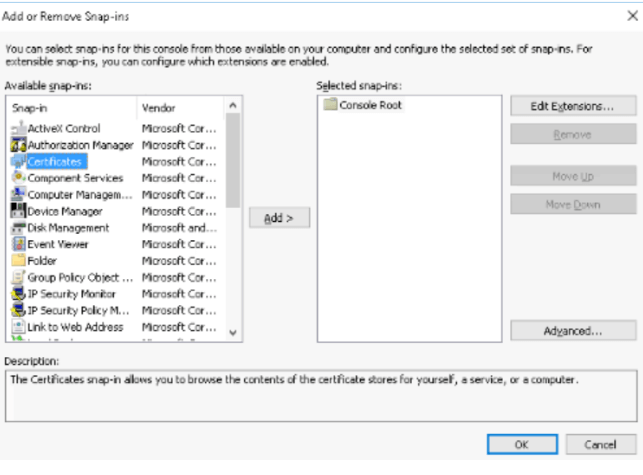
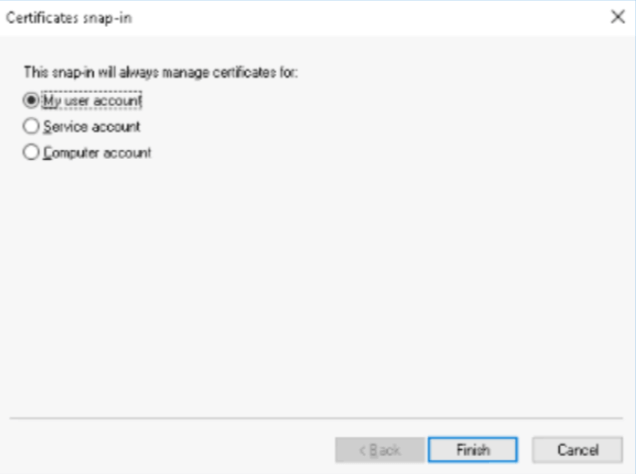
Select My user account and click on finish.
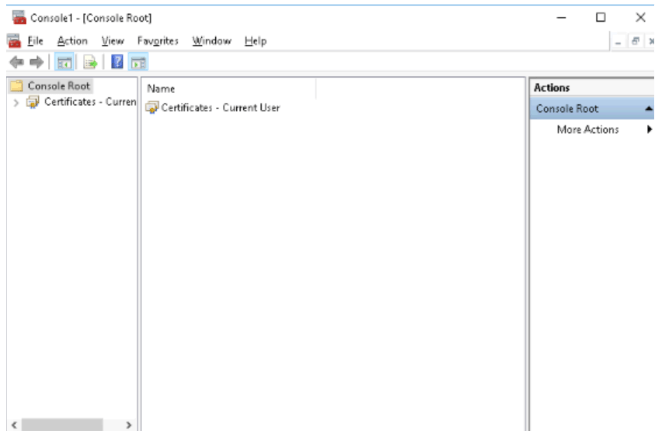
Now, you can see the certificates on the console.
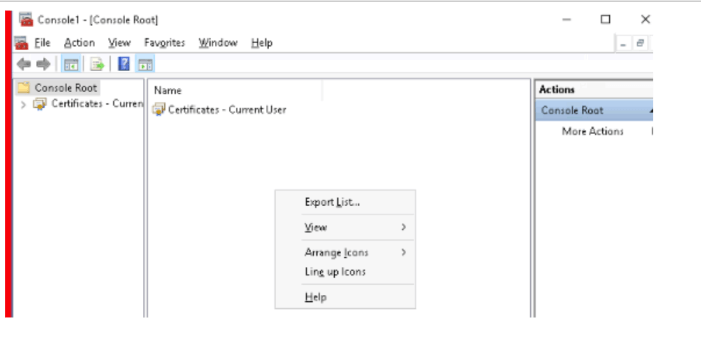
Right click on the console and select export list and save the certificate to target directory.
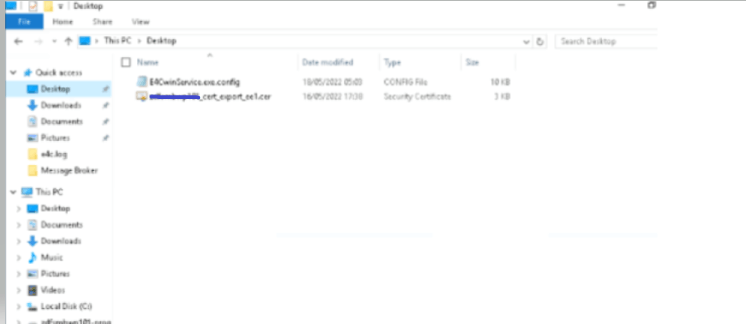
Now, you can see the certificate in the target directory.
Certificate import:
Run STURST transaction code then import the certificate.