Today, we would present you just three flow charts. These are teasers to raise your curiosity to learn more about the enhancement of SAP standard Fiori App. In our next article, we would explain the detailed step by step to enhance the Fiori frontend and backend.
In every Fiori enhancement projects, you would have one or all of the below three requirements.
- Hide existing screen elements or add new screen elements in the frontend UI screen.
- To meet requirement 1 above, we need to add more fields in the Entity Type of the backend OData service.
- Make the UI Project point to newly enhanced backend OData service which has additional fields and logic.
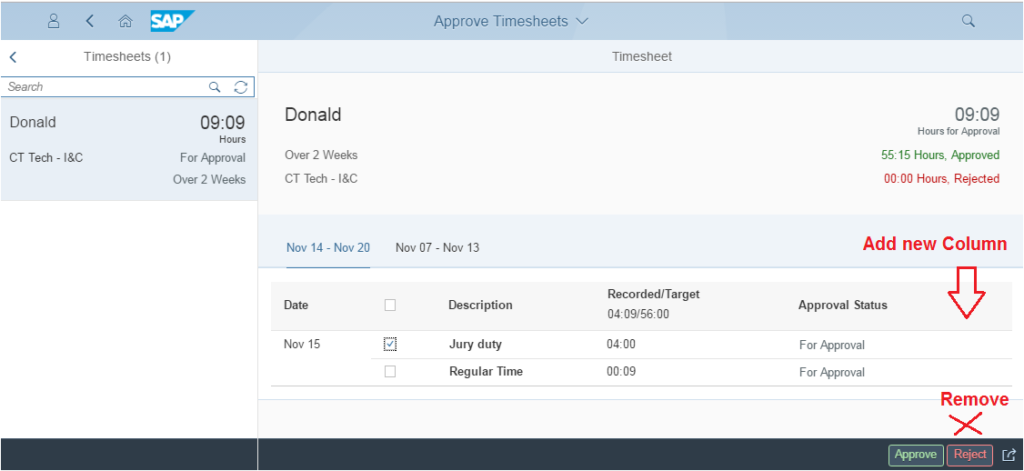
Business Requirement: Enhance the standard Approve Timesheets Fiori App.
- Add a new column with header text called Ext Source (External Source) and its item column as a check box.
- If the user id of the user who creates the time starts with Ext then mark this column as ‘X’, else leave it blank. ‘X’ means time created from an External system.
- Remove the Reject button. Business do not want to reject from the frontend.
The above three enhancement of the Fiori App is a genuine business requirement of a real client.
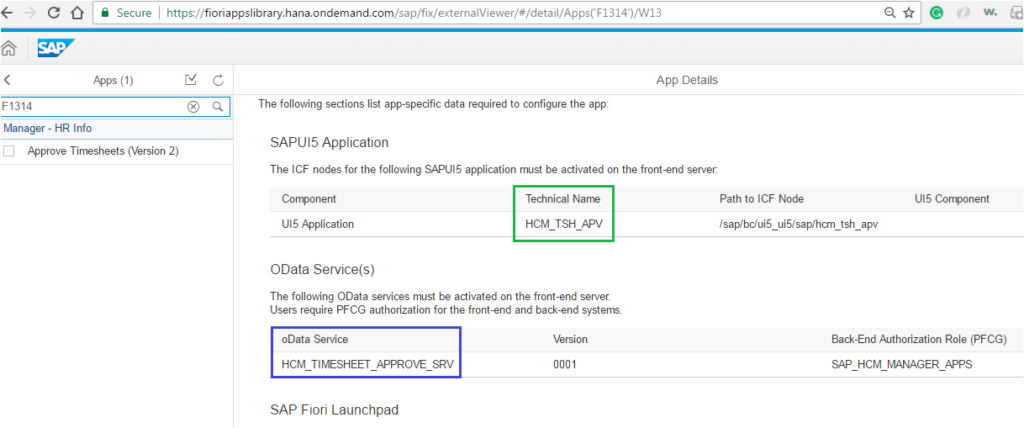
Go to SAP Fiori Library to get the details about Approve Timesheets App.
Flow Chart 1:
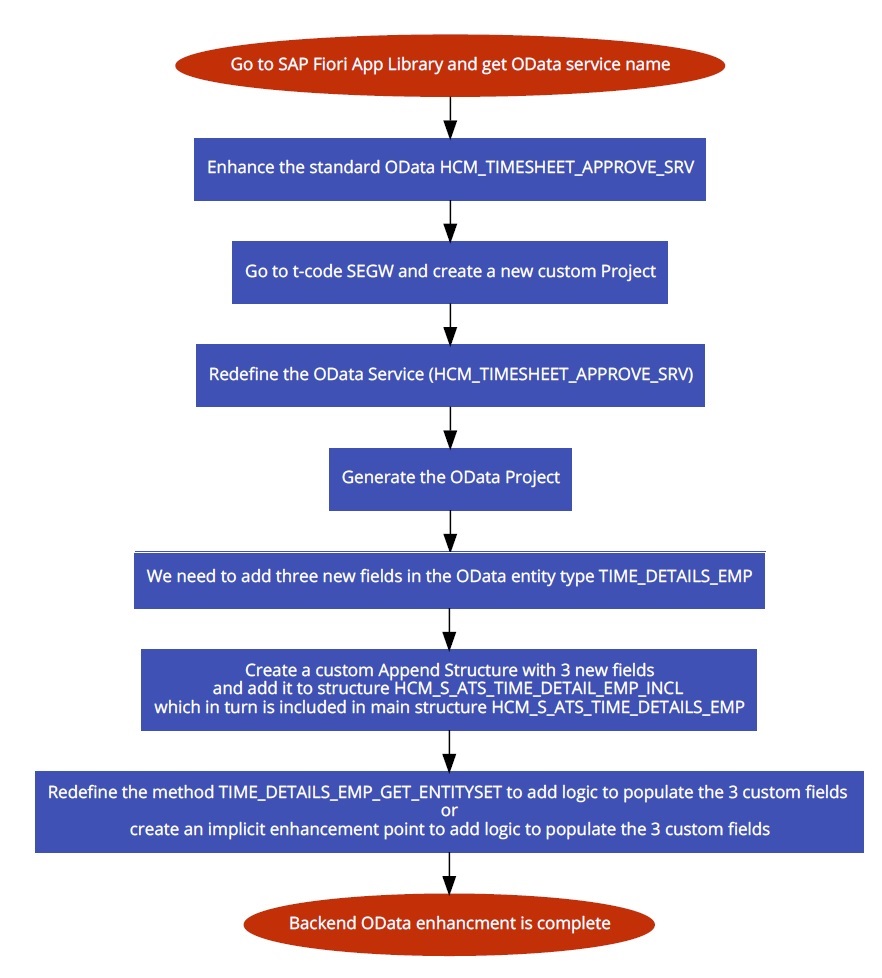
If the frontend UI screen needs to show additional fields on the screen which already exist in the OData Entity Type, then we do NOT need to enhance the backend OData Service. Most of the video tutorials show how to display/hide elements in frontend assuming all fields/properties would always be there in OData Entity Type. But more often than not, you would need to add additional custom fields in the OData Entity Type and make them visible in the frontend UI. In such scenarios, we need to enhance the standard OData service and put the additional properties.
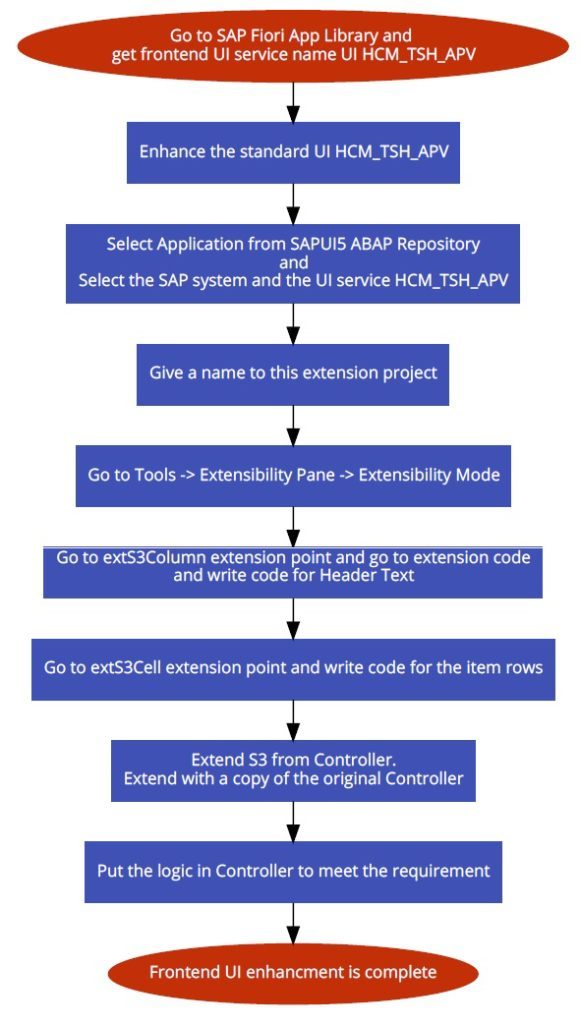
Flow Chart 2:
If there is a need to make any single change in the standard frontend UI, we need to enhance/extend the standard project. For our tutorial, we would do the enhancement using SAP WebIDE (not eclipse). Standard extension points are provided by SAP (just like enhancement spot/badi/exit) which can be used for doing the modification as shown in the flow chart below.
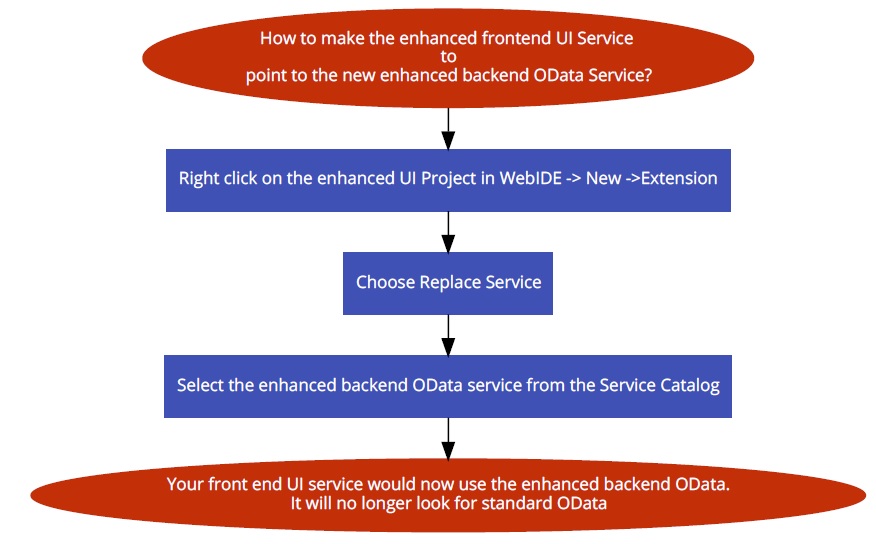
Flow Chart 3:
If you have made the change in the backend OData, then it is imperative that you would want to consume the enhanced OData rather than the standard OData from the frontend. In flow chart 2, we just enhanced the UI part. Nowhere did we change the setting to make the UI pull data using new OData service. Please follow the below quick steps to make the let your UI project know which OData to use going forward and replace the old standard OData service with the new redefined OData Service.
I am sure, it might not have been 100 percent clear as to how the business requirement can be met. The idea was to give you the high-level overview of the steps. At least after going through the above 3 flow charts, you know that there are three things to be done. When I first started learning, I was not aware of flow chart 3 and always wondered how would I make the UI point to the new OData. We have written this post to build up the environment for our next post where we would present in front of you the whole buffet.


