This blog post is intended to provide the reader details for SAP EWM RF development.
As part of this blog, I am going to discuss the functional aspects for RF menu changes, Function code key changes & addition of new screen in the RF Flow.
Menu changes –
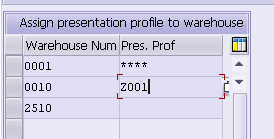
We need to create new Presentation profile and assign it to Warehouse.
All other RF Menu configurations are done with respect to new Presentation profile created here.
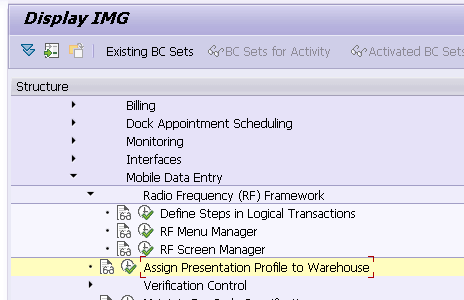
RF Menu manager can be accessed with following Navigation.
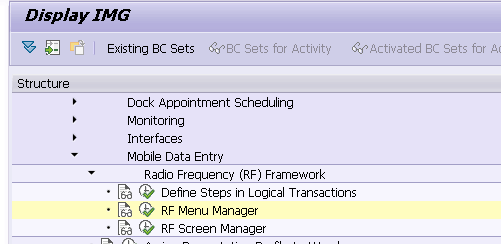
The Standard SAP presentation profile- ‘****’ & Personalization profile – ‘**’ can be copied to own Presentation/Personalization profile.
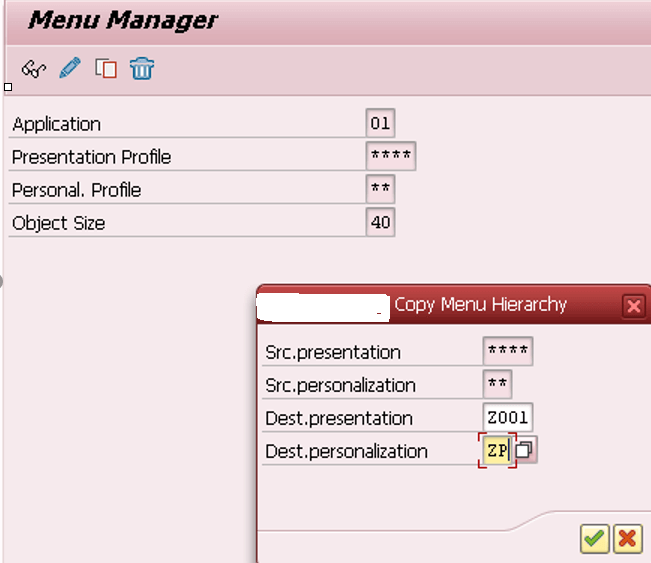
Standard SAP Presentation profile – **** and Personalization profile – ** Menu
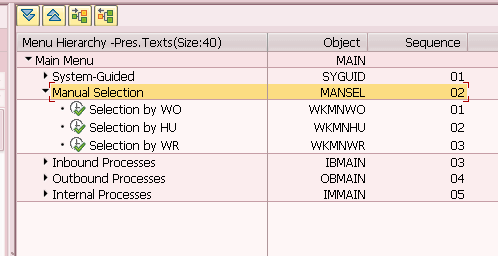
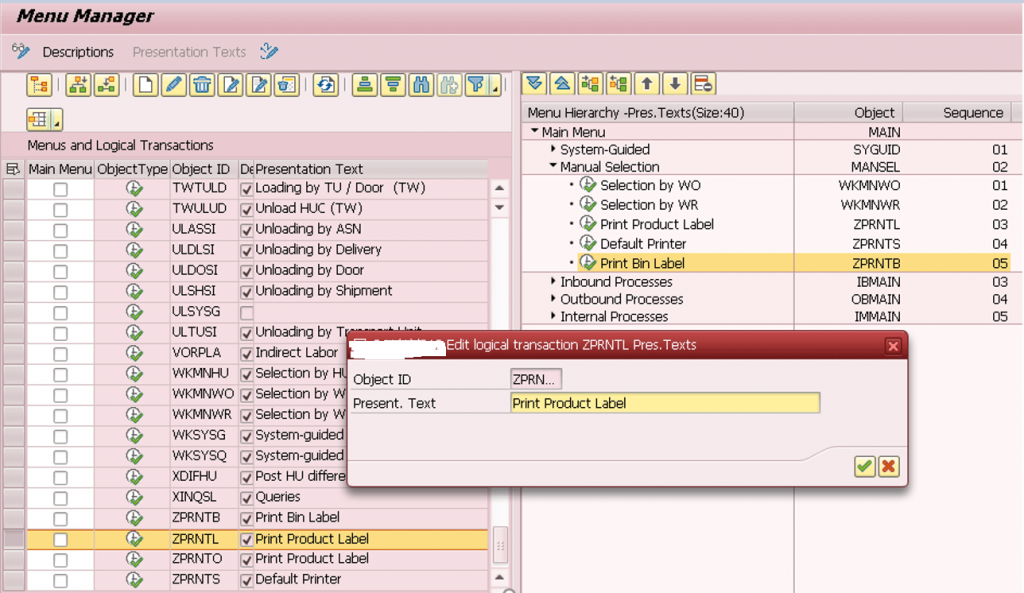
In the Copied Presentation profile – Z001 and Personalization profile – ZP We added few additional menus’ in the Node – ‘Manual Selection’.
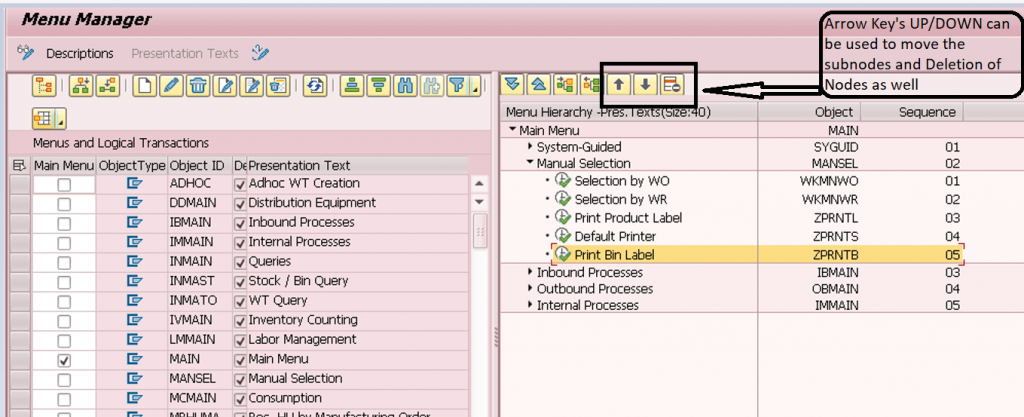
You can do all your Menu node changes in this configuration path i.e. Addition of New Node in the Menu path (Just Drag it from left pane where there are all the logical transactions and drop it in the right pane in the required Menu path), Renaming the description, Changing the existing sequence (UP/DOWN) or Deletion of any irrelevant node/sub node etc.
E.g. Renaming the Description
Function Key Changes –
We had business requirement to have 8 Function keys in the screen instead of standard SAP delivered 4.
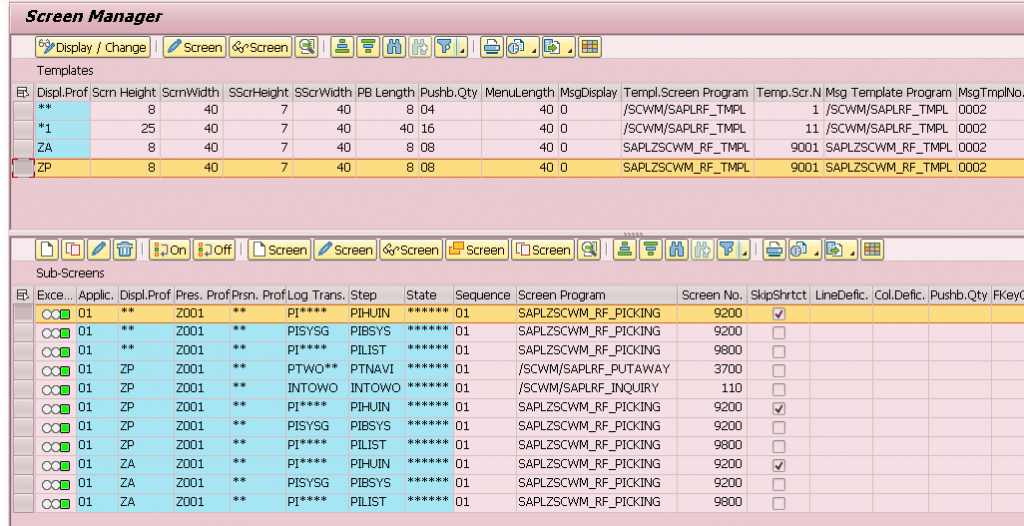
In order to achieve it, we copied standard Display profile – ** and created new one.
While copying it, we can change the No of Push Button’s Quantity, Screen height/Width, Push button’s length Etc.

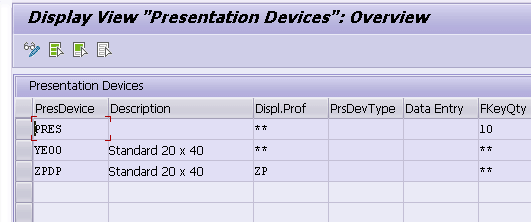
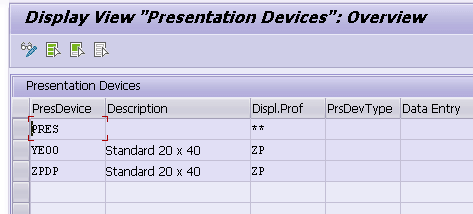
We need to assign the Display profile created above to Presentation device in easy access – /N/SCWM/PRDVC.
We can create separate Presentation device for RF scanner’s, Voice terminals and assign the Display profile to them.
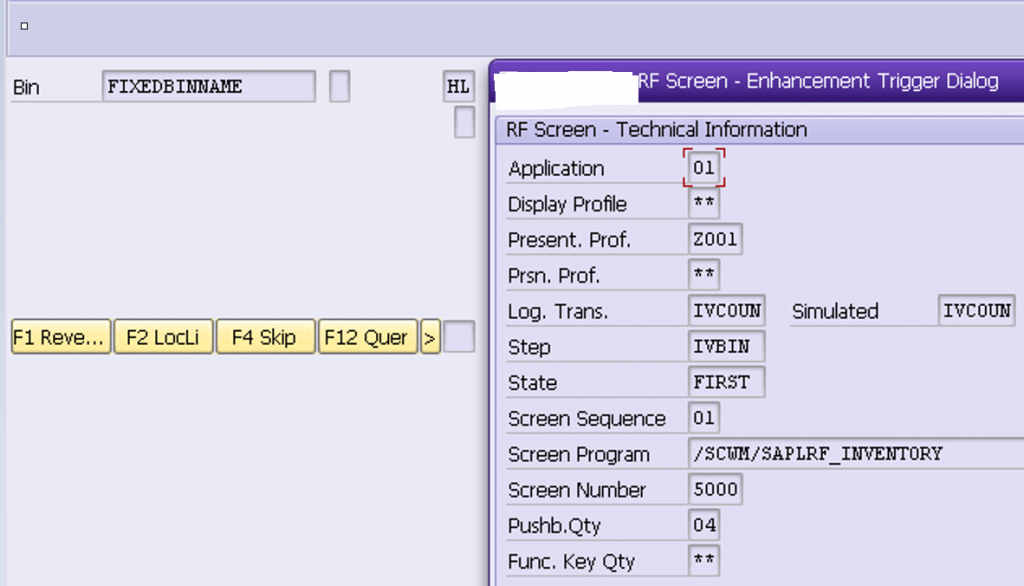
When Standard Display profile-** is assigned to Presentation device, it derives 4 Function keys.
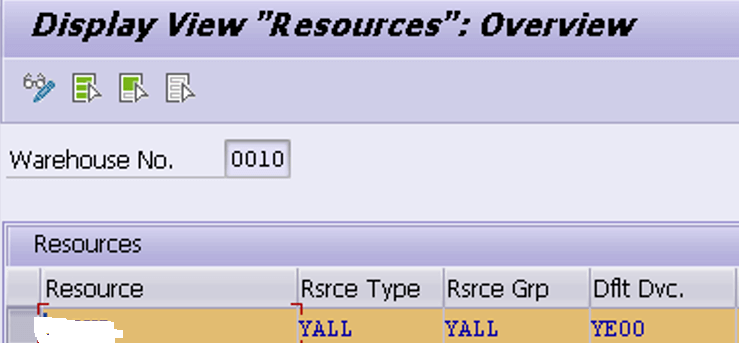
The Presentation device is assigned to Resource in /N/SCWM/RSRC.
When Display profile- ** is assigned to Presentation device, it derives 4 Function keys.
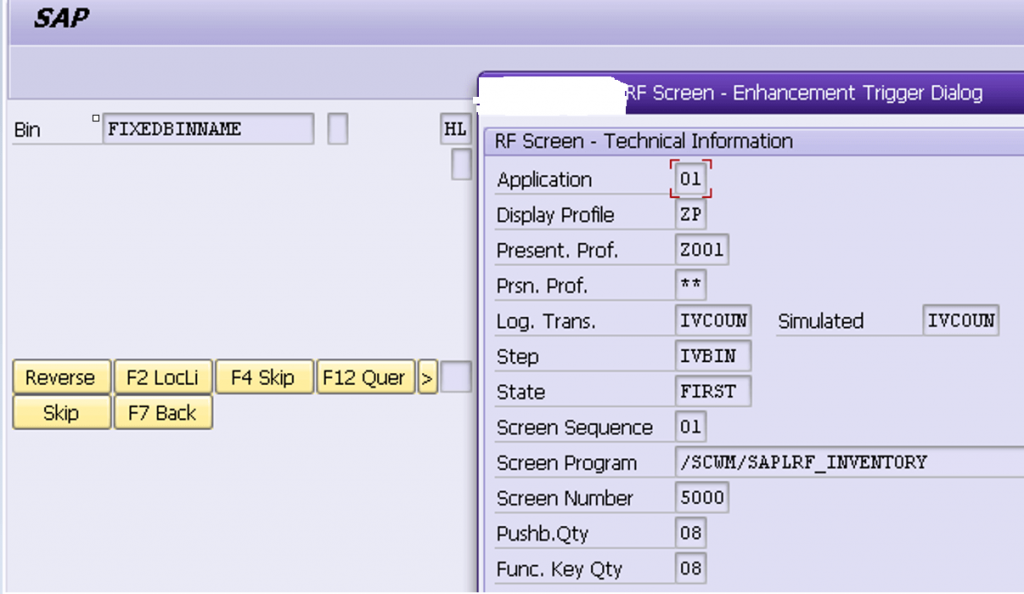
Now if we assign the Display profile – ZP which was configured to have 8 Push button’s then RF processing shows 6 Push buttons i.e. Maximum 8 can be shown on the screen.
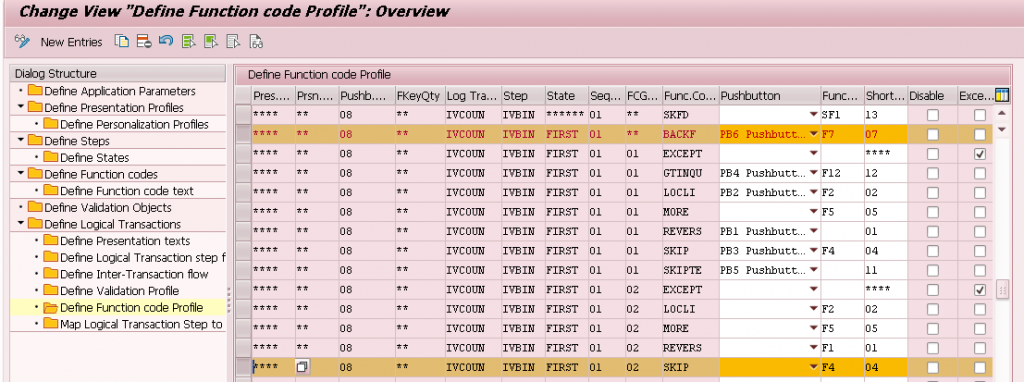
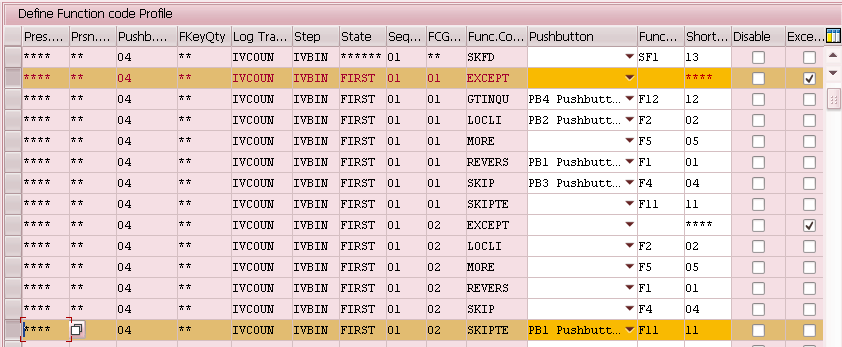
The Push buttons can be added or Changed in the Configuration node – ‘Define function code profile’.
We can get Logical transaction in RF Menu screen with ‘Ctrl+Shift+F1’.
Go to Customizing, Select the logical transaction and further go to Define function code profile.
You need to select the entry as per Logical transaction/step with respective presentation profile/personalization profile/push button Quantity.
As you can see here there are entries with Push button Qty – 8 and Push button Qty – 4 so you need to make the changes for the respective combination of Presentation profile/display profile/Push button qty. and then all the Corresponding Function keys will be available in the particular RF transaction.
The Sequence for Push button’s from PB1 to PB16 can be assigned or changed here.
The 6 Push button’s available above are assigned in the below config node.
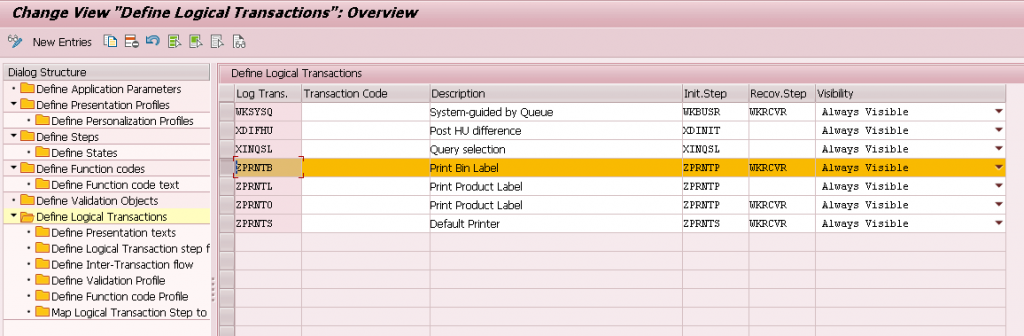
Addition of new Logical transaction
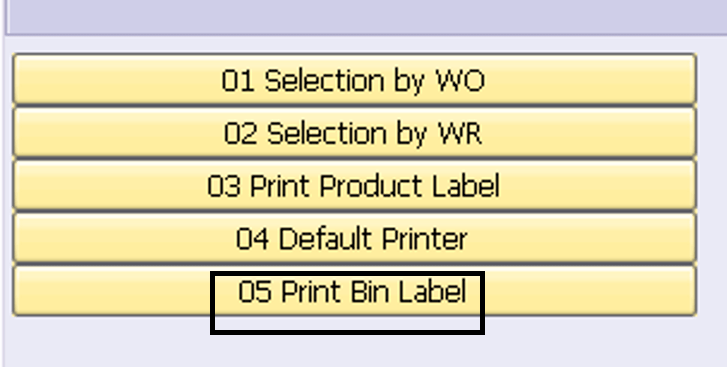
Business asked to add new RF screen’s/Menu’s in the existing flow to print the Bin/Product label. We had separate development for this Product/Bin label print and as part of this Blog I am going to discuss as how we added that in the Existing RF flow.
Separate logical transactions were created for Bin Label & Product label.
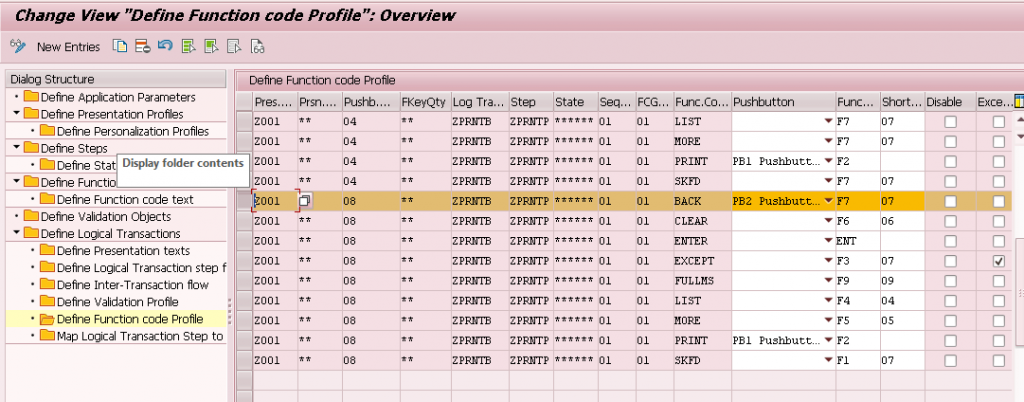
We need to assign the Transaction step flow for all the relevant Function keys.
E.g. Push button Print was a trigger for Bin label print so that function code needs to be configured here and Function module needs to be assigned.
SAP EWM RF flow needs PBO (Process before output) and PAI (Process after Input) Function modules for every RF screen and corresponding Function module needs to be assigned in this Node.
Function Code – INIT is to initialize the screen so it has PBO Function module and next when Push button ‘Print’ is triggered the assigned function module here will take of the printing logic.

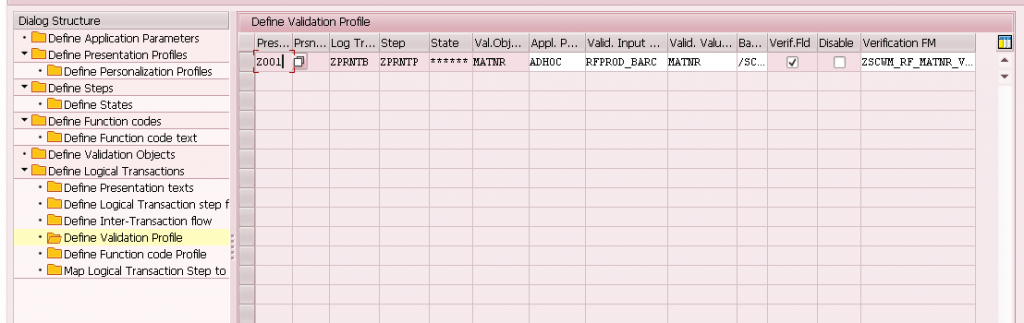
The Validation for particular Field e.g. in this case we got Material validated after entry and corresponding FM /rest of the details needs to be assigned here.
The required function keys can be assigned here.
In the Node – ‘Map logical transaction Step to Sub-screen’, the Sub screen no and FM can be assigned.
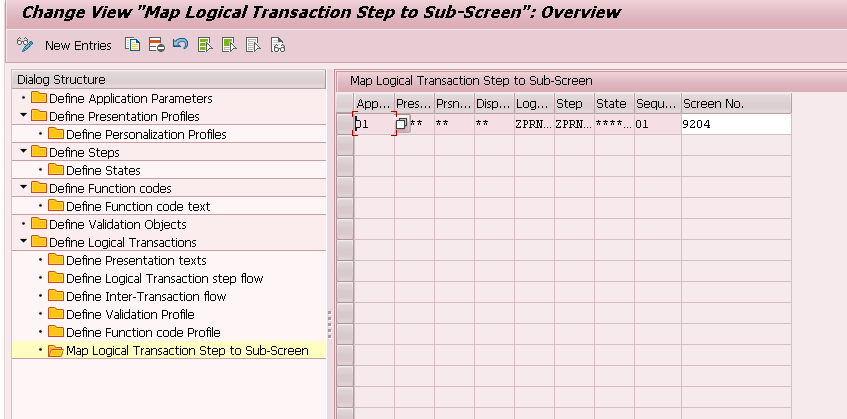
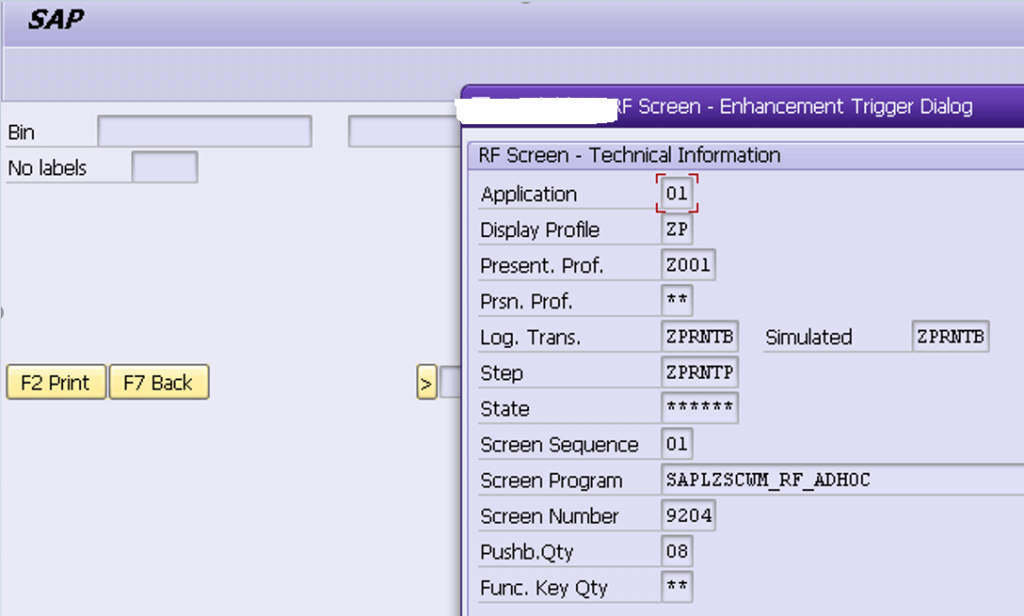
Once above Steps are done, the Screen development is done by developer and result is following RF screen – 9204 for logical transaction – ZPRNTB.
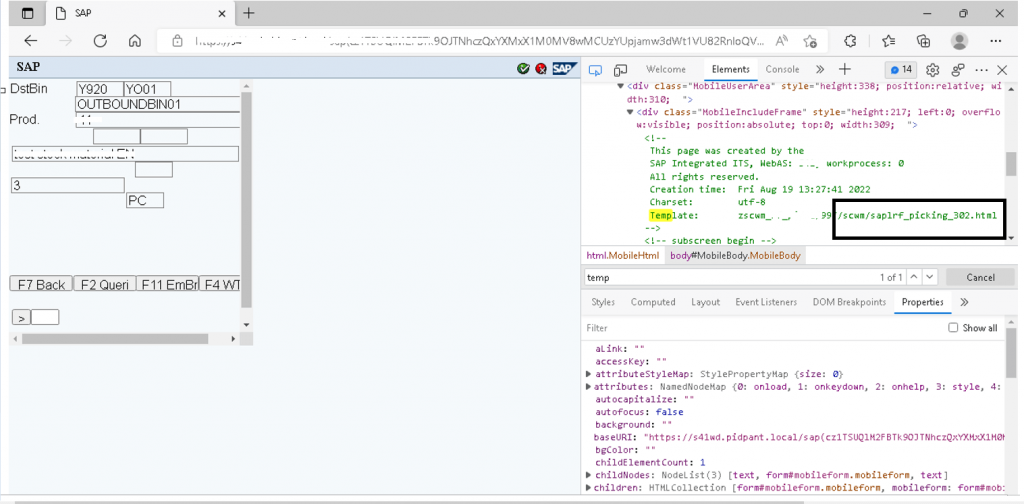
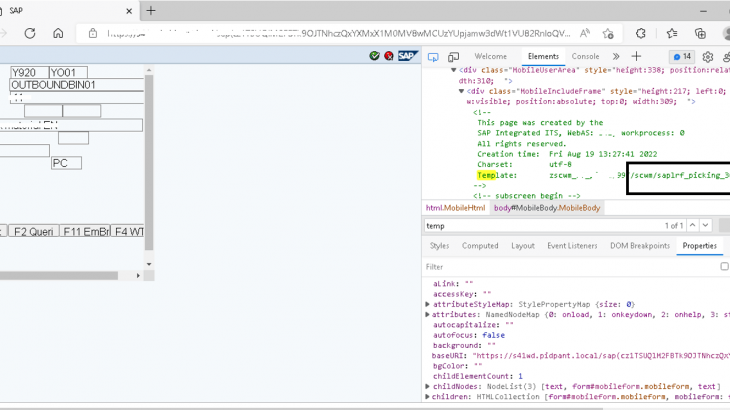
Small trick when working with Web browser link to test RF flows –
Some times when we are working on the RF flow with Web browser link then reading a screen’s detail is not feasible. So instead of navigating to Tcode – /n/scwm/rfui and getting the screen details with ‘Ctrl+Shift+F1’ we can read screen program and screen number as follows.
Click ‘Ctrl+C’ on your web browser link. Click on Properties tab and ‘Ctrl+F’. Then Search keyword – Template and you would get the details for RF screen program- /scwm/saplrf_picking and screen no – 302 in this case.