Introduction
SAP Datasphere has introduced a new feature, ‘Replication Flows‘. This new capability (now available with Amazon S3) allows for the process of copying multiple tables from one source to another, offering a fast and seamless experience in data management.
In this blog, we’ll provide a step-by-step tutorial on replicating data from SAP S/4HANA to Amazon S3, showcasing the practical application and efficiency of this new feature in real-world scenarios.
The steps outlined below are the same for SAP S/4HANA On-Premise and SAP S/4HANA Cloud.
Now, let’s dive in. We’ll walk you through each step necessary to effectively utilize ‘Replication Flows’ for transferring data from SAP S/4HANA to Amazon S3.
Steps
1. To start, you will need to create a connection in your SAP Datasphere instance to Amazon

2. Please ensure you have a Dataset in your Amazon S3 that you would like to replicate the tables into.
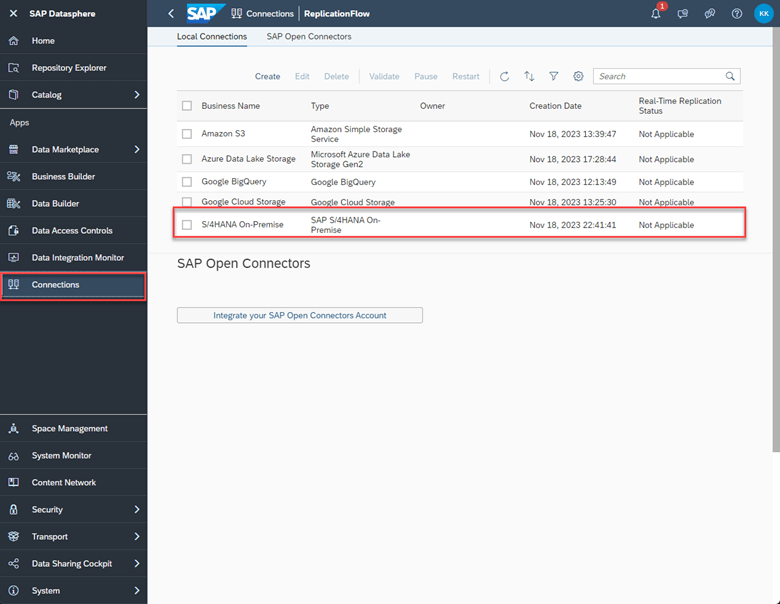
3. Make sure you have a source connection (Cloud or On-Premise). In this case, we will be using S/4HANA On-Premise. You will need to create this connection in the ‘Connections’ tab in SAP Datasphere.
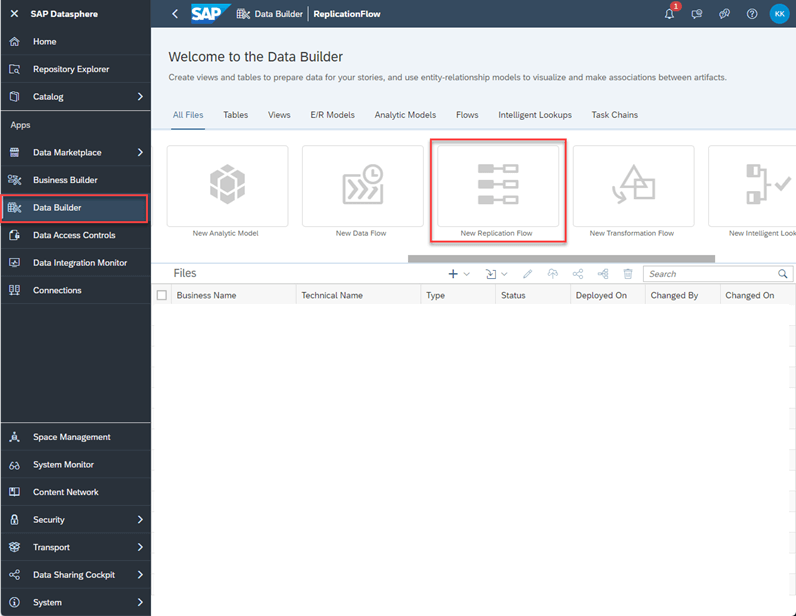
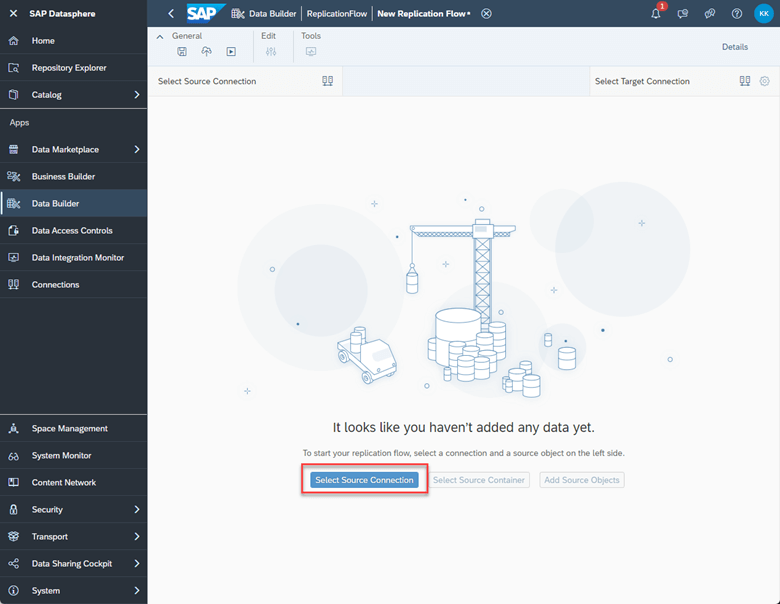
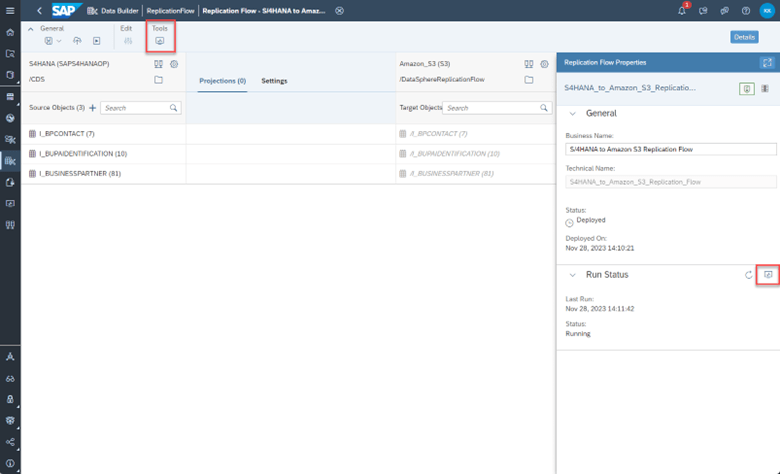
4. Navigate to SAP Datasphere and click on ‘Data Builder’ on the left panel. Find and click the ‘New Replication Flow’ tile.
5. Once you are in ‘New Replication Flow’ Click on ‘Select Source Connection’.
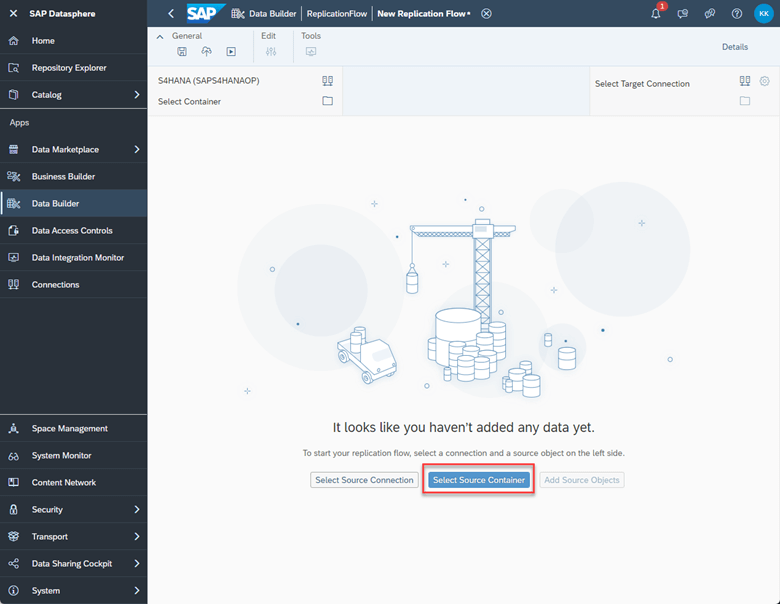
6. Choose the source connection you want. We will be choosing SAP S/4 HANA On-Premise.
7. Next, click on ‘Select Source Container’.
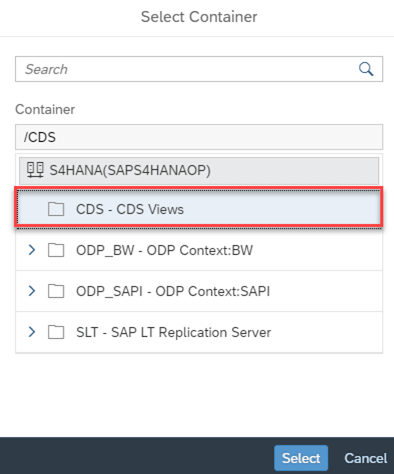
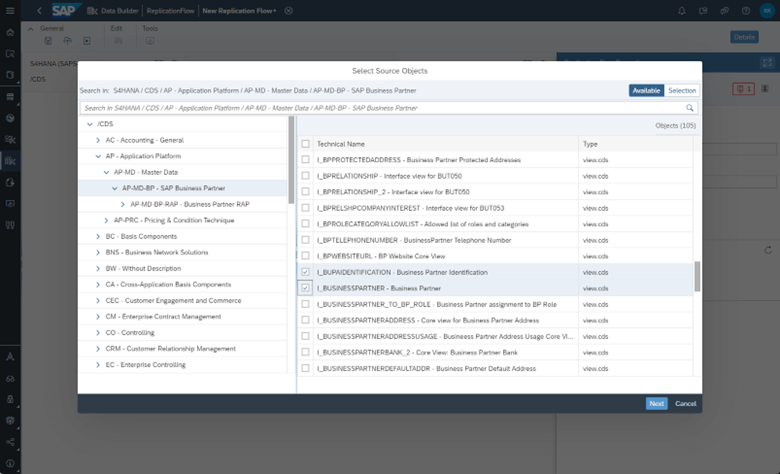
8. Choose CDS Views and then click Select.
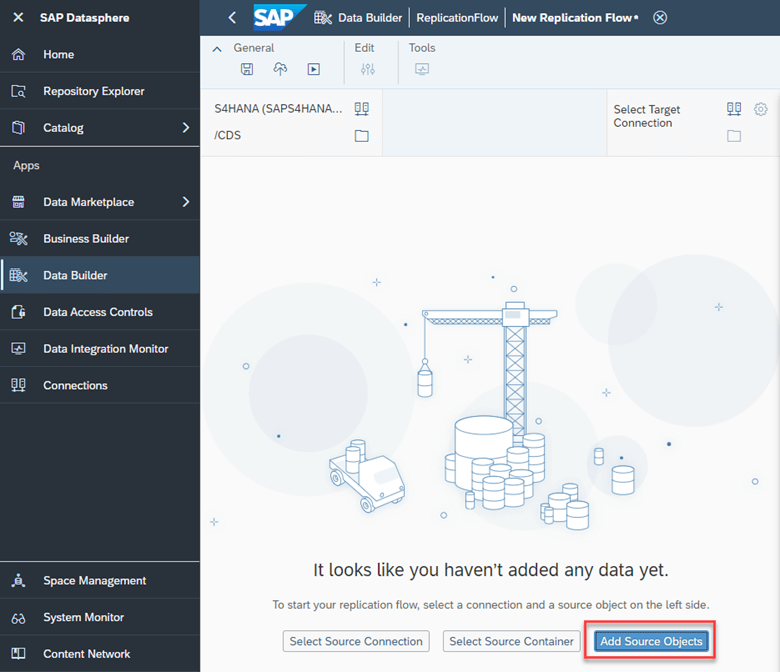
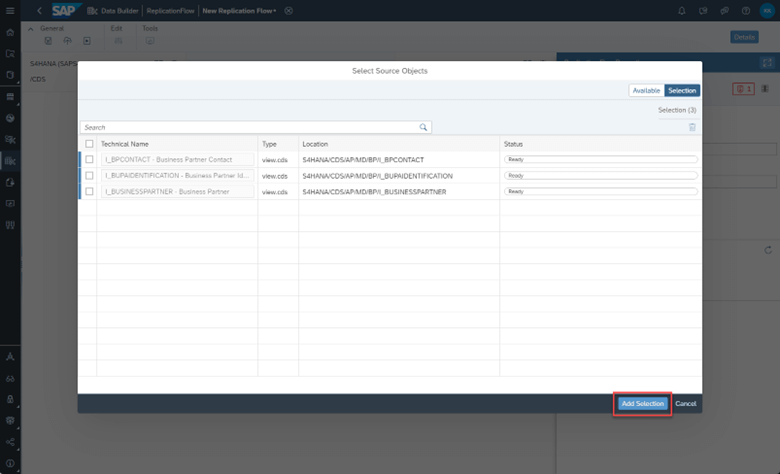
9. Click ‘add source objects’ and choose the views you want to replicate. You can choose multiple if needed. Once you finalize the objects, click ‘Add Selection’.
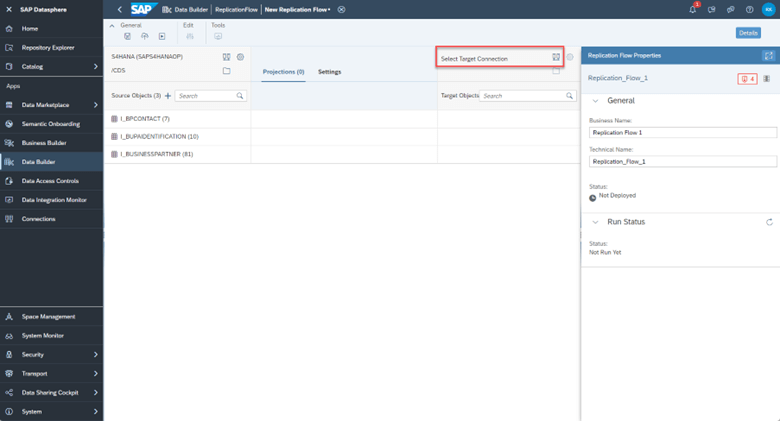
10. Now, we select our target connection. We will be choosing S3 as our target. If you experience any errors during this step, please refer to the note at the end of this blog.

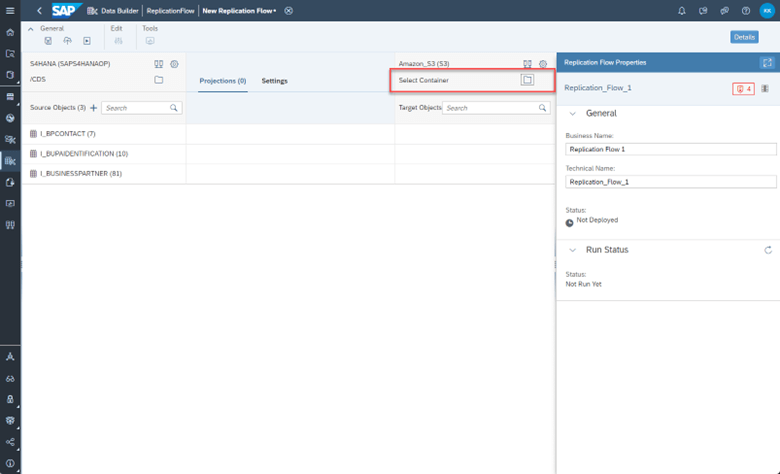
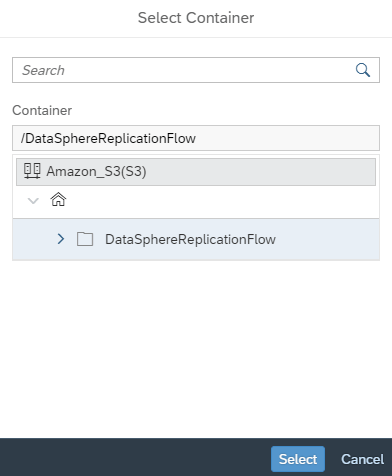
11. Next we choose the target container. Recall the dataset you created in S3 earlier in step 2. This is the container you will choose here.
12. In the middle selector, click ‘settings’ and set your load type. ‘Initial only’ means to load all selected data once. ‘Initial and delta’ means that after the initial load, you want the system to check every 60 minutes for any changes (delta) and copy the changes to the target.

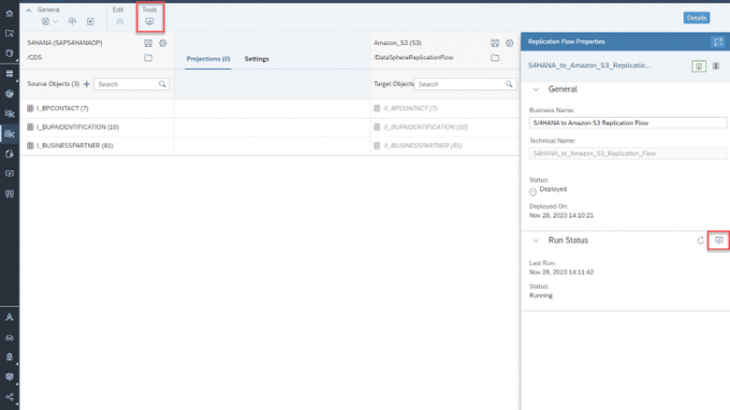
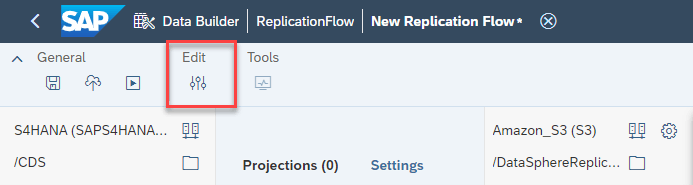
13. Once done, click on the ‘Edit’ projections icon on the top toolbar to set any filters and mapping.
14. You also have the ability to change the write settings to your target through the ‘Settings’ icon next to the target connection name and container.
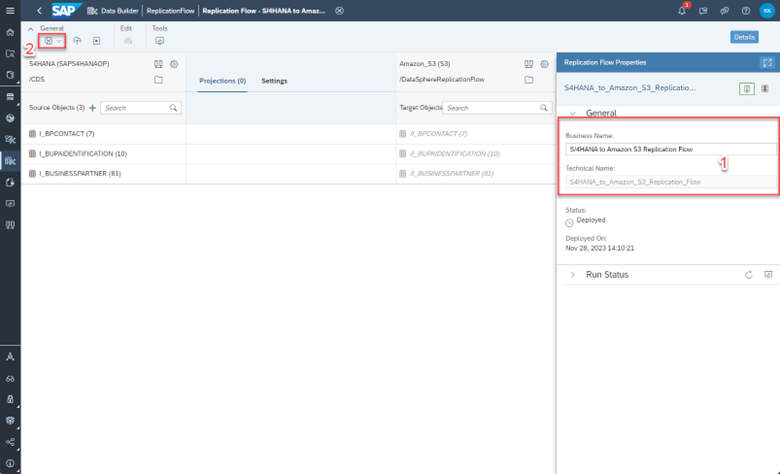
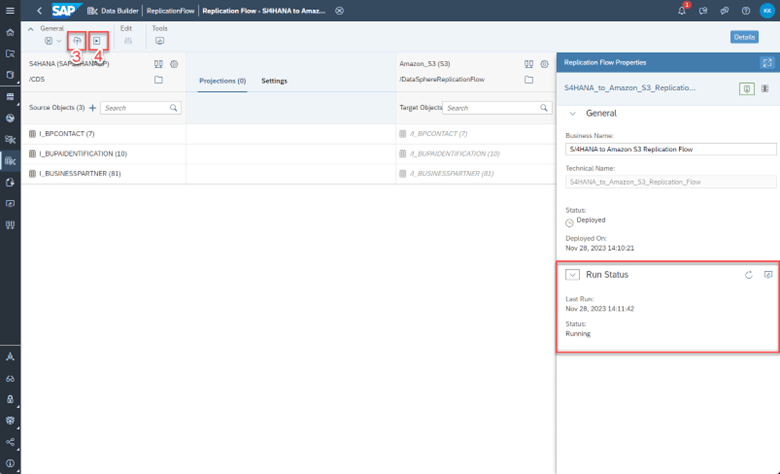
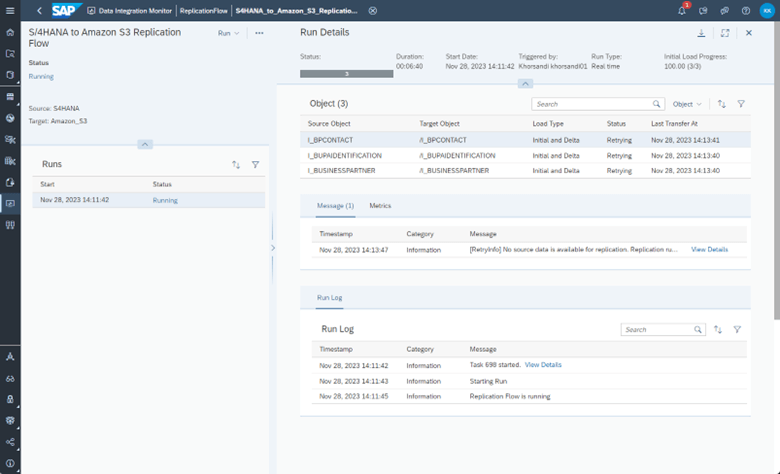
15. Finally, rename the replication flow to the name of your choosing in the right details panel. Then, ‘Save’, ‘Deploy’, ‘Run’ the replication flow through the top toolbar icons. You can monitor the run in the ‘Data Integration Monitor’ tab on the left panel in SAP Datasphere.
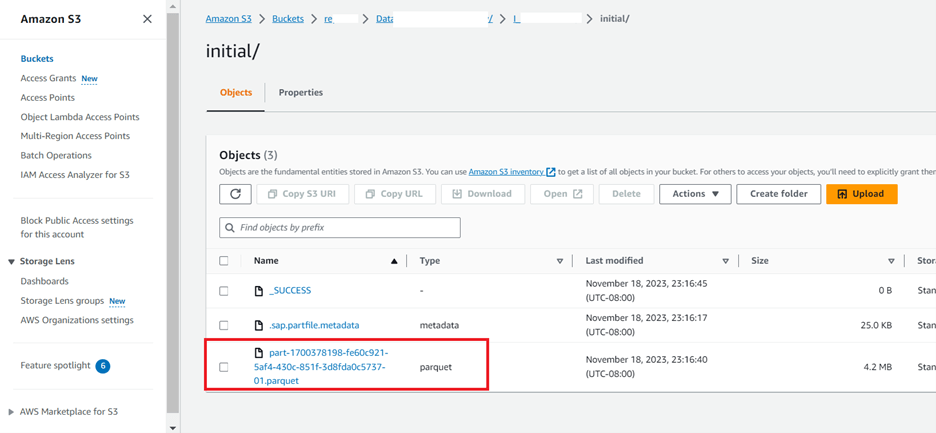
16. When the replication flow is done, you should see the target tables in Amazon (AWS) S3 as such. It should be noted that every table will have 3 columns added from the replication flow to allow for delta capturing. These columns are ‘operation_flag’, ‘recordstamp’, and ‘is_deleted’.
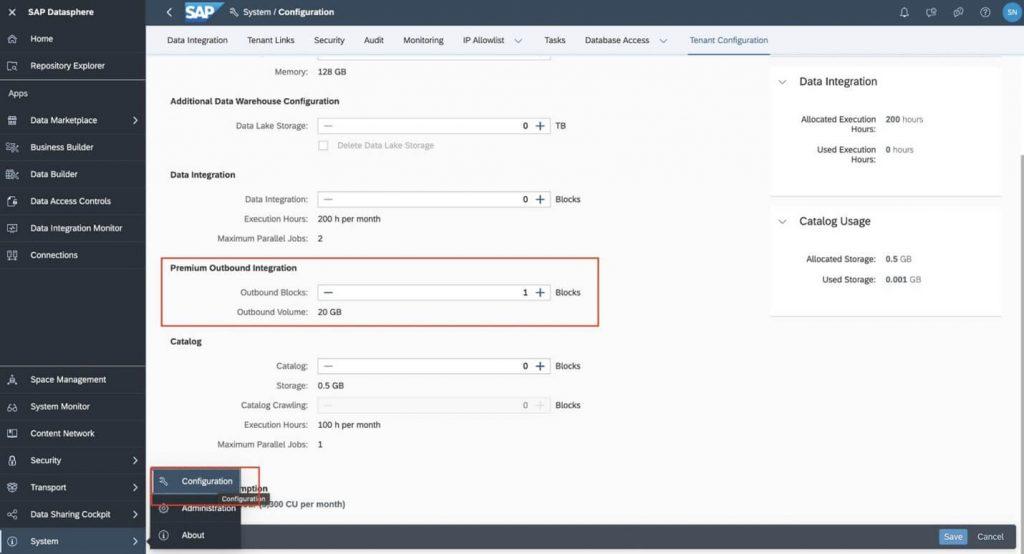
Note: You may have to include Premium Outbound Integration block in your tenant to deploy the replication flow.