Introduction:
Data access controls offer the ability to apply row-level security to your objects. When applied to a data layer view or a business layer object, users will only see authorized rows based on specific criteria, ensuring their access is restricted appropriately.
We can create one or more data access controls that consume this permissions entity and select one or more columns in each data access control to specify the criteria that it will enforce. We can also apply a single data access control to multiple views.
Let’s look at a simple business scenario:
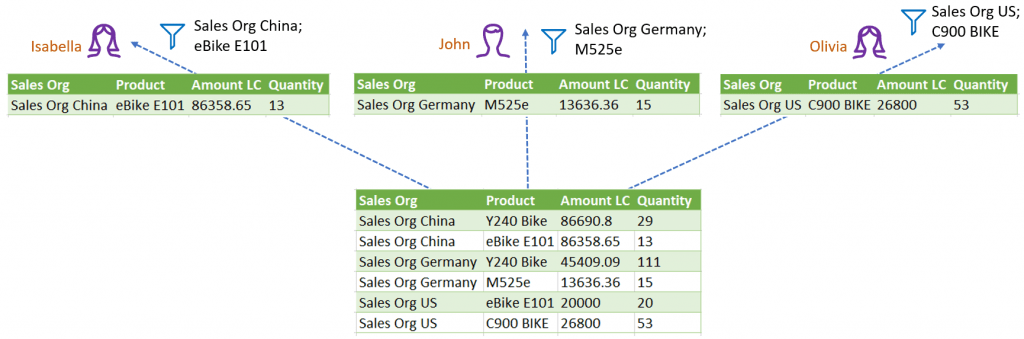
Isabella: Isabella holds the role of a business analyst in the China sales department. When using SAP Analytics Cloud to build a story based on the Sales Org View, she has specific access. Isabella is limited to viewing only the Sales Organization China and Product eBike E101 data.
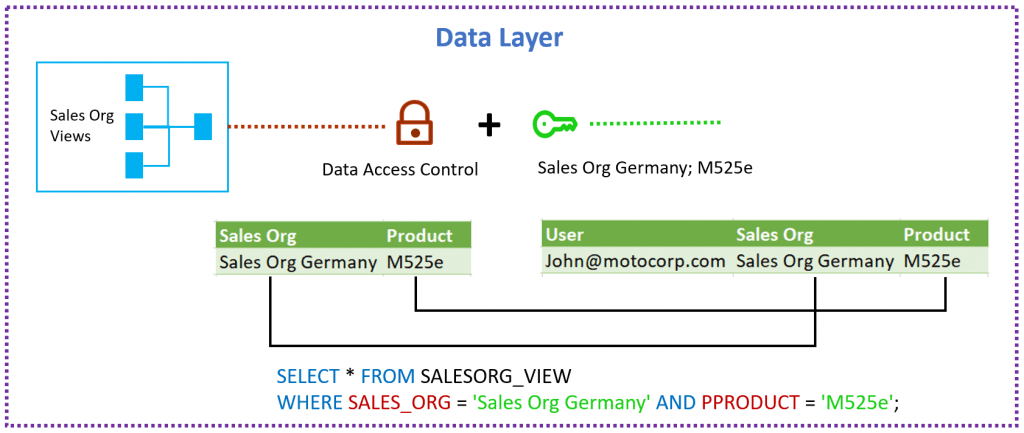
John: As a data modeler in the German sales department, John uses SAP Datasphere to create business models. He combines the Sales Org View with other data sources. When he previews data, he can only see information related to the Germany Sales Organization and the M525e Product.
Olivia: She is a business analyst in the US sales department. When connecting to SAP Analytics Cloud to create a story using the Sales Org View, Olivia’s access is limited. She is able to see data only from Sales Organization US and Product C900 BIKE.
Technical Diagram:
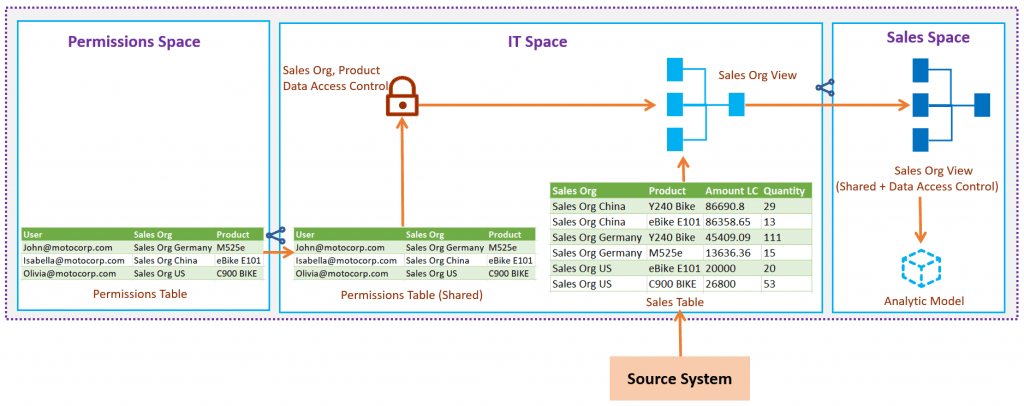
The above diagram depicts a typical environment where a permissions entity is maintained by business users in Permissions Space and shared with the IT Space, where technical users create data access controls from it and apply them to views. These views are then shared with Sales Spaces, ensuring secure access for modelers and analysts.
Permissions Space:
Business users operate within the Permissions space. They are responsible for managing the Permissions table.
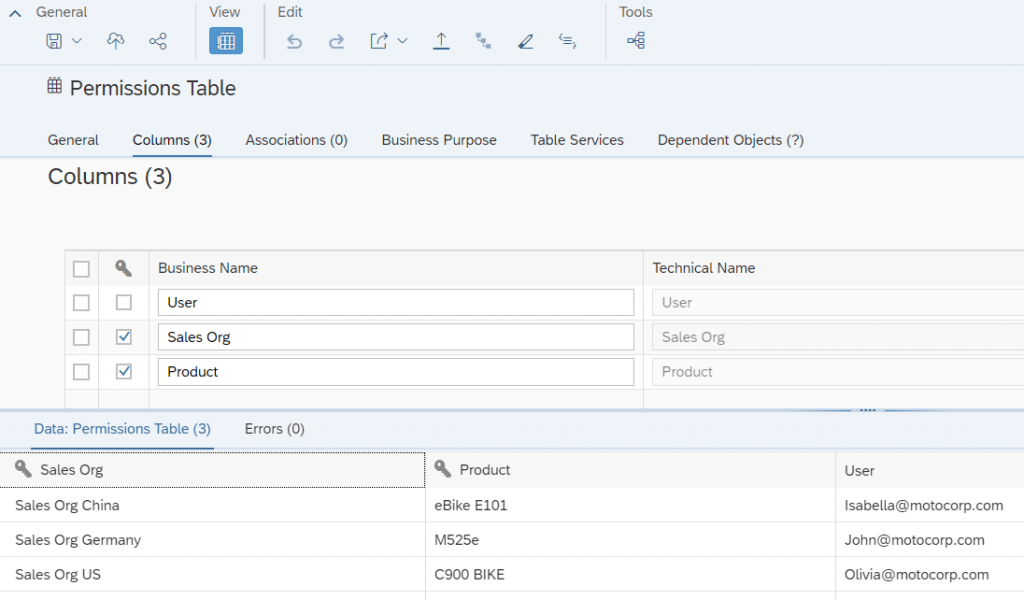
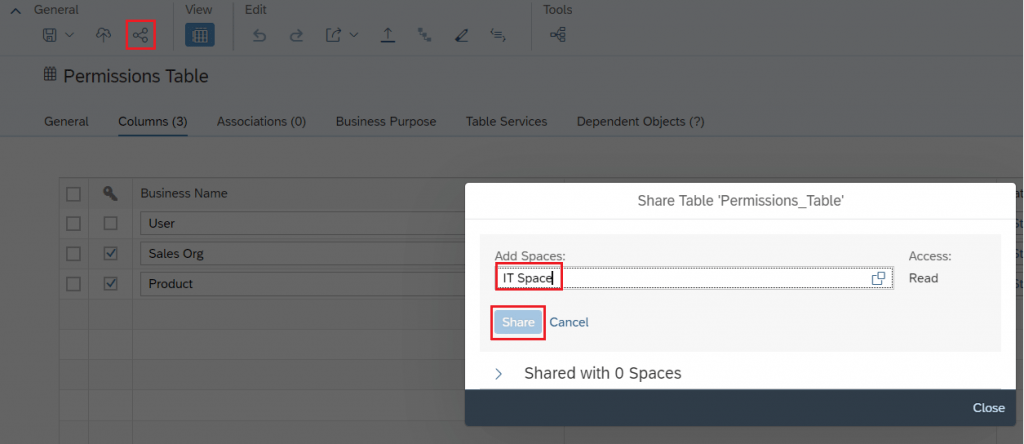
The Permissions table is shared with the IT space.
IT Space:
The IT space members are the technical users, they utilizes the shared Permissions table as a foundation for Data Access Controls. The technical users maintain a connection to an external source system. This connection facilitates the import of the Sales table into the IT space.
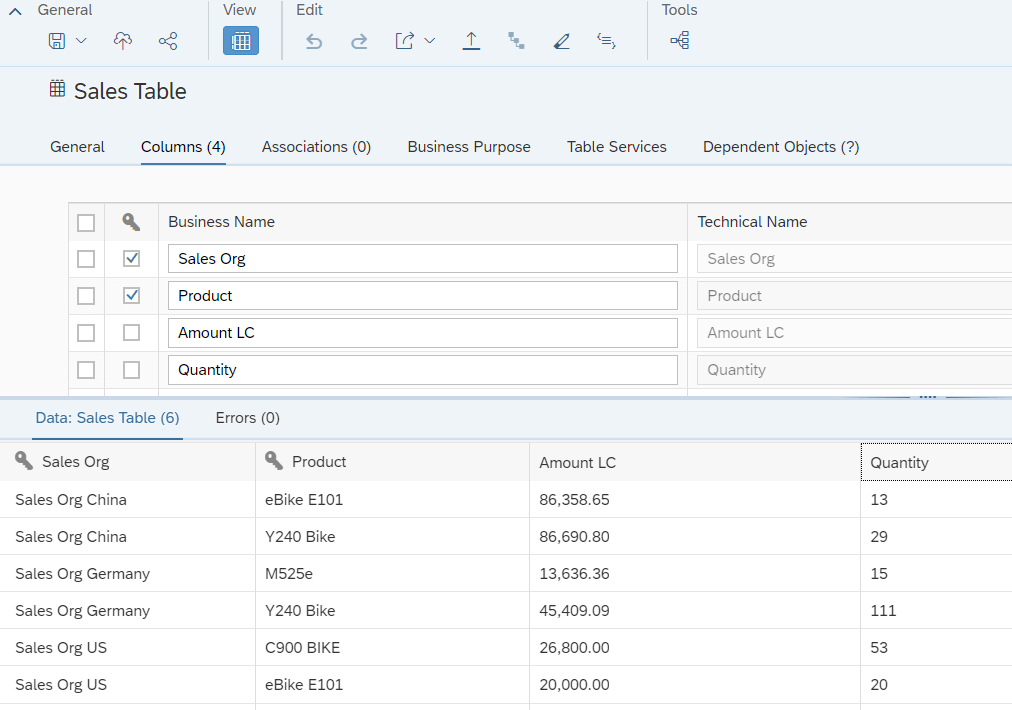
The Technical users create a Sales Org View intended for business analysts and modelers to use.

Creating a Data Access Control in IT Space:
To establish data access controls and determine the criteria for displaying data to users, it’s essential to have the Space administrator role.
Follow the below steps to create a Data Access Control:
1. Navigate to the Data Access Controls section in the side menu. If needed, select a specific space. Click “New Data Access Control” to open the editor.

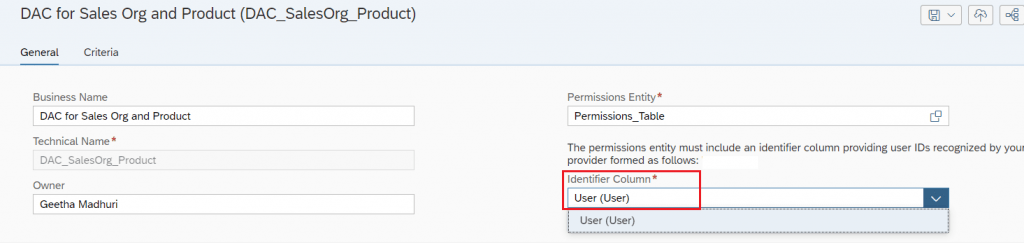
2. Provide a descriptive Business name for easy identification by users. You can change this name later. If you wish to change the default technical name, you can enter a new alphanumeric name (with underscores). Note that technical names can’t be changed after saving. Enter the name of the person responsible for the data access control.
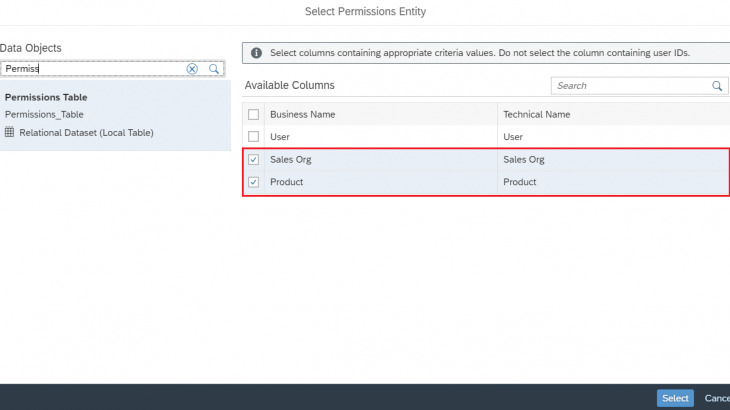
3. Choose the Permissions_Table shared from the Permissions Space. Each data access control uses a table or view containing permission information.
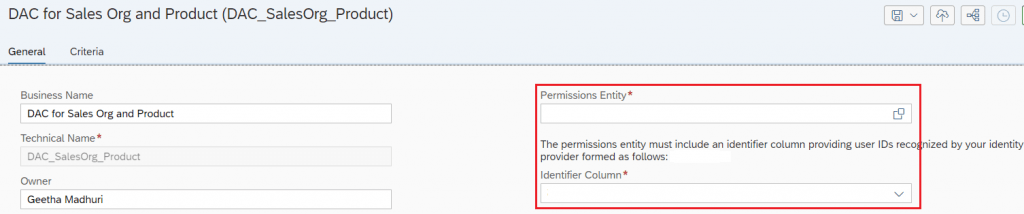
4. The permissions entity should have at least two columns:
– One or more columns with filter criteria (e.g., Sales Org, Product) to determine how data is exposed to users. These columns are Criteria columns in your data access control.
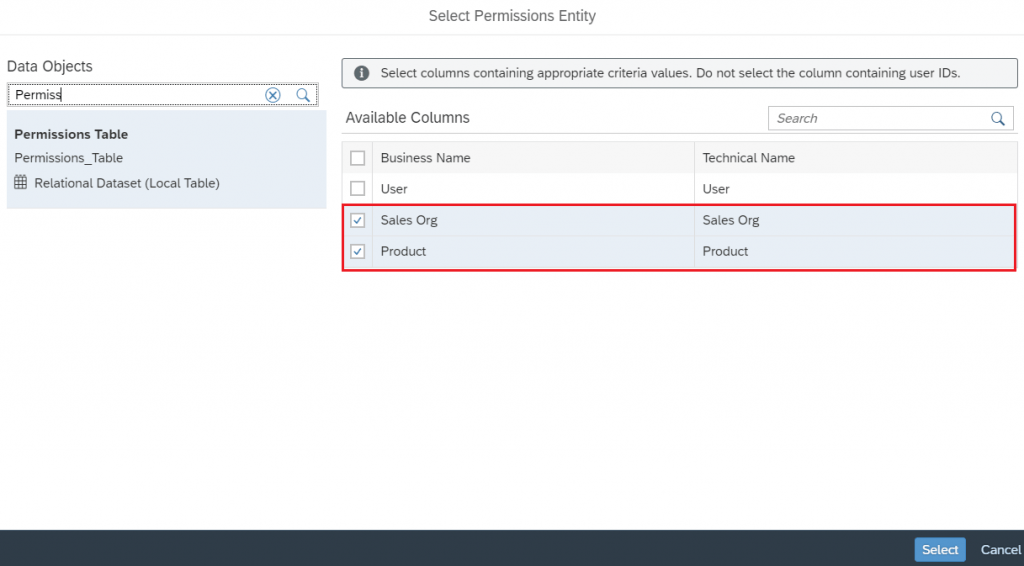
– One column with user IDs in the required format (such as email addresses or logon names). This column becomes the Identifier Column in your data access control.
5. In the criteria section, list the columns selected as filter criteria for your data access control.
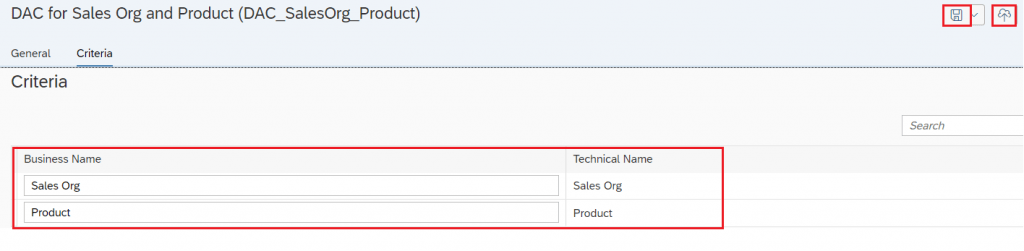
6. Save your changes to the design-time repository. Deploy the changes to make them available in the run-time environment.
Applying Data Access Control to Sales Org View:
To apply data access controls to a view and control user data visibility based on criteria, follow these steps:
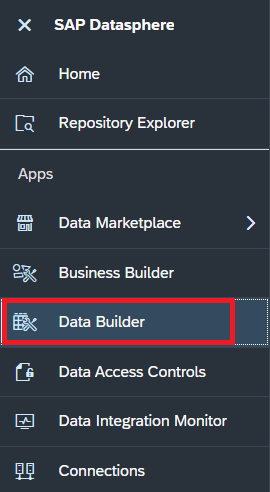
1. Navigate to Data Builder in the left navigation and select the relevant space. Open the desired view for applying the data access control.
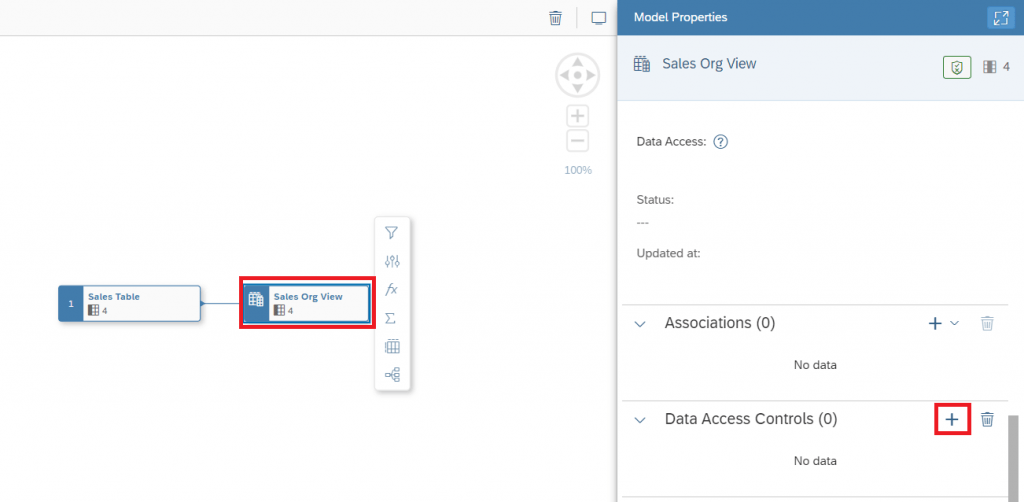
2. Open the Sales Org View, select the output node of the view and open the Data Access Control section in the side panel, click “Add”.
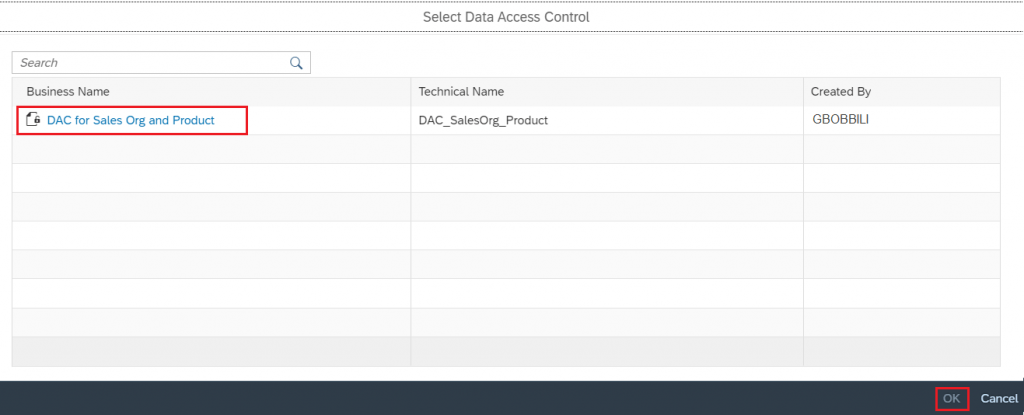
3. Choose the desired data access control, and confirm with “OK.”
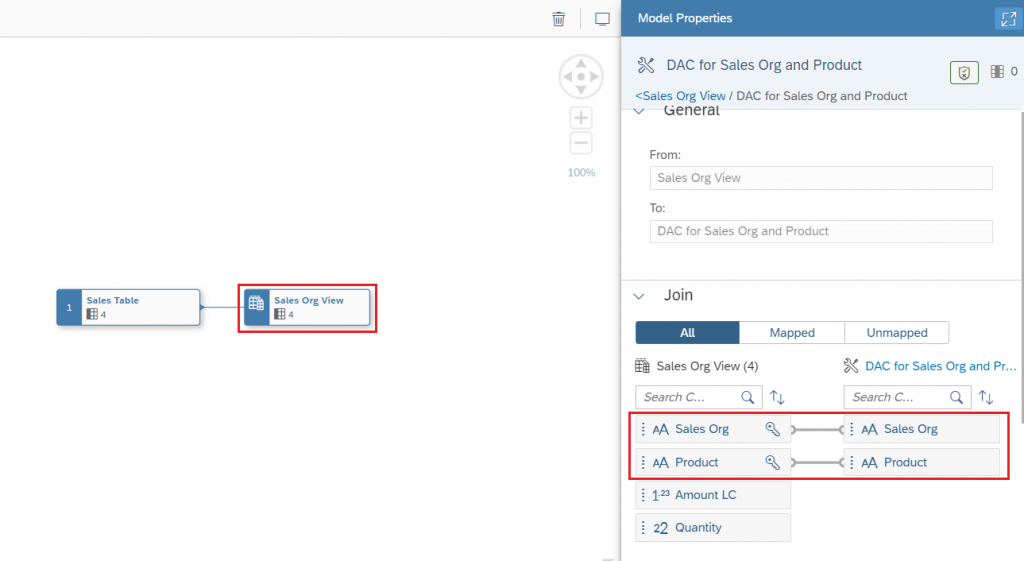
4. In the Join section, map columns from the Sales Org View to the criteria columns defined in the data access control. We must map a column from your view to each criteria column to appropriately filter view data.
5. Click “Deploy” to save and deploy the view.

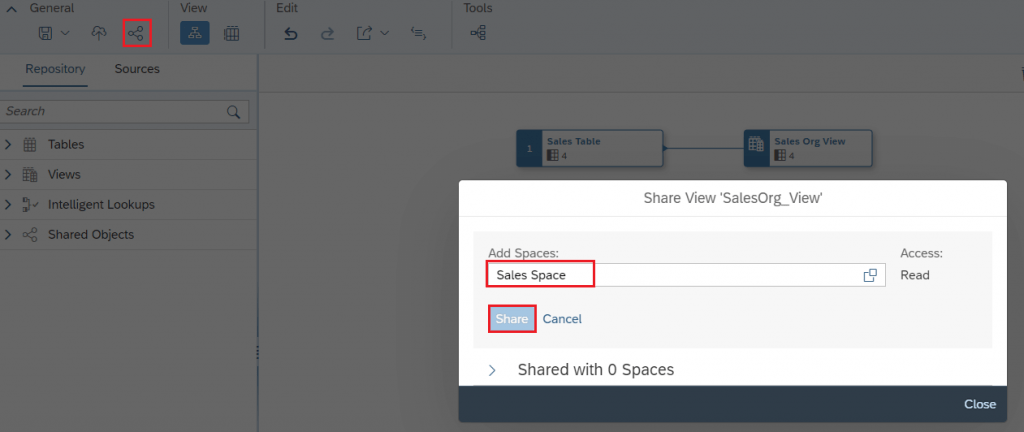
6. Applying the “Sales Org and Product” Data Access Control, the technical users ensure that only authorized data is visible within the Sales Org View.
7. Subsequently, the technical users share the protected Sales Org View with the Sales space. This view is now accessible for secure analysis by sales teams.
Sales Space:
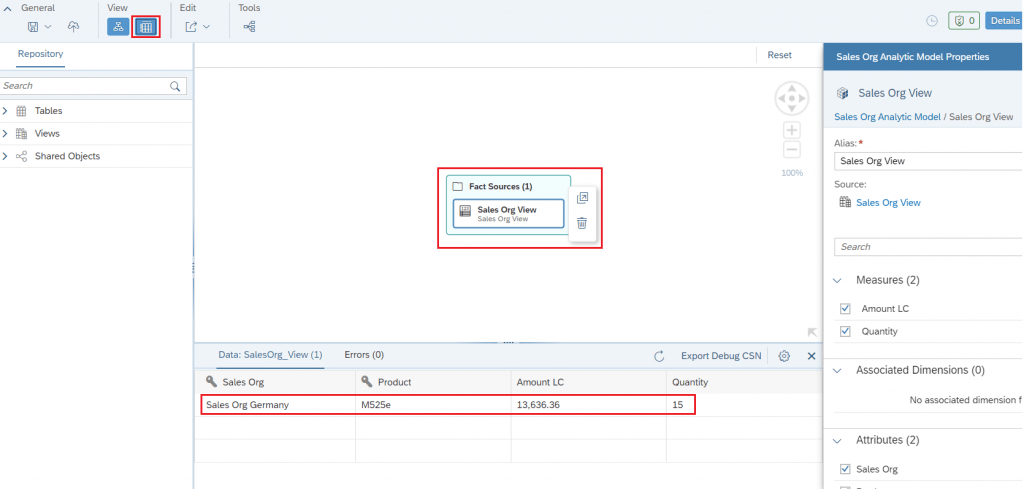
In the Sales Space, John created the Analytic Model with the Sales Org View added as a source. When he previewed the data, he was able to see the information related to the Germany Sales Organization and the M525e Product.
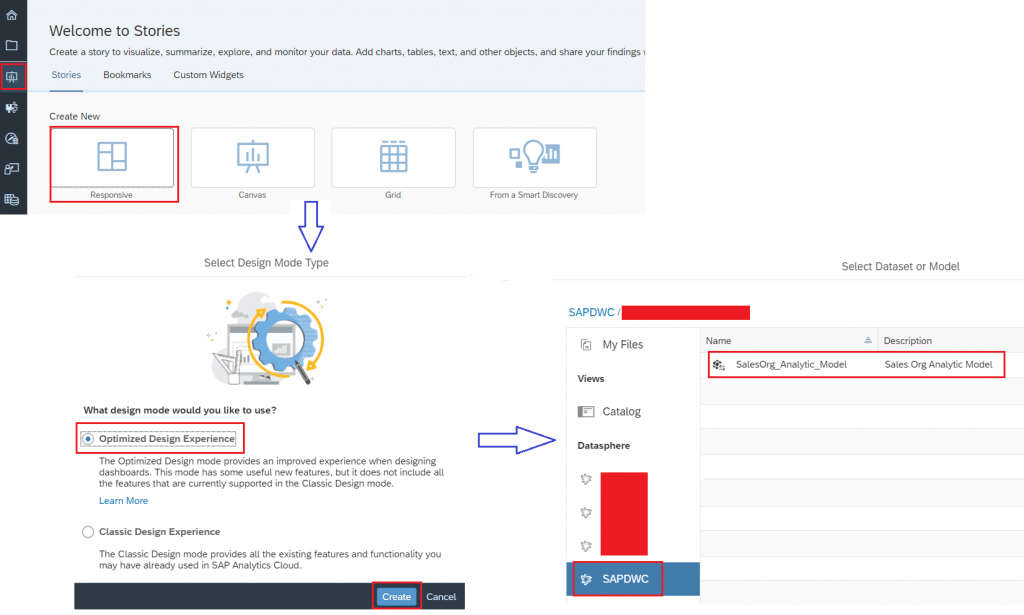
Consuming SAP Datasphere Analytic Model in SAP Analytics Cloud:
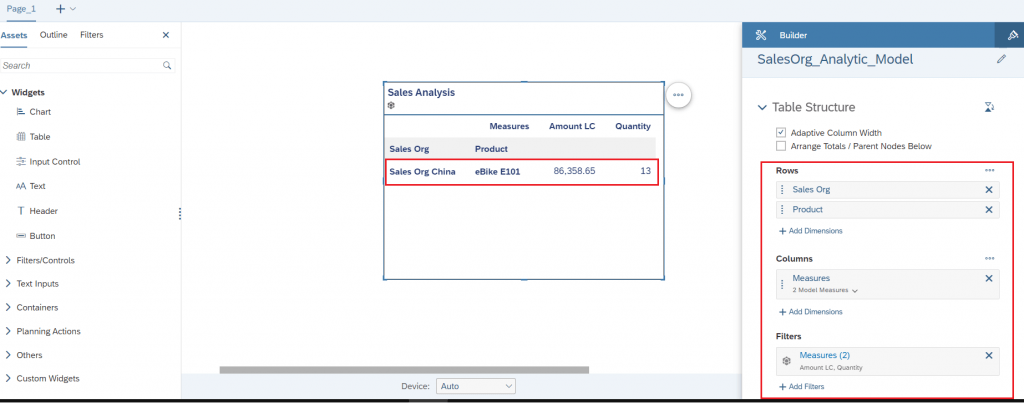
Isabella has created a SAP Analytics Cloud story using the SalesOrg Analytic Model created by John.
She is limited to viewing only the Sales Organization China and Product eBike E101 data.