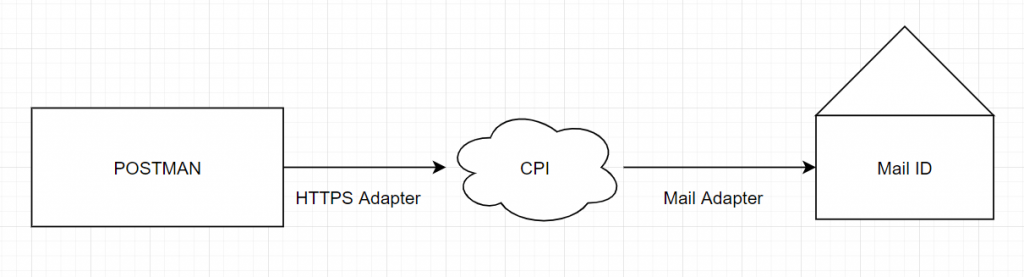
If you are someone with access to a CPI tenant wanting to explore its capabilities, this article will help you get started. In this quick blog post, Ill show you how to send a simple message from a HTTP Client (Postman) to your E-Mail ID via CPI as shown in Figure: 0.
Assumptions:
- You have access to a CPI Tenant.
- You have a Yahoo mail account or have access to create one.
- You have access to Postman.
Step 1 : Create an iFlow Artifact
Open the CPI Tenant link in a browser (link looks like -> https://******.hana.ondemand.com/itspaces/)

- Click Design in the left Panel.
- Click Create present on top right corner of the page. This will take you to the page where you can create a package.
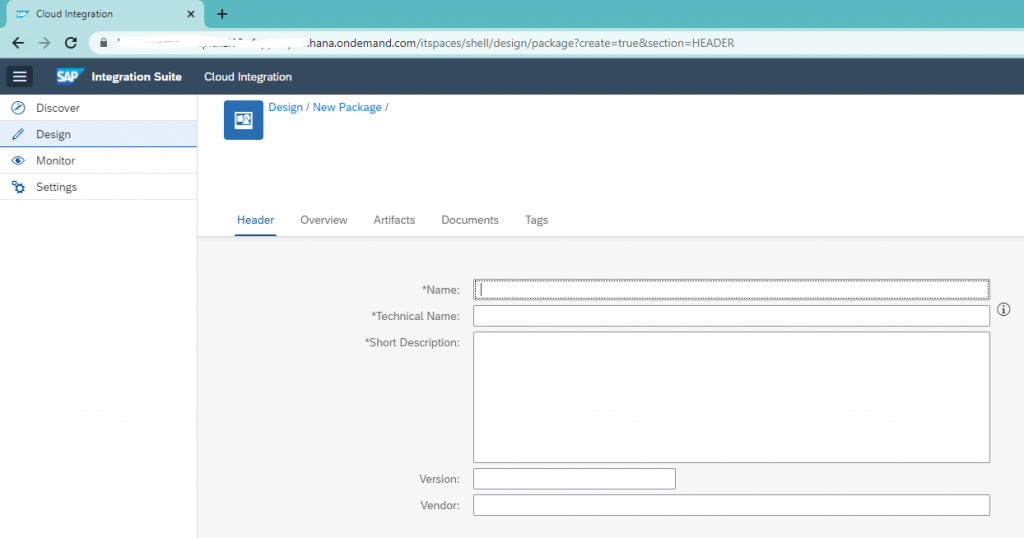
- Give the package a name & a short description & Save it (Save button is on the top right).
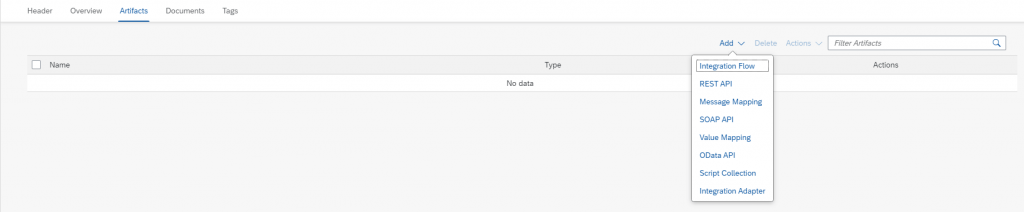
- Click on the Artifacts tab & click the Edit. The Add & Delete buttons are now made visible.
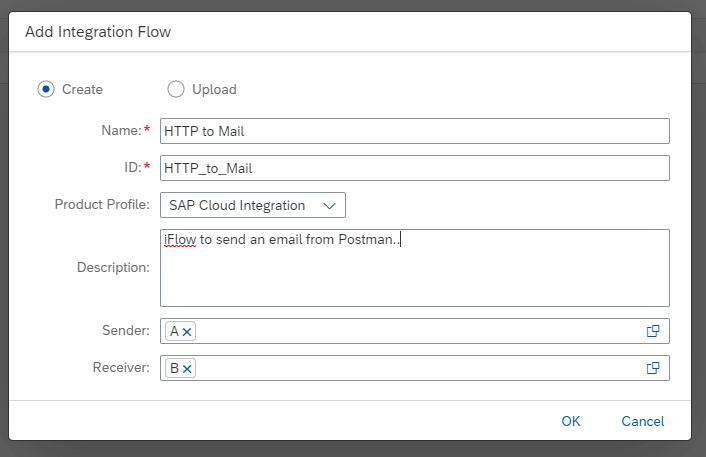
- Click on Add and from the drop down, select Integration Flow (iFlow)
- You now have a popup where you can create or Upload an iFlow. Give the iFlow a name, a description and any name of your choice in Sender & receiver fields (Eg: Sender – Postman, Receiver – Yahoo Mail).

That’s it. Your basic iFlow template is now ready for further exciting development.
Step 2: Develop the iFlow

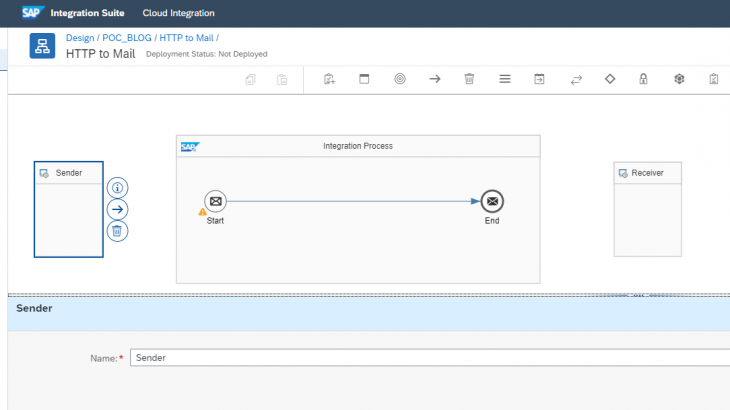
- Clicking the iFLow will open up the default template as shown in above figure.
- In order to make changes to the template, click on edit (on top right). This activates the pallet (greyed icons) on the screen.
- Click the box on the left that reads ‘sender’. This will open a tab below with properties of the component you just clicked (‘sender’ in our case).
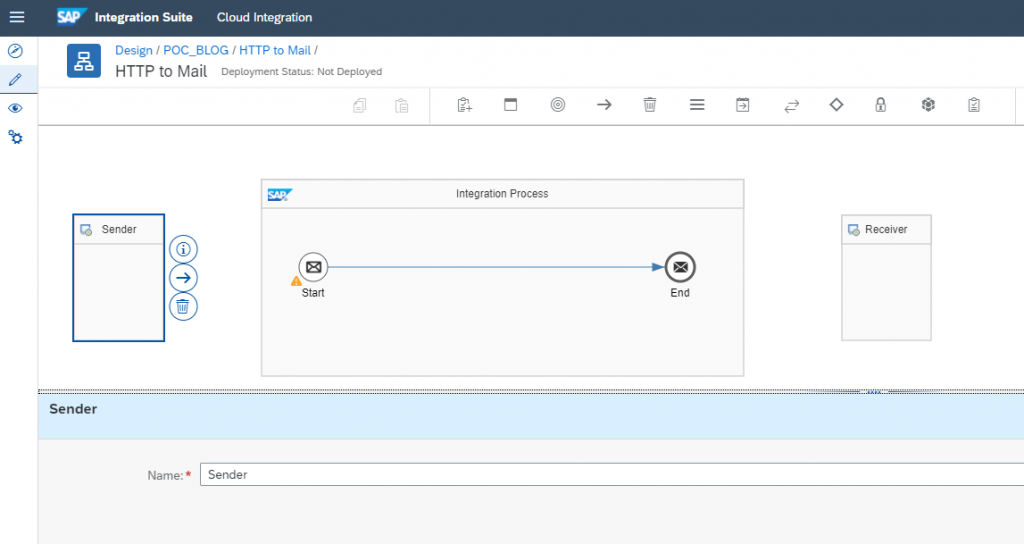
- Change the Sender component name to Postman. Repeat the process & change the receiver component name to Yahoo or any name of your choice.
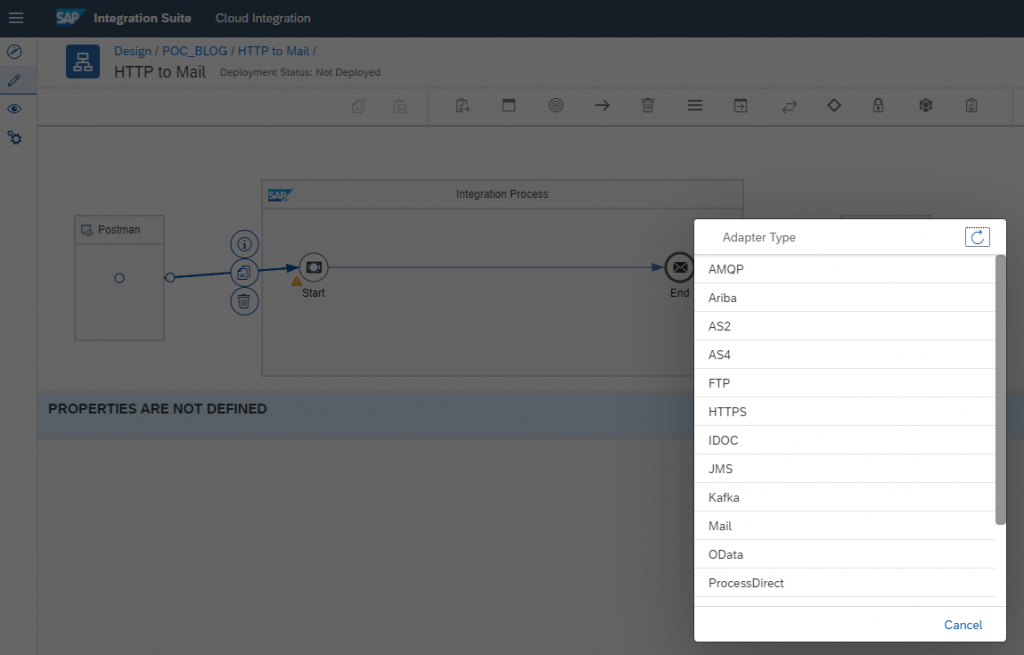
- Now click on the arrow next to the sender component & drag it into the Start Icon in the integration process as shown in Figure: 8
- This will show us a pop up with a variety of sender adapters to choose from. For our scenario, we will choose HTTPS as we will be sending data from Postman that can be used as a HTTP client.
- You can give the adapter a different name (only if you want to) in the General tab of the properties window that just opened at the bottom.
- You can establish the connection details in the Connection tab.
- Maintain the message size in the Conditions tab.
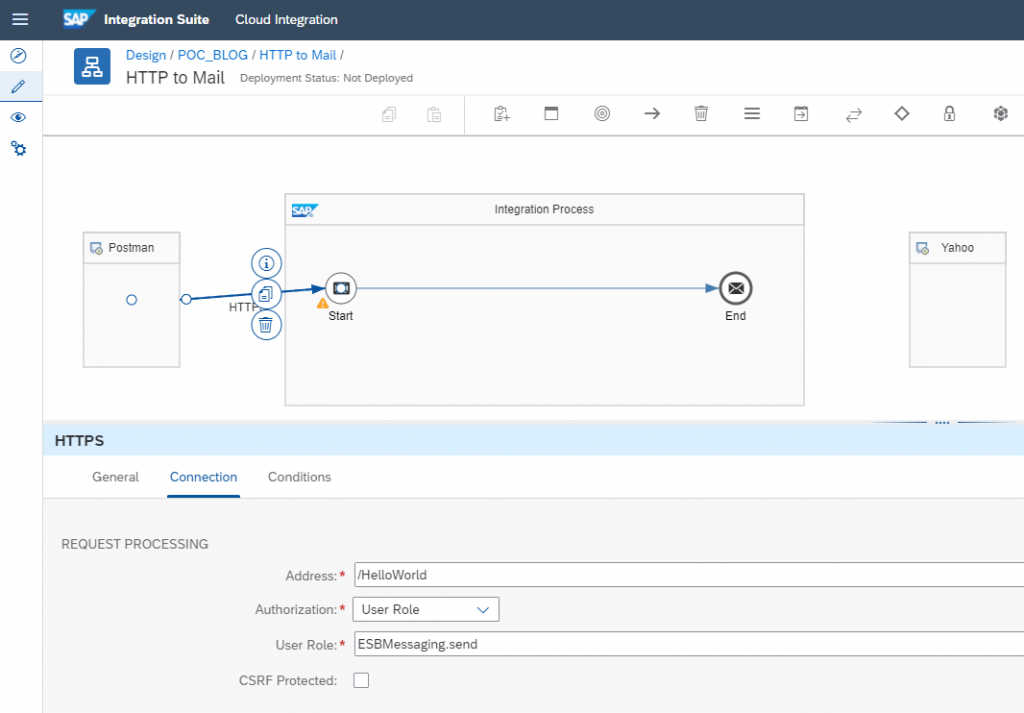
- We will open the Connection tab and type in a string in the address field with a forward slash before it as shown in Figure: 9. Uncheck the CSRF Protected check box for now (Topic for another day).
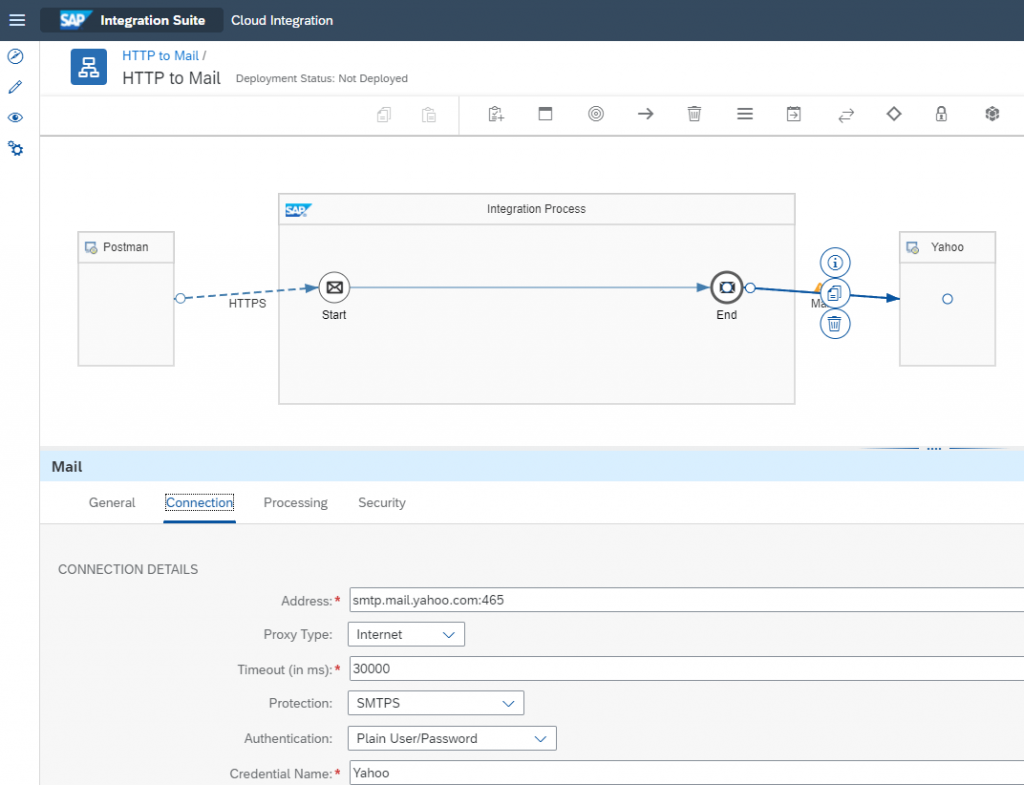
- Now that our sender adapter is ready, let’s setup the receiver adapter.Click on the End icon. An arrow will be visible next to it. Click & drag the arrow to the receiver component we renamed as yahoo as shown in Figure: 10
- In the pop up box, select Mail.
- Maintain the Connection tab details as shown in Figure: 10.
- In the Credential Name field, give the name of the credential you create in Step 2.2.
- In the Processing Tab, provide the same mail ID in the From & To fields.
- Fill the rest as shown in Figure: 10.
- Save & Deploy the iFlow
Step 2.1: Setup Yahoo Mail
- It was complex & time consuming for me to connect CPI with Gmail as it was not very friendly towards third party applications (CPI) if certain security measures were not in place. For simplicity of our POC, I had to step back and use Yahoo mail instead with basic security measures.
- Once you have a Yahoo Mail account created, you can use that mail ID & password in CPI. Yahoo provides a secondary method where you can have a temporary password generated in a minute, use it for our POC and delete the password once you are done using it making it a bit more secure.
Step 2.2: Create credential in CPI
- Now that you have a Yahoo Mail ID & temporary password setup, let’s maintain the same in CPI. On CPI Home page, click the Monitor Icon (one that looks like an eye) on the left panel.
- Open the Security Material Tile in the Manage Security section.
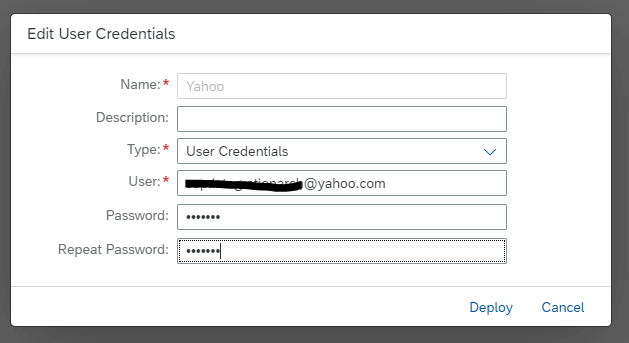
- Click Create (on top right) and select User Credentials.
- Fill the popup as shown in Figure: 11. Provide your respective mail ID & password.
- The Name You Provide here (Yahoo in our case) is to be maintained in our iFlow -> mail Properties -> Connection Tab -> Credential Name (Shown in Figure: 10)
- Click Deploy.
Now that our Yahoo mail credential is maintained in CPI, the next step is to maintain Yahoo’s certificate in CPI.
Step 2.3: Maintain Yahoo’s certificate in CPI
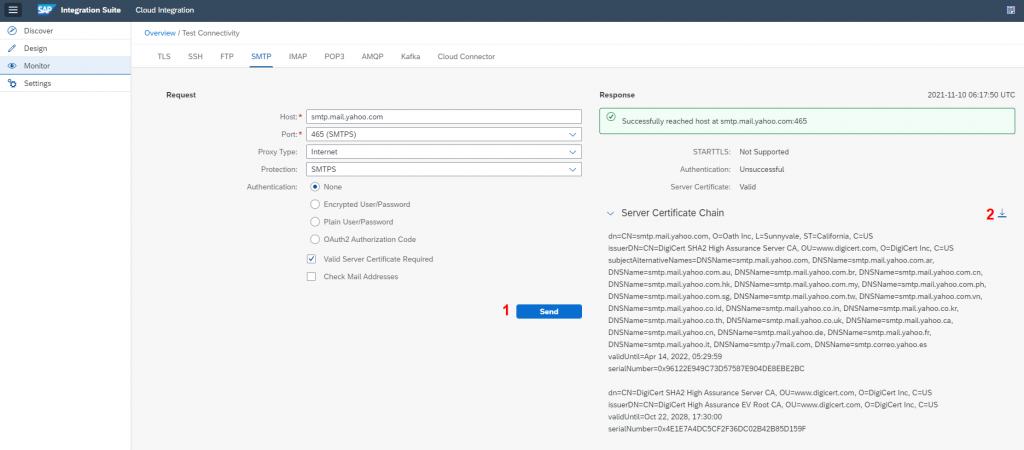
- First, we need to acquire Yahoo’s certificate to maintain it in CPI. Easiest way to acquire it is from CPI’s Monitoring area. Click on the Monitor Icon (one that looks like an Eye) in the CPI Home page. Open the Connectivity Tile in the Manage Security section. Click the SMTP tab.
- Maintain the details as shown in Figure: 12 & click Send. This will display the certificate chain on the right side of the screen. Click on the download Icon to download the certificates in a ZIP file.
- Unzip the downloaded file & you’ll find two certificates in it. These files need to be uploaded in CPI for CPI to safely connect with Yahoo Mail.
- Open the Monitoring area of CPI. Open Keystore Tile in the Manage Security section. Click Add & select certificate in the dropdown.
- Click Browse & choose the extracted certificates one by one.
Now that the security Credentials, Certificates & iFlow configuration are in place, all that’s left for us is to test the iFlow.
Step 3: Test The iFlow
- Open CPI’s Monitoring Area & Open the Started tile in the Manage Integration Content
- Search your iFlow by Name & click on it once you find it on the left panel. You’ll have a screen similar to the one shown in Figure: 13
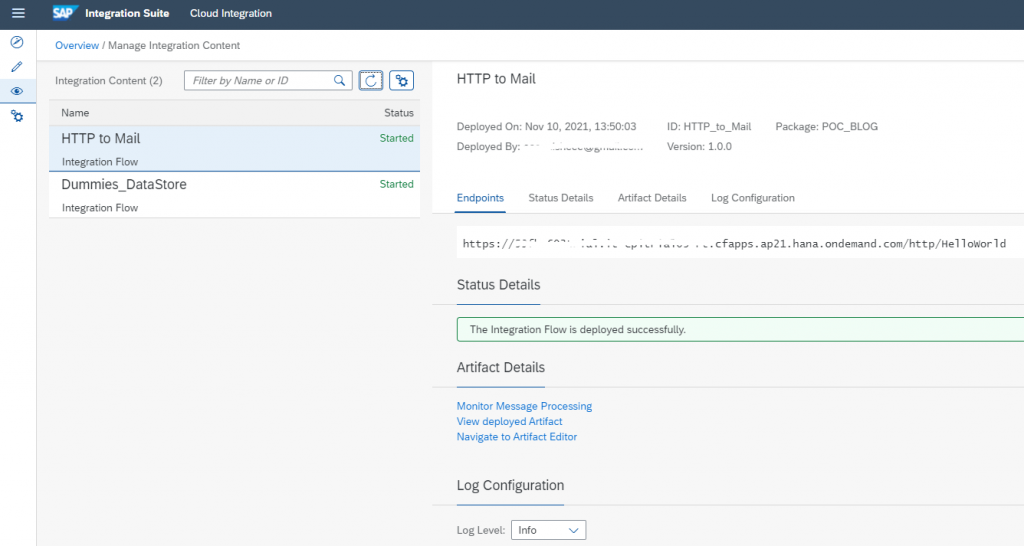
- Copy the URL displayed in the Endpoints tab.
- Open https://web.postman.co/ in a browser.
- Click on Send a request.
- Change the request type from GET to POST & paste the copied URL next to it.
- In the Authorization section, choose the type as Basic Auth & provide your CPI Username & Password. Make sure your CPI username has the user role ESBMessaging.send assigned to it in the SAP Cloud Platform Cockpit.

- In the Body Section, select raw & type any information you want to send to the Mail ID maintained in the iFlow. I’ll just type ‘Hello World’.
- Click Send.

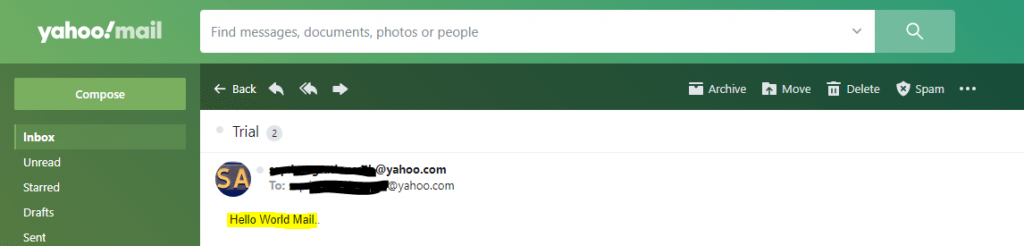
The mail is successfully received in the Yahoo Mail Inbox as show in Figure: 16.
To summarize, you have now walked through different work areas (Design & Monitor) of CPI, understood how to setup HTTPS & Mail adapters & have learned how to maintain security certificates & credentials in CPI & test your iflow using Postman.


