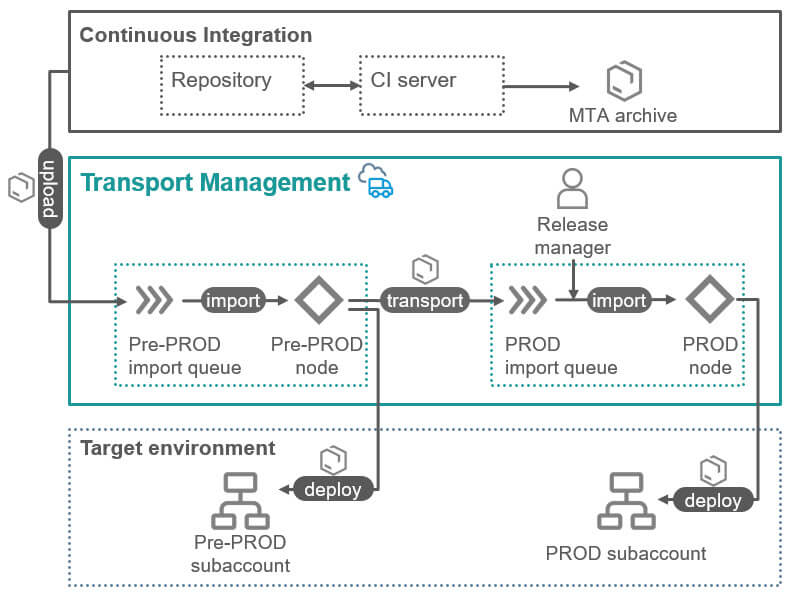
With this integration, your fully qualified Multitarget Application (MTA) archive gets automatically handed over to the SAP BTP Transport Management service (TMS), along the following typical process flow:
1. Transport process is triggered by CI/CD service
2. The MTA archive is uploaded into the import queue of the source/first node (e.g. Pre-PROD Node)
3. An operator can manually trigger or schedule the import, which results in a physical deployment of the MTA archive into the corresponding subaccount (e.g. Pre-PROD subaccount)
4. At the same time with the execution of import Pre-PROD Node, a transport is triggered along the defined transport route, so that the MTA archive reaches the import queue of the next node (e.g. PROD Node)
5. Again, the physical import can be triggered manually or via a job scheduler, which results in a physical deployment of the MTA archive into the corresponding subaccount (e.g. PROD subaccount)
Prerequisites
- Two separate subaccounts (for Pre-PROD Node and PROD Node)
- Github repository for an MTA application
- Entitlements:
- Transport Management service (can be provisioned to any single subaccount, called TMS Subaccount in this post):
| Service | Plan | Category |
| Cloud Transport Management | standard | Service |
| Cloud Transport Management | standard (Application) | Application |
- Cloud Foundry Runtime (both Pre-PROD subaccount and PROD subaccount)
| Service | Plan | Category |
| Cloud Foundry Runtime | memory | Service |
- Continuous Integration & Delivery service (for SAP CI/CD)
| Service | Plan | Category |
| Continuous Integration & Delivery | default (Application) | Application |
Configuration Entries
- Transport Destination for Pre-PROD Node and PROD Node
- Transport Node for Pre-PROD Node and PROD Node
- Transport Route between Pre-PROD Node and PROD Node
- TMS configuration in Continuous Integration & Delivery
Step 1: Set Up the TMS Environment (TMS Subaccount)
Please follow this guide to set up your TMS environment: https://help.sap.com/viewer/7f7160ec0d8546c6b3eab72fb5ad6fd8/Cloud/en-US/25a3bb93c6334c7780c8f65b0c3948d7.html
Step 2: Configure Destinations for Deployment (TMS Subaccount)
Transport destinations (for deployment) needs to be set for each node which is planned to deploy the application. In this scenario, we should configure transport destinations for both Pre-PROD Node and PROD Node.
Create Destination for Pre-PROD Node
In SAP BTP Cockpit of the subaccount with TMS provisioned, choose Connectivity -> Destinations -> New Destination.
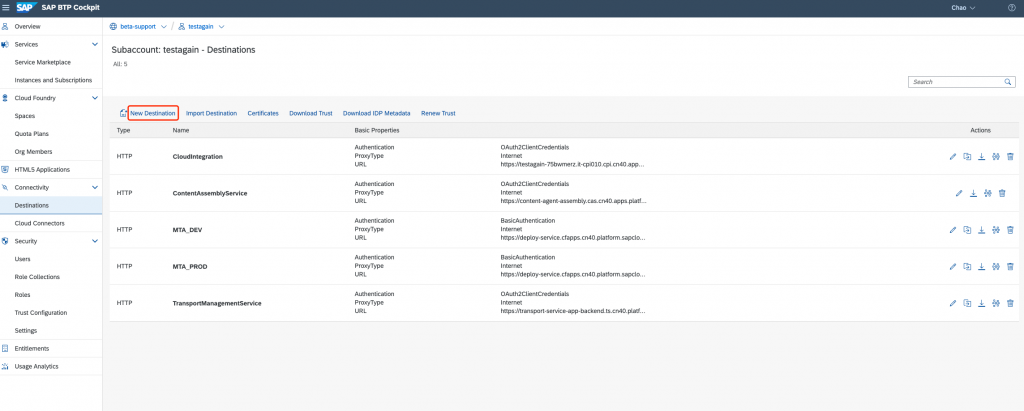
Fill in with the following information:
| Field | Value | Description |
| Name | PrePROD_Node | For example. |
| Type | HTTP | |
| URL | https://deploy-service.cfapps.<default-domain>/slprot/<myorg>/<myspace>/slp. | As a result, the MTA is deployed into the space <myspace> of the organization <myorg>. The default domain can be found in the API Endpoint. For example (BTP@AliCloud): https://deploy-service.cfapps.cn40.platform.sapcloud.cn/slprot/beta-support_testagain-75bwmerz/tms/slp |
| Authentication | BasicAuthentication | |
| User | Specify the name of the technical user that is used for the deployment. The technical user used for the destination must be a valid user on Cloud Foundry environment, and it must have the role SpaceDeveloper in the target space. | |
| Password |
For example:
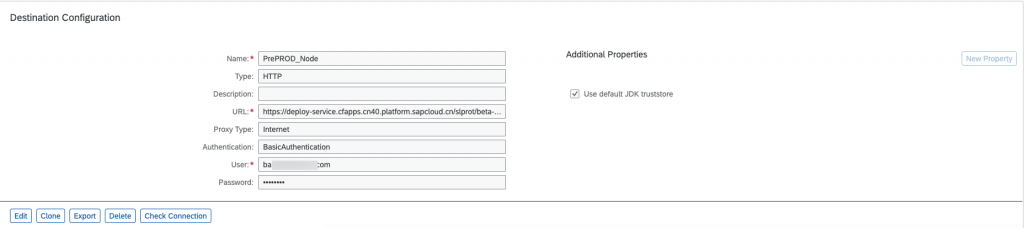
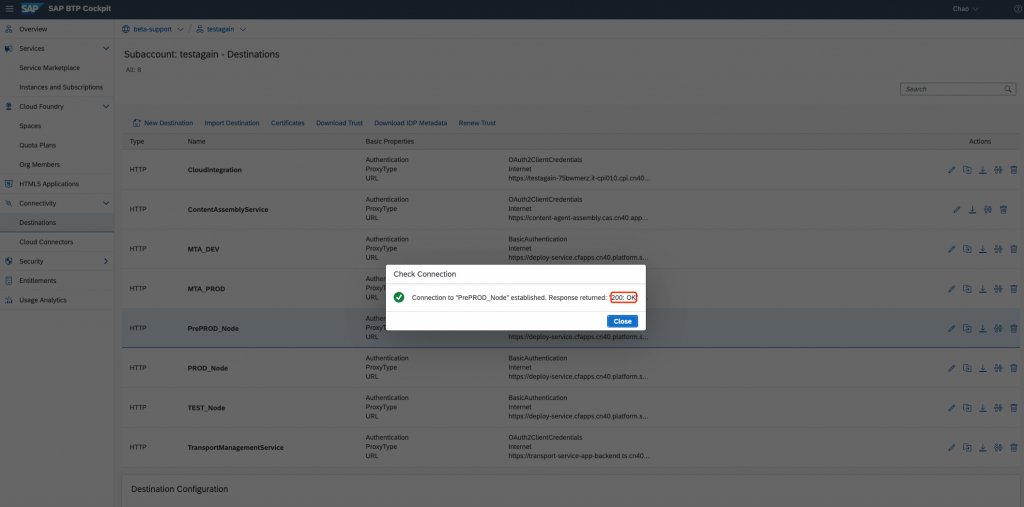
Click Save.
Click Check Connection, it will return 200: OK
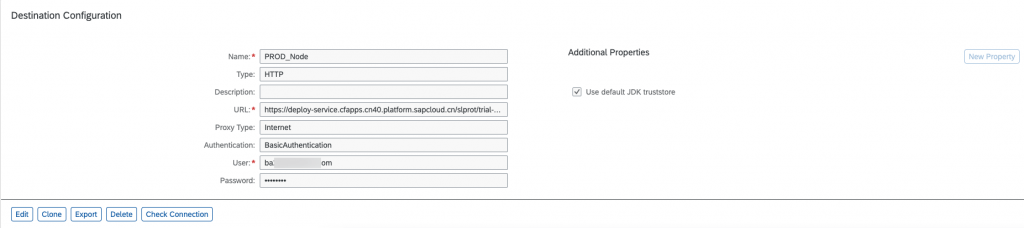
Create Destination for PROD Node
The same as above.
For example:
Step 3: Configure Transport Nodes (TMS Subaccount)
In Cloud Transport Management, transport nodes represent source and target end points of a deployment process – for example, a Cloud Foundry subaccount. Transports take place between transport nodes.
Create Pre-PROD Node
Make sure you have one of the roles Administrator or LandscapeOperator assigned to your user.
You have the following options to create transport nodes:
- Choose Landscape Visualization from the navigation pane, and then click button + (Create a Node).
- Choose Landscape Wizard from the navigation pane, then select a template for your landscape, and create your transport nodes as part of the process.
- Choose Transport Nodes from the navigation pane, and click button + (Create a new node).
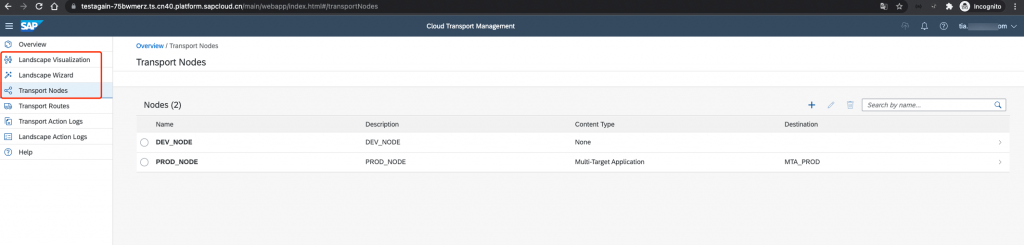
In this post, we create node with option Transport Nodes.
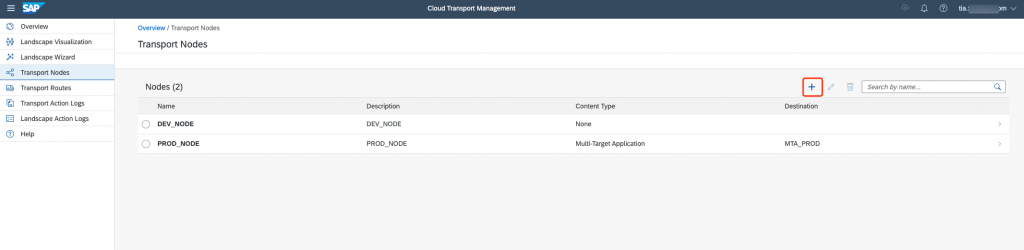
Open the Transport Management home screen:
Navigate to Transport Nodes, click button + (Create a new node):
Fill in with the following information:
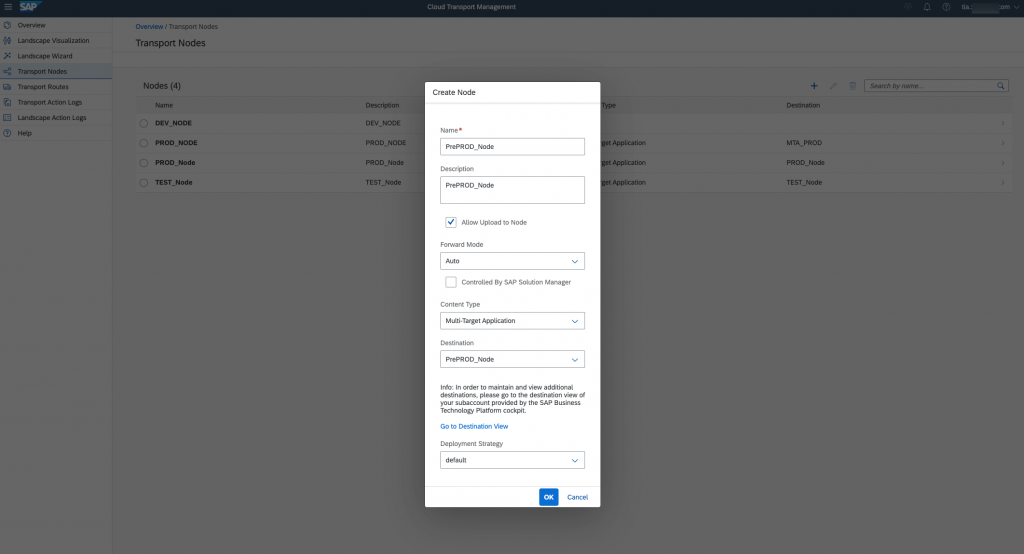
Since we need to manually upload MTA into the PrePROD_Node, select the Allow Upload to Node checkbox.
We need to set the Destination so as to deploy the application into corresponding space.
Click OK.
Create PROD Node
Create a new one and fill in with the following information:
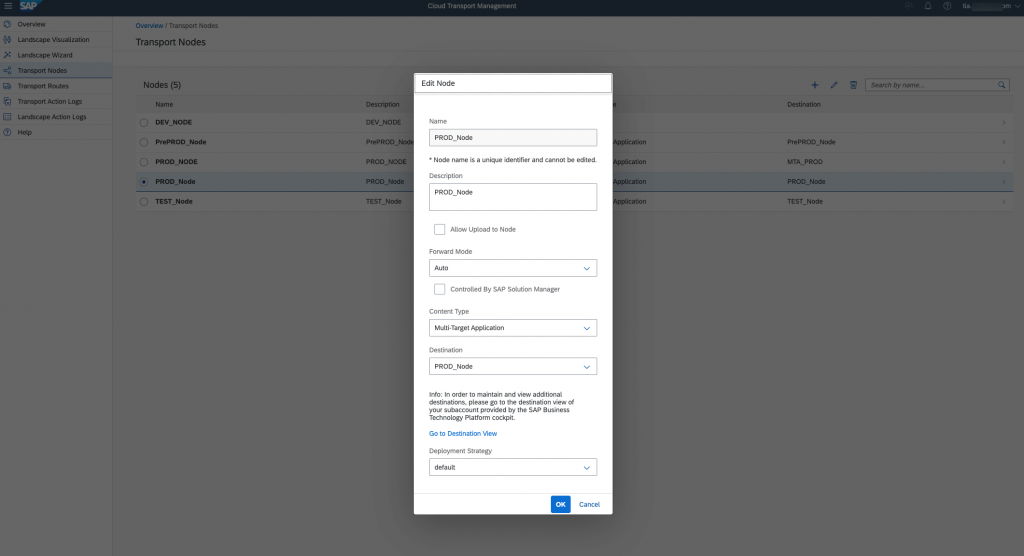
We need to set the Destination so as to deploy the application into corresponding space.
Step 4: Configure Transport Routes (TMS Subaccount)
You can use the same transport node as a source node for multiple transport routes. However, you can use the same transport node only once as a target node for a transport route.
You have the following options to create transport nodes:
- Choose Landscape Visualization from the navigation pane, and then choose Create a Route, or select a transport node and choose Create Route from the side menu.
- Choose Landscape Wizard from the navigation pane, then select a template for your landscape, and create your transport routes as part of the process.
- Choose Transport Routes from the navigation pane, and choose Create a route.
In this post, we create node with option Transport Routes.
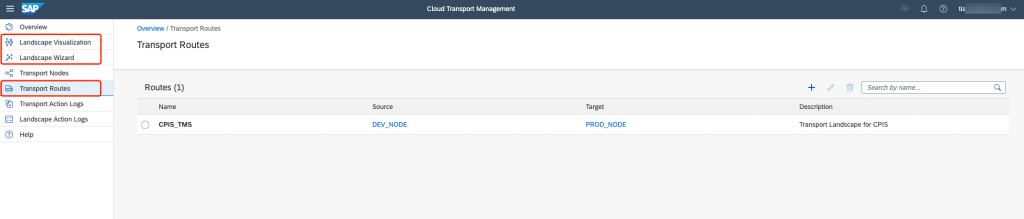
On your SAP Cloud Transport Management home screen, click button + (Create a route):
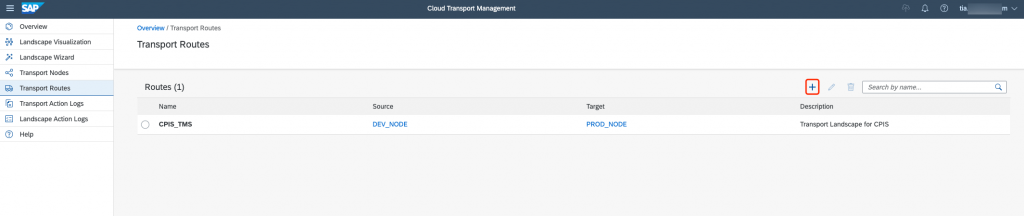
Fill in with the following information:
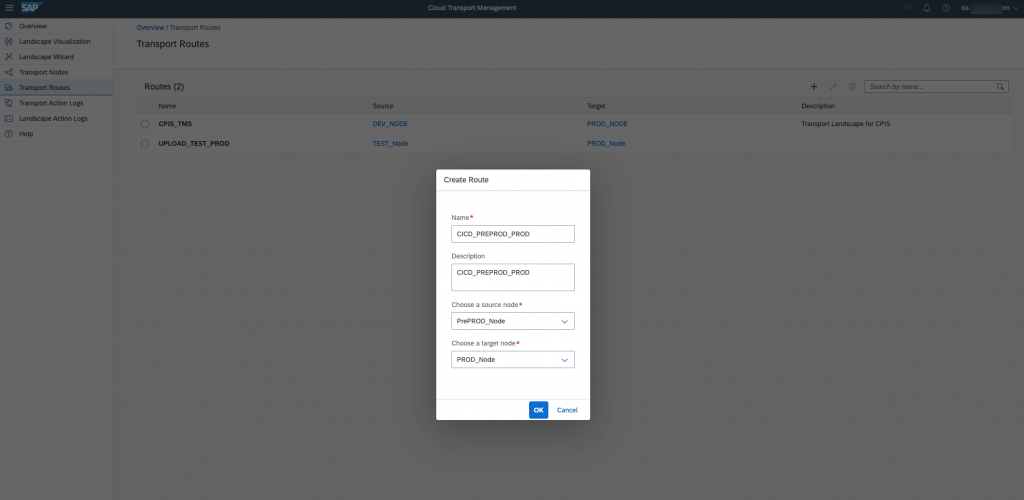
Click OK.
Step 5: Set Up the CI/CD Environment (CI/CD Subaccount)
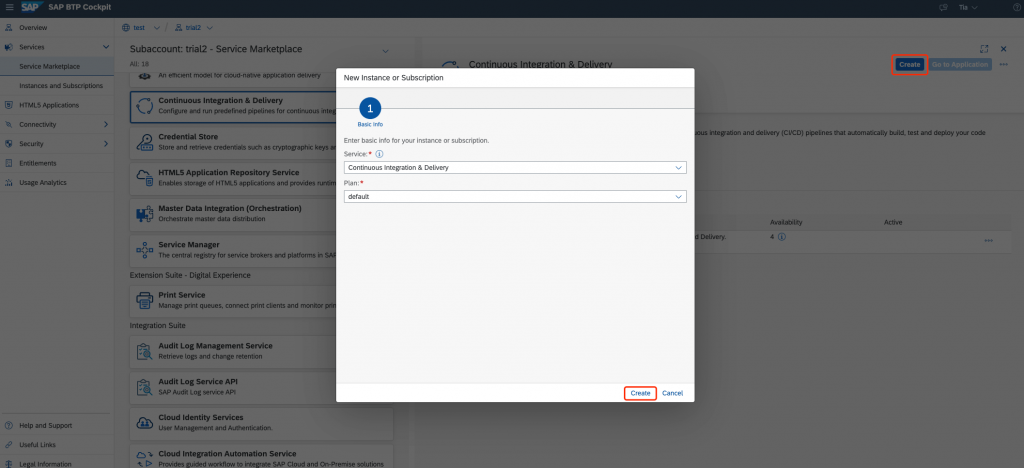
Go to your subaccount in SAP BTP and navigate to the Service Marketplace. Find the Continuous Integration & Delivery Service.
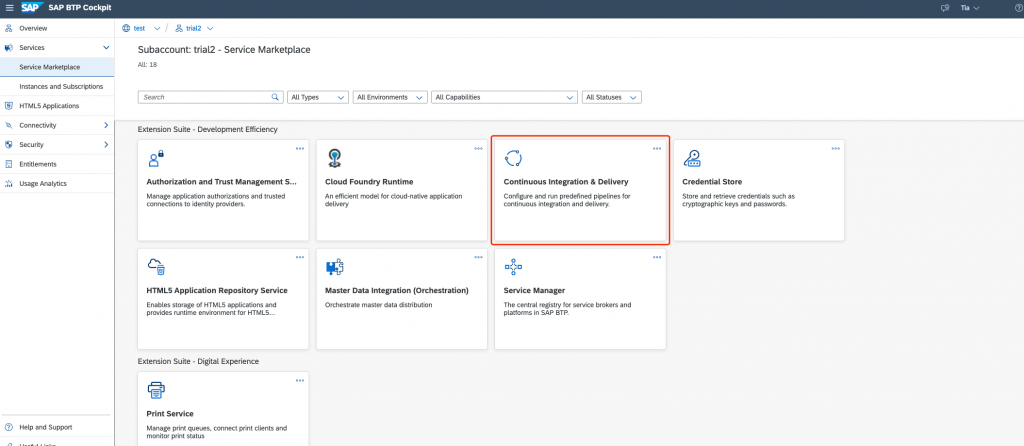
Subscribe to the service.
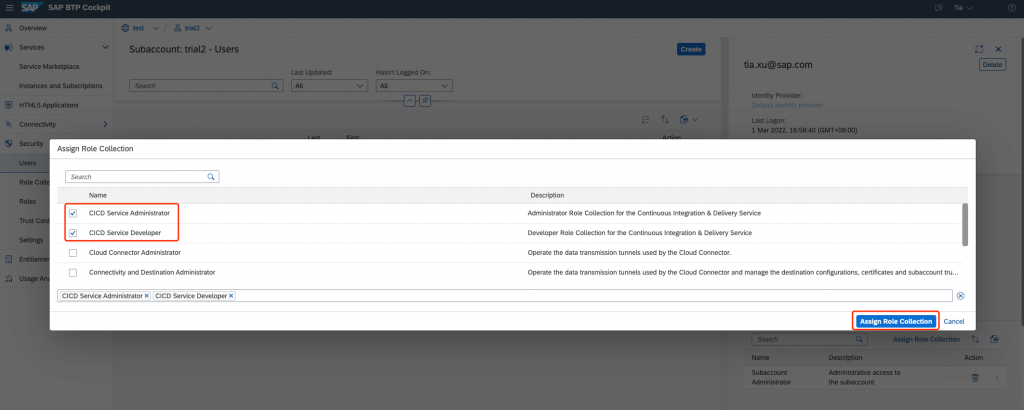
Assign the Role Collections to your user.
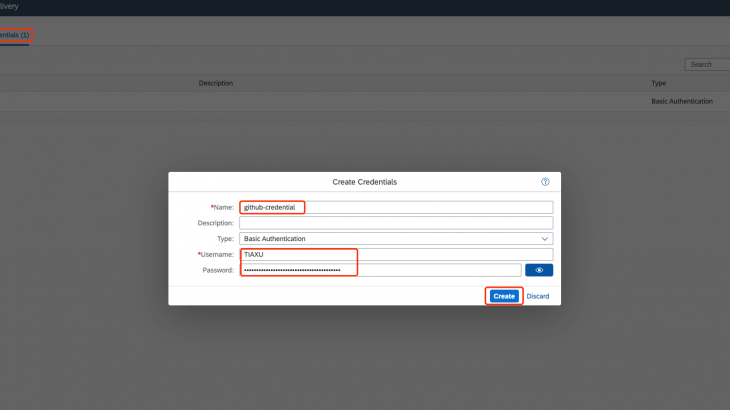
Step 6: Create GitHub Credential (CI/CD Subaccount)
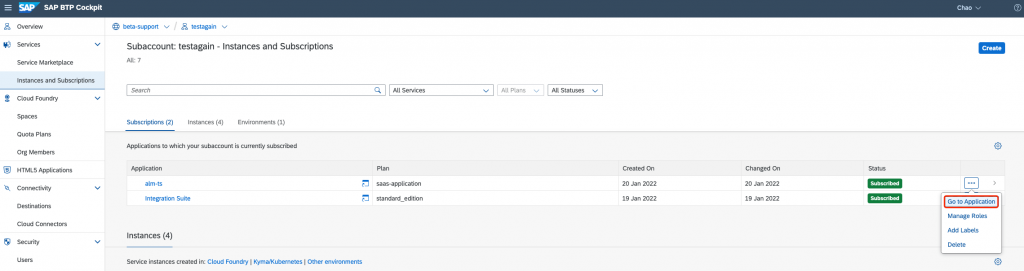
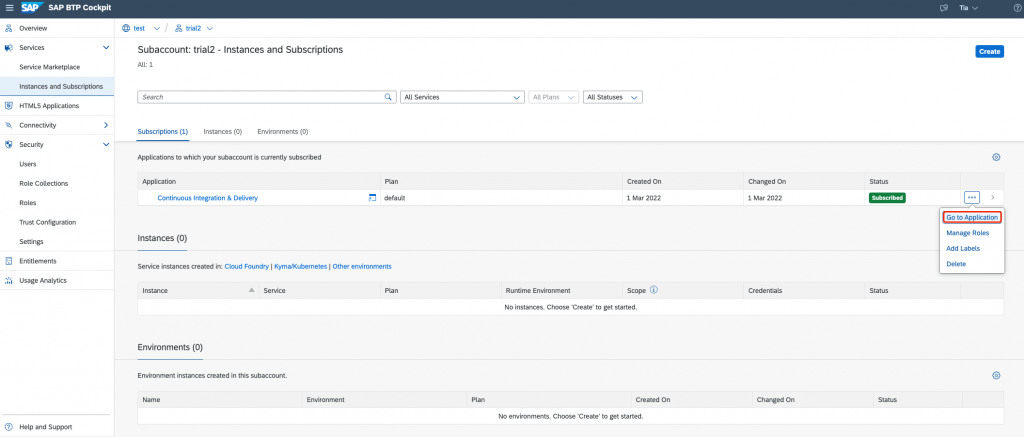
Click Go to application to open the console.
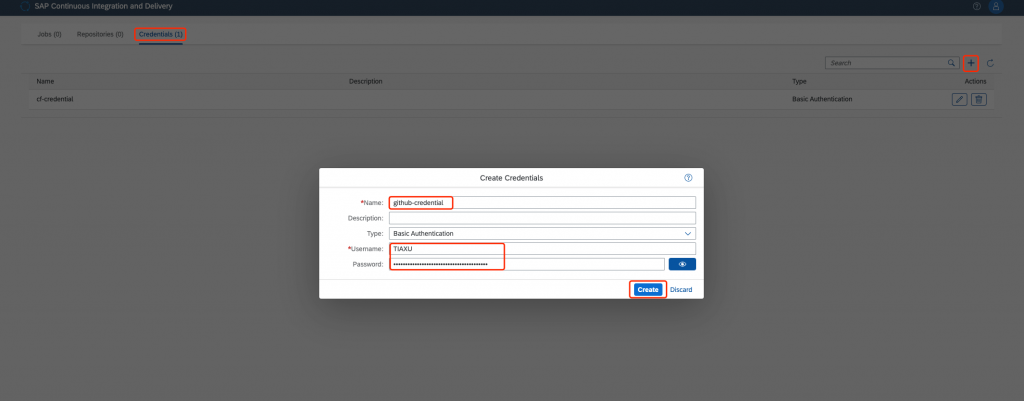
Navigate to the Credentials tab, create credential for Github.
Hint: access tokens can be created in GitHub by going to Settings -> Developer Settings
Step 6: Add Repository (CI/CD Subaccount)
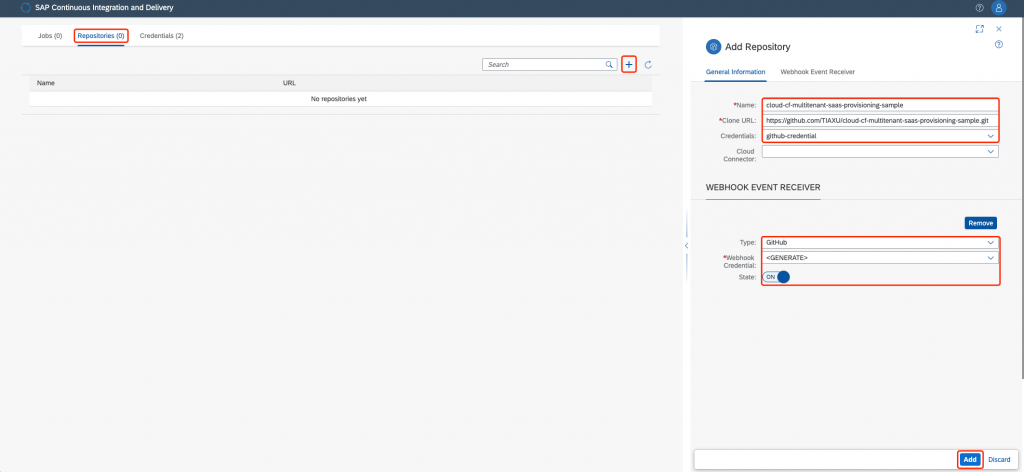
Navigate to the Repositories tab, add your repository into the service.
Step 7: Create GitHub Webhook (CI/CD Subaccount)
In this step we will configure the Github Webhook by entering the CI/CD endpoint URL and credentials. This will allow Github to notify SAP CI/CD service that there are code changes in repository.
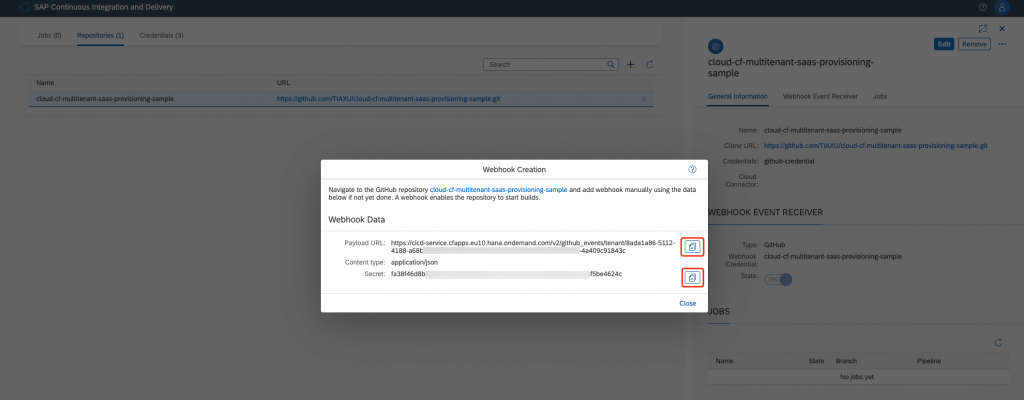
To create a webhook in GitHub, you need some data that has been automatically created during the previous step. You can find this data (Payload URL and Secret) when you open the detail view of an existing repository in the Repositories tab:

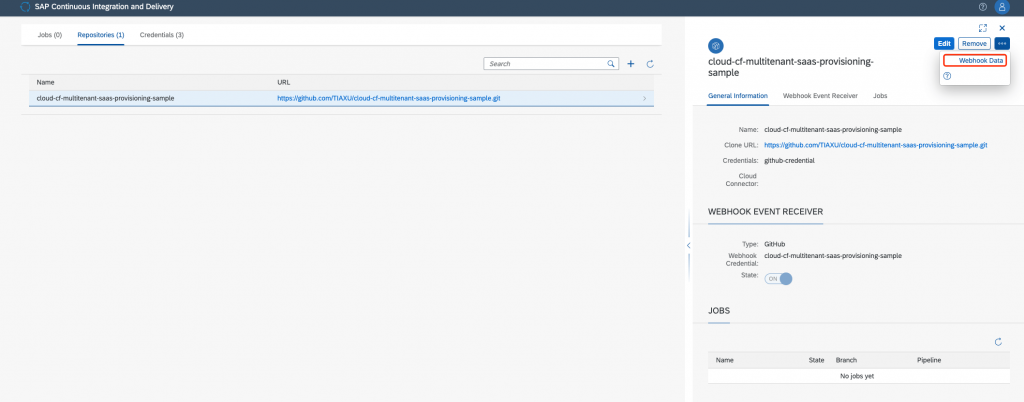
Copy the Payload URL and Secret:
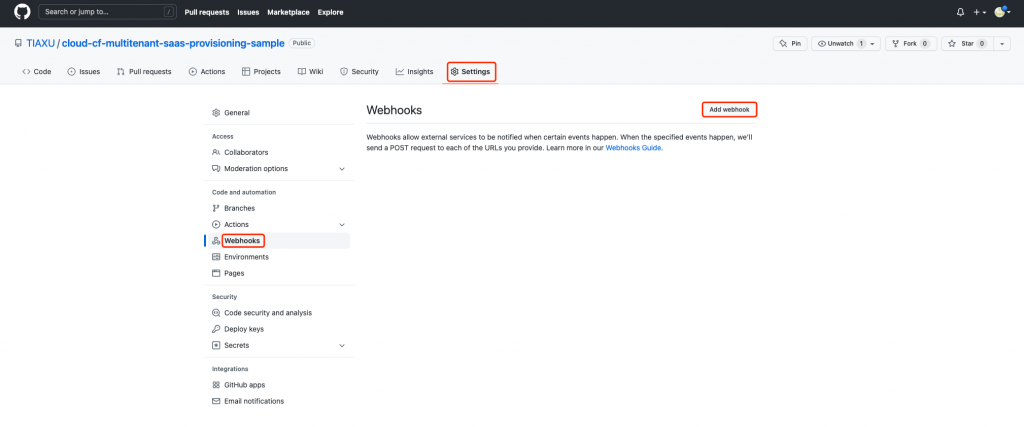
In your Github repository, switch to the Settings tab. Find the Webhooks in the navigation bar, click Add webhook to do the configuration:
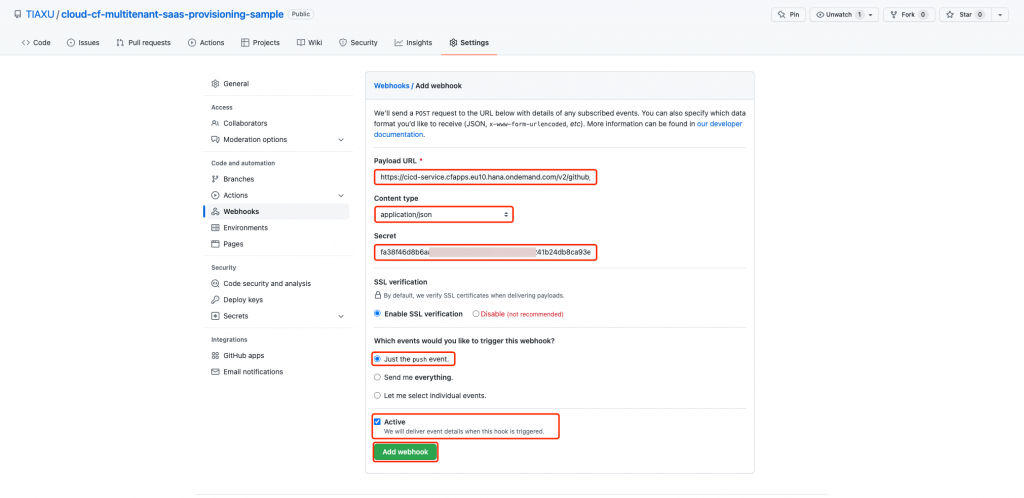
Paste the Payload URL and Secret into the webhook, select content type as application/json:
Step 8: Create CI/CD Job (CI/CD Subaccount)
For the field Pipeline, choose SAP Cloud Application Programming Model.
In the Stages tab, choose Job Editor from the Configuration Mode dropdown list. Alternatively, you can choose the Source Repository, where you can configure the pipeline steps in source code and the configuration file can be found in .pipline/config.yml.
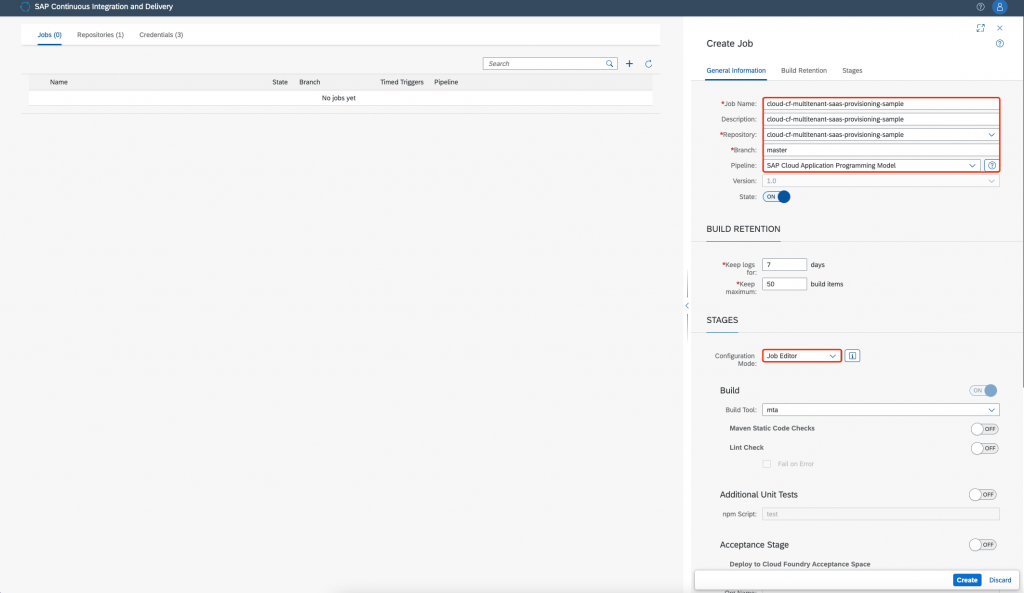
Click Create.
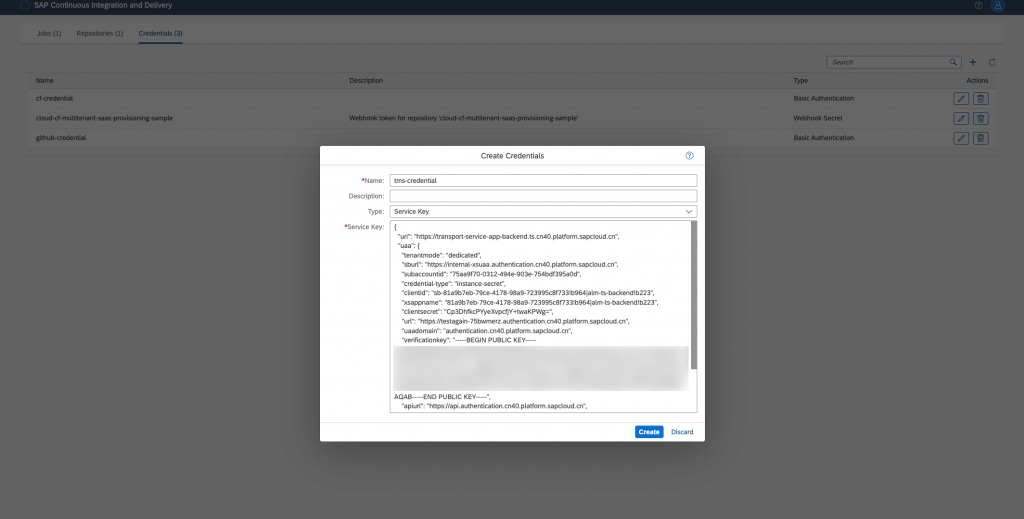
Step 9: Create TMS Credentials in CI/CD service (TMS and CI/CD Subaccount)
In the TMS Subaccount, create or find the service key for your TMS instance. Click button Copy JSON.

In the CI/CD service, create a new credential for TMS instance, paste the copied service key in it.
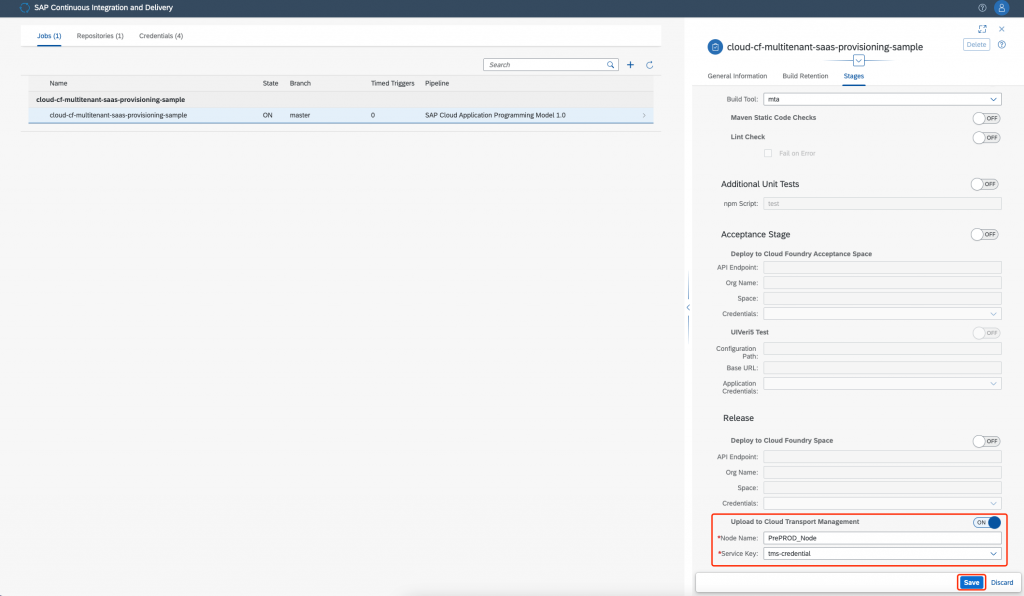
Step 10: Configure TMS in CI/CD service (CI/CD Subaccount)
Open the Job you created previously, navigate to the Stages tab, find the button Upload to Cloud Transport Management, open it and fill in all fields. Where, Node Name is the name of the source node you configured in the TMS dashboard.
Step 11: Test
Trigger Pipeline
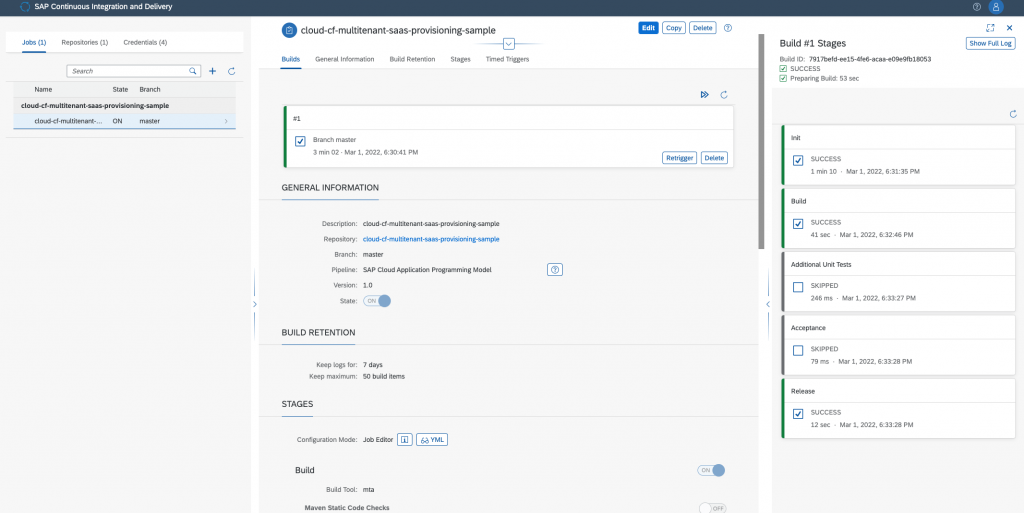
Trigger the pipeline by clicking the button as shown in the screenshot below or making changed in your repository:
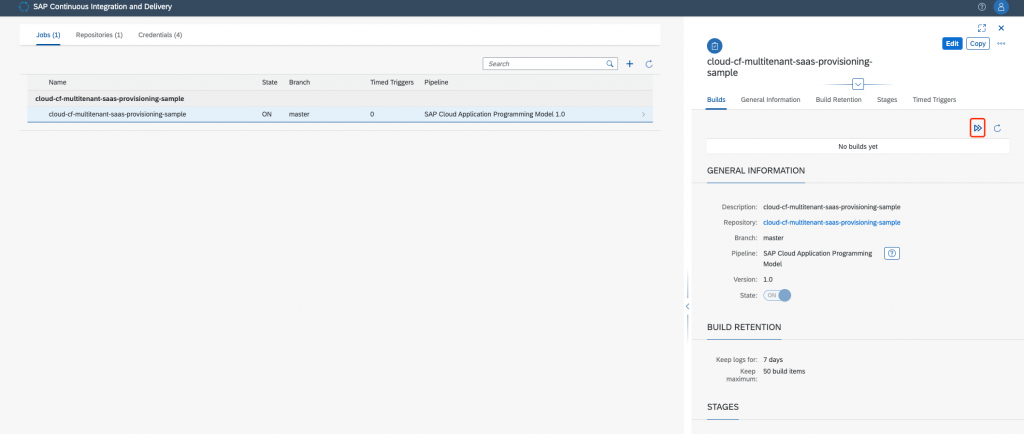
You can monitor the execution status of your pipeline. Once it returns SUCCESS, which means the MTA archive has been uploaded into your TMS tenant, PrePROD_Node.
Import to Pre-PROD Node and Transport to PROD Node
In Cloud Transport Management, the upload process will create a transport request and attach the content archive to it, so that it will be available in the import queue of the PrePROD_Node for import (deploy) into the Pre-PROD subaccount. After being imported in the Pre-PROD subaccount, it is available in the import queue of the PROD_Node for import (deploy).
Go into the PrePROD_Node, select the transport request and click Import Selected, the content archive will be imported (deployed) into Pre-PROD subaccount and immediately transported into the PROD_Node:
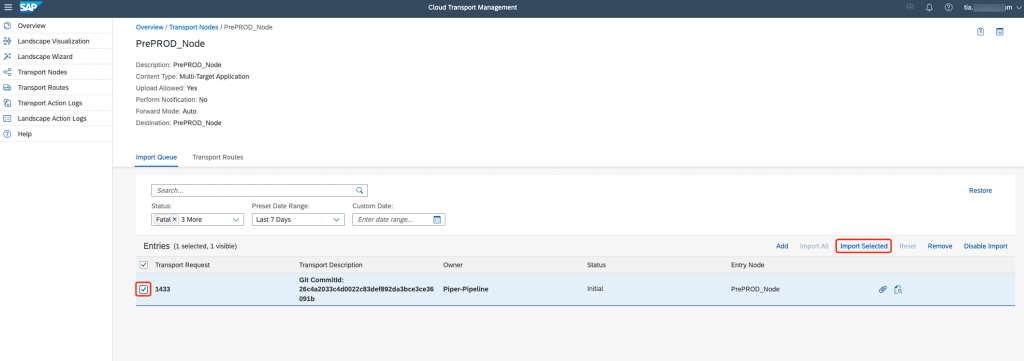
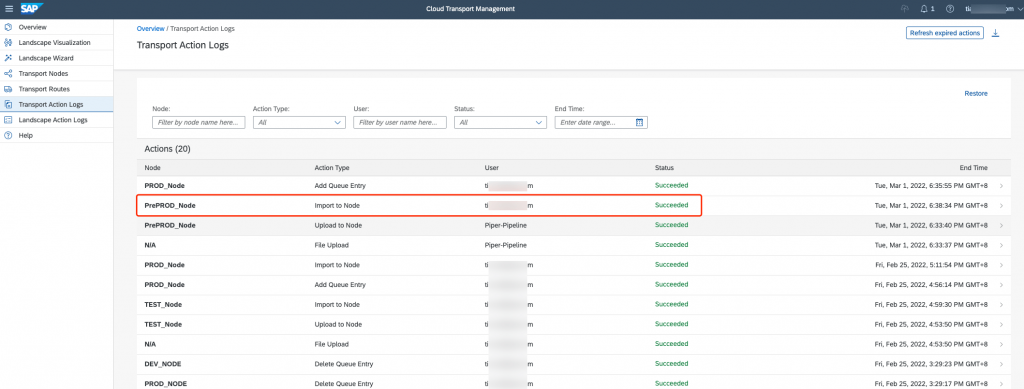
If this action is executed successfully, it means the application has been successfully deployed into the Pre-PROD subaccount. At the same time, the content archive has been transported to the import queue of the PROD_Node.
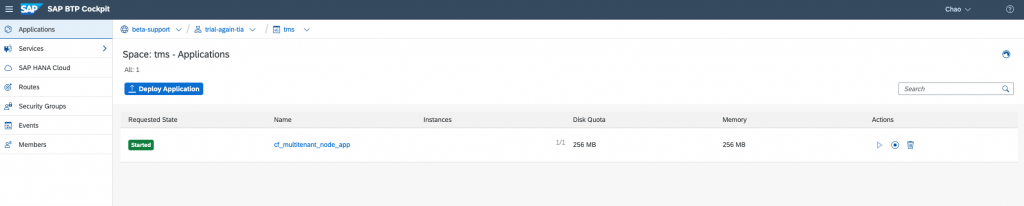
Check the deployed application in the space of the Pre-PROD subaccount:

Import to PROD Node
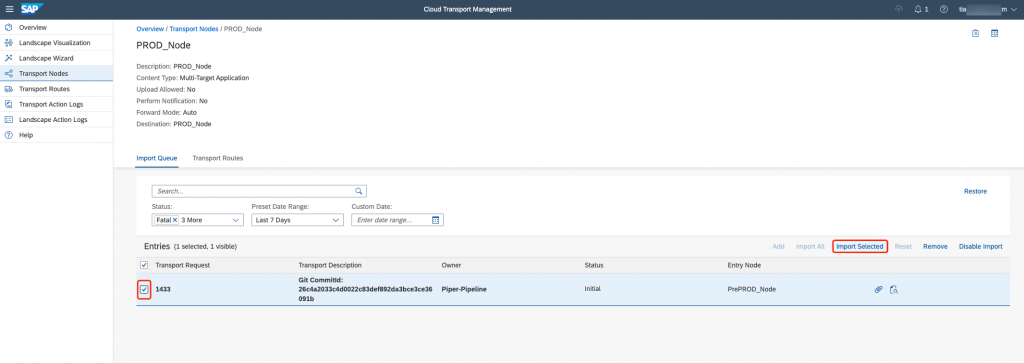
Now you can see the transport request in the import queue of the PROD_Node. In the PROD_Node, select the transport request and click Import Selected, the content archive will be imported (deployed) into PROD Subaccount.
Check the deployed application in the space of the PROD Subaccount:
Now the whole CI/CD-triggered transportation process has been finished.


