SAP Build Process Automation provides extended workflow capabilities and the ability to include into the workflows the robotic automation (iRPA) components. The combination of workflows and robotic automations allows the developers to implement complex use cases in an easy way.
In one of the projects I’m implementing, I needed to process a workflow attachment from within a robotic automation and then I had to create, always from a robotic automation, another document to be consumed as attachment in a form of the same workflow process.
The way an automation can extract an attachment from a workflow is not clearly documented, then I decided to write this blog post in order to share my experience on that topic.
First of all, in order to enable attachment processing in SAP Build Process Automation, the Document Management Service must be enabled in the BTP subaccount and a specific configuration must be performed.
This blog article provides a detailed explanation on how to enable attachments and use them in SAP Build Process Automation.
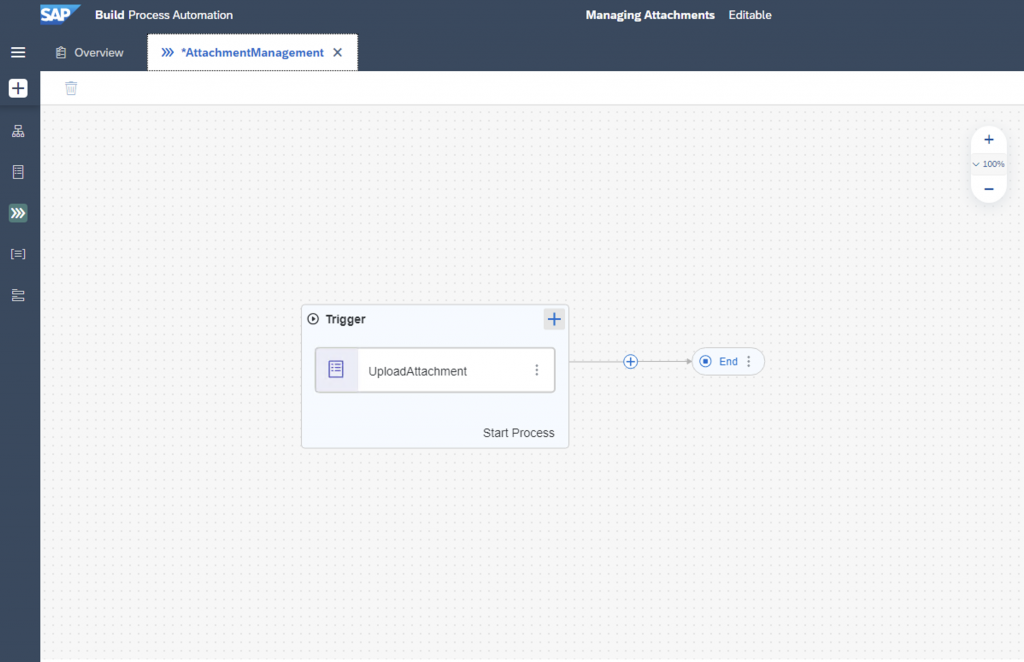
After completing all the configuration tasks described in the article, now we’re able to create a simple workflow that requires in its first step to upload a document:
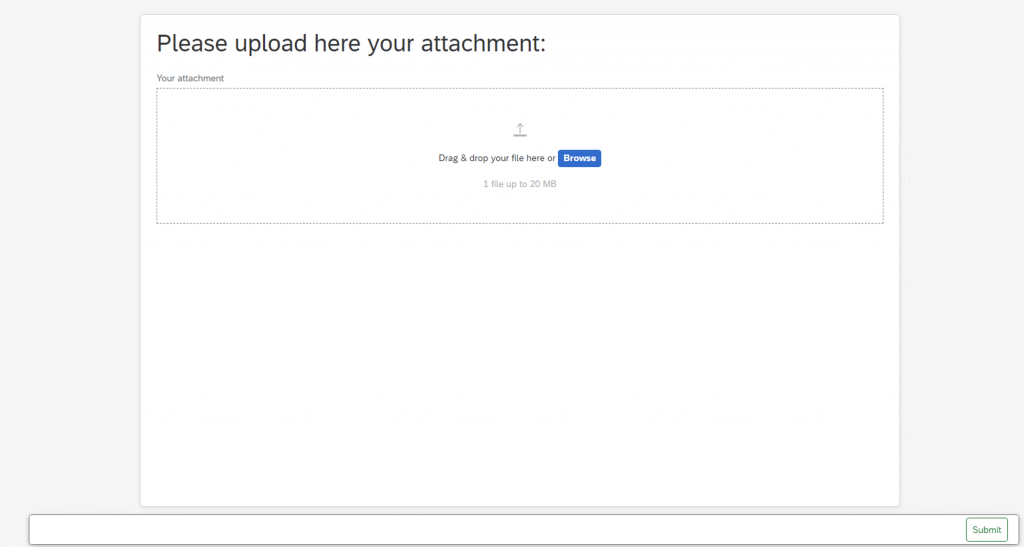
And when we start an instance of this workflow process, we can then upload a document:
Before moving forward, we need to understand how the attached document is saved into the Document Management Service (DMS) and how SAP Build Process Automation maintains the link to the uploaded document.
To do that, I used a simple Java frontend that allows to graphically navigate into the DMS (Apache Chemistry).
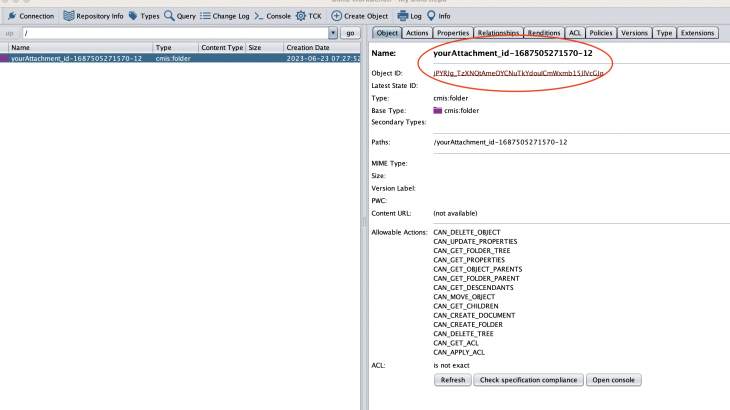
After logging into the DMS repository I created to save the workflow attachments, I can see that a dedicated folder has been added to the /root, for storing my attachment:
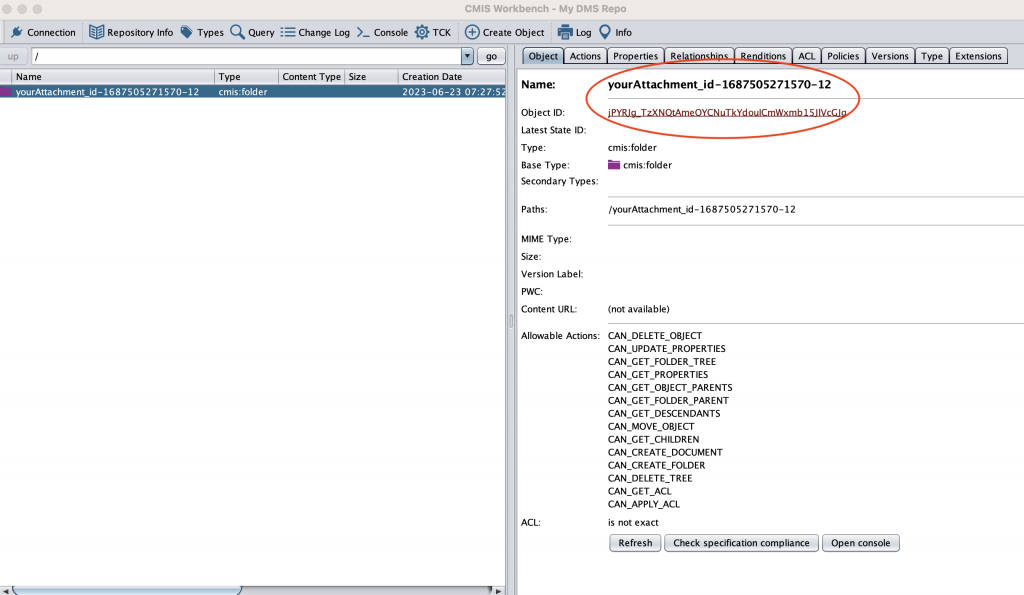
The folder is identified by name and by the cmis Object ID:
Name: yourAttachment_id-1687505271570-12
Object Id: jPYRJg_TzXNQtAmeOYCNuTkYdouICmWxmb15JlVcGJg
Then, opening the SAP Build monitor and looking at the completed workflow, I can see how the link to the the DMS object is maintained in the context of the workflow process:
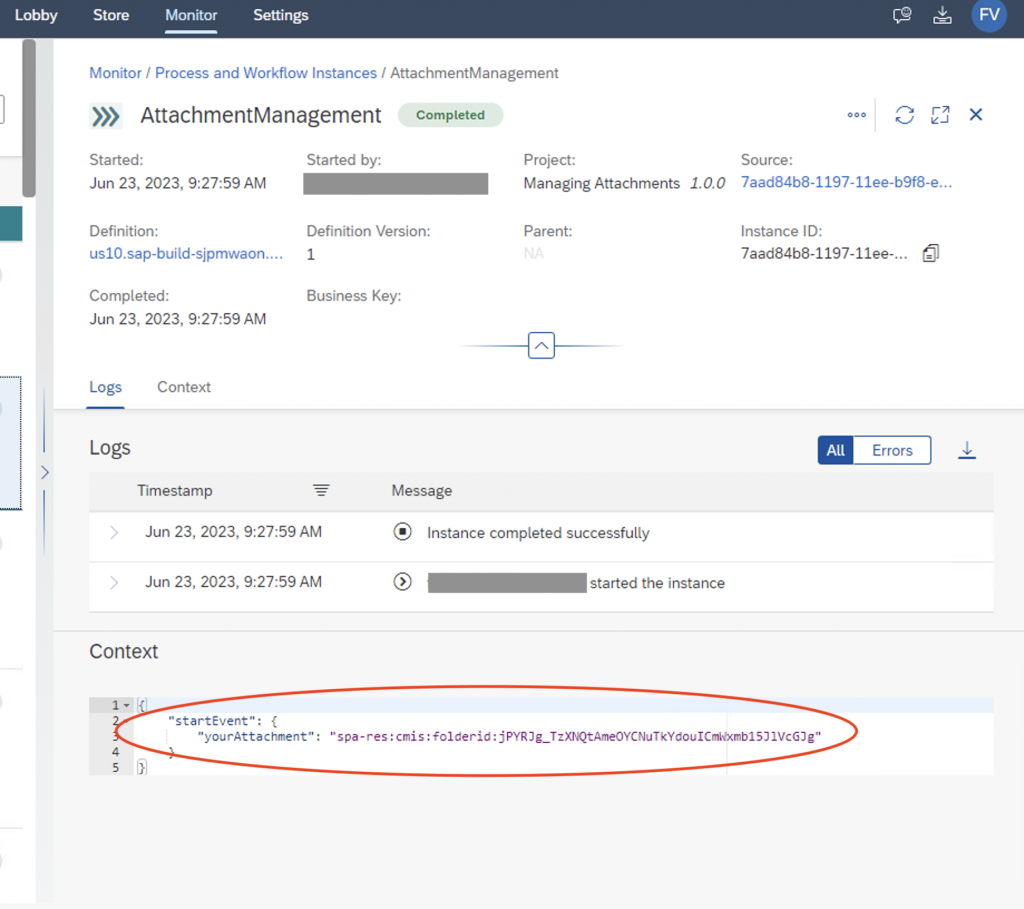
From the monitor we can understand that the link to the attachment is kept using the object id of the folder. The name of the folder and the name of the document are not available in the context.
Now it’s time to start working at an automation that can extract the document from the DMS repository.
The interaction with the DMS repository occurs thru a set of API.
But we don’t need to spend too much time in understanding the API: in the Store of SAP Build we can find a template named “How to use Document Management Service”:
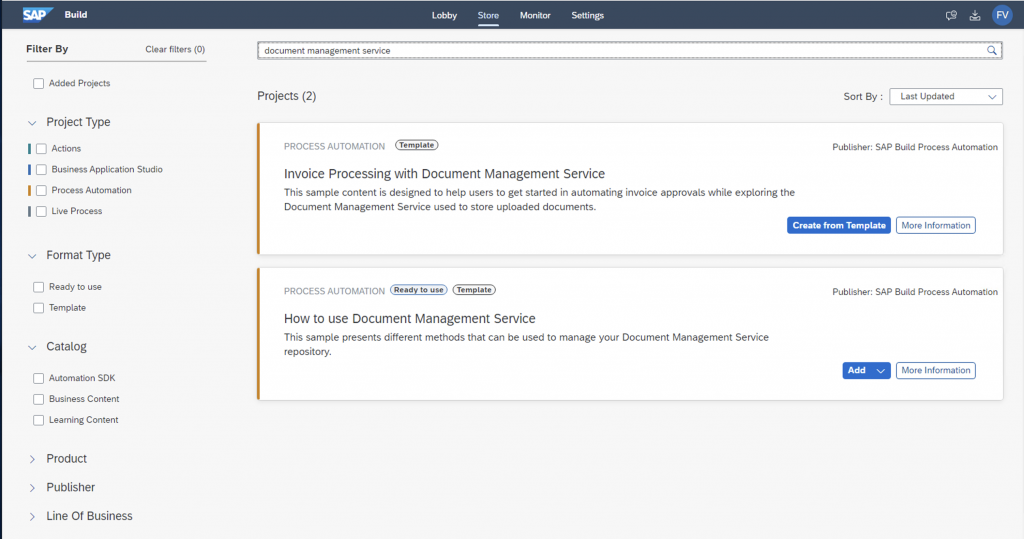
This template contain examples of automations for performing all the relevant operations needed for working with the DMS. We can just create a project from this template and start using the sample automations provided in the template.
I decided to perform all the activities just reusing the provided examples.
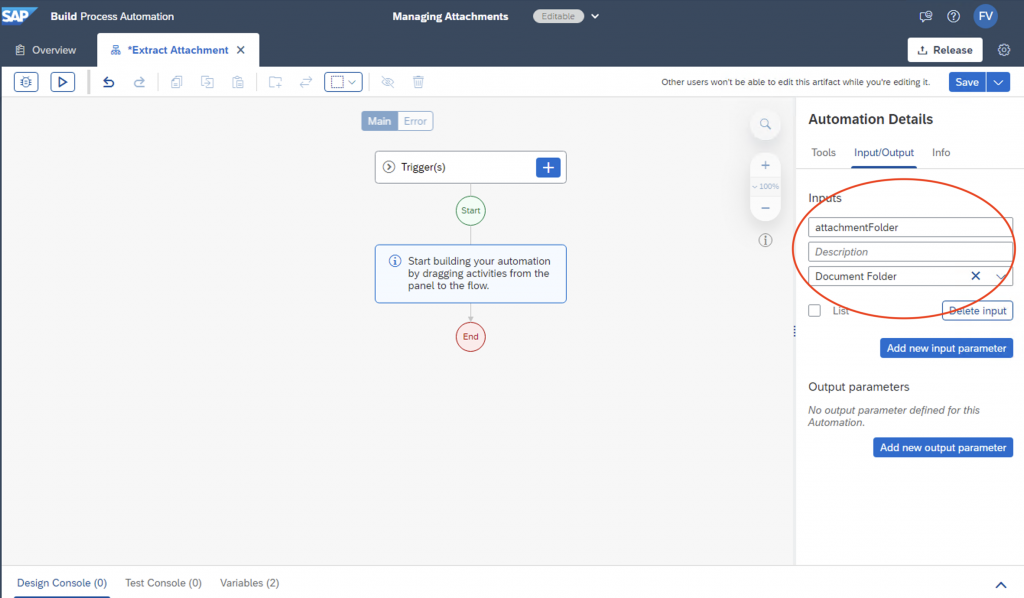
I started creating an automation for extracting an attachment from the DMS and then storing it to a temporary directory (for instance C:\Temp). This automation requires as input parameter a variable of the type Document Folder:
When this automation will be called as part of a workflow process, this input variable will receive the link to the DMS folder in the format it is stored in the context of the workflow, as we’ve seen above.
For extracting the attachment from the DMS, we can use the sample automation named Download document: this automation requires as input the document name, the document path in the DMS and the destination folder to save the extracted document.
But from the information that the automation receives as input, we do not have neither the document name nor the folder name. We have only the object id of the folder.
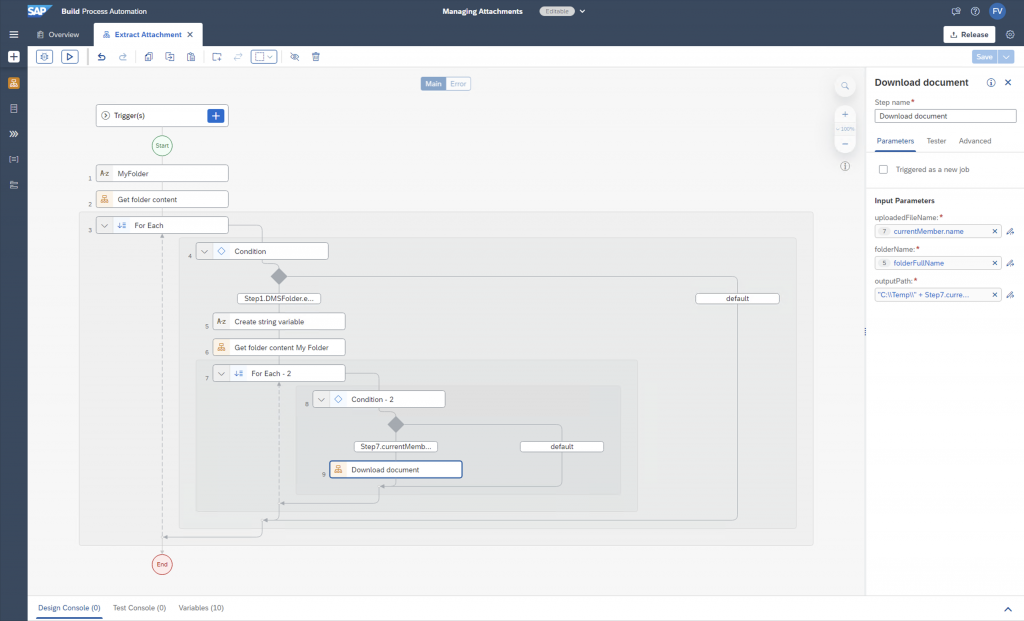
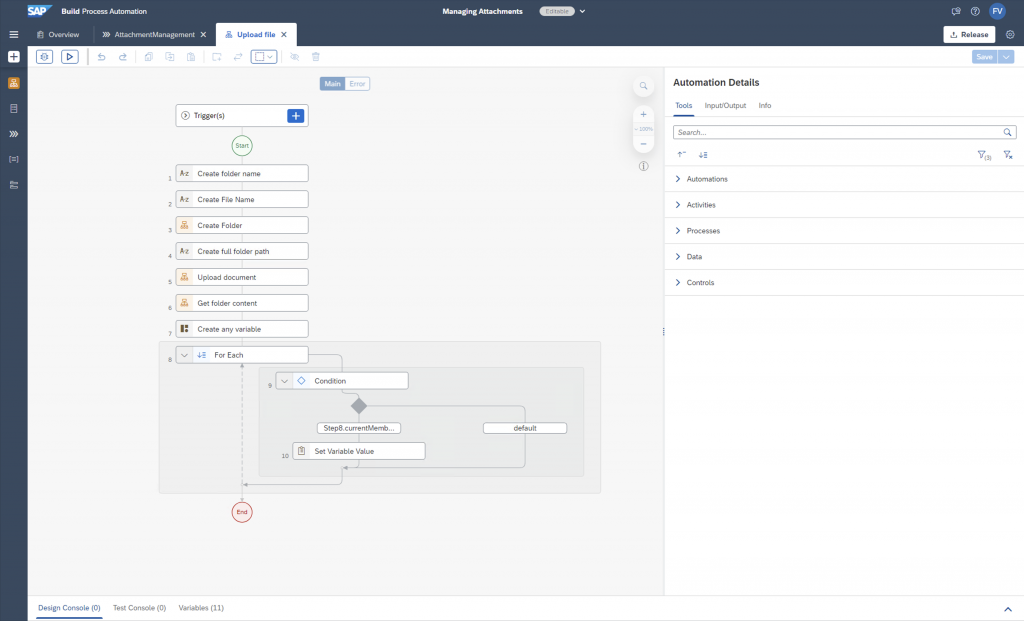
Then we need to implement some logic for obtaining the required informations (folder name and document name) from the folder object id. Here following all the steps:
- Scan the content of the /root folder of the DMS repository, using the sample automation named Get folder content. This automation provides as output a list of DMS objects. For each object we have the Object Id, Object Name and Object Type.
- Run a For Each cycle on the list of DMS objects of above, until we can find an object with the id that corresponds to the one received as input. The Object Name of that object is the name of the folder where our document is stored. Let’s call it folder_name and use it in the next step.
- Scan the content of the folder /root/folder_name using the the sample automation named Get folder content, as we did before. Also in this case a list of DMS object is created as output and we expect this list contains only one document, the one we’re looking for.
- Run a For Each cycle on the list of DMS objects of above, until an object with Object type = “document” is found. The Object Name of that object corresponds to the name of the document we want to extract. Let’s call it document_name.
We can now invoke the Download document sample automation, using the folder_name and the document_name obtained with our logic, and setting to C:\Temp\document_name the destination of the extracted document.
The automation I implemented looks like that:
We can add this automation to our workflow:
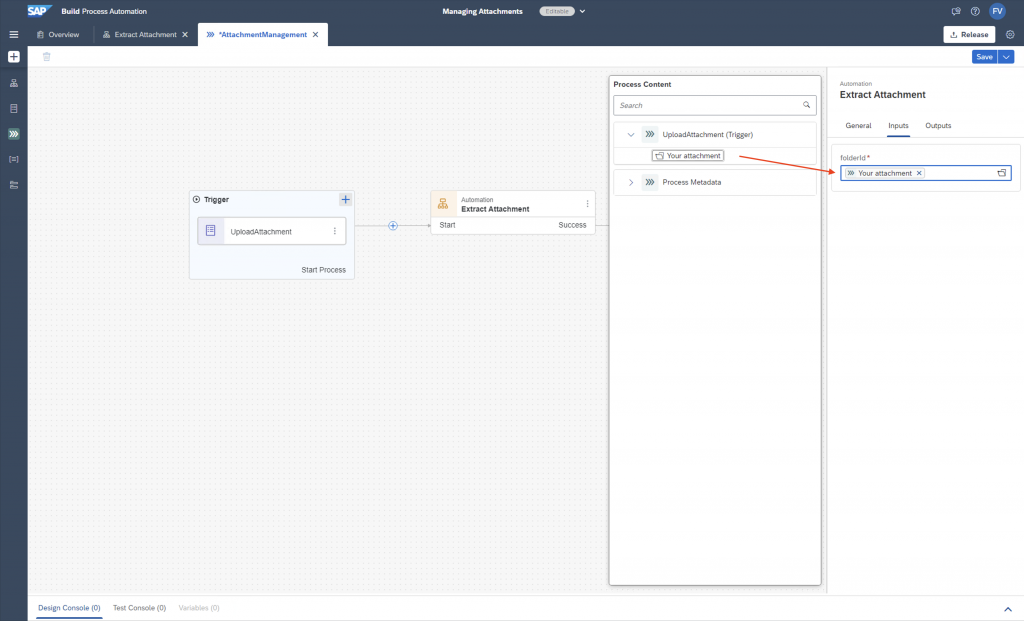
The input of the automation must be set just selecting the attachment of the previous form.
When running the workflow, the document attached to the initial form is extracted by the automation to the C:\Temp directory of the system where the Agent is running.
The saved document can be processed using other automations in the following steps of the workflow process. For instance, we can attach in the first step an invoice document and then we can extract all the relevant information with a robotic automation.
Now that we know how to use the DMS, we can implement an automation that does the reverse path: it stores a document to the DMS and it makes it available as an attachment to a workflow form.
Assuming we’ve a document saved in the C:\Temp directory of the system where the agent is running, here following the logical steps to be performed:
- Use the Create folder sample automation to create a folder in DMS /root, assigning a unique name. I usually include the business key of the process and a document identifier.
- Use the Upload document sample automation to upload the document from the C:\Temp directory to the folder we’ve just created in the DMS repository.
- Scan the content of the /root folder of the DMS repository, using the sample automation named Get folder content and obtain a list of DMS objects.
- Run a For Each cycle on the list of DMS objects of above, until we can find an object with the name that corresponds to the name of the folder we created. The Object Id of that folder is the information to be used for making the document available in a workflow form.
The output of this automation must be of Document folder type and we need to compose it adding to the extracted object id the initial string: “spa-res:cmis:folderid:”. Please notice that in your system this string may be different. You can use the SAP Build monitor to see how the attachment’s information are stored in the context of a process.
The automation I implemented for uploading files as attachments looks like that:
This automation can be added to a workflow process and its output can be provided as an attachment to a form.
Now that the logic of the automations for managing the attachment is clear, you will be able to add more features into the workflows you’re developing with SAP Build Process Automation.
For instance:
- the ability to upload a file as a workflow attachment and then to process it using a robotic automation,
- the ability to generate a document using a robotic automation and then to make it available as an attachment in a workflow form,
- the ability to extract an attachment, manipulate it with a robotic automation and upload it back in the same folder.


