The SAP Build portfolio combines our low code solutions which enable users of all skill levels to easily create and augment business applications. The unified low-code solution portfolio empowers users to create applications, automate tedious processes, and design engaging business sites with drag-and-drop simplicity.
What is SAP Build Apps?
SAP Build Apps is SAP’s low-code no-code platform to create apps for the Web and native mobile use. As an evolution of SAP AppGyver, it now has multiple backend capabilities. Business users can confidently build enterprise-grade apps that work seamlessly across all operating systems – all without writing a single line of code. Professional developers will reduce coding effort in the creation of complex data models and business logic and enjoy a significant boost in productivity.
What scenario we are covering?
Best Run Bikes company has multiple systems like the SAP Gateway server, SAP SuccessFactors and other odata based backend systems to run their day-to-day business operations. The company now has requirement to consume all of this data through a simple mobile App.
We can build such Apps quickly now with low-code! Yes, you heard it right!
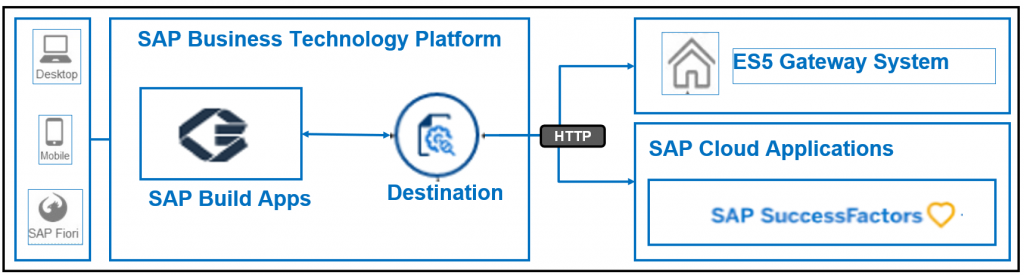
This simple blog post helps you get an understanding into how data from multiple sources can be fetched and presented using a simple SAP Build App on SAP Business Technology Platform (BTP). By bringing data from SAP Gateway system, SAP SuccessFactors, Odata / Rest based sources and Visual cloud functions, we can enable enterprise-wide processes, experiences, and insights all at one place using SAP Build Apps.
This blog post covers –
- Creating Visual cloud Functions backend and consume them in a SAP Build Apps frontend.
- Consume Data from SAP ES5 Gateway server.
- Bring data from Odata based sources.
- Present Data from SAP SuccessFactors.
- Create an App that presents all this data from different sources at one place.
Below are the high-level steps involved in realizing this App.

Let’s get started to see how we can build this App in a few simple steps.
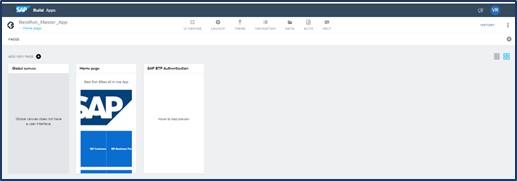
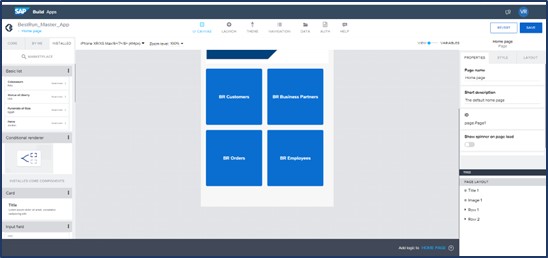
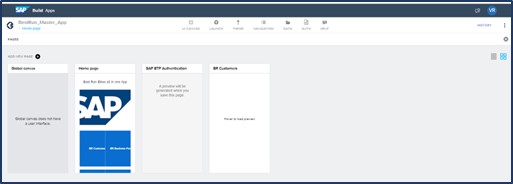
Section I: Create a Homepage(Landing Page) for the App
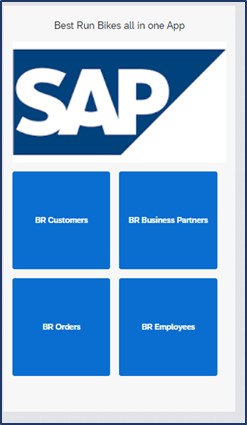
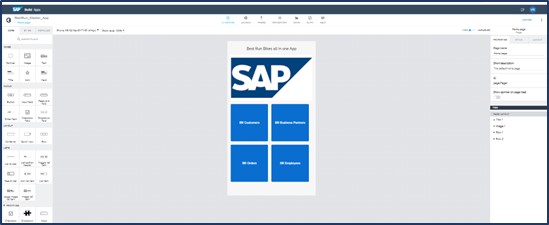
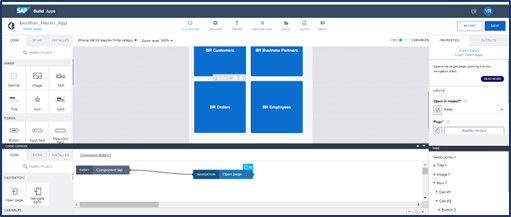
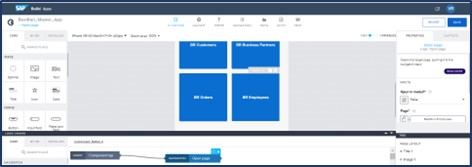
Let’s create a landing page for our App. The Lading Page will have the Company Name as the heading, an image of the company or a logo along with four buttons. The layout of the lading page is given below –
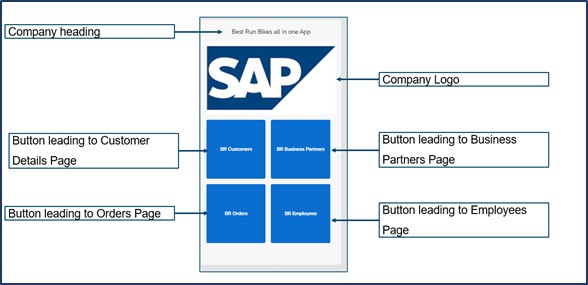
The App fetches Customer details from the Visual Cloud Functions backend, Business Partners details from ES5 Gateway system, Orders details from northwind odata service and Employee Details from SAP SuccessFactors.
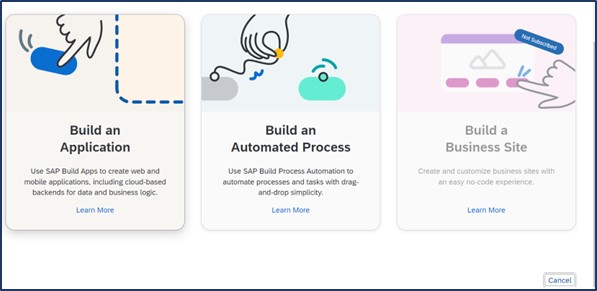
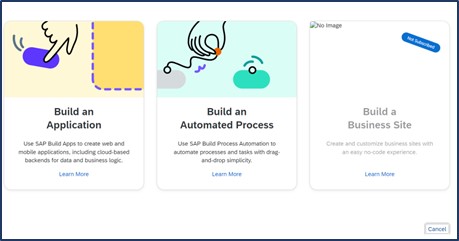
To Create the lading page, go the Build Apps Lobby, then select Build an Application tile.
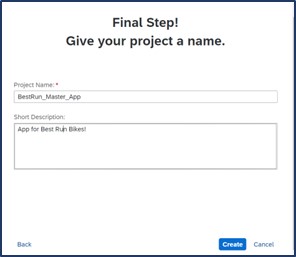
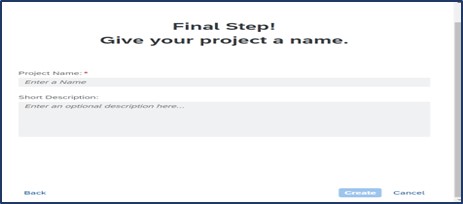
Specify a name and description to the project.
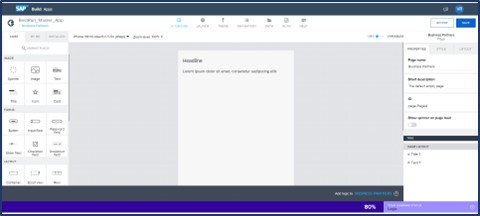
The Page by default, will have a title and a text element.
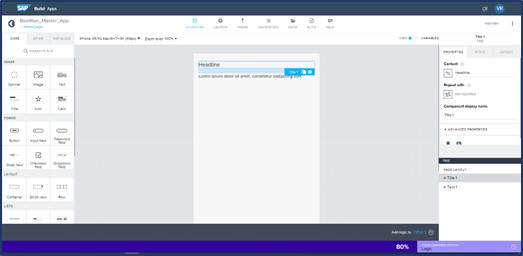
Remove the Text element and adjust the title to “Best Run Bikes all in one App”.
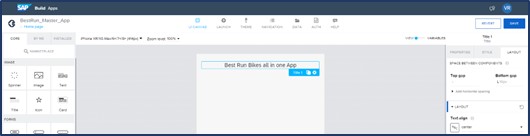
Add an image component into the page and specify the image source as shown below –

Add a button component.
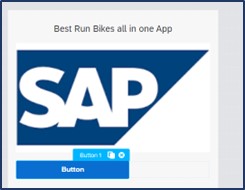
Change the Button property to display “BR Customers”. Adjust the button’s height and width to make it look like a tile.
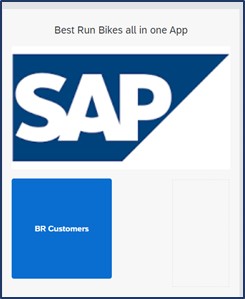
Similarly, add 3 more buttons and change the properties for BR Business Partners, BR Orders and BR Employees buttons.
Section II: Create Visual Cloud Functions backend and link it to customers tile on the Home Page
It’s time for us to create a visual cloud functions backend in SAP Build Apps for referencing it as a backend for customers page.
Go to the SAP Build lobby and click on the create button.
Select the option Build an Application.
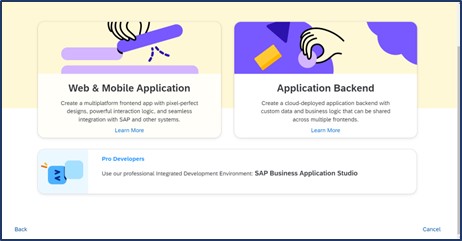
From the available options, select Application Backend to start the creation of Visual cloud functions.
Specify a name and description to the project.
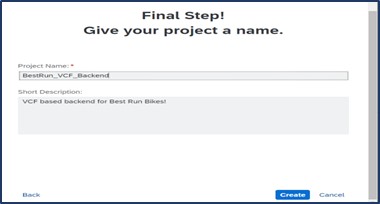
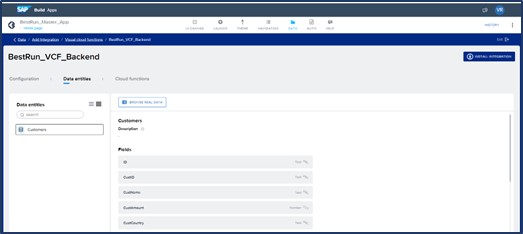
I have entered the project name as BestRun_VCF_Backend and a description as shown in the screenshot.
Click create button upon entering the name and description.

Click on the create new button to add a New entity.
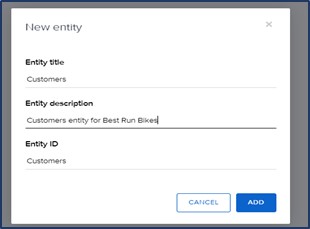
Specify a name and description for the new entity.
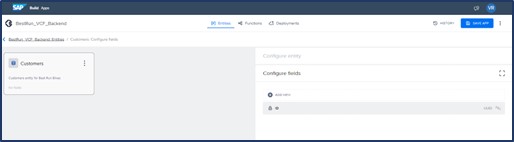
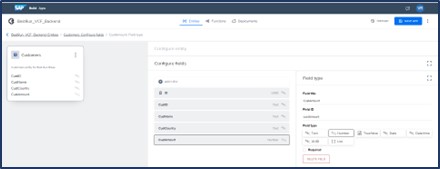
Click on Add new to add a field to the Customers entity. I have added CustID of field type Text as the first filed.
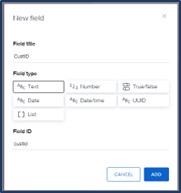
Specify a title to the field and choose a field type as applicable.
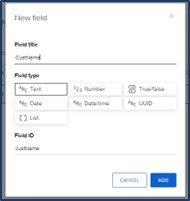
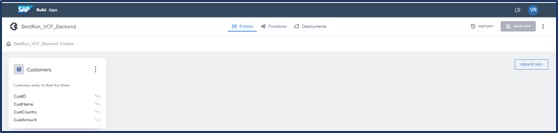
Similarly add other fields to the entity. I have added CustID, CustName, CustCountry and CustAmount fields.
Save the entity created.
Similarly, based on the requirements you can add more entities.
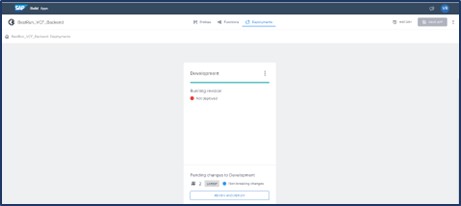
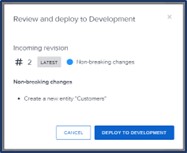
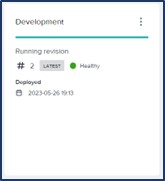
Finally deploy the entity to be able to consume it in the Build Apps front-end.
Deployment will take some time.
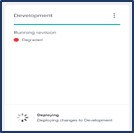
Upon successful deployment, we will see the message indicating the entity is deployed.
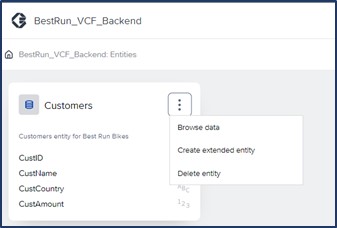
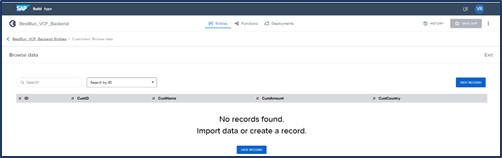
Let’s enter sample data into our customers entity. To achieve this, click on the browse data option present in the options against the entity.
Click on the button New Record.
Enter the values for the entity.
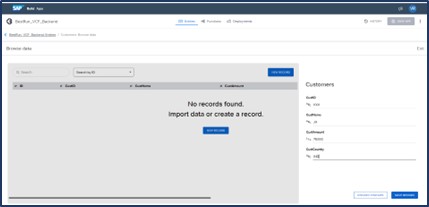
You can see the row entered upon adding the new record.

Repeat this process to add multiple rows based on your requirements.

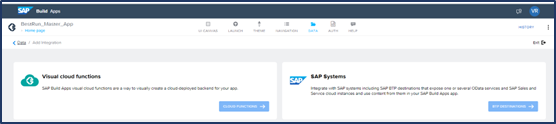
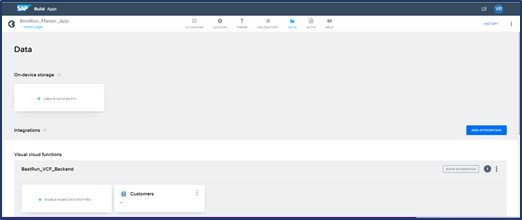
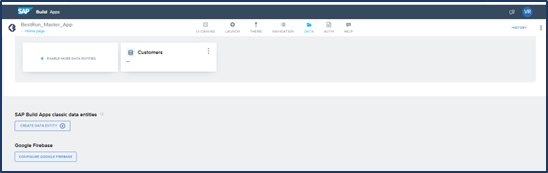
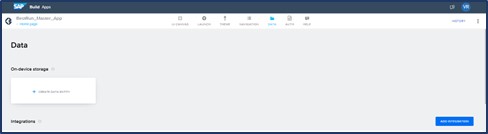
To use the Visual Cloud Functions backed as Data source for our customers page, go to the Data tab in SAP Build.
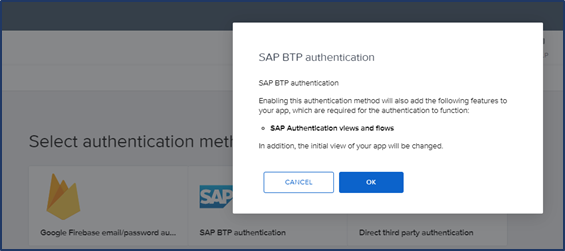
Both Cloud Functions and BTP destinations buttons are greyed out. To use the Visual Cloud functions backend and BTP destinations as data sources, we need to enable SAP BTP Authentication. Head to the Authentication tab to accomplish this.
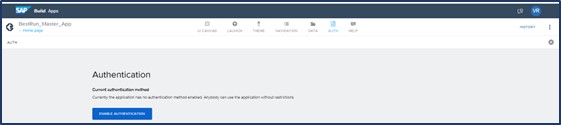
After Clicking on Enable Authentication, we will see the below authentication methods.
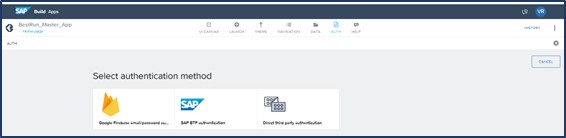
Select SAP BTP Authentication and then click on OK button.
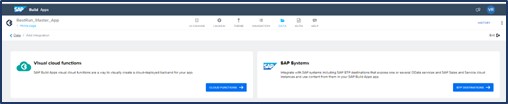
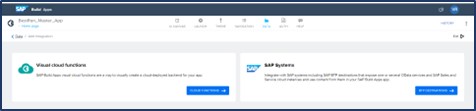
Go to the Data tab again to add the Integration. Click on Add Integration.
Now the buttons Cloud functions and BTP destinations are enabled as we have set up the BTP Authentication.
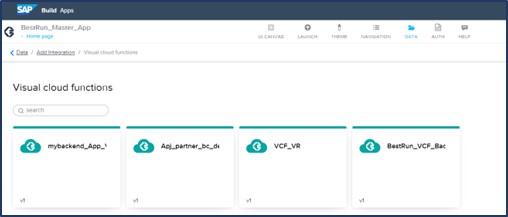
Click on Cloud Functions to see the BestRun_VCF_backend – Visual Cloud functions based backend that we have created.
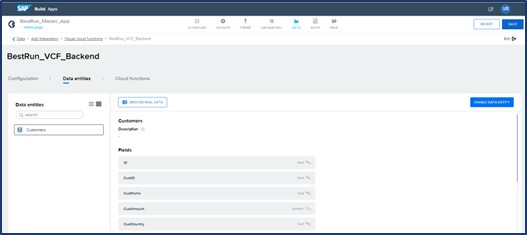
After Clicking on the BR cloud function, we will see the Customers Entity. Click on Install Integration.
Now select the Customers entity and then click on Enable Data Entity.
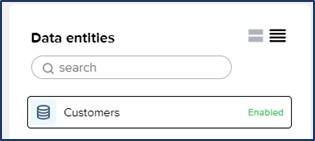
The customers entity gets enabled as shown below.
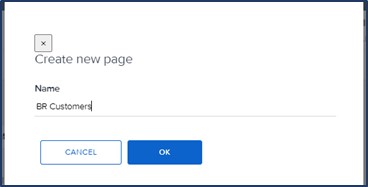
Let’s add a page for Customers now. Click on Add New Page.
Specify a name to the Page and then click OK.
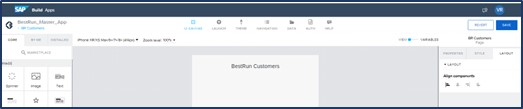
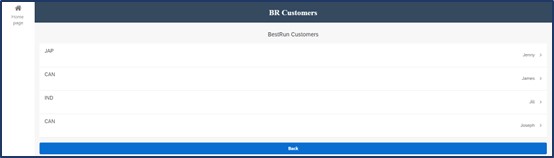
Adjust the page title to display BestRun Customers.
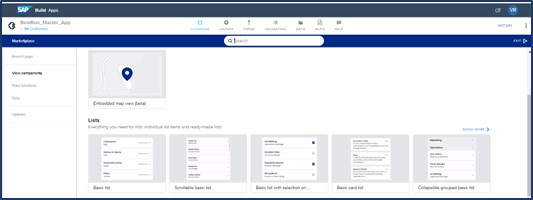
Go to the components marketplace and look for Basic list component.
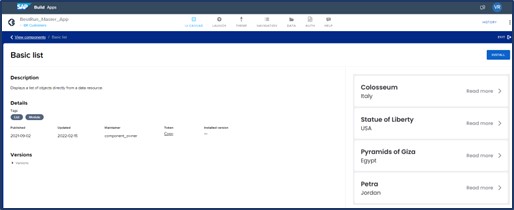
Select Basic List and then click on Install.
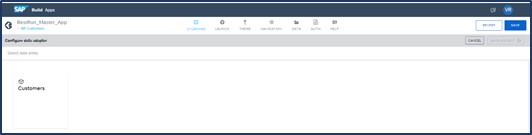
Add the Basic list from the installed components tab into the BR Customers page. Select the basic list and then click on the Configure button to bind it to the Customers entity.
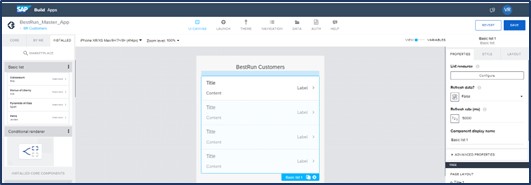
Select the Customers entity.
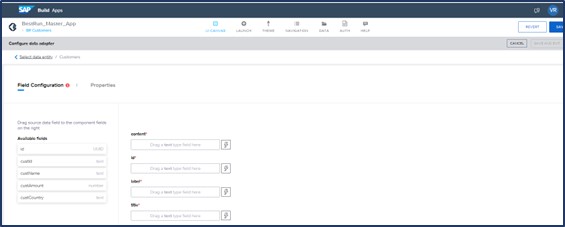
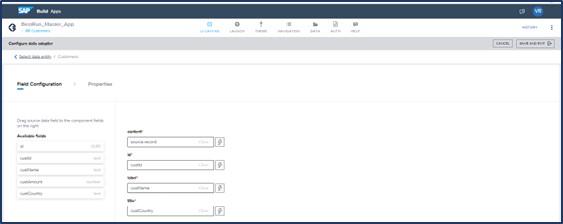
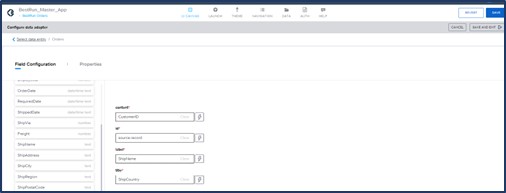
Do the field configuration of basic list using the fields from Customers entity.
Save the page settings.
Add a Back button below the basic list on click of which we will get navigated to the home / landing page.
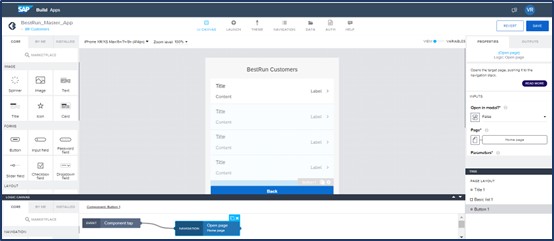
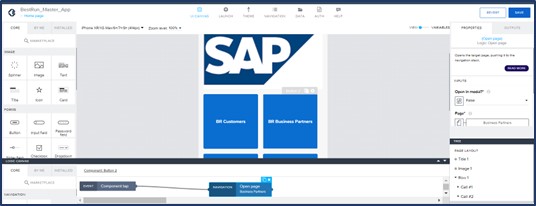
Now we need to link the BR Customers button on the Home page to the BestRun Customers page.
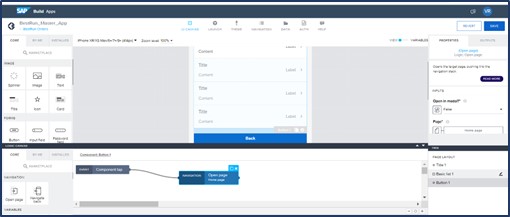
Click on the Add Logic to Home PAGE option to add this navigation between the pages.
Add Open Page component from the Logic Canvas and link it to the BR Customers Page.
Save the page, click on the launch option to test the working of the home page to BestRun Customers Page navigation.
Section III: Configure Destination for SAP ES5 Gateway system and link it to Business Partners tile on the Home Page
Now let’s get the Business Partner data from ES5 Gateway system.
Refer to this Developer Tutorial to get an account on the SAP Gateway Demo System
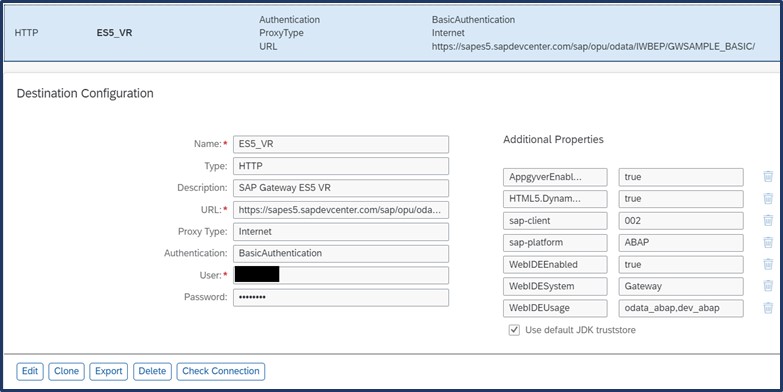
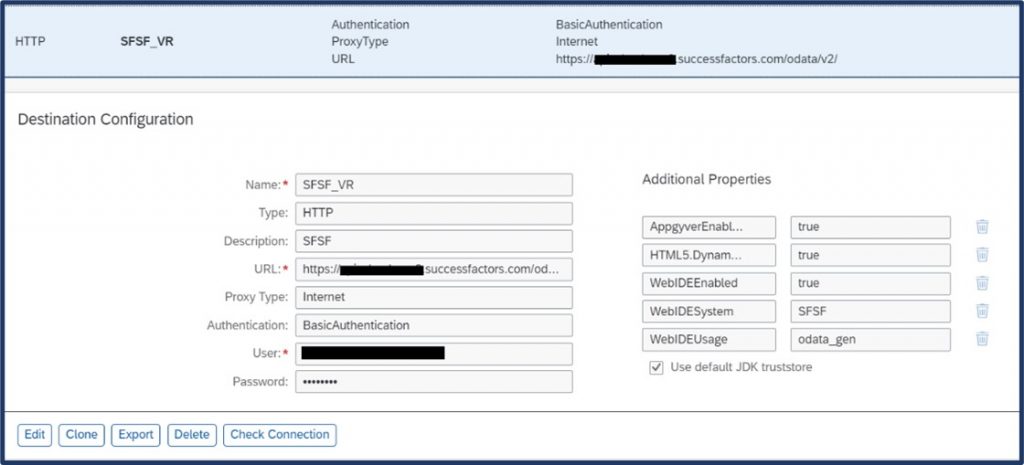
To fetch business partners list from ES5 system, Create a destination for ES5 system in SAP BTP Cockpit.
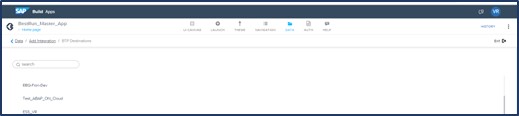
Go to the data tab of SAP Build Apps, to Add Integration to this ES5 destination.
From the available options, select BTP destinations.

You will get to see the destination that was created for ES5.
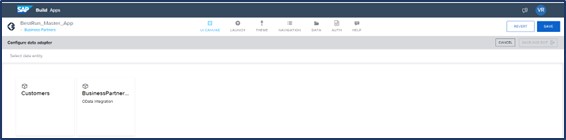
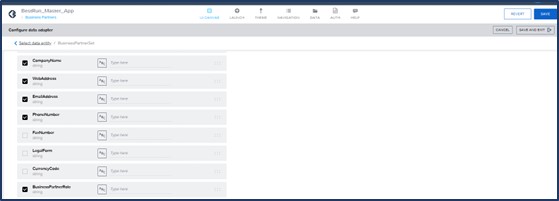
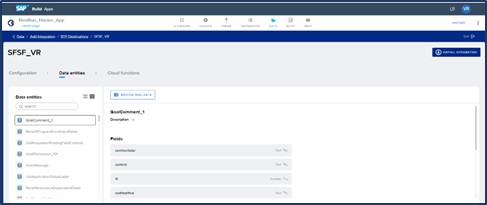
Click on ES5_VR destination to see all the available Data entities in ES5. From the list of entities, select BusinessPartner Set and then click on Install Integration.
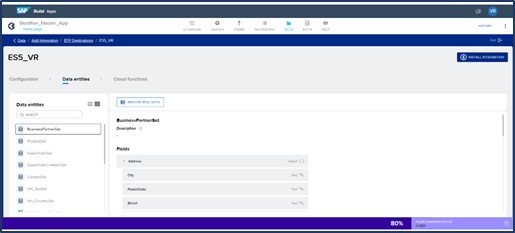
Select the BusinessPartners Set and click on Enable Data Entity.
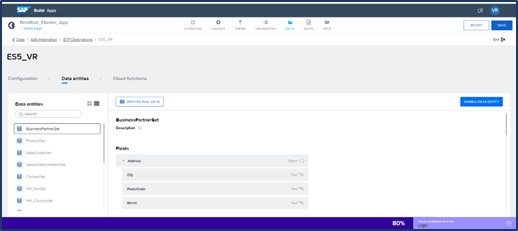
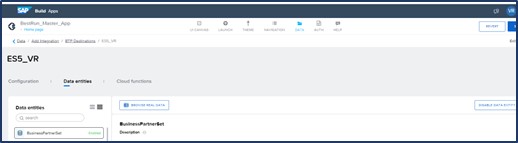
BusinessPartner Set entity gets enabled.
Let’s add a new page to present Business Partners Data. Click on Add new Page.
Specify a name to the page and then click on OK.

Remove the text element and then adjust the title to display BR Business Partners.
Install table component from the components marketplace.
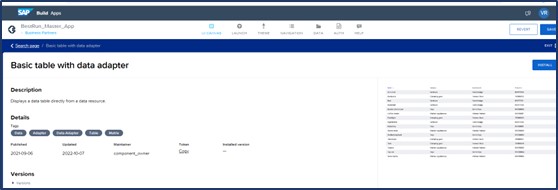
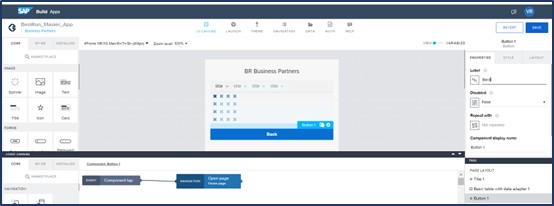
Add the table component into the Businees Partners Page.
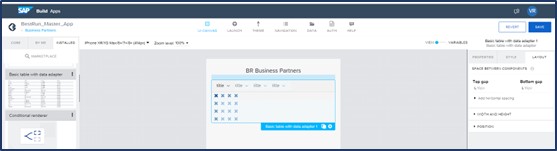
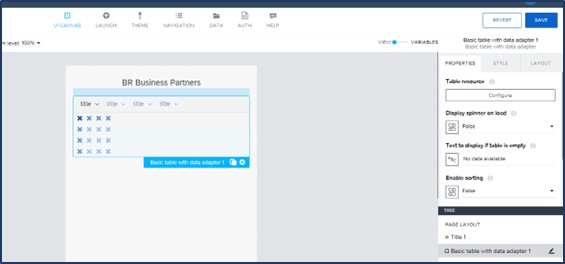
Select the table component and then select configure button in the properties section to bind the table to the Business Partners Set.
Select Business Partner Set.
Select the columns to be displayed in the table and order them based on your requirements.
Add a Back button below the table on click of which we will get navigated to the home / landing page.
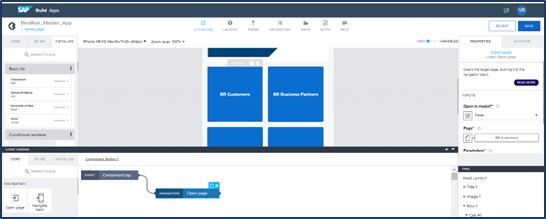
Now we need to link the BR Business Partners button on the Home page to the BestRun Business Partners page.
Click on the Add Logic to Home PAGE option to add this navigation between the pages.
Link Home page to the BestRun Business Partners page using Open Page component.
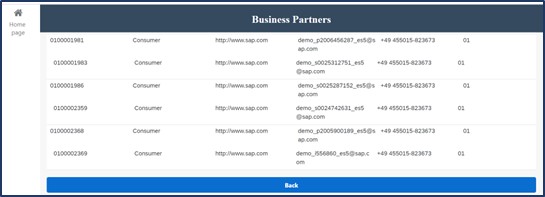
Click on the Launch tab to test the working of Business Partners Page.

Select preview your App to see the Business Partners details.
Section IV: Integrate Northwind Odata as a backend and link it to Orders tile in the Home Page
It’s now time to set the configurations for Orders Page in our App.
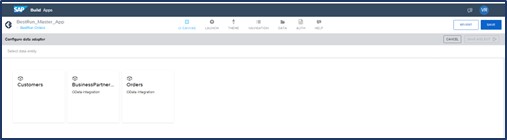
Go to the Data Tab.
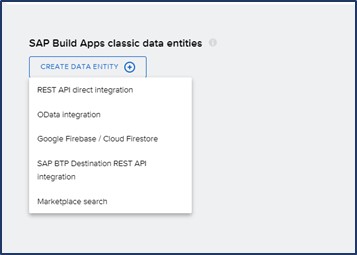
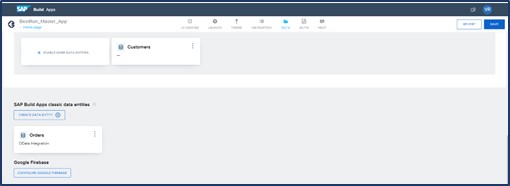
Select Odata Integration under Build Apps classic data entities.
Add northwind odata url under Base API URL.
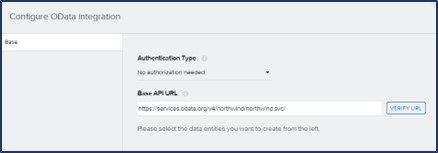
Verify URL.
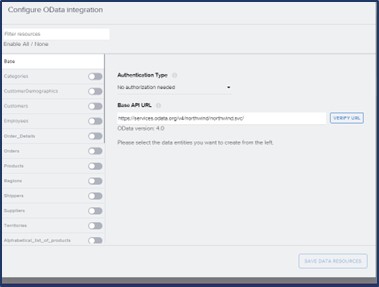
Select Orders entity.
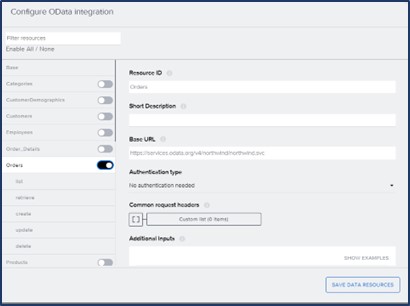
Click on save data resources.
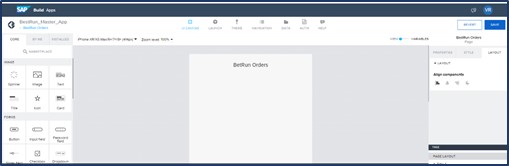
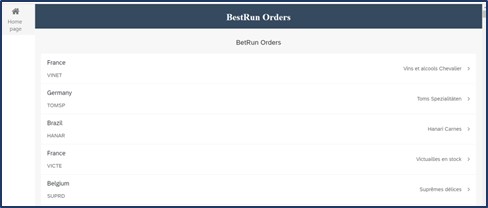
Let’s add a new page to display order details in our App.
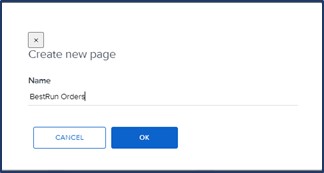
Set the title for the page as BetRun Orders.
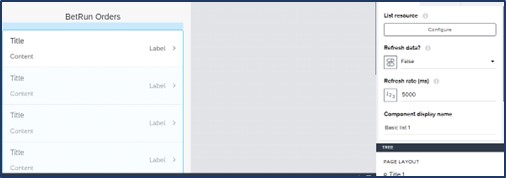
Add a basic list into the page.
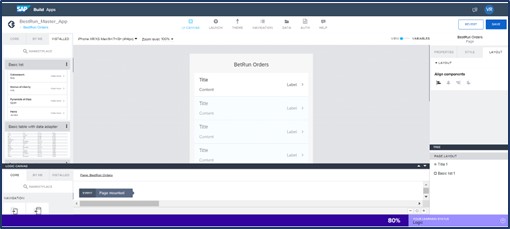
Click on configure to bind the orders entity and the basic list.
Select Orders.
Complete the necessary field Configuration.
Add a Back button below the basic list on click of which we will get navigated to the home / landing page.
Now we need to link Orders page and Home page. Click on the Add Logic to Home PAGE option to add this navigation between the pages.
Let’s preview the app by clicking on the launch tab.
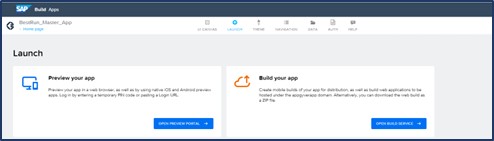
Click on Open Preview Portal to display the order details.
Section V: Configure SF Destination to fetch employee details and link it to Employees tile in the Home Page
Now lets get the Employee data from SAP SuccessFacators.
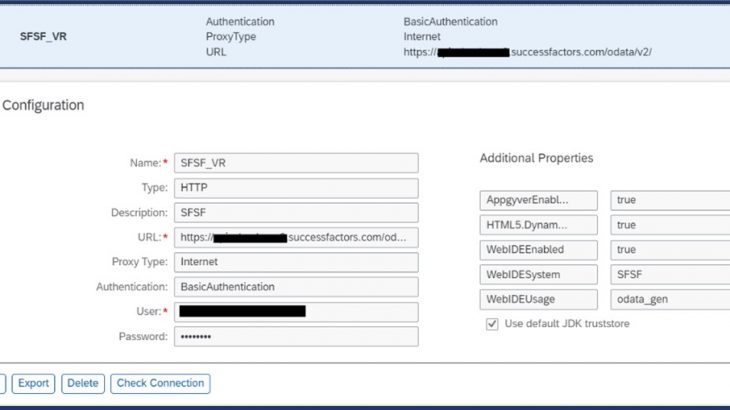
To fetch Employees list from SAP SuccessFacators, create a destination for SF system in SAP BTP Cockpit.
Go to the data tab to add the integration.
Select BTP Destinations.
Select the SF Destination created.

Click on install integration.
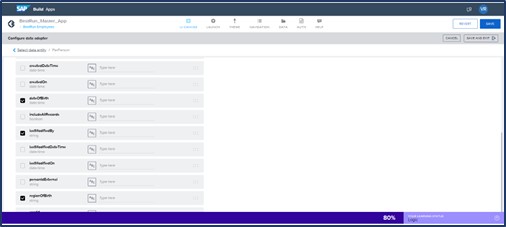
Select PerPerson entity and click on Enable Data Entity.
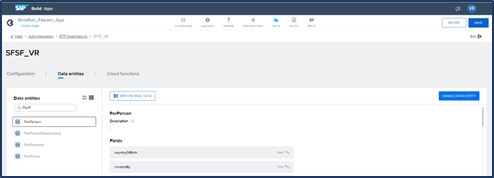
PerPerson Entity gets enabled.

Let’s add a new page in our App for listing Employees.
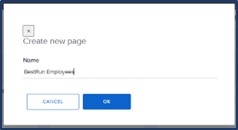
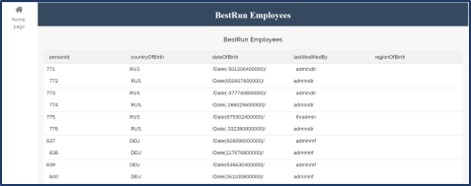
Adjust the title to BestRun Employees.
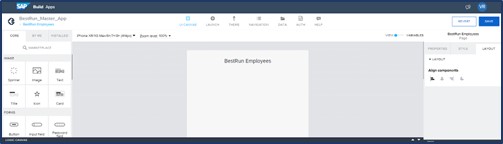
Add a table component to the page.
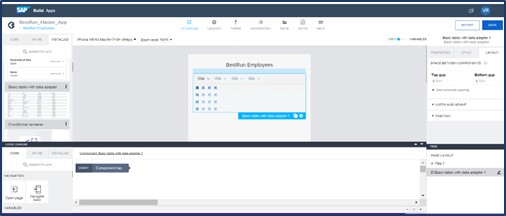
Select the table and then click on configure button under the component’s properties.
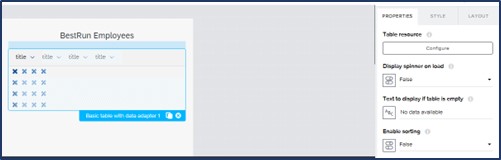
Select and order the fields to be displayed in the table from PerPerson entity.
Add a Back button below the table on click of which we will get navigated to the home / landing page.
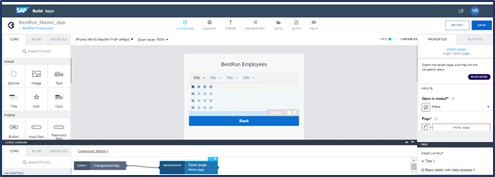
Click on the Add Logic to Home PAGE option to add the navigation between home page and Employees page.
Save the page and then click on Preview your app option under the launch tab.
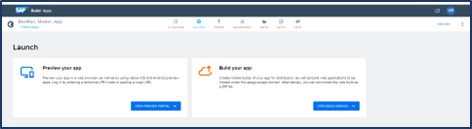
Wait for the preview of the employees page.