
Introduction
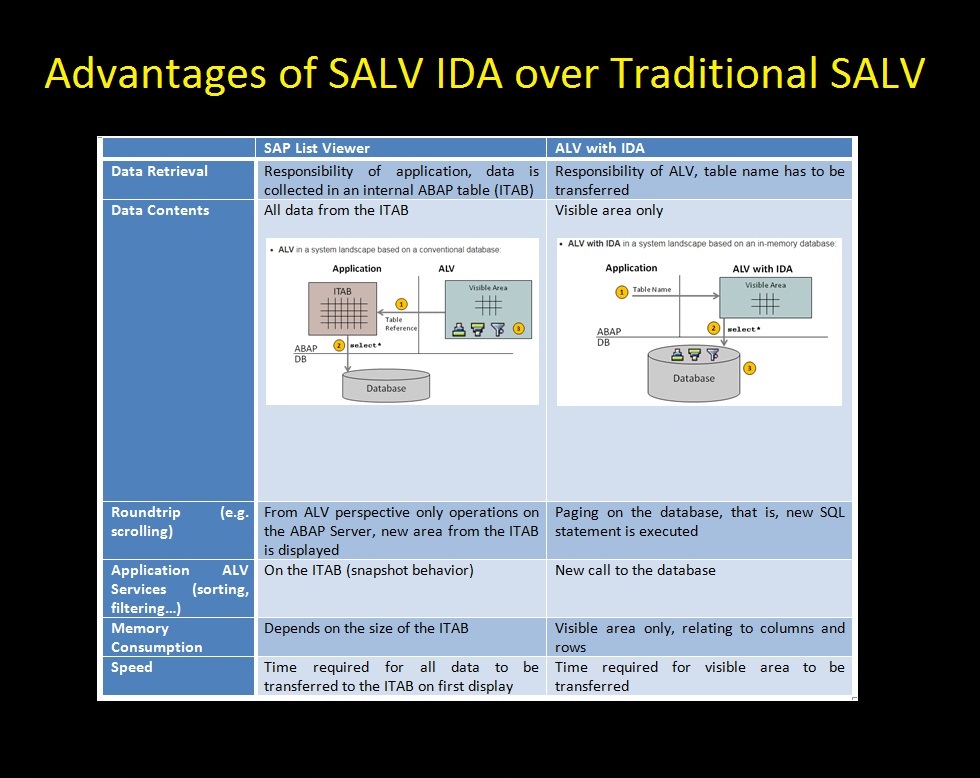
Handling huge amount of data of a table often leads to the performance bottleneck. SAP offers a new version of ALV to deal with the large quantity of data to be displayed on UI resulting improved response for operations like sorting, aggregation or filtering etc. The table below shows the advantages of SALV IDA over traditional SALV.
Program Construct
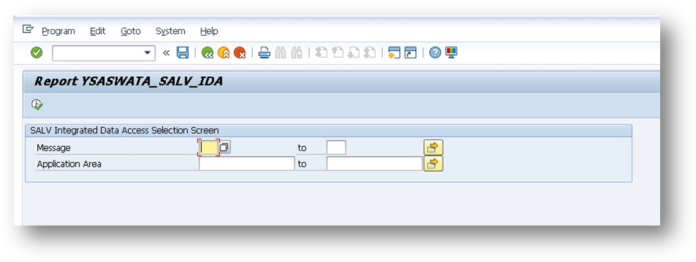
Step – I: Design Selection Screen
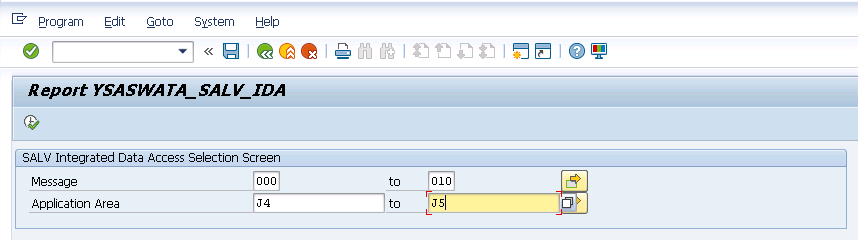
We are going to use T100 table for this SALV IDA. Our selection screen should look like this
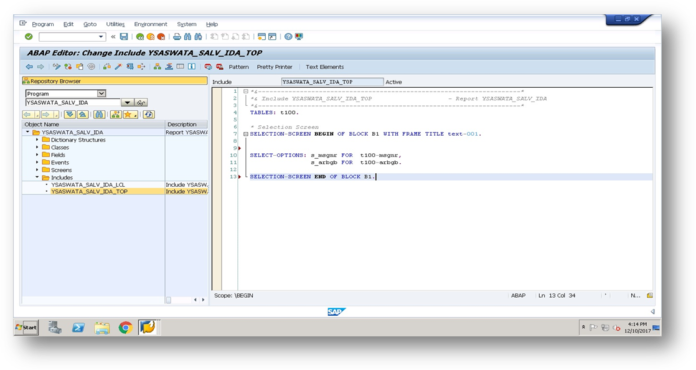
Necessary coding has been done in a separate include – YSASWATA_SALV_IDA_TOP
Step – II: Design Local Class for SALV IDA implementation
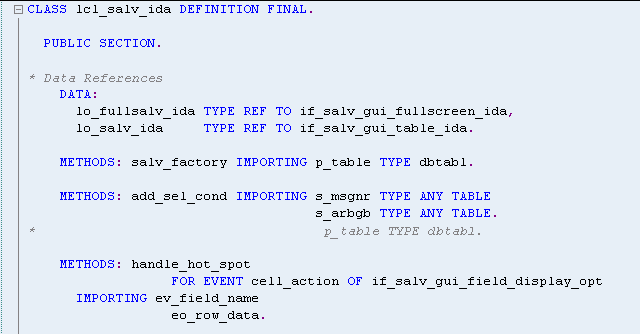
We are going to create a separate include which will hold our local classes and related implementations.
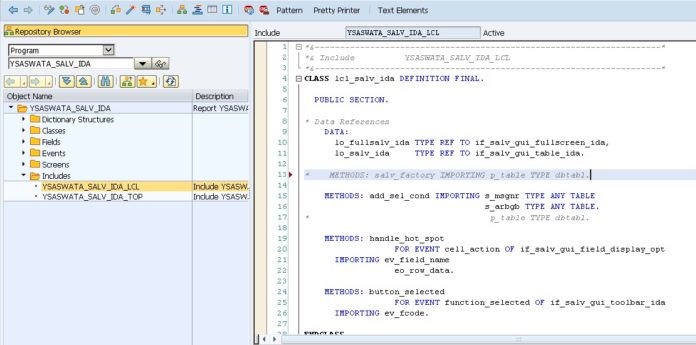
At this point, our prime concern is METHOD – “add_sel_cond” as this will create the factory subsequent to which we will have our other method accesses. Note the importing parameters are message number(s_msgnr) and application area(s_arbgb) since we are passing only these two selection screen select-options and want our data to be filtered on the value passed by the user. You can pass your own select-options as per your requirement.
Step – III: Call SALV IDA Factory
Now let’s see the factory creation method –
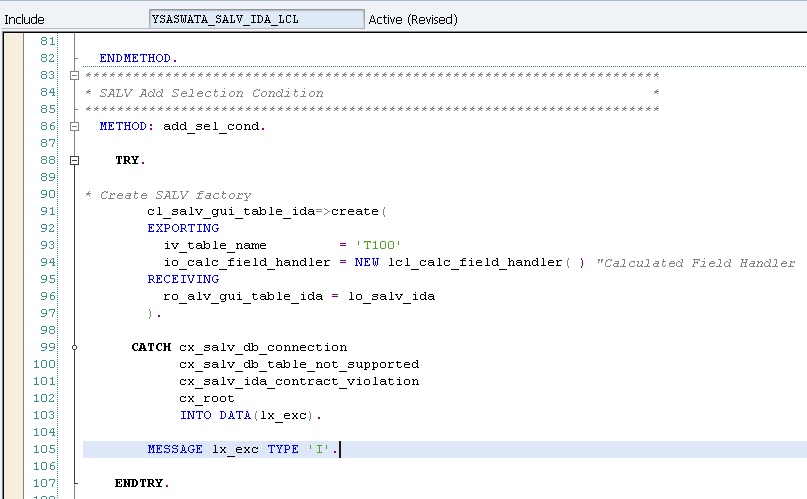
Call the CREATE method of the class – CL_SALV_GUI_TABLE_IDA . At this stage, we can only pass iv_table_name and receive lo_salv_ida (we will come to io_calc_field_handler at a later stage of this document).
Step – IV: Handle Selection Screen Select Options
Since we have select options on the selection screen, we need our table to fetch data from HDB considering the select options values provided. For this, we need to pass the select options to cl_salv_range_tab_collector class. With the object created, we can access add_ranges_for_name method for adding select-options.
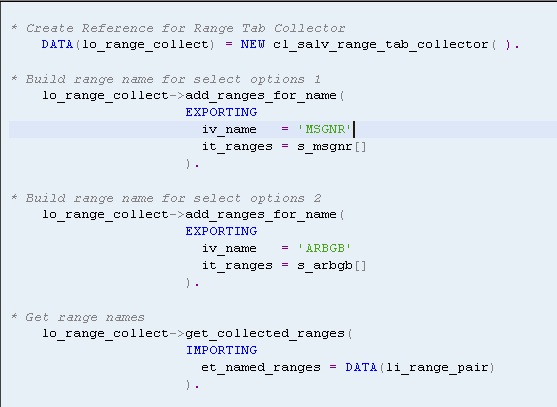
Once the add_ranges_for_name for all the select-options are done, we need to collect them through get_collected_ranges method in li_range_pair table.
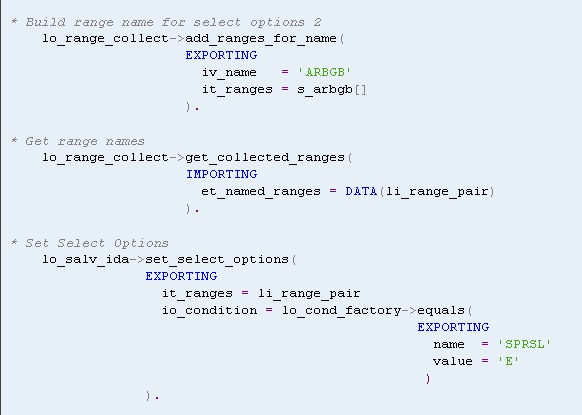
Call set_select_options method of if_salv_gui_table_ida to set the select-options to be processed and pass li_range_pair.
NOTE: You can also add hard conditions just by creating a reference otocondition factory.
* Create Reference for Condition Factory
DATA(lo_cond_factory) = lo_salv_ida->condition_factory( ).

* Set Select Options
lo_salv_ida->set_select_options(
EXPORTING
it_ranges = li_range_pair
io_condition = lo_cond_factory->equals(
EXPORTING
name  = 'SPRSL'
value = 'E'
)
).
Step – V: Handle Calculated Fields
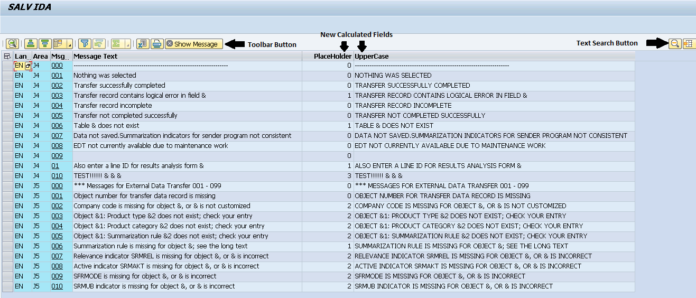
Although we cannot have our own table to be passed to utilize the power of SALV, we can surely add some columns to our final SALV IDA structure based on the derived calculation from existing fields. In this example, we will add two custom calculated columns which essentially hold the count of ‘&’ and uppercase form of the message text present in column ‘TEXT’. You can add your own logic and add as many columns as you want.
To achieve this we need to create a local class and incorporate the if_salv_ida_calc_field_handler interface.
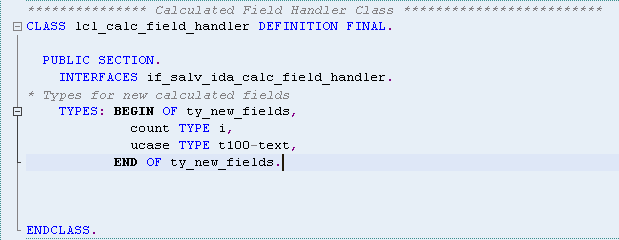
NOTE: I have created a new type (ty_new_fields) of the enhanced structure we are going to use.
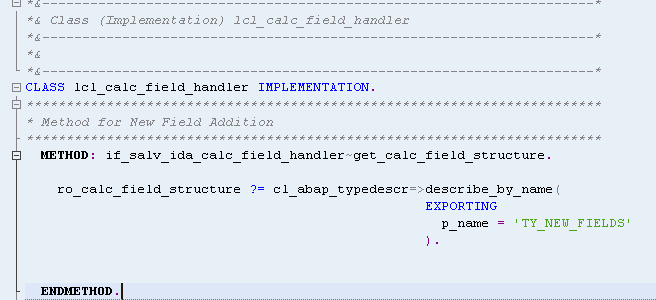
Implement the “get_calc_field_structure”
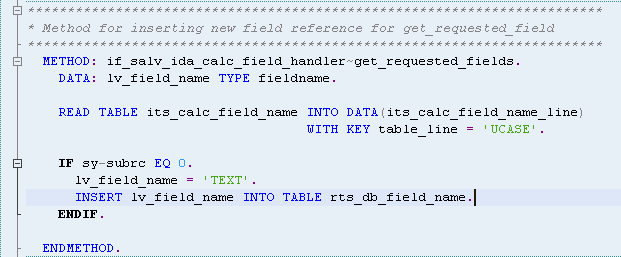
Implement “get_requested_fields”
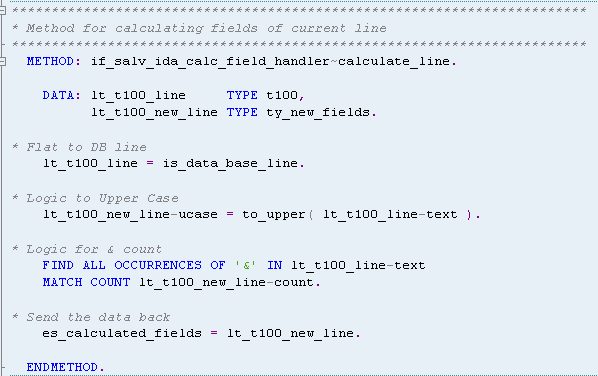
Implement “calculated_line”
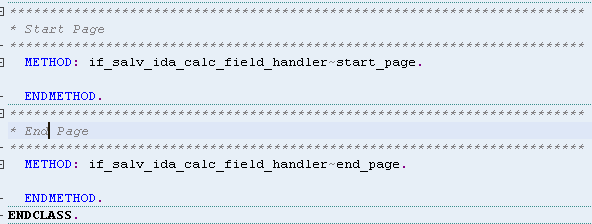
Implement “Start_Page” and “End_Page”
Finally we need to pass this if_salv_ida_calc_field_handler reference to SALV factory to have this functionality available in our SALV.
* Create SALV factory
cl_salv_gui_table_ida=>create(
EXPORTING
iv_table_name = 'T100'
io_calc_field_handler = NEW lcl_calc_field_handler( ) "Calculated Field Handler
RECEIVING
ro_alv_gui_table_ida = lo_salv_ida
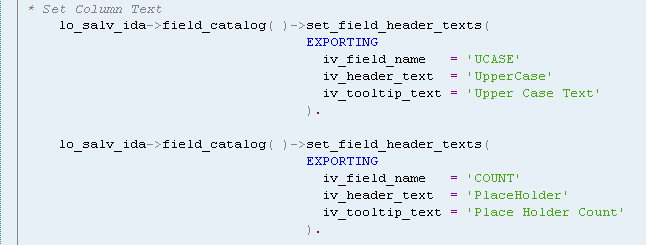
).Set the heading text of newly added column
Step VI – Handle Hotspot Event
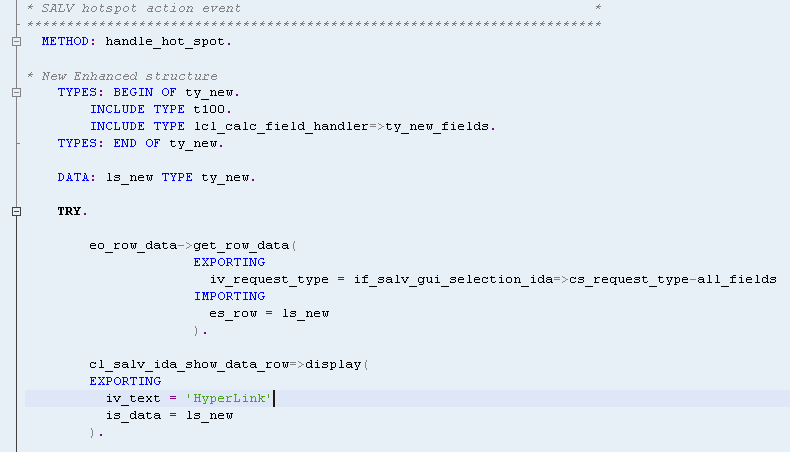
Create an event method to handle the hotspot functionality.
Upon clicking on the hotspot, the row details will be shown. To achieve this functionality we need to introduce the if_salv_gui_selection_ida interface to fetch all field information. To display all fields we can make use of the cl_salv_ida_show_data_row=>display class and method.
Step VII – Handle Toolbar Button (Button Function)
Like any other SALV, it is absolutely possible to add buttons to the application toolbar and plug in custom functionality upon clicking on them.
Create a method (button_selected) of event “Function_Selected” which can be found in if_salv_gui_toolbar_ida.
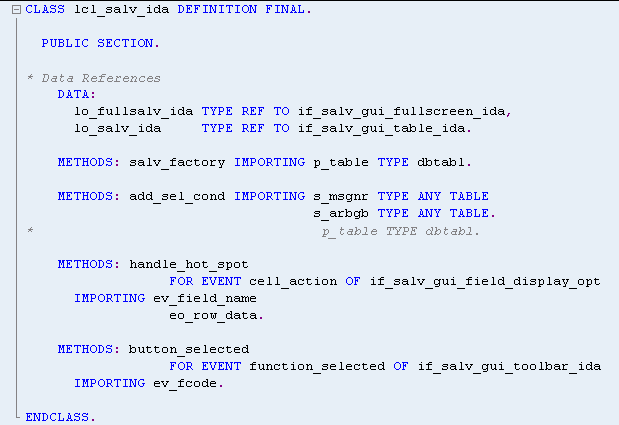
“EV_FCODE” should hold the button function code. Remember to check whether any row is selected or not. Without this condition, if the user clicks on the button without selecting any row subsequent code will be triggered.
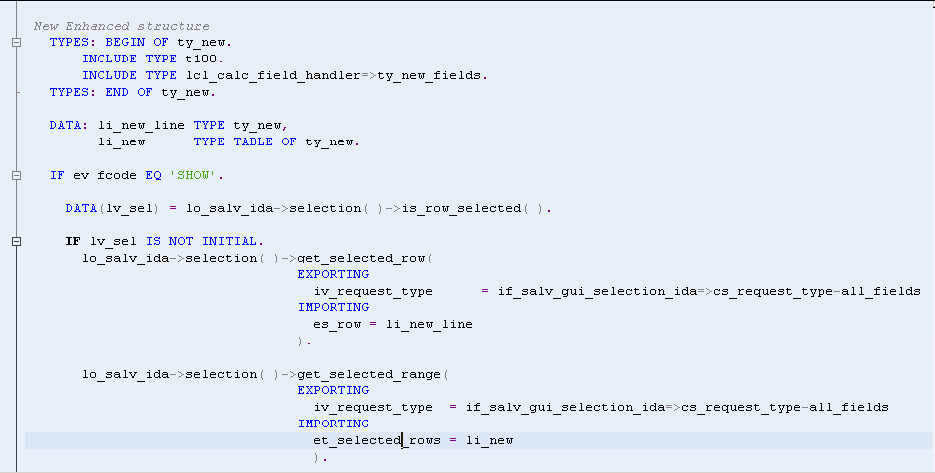
Note – ‘GET_SELECTED_ROW’ is for selecting a single row and ‘GET_SELECTED_RANGE’ is for selecting multiple rows.
You can add your functionality depending upon the value you get in ‘LI_NEW_LINE’ or ‘LI_NEW’.
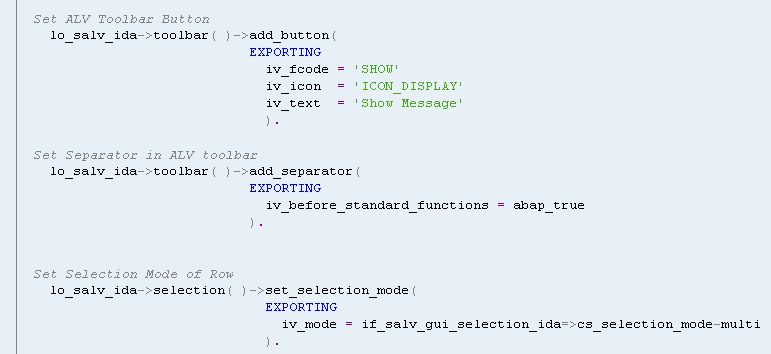
To add the button, we need to use ‘ADD_BUTTON’. For adding separator use ‘ADD_SEPARATOR’. For selection mode of rows use ‘SET_SELECTION_MODE’.
Step VIII – Adding Text Search Functionality
We can add fuzzy search functionality in SALV IDA just with this simple technique.

Restriction – The field on which we want the text search should be a char/string field.
Step IX – ALV Title
You can add the title to the ALV with this one-liner code.

Step X – Add Zebra Pattern

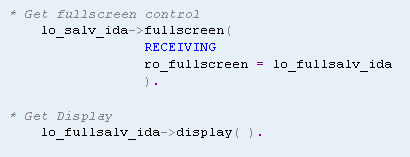
Step XI – Add Full Screen Control
Output
Let’s check the final output of all the coding.
Selection Screen
Text Search


