Production Engineering and Operations module delivered to an extension of standard Production Planning to cover the Engineering and Shop Floor Operations during the shop floor execution. SAP was not delivered the best practices to understand and implement this module in the market, so this blog covers the basic configuration required to execute end to end cycle.
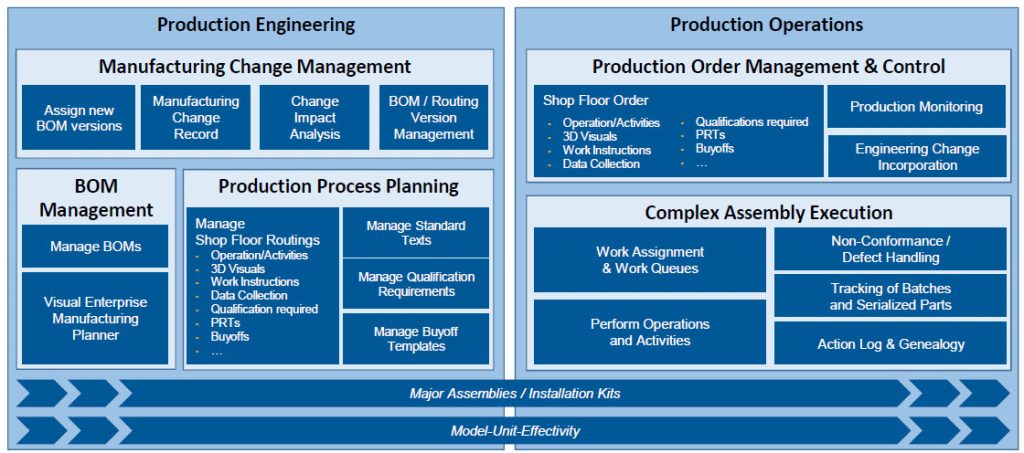
This implementation guide describes the configuration steps you need to perform to prepare your system for working with SAP S/4HANA Manufacturing for production engineering and operations (PEO).
For detailed information, refer to the following sections:
- Apps, Roles, and Authorizations
- Basic Configuration and Setup Activities
- Manufacturing Users
- Manage Teams and Responsibilities
- Settings for Bills of Material
- Date-Effective Scenario
- Unitized and Version-Controlled Scenario
- Non-Unitized and Version-Controlled Scenario
- Settings for Shop Floor Routings
- Settings for Execution
- Parameter Effectivity Settings for Product Unitization
Apps, Roles, and Authorizations
To find the apps relevant to PEO, proceed as follows:
- Open the SAP Fiori apps reference library.
- Choose SAP Fiori apps for SAP S/4HANA by Line of Business Manufacturing.
- Enter PP-PEO in the search field and press ENTER.
- The system displays all the available apps for production engineering and operations.
- Click each app to display detailed product features and implementation information.
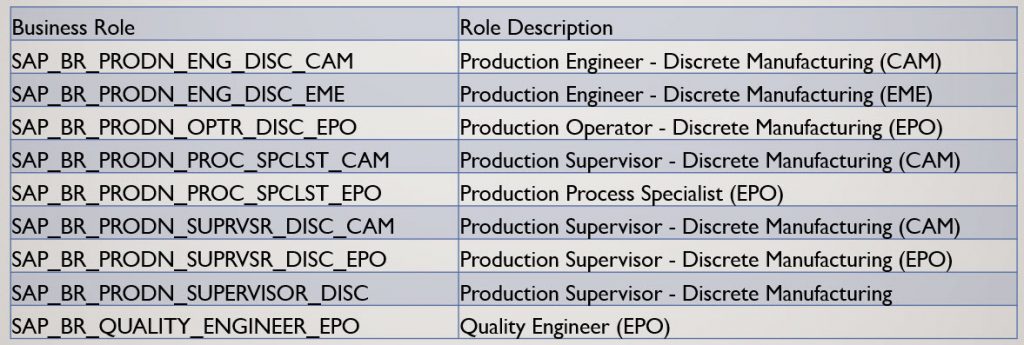
The following subsections describe each of the roles used in PEO and provide an overview of which apps and transactions are assigned to the business catalogs in each role.
Basic Configuration and Setup Activities
This section describes the basic configuration and setup activities that you need to perform to use SAP S/4HANA Manufacturing for production engineering and operations (PEO).
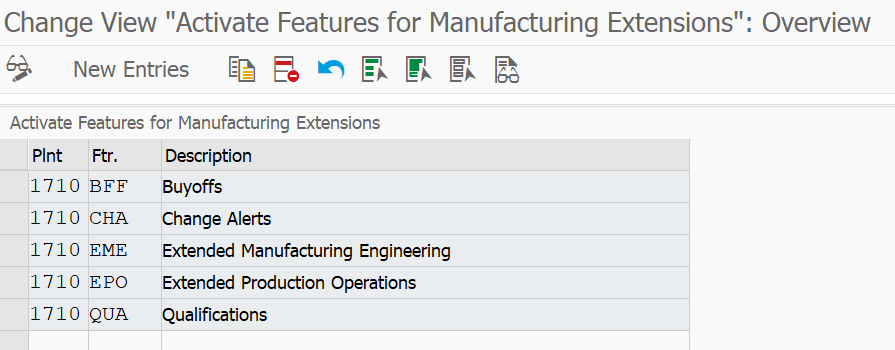
1.Activate PEO in Customizing (SPRO) for Production under Manufacturing for Production Engineering and Operations Activate Features and Acknowledge License Obligations. The following graphic shows an example of Customizing data:
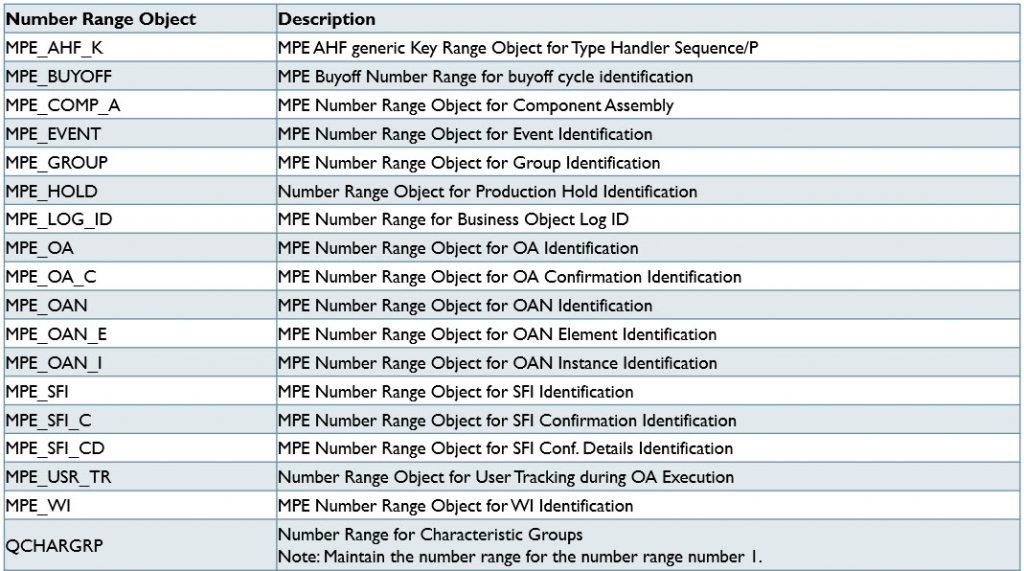
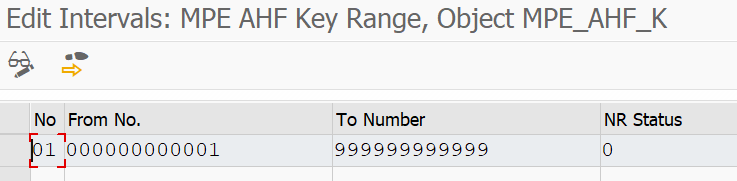
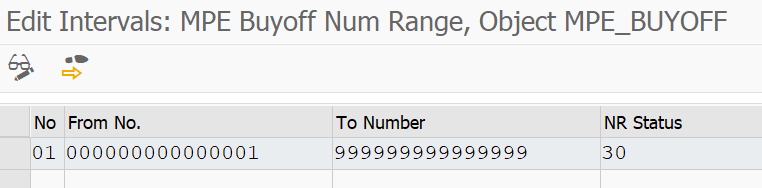
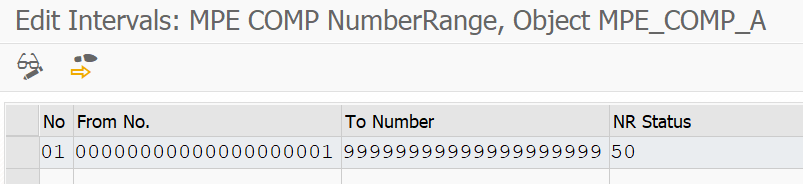
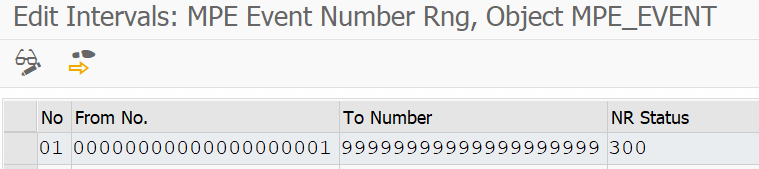
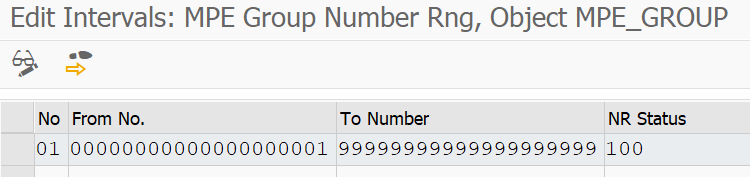
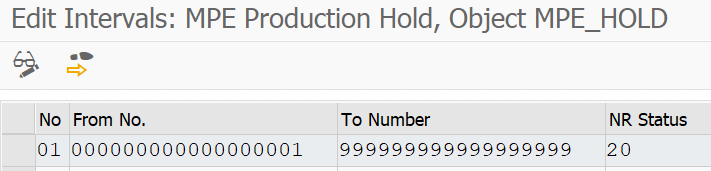
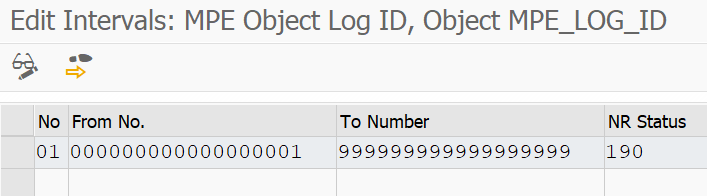
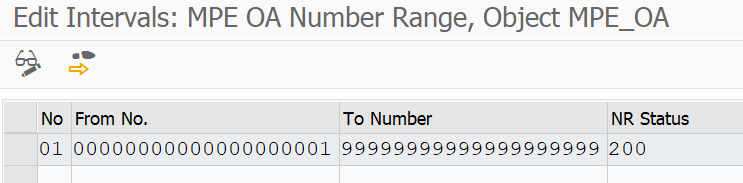
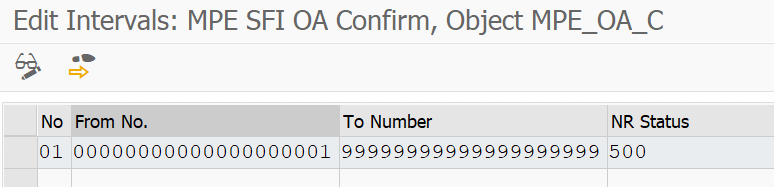
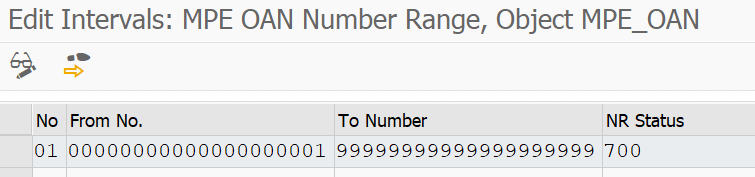
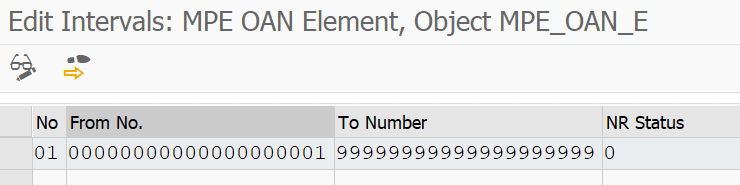
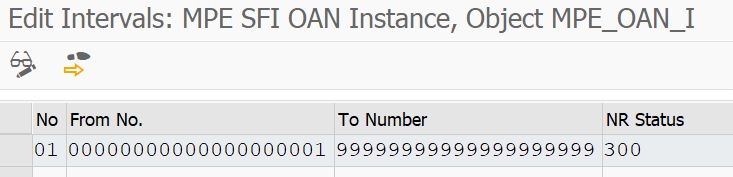
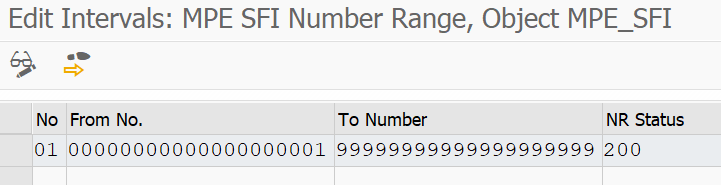
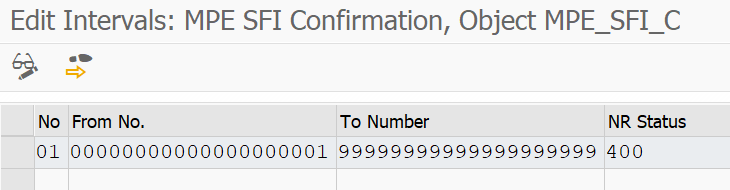
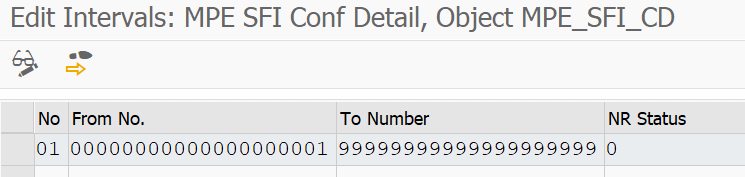
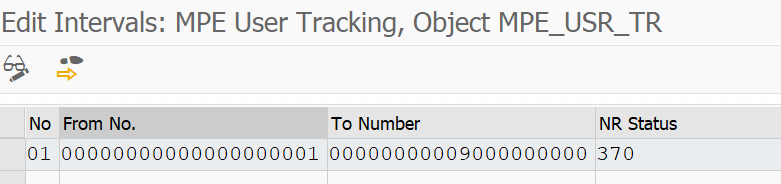
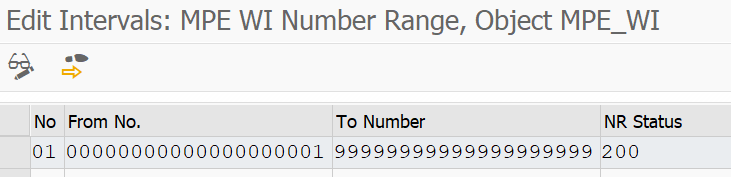
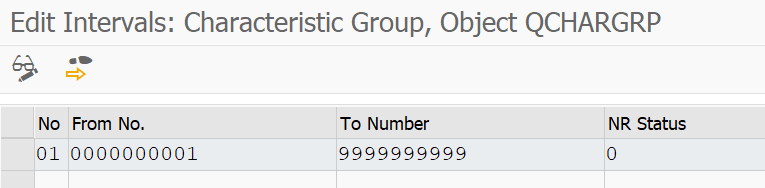
2.Maintain number ranges for the objects listed in the table below:
- Call transaction SNUM in the back-end system.
- Enter the number range object and choose F7 (Interval Editing).
- For each object, create the number range number 01 for the full range and ensure that the External checkbox is deselected.
3. Create business partners and manufacturing users.
In PEO all users need a manufacturing user, regardless of their role.
With SAP S/4HANA, a business user is defined as a natural person who is represented by a business partner and a link to a user in the system. Business users interact with the software in the context of a business process, for example, in the role of a production engineer, a production supervisor, or a production operator.
For creating manufacturing users, you first have to create business partners that are then used as manufacturing users. In general, you can differentiate between two major scenarios for creating manufacturing users in SAP S/4HANA:
- Scenario A: Human resources (HR) integration is active
- Scenario B: Human resources (HR) integration is inactive
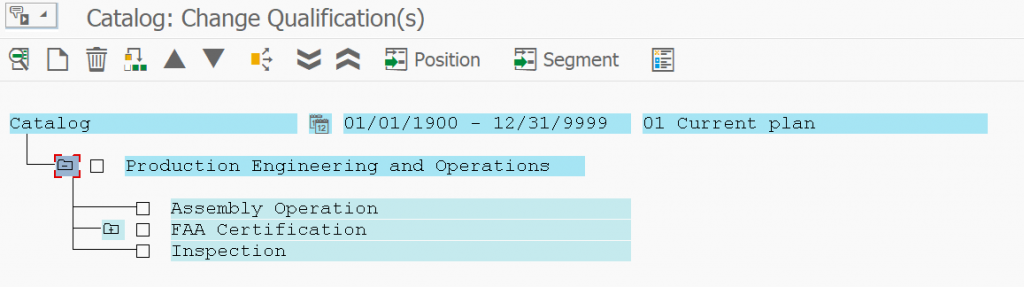
4. Create HR qualifications in Customizing for Personnel Management under Personnel Development -> Master Data -> Edit Scales / Edit Qualifications Catalog.
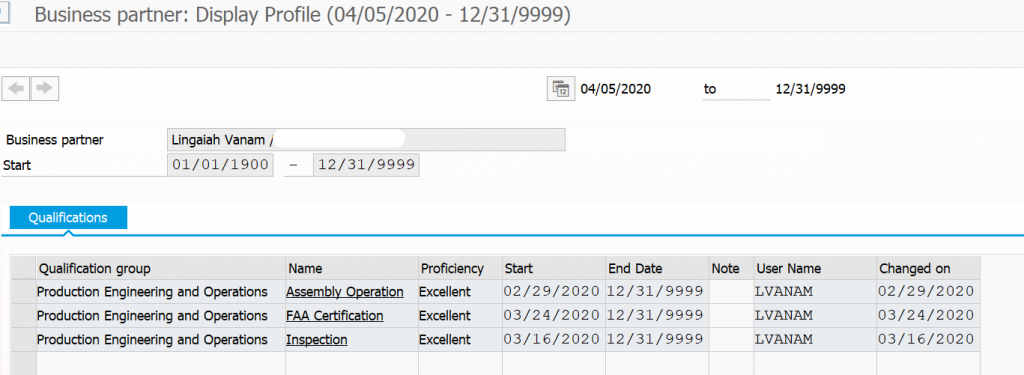
5. Assign qualifications to business partners in HR as necessary.
- Choose Human resources -> Personnel management -> Personnel development -> Profile Change.
- The Change Profile screen appears.
- Select the person you want. For more information on selecting objects in the Object Manager, refer to Working With the Object Manager.
- Double-click the selected person.
- If necessary, change the key date.
- Choose the Qualifications tab page.
- To display a person’s master data, choose Goto HR master data. Choose.
- The Select Qualification dialog box appears.
- Select one or more qualifications that you want to include in the qualifications sub-profile and choose Transfer.
- This takes you back to the Person: Change Profile screen.
- To obtain more detailed information on qualification, select the qualification in question and choose Qualifications Display.
- Select a proficiency for each qualification, and then choose Enter.
- If necessary, change the validity period by changing the values in the Start Date and End date fields.
- If a validity has already been defined for the qualification, the validity period is delimited automatically.
- Save your entries.
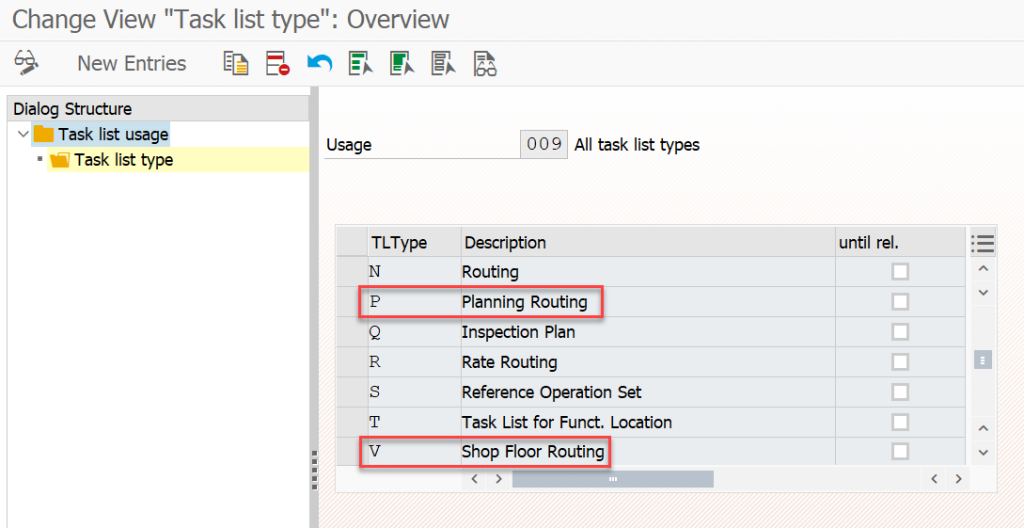
6. Enable work center usage for the routing types V(shop floor routing) and P (planning routing) in Customizing for Production under Basic Data -> Work Center -> General Data -> Define Task List Usage.
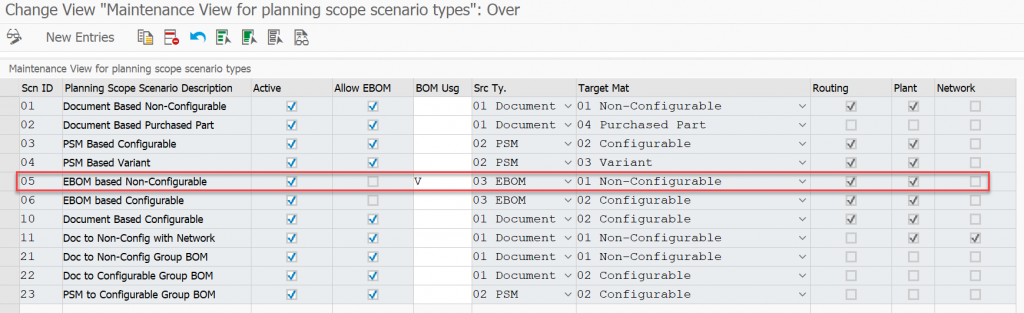
7. Verify that you have configured planning scenario 05 to use the correct BOM usage in Customizing for Productionunder Visual Manufacturing Planner -> Configure Planning Scenario.
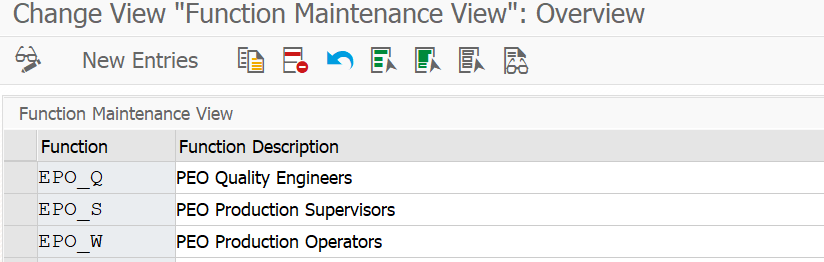
8. Maintain the buyoff configuration in Customizing for Cross-Application Components follows:
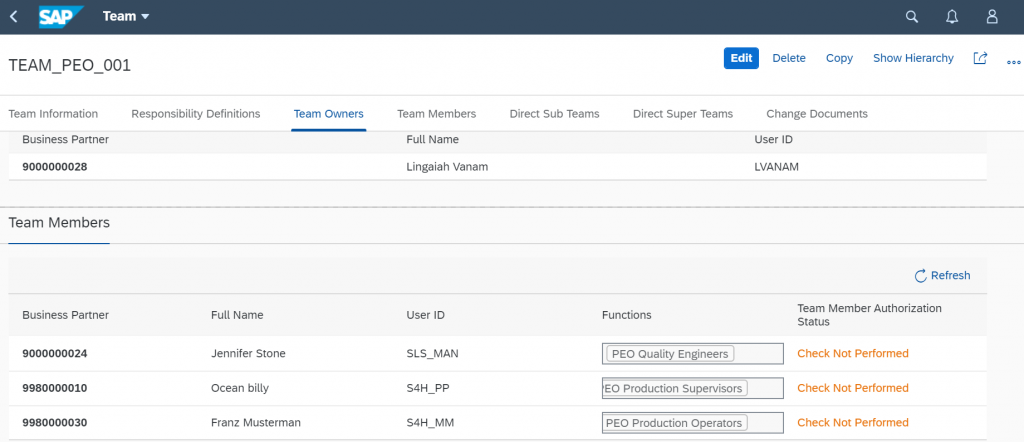
- Define the functions under General Application Functions -> Responsibility Management -> Functions -> Define Functions:
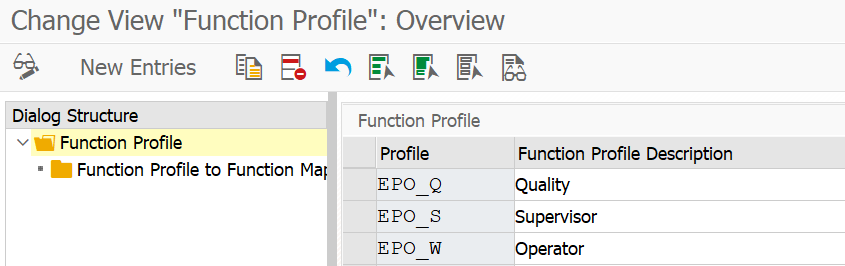
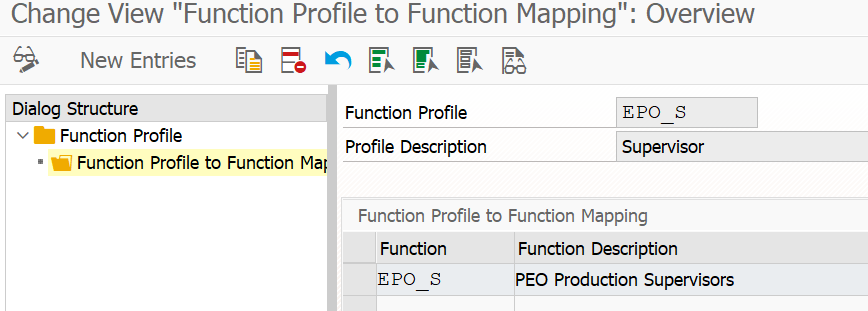
- Define the function profiles under General Application Functions -> Responsibility Management -> Functions -> Define Function Profiles.


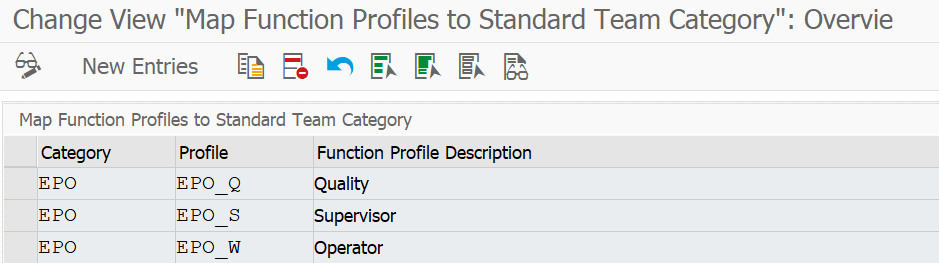
- Map the newly created function profiles to standard team categories under General Application Functions -> Responsibility Management -> Teams and Responsibilities -> SAP Delivered Team Categories -> Map Function Profiles to Standard Team Category.
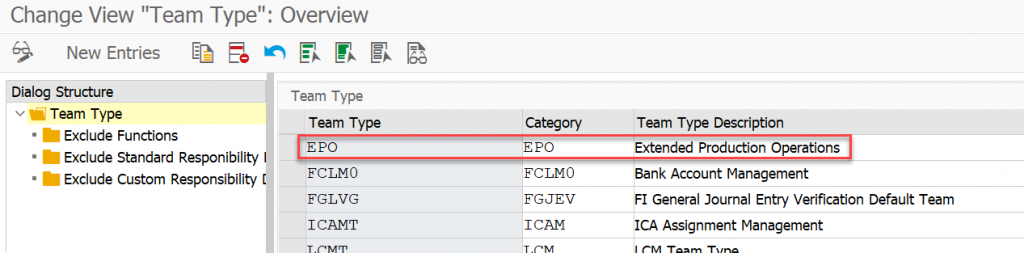
- Enter your team types (freely definable) under General Application Functions -> Responsibility Management -> Teams and Responsibilities -> SAP Delivered Team Categories -> Define Team Types.
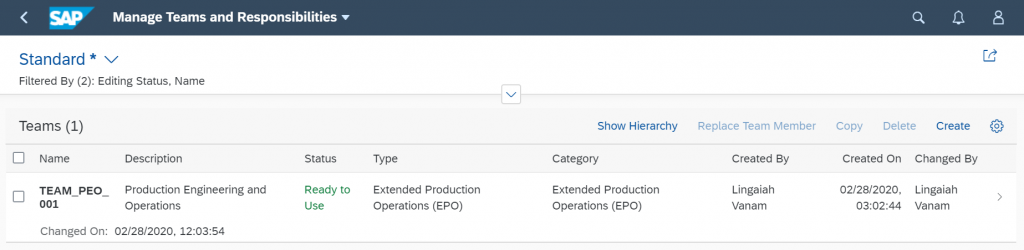
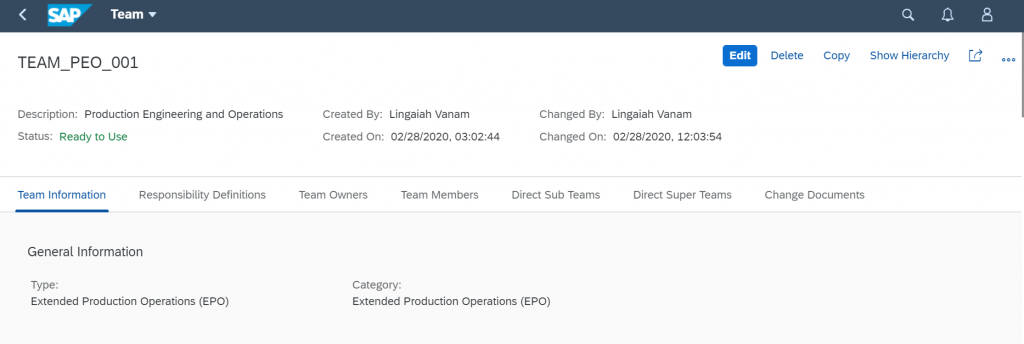
9. Maintain your teams and their responsibilities.
For several functions in Production Engineering and Operations, you must have created the appropriate teams and responsibilities. This is required for the following functions, for example:
- When adding a buyoff to operation activities in the routing, you have to specify the appropriate team and function information.
- When creating buyoff cycle templates, you have to specify the appropriate team and function information.
You maintain teams and responsibilities in the Manage Teams and Responsibilities app.
Settings for Bill of Materials
Date Effective Scenario
- This section describes how to configure settings for bills of material (BOMs) in a date-effective scenario.
- In this scenario, a date-effective engineering BOM (EBOM) is incorporated into a version shop floor BOM. The EBOM can either be directly incorporated into a shop floor BOM or the EBOM can be first incorporated into a (date-effective) planning BOM, which is then used to create the shop floor BOM automatically.
Unitized and Version-Controlled Scenario
- This section describes how to configure settings for bills of material (BOMs) in a unitized and version-controlled scenario.
- In this scenario, a unitized and version engineering BOM (EBOM) is incorporated into a version shop floor BOM. The EBOM can either be directly incorporated into a shop floor BOM or the EBOM can be first incorporated into a (unitized and version-controlled) planning BOM, which is then used to create the shop floor BOM automatically.
Non-Unitized and Version-Controlled Scenario
- This section describes how to configure settings for bills of material (BOMs) in a non-unitized and version-controlled scenario.
- In this scenario, a non-unitized version engineering BOM is incorporated into a non-unitized, version shop floor BOM. In this case, you cannot create planning BOMs because no date effectivity or parameter effectivity is involved.
For all the above 3 scenarios almost all the settings are same and very minor differences.
To configure the date-effective scenario, make the following settings:
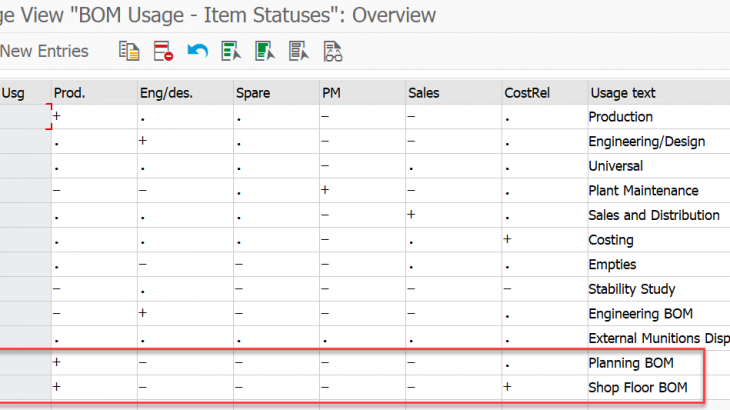
Maintain the BOM usage to enable versioned production. You can do this in Customizing for Logistics – General under Product Lifecycle management (PLM)-> Basic Data -> Bill of Material -> General Data -> BOM Usage -> Define BOM Usages.
Create the following BOM usages, whereby the planning BOM usage is optional:
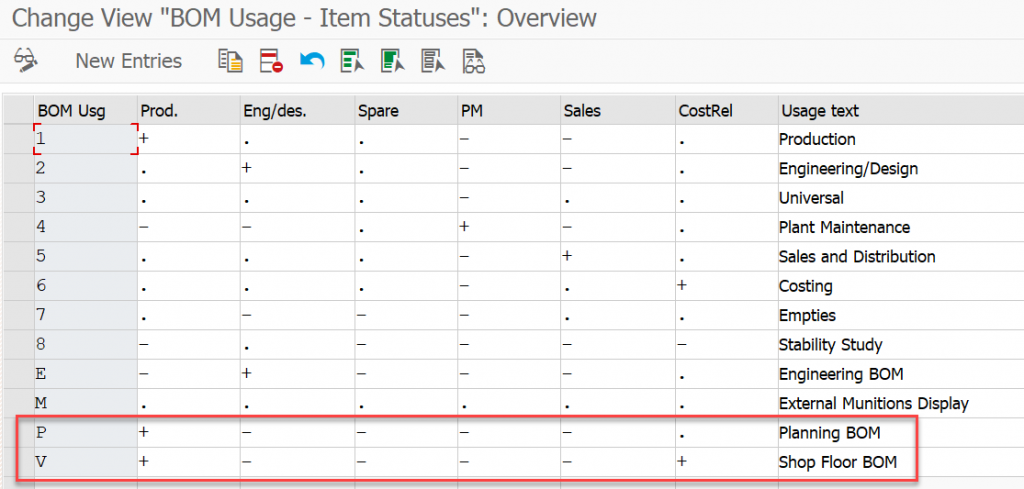
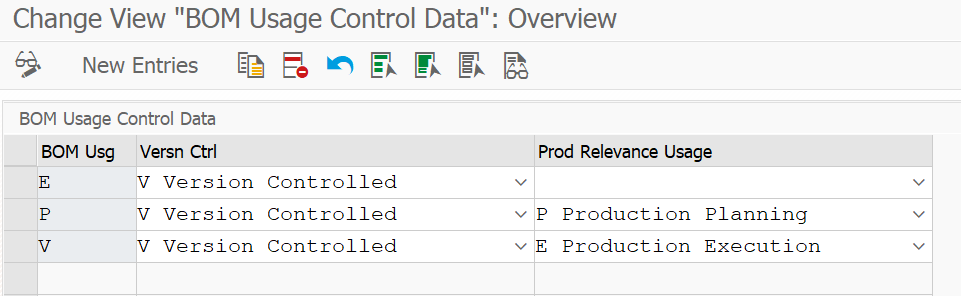
Maintain the control data for the BOM usage to enable the creation of version BOMs. You can do this in Customizing for Production under Manufacturing for Production Engineering and Operations -> Production Engineering -> Define Control Data for BOM Usage.
If you want to work with planning BOMs, configure this setting for the three BOM usages created in the previous step:
Complete the following Customizing settings for the BOM:
Production -> Basic Data -> Bill of Material -> General Data -> BOM Usage -> Define Default Values for the Item Status.

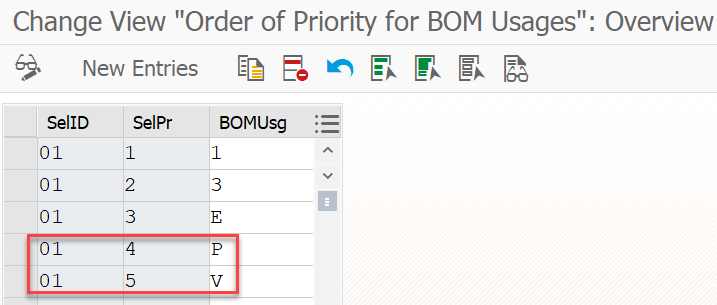
Production-> Basic Data -> Bill of Material -> Alternative Determination -> Define Order of Priority for BOM Usages.
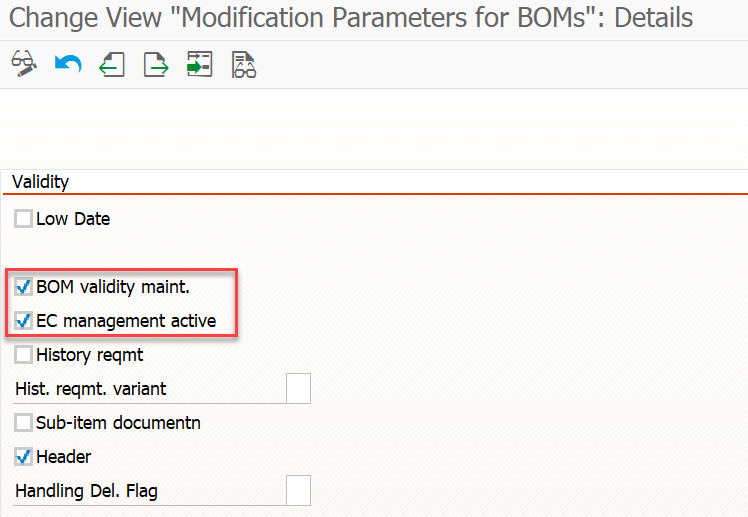
Production -> Basic Data -> Bill of Material -> Control Data for Bills of Materials -> Define Modification Parameters.
Settings for Planning Routing is not considered in this blog, because it depends on the custom requirements. Business users are not interested in set up planning routing and plan materials accordingly.
Settings for Shop Floor Routings
Perform the following Customizing activities:
Define Material Type Assignments: All material types that you want to use in shop floor routings have to be assigned to task list type V.
Production -> Basic Data -> Routing -> General Data -> Define Material Type Assignments

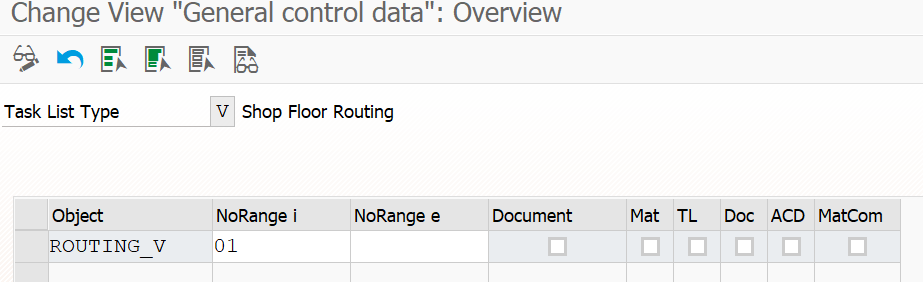
Maintain Task List Types and Set SET/GET Parameters: Maintain number ranges only. Definition of SET/GET parameters not relevant for shop floor routing.
Production -> Basic Data -> Routing -> Control Data -> Maintain Task List Types and Set SET/GET Parameters.
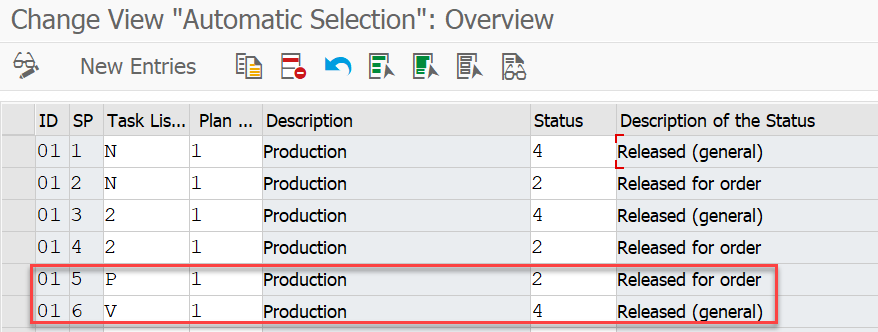
Select Automatically: Selection ID 01, priority 05, TL type P, Usage 1, Status 2
Select Automatically: Selection ID 01, priority 06, TL type V, Usage 1, Status 4
Production -> Basic Data -> Routing -> Routing Selection -> Select Automatically.
Define the version profile in Customizing for Production under Manufacturing for Production Engineering and Operations ->Production Engineering ->Routings Shop Floor Routing -> Define Version Profile. To determine which options you require, refer to the F1 Help in the system. The following graphic shows an example version profile:

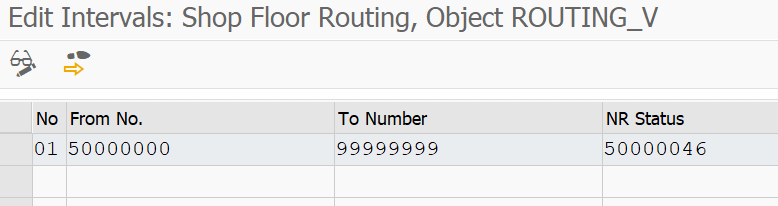
Define number ranges for the shop floor routing in Customizing for Production under Manufacturing for Production Engineering and Operations -> Production Engineering -> Routings -> Shop Floor Routing -> Define Number Ranges for Shop Floor Routing.
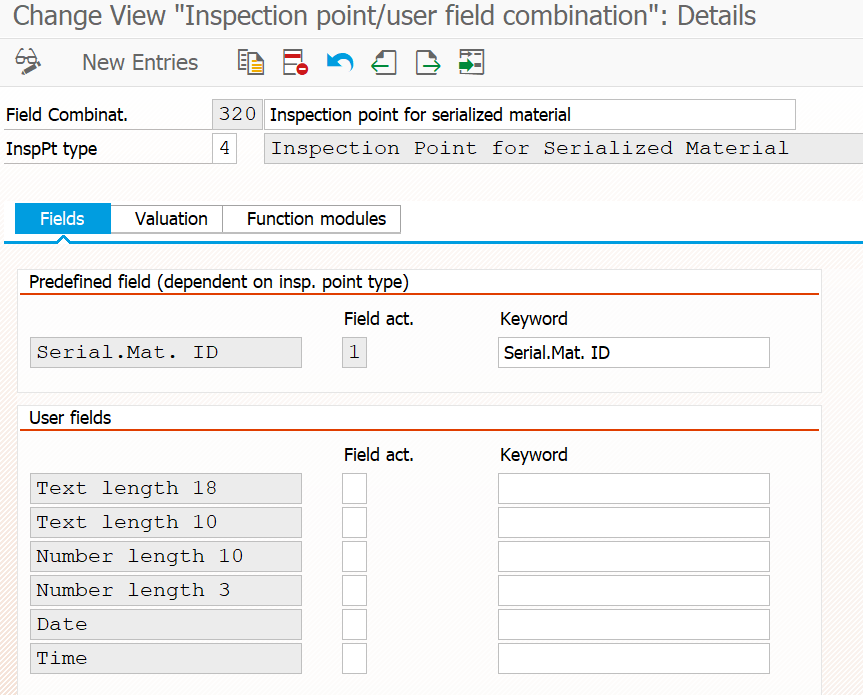
Create a field combination for the inspection point type 4 – Inspection Point for Shop Floor Item in Customizing for Quality Management under Quality Planning -> Inspection Planning -> General Define Inspection Points.
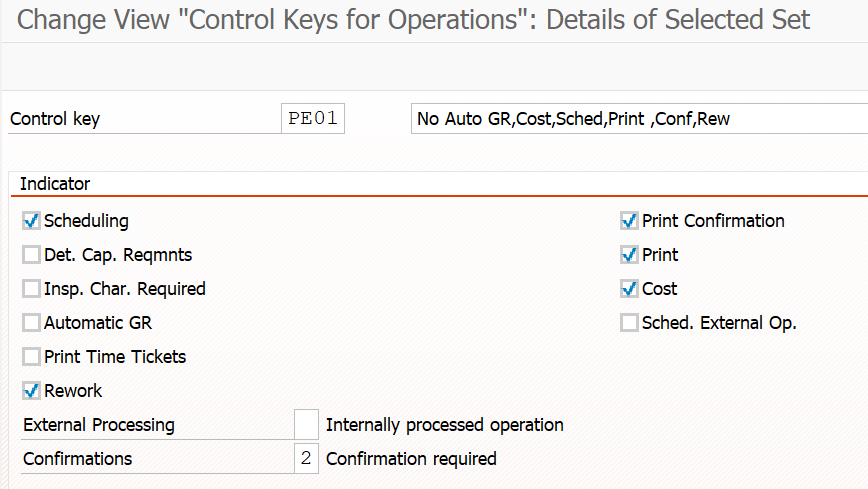
For the creation of rework routings, create a control key that allows rework. You can do this by selecting the Rework checkbox for the control key in Customizing for Production under Shop Floor Control -> Master Data -> Routing Data -> Define Control Key.
Settings for Execution
This section describes the settings you need to configure for production execution.
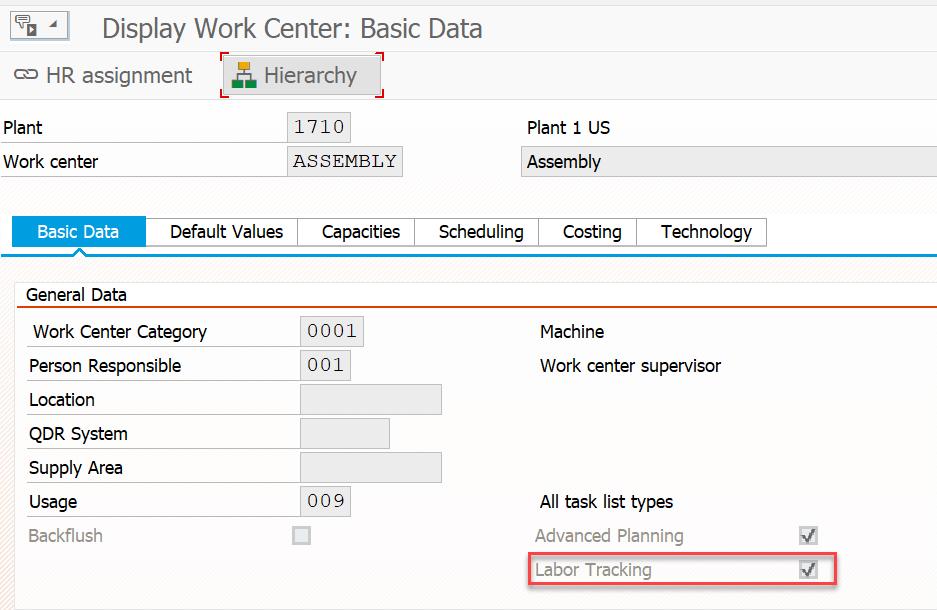
Enable labor tracking in the master data of the respective work center as follows:
- In the SAP Easy Access menu, choose Logistics -> Production -> Master Data -> Work Centers -> Work Center -> CR02 – Change.
- Enter the relevant plant and work center and choose Basic Data.
- In the General Data section of the Basic Data tab, select the Labor Tracking checkbox to activate this feature.
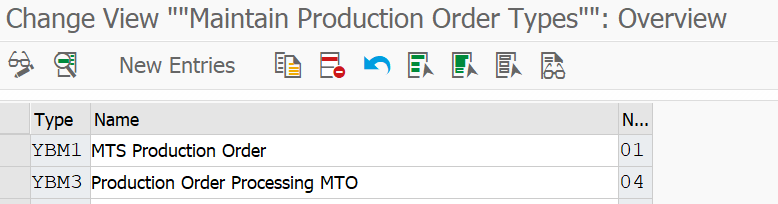
Ensure that production order type YBM1 exists in Customizing for Production under Shop Floor Control -> Master Data -> Order -> Define Order Types.
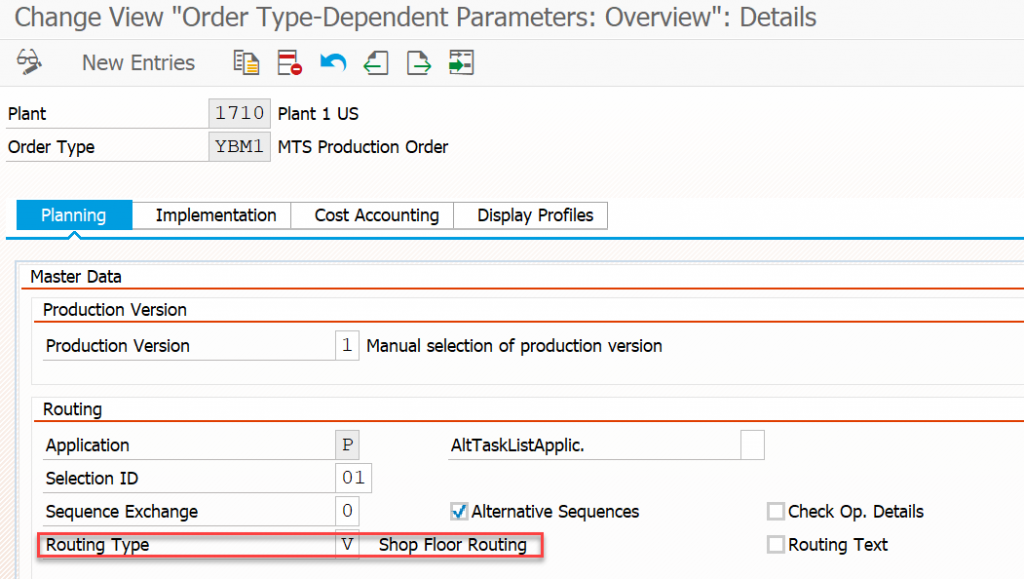
Ensure that production order type YBM1 Routing Type V- Shop Floor Routing exists in Customizing for Production under Shop Floor Control -> Master Data -> Order -> Define Order-Type-Dependent Parameters.
Parameter Effectivity Settings for Product Unitization
This section describes how to configure parameter effectivity for product unitization.
Product unitization allows you to filter the super BOM and related super routing during production to retrieve only the information relevant for that unit and assigned to the production order.
Classical parameter effectivity is used as a foundation for supporting the patterns for product unitization. You define the attributes of an object with an effectivity type that determines whether an object is valid, depending on the values assigned to the parameters of the effectivity type.
To configure parameter effectivity for product unitization, perform the following steps:
Configure the parameters required for effectivity, their descriptions, and effectivity type in Customizing for Cross-Application Components under Engineering Change Management -> Parameter Effectivity.
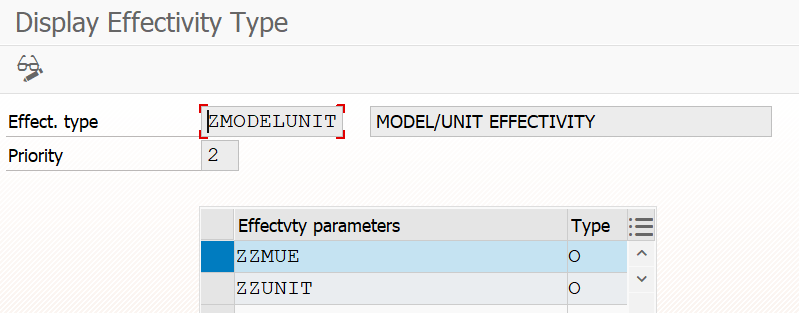
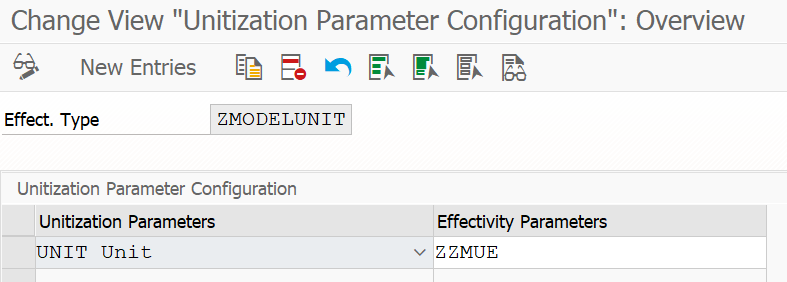
Select the effectivity type to be used for unitization and its parameters in Customizing for Production under Manufacturing for Production Engineering and Operations -> Cross-Applications -> Unitized Product -> Configure Parameter for Product Unitization. A unitization parameter is a Model, Variant, or Unit for which a component can be used.
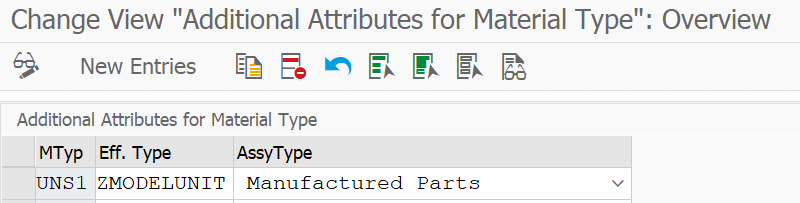
Since you can configure multiple effectivity types for unitization, you need to specify which effectivity type is to be used for which material type. You can do this in Customizing for Production under Manufacturing for Production Engineering and Operations ->Basic Settings -> Define Additional Attributes for Material Type.
Additional material types (copy standard HALB and FERT) to be created for unitized materials.
Maintain a BOM for a material with the material type that has been configured for unitization.


