SAP UI5 Framework offers a special and efficient concept for Navigation between its screens/Views. Let us refresh this all-important concept which every front-end developer (new age ABAPers) would need in every SAPUI5 developments. In the article I am not going to show any SAP screens, I am trying to focus on explanation more.
Prerequisites: Reader must be aware of the basic UI5 framework.
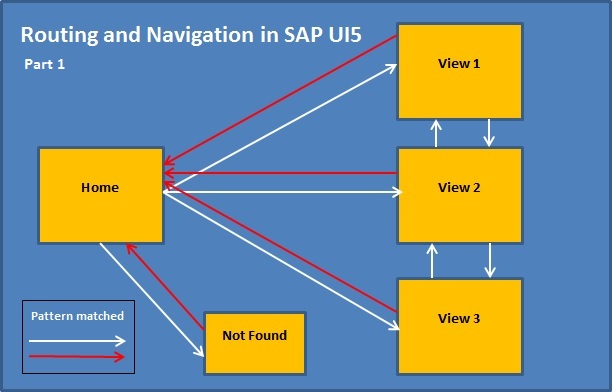
Refer more: Routing and Navigation in SAPUI5 Application.
Sap.m.routing.Router is the class used for Routing and Navigation purpose in SAP UI5 framework.
We define routing configurations in manifest.json file which is also called descriptor file. Routing is defined using routing namespace within sap.ui5 namespace. It has the following properties.
Manifest.JSON file:
“sap.ui5” : {
“routing”:{
“config” : {
“routerClass” : “sap.m.routing.Router”,
“viewType” : “XML/JS”
“viewPath” : “sap.webapp.path.viewfolder”,
“controlId” : “app”,
“controlAggregation”:”pages”,
“bypassed”:{
“target”: “bypasstarget”
}
}
“routes : [{
“pattern”:””,
“name”:”routername”,
“target”:”target1″
},
{
“pattern”:”pattern1″,
“name”:”routename1″,
“target”:”target2″
}]
“targets” : {
“target1”:{“viewName”:”veiw1″},
“target2”:{“viewName”:”view2″}
}
}
}
Now let us see each section and each property in detail.
Config
This section is dedicated to global routing settings. Parameters defined here are applicable across the app.
routerClass defines the kind of router to be used in the app
viewType defines the types of view used in the app. Normally it will be either XML or JS
viewPath defines the path where the views are stored. This path enables the app to download and load the views whenever any target/router is hit. This value is applicable across the application.
controlId defines the control in which the views are to be loaded
controlAggregation defines the aggregation of the above control where the views are filled in. This value is applicable across the application.
For example “pages” is the aggregation for App and “masterPages” and “detailPages” are the aggregations for SplitApp control. If the view is to be loaded in the control other than the one defined in config namespace, controlID and controlAggregation can be overwritten in targets. This is procedure is explained further.
bypassed handles invalid hashtags. When the hashtag is incorrect, ‘target’ defined inside it, will be executed.
Routes
This section defines the routes with hashtags. “Routes” is basically an array of objects. These objects contain pattern, name, and target as its name-value pairs.
“Pattern” defines the hashtag that needs to be added at the end of the URL when it is hit
“name” defines a unique name for the particular route
“target” defines the target which is defined in targets section
Targets
This section defines the names of the views to be loaded when the route associated with it is hit.
viewName defines the name of the view to be loaded.
The Router must be instantiated before it is used. In order to avoid creating multiple instances, the router should be instantiated in the component during the bootstrapping.
Use the below code to initialize the Router in component.js file
this.getRouter().initialize();
In the controller, code logic needs to implemented for navigation. For example: on pressing a button. (button press event)
In the event, we have to first get the reference of Router and execute navTo method. We have already initialized the router in component file. We just need to get the reference. We can access the component content by using getOwnerComponent() method.
this.getOwnerComponent().getRouter() will return the router object. By using this object, all the routing related method can be called whenever necessary. One such method is navTo.
this.getOwnerComponent().getRouter().navTo(“route_name”);
The method navTo helps navigating from one view to another. It accepts route name as the parameter. The route_name is the same name which we have defined in “name” property in routes section. Whenever we execute this method it adds the pattern defined in the route at the end of the current URL and loads the view defined in the target, in the control/its aggregation defined in the config section of routing.
We can also attach an event listener to this route. The event is called Matched event. This event helps to execute the custom logic with in the call back function.
Ex: this.getRouter().getRoute(“routeName”).attachMatched(this._callBackFunction,this);
This will also help us to capture the values passed via route pattern. This procedure will be explained in the Next Part. Along with this concept, the below fundamentals are also explained in Part 2.
- Capturing the data passed to a route
- Annotations used in the route pattern
- Common errors occur while using navTo and display methods.


