Introduction
This blog post covers the use case for communicating an external system or client (for example Postman) with SuccessFactors using Principal Propagation in SAP Integration Suite, that is forwarding the identity of a user across several systems.
Prerequisite for that to work is that the propagated user has an e-mail assigned to him and this e-mail exists as contact information of a user in SuccessFactors. Cloud Integration as a trusted client in SuccessFactors will generate a SAML bearer assertion using the e-mail of the user to propagate the identity to SuccessFactors.
Let’s differentiate 2 sub-use cases. First, when the client uses basic authentication and second, when the client uses client certificates. If the sending system uses basic authentication while calling the SAP Integration Suite, then it is enough with Cloud Integration service for this to work. In the configuration explained below, the steps 1, 5 and 6 will not be needed. The client will use an existing user in SAP Integration Suite while doing the call, and with his e-mail the integration flow will propagate his identity to SuccessFactors.
But if the client uses client certificate authentication, then the scenario gets a bit more complicated. In Cloud Foundry we do not map the client certificates to users as in Neo, but to service keys. That means, that there is no way to propagate the identity of a user between systems. But for that there is a roundabout way using SAP API Management to initiate an OAuth2SAMLBearer grant flow. Here SAP API Management, as a trusted issuer, will generate a SAML artefact and exchange it with SAP BTP’s XSUAA for a JWT token that can then be presented to Cloud Integration
The configuration steps are:
- Setup SAP API Management as a trusted Identity Provider
- Download public key of the SAP Destination service from subaccount
- Register subaccount as OAuth client in SuccessFactors
- Create your integration flow in Cloud Integration
- Enable two-way SSL in SAP API Management
- Create the API Proxy in SAP API Management
- Set client certificate authentication in your external system
1) Setup SAP API Management as a trusted Identity Provider (just for client certificate authentication)
In this step you will need to trust a new custom Identity Provider in your SAP BTP subaccount, so that SAP API Management can have a trusted relationship with XSUAA to enable SAML2Bearer grant flow.
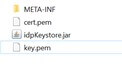
In this post you can see how to generate the certificates for signing the SAML Assertions (see the chapters “Generate Certificate for Signing SAML Assertion” and “Generate JAR containing Certificate”) and how to obtain the SAML Metadata for the new Identity Provider (see the chapter “Generate SAML IdP Metadata”). After generating the certificate, you should have the following files (certificate, key and keystore):
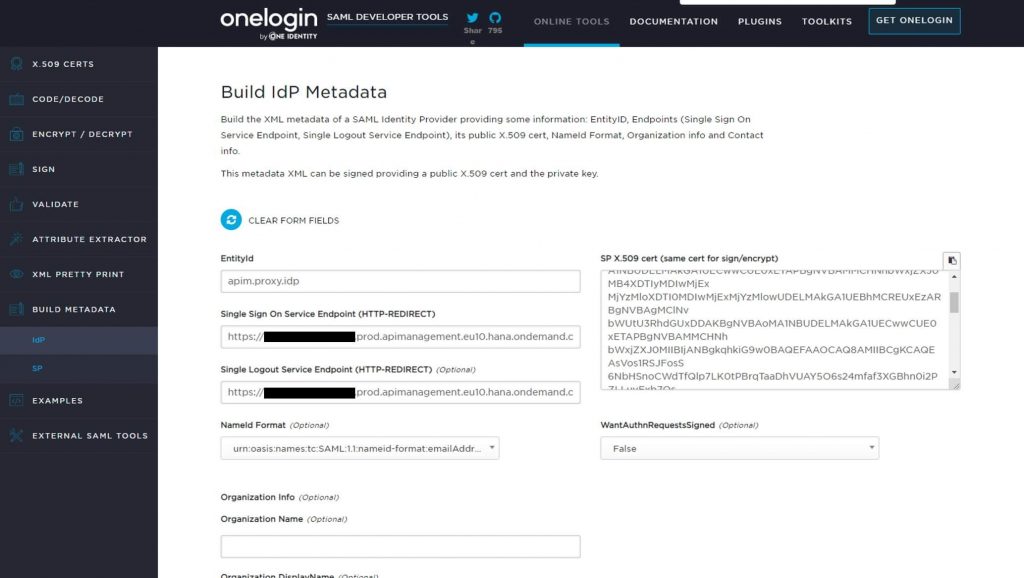
As explained in the same blog post, you can use a tool like https://www.samltool.com/idp_metadata.php to generate the metadata for your new custom Identity Provider. Give an EntityId (apim.proxy.idp in the example), an Http redirect url (not relevant) and as SP X.509 cert paste the content of the cert.pem generated in the previous step.
Next step is trusting the new Identity Provider in your subaccount. Go to Security–>Trust Configuration and upload a New Trust Configuration.
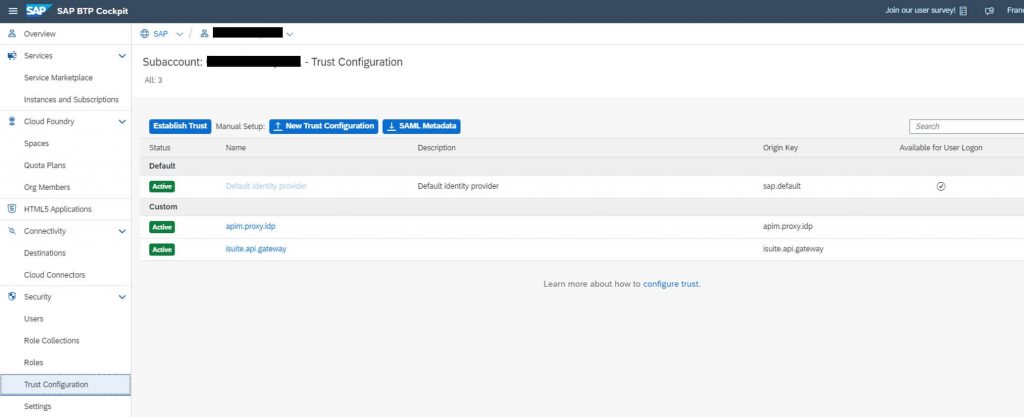
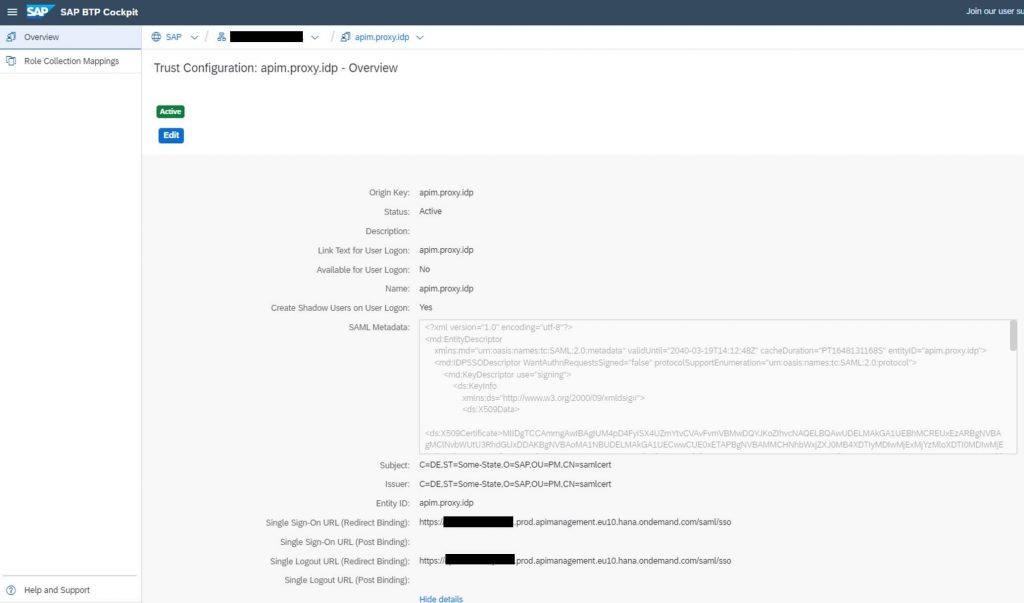
Select the Metadata XML file generated in the previous step and provide a name for the Identity Provider (apim.proxy.idp in the example). You probably would like to disable the flag Available for User Logon, so that you keep on using the default Identity Provider to access the Cloud Integration WebUI. The flag Create Shadow Users on User Logon allows you to automatically create a user in this Identity Provider when a request arrives, otherwise the user must exist in this Identity Provider before doing the call or you’ll receive a 401 Unauthorized error.
Next step is to create or reuse an existing role collection with the MessagingSend role assigned to it to allow the generated JWT Token to execute the integration flows. If you have configured your integration flows to use a different role, then this different role must be assigned to the role collection.
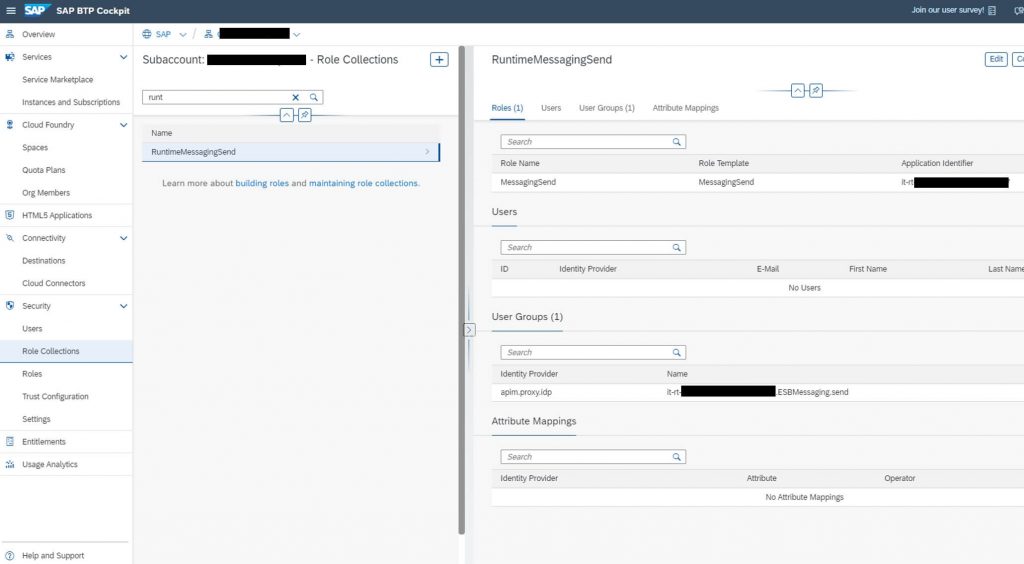
In the new custom Identity Provider map the attribute group given when generating the SAML artefact to the above mentioned role collection. In this example, the attribute group is called “it-rt-….ESBMessaging.send” and will be configured in the API policy in step 6 – Create the API Proxy in SAP API Management–>samlHelper.js–>AttributeValue.

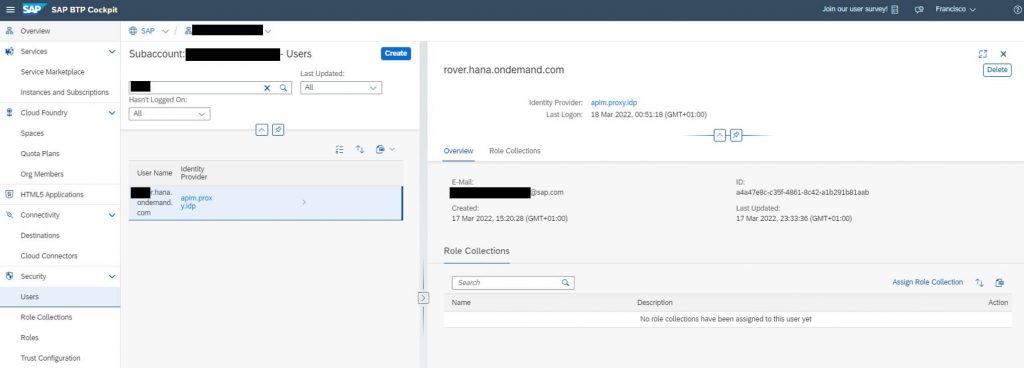
As said before, if you do not allow shadowing users, then the needed user must be created manually for the new Identity Provider in the SAP BTP cockpit. The user does not need any role as it will be given while generating the SAML assertion. In this example, I will use the common name of the client certificate as username.
2) Download public key of the SAP Destination service in subaccount
SuccessFactors needs to trust the public key of the SAP Destination service of your subaccount, that will be the responsible for generating the SAML assertion against SuccessFactors. For that, go to Connectivity–>Destinations and use Download Trust or Download IDP Metadata to extract the public certificate.
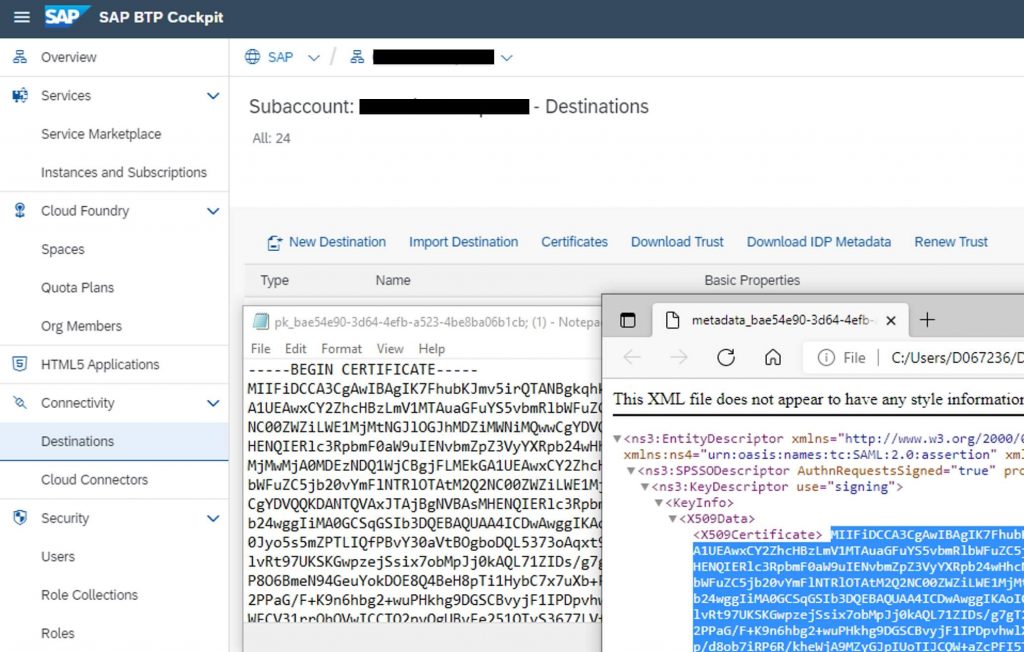
This public key will be needed in the next step.
3) Register subaccount as OAuth client in SuccessFactors
In SuccessFactors you need to register a new OAuth client with the public key downloaded from your subaccount in the previous step.
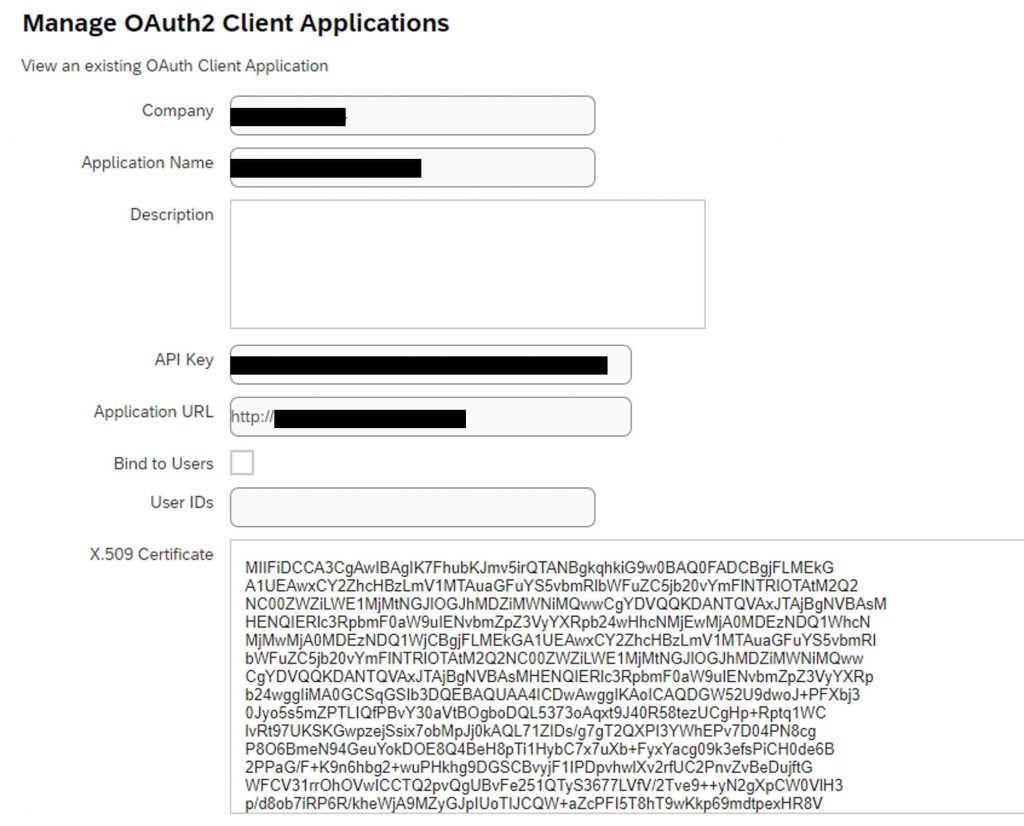
The API key generated will be needed in the next step.
4) Create your integration flow in Cloud Integration
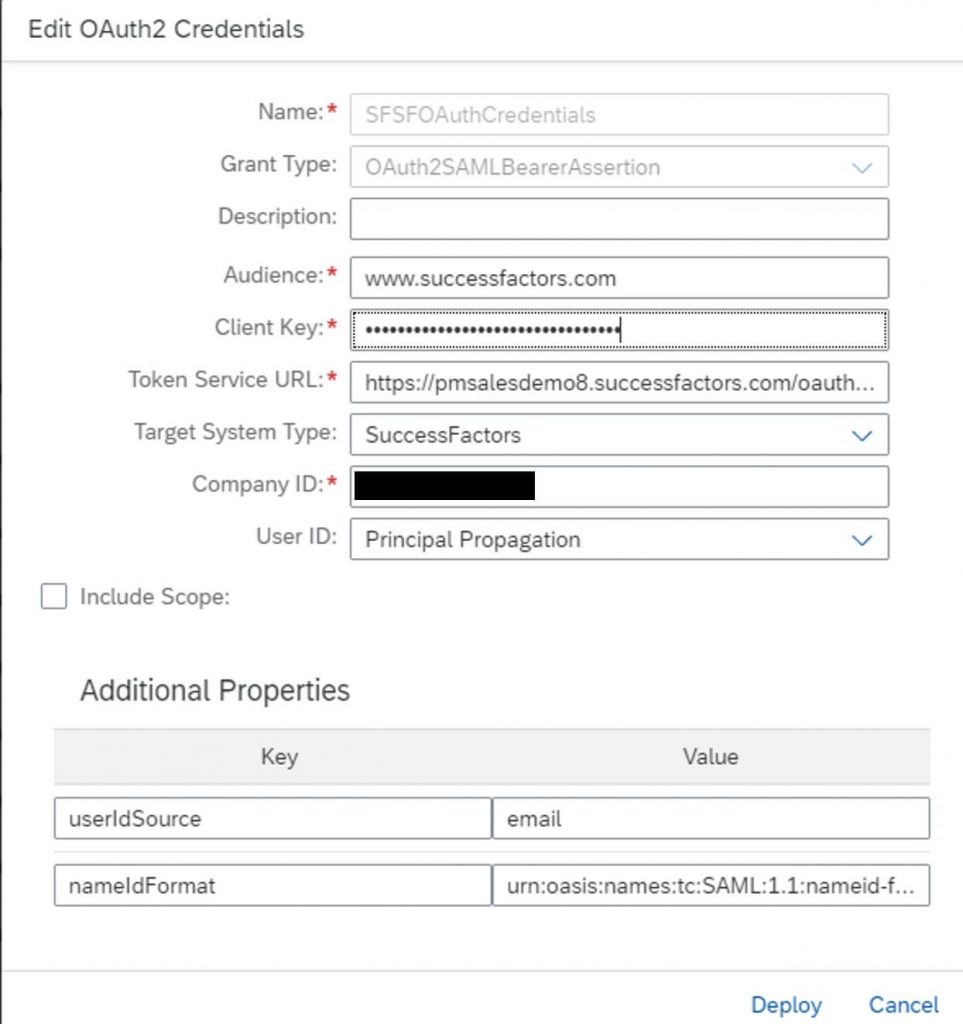
In Cloud Integration add a new OAuth2 SAML Bearer Assertion security artifact of type SuccessFactors. As Client Key enter the API key generated in the previous step. You must enter here https://<successfactors_api_url>/oauth/token as Token Service URL.
You need also your Company ID. Enter email as userIdSource property and urn:oasis:names:tc:SAML:1.1:nameid-format:emailAddress as nameIdFormat property.
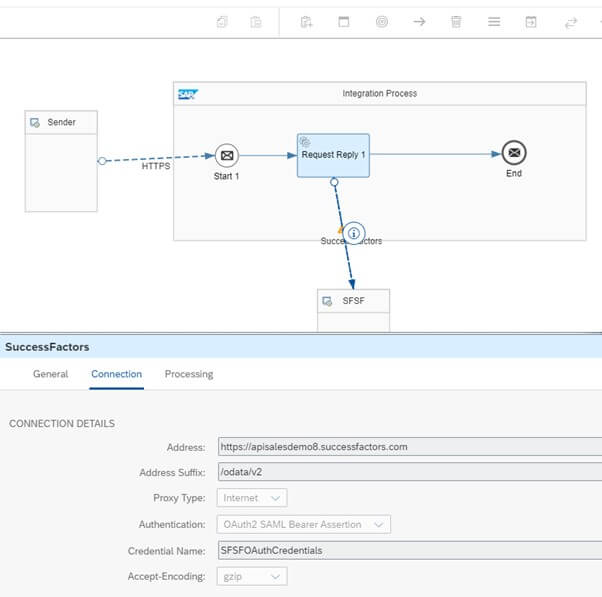
Here is an example of a simple integration flow. Important is to select OAuth2 SAML Bearer Assertion as authentication method and give the credential name of the security artifact just created.
5) Enable two way SSL in SAP API Management (just for client certificate authentication)
As we do not call the integration flow directly, but through SAP API Management, we need to configure it.
To enable inbound client certificate authentication in SAP API Management you must request Two-Way SSL certificate.
Per default, the virtual host of your SAP API Management is secured with a one-way SSL certificate. That means, that the sender does not use client certificates. If two-way SSL certificate is used, then all the API proxies called through this virtual host will need a client certificate, otherwise they will not work anymore. A best practice for this is to request an additional virtual host and use this virtual host just for those API Proxies requesting client certificates. Doing this, all the remaining API proxies will still work the old way.
6) Create the API Proxy in SAP API Management (just for client certificate authentication)
Create a key store in SAP API Management with the jar file created in step 1 (Setup SAP API Management as a trusted Identity Provider–>Generate certificate for signing SAML assertions) to sign the SAML assertion to be exchanged with the SAP BTP’s XSUAA.

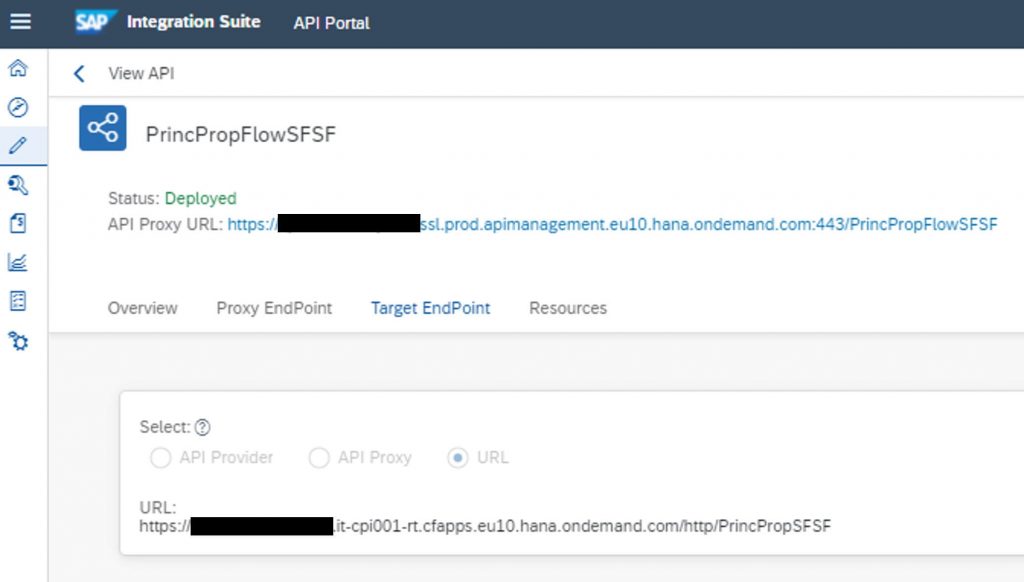
Create the API proxy pointing to your integration flow. It is important not to use an API Provider with credentials defined, otherwise it uses those credentials to access the Cloud Integration instead of the generated token. Use a URL instead as provider.
Search for the policy template “Connect to SAP Cloud Foundry services”–>“SAP Cloud Foundry SAML2OAuth Flow” on SAP API Business Hub and apply it to your API proxy.
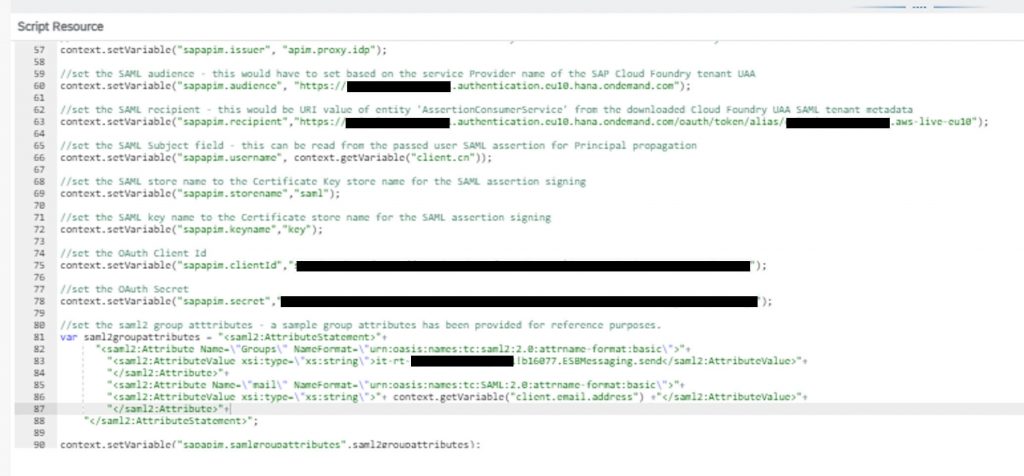
In the samlHelper.js in the policies enter the following info:
- Variable sapapim.issuer: origin key of the custom identity provider created in step 1 (Setup SAP API Management as a trusted Identity Provider–>New Trust Configuration)
- Variable sapapim.audience: download SAML Metadata of your subaccount from SAP BTP Cockpit–>Trust Configuration and take entityId
- Variable sapapim.recipient: also from SAML Metadata, take the AssertionConsumerService Location (…/oauth/token/alias…)
- Variable sapapim.username: context.getVariable(“client.cn”) to get the common name of the client certificate making the request
- Variable sapapim.storename: store name used to sign the SAML assertions to be exchanged with XSUAA
- Variable sapapim.keyname: name of the key used to sign the SAML assertions
- Variable sapapim.clientId: client id of the Process Integration Runtime (integration-flow plan) service key with the ESBMessaging.send role assigned
- Variable sapapim.secret: client secret of the Process Integration Runtime (integration-flow plan) service key with the ESBMessaging.send role assigned
- AttributeValue: attribute Name=”Groups” mapped to the role collection used in step 1 for sending messages to Cloud Integration (ApplicationIdentifier.RoleName)
- AttributeValue: attribute Name=”mail” mapped to getVariable(“client.email.address”) to get the e-mail of the client certificate making the request
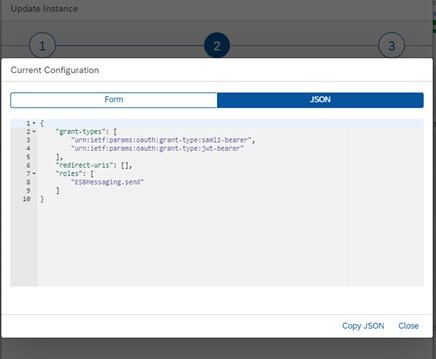
The Process Integration Runtime instance for the service key used above must have following configuration:
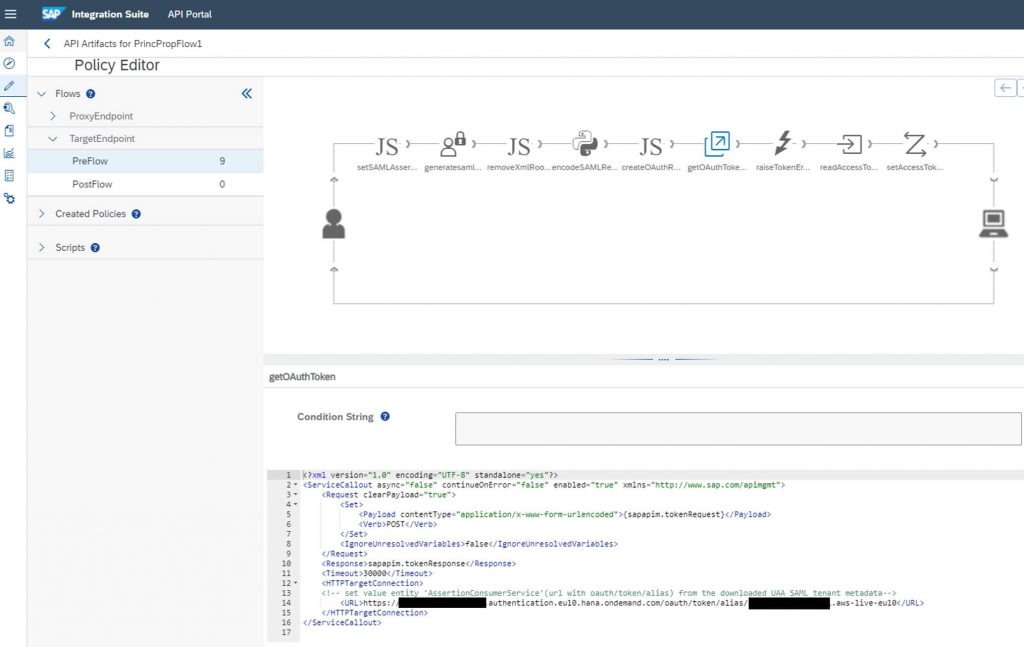
In the policy getOAuthToken enter as HTTPTargetConnection the value of AssertionConsumerService Location found on the file downloaded from the SAP BTP Cockpit–>Trust Configuration–>SAML Metadata.
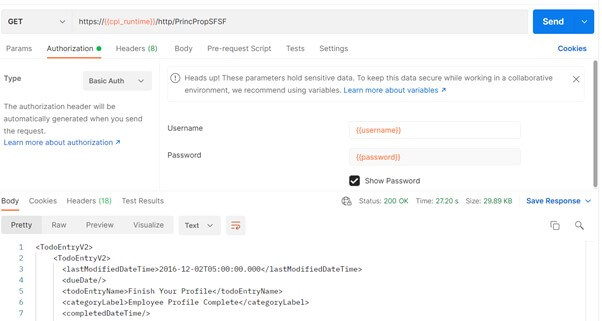
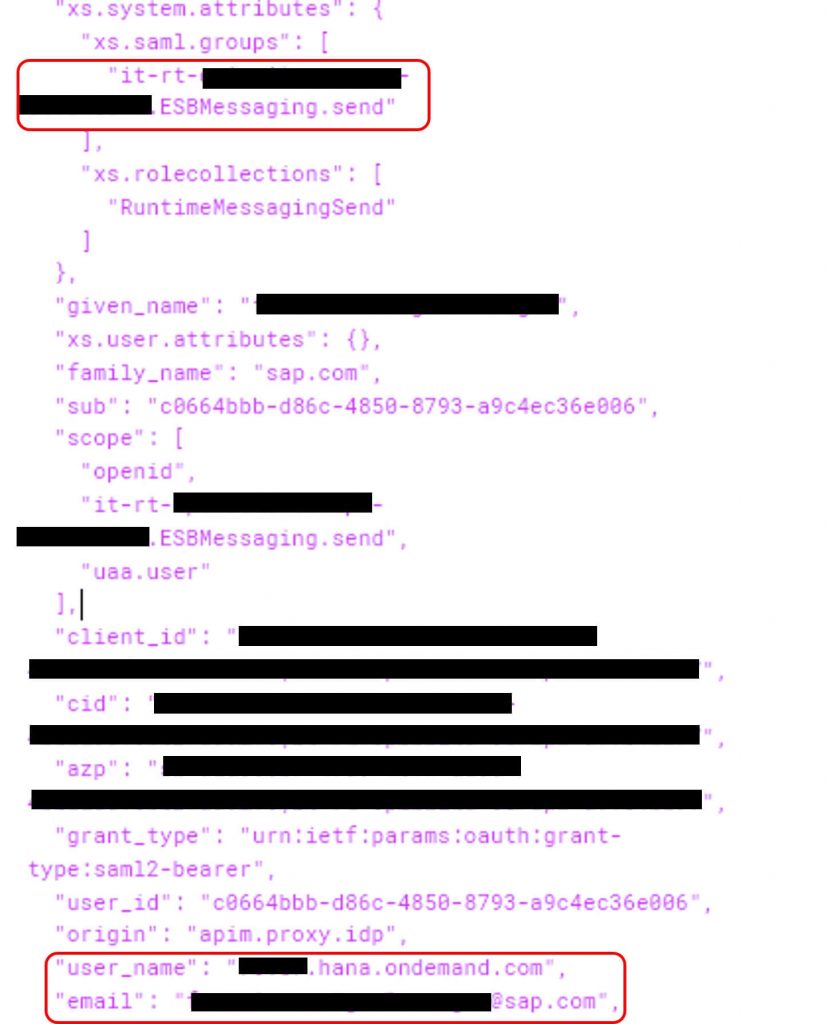
Once you save and deploy the API proxy you can debug it and obtain the generated JWT token.

If you decode the token, you can see the extracted user (the common name of the certificate – e.g. *.hana.ondemand.com), the e-mail (*@sap.com) and the group/role assigned to him, among other information.
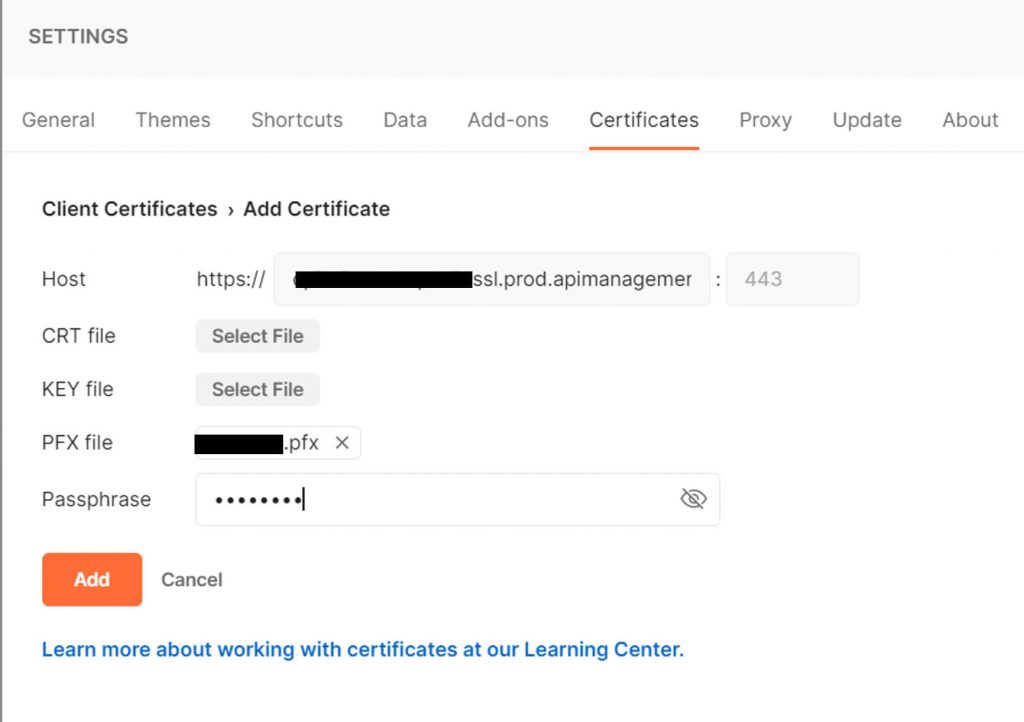
7) Set client certificate authentication in your external system
Configure your sending system or client for using client certificate authentication. In postman it is done going to File–>Settings–>Certificates and assign your certificate to your endpoint.