In this blog post I am going to explain the step by step execution of Predictive Material and Resource Planning (pMRP).
pMRP is a brand new functionality by SAP. It helps you to identify potential capacity issues and to evaluate possible solutions as early as possible based on a simplified requirements plan using a simplified material requirements algorithm. As a result of the simulation, production planners are prepared to take decisions on changed conditions, for example with regard to requirement planning, resource plans, preproduction, or make-or-buy decisions.
In SAP ECC and earlier releases of S/4HANA, Long-Term Planning (LTP) can be used to simulate MRP and allow us to analyze the results for capacity situation, all the levels of semi-finished products and raw materials.
Pre-requisites:
Master Data:
- Materials
- Bill of Material for Materials
- Work Centers
- Routings
- Production Versions
Transnational Data:
- Planned Independent Requirements
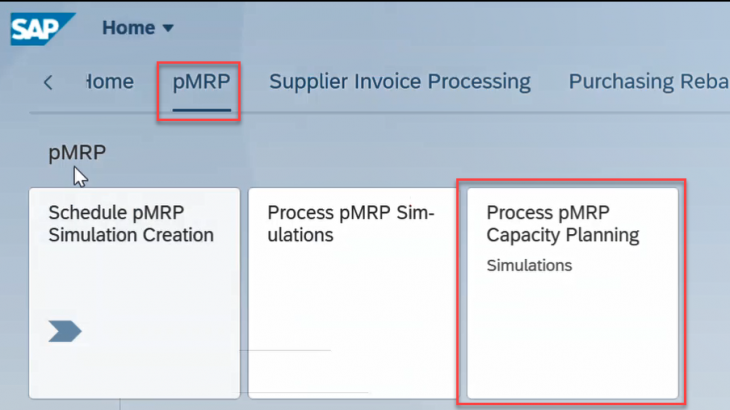
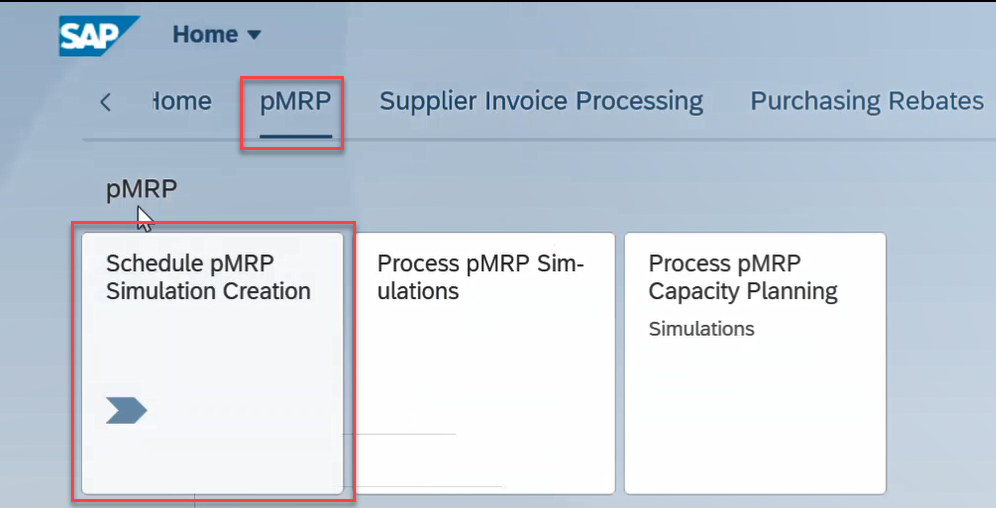
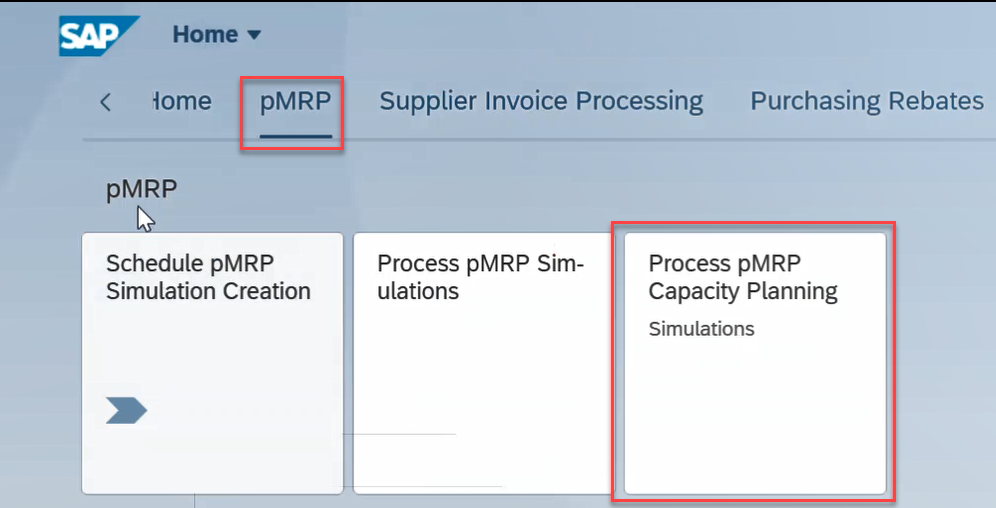
FIORI apps: The below dedicated Fiori apps for this functionality, there are no transaction codes available.
- Schedule pMRP simulation creation
- Process pMRP Simulations
- Process pMRP Capacity Simulations
In this process I have executed on one material. The same process you can apply on multiple materials or plant/s with different criteria.
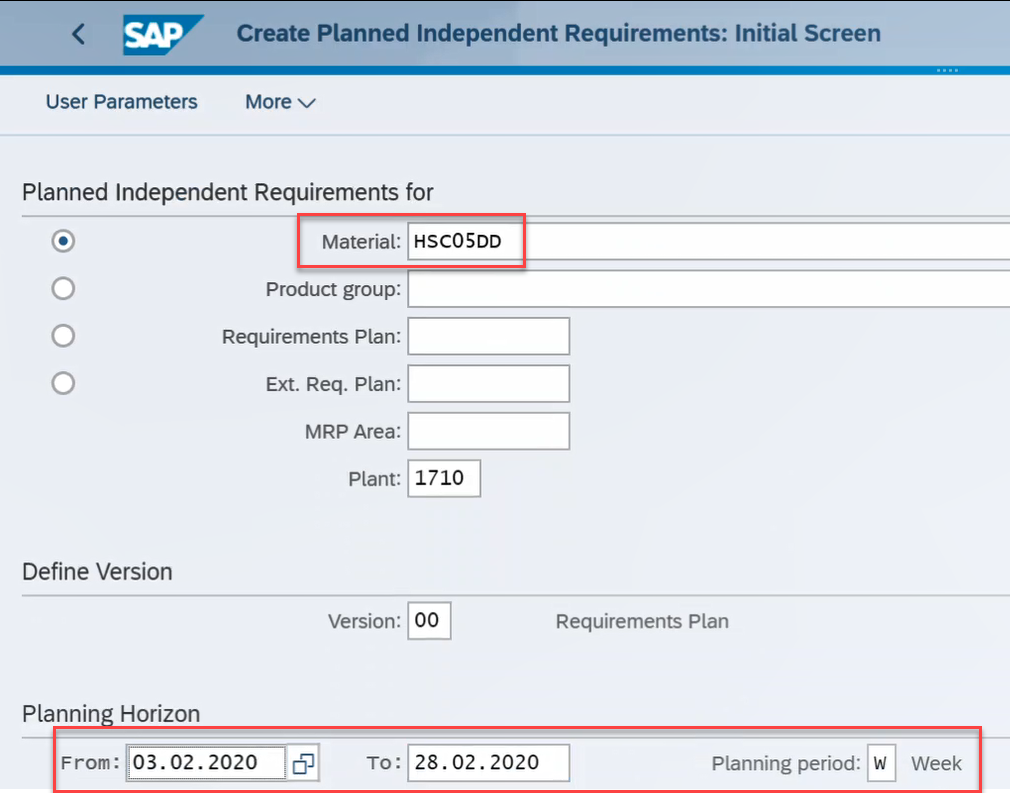
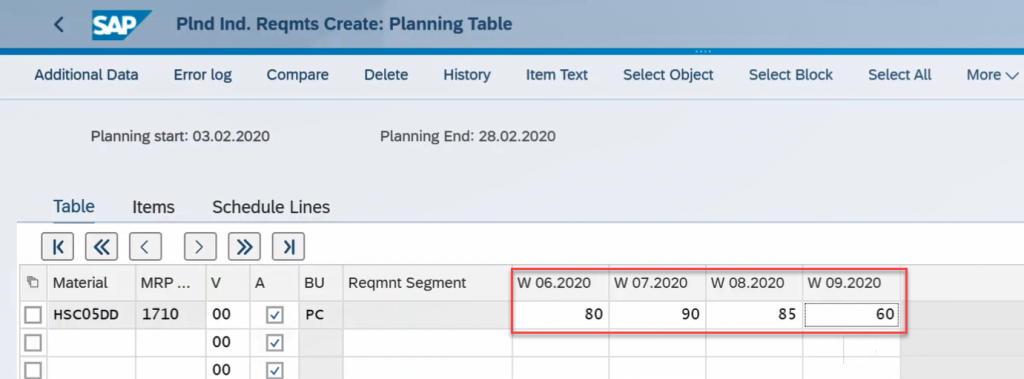
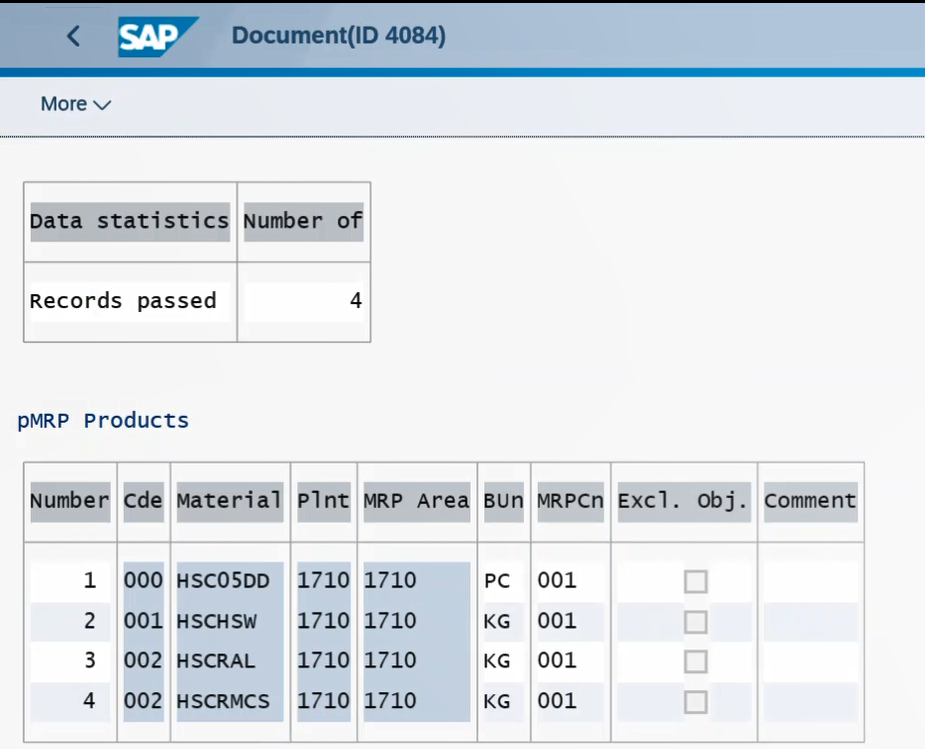
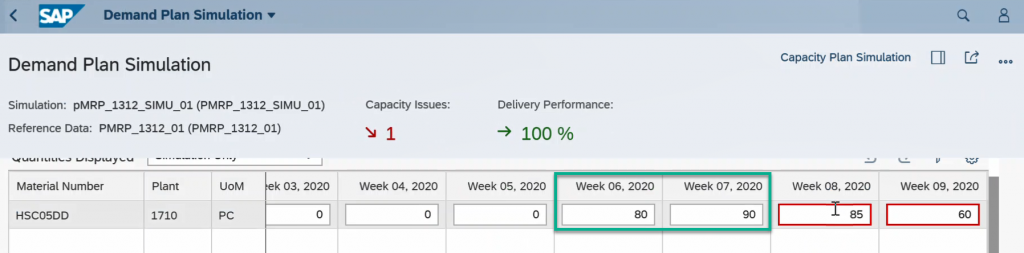
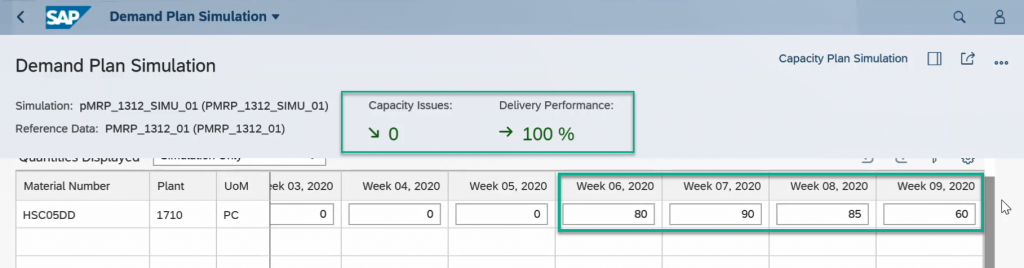
The first step I have created Demand in the form of Planned Independent Requirements for four weeks with active version.
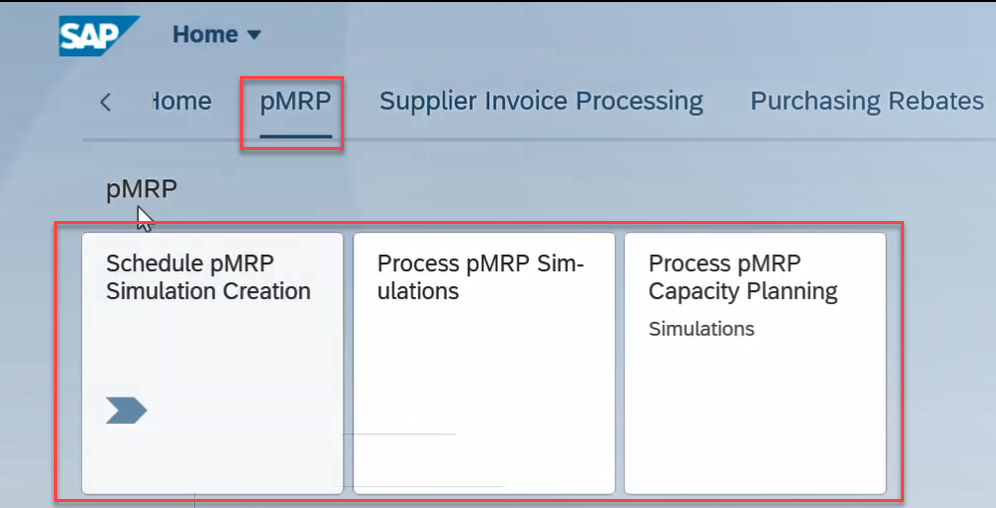
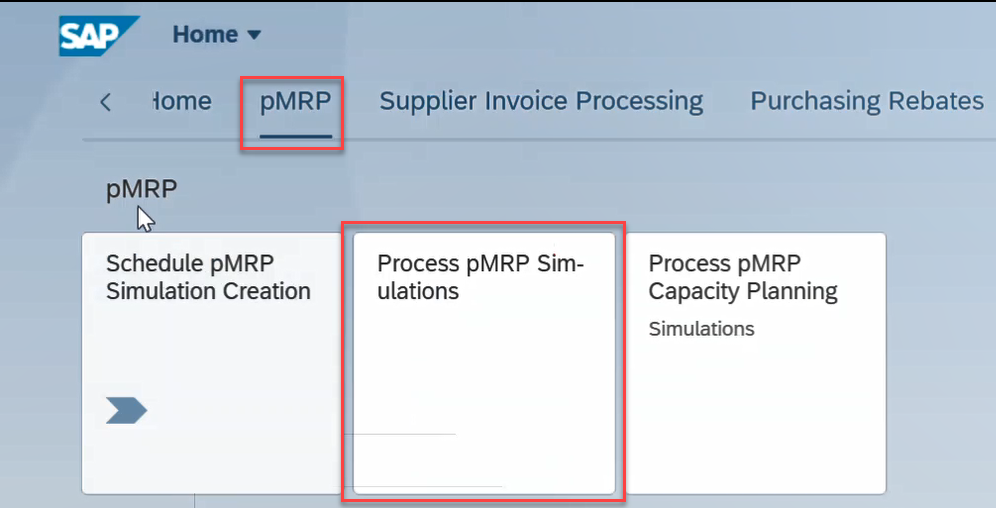
The below three apps are using for pMRP.
1. Schedule pMRP simulation creation: Create a pMRP Simulative Plan.
In this app you define which reference data are going to be considered as reference data for a simulation. Then you start the creation of a simulation which can be processed in the Process pMRP Simulations app.
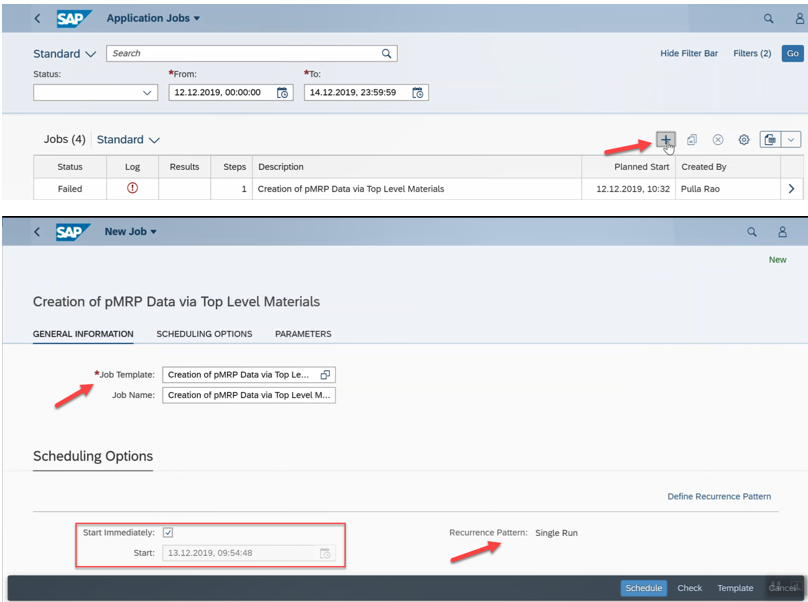
Herein there are two job templates are available. I have created plan with via Top-Level Materials.
- Creation of pMRP Data via Top-Level Materials
- Creation of pMRP Data via Work Center
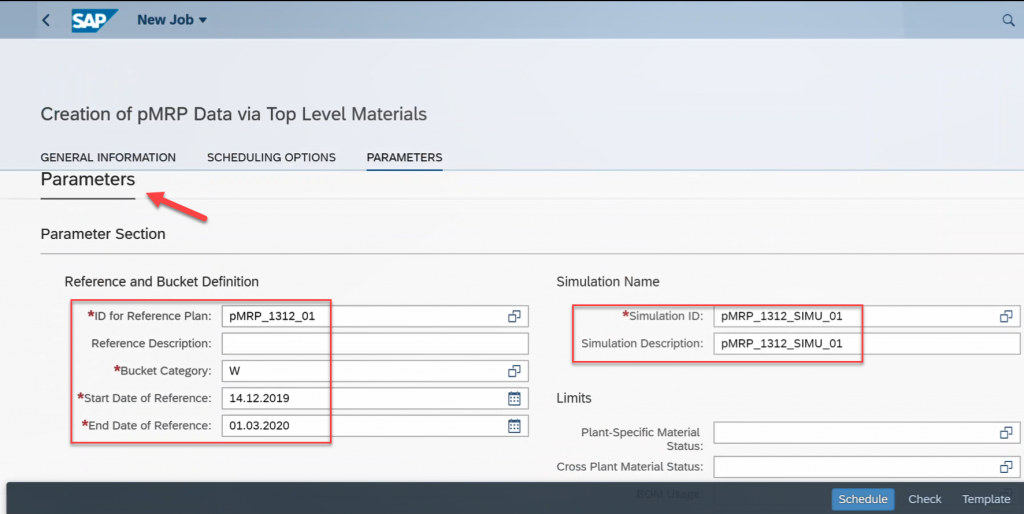
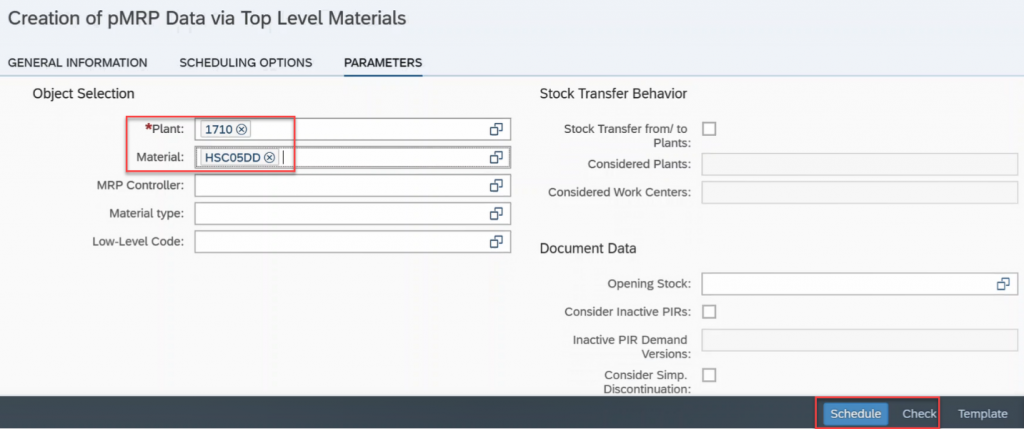
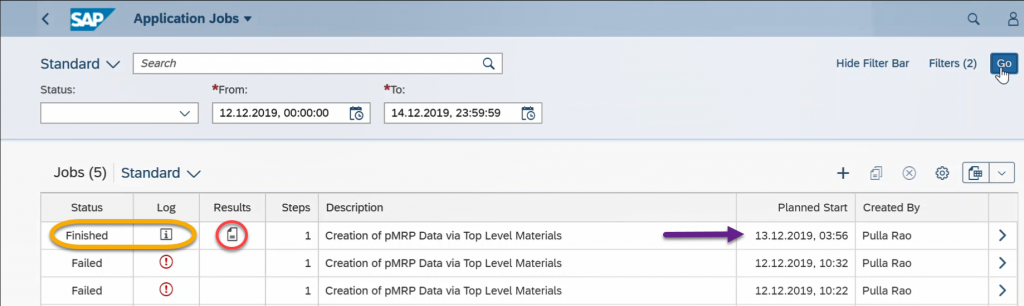
Provide your Simulation plan, ID, start date and end date of the reference plan. Once you filled with parameter section scroll it down and fill-up Object section. Then check and schedule the job.
Here you can see the status of the job and results as well.
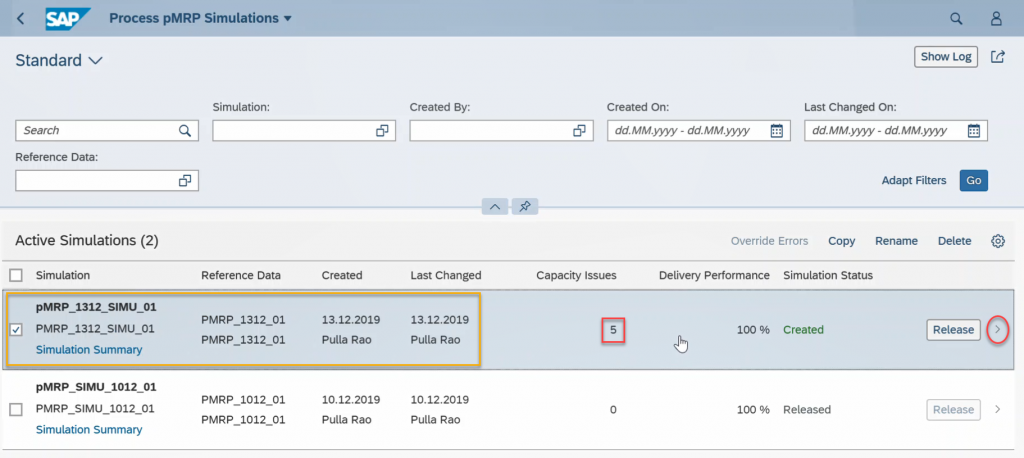
2. Process pMRP Simulations:
With this app you can create multiple simulations, check the impact of simulated changes to capacity or demands on the KPIs, and take informed decisions for your production planning.
You can reduce inventory costs by making the right adjustments in your simulation.
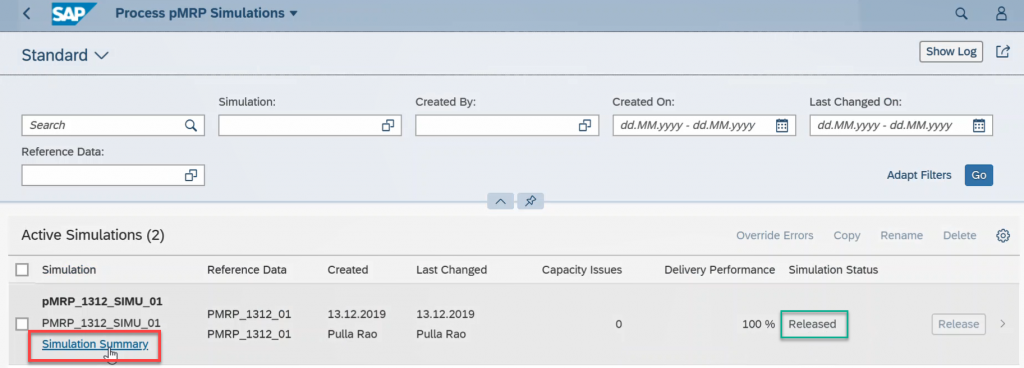
Herein the below simulative plan created in previous step. Now it’s in created status.
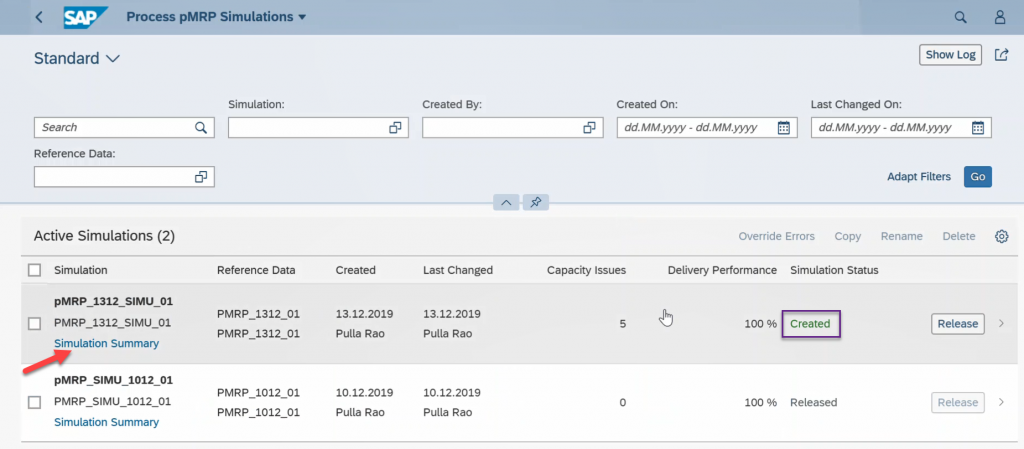
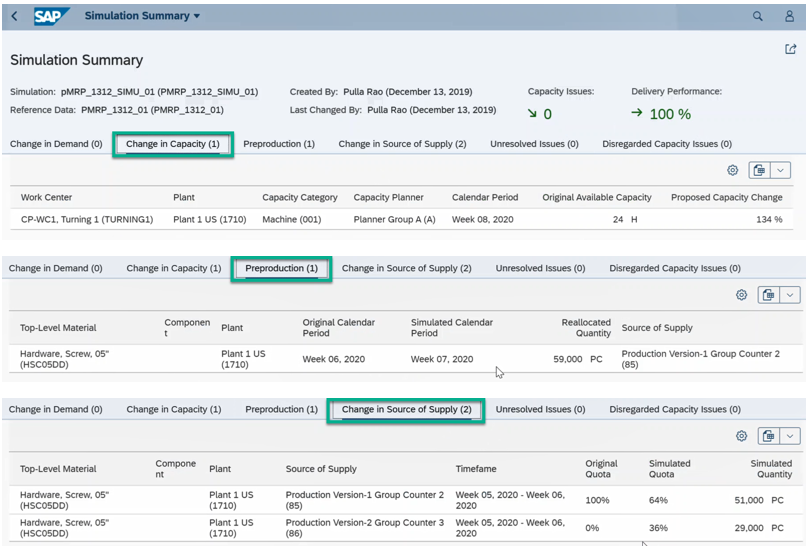
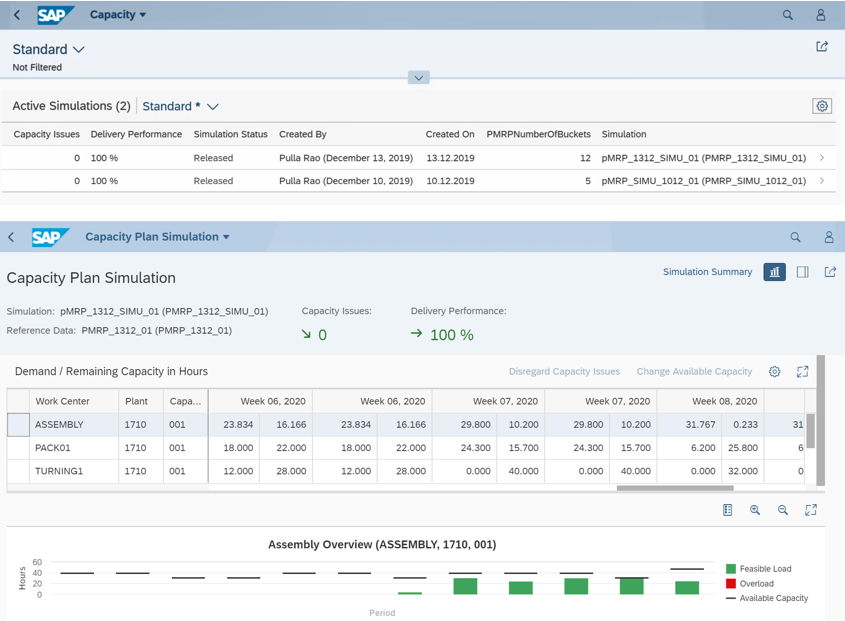
If you can go to Simulation Summary of Simulation Plan (pMRP_1312_SIMU_01) you will see an overview of all the still unresolved issues and the issues you explicitly discarded. This overview helps you to analyze how these measures help to solve capacity issues on the one hand and how close you come to meeting your delivery target on the other hand.
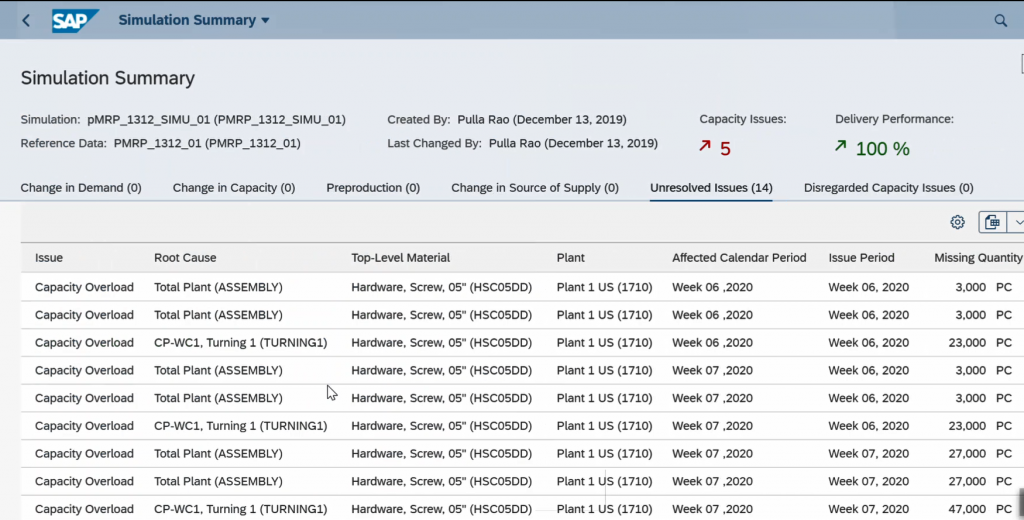
Go inside the Simulation plan as I showed in the above screen shot
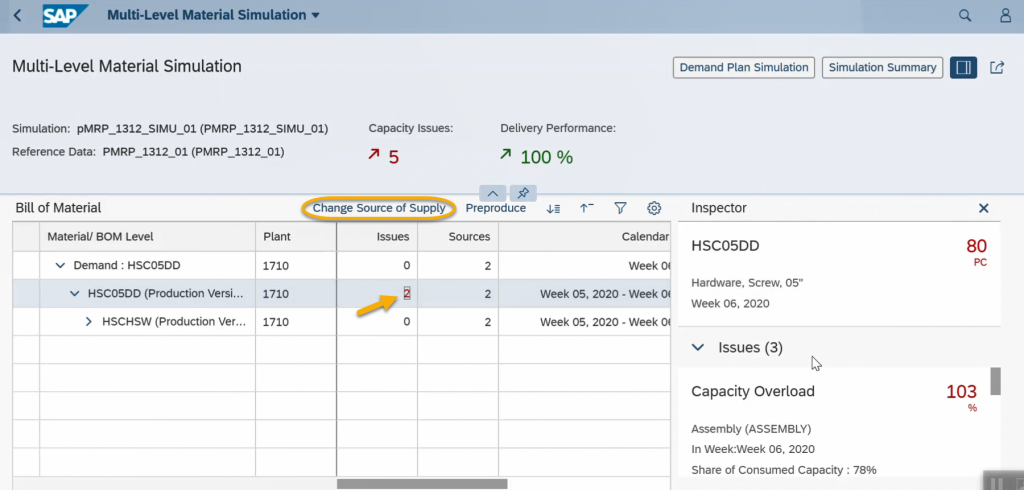
Generally in pMRP, you can solve the capacity issues by using different ways. Currently you can see there is 5 Capacity issues in the Simulation plan. To solve these capacity issues I have used the below ways.
- Change Source of Supply
- Preproduce
- Change Available Capacity
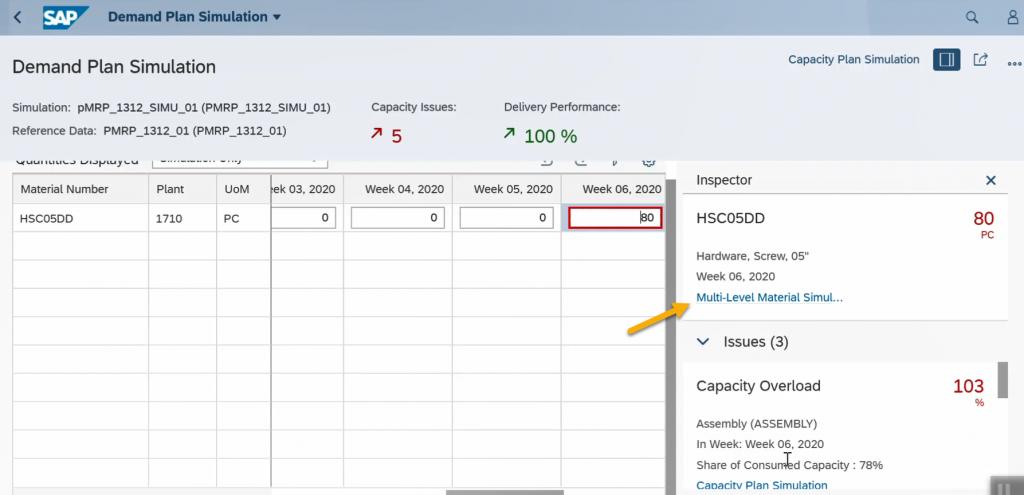
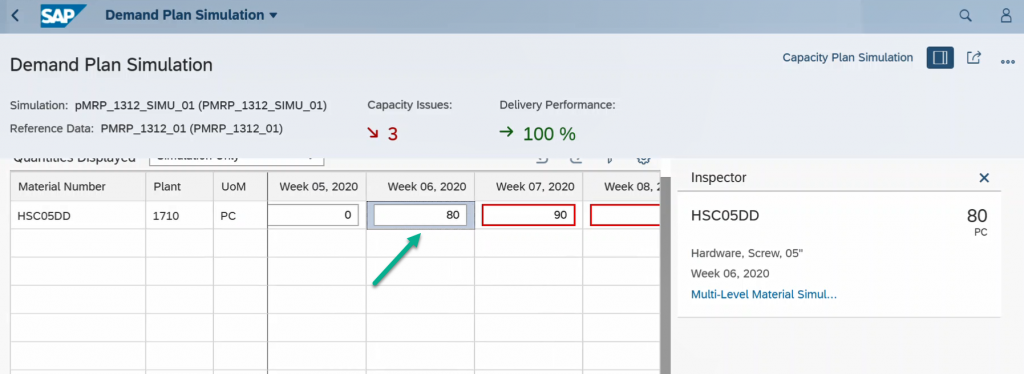
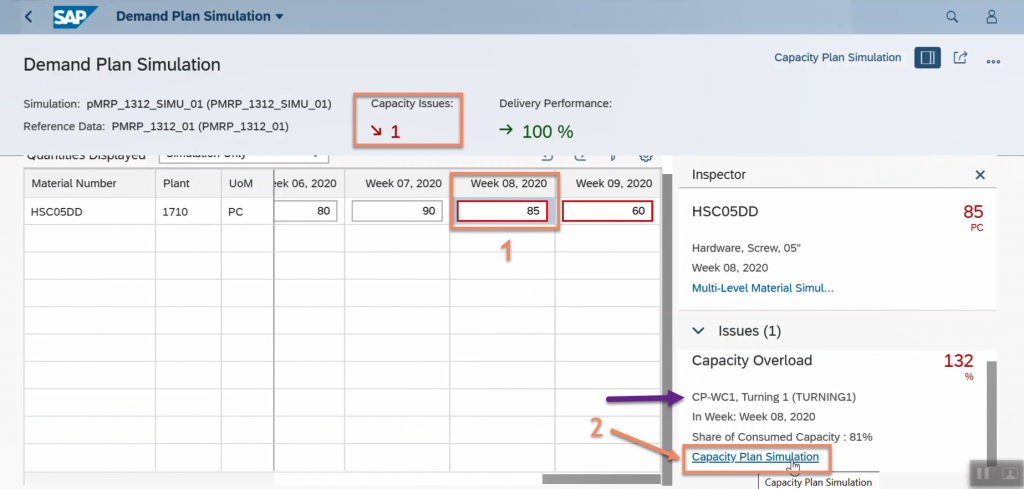
So here in Week 06 have some capacity issues, when you place the cursor on Week 06 you will get right side Inspector panel.
If you can click on Multi-Level Material Simulation it will shows you the multi-level bill of material with all its components. You can open the inspector to display capacity issues. You have the following options to solve capacity issues:
Change Source of Supply: If an alternative source of supply (alternative production versions) exists, you can choose to change it to encounter capacity issues.
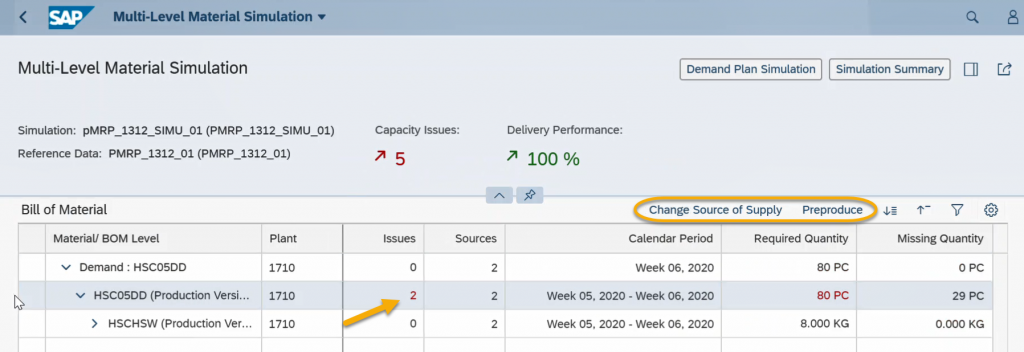
So here on Week 06 have 2 capacity issues out of 5, click on 2 and select the Change Source of Supply button.
You can the popup for Change Source of Supply. In this popup production version-1 has total 51 PCE capability to produce on Week 06. For remaining 29 PCE, it’s proposing to use production version-2 to fulfill the entire Week 06 demand (80 PCE).
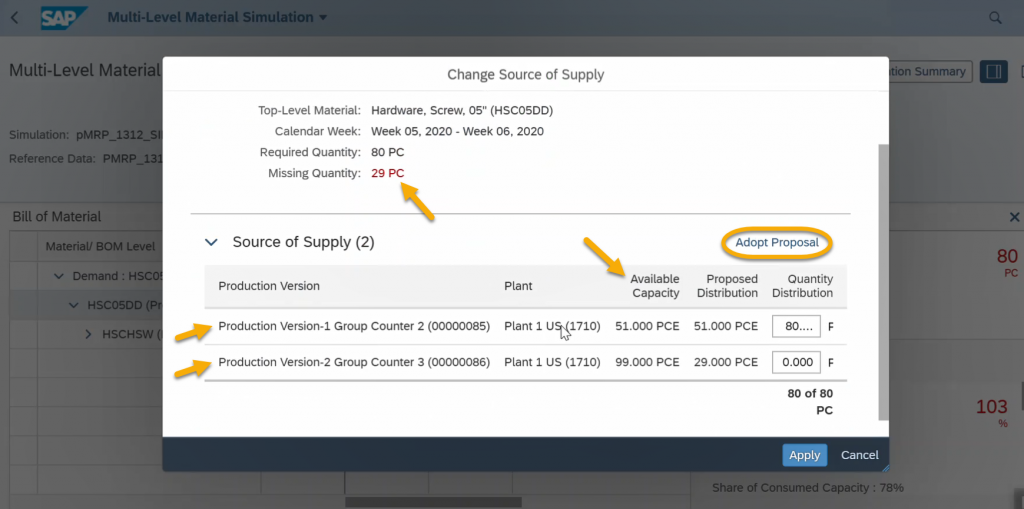
Click on Adopt Proposal.
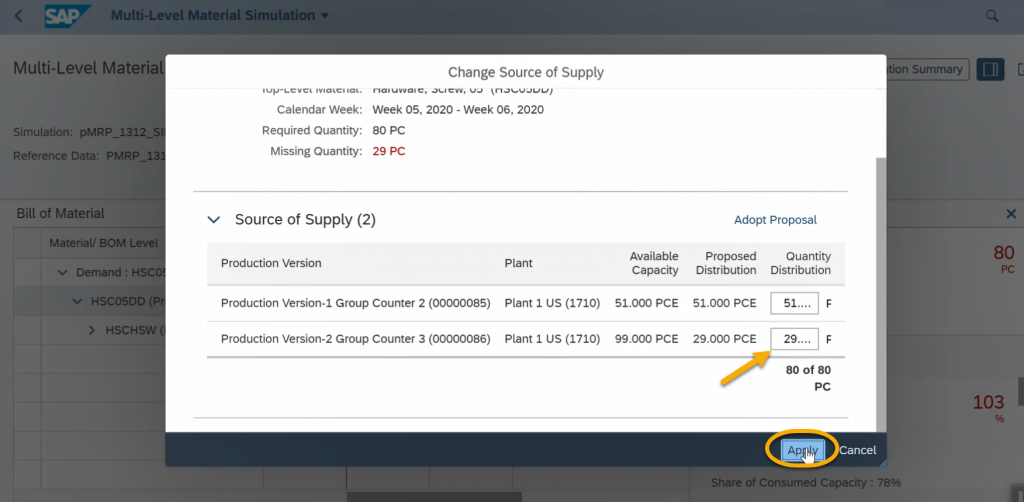

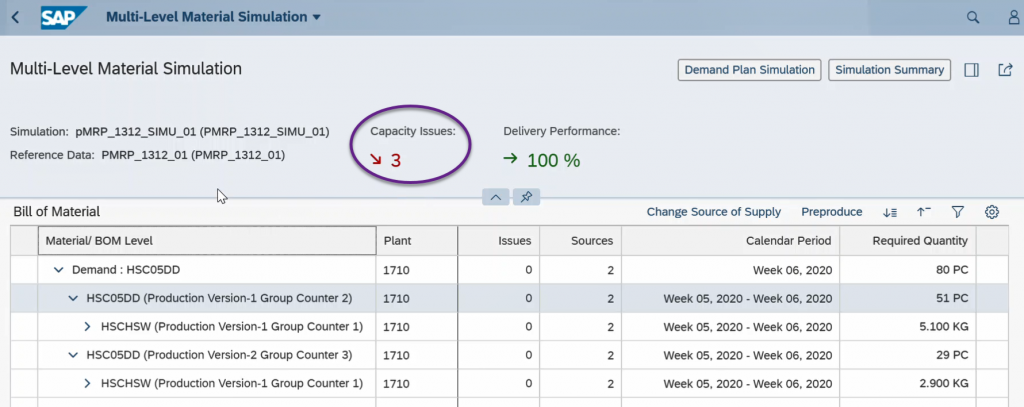
Once you click on Apply then 5 capacity issues will become 3. See below
In the same way just check on Week 07, click on Multi-Level Material Simulation
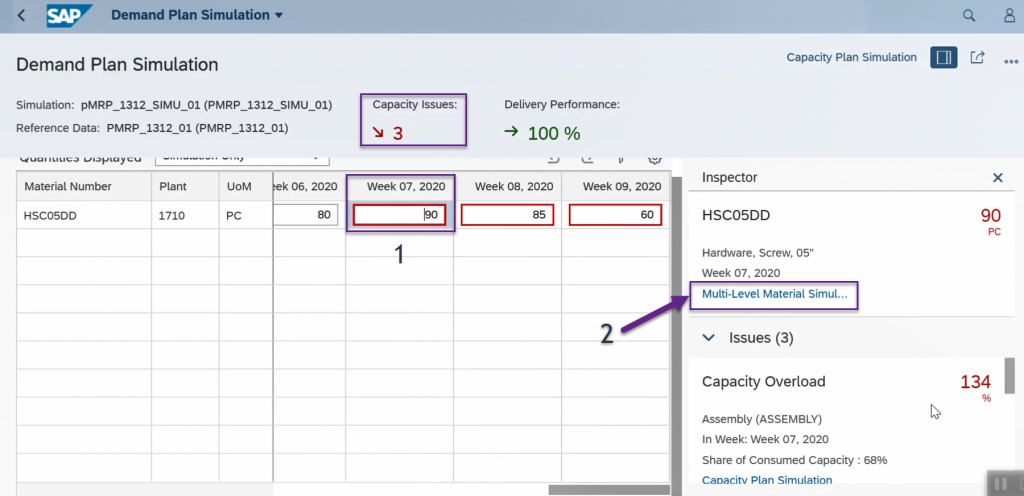
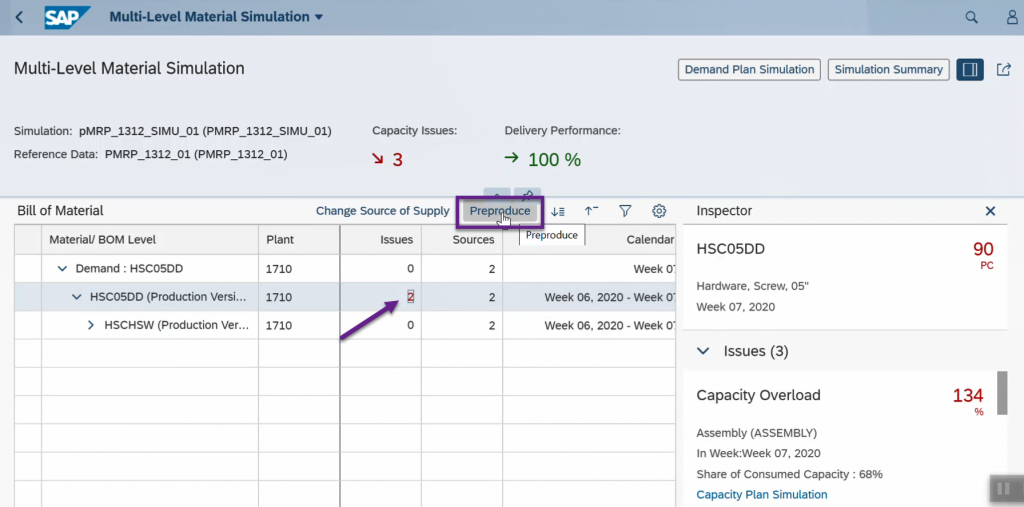
Here also 2 capacity issues out of 3, click on 2 and select the Preproduce button.
Preproduce: You can decide to plan a preproduction on component level to mitigate capacity overloads.
You can see below the available preproduction dates/periods for missing quantity. And also it will show us total available capacity of preproduction dates as well. So Here you can adopt the proposal or go with your own proposal by distributing the quantity.
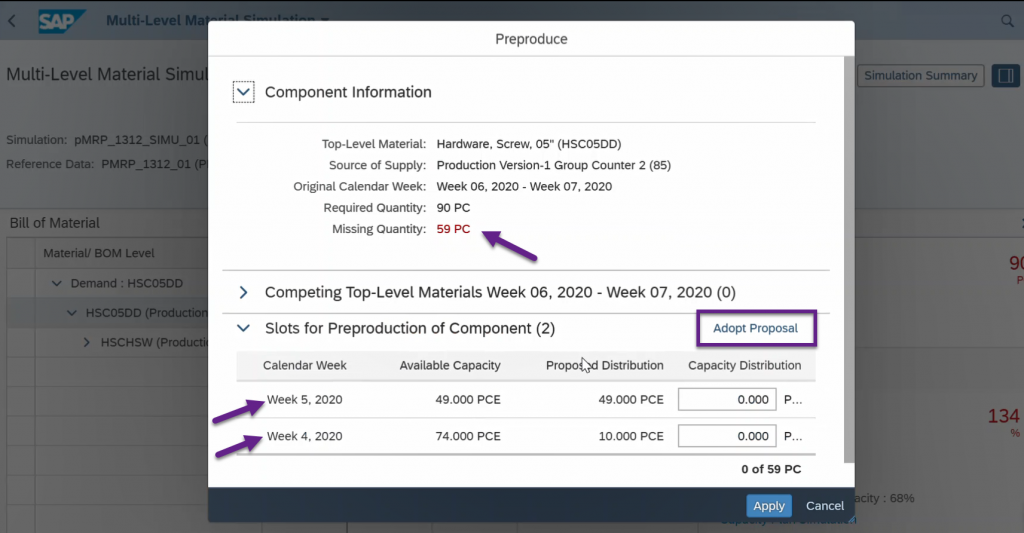
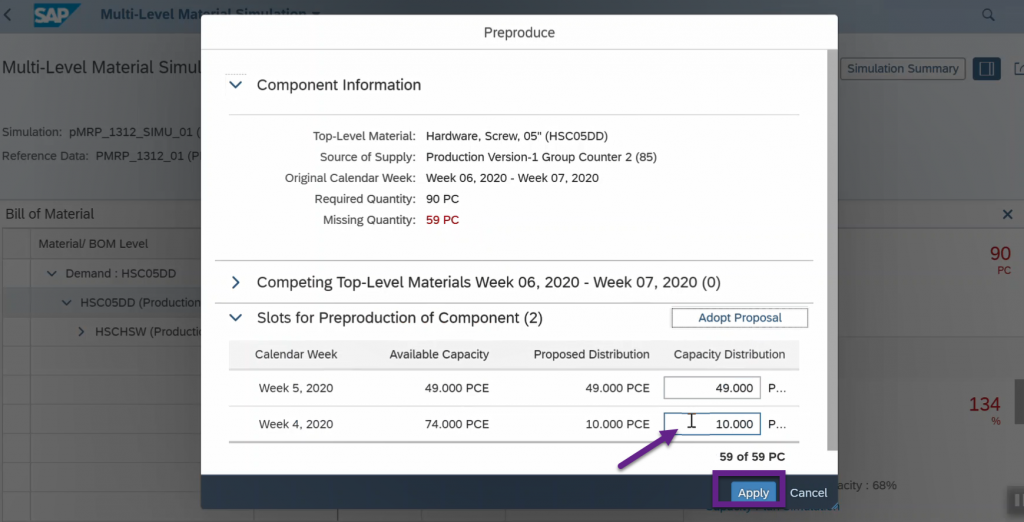
Click on Adopt Proposal and Apply.
Now you can see below the capacity issues become 1.
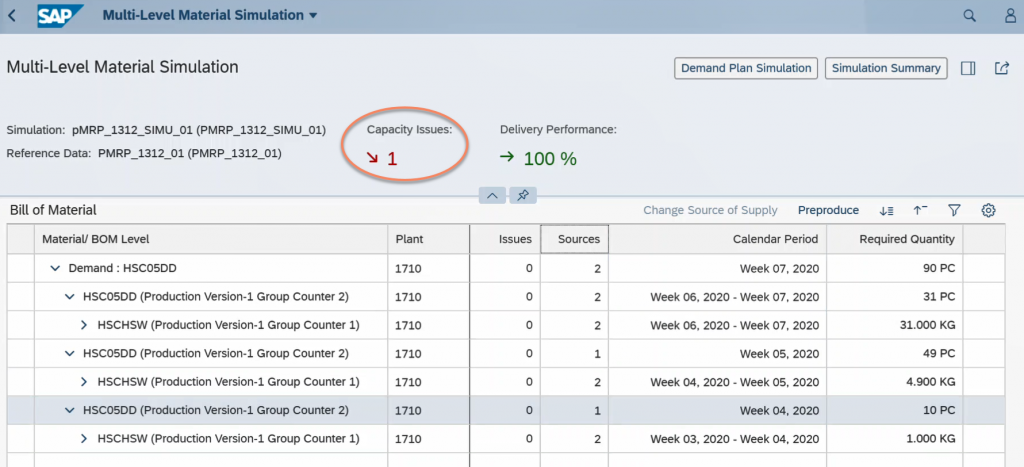
Click on back button.
Finally we have only one capacity issue. Now I am going to resolve by using Change Available Capacity through Capacity Plan Simulation.
Capacity Plan Simulation: This view displays the work center and for each period all related top-level demands. You can see work center’s capacity situation over the defined time period. You have the following options:
Change Available Capacity:
You can simulate changes to the capacity of a work center by changing the available capacity, and analyze the result of it. You can also display a graphic with an overview of the capacity situation of the work center.
Disregard Capacity Issues:
Use this option, if you are sure that you want to ignore capacity issues, for example, because this particular resource of the work center is not considered as crucial.
As a result, all the issues of the selected work center will disappear. If you want to restore them, you navigate to the Simulation Summary and restore the issues on the Disregarded Capacity Issues tab.
Click on Change Available Capacity button
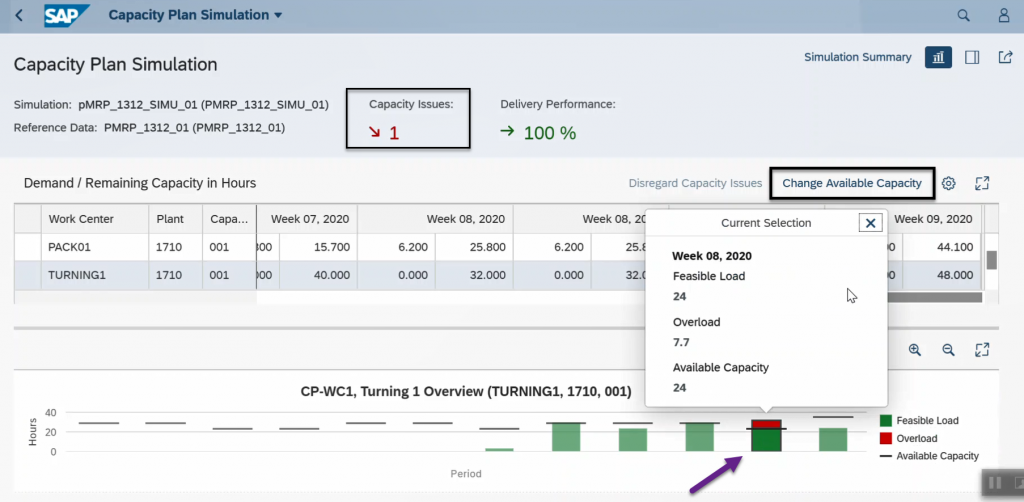
Select the Week and change New Capacity Utilization.

Then click on Apply, all capacity issues resolved.
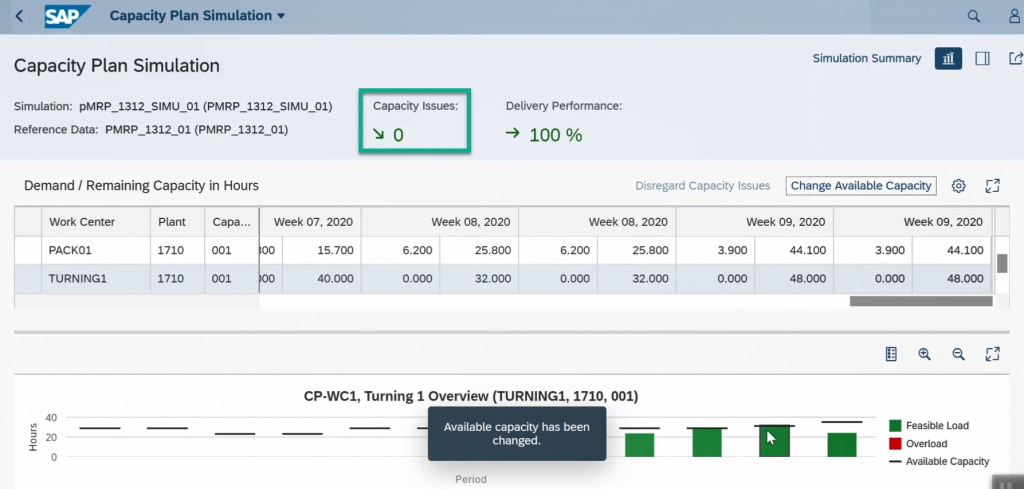
All capacity issues are resolved.
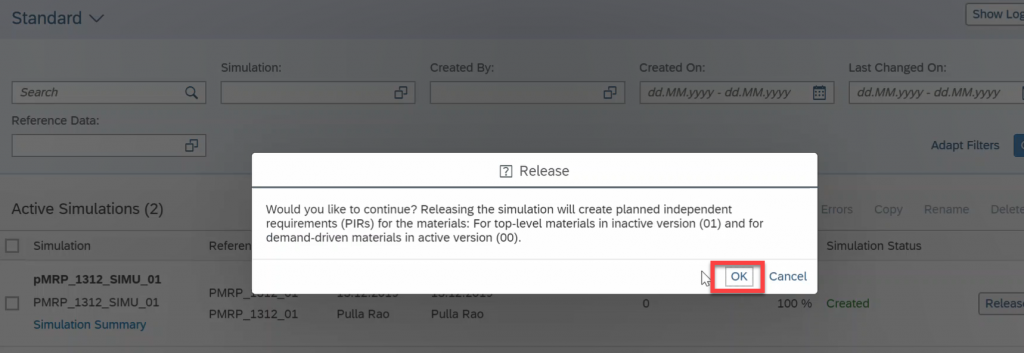
After analyzing your simulation, you can go ahead and Release your simulation plan with the changes that you want to implement. The released simulation cannot be edited any longer.
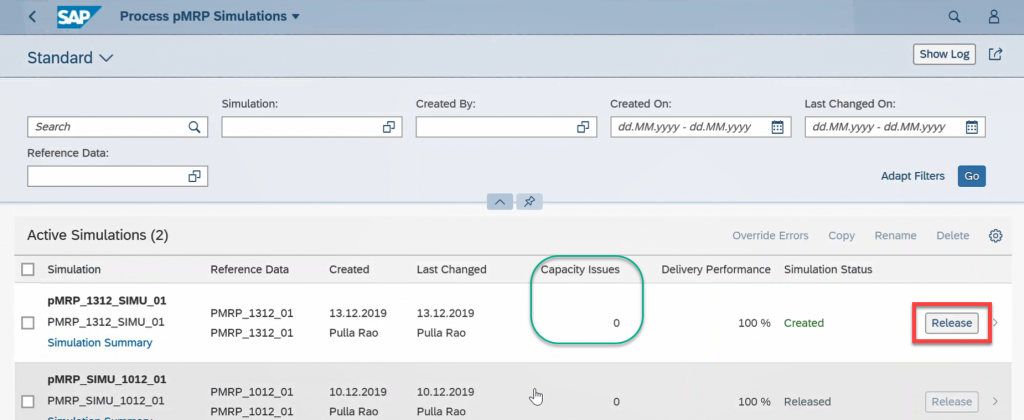

Here you can see the overview of simulation summary what you have done so far.
3. Process pMRP Capacity Planning: In this app you can find the list of active plan and its details.
Conclusion: The simple set up without customization resulting in a mid-term planning tool with flexible end-to-end simulation capabilities makes pMRP highly valuable for production planners and related stakeholders.


