When dealing with Instances that have Onboarding and Employee Central implemented, it is common for the clients to have some types of information that are required in the Additional Data Collection Step of the Onboarding process and might be reutilised in the Employee Profile when the onboardee is converted to a employee in Employee Central.To quote some examples, it can be data related to equipments, parking, transportation, clothing, etc. Unfortunately, it is not possible to use the same MDF object for the Additional Data Collection in ONB and the Employee Profile in EC.
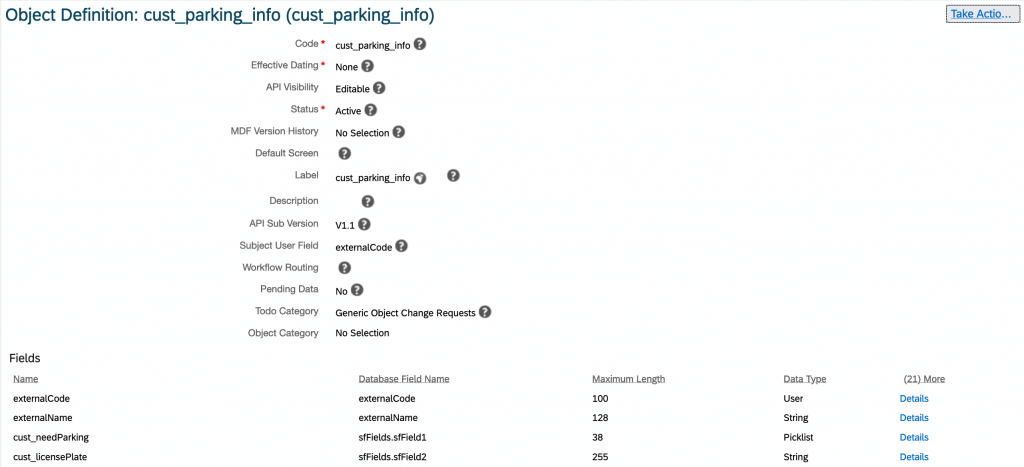
Basically, that’s not possible because the MDF Object used in the Additional Data Collection of Onboarding must have its externalCode defined as ‘Autonumber’, while a MDF Object that is used in the Employee Profile must have its externalCode defined as ‘User’.
A possible solution to that scenario is to copy the MDF object that will be used in the Employee Profile of Employee Central and use the Integration Center to automatically integrate the information provided in Onboarding to Employee Central using a daily basis frequency.
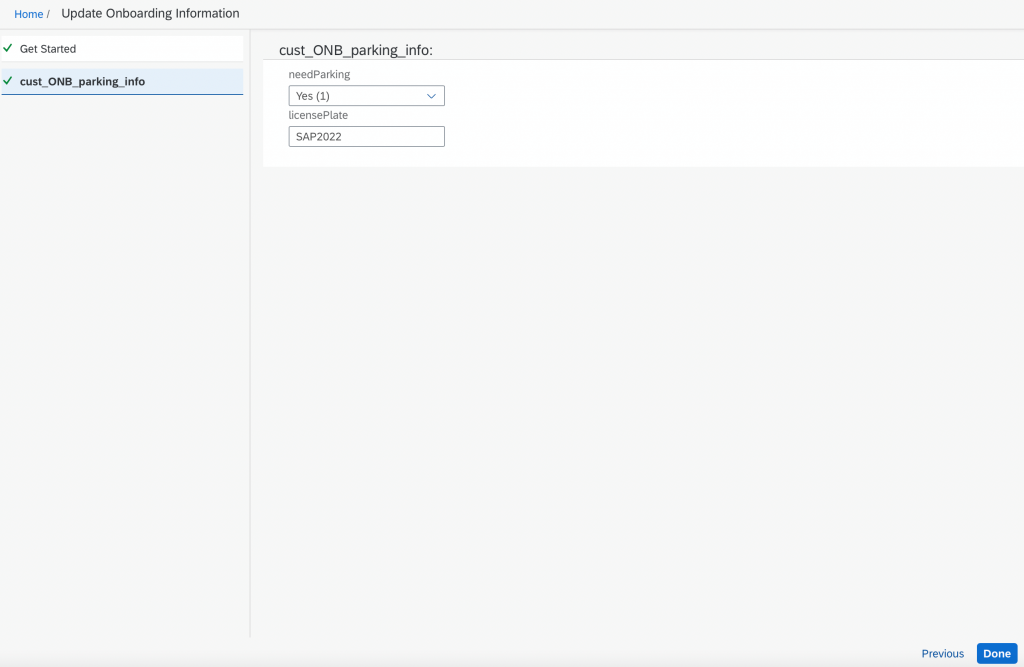
In the example below, information related to parking information will be catched in the Additional Data Collection of the Onboarding Process and will be integrated to the Employee Profile in Employee Central by Integration Center.
Fields:
- Need parking spot?’ -> yesno picklist type field
- ‘License plate’ -> string type field
Following the steps below, we have the entire process:
1. Create the MDF Objects:
Go to Configure Object Definitions -> Create New -> Object Definition
cust_parking_info (for Employee Profile)
cust_ONB_parking_info (for Additional Data Collection in ONB)
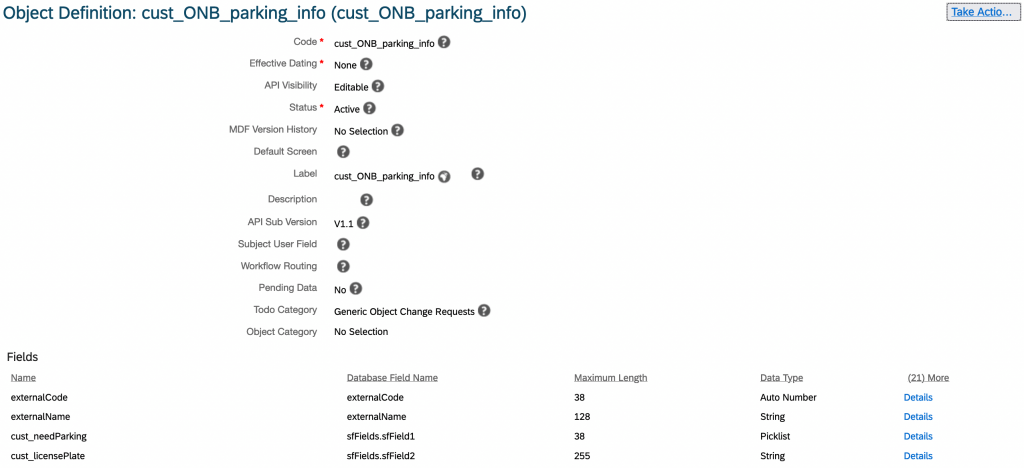
For this object, refer to the Onboarding Implementation Guide for further details.
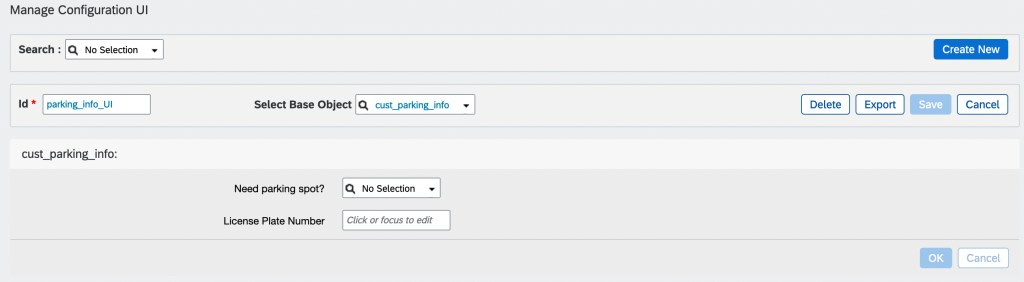
2. Create the UI:
For this step, you need to create the UI for each MDF object created in the previous step. The UIs might be different if your requirementes make it necessary. Otherwise, you can create 2 identical UIs with different base objects.
The externalCode and externalName fields might be hided from the UI
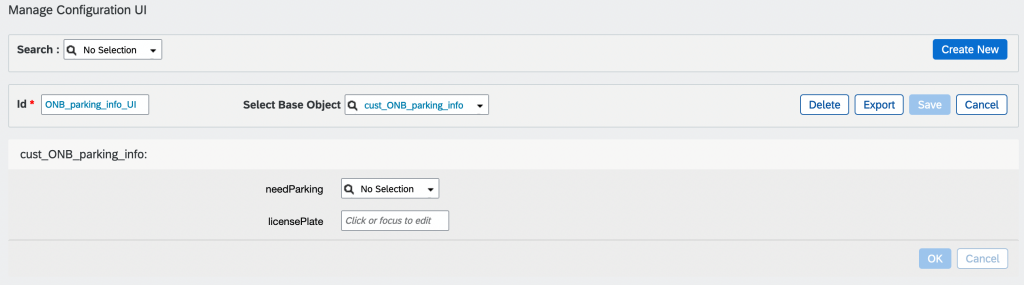
parking_info_UI ( Base Object= cust_parking_info)
ONB_parking_info_UI (Base Object= cust_ONB_parking_info)
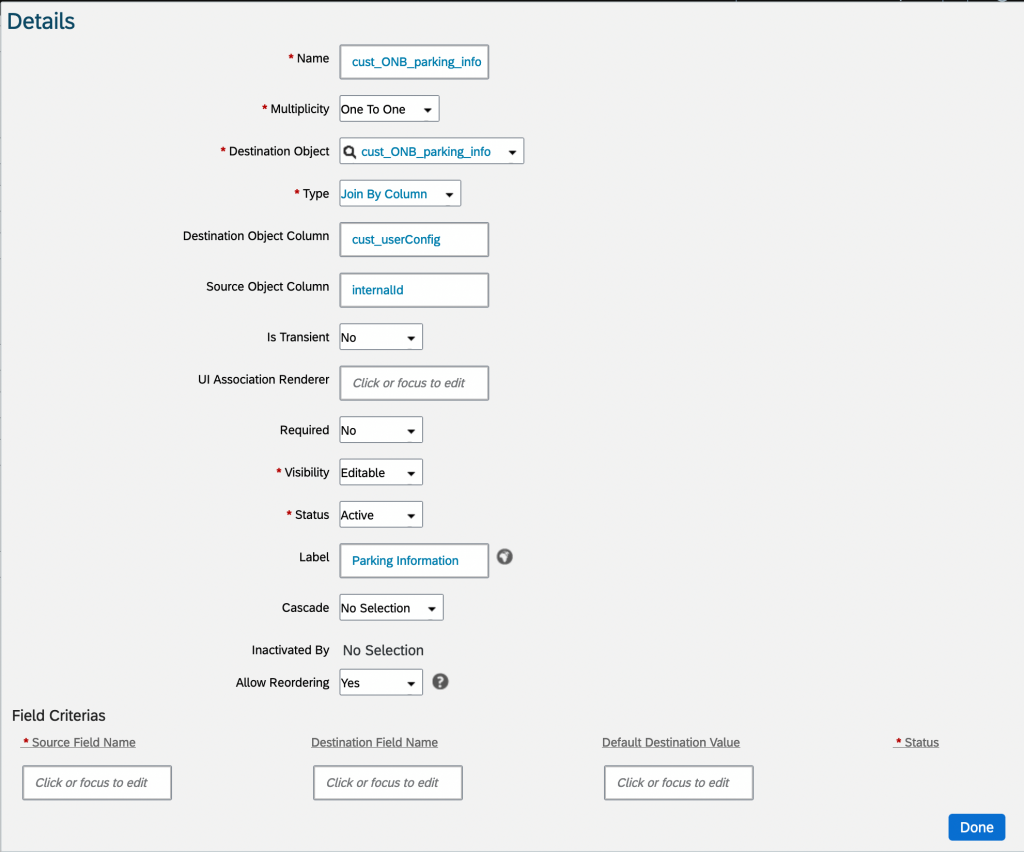
3. Associate the objects to the Custom Data Collection in ONB and to the People Profile in EC:
Configure Object Definitions -> ONB2DataCollectionUserConfig -> Go to the Associations tab
Go to Manage Data -> Onboarding Data Collection Configuration -> Open the Data Collection Configuration Record -> Add the ONB_parking_info_UI

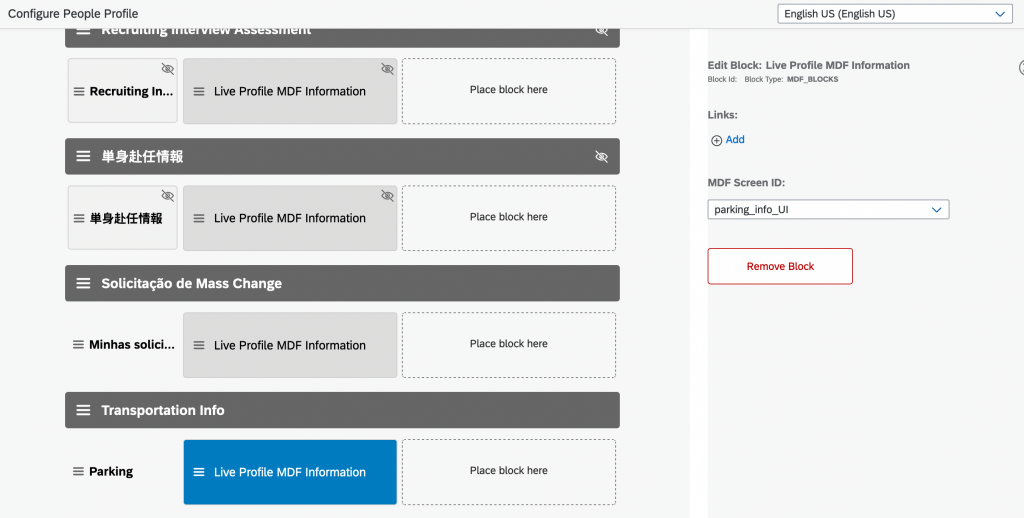
Go to Configure People Profile -> Add the ‘parking_info_UI’ UI to the Employee Profile:
4. Configure RBP Permissions
For EC:
Manage Permission Roles -> Select the Role -> Employee Views -> Enable the People Profile section “Transportation Info”
Manage Permission Roles -> Select the Role -> Miscellaneous Permissions -> View/Edit Permission for the MDF Object cust_parking_info MDF Object
For ONB:
Manage Permission Roles -> Select the OnboardingExternalUser Role -> View/Edit Permission for the cust_ONB_parking_info MDF Object
5. Configure the integration in Integration Center
Having all the objects configured, its time to set up the integration so that the information provided in Onboarding goes to the Employee Profile, after the Onboardee is converted to a internal user.
Go to Integration Center -> My Integrations -> Create -> More Integration Types
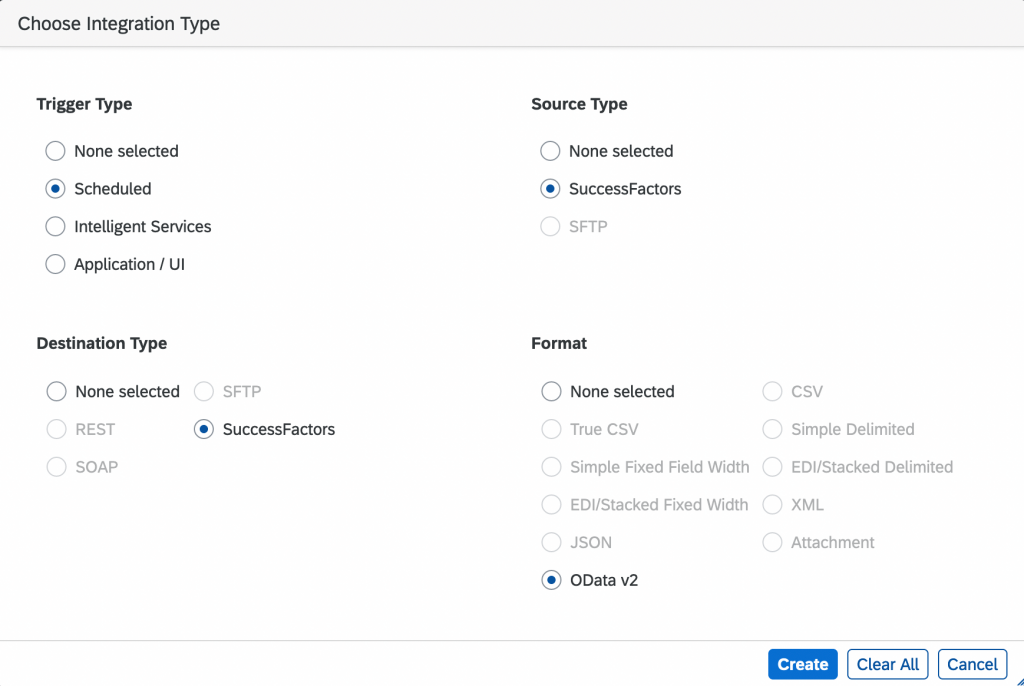
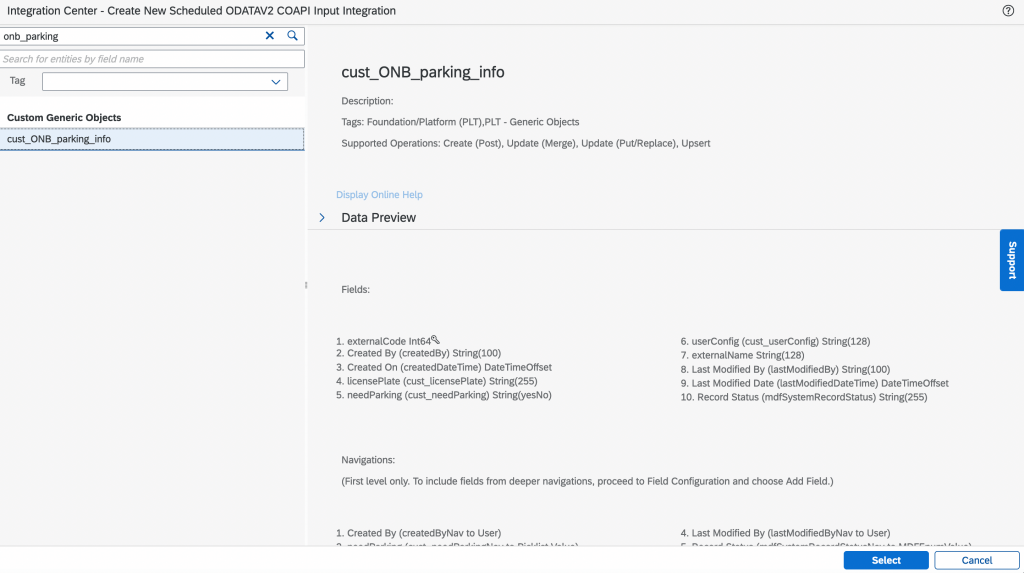
The start entity will be the MDF Object of Custom Data Collection in ONB (cust_ONB_parking_info)
Select a name for the integration and go to the Configure Fields Screen. Select the Field Mapping View and insert the ‘cust_parking_info’ object as the target:
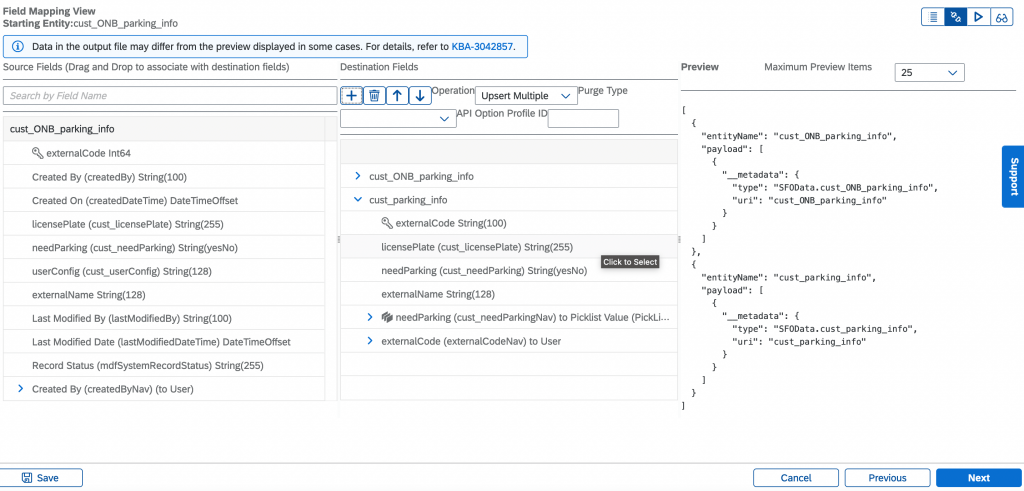
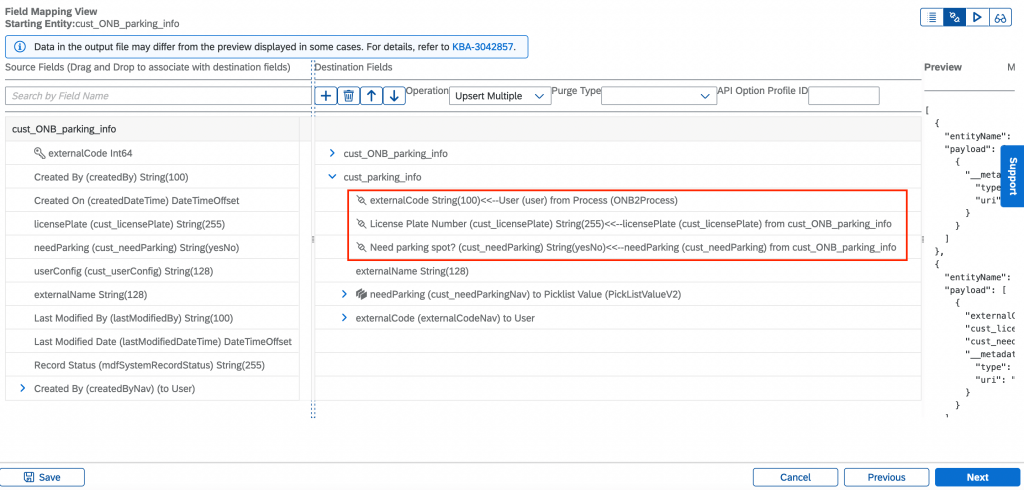
For the mapping, drag the source field to the target field. The mapping is as follows:
userConfig>ONB2Process>User —-> externalCode
cust_licensePlate —-> cust_licensePlate
cust_needParking —-> cust_needParking
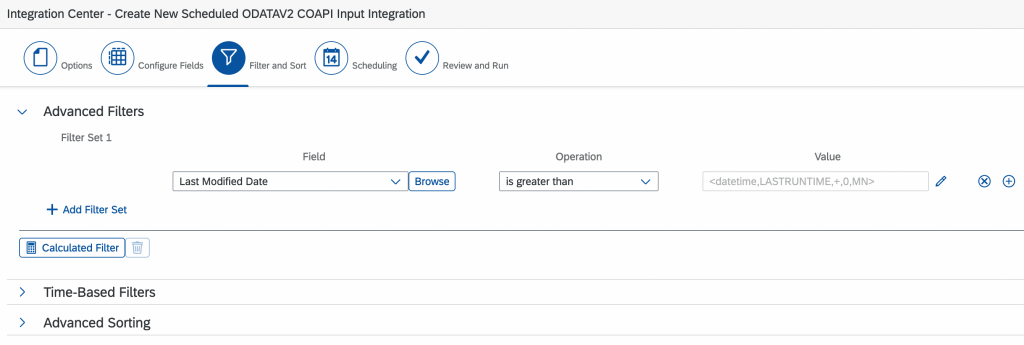
In the Filter and Sort Screen, select Advanced Filter. The filter will be set in a way that the integration will only send the records created after the last integration runtime. In that scenario, the records already sent wont be repeated in the integration:
ONB_parking_info>Last Modified Date —-> is greater than —-> LASTRUNTIME
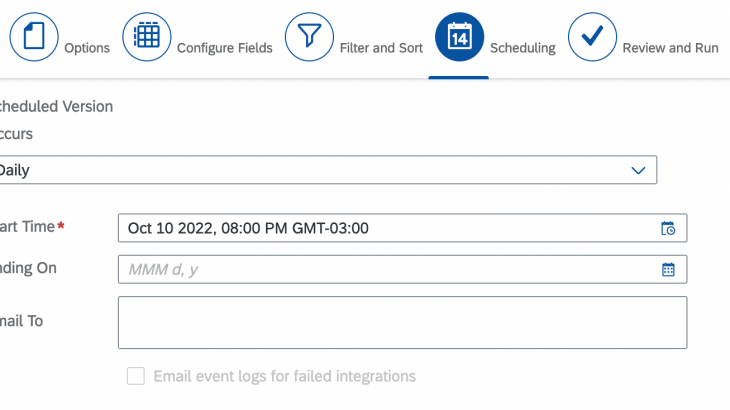
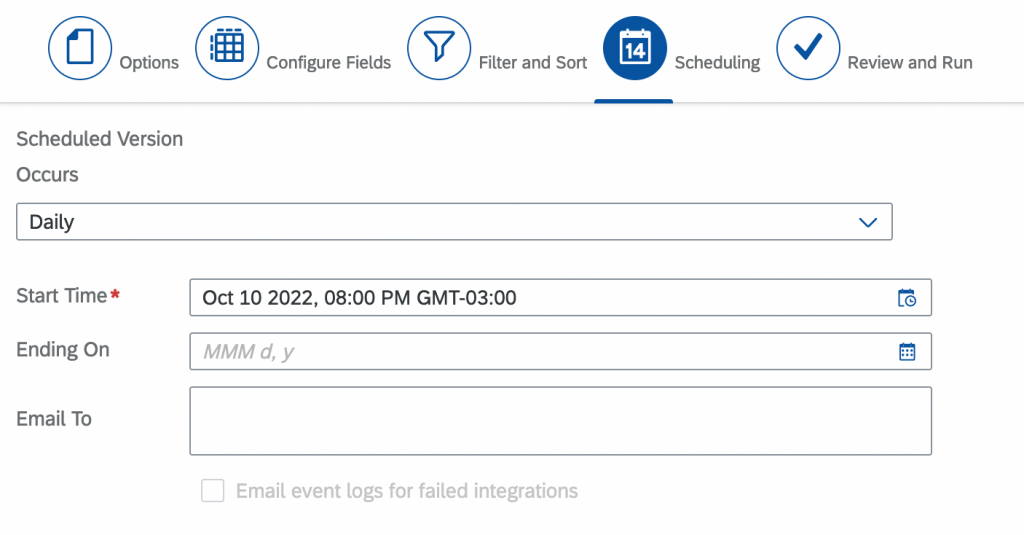
In the Scheduling Screen, set up the integration to run every day, in the end of the day, so that every record created during the day will be catched in this daily integration and a new record will be created in the employee profile.
Save and Schedule your integration and the configuration is all done!
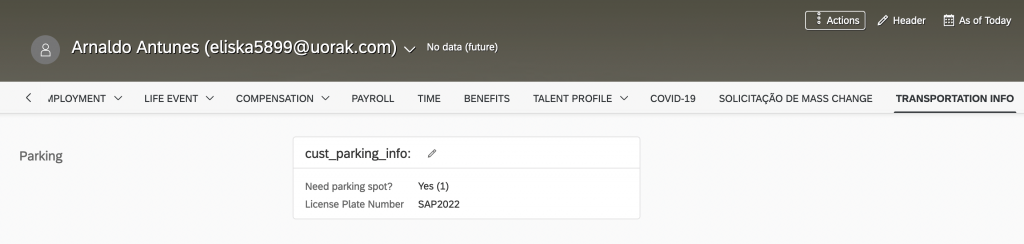
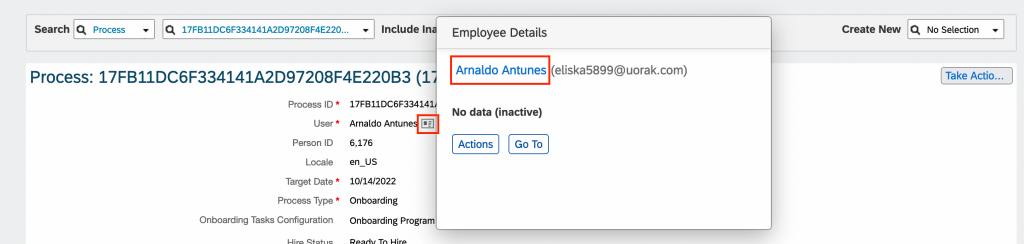
You will notice that after the integration, the data is sent to the employee profile and you can see the record after the MPH step, even if the employee is inactive and not searchable in the system.
Custom Data Collection (ONB):
Integration Center:

Manage Data -> Process -> Select Onboardee Process ID -> Click on the Onboardee Name Icon:
Go to the Employee Profile Section: